

This full tutorial will show you how to use Cricut infusible ink like a pro! Complete with Design Space screenshots and directions on how to slice images…

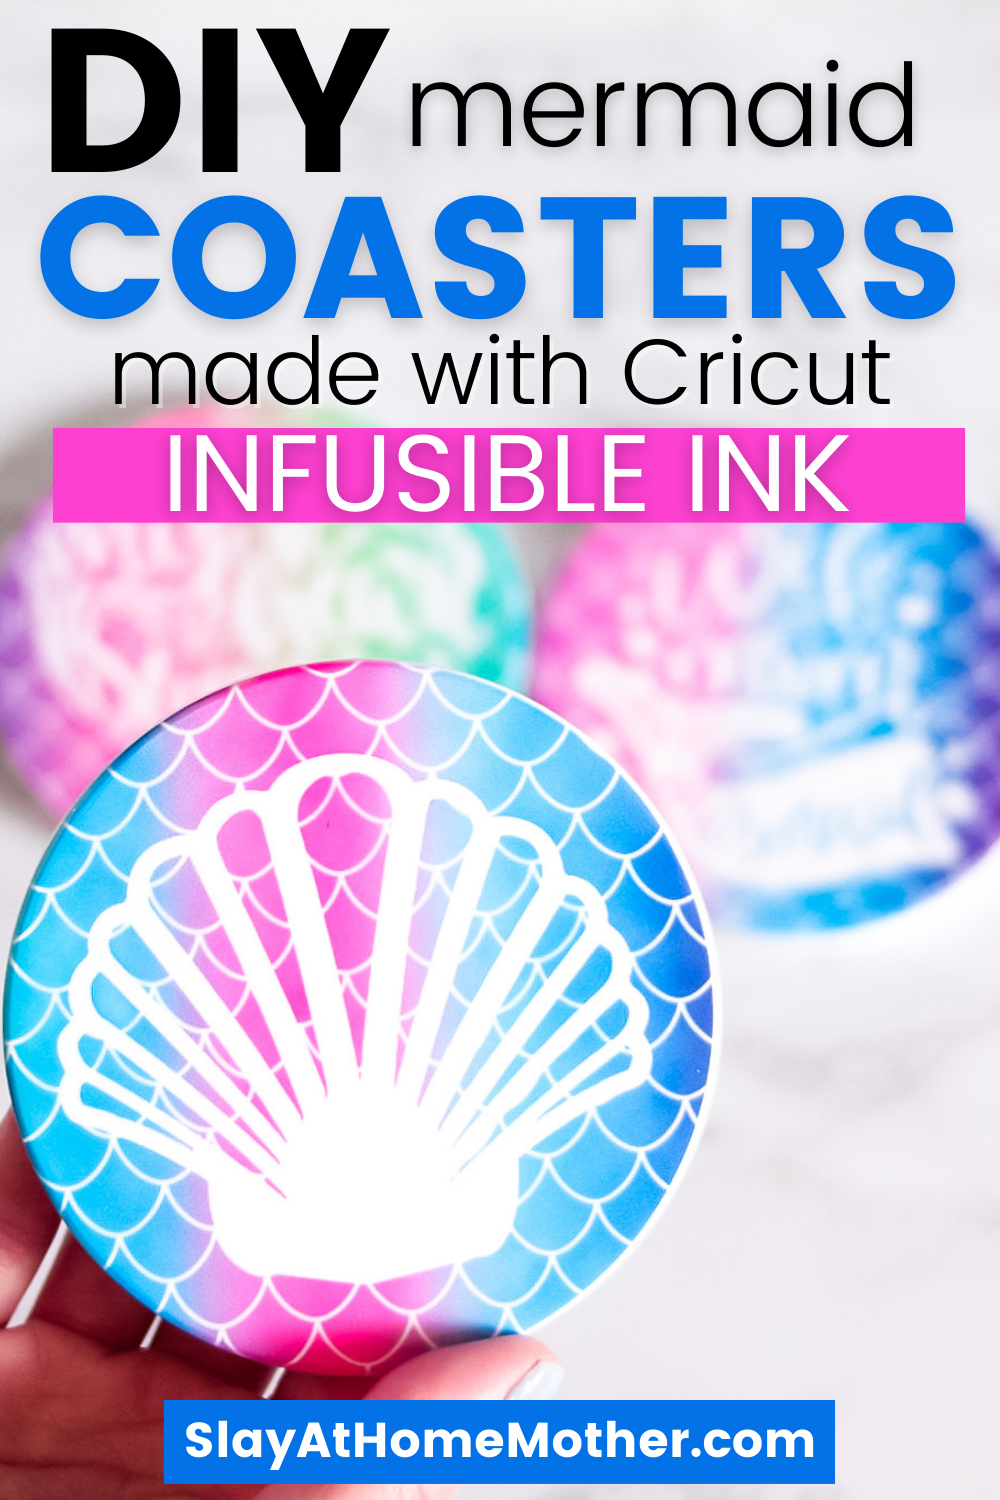
Hi friends! I’m super excited to share my new office coasters with you all in this post. They’re mermaid themed, and I’m totally in love!
I’m a huge mermaid fan.
This has been true since I was in diapers.
I had just about every mermaid doll there ever was – my favorite one used to sing when you pressed her belly button.
And, of course, my favorite Disney movie as a little girl was The Little Mermaid.
Now, mermaids are all the rage, along with vampires, werewolves, and all things mystical and mythic.
What Is Infusible Ink?
Here’s what Cricut has to say about their Infusible Ink…
“Infusible Ink is an all-new system of Cricut DIY products that make it possible to achieve pro-level, personalized heat transfers on T-shirts and more at home for the first time. Unlike the vinyl or HTV process, where artwork is attached on top of a base material using adhesive, an Infusible Ink transfer becomes one with the material itself. The results are bright, beautiful, seamlessly smooth transfers that never flake, peel, wrinkle, or crack. “
With infusible ink, you never have to worry about your design peeling up and away from your project – your design becomes one with the blank.
What Can I Use Infusible Ink On?
You can use Cricut infusible ink on any Cricut blanks available on their website:
There are talks that Cricut will be adding even more options for us crafters to use their infusible ink transfer sheets on like keychains, dog tags, notebooks, etc.
If using a T-shirt that is not a Cricut blank, stick to shirts that are light colors (white is best) and have a high polyester count. According to the Cricut website, infusible ink will not transfer to 100% cotton.
Infusible ink works best with Cricut products, however.
Materials Needed For Infusible Ink Coasters

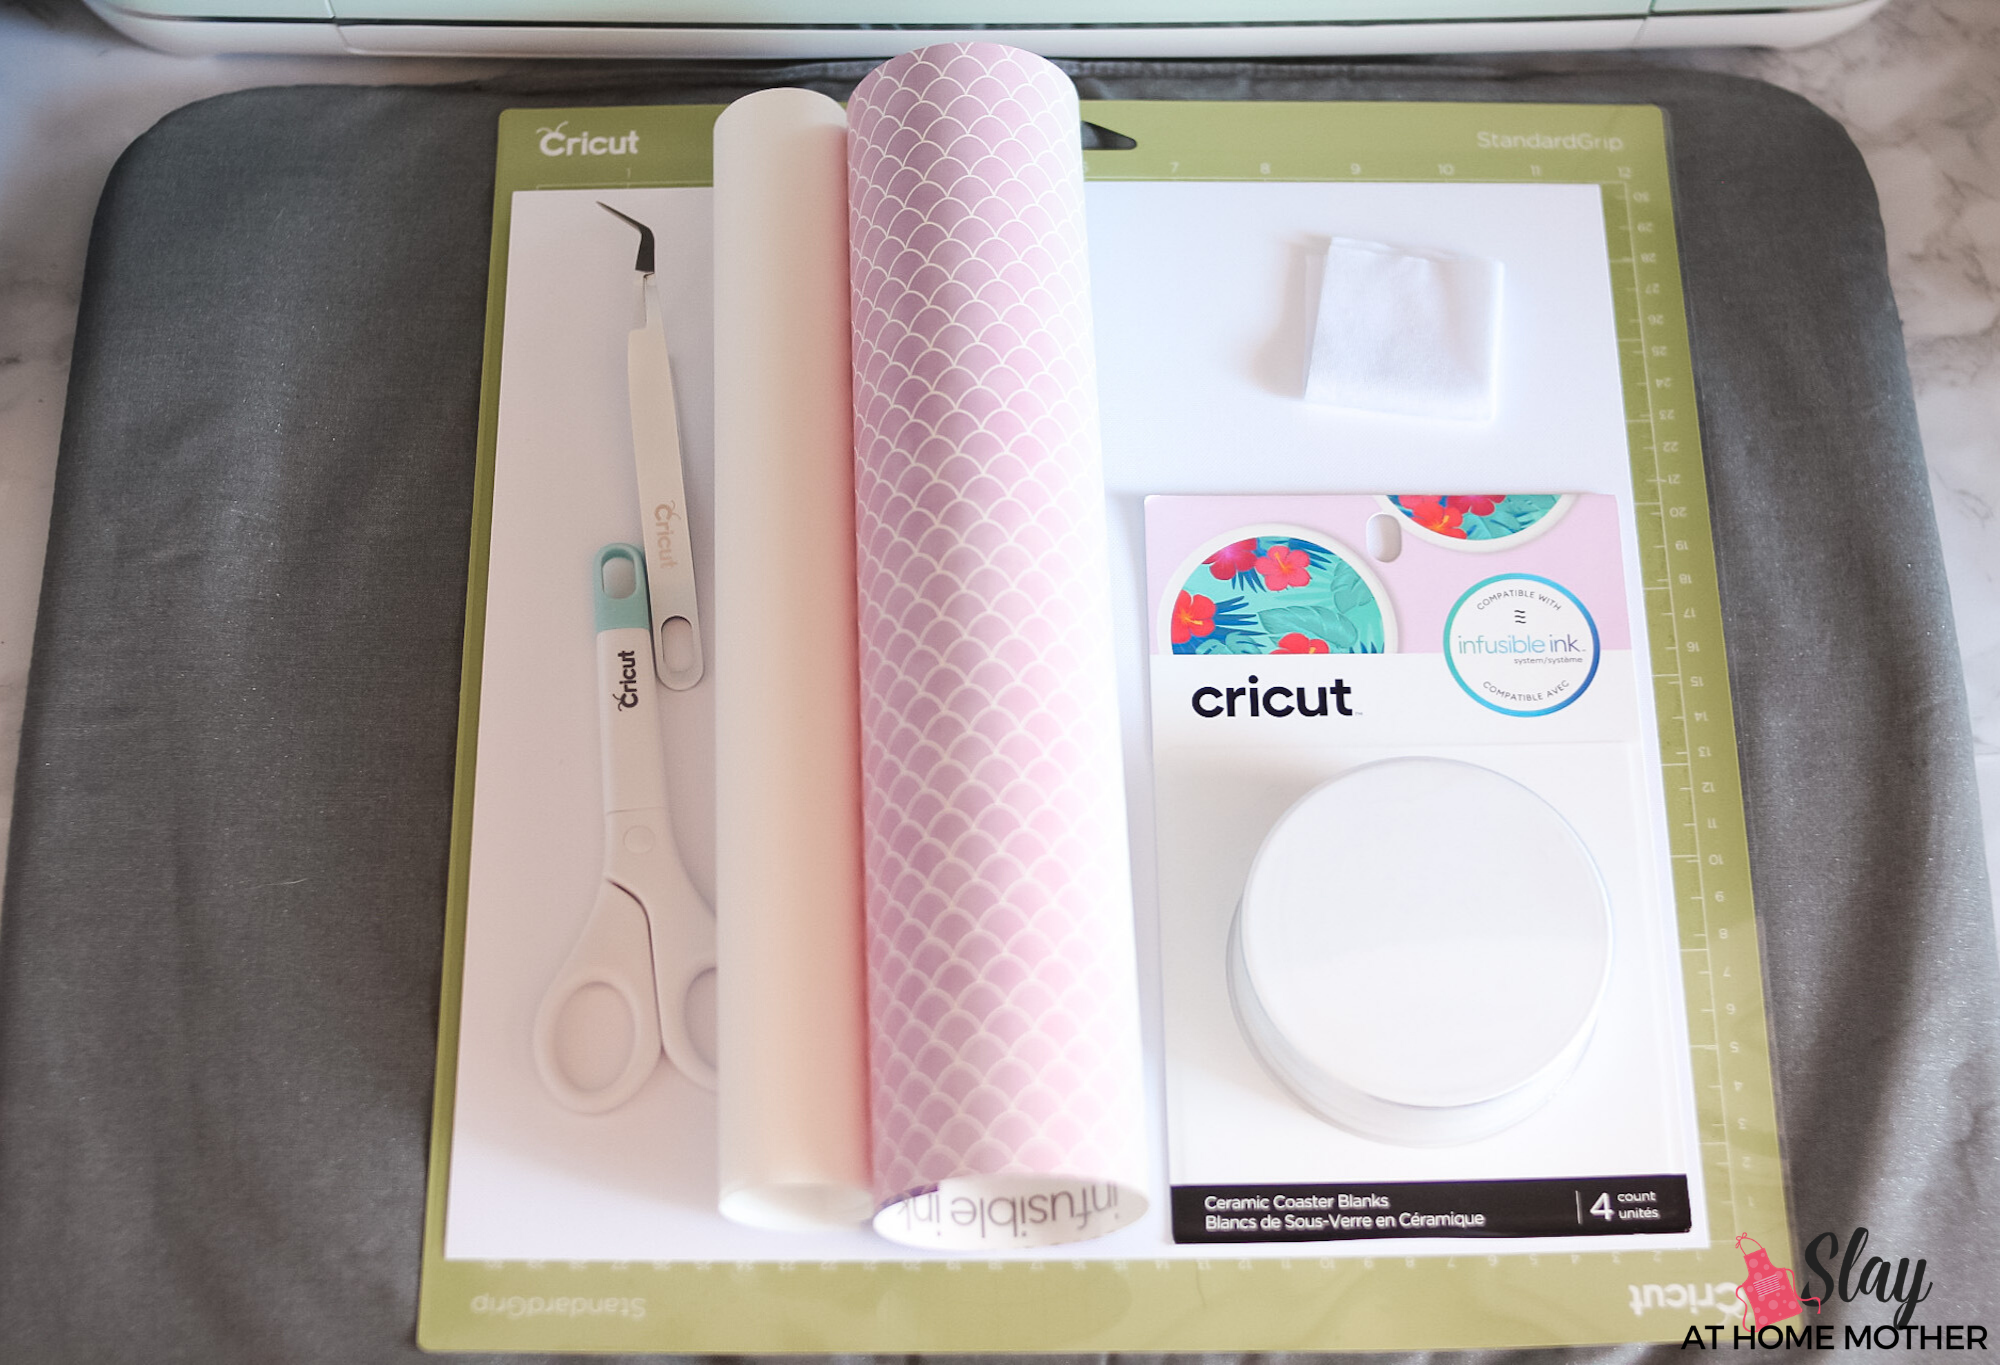
- infusible ink transfer sheets (I’m using the Mermaid Rainbow pack)
- heat resistant tape
- tweezers
- scissors
- butcher paper (comes in the box with infusible ink sheets)
- infusible ink coasters
- green StandardGrip mat
- white cardstock
- EasyPress 2 + EasyPress mat
- Cricut machine
- fine-point blade and housing (this comes with your machine)
I’ll be using my Cricut Explore Air 2 machine in this tutorial, but this works with the Maker as well.
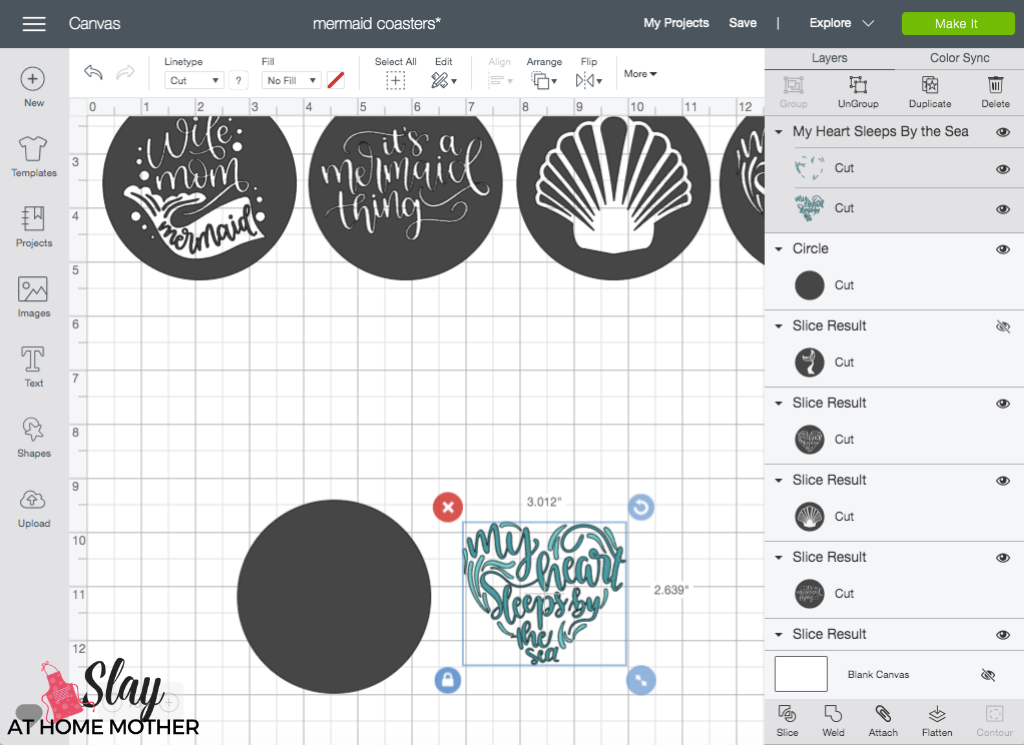
How To Slice In Design Space
For ready-to-cut coasters, Cricut Design Space has a ton of designs, just go to the Images tab on the left toolbar and type in Coasters.
Or you can choose to make your own like I did!
All of the designs I used on my coasters can be found in Design Space, I simply sliced the designs onto circles that were the same circumference as the infusible ink coasters…

To use this design I created in Design Space, click this link here!
To slice in Design Space, layer an image over another in Design Space.
If the top layer image is made up of multiple cuts, be sure to Weld it before slicing.
In these screenshots, you can tell the image has been welded because the ‘my heart sleeps by the sea‘ image goes from being two cuts with two different colors of blue to being one color after pressing the Weld button.
Center align the images (see screenshot below).

Select both images together, and click the Slice button towards the bottom right.
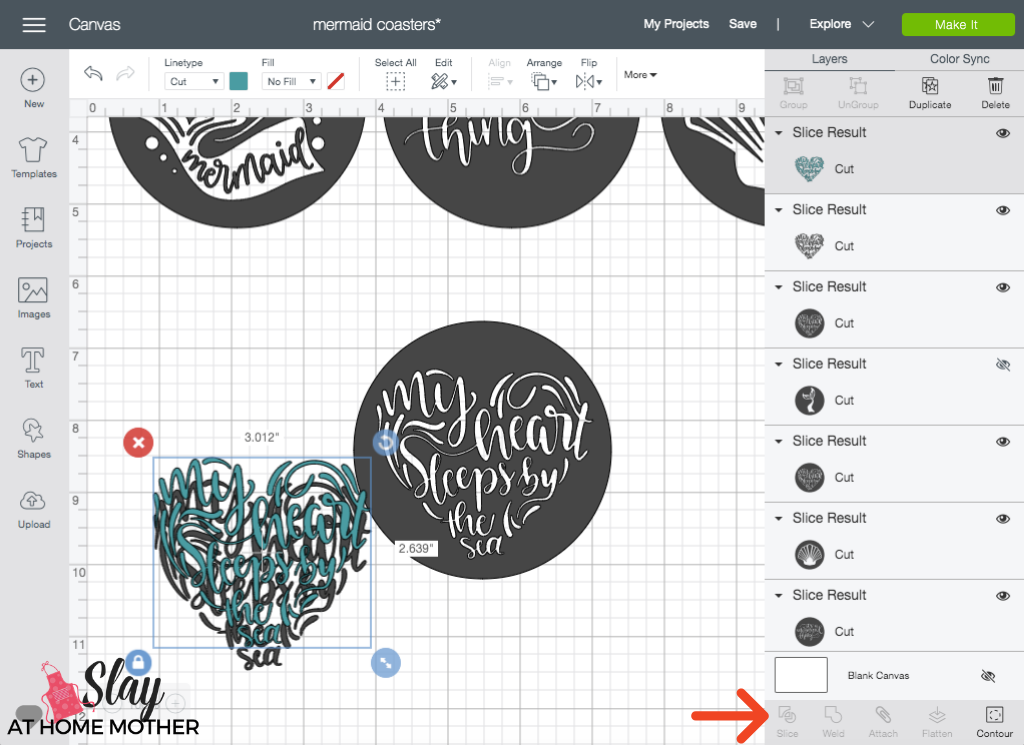
The image above has been sliced, and the negative has been drug away.
Delete the negatives from your Design Space canvas.
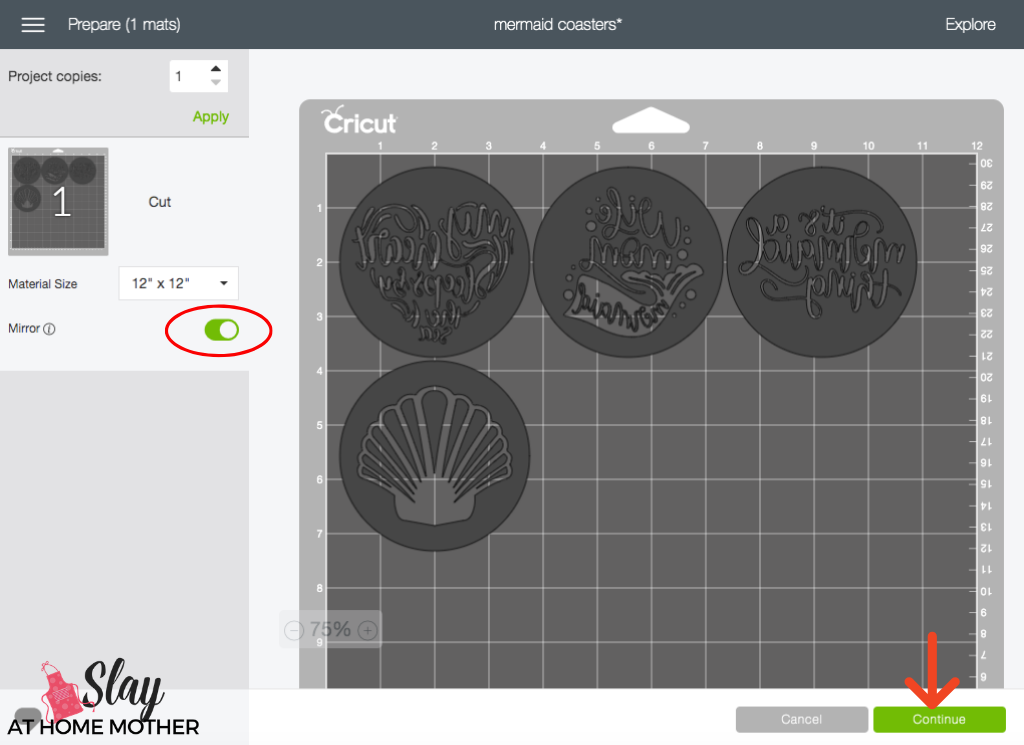
Size each coaster to 3.5 x 3.5.

Your coaster designs are all sliced and ready to go!
Cutting Infusible Ink
Once you’re ready to cut your infusible ink, select Make It.
Be sure to select Mirror before proceeding (see below).
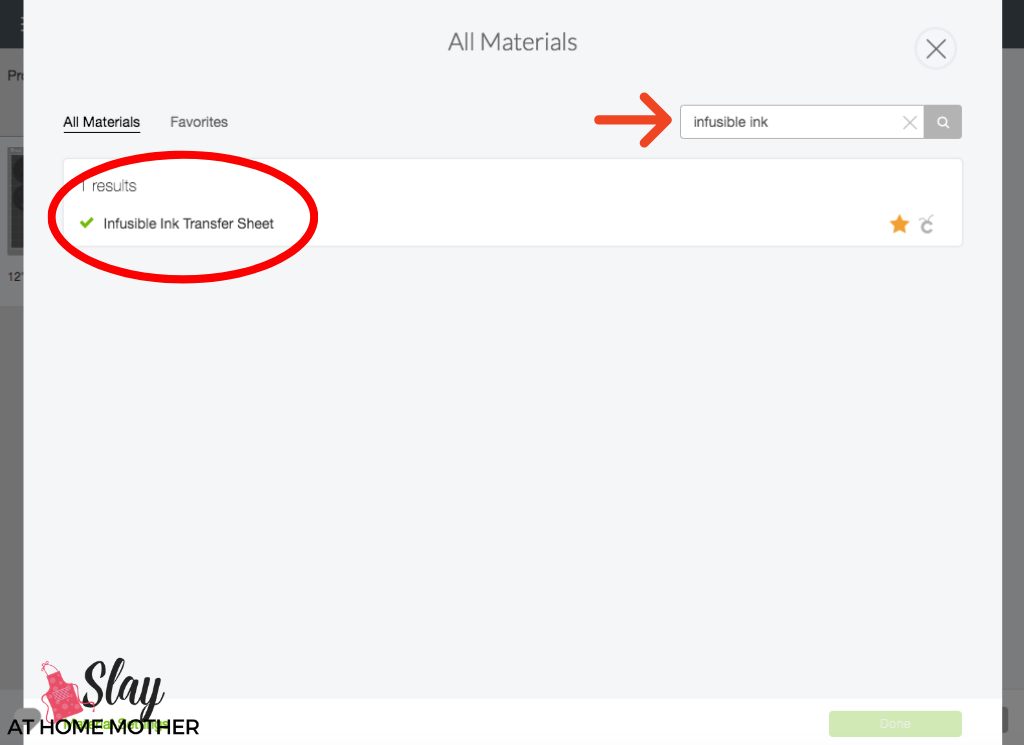
With your machine’s dial set to Custom, Design Space will ask you to select your custom material. Browse through the materials or type infusible ink in the search bar. Select Infusible Ink Transfer Sheet.
Double-check your settings before proceeding with the cut – there’s nothing like finishing a full cut on your project to realize you forgot to Mirror it!
For pressure, the default setting should suffice – unless you are working with a blade that needs replacing soon ;).
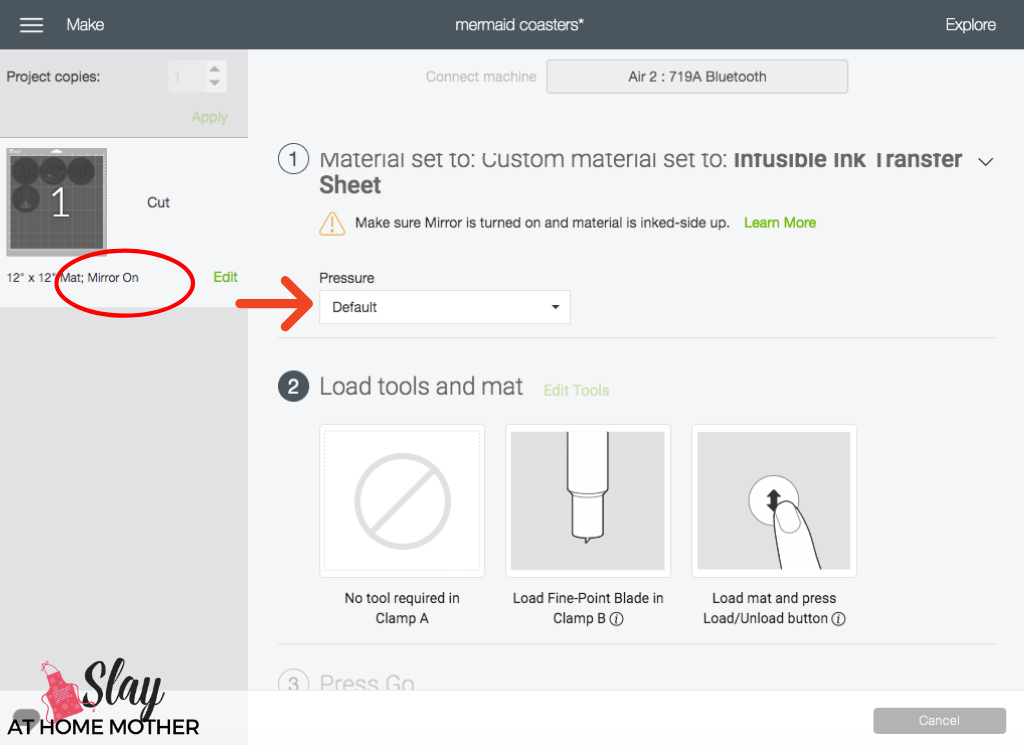
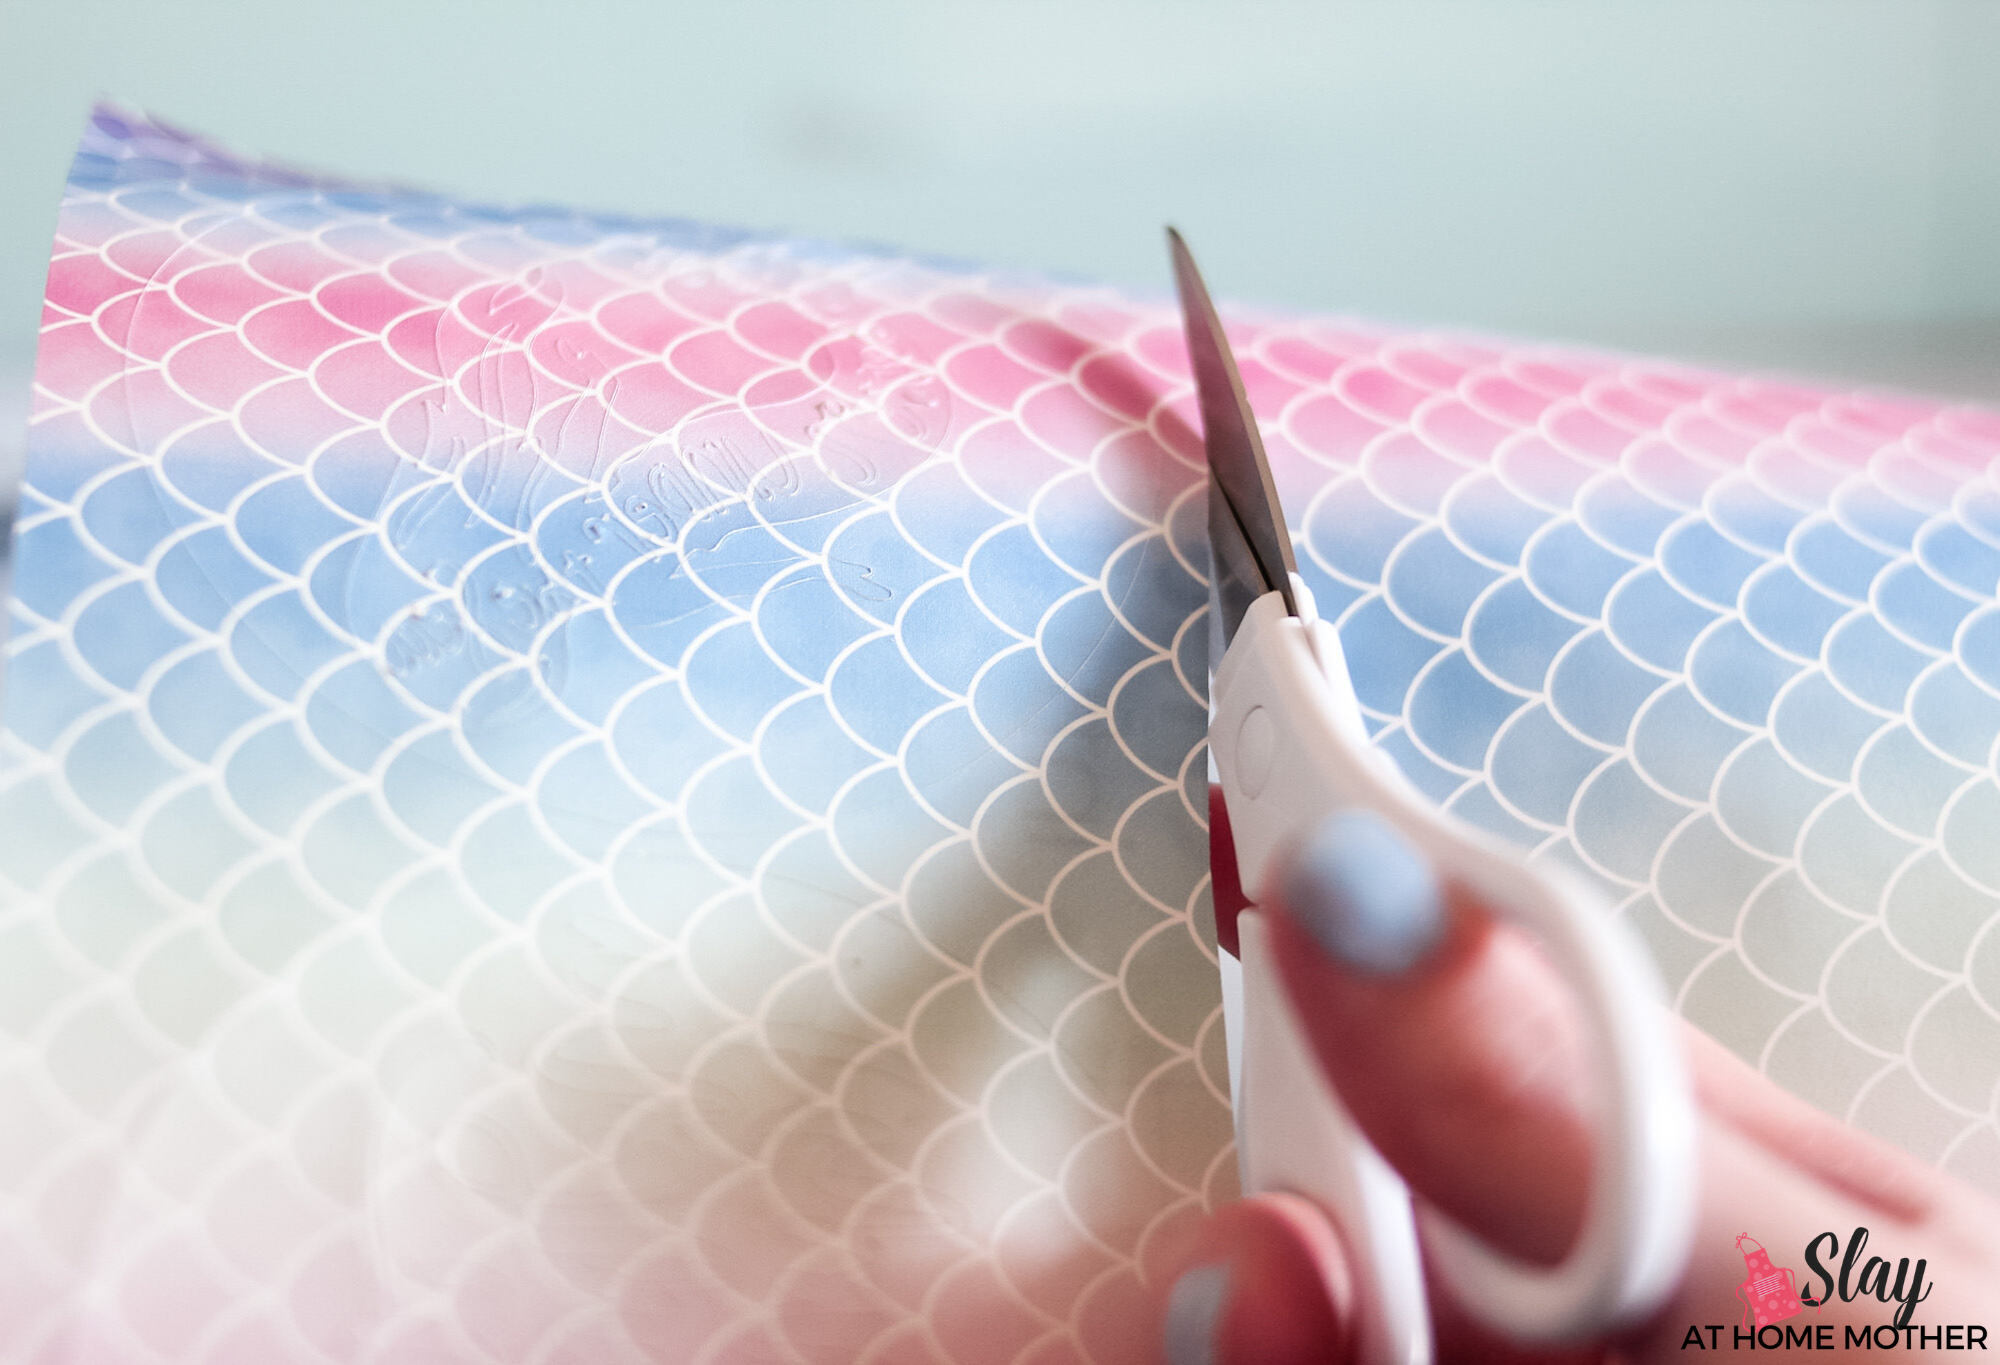
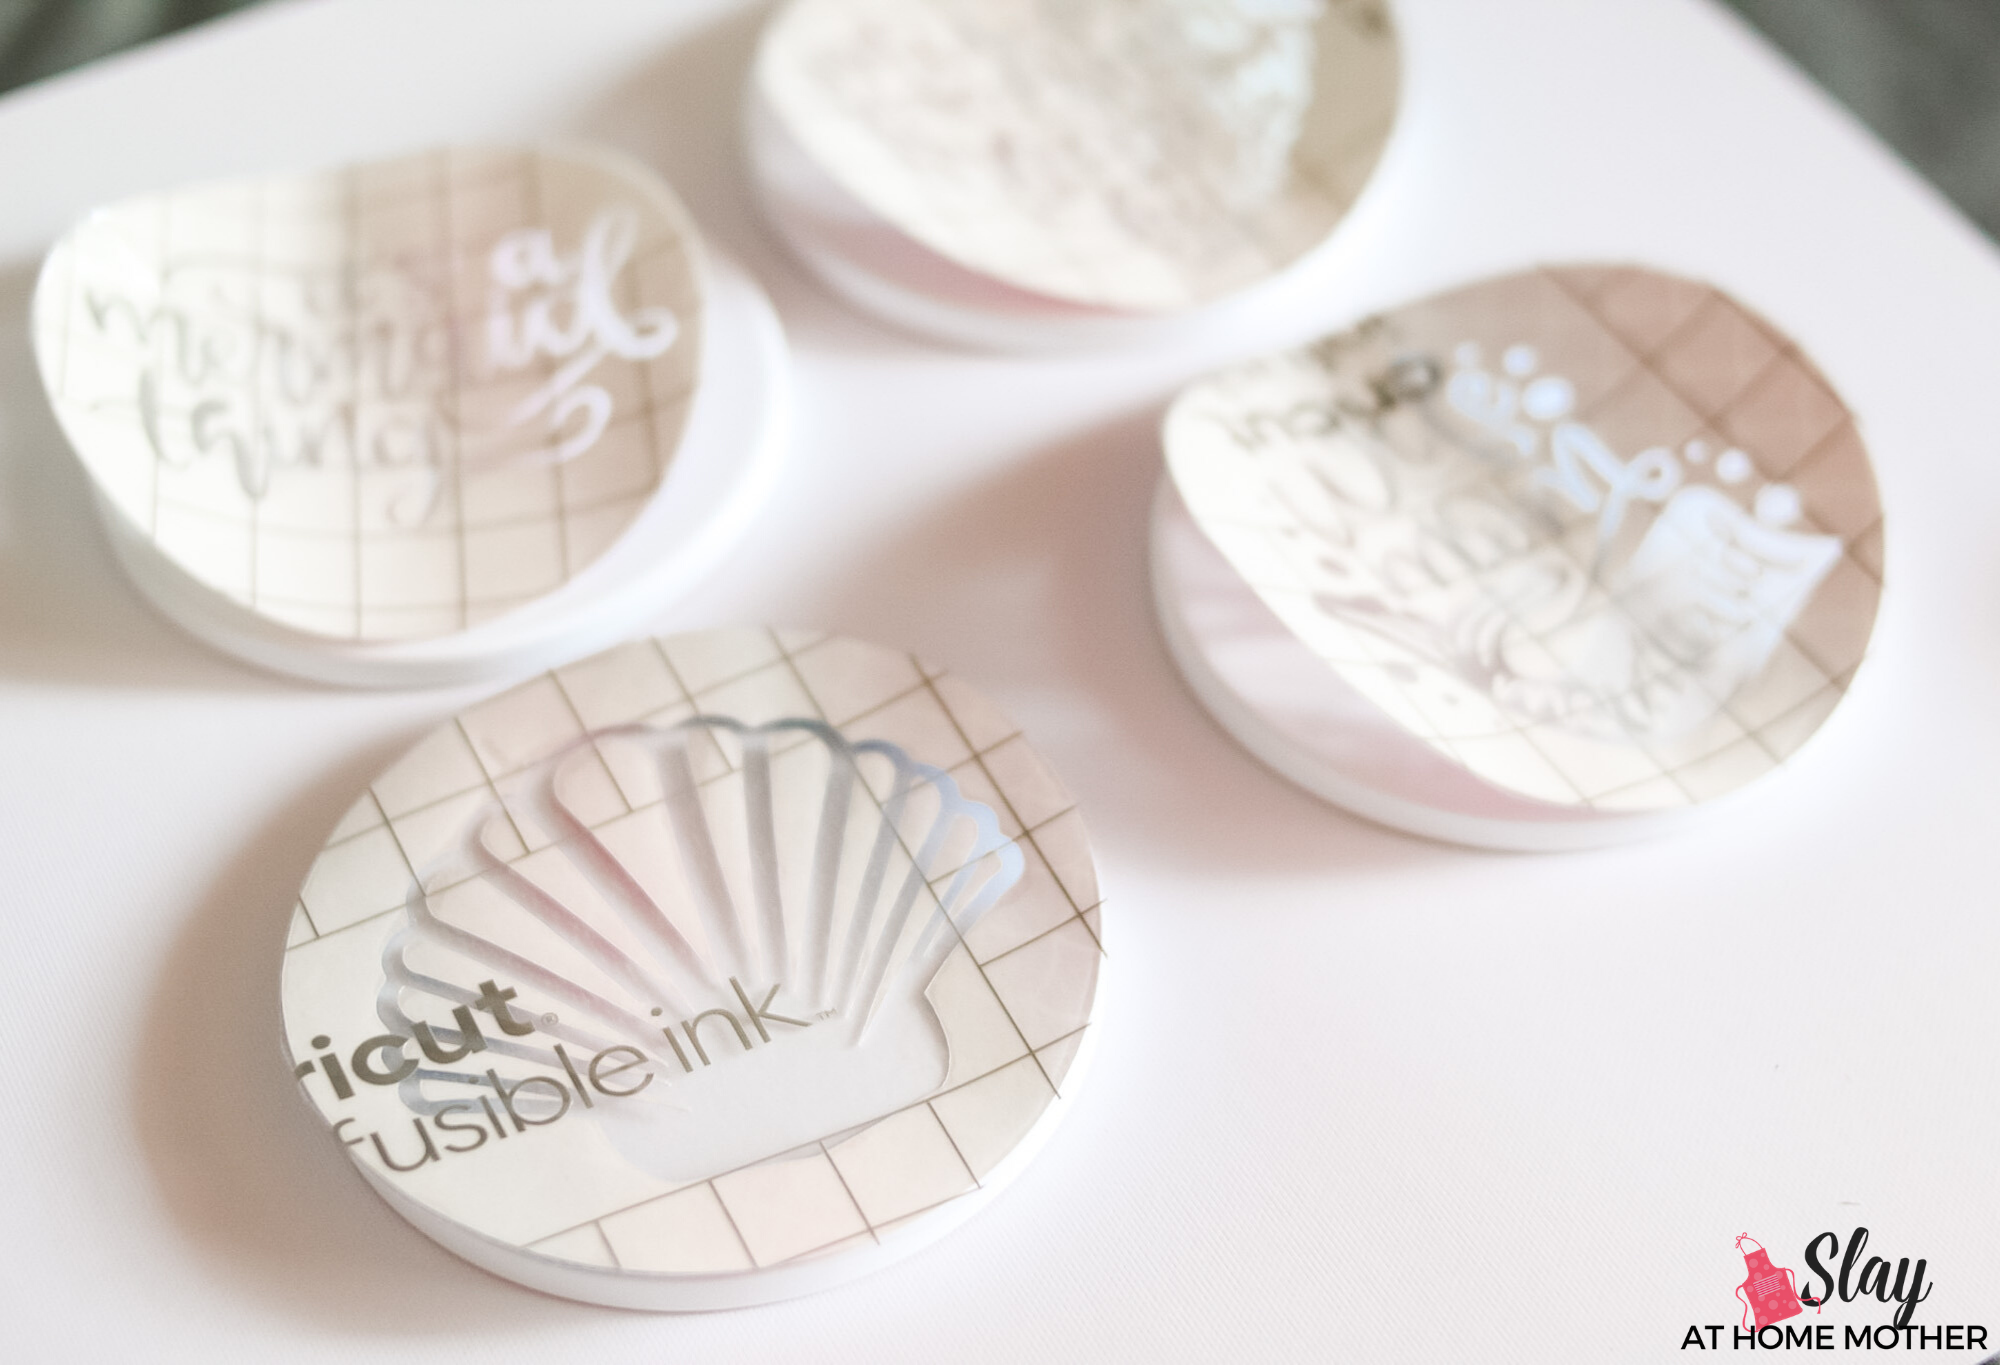
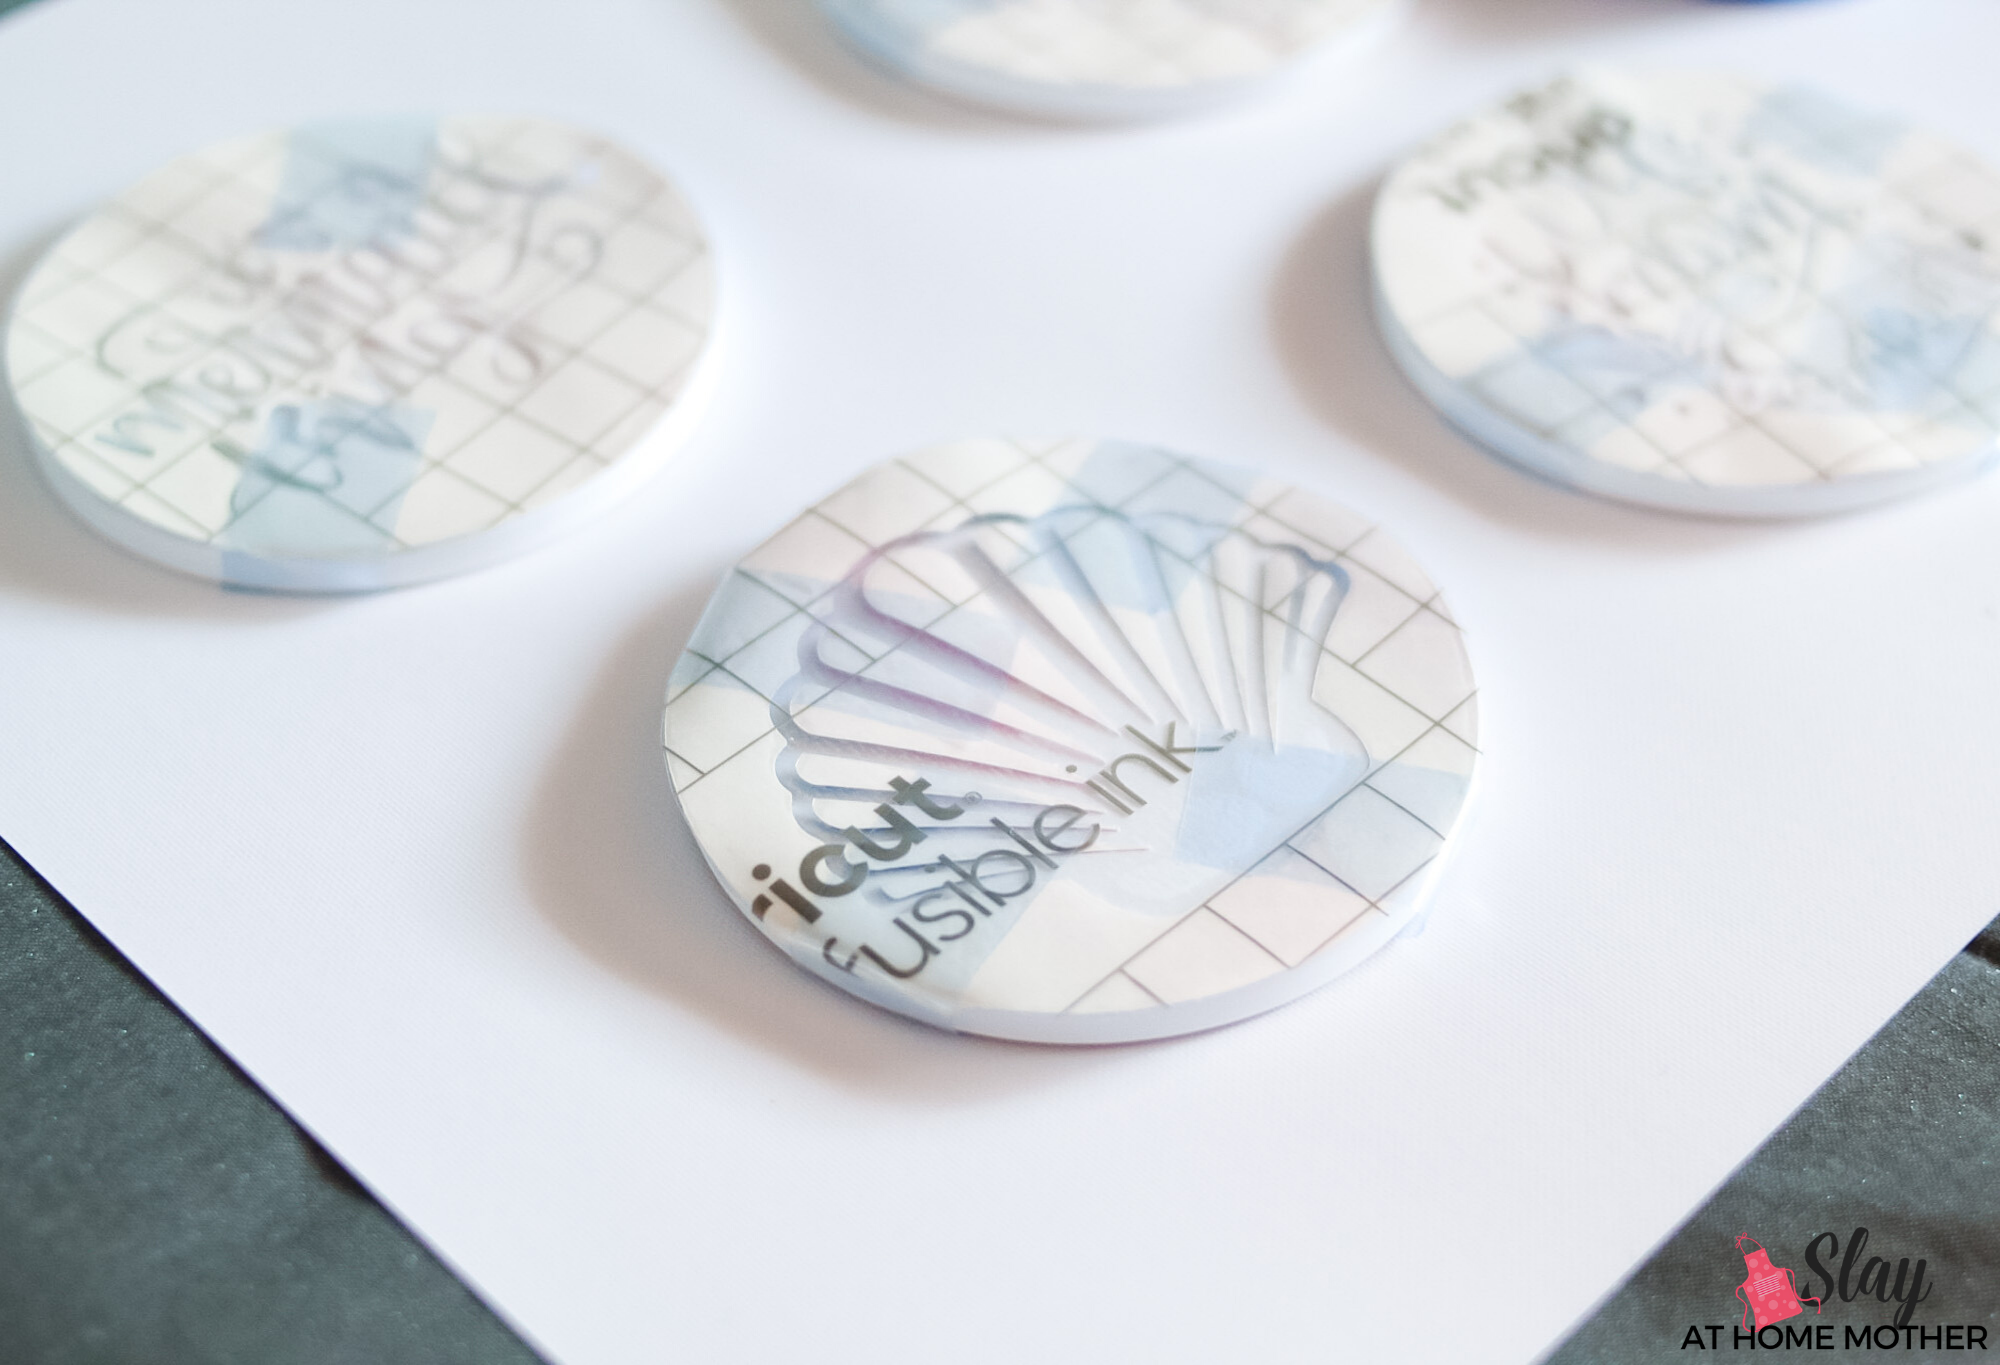
Place an infusible ink transfer sheet onto your green StandardGrip mat with the ink side facing UP.
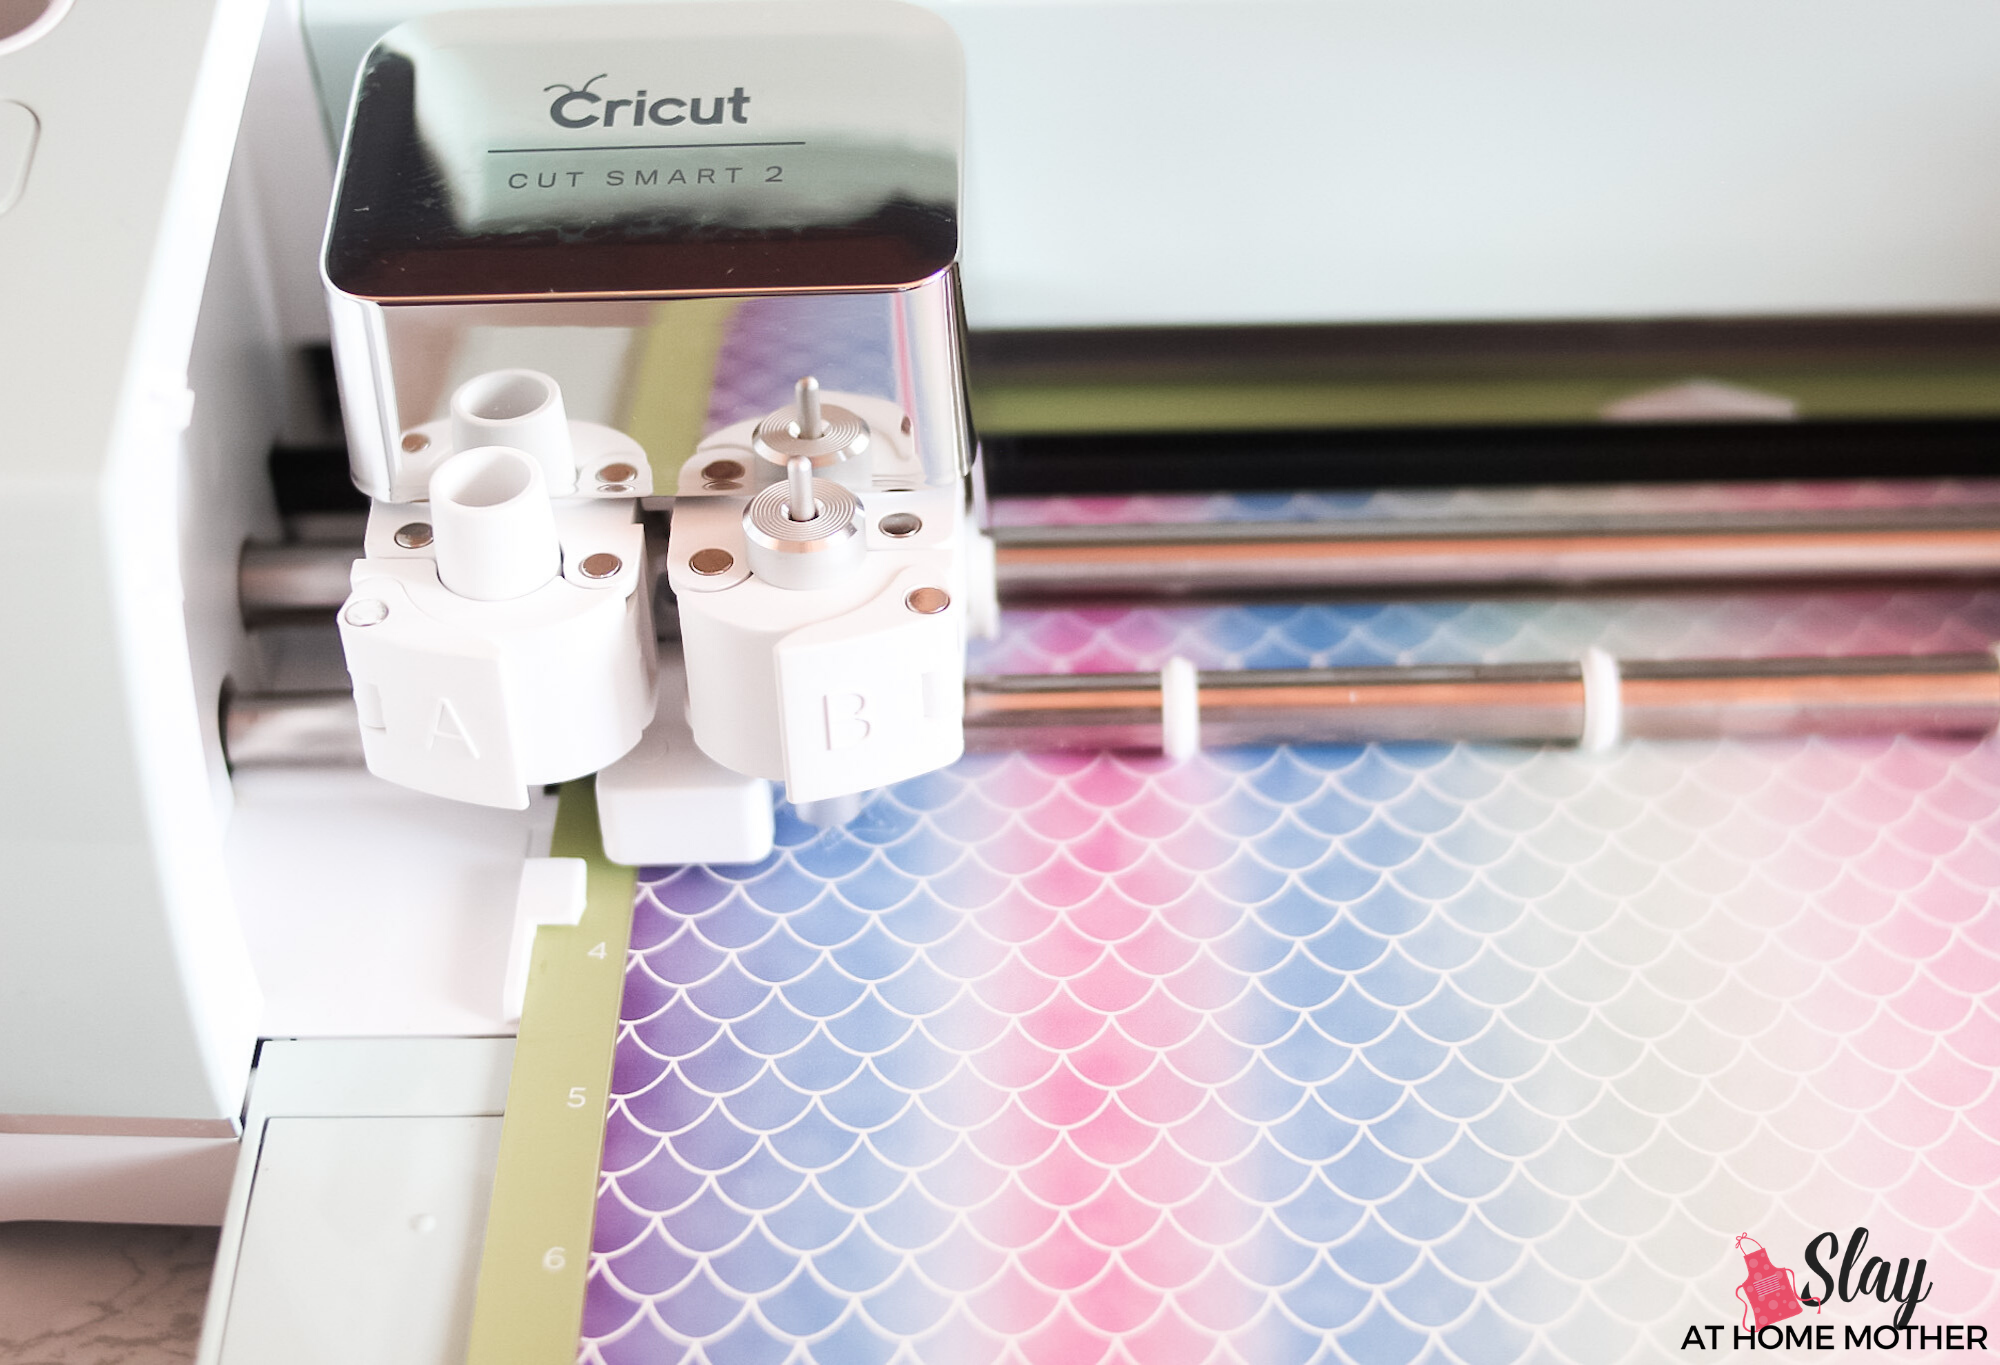
Load the mat into your machine, be sure that you have your fine-point blade and housing installed in clamp B, and proceed with cutting.

Once your machine is done cutting, unload your mat and peel away the infusible ink transfer sheet from the mat.
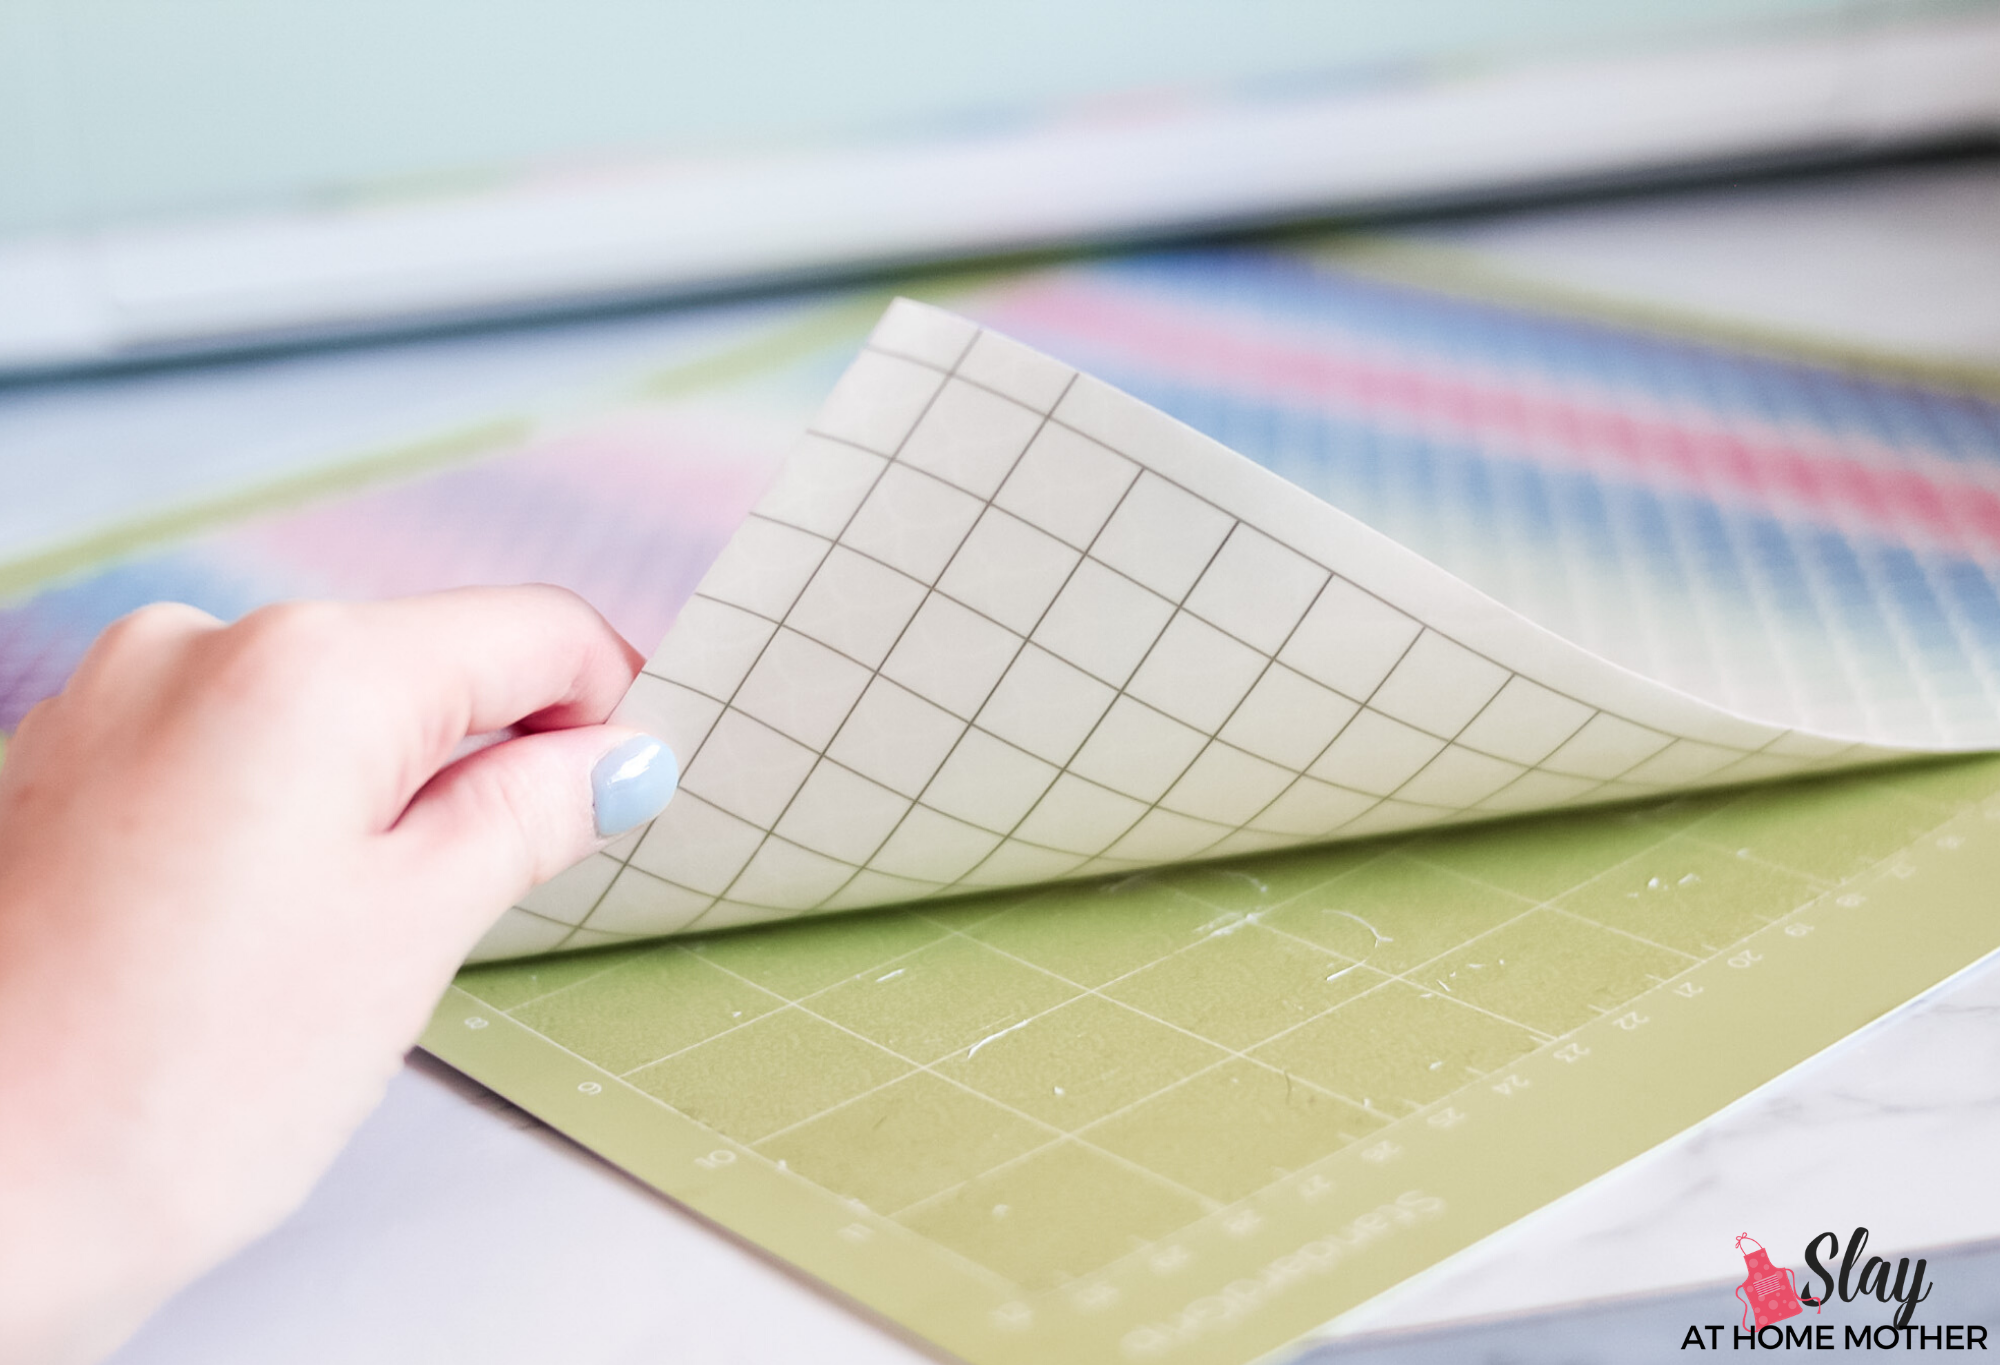
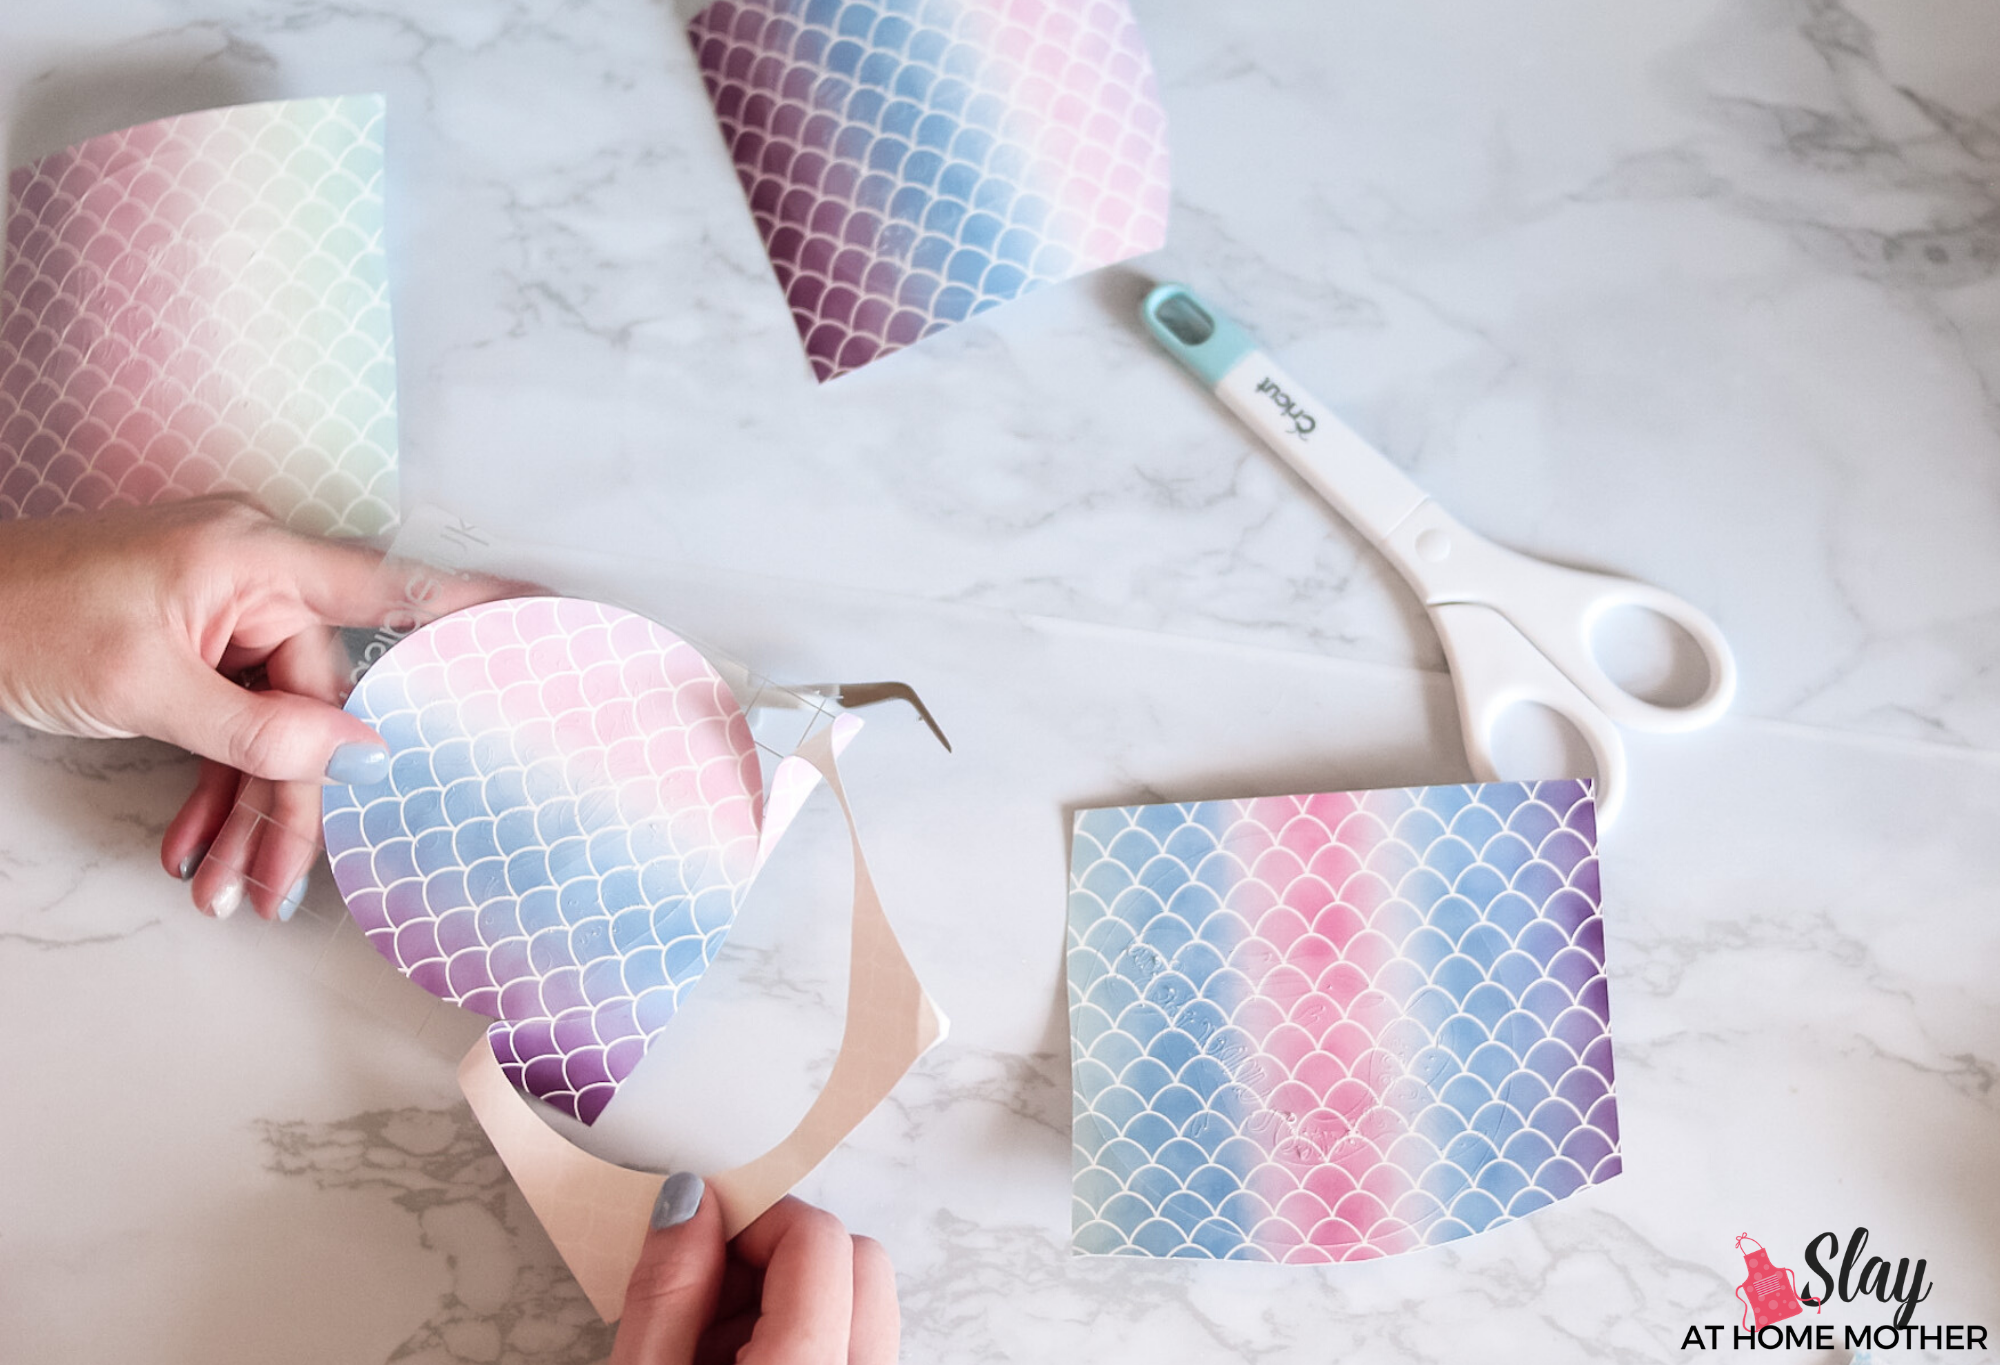
Cut away excess material with scissors.
Slightly bend the material to peel away the negative. You should only need your hands, and perhaps a pair of tweezers.
The transfer sheet is far thicker than a regular sheet of vinyl, so a weeder is not needed or helpful with this material.
While you are weeding away the negatives, get your EasyPress 2 ready by preheating it to 400 degrees Fahrenheit and setting the timer to 240 seconds.

Applying Infusible Ink Transfer Sheets
Once your transfer sheets are weeded and all negative design elements have been removed from the clear liner, it’s time to apply them to your coasters!
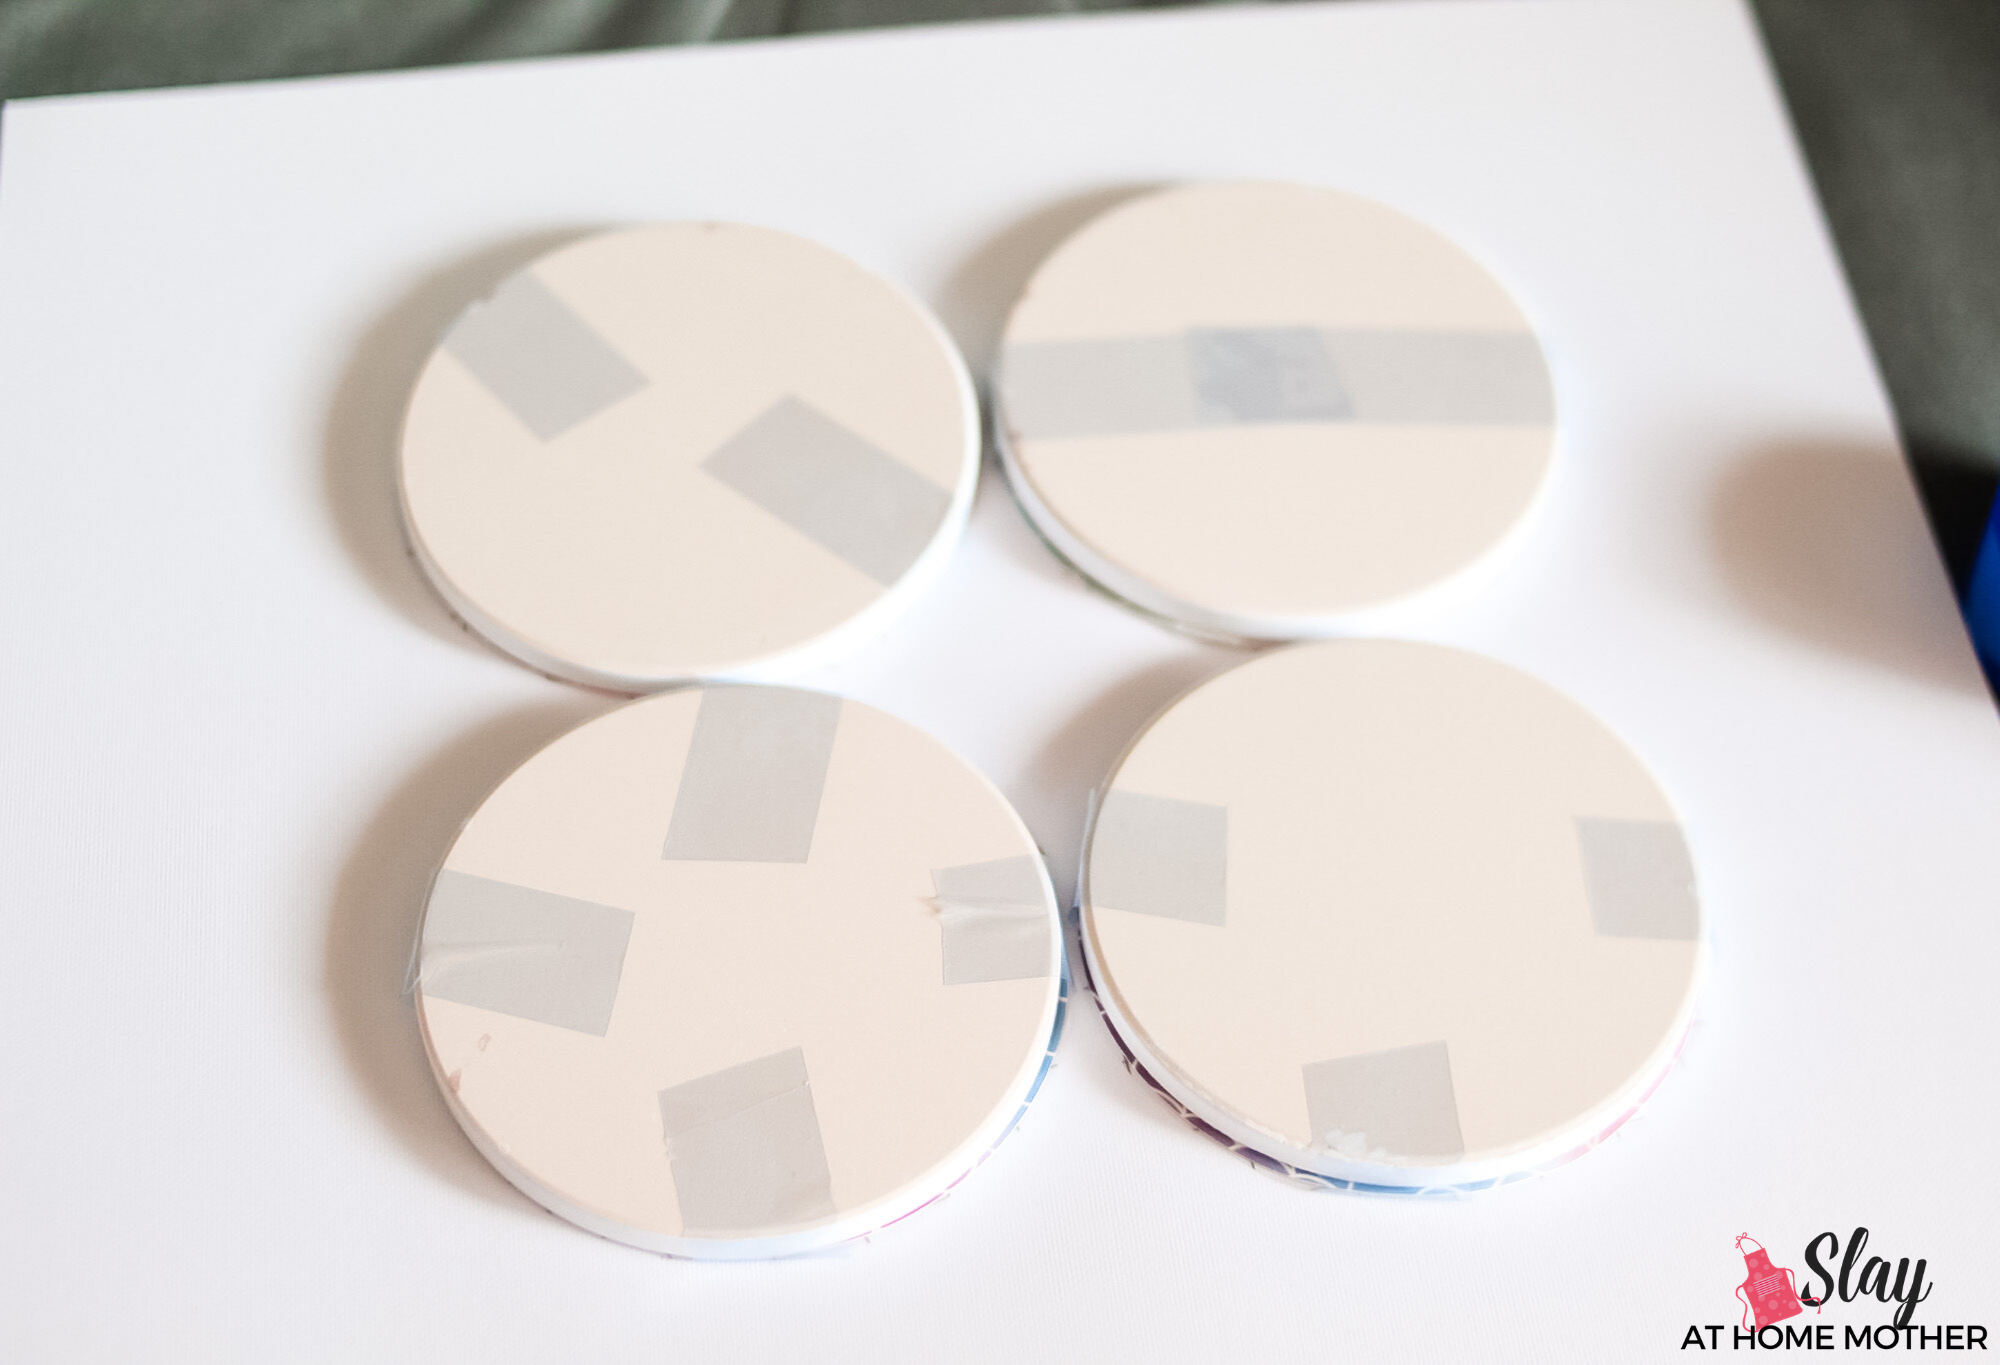
Wipe down your coasters with the lint-free cloth included in your infusible ink transfer sheet box to remove any dust or debris from coasters.
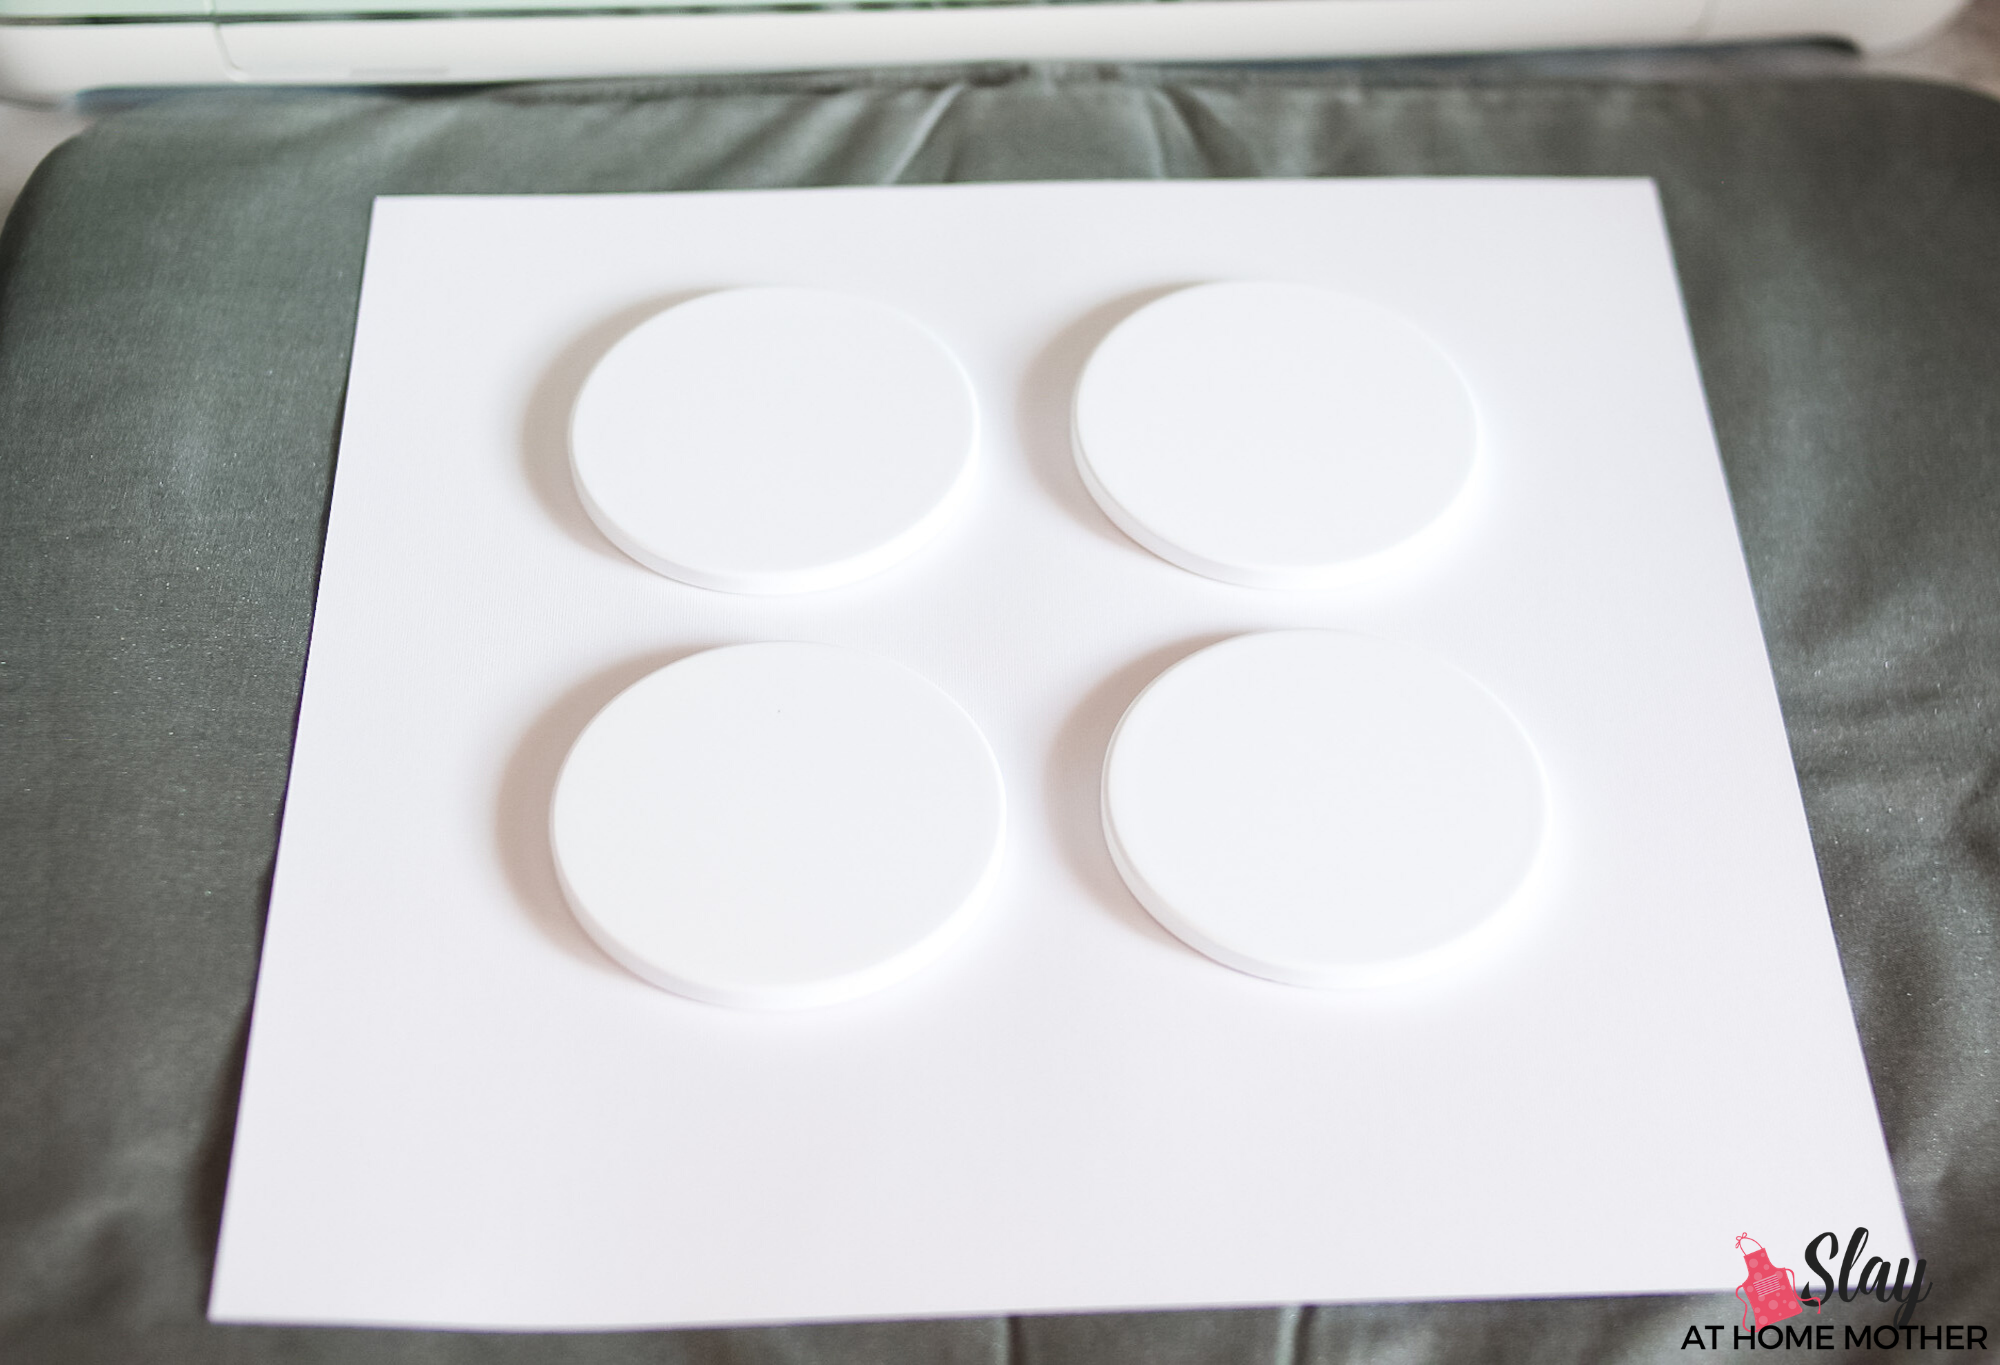
Lay down your EasyPress mat on your working surface and set a piece of white cardstock over top. This helps prevent any unwanted ink transfer from occurring on your mat. Lay your coasters on top of the cardstock sheet with the white ceramic facing UP.
Place your coaster designs face DOWN onto the coaster surface. The shiny liner side will be facing UP.
Tape each infusible ink transfer sheet in place with heat resistant tape.
The heat resistant tape helps keep the transfer sheet (and therefore the ink) in place and prevents it from sliding around on your coasters.
Now flip your coasters over so the bottoms are facing UP and the infusible ink transfer sheet is flat against the white cardstock.
Place your butcher paper on top of your coasters.
Gently lay your pre-heated EasyPress 2 on top of your covered coasters with no added pressure for 240 seconds.
Try to keep the EasyPress steady as you place it on your coasters to avoid moving the ink around on the coaster.
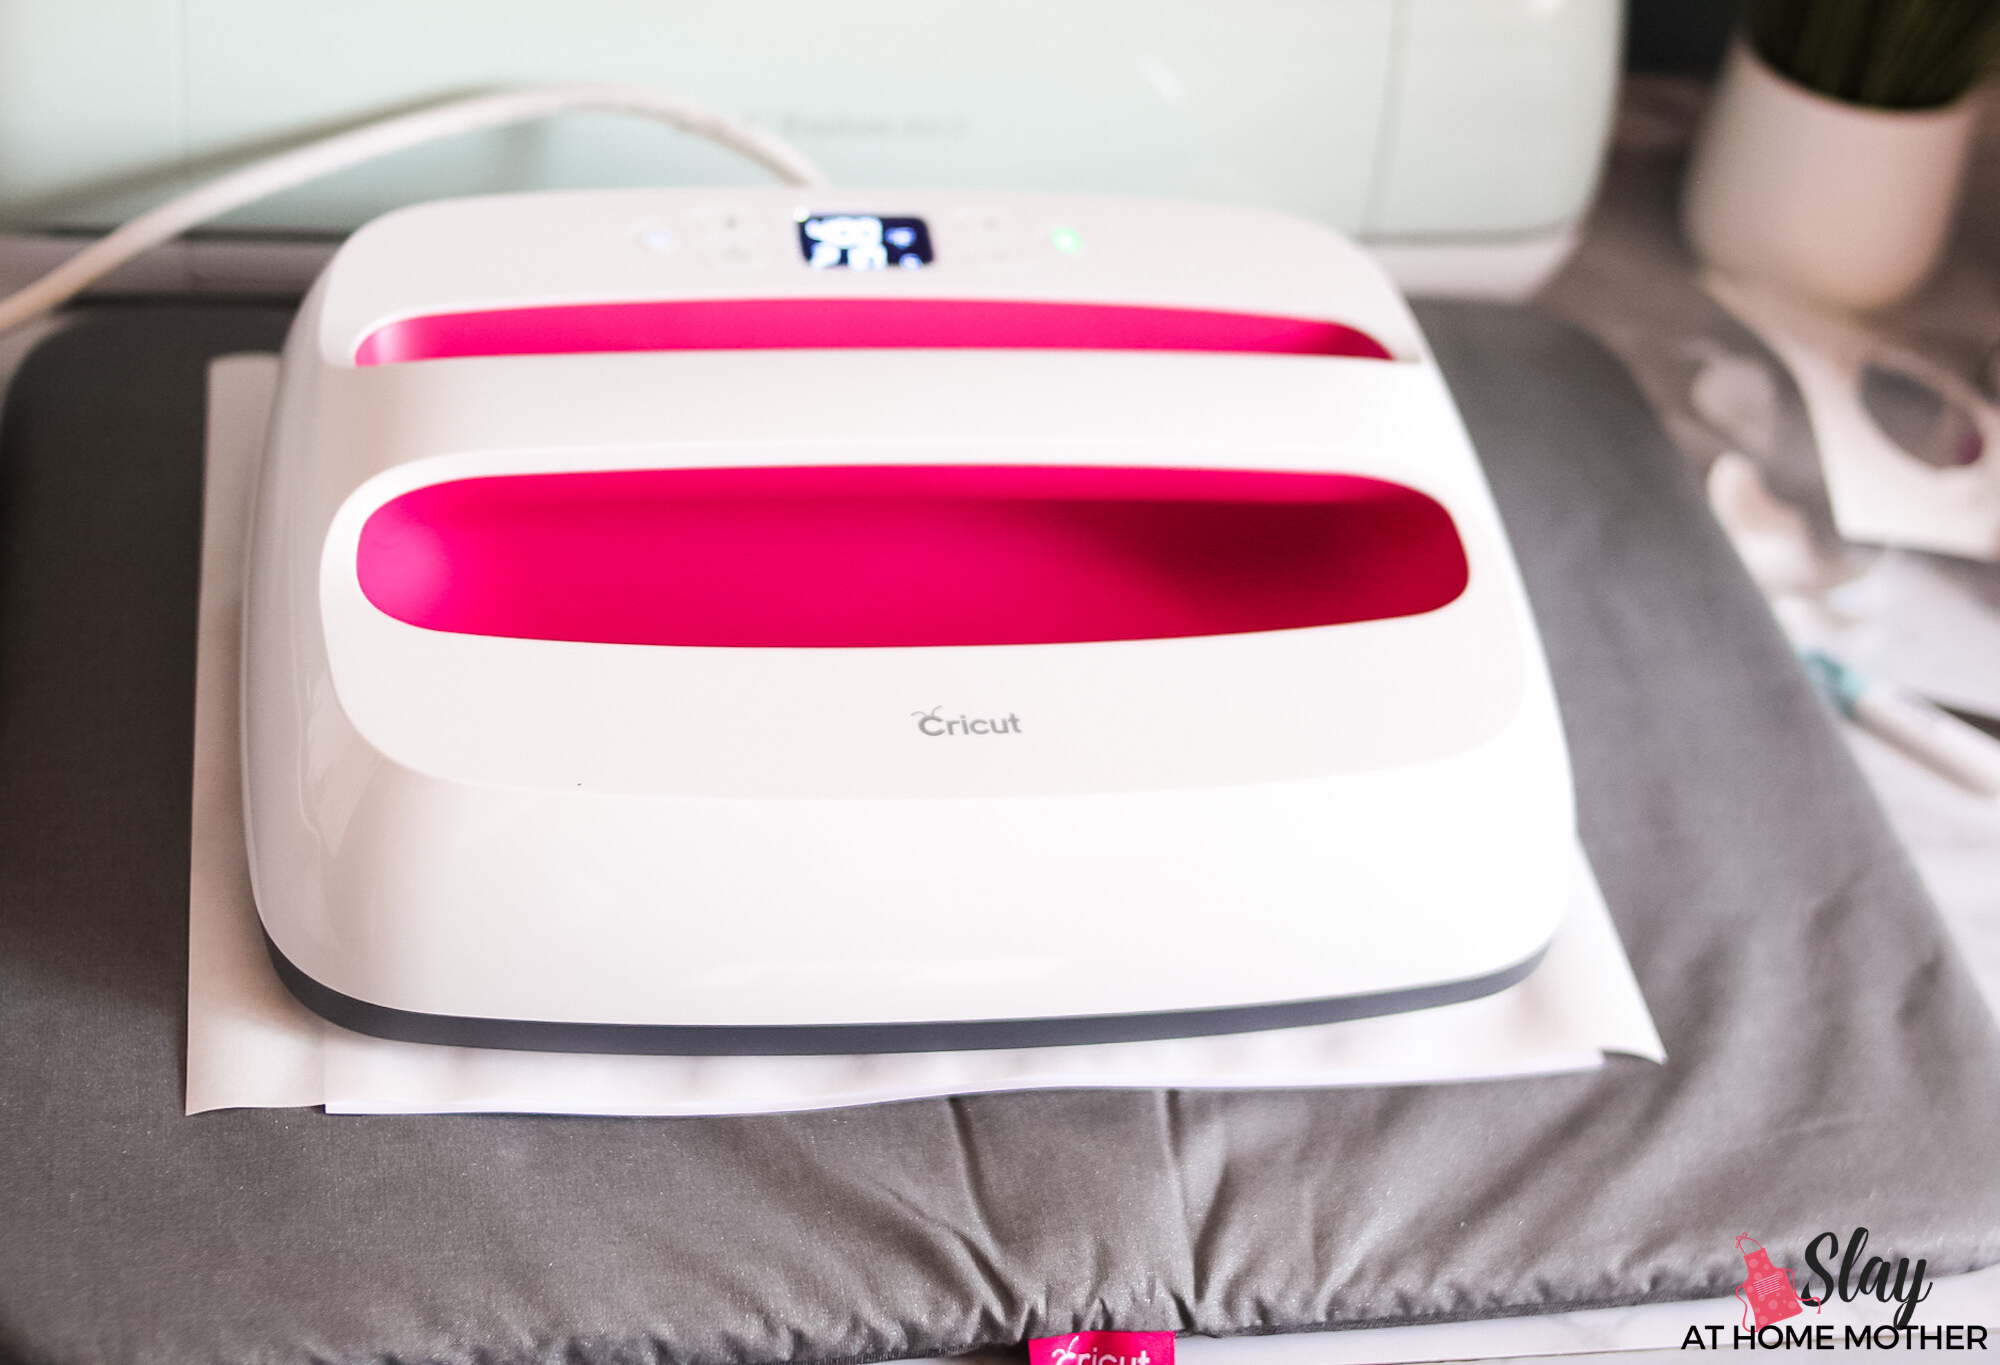
When your EasyPress 2 beeps, gently and slowly lift it from the coasters, making sure not to move anything underneath, even the butcher paper.
Allow coasters to cool completely before handling. Remove butcher paper, tape, and liners.

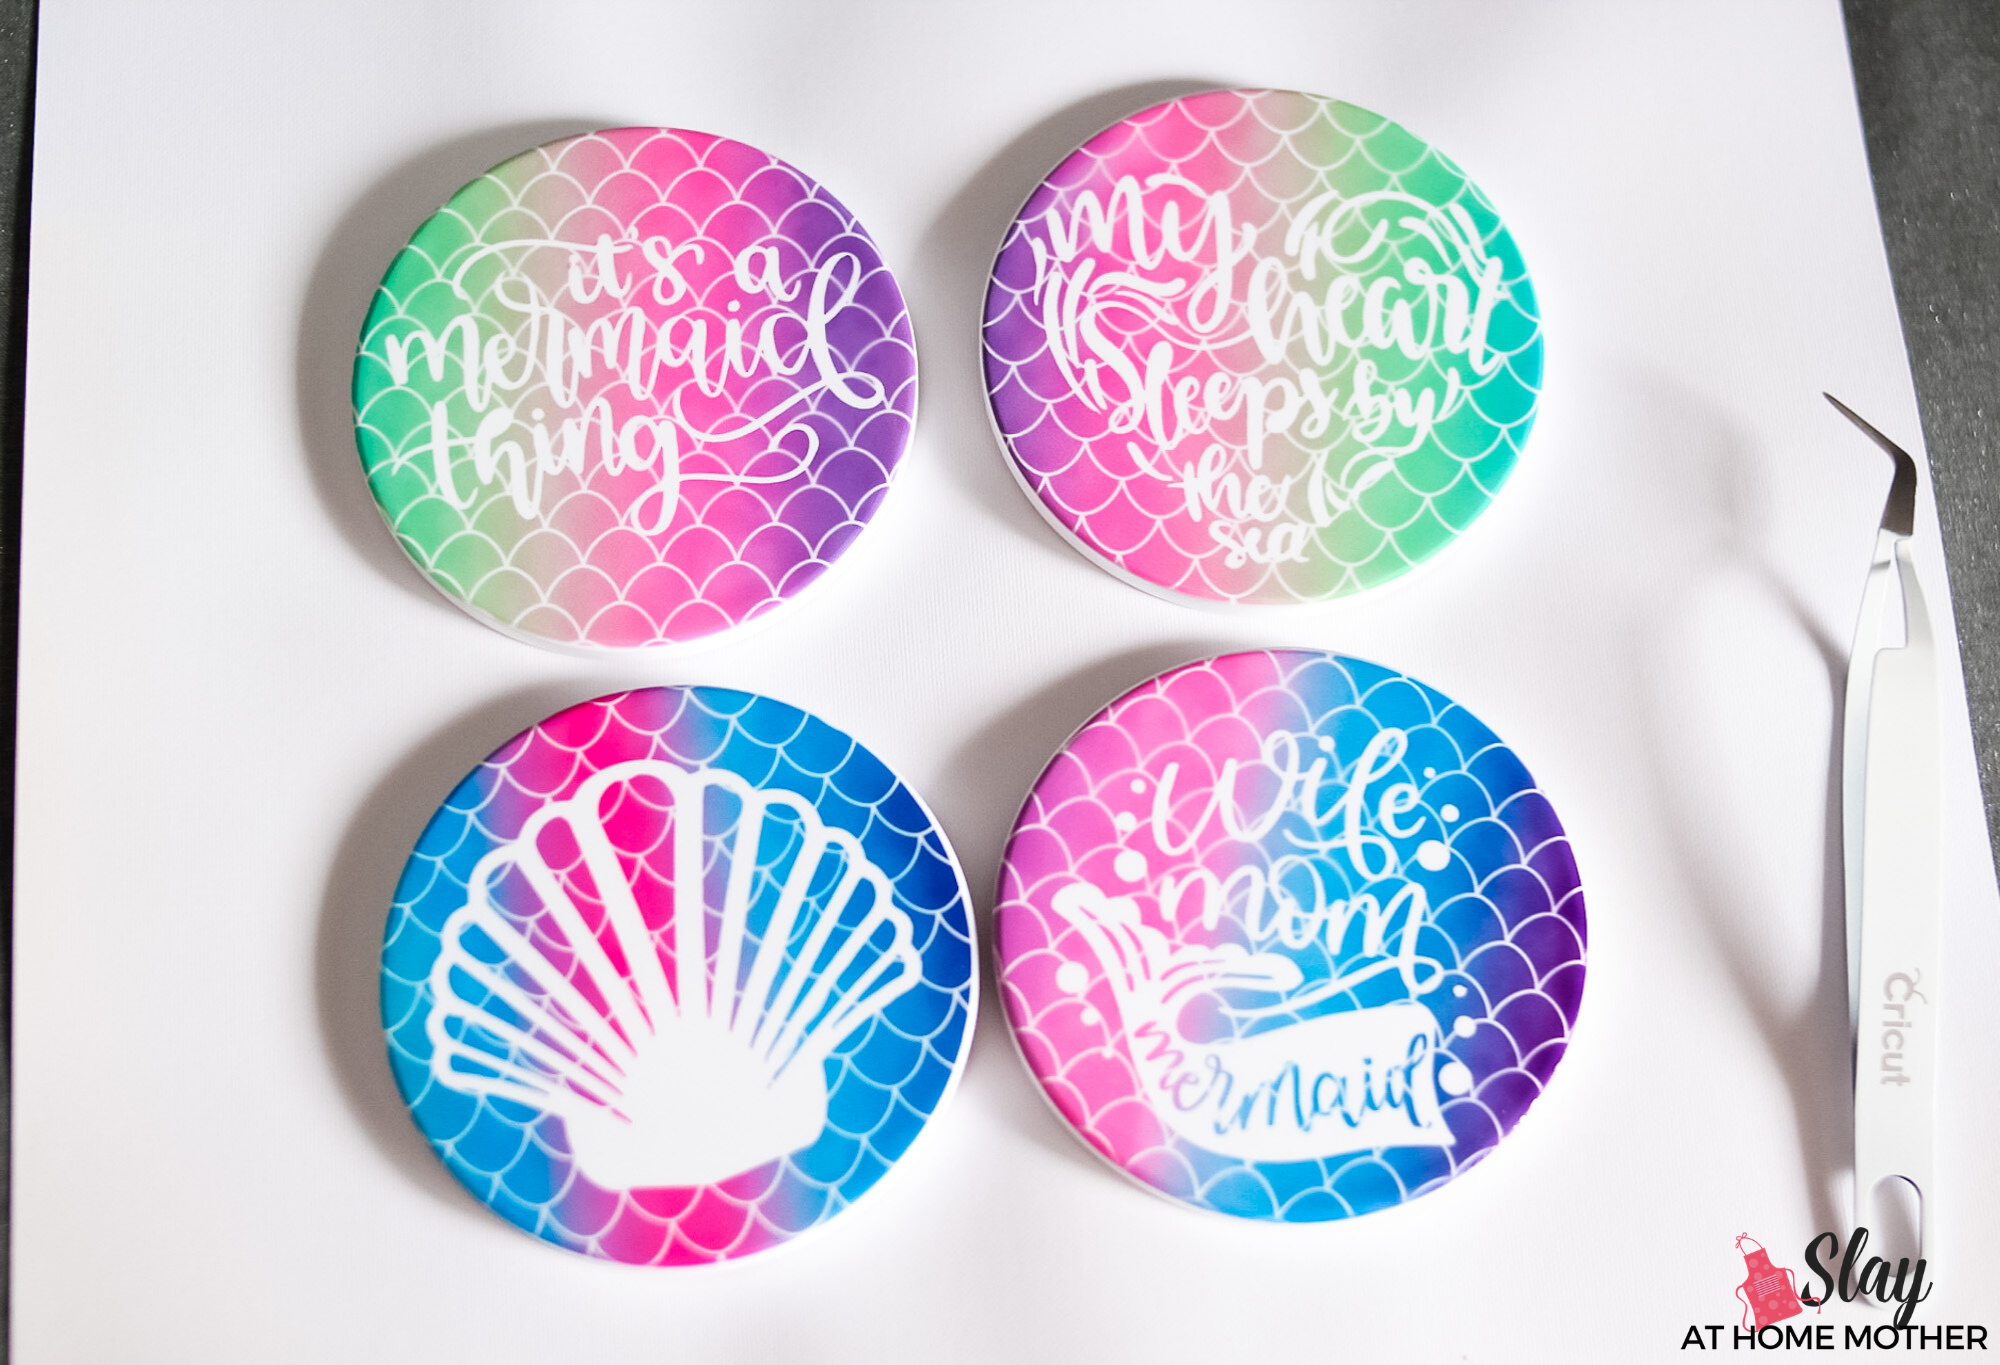
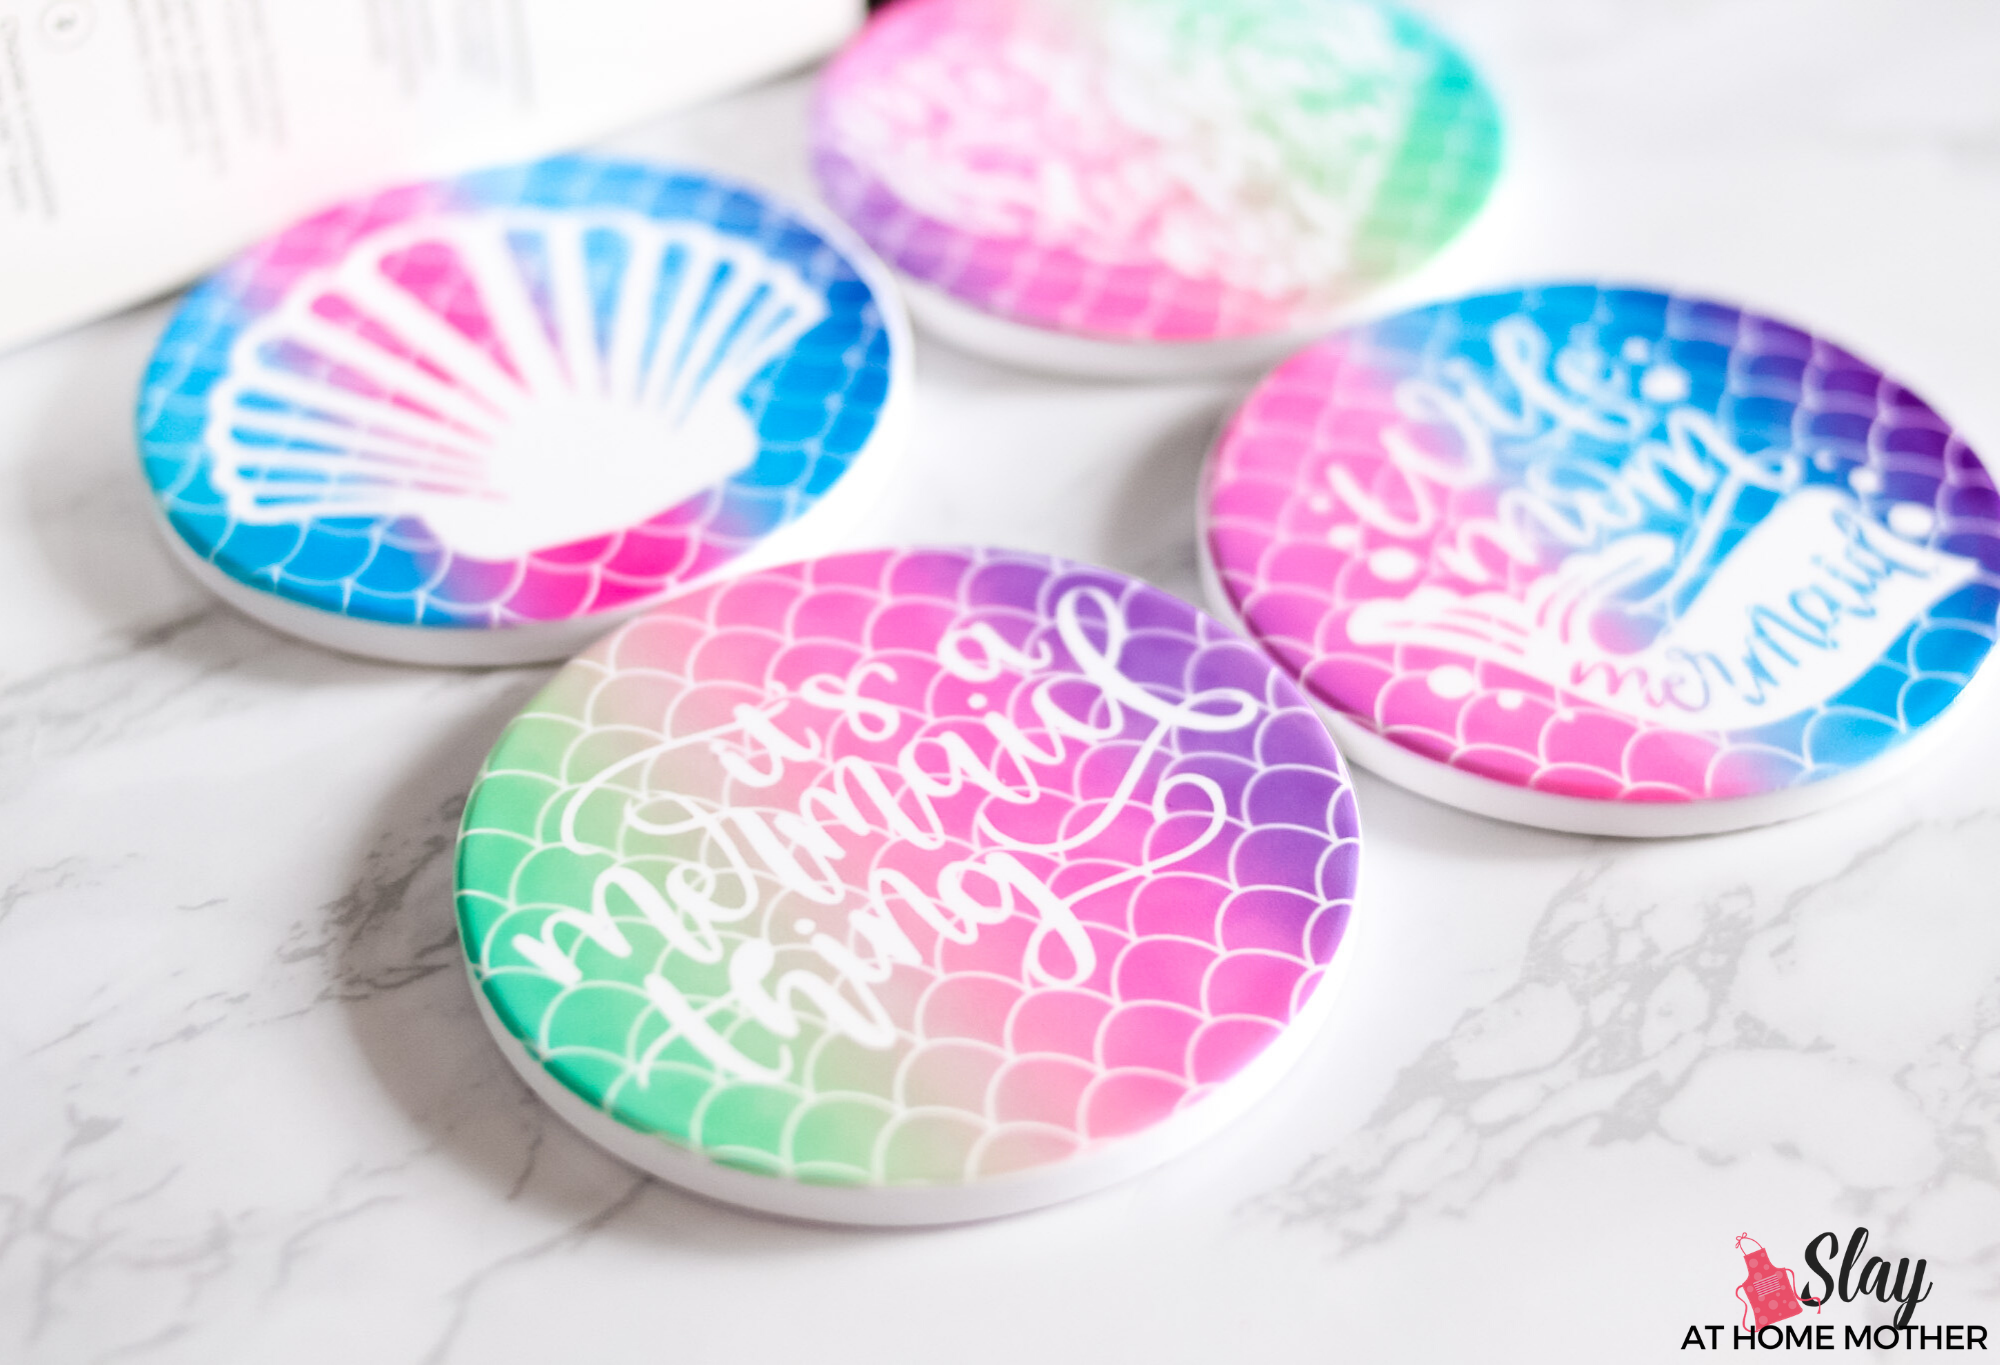
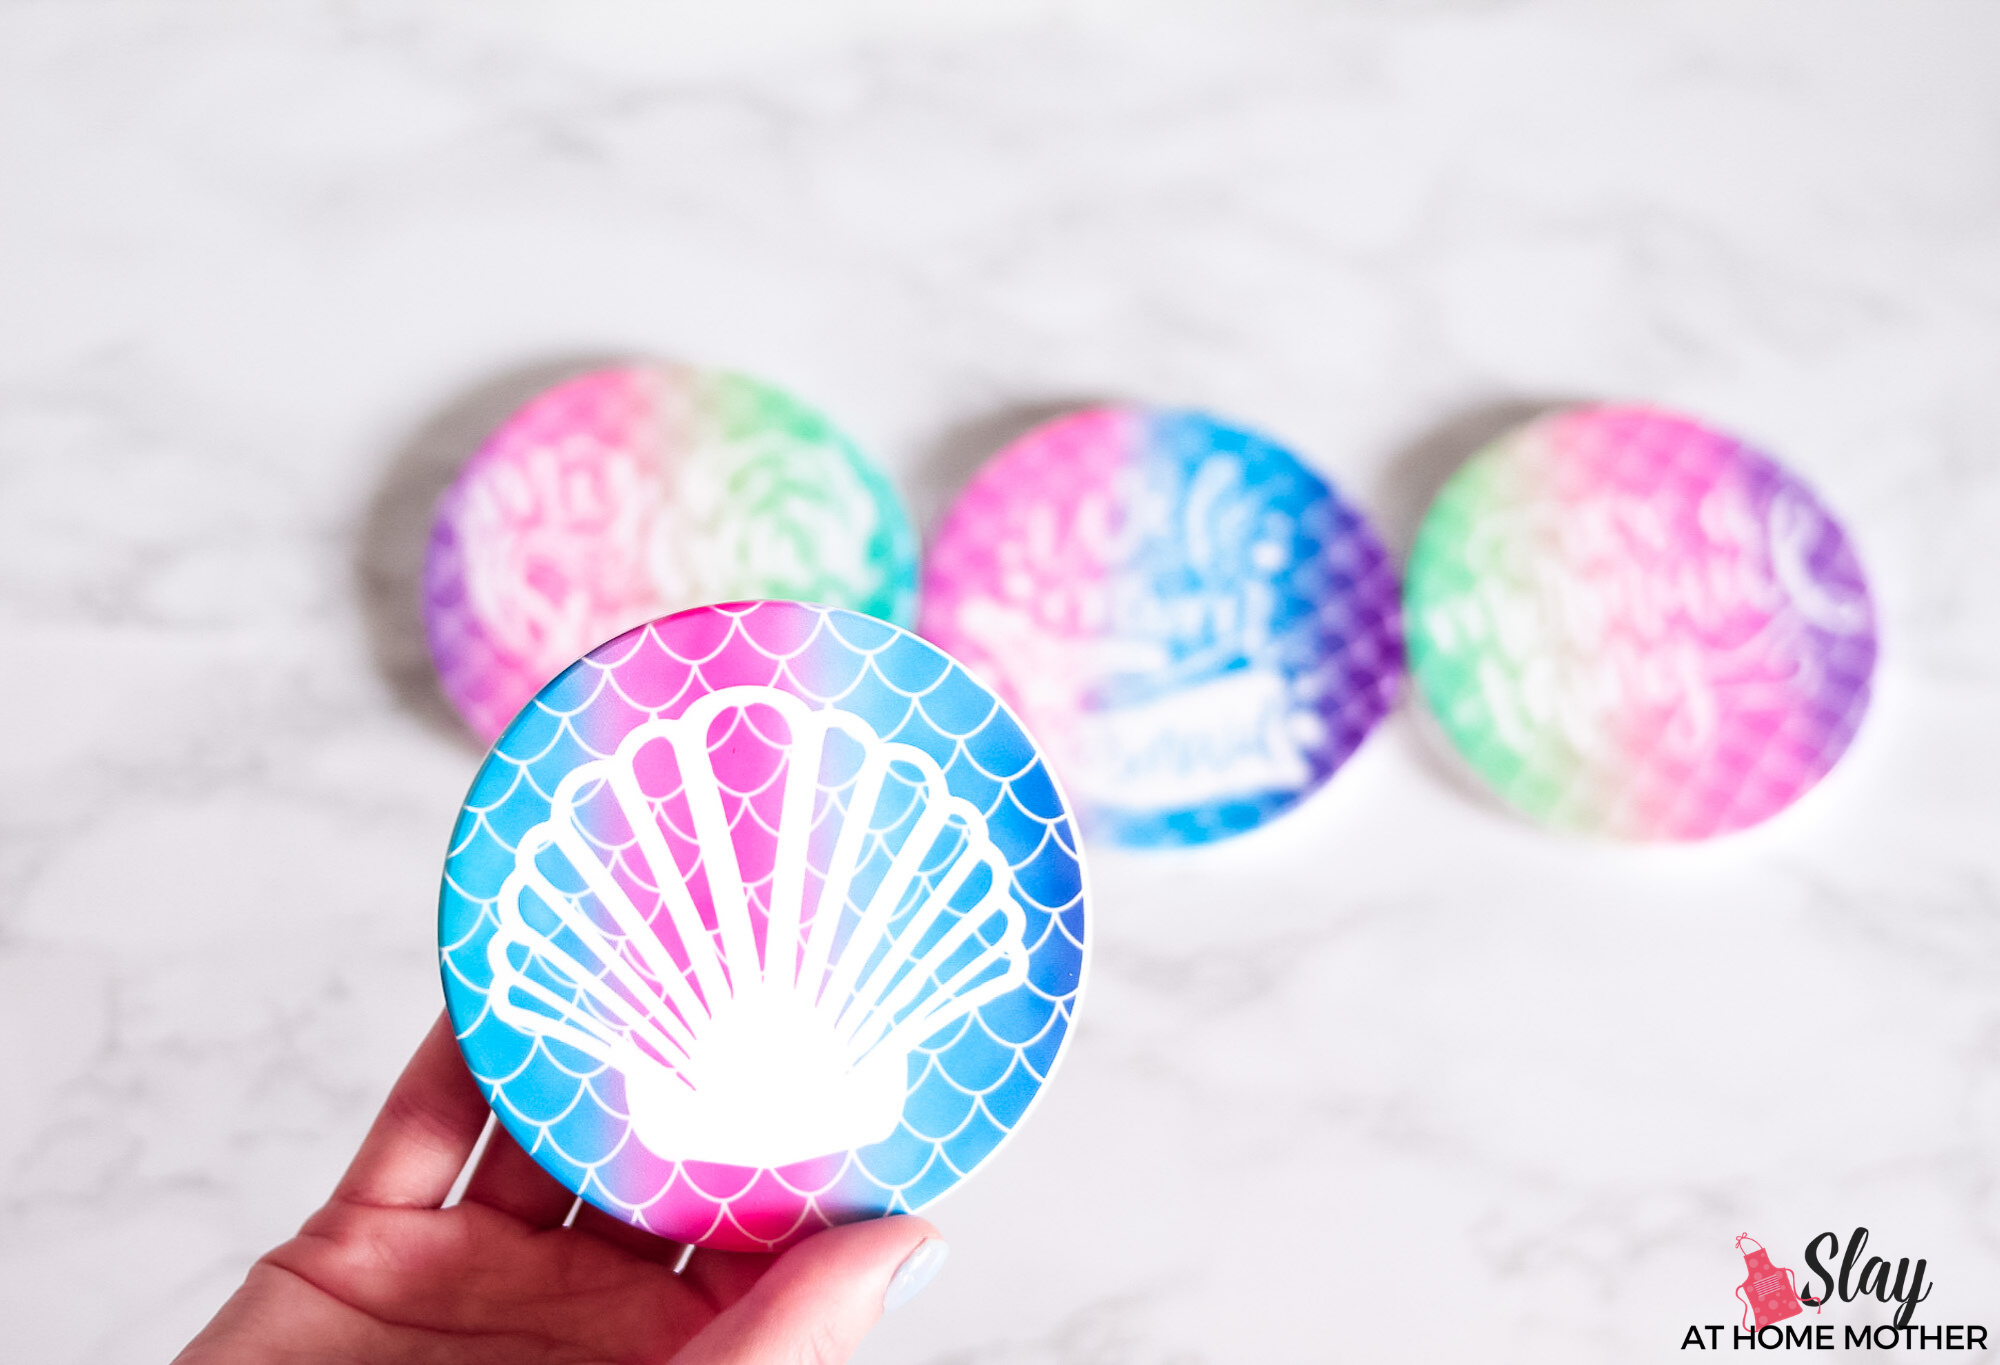
Now that you’re all finished, admire your gorgeous finished coasters!
The ink really brightens up once the transfer is complete.
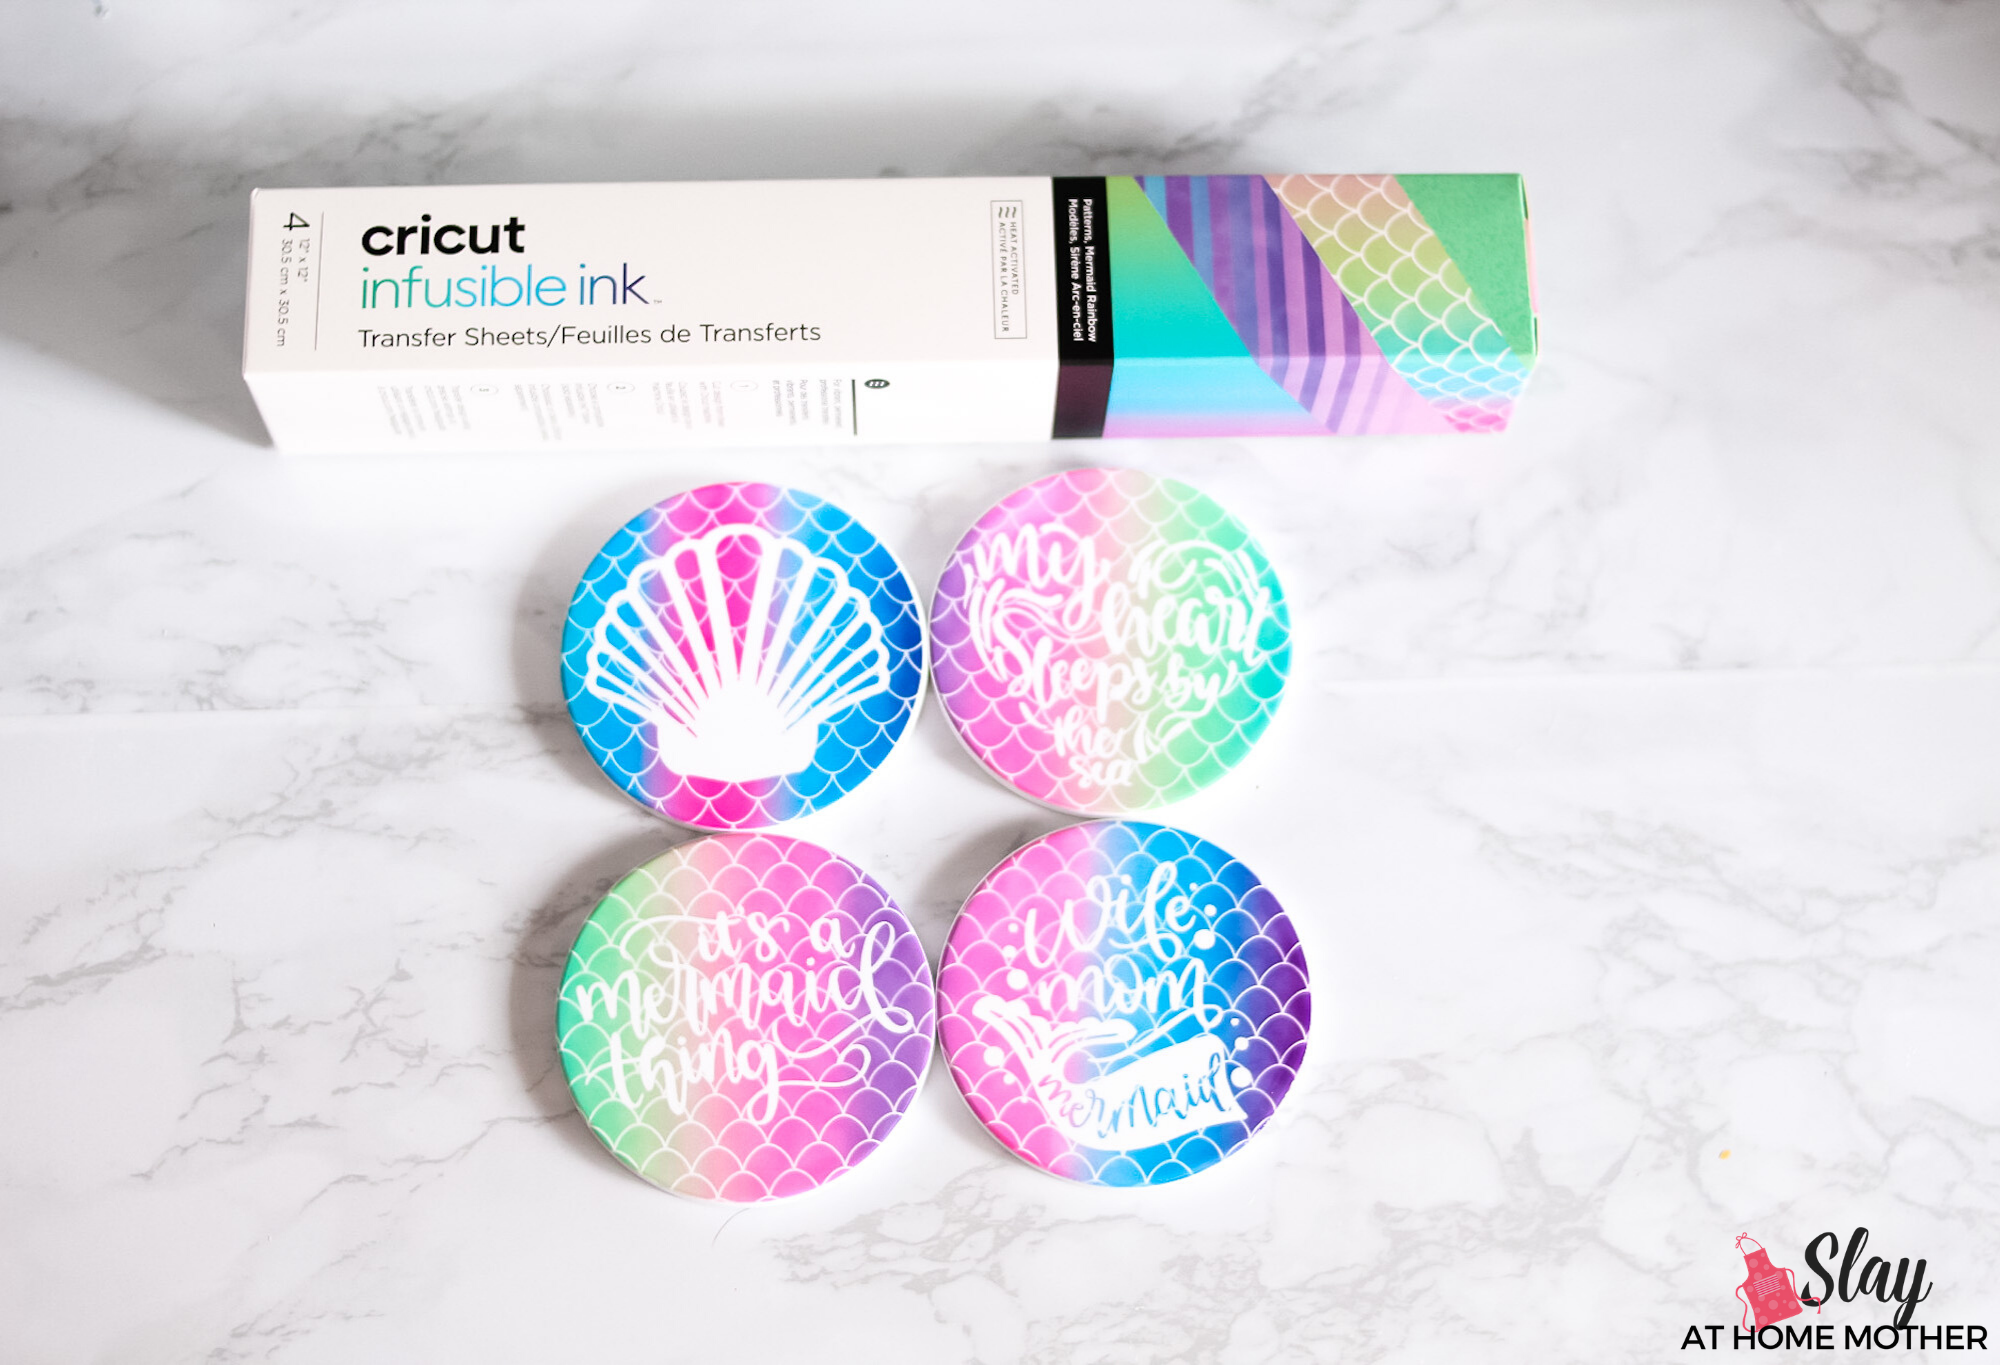
There are tons of different infusible ink patterns to choose from, from stripes and plaid to gorgeous rainbow colors and more!
I can see them expanding on their print and color availability soon, especially as they add more blanks to their stock.
How To Clean Infusible Ink Coasters
Cricut recommends cleaning finished ceramic coasters with warm water and glass cleaner.
Be sure to avoid harsh scrubbers or abrasive sponges, etc. as this may scratch the design.
Thank you so much for reading – I hope you enjoyed this post and feel confident making your own infusible ink coasters.
If you make these, be sure to tag me on Instagram (@slayathomemother) so I can see your finished project!
*Post originally published February 2020, last updated March 2023.