

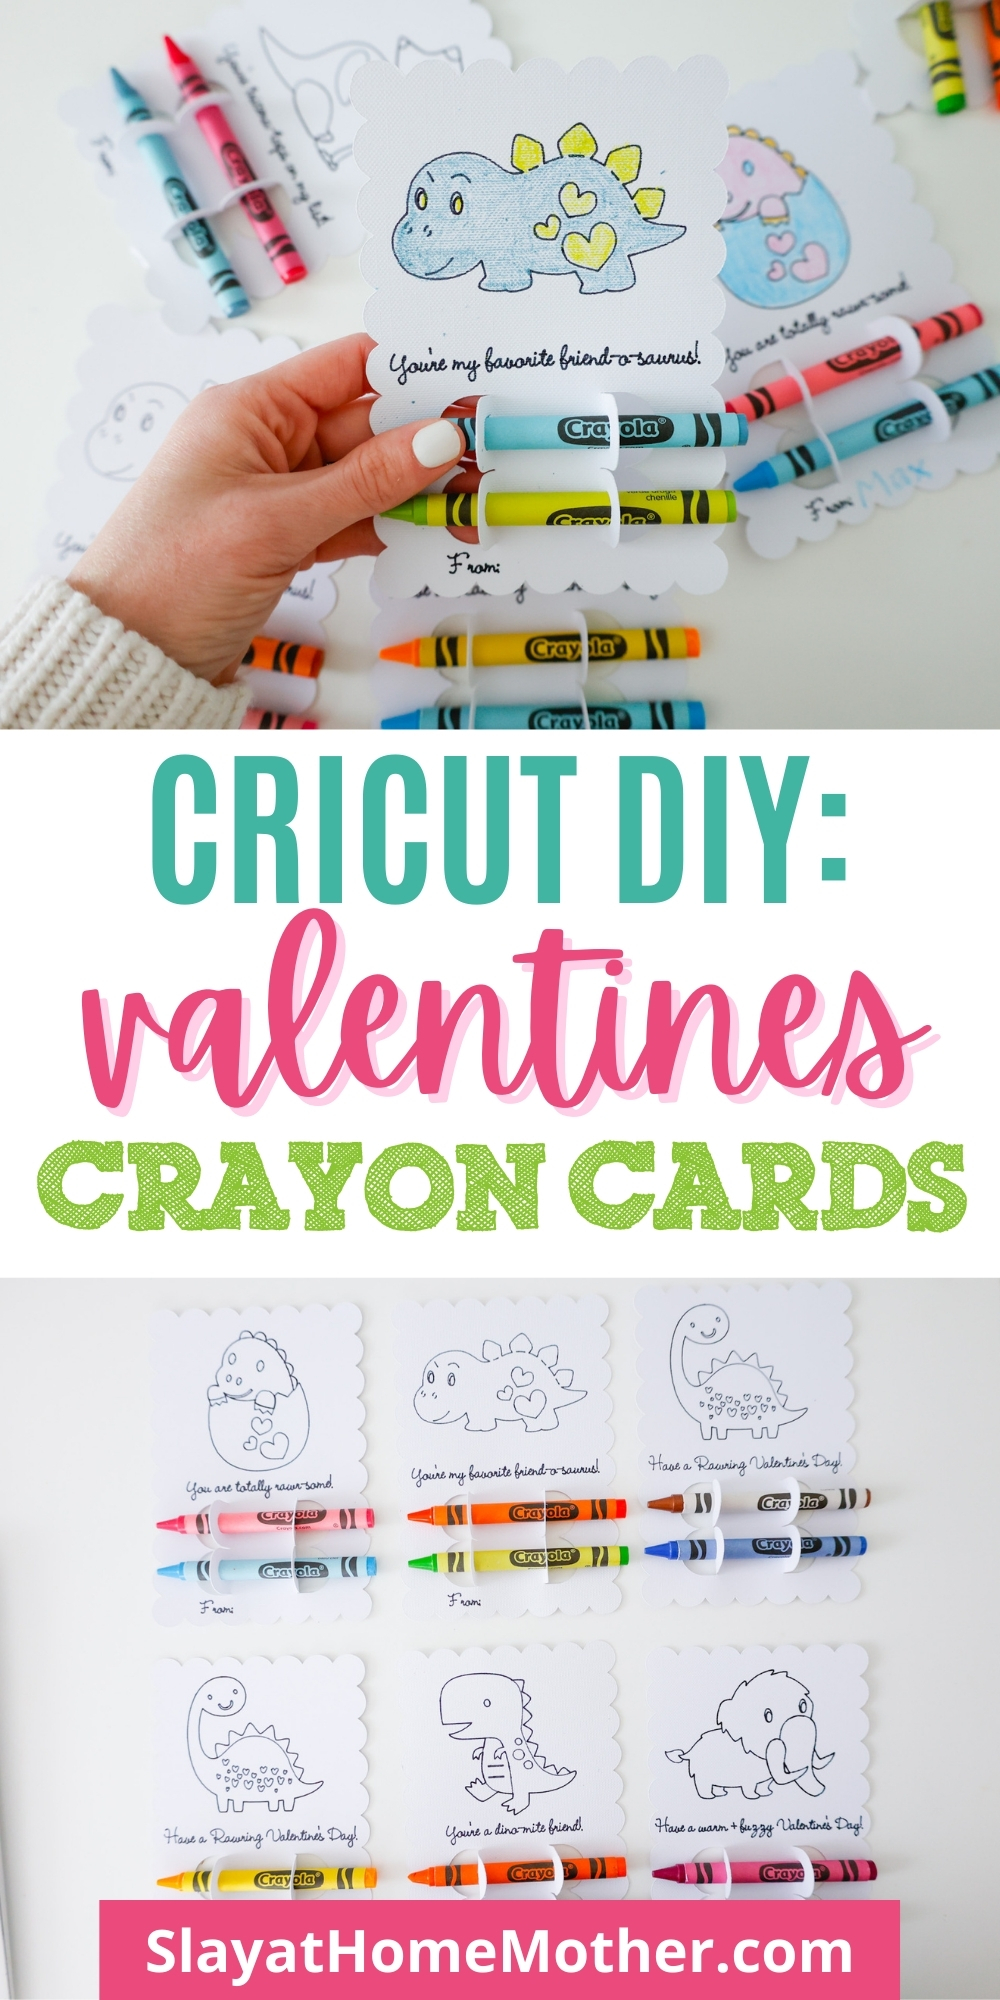
Craft these easy and adorable dinosaur-themed coloring cards for your child’s class this Valentine’s Day for an allergy-free, non-candy dino-mite activity!


Raise your hand if your child is in a class with a TON of allergies!
I believe my son’s classroom has about four or five serious allergies we have to keep in mind for every holiday, school party, and birthday treats the parents send in.
The news of these allergies was disappointing at first, but only because the minor convenience of being able to send in whatever we wanted with our children was taken away.
I started thinking it over with my husband, though and felt grateful that we weren’t in those parents’ shoes.
Trying to imagine what it must be like for parents who have to worry day-in and day-out about allergies -it must be exhausting!
And then having to worry about not only what you are giving your child, but what they might be exposed to when they’re at school, a friend’s house, on a field trip, etc.
My heart goes out to you guys!
I learned that one safe treat I could bring in that avoided the major allergies in the classroom were Blow Pops, in case you’re wondering.
I started paying attention to the birthday and holiday treat bags that other parents were sending in, though, to get ideas for my son’s winter birthday, Christmas, and spring holidays.
Most parents sent in treat bags filled with pencils, erasers, small toys, and other goodies for the class.
For Valentine’s Day this year, I wanted to create something with my Cricut that was both non-candy (since a lot of the classroom allergens can be found in candy and chocolate) and allergen-free. And that’s when I decided to make some homemade coloring cards!
My boys both love dinosaurs, so I figured this would be a great way to use up the extra sheets of white cardstock I had on hand, and create some easy DIY valentines for my kids to hand out without having to worry about dietary restrictions or allergies.
And let me tell you – for this being my first project using a pen with my Explore Air 2, I’m hooked!
It was incredibly easy to design and make – I’m so excited to share the design with you guys so you can create these for your child’s class, too!
*This post contains affiliate links, however, all opinions are my own, as always*.
What Do I Need To Make These Coloring Cards?
Not much! All you need is…
- white cardstock (4 or 5 sheets)
- black 0.4 tip Cricut pen
- StandardGrip mat (the green one)
- fine-point blade and housing
- Cricut machine (either the Explore Air 2 or the Maker)
- crayons (two crayons per Valentine you’ll be making)
For this tutorial, I’ll be using my Cricut Explore Air 2 machine, but this also works with the Maker machine as well.
Valentine’s Day Dino-Mite Coloring Cards Design
For these coloring cards, I used images and fonts available within Cricut Design Space.
Here’s the direct link to this project within Design Space so you can make these for yourself!

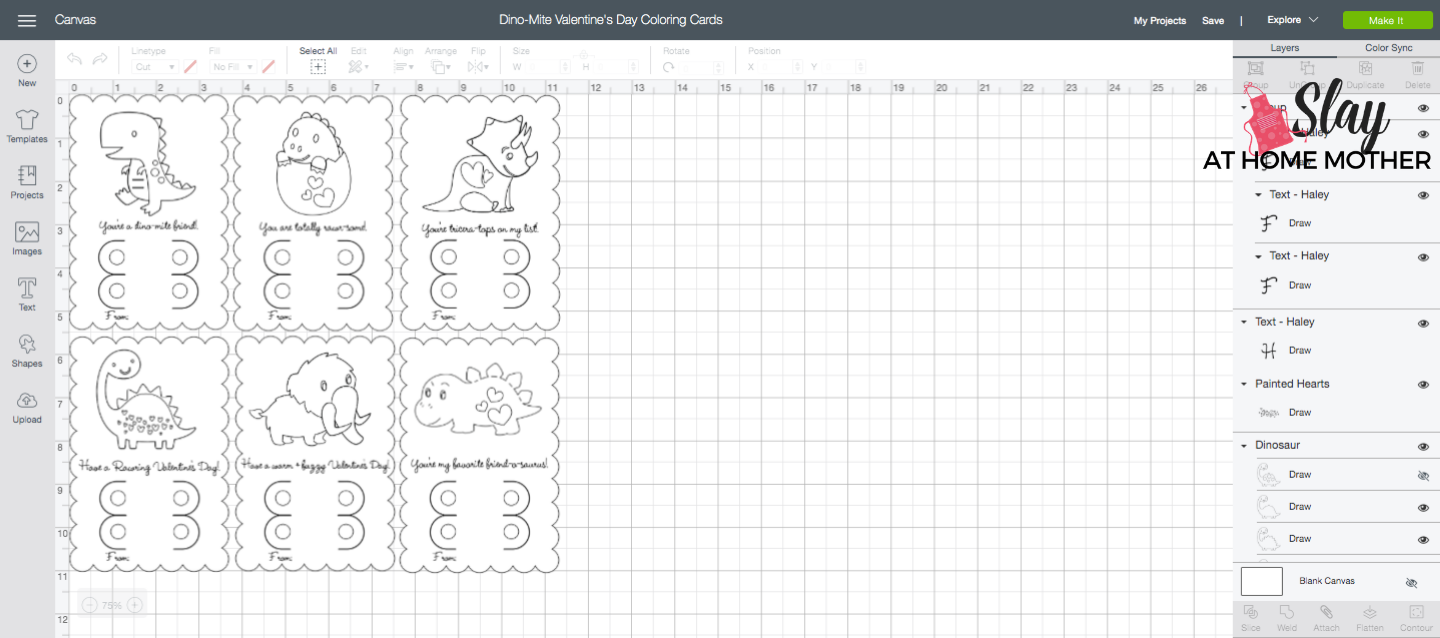
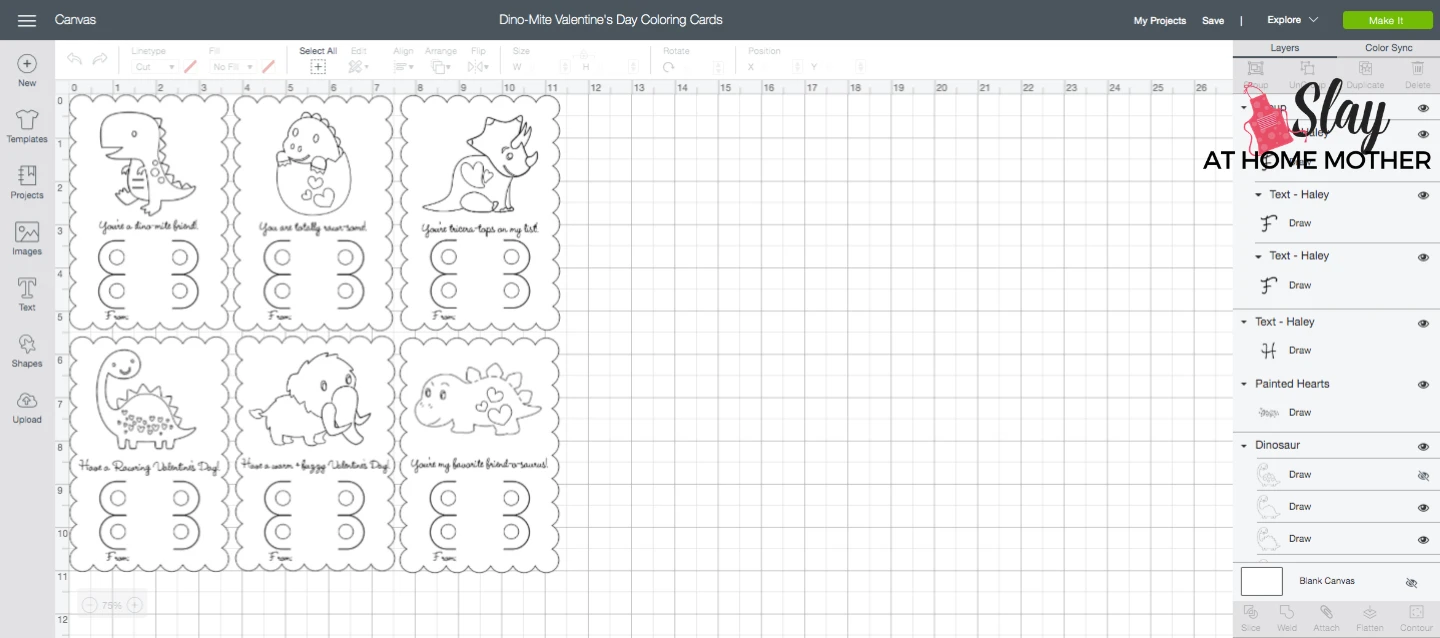
If you do not want to use this design and want to create your own (maybe you want a different theme, and that’s okay!), here are the two key Design Space elements you’ll need which can be found under the Images tab:
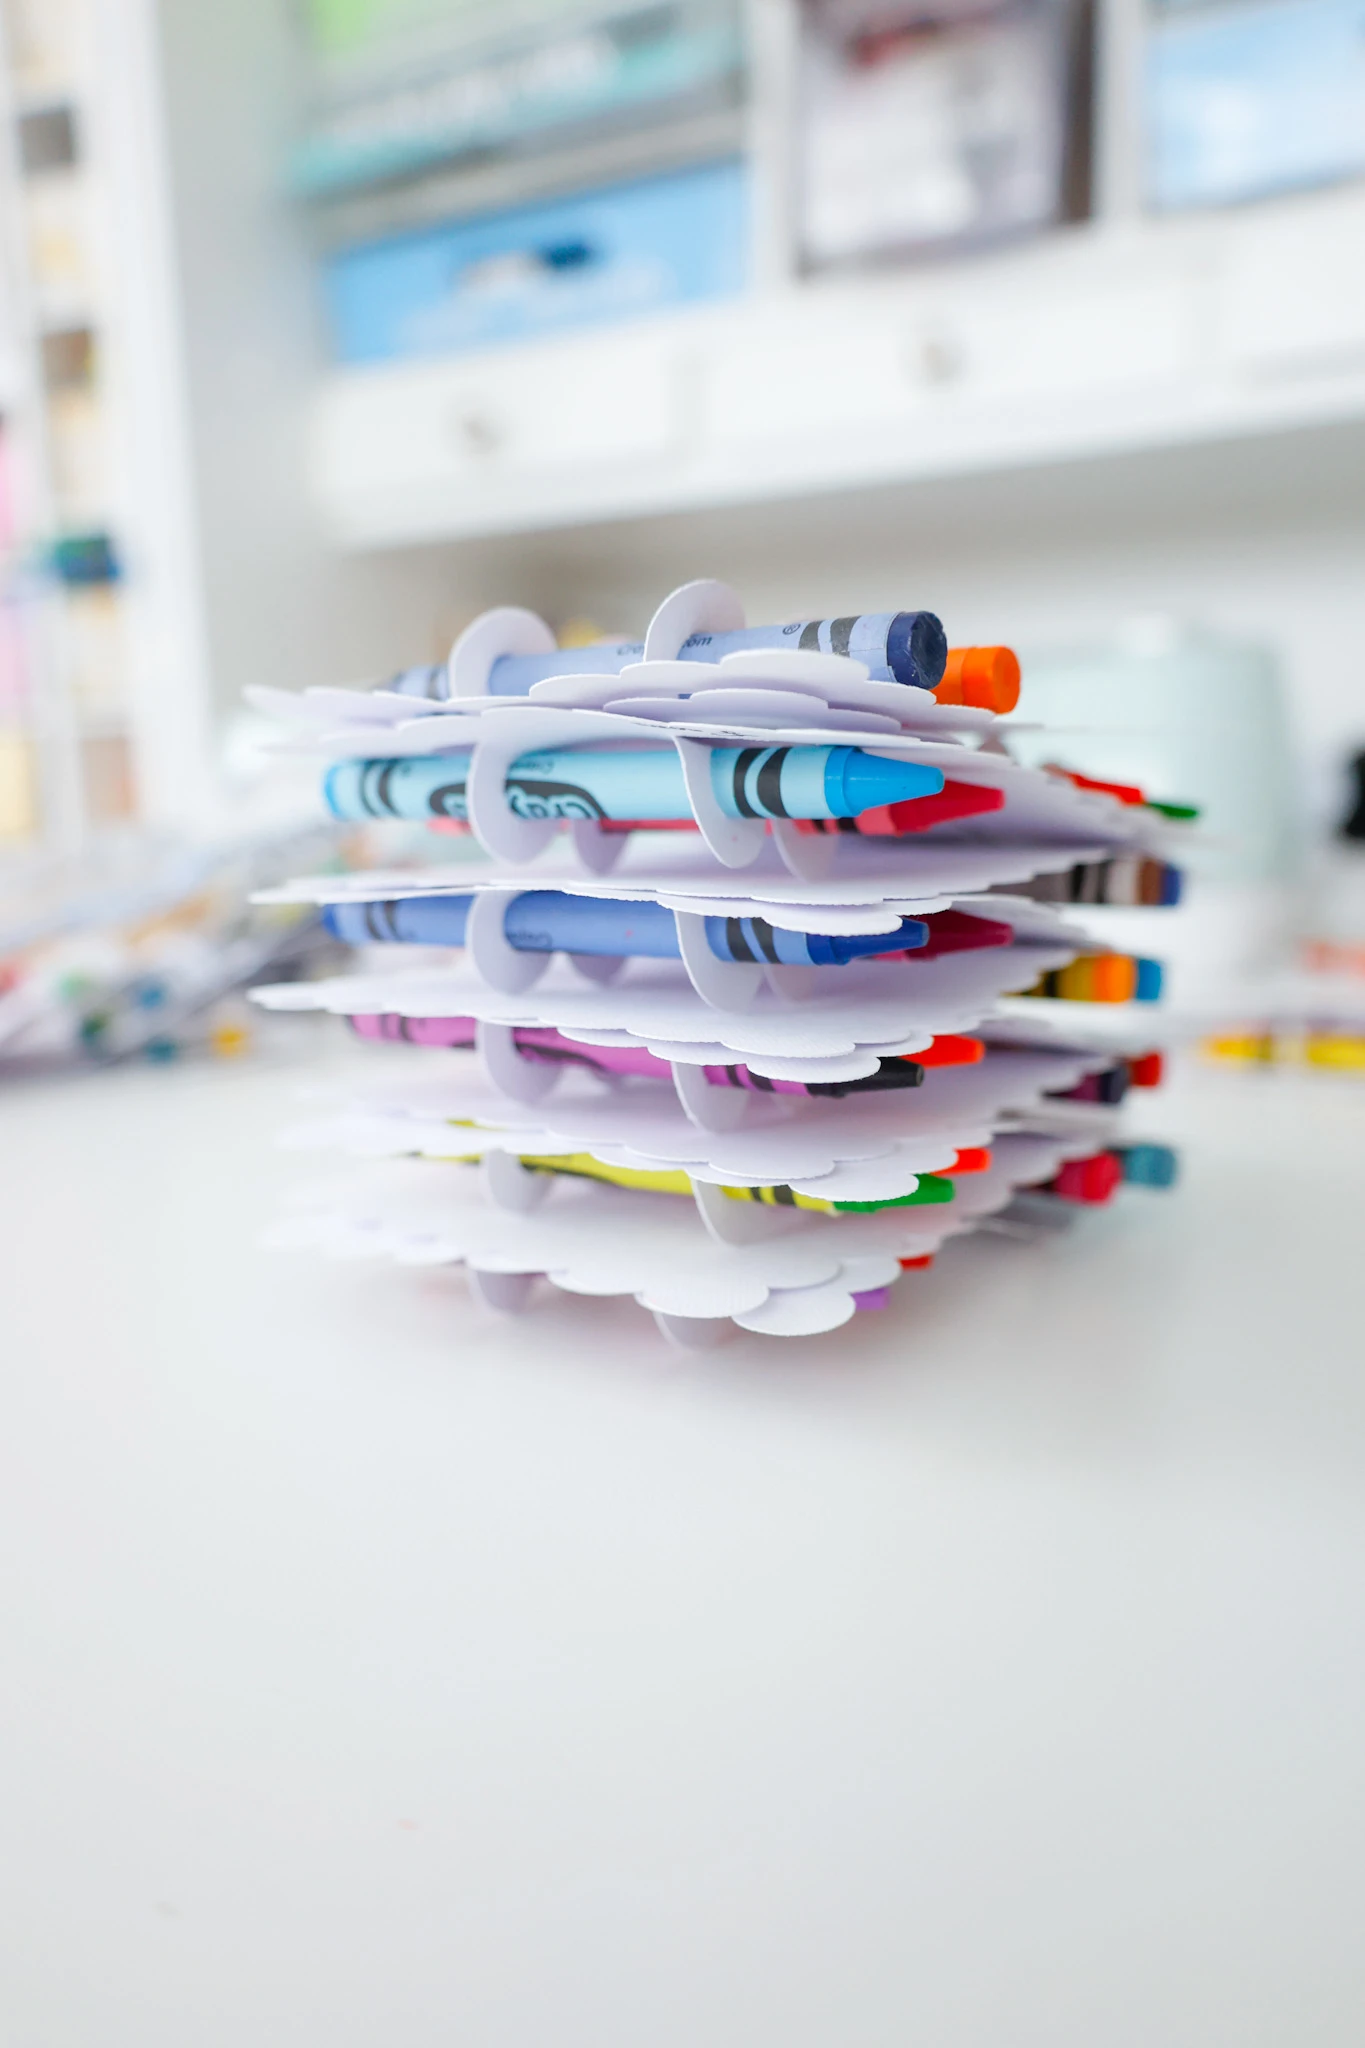
- double crayon holder (in the Bloggers Love Cricut cartridge)
- scalloped edges card (in the Creative Cards cartridge)
BTW, I’m using the Cricut font Haley for this project. It’s a gorgeous cursive font and I highly recommend it!
If steering clear of the dinosaur theme, feel free to browse through Cricut’s Images library to find designs or images you like.
Drawing and cutting with the Cricut Explore Air 2
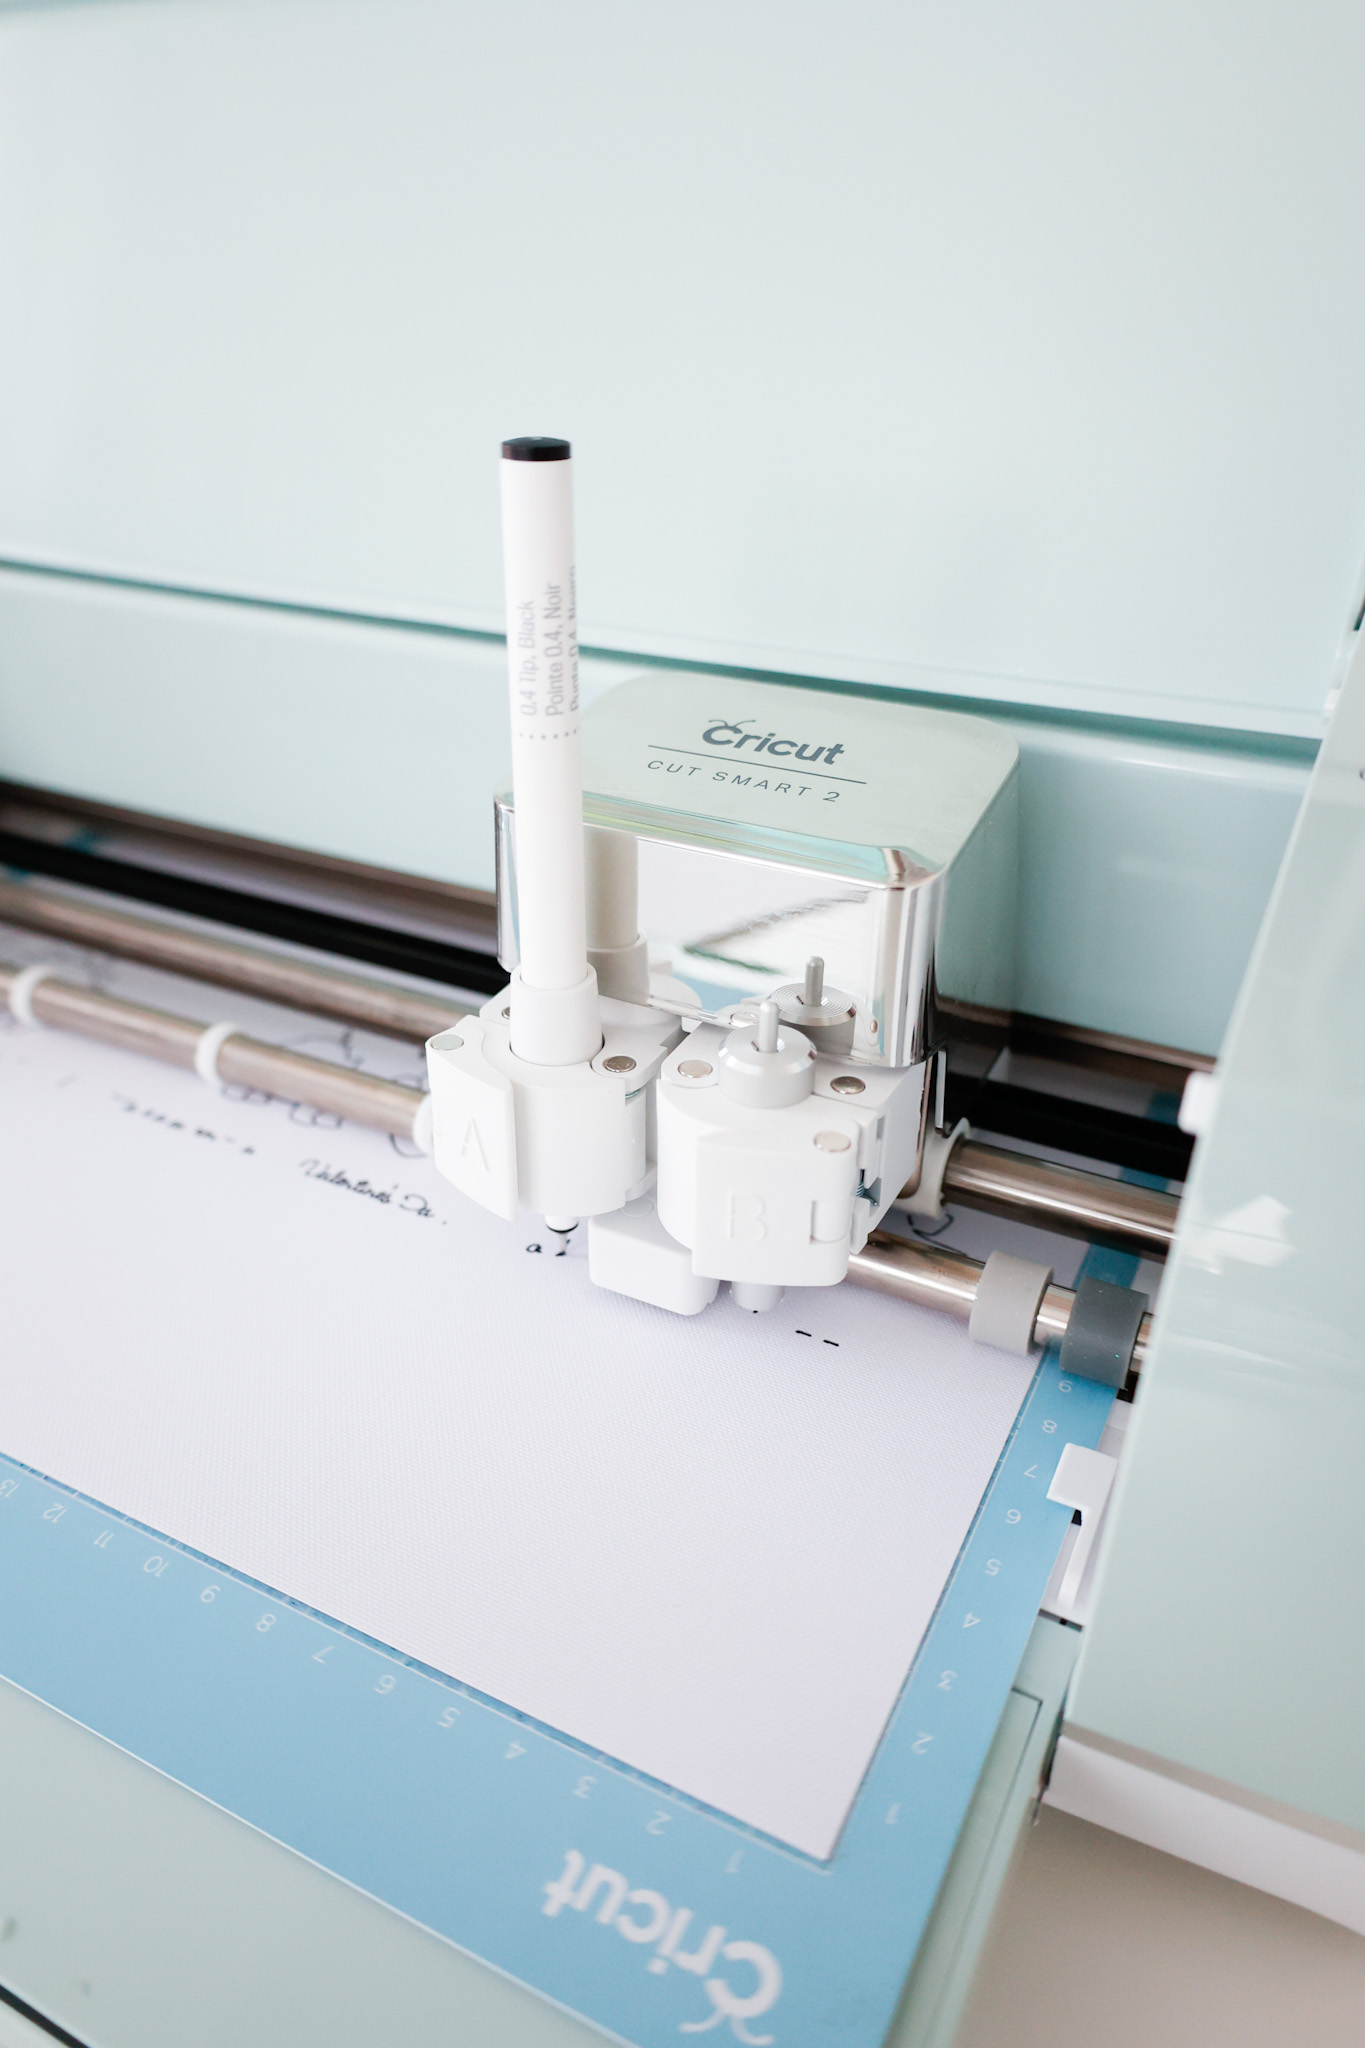
To get your machine ready to draw and cut this design, you’ll need to be sure the proper tools are installed in the clamps, and your machine dial is turned to the ‘Cardstock‘ setting.
Load a black Cricut pen into your machine’s A clamp. Here’s a helpful video…
https://www.youtube.com/watch?v=vuRVUQODbUI
You’ll need to open the clamp and place the pen in the clamp. Push the pen down into the housing with a little force (see the video above).
Also, if you don’t already have the fine-point blade installed into the B clamp, do so at this time.

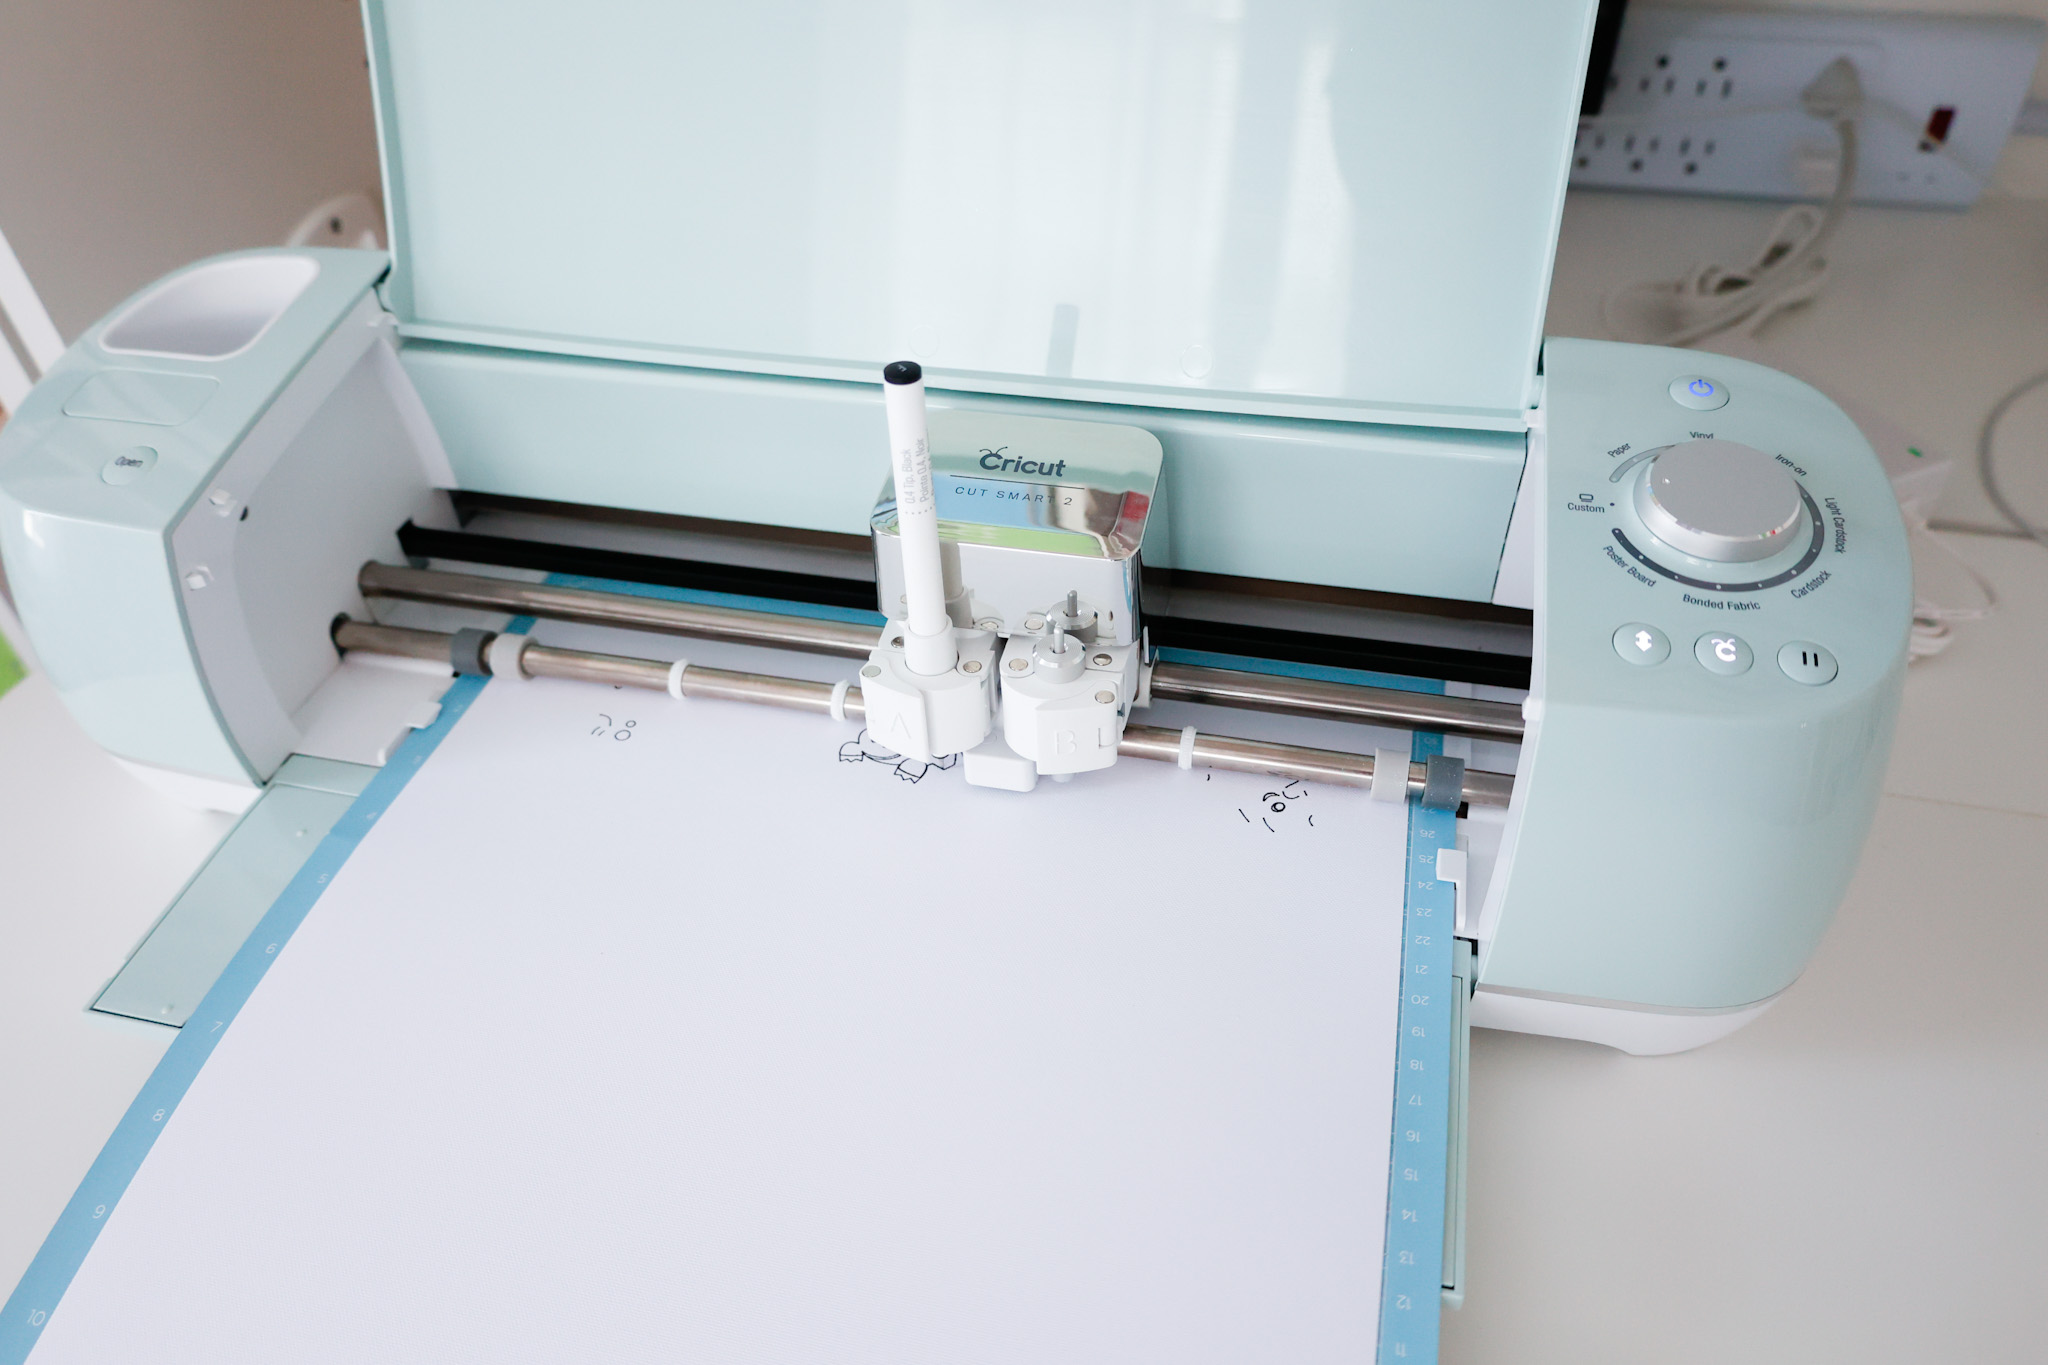
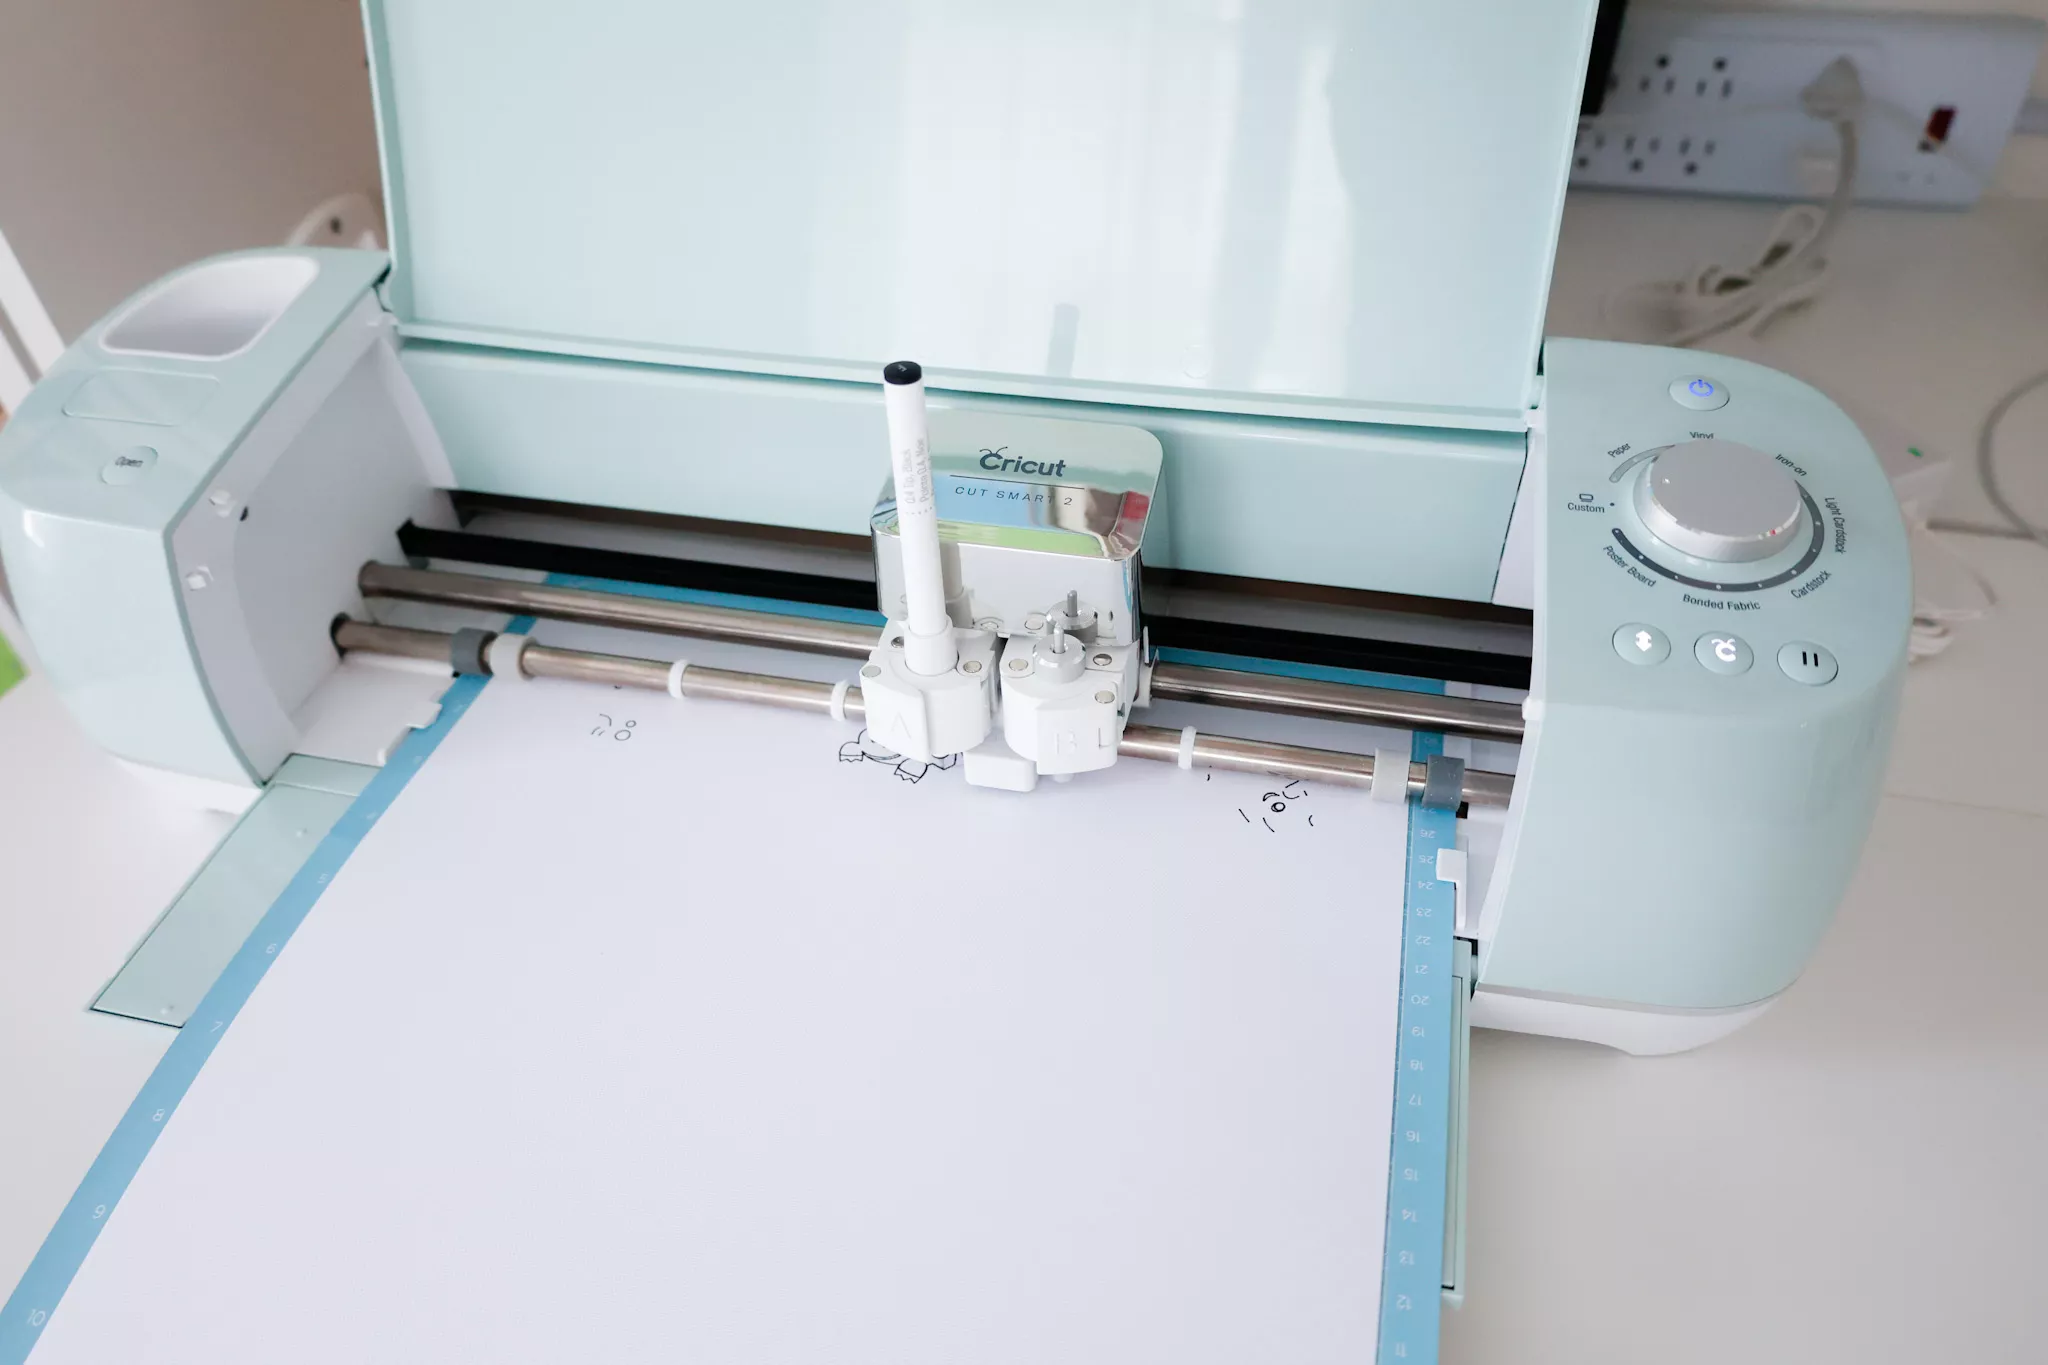
Place one piece of white 12″x12″ cardstock on your green StandardGrip mat and load it into your machine.
Now you’re ready to draw and cut your cardstock!

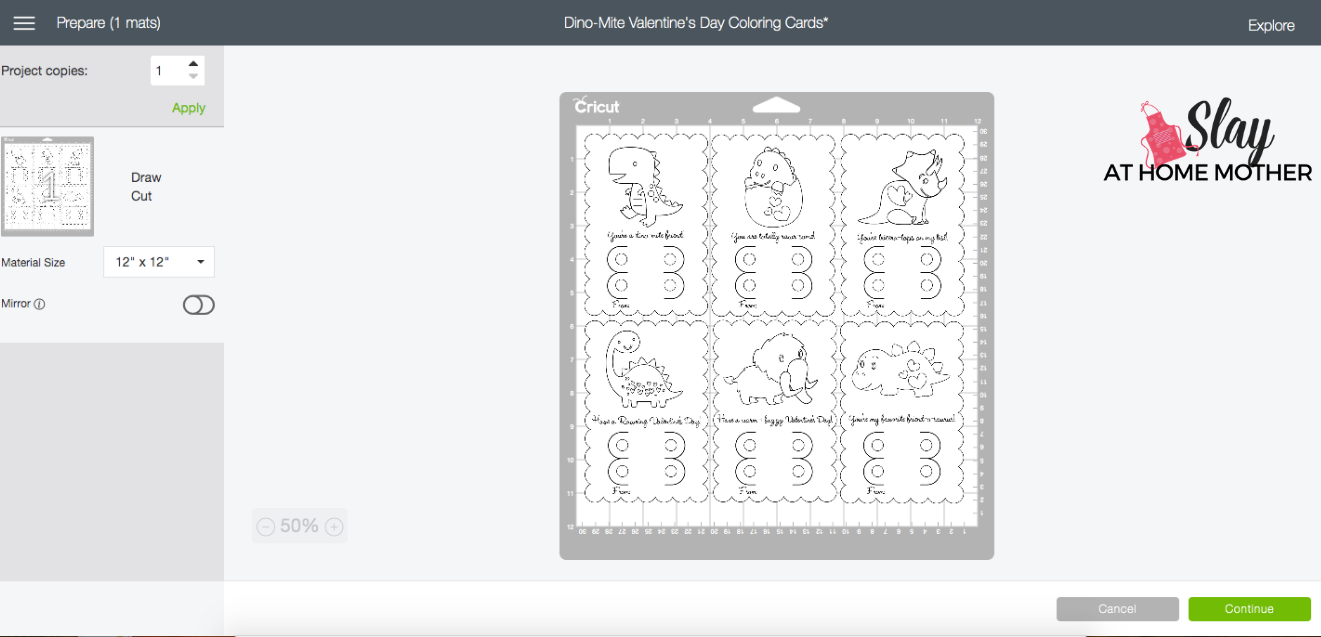
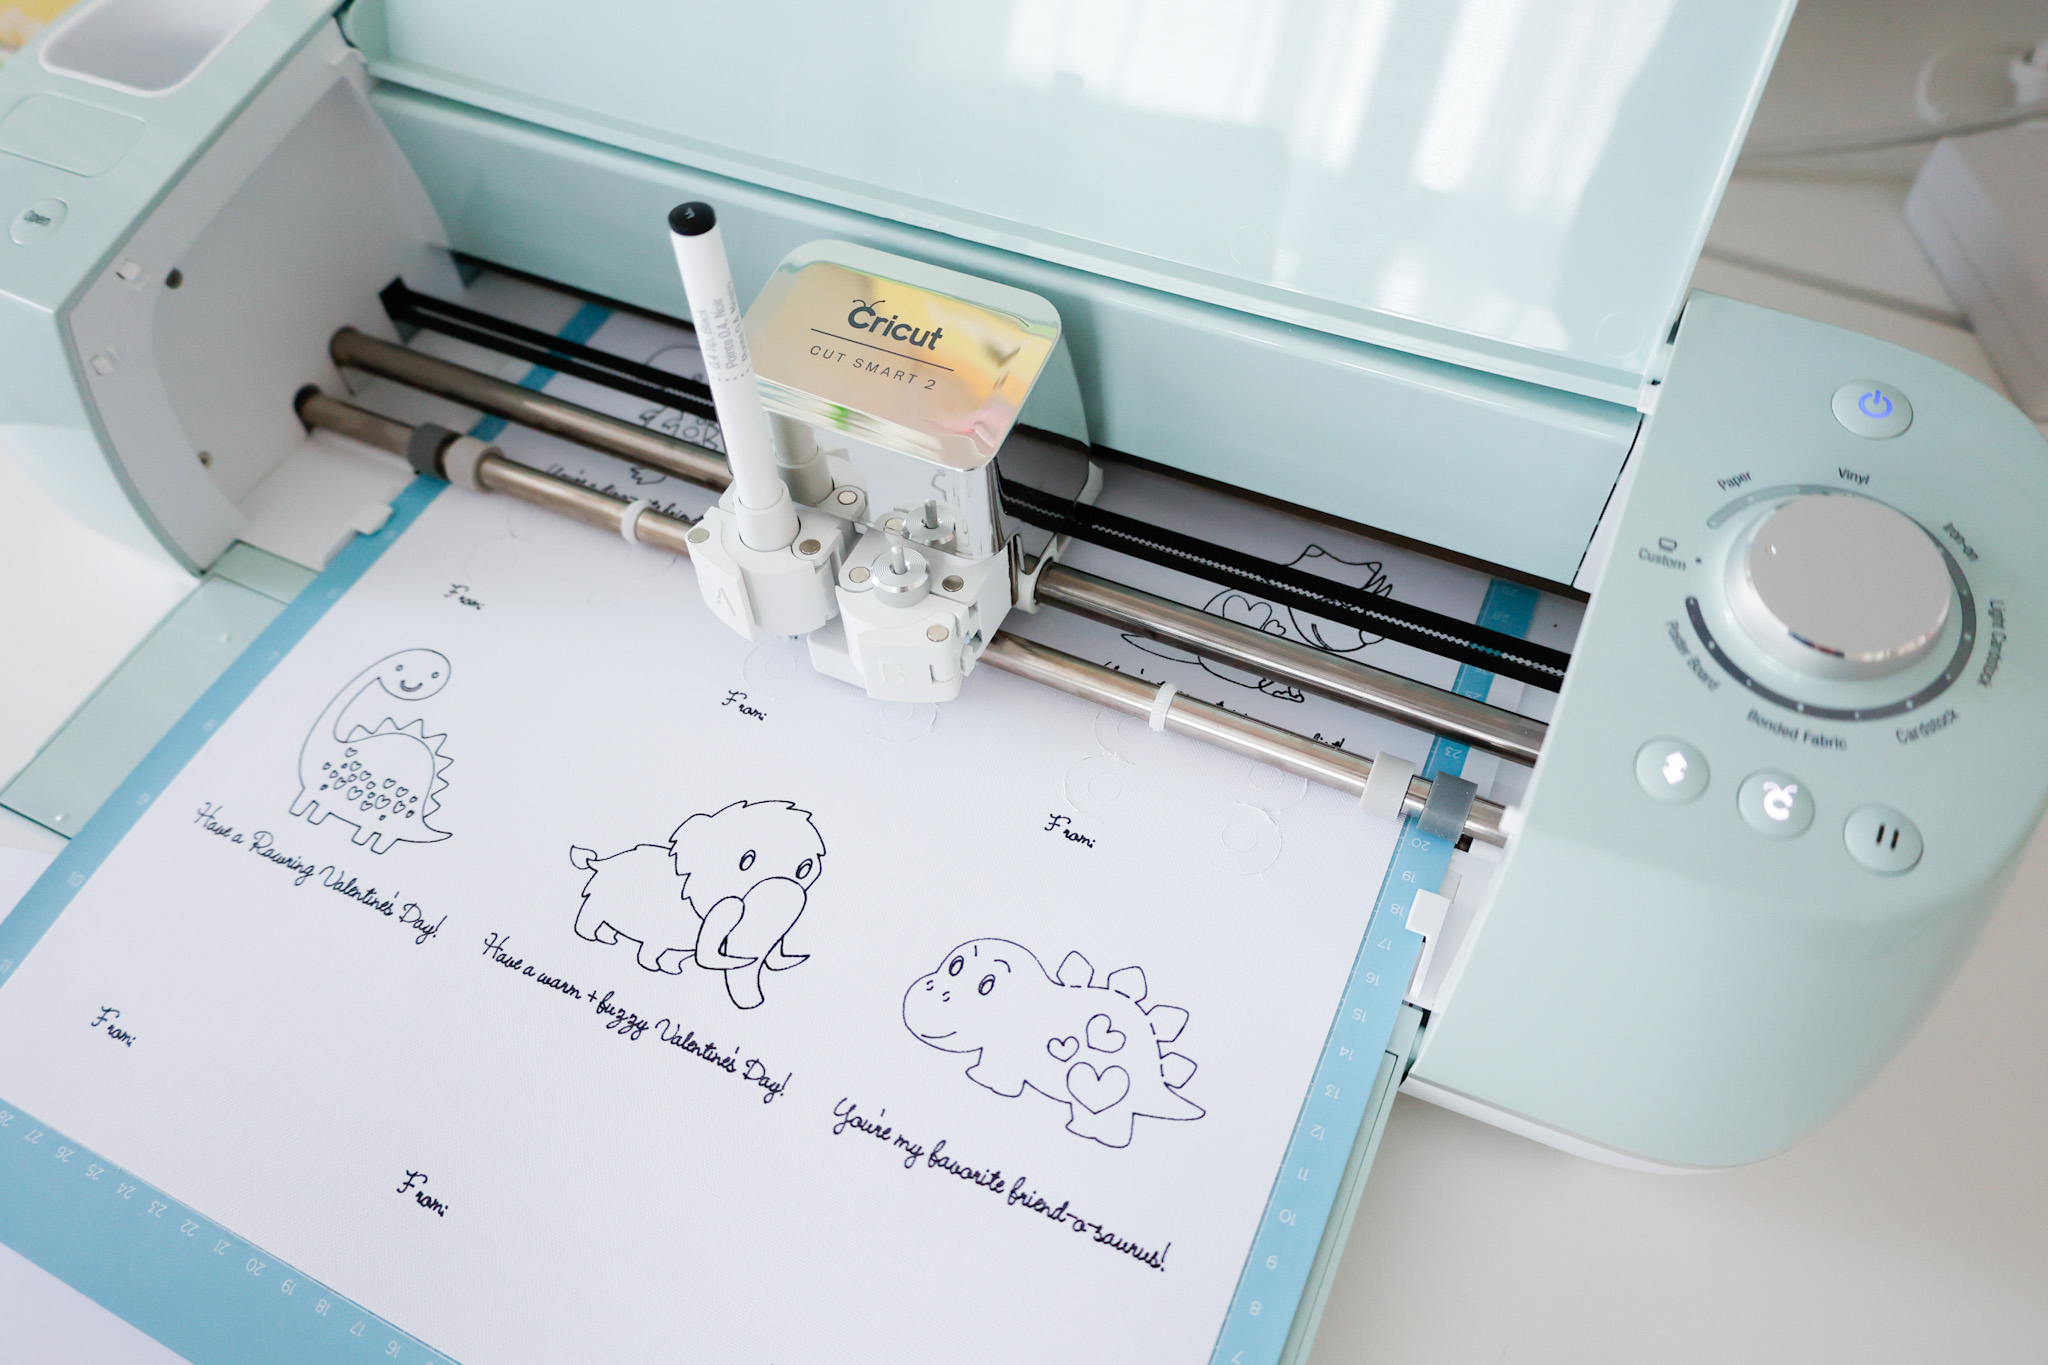
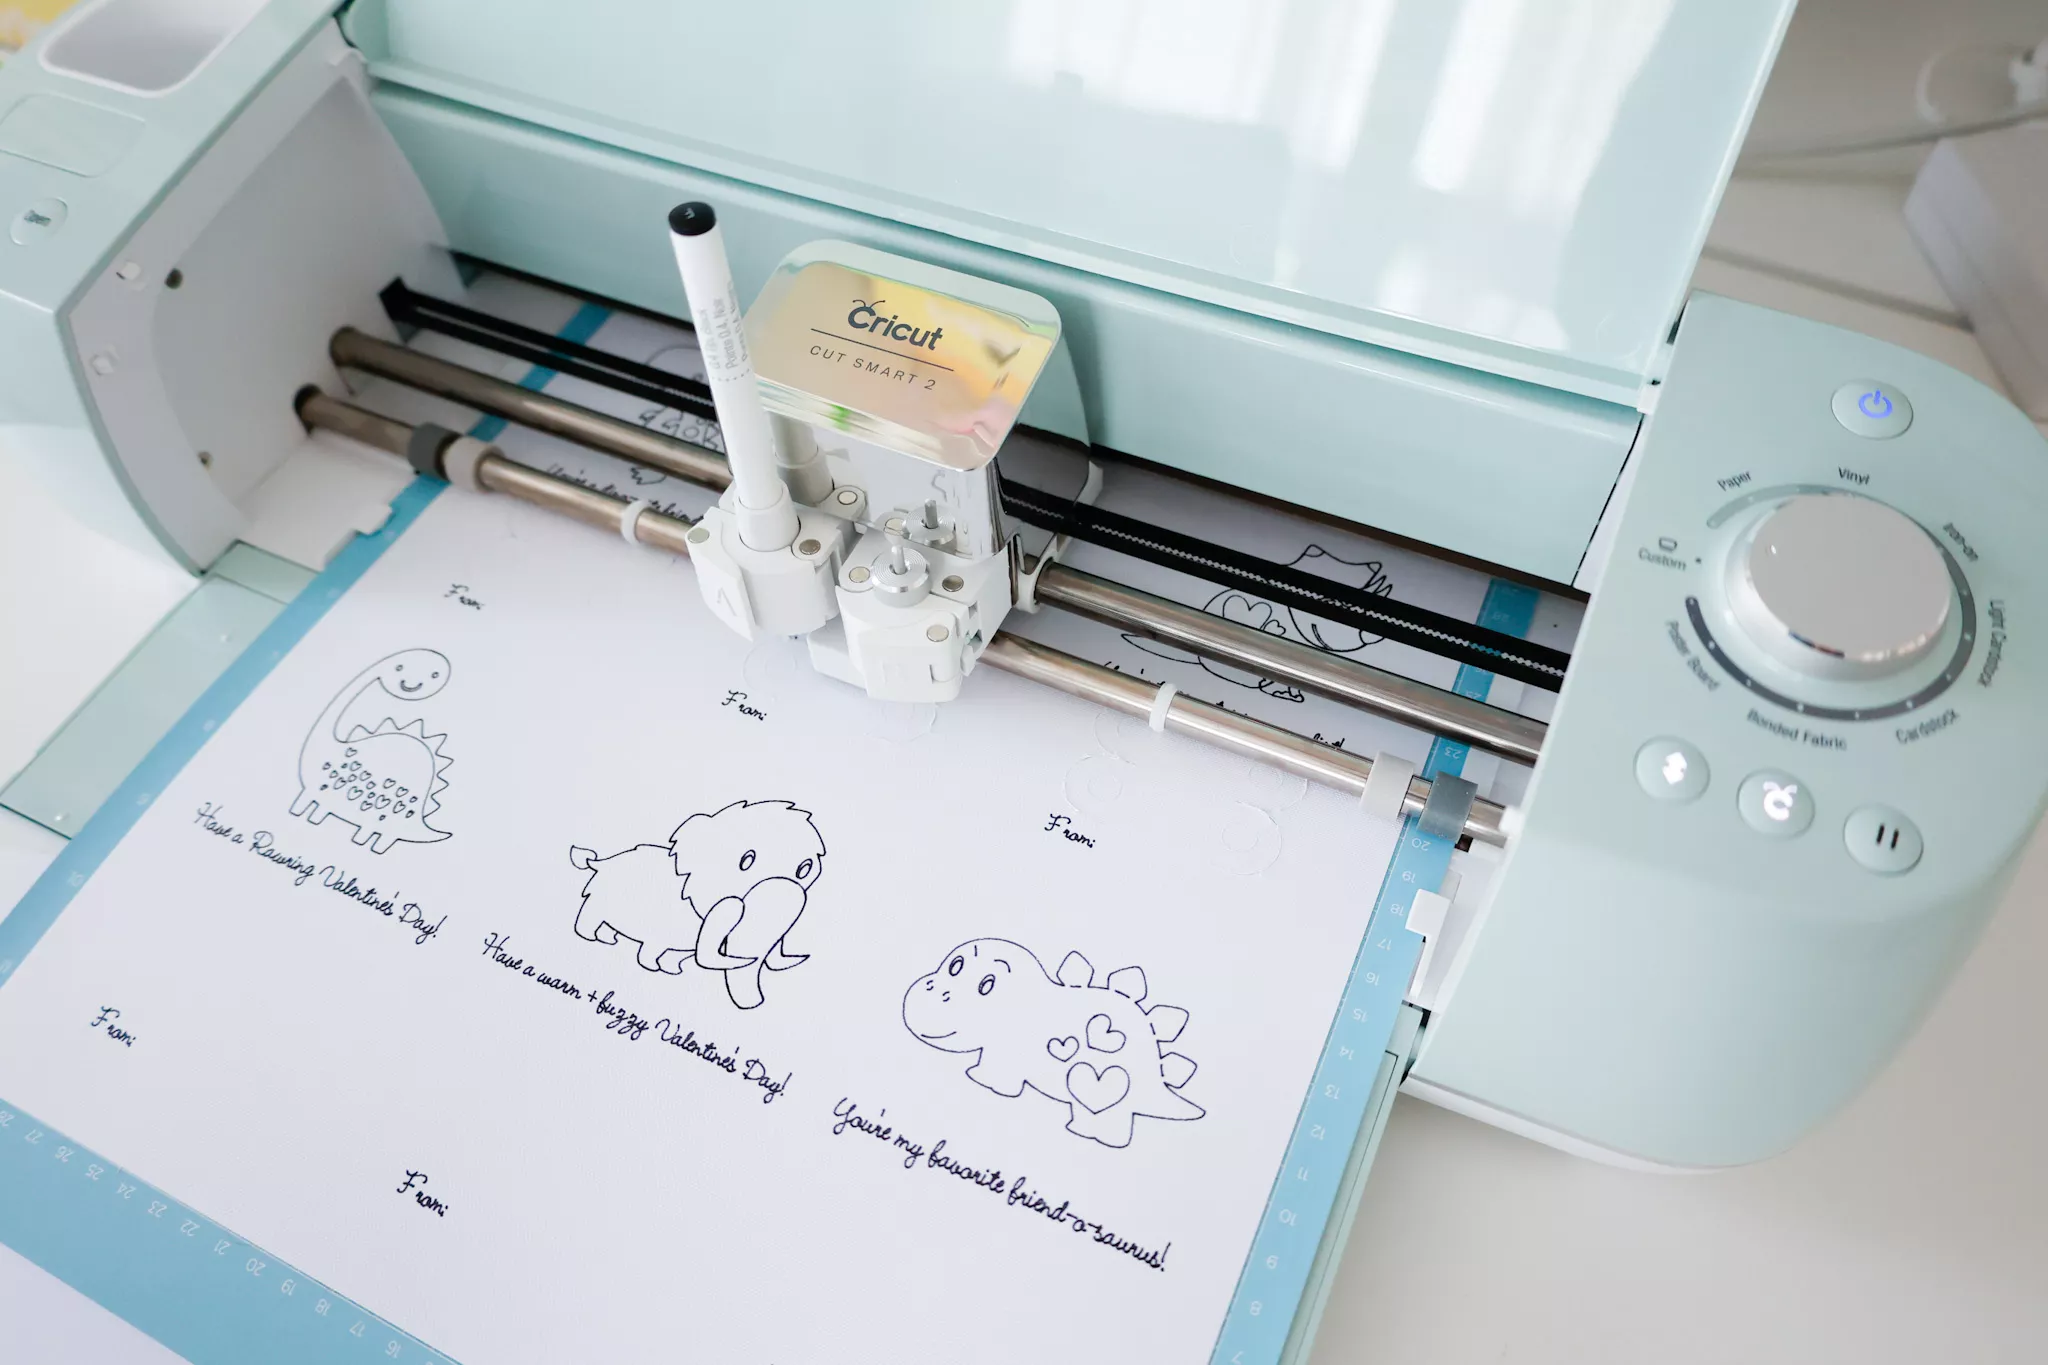
This design is set up to fit 6 coloring cards on each piece of 12″x12″ cardstock, so for a class of 24, you’ll need to do this process four times to have enough.
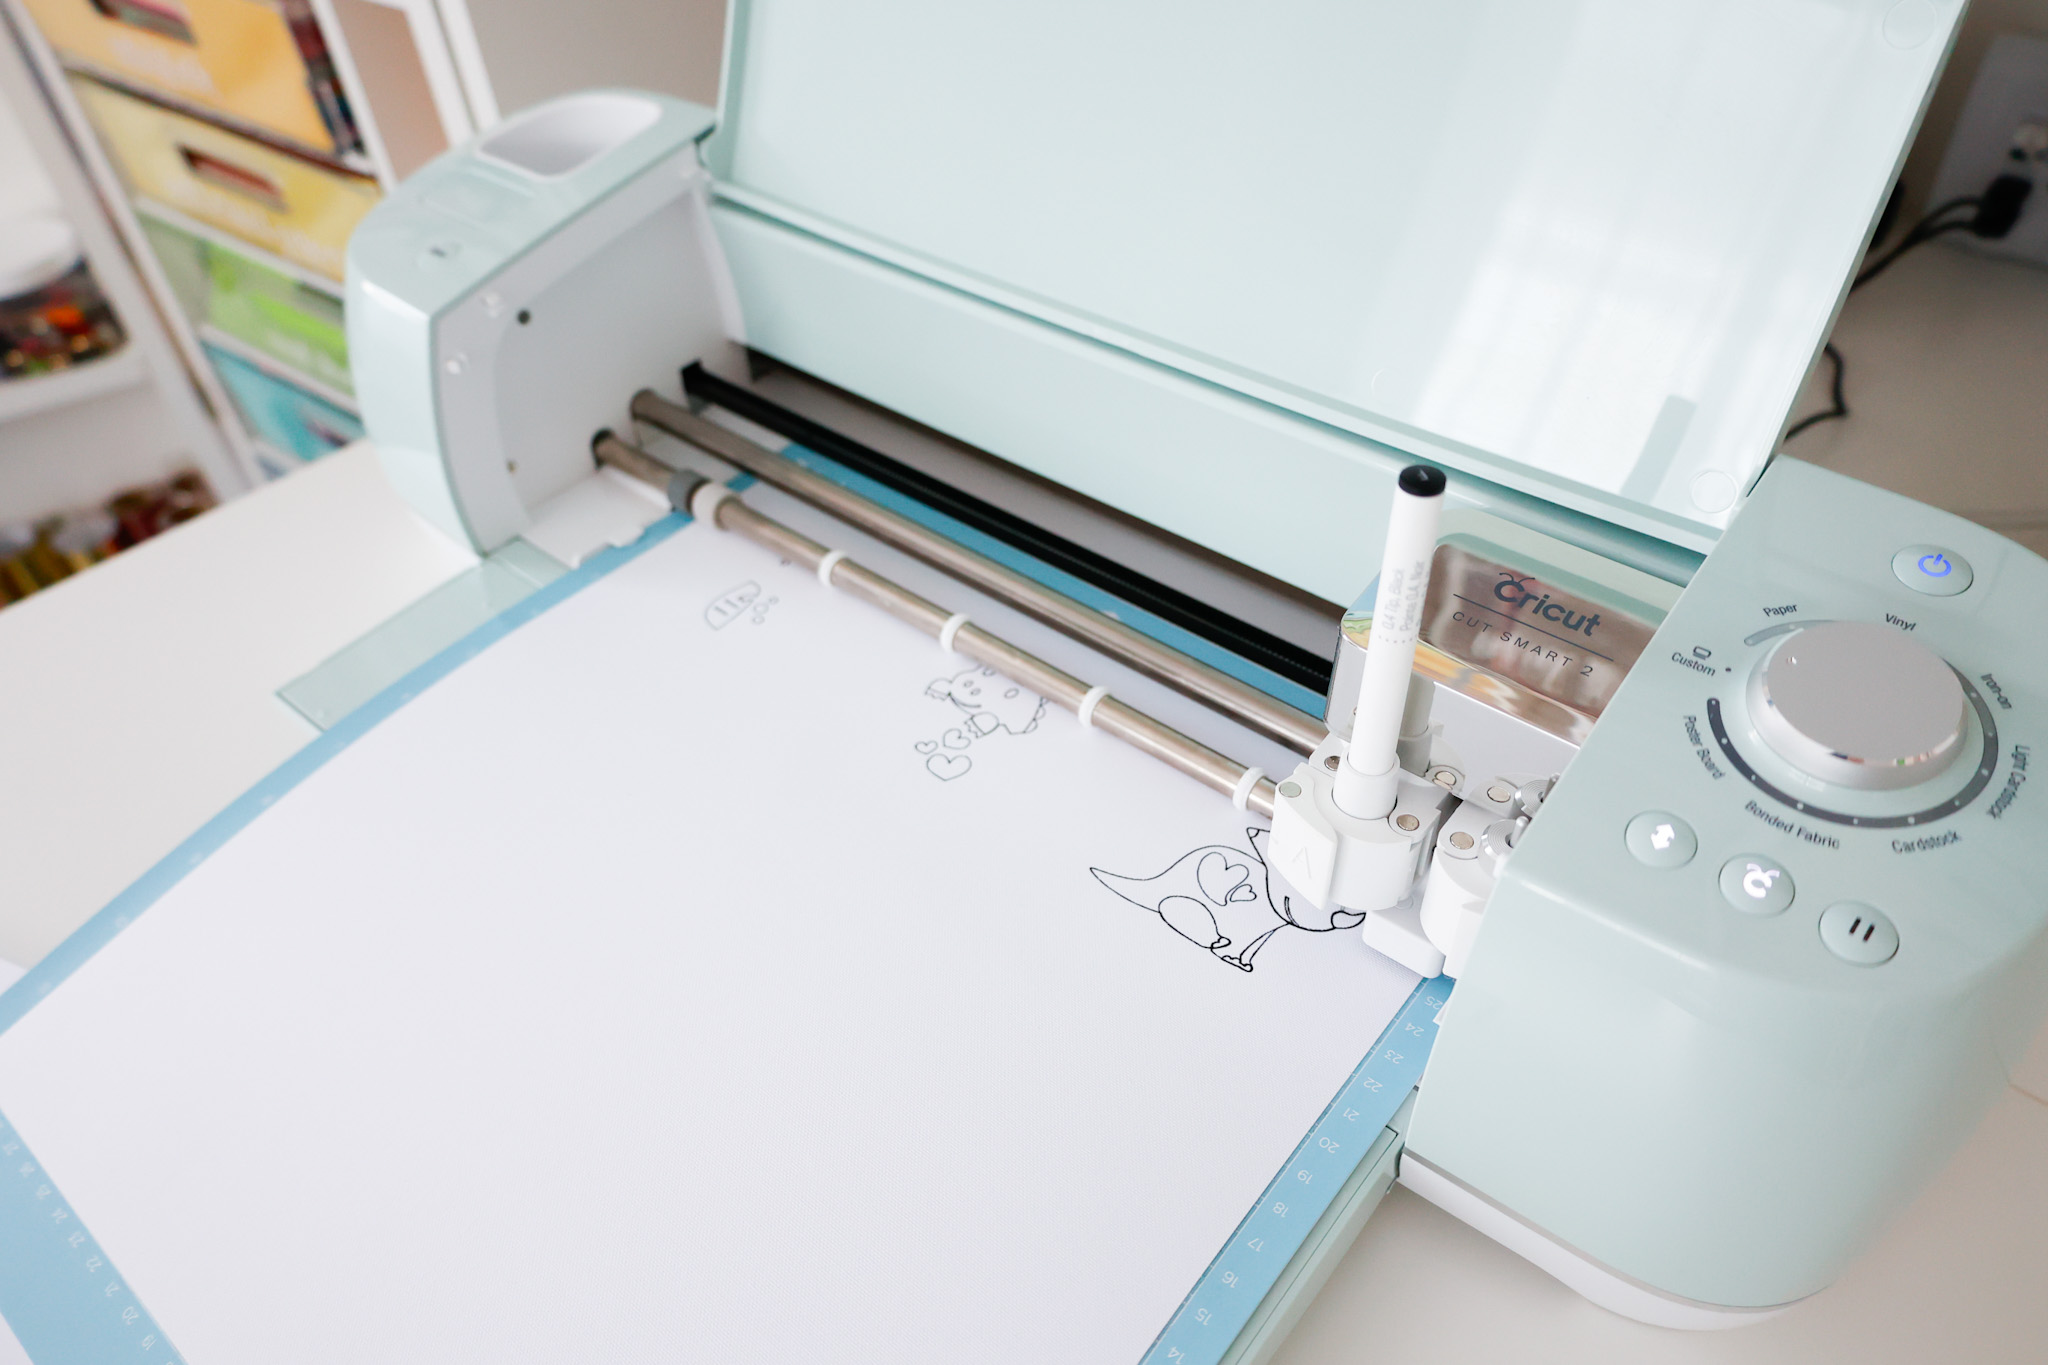
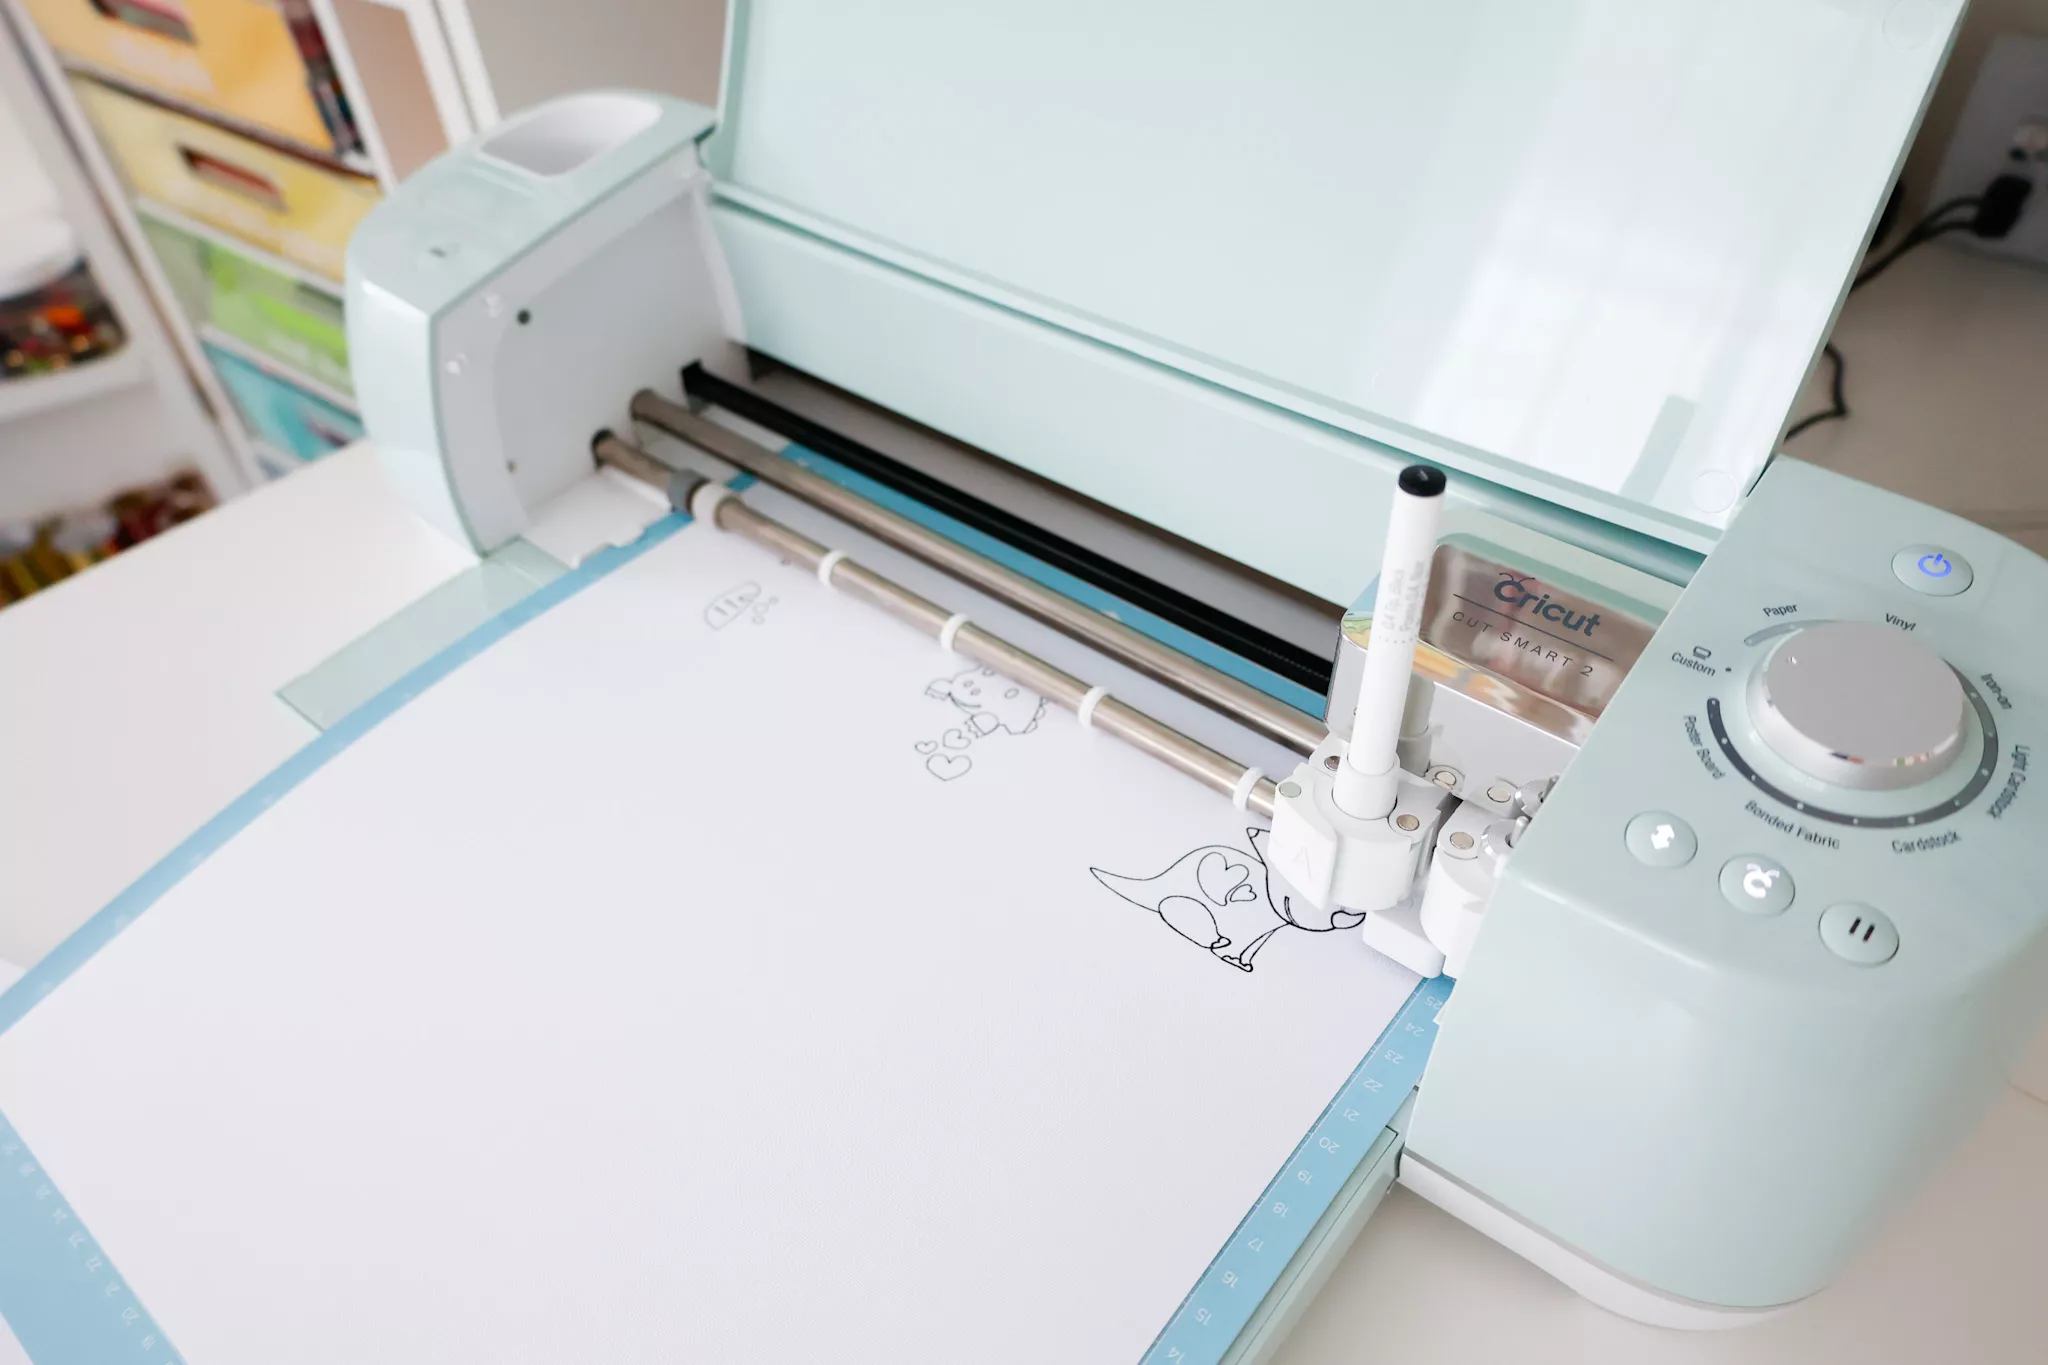


Your machine will begin by drawing the dinosaurs and then writing the font.
When it’s done drawing, I like to hit the pause button so I can remove the pen from the A clamp and replace the cap so it doesn’t dry out. Then I resume by pressing the Cricut button on my machine.
I’ve learned this trick from a few fellow Cricuteers: try storing your pens upside down so they don’t dry out as quickly!
Remove the cardstock from your StandardGrip mat by placing the mat upside down and rolling it away from the paper.
If you try to peel your cardstock away from the mat like you would peel away vinyl, the paper will end up curling.
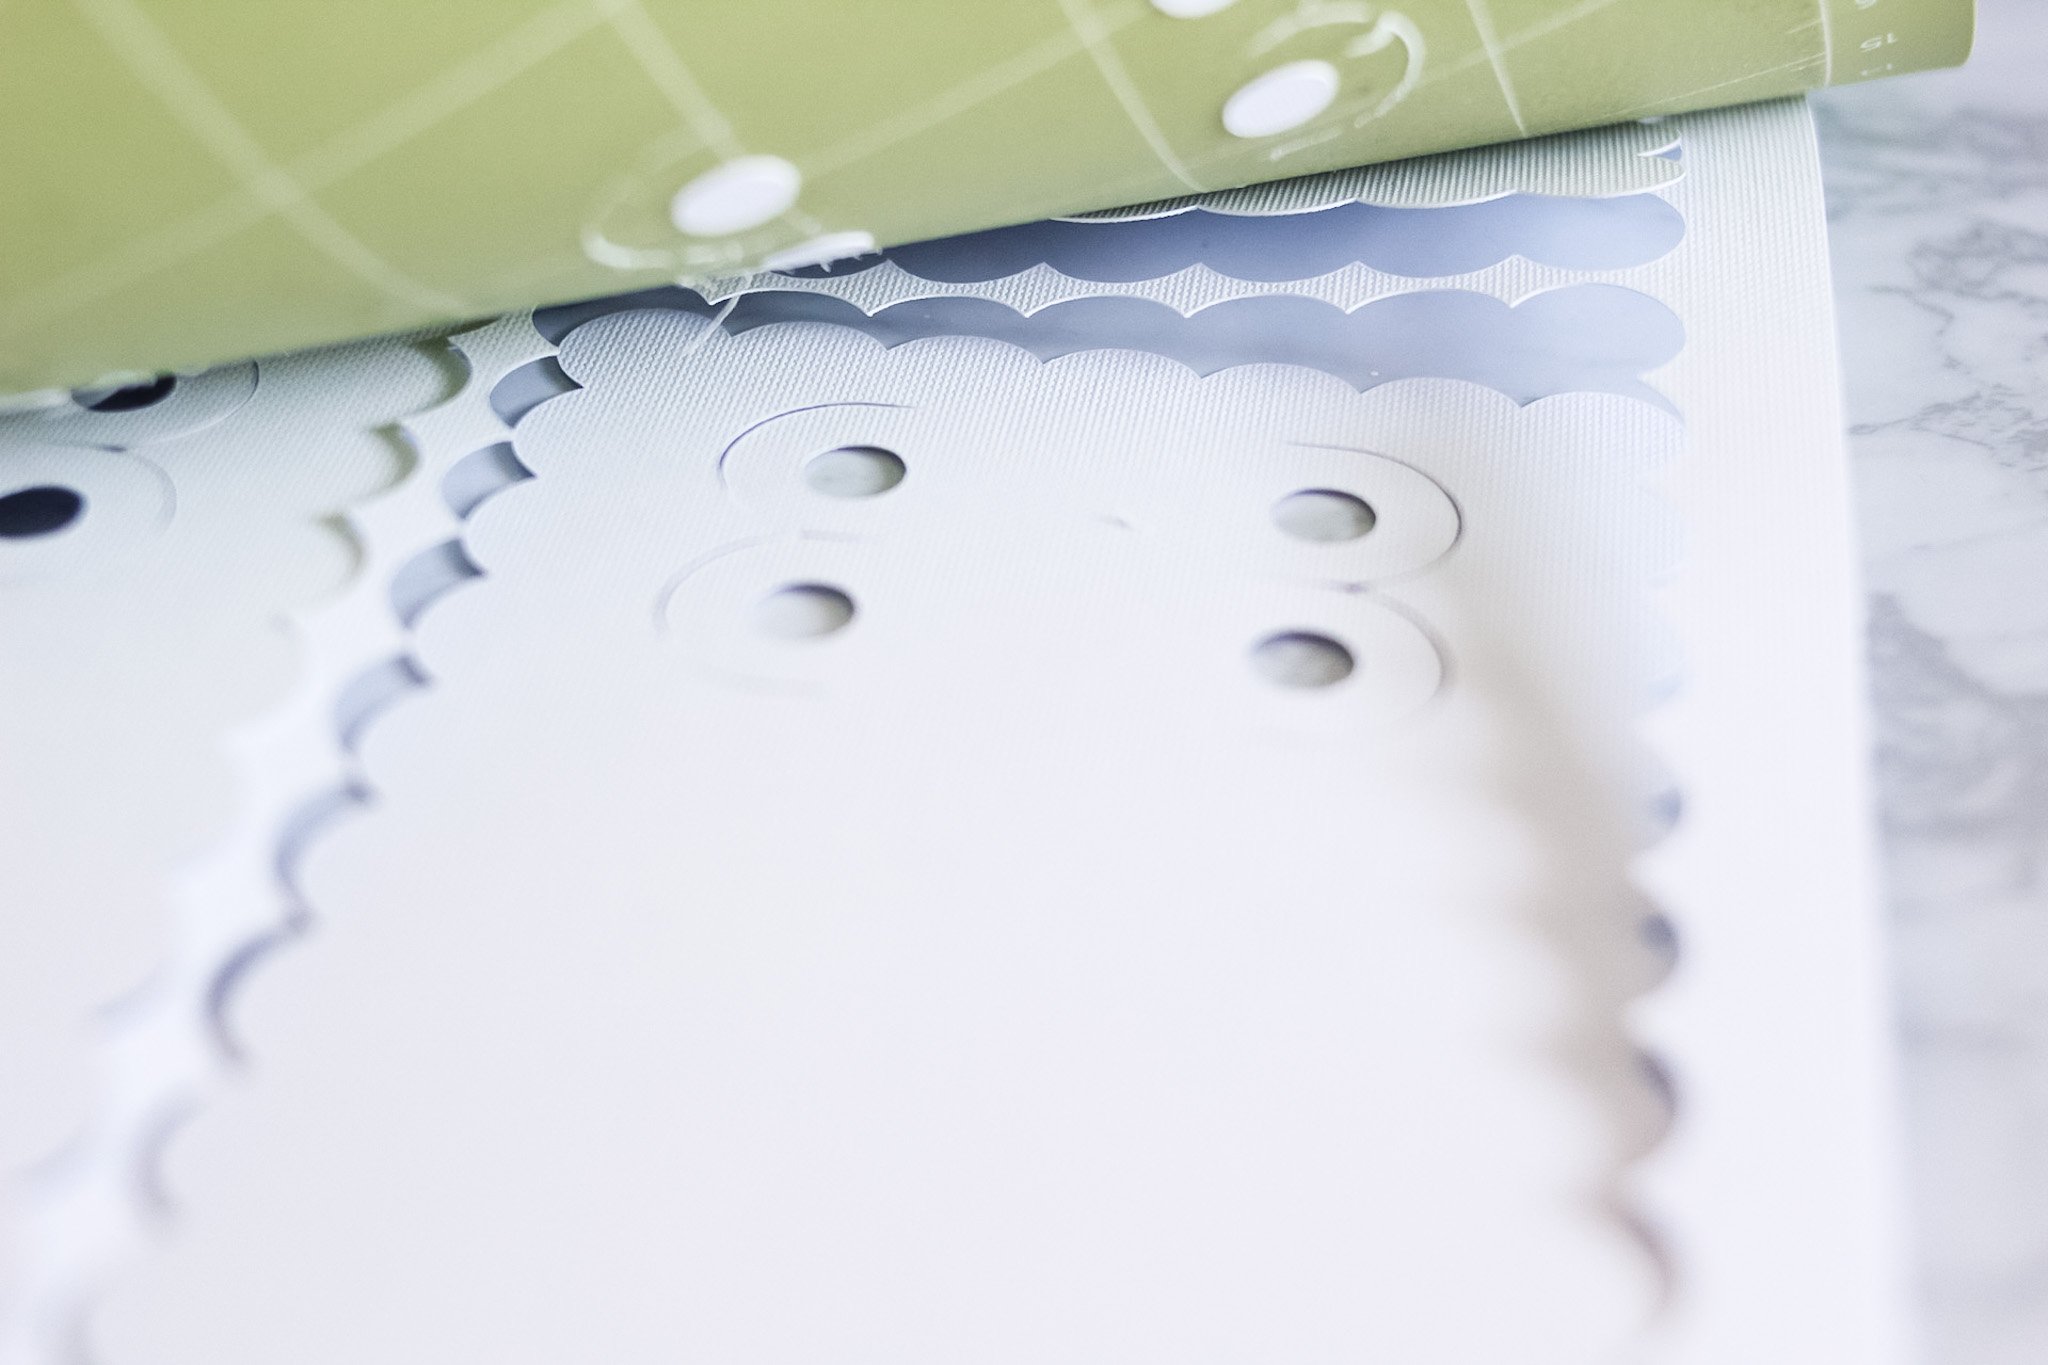
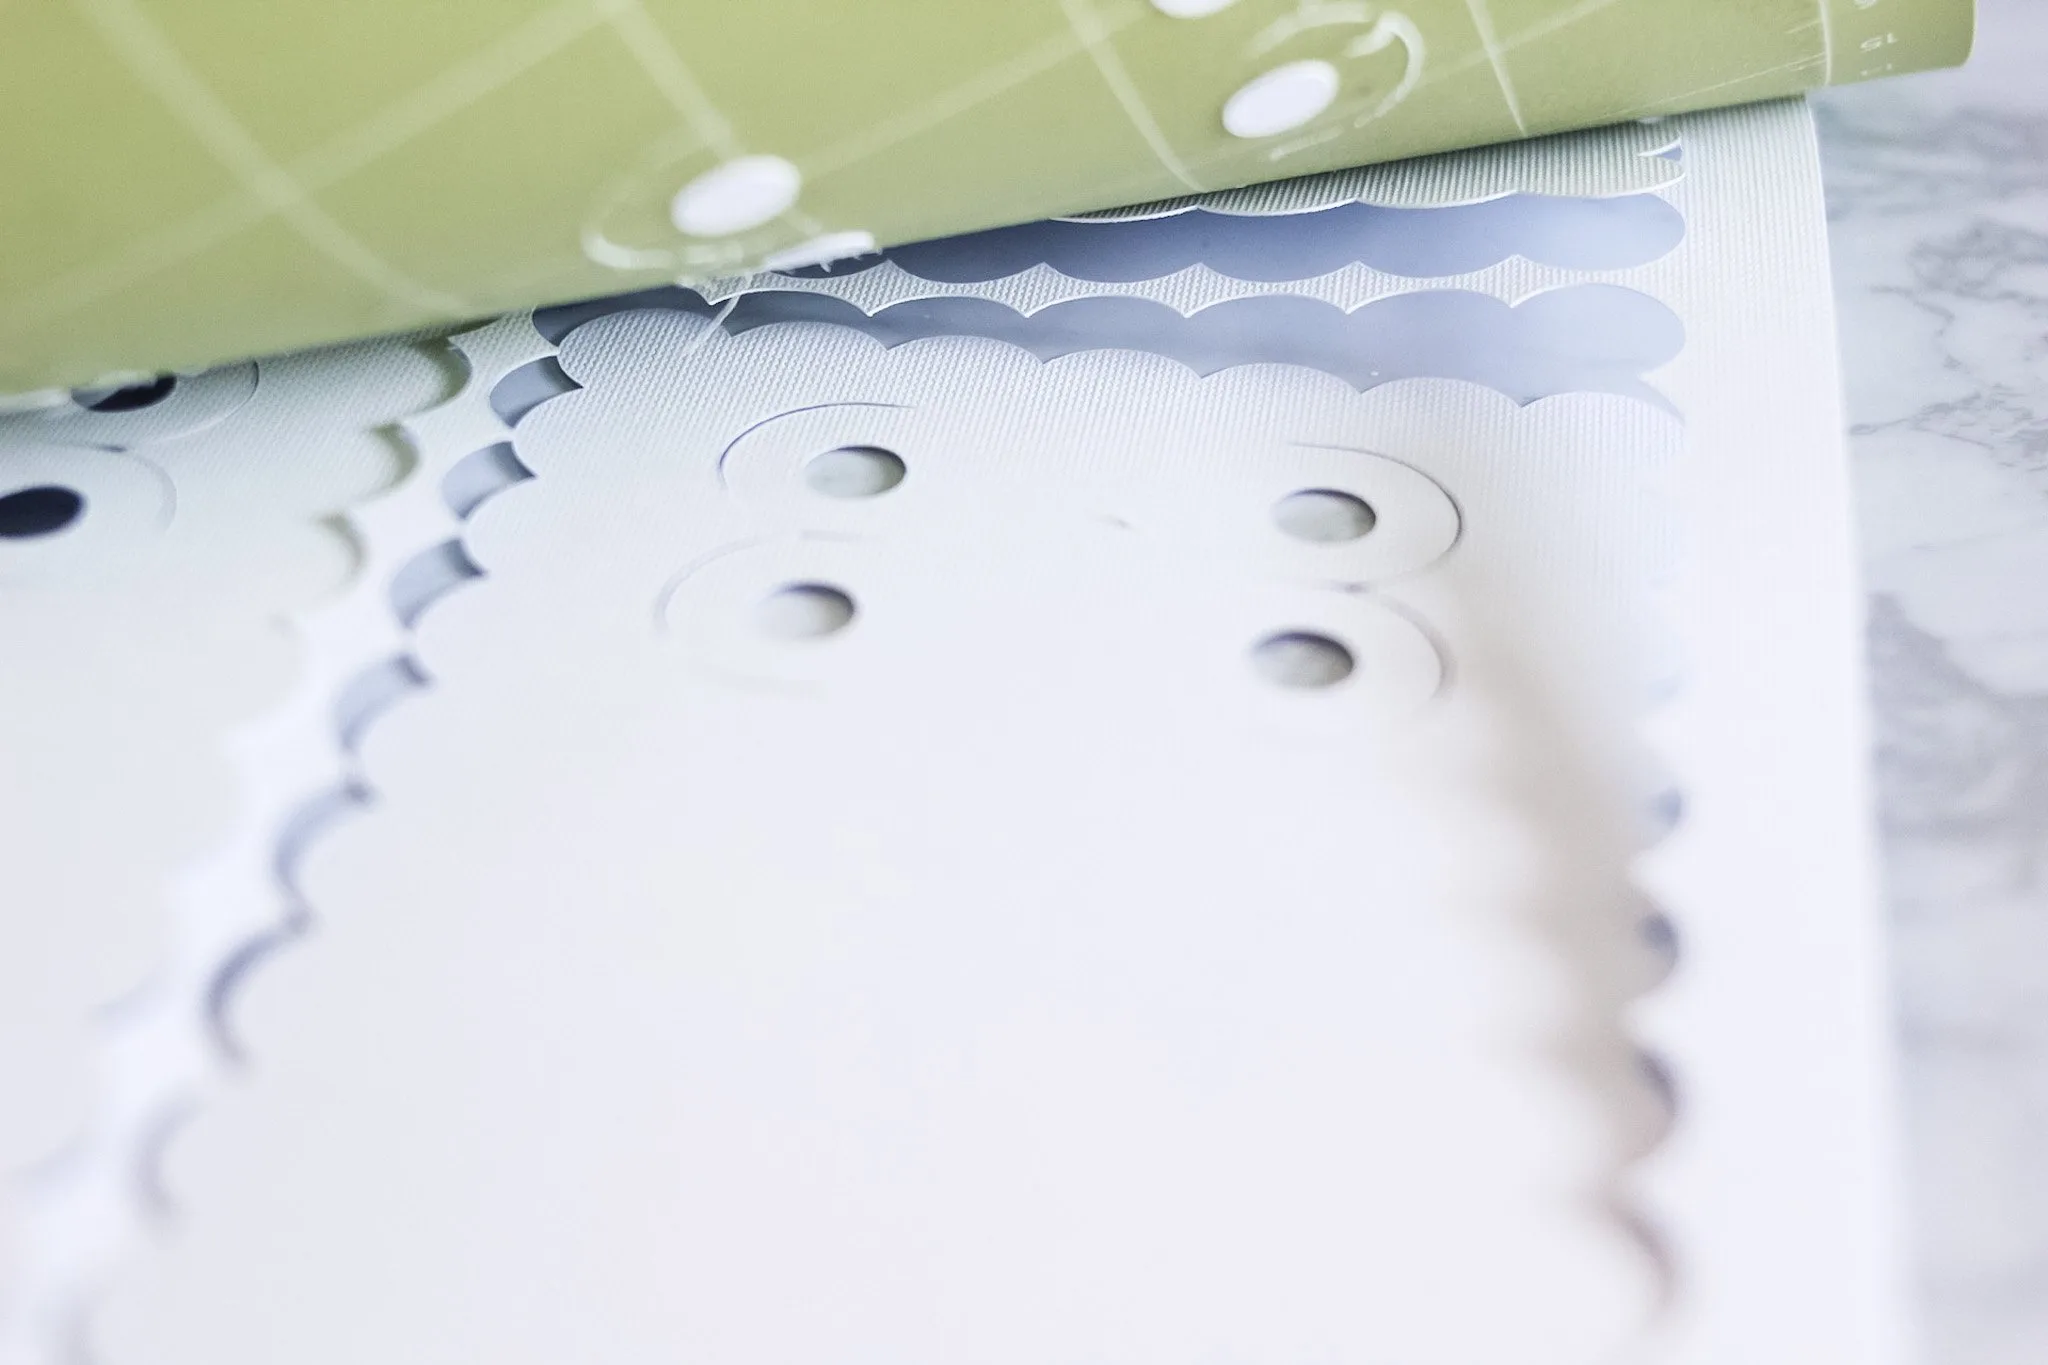
Once you have removed your cardstock from the mat, look each one over and remove any negative paper trimmings.
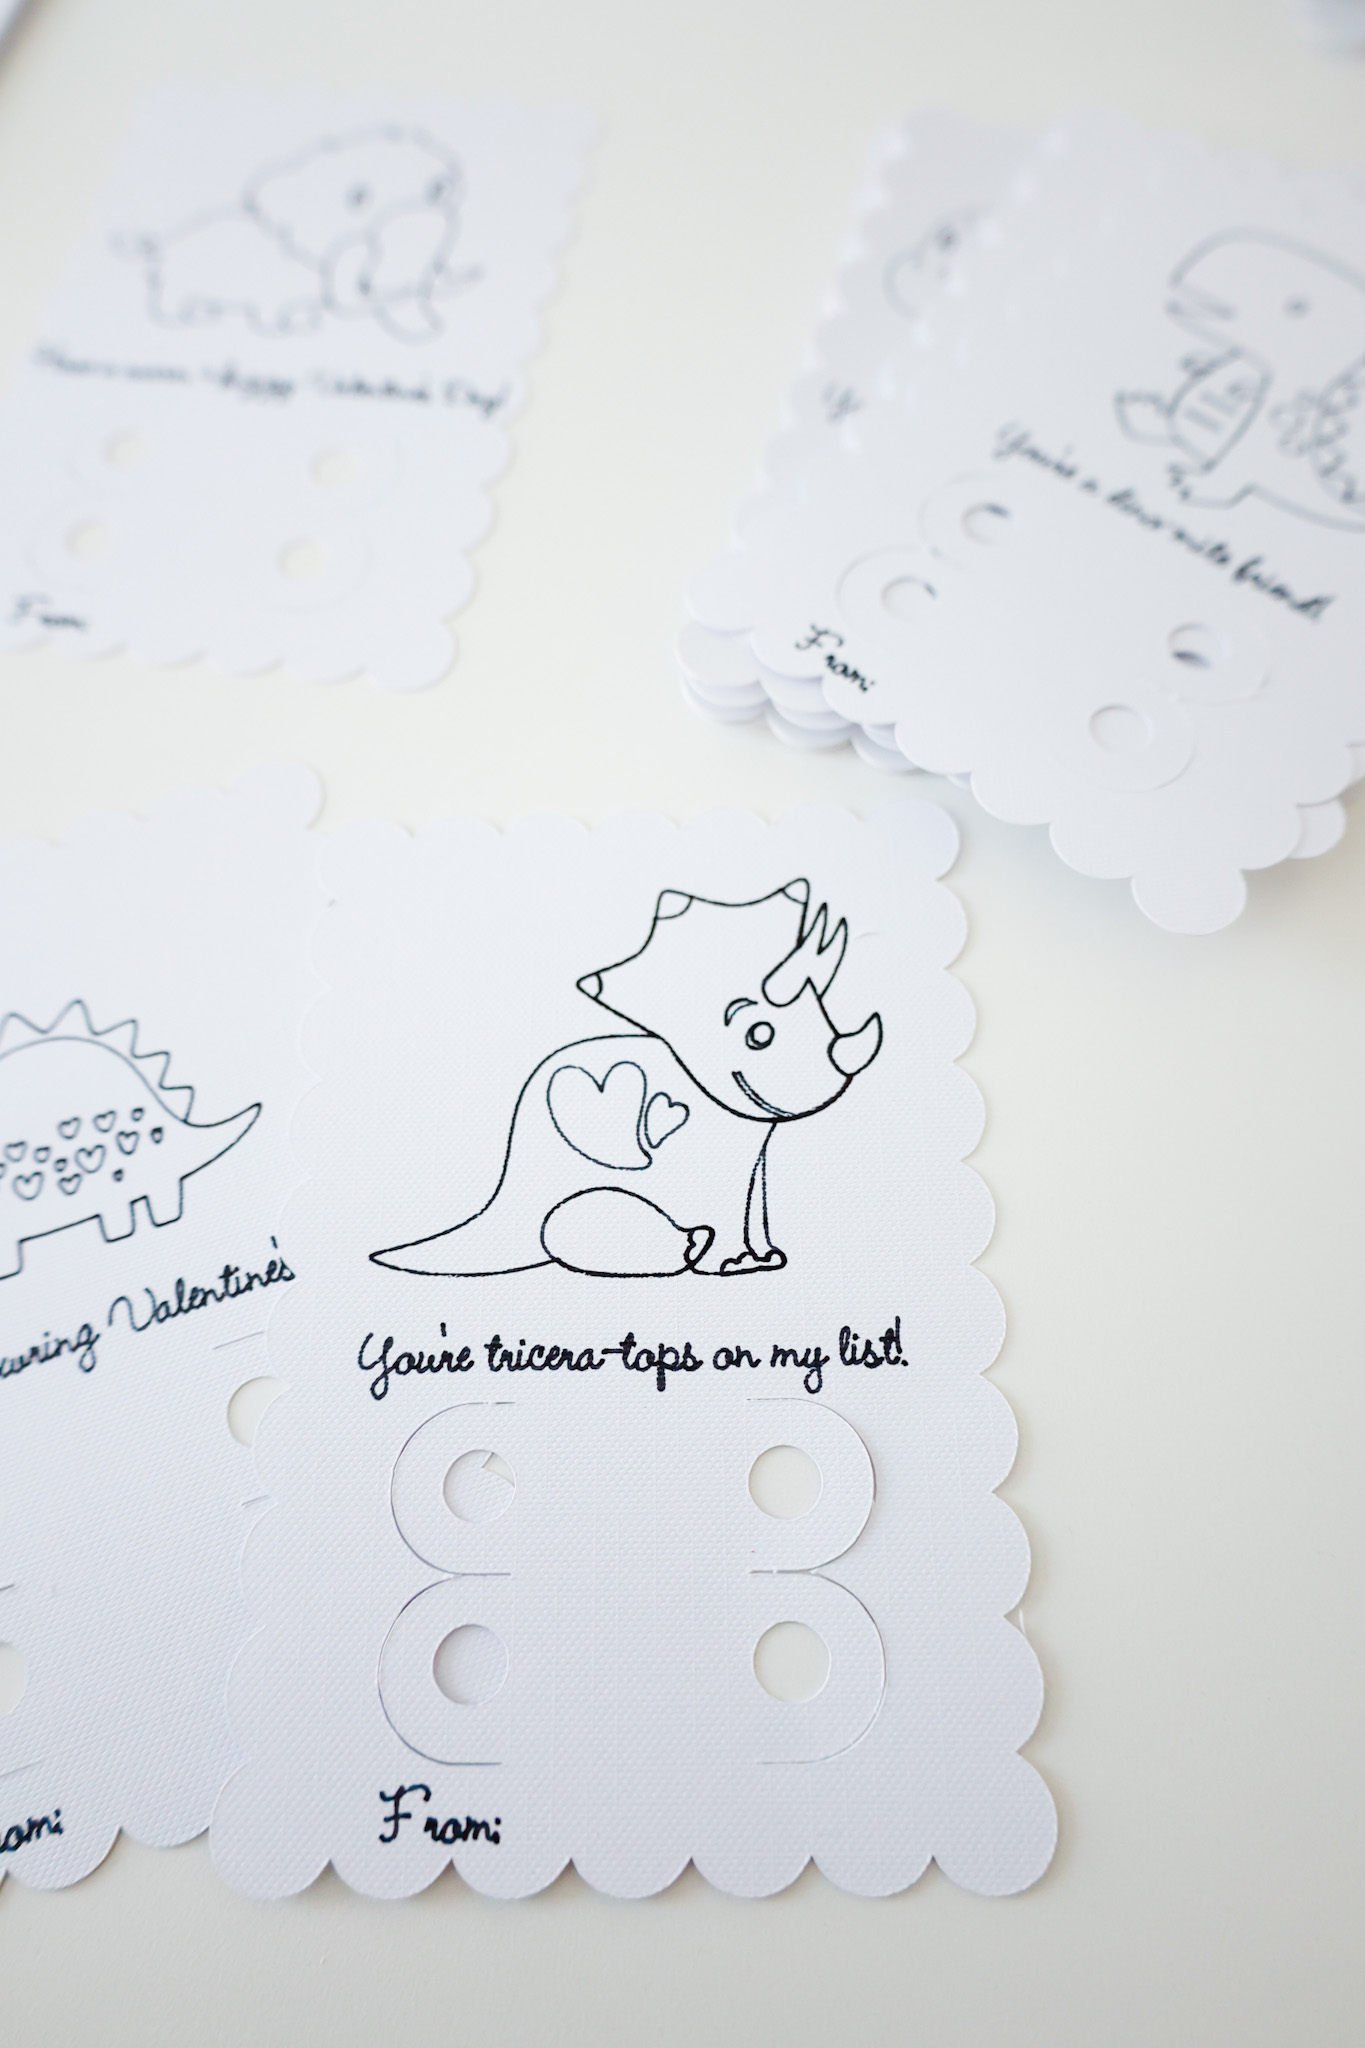
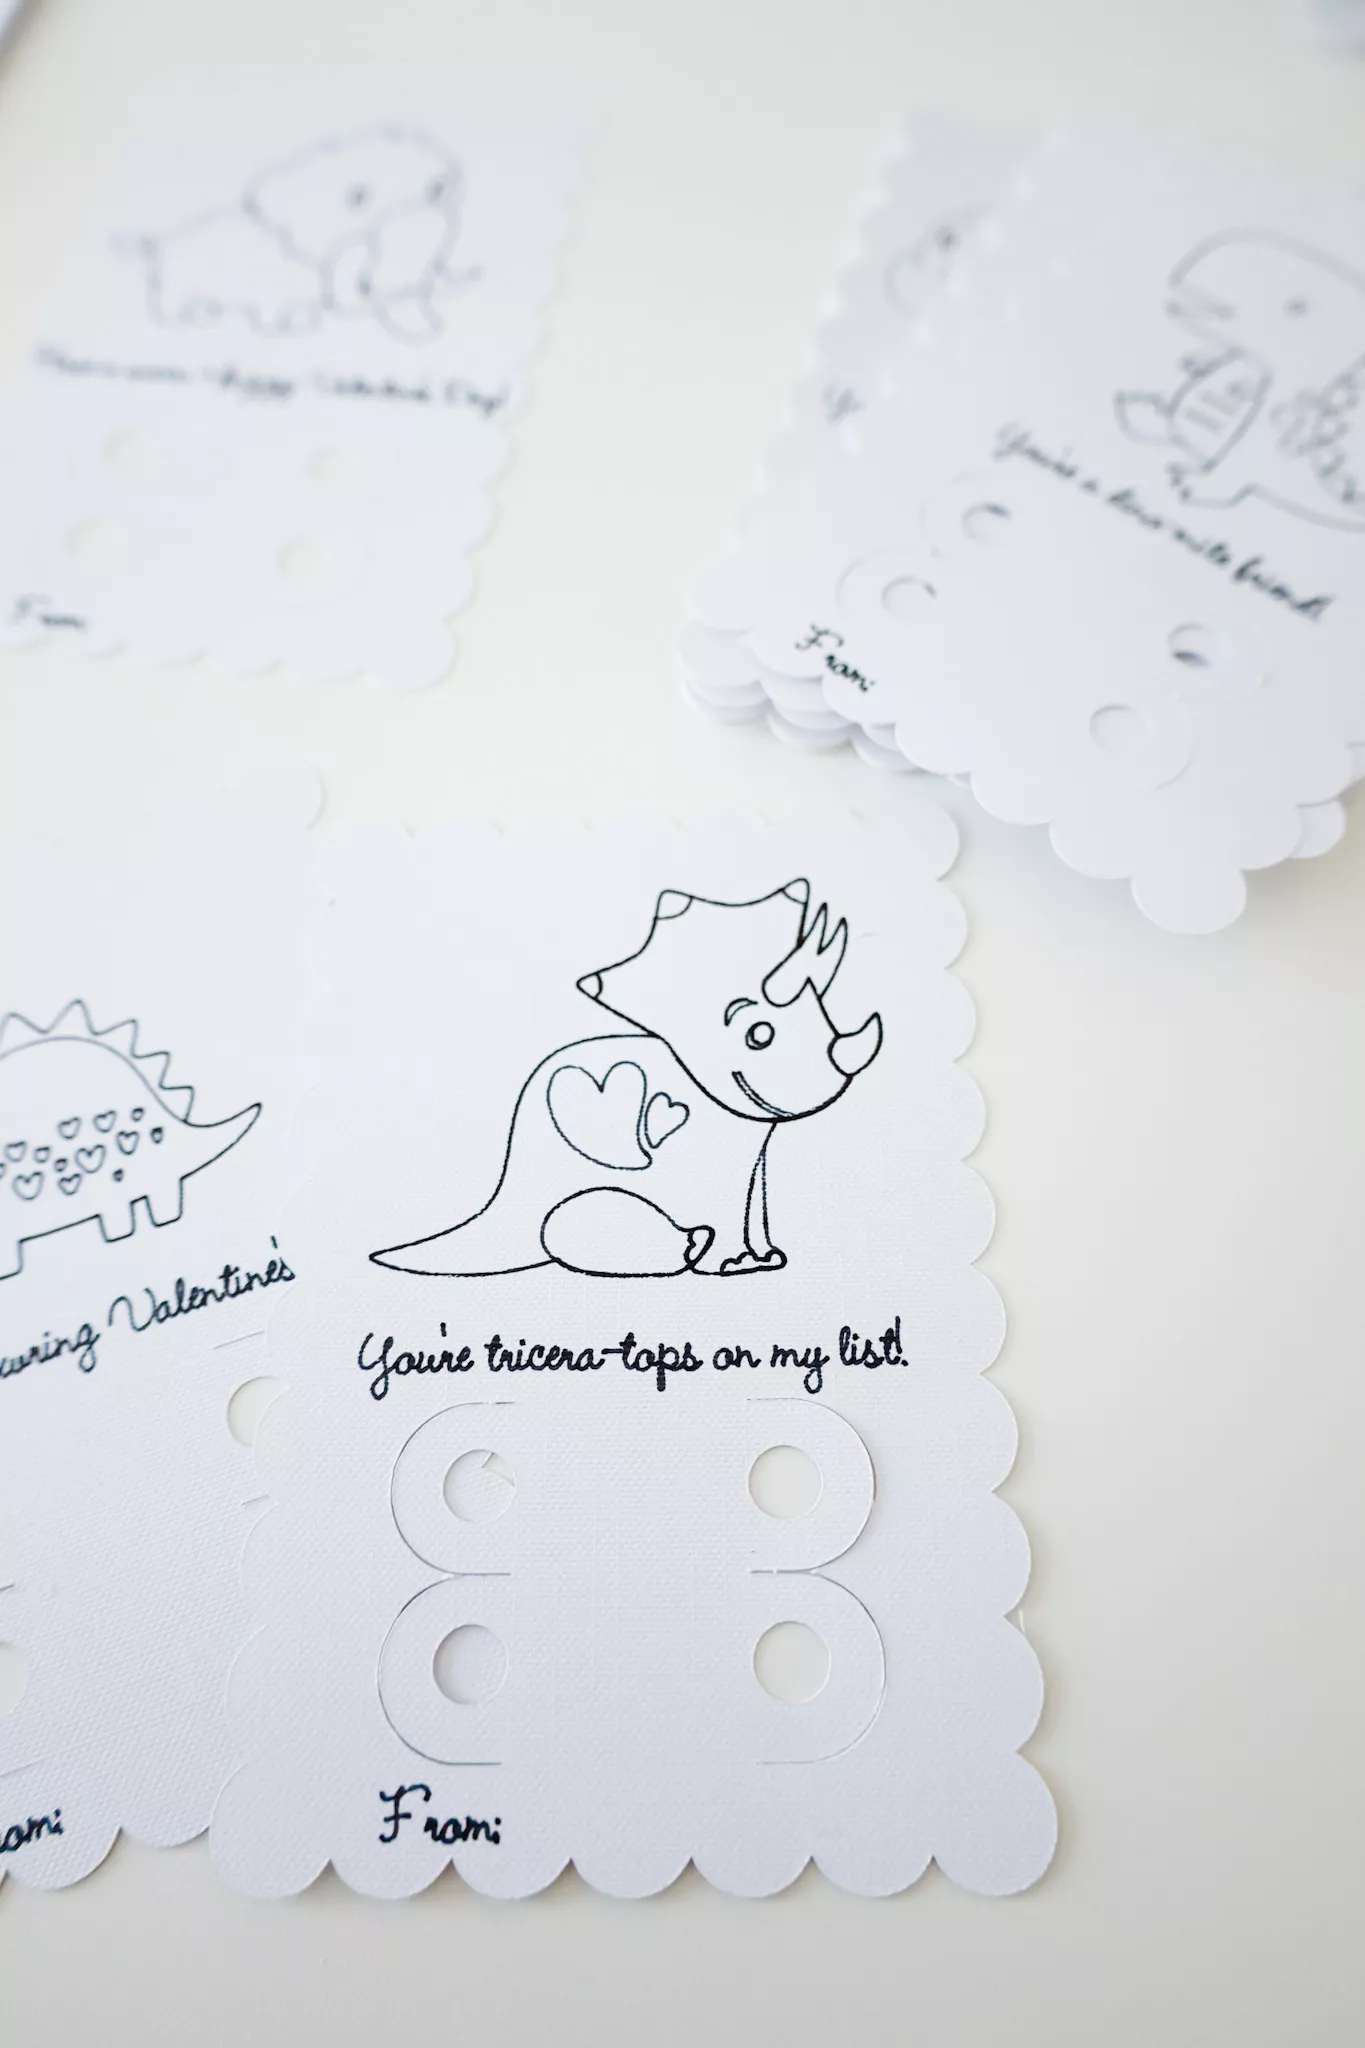
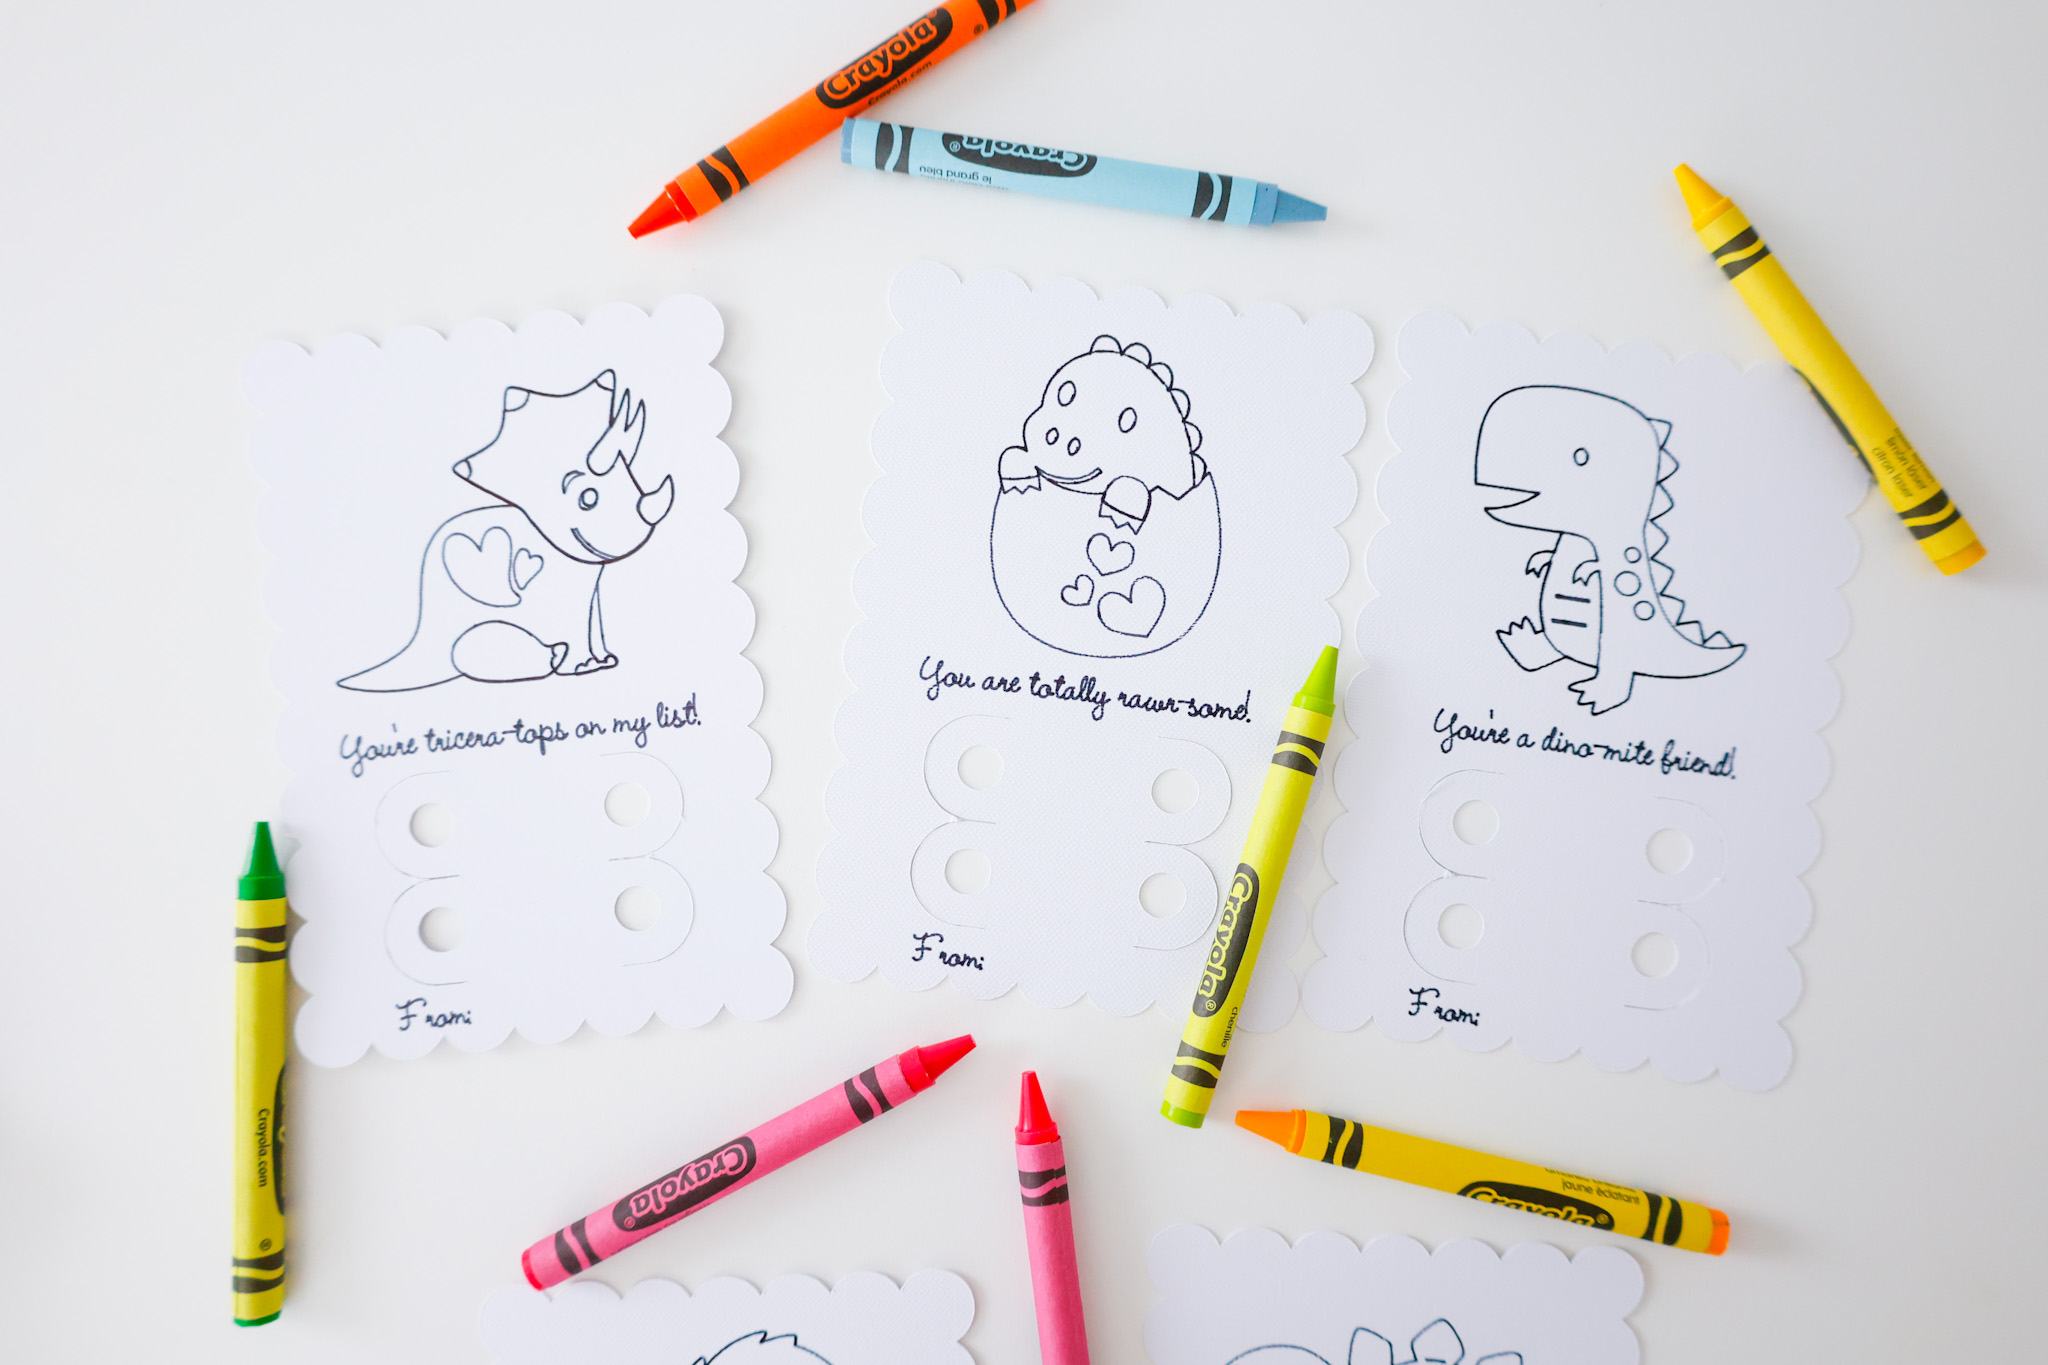
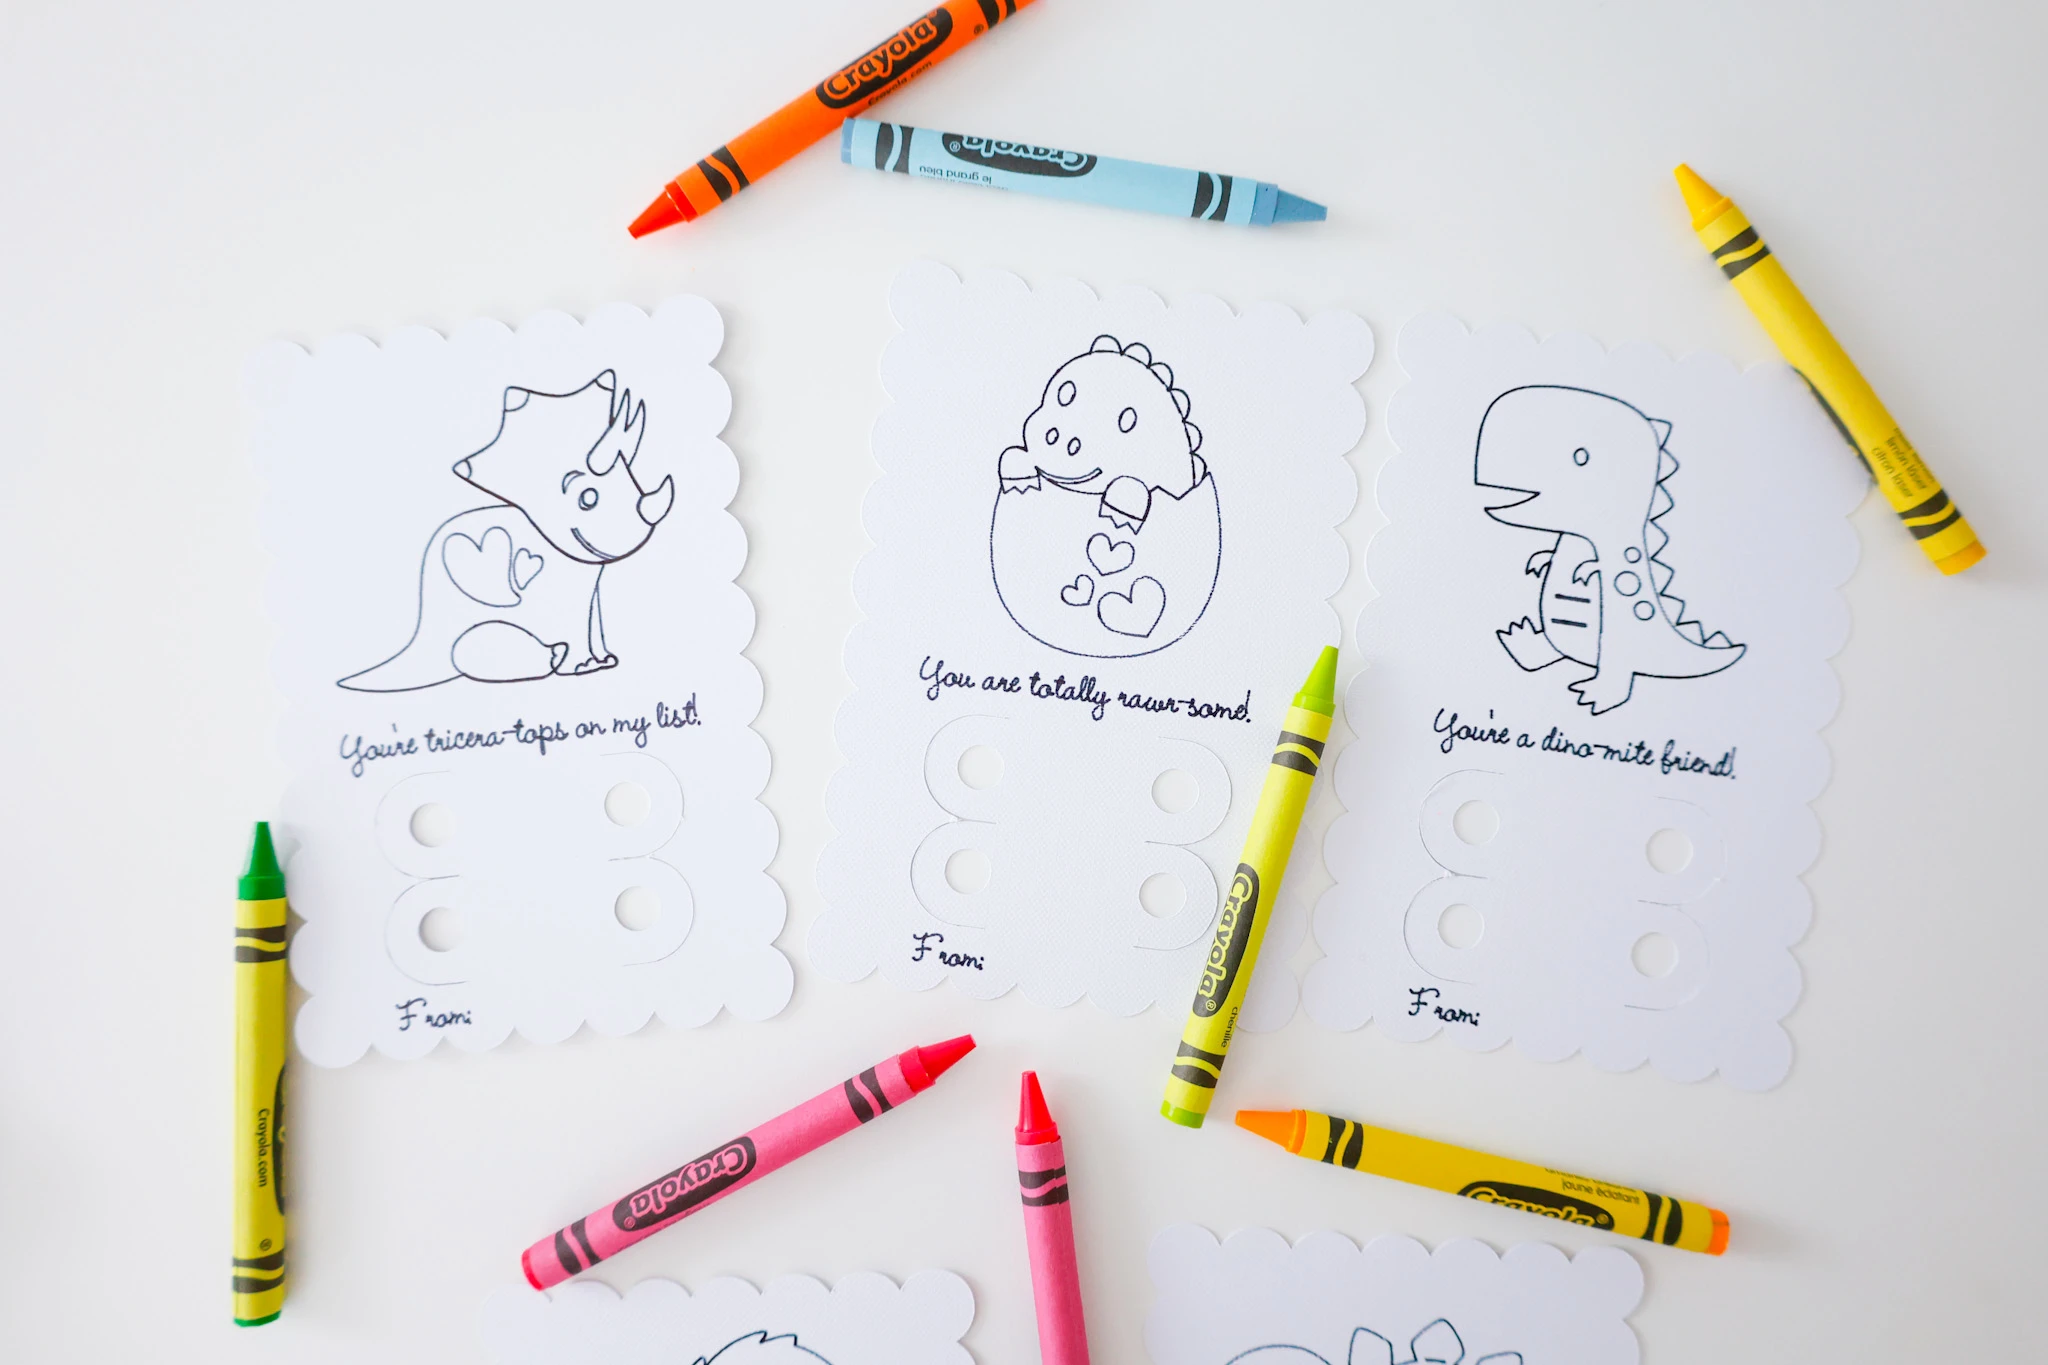
Have your child write their name along the bottom next to the From: text before placing the crayons so they have room to write.
Place two crayons in each card using the crayon holder holes.
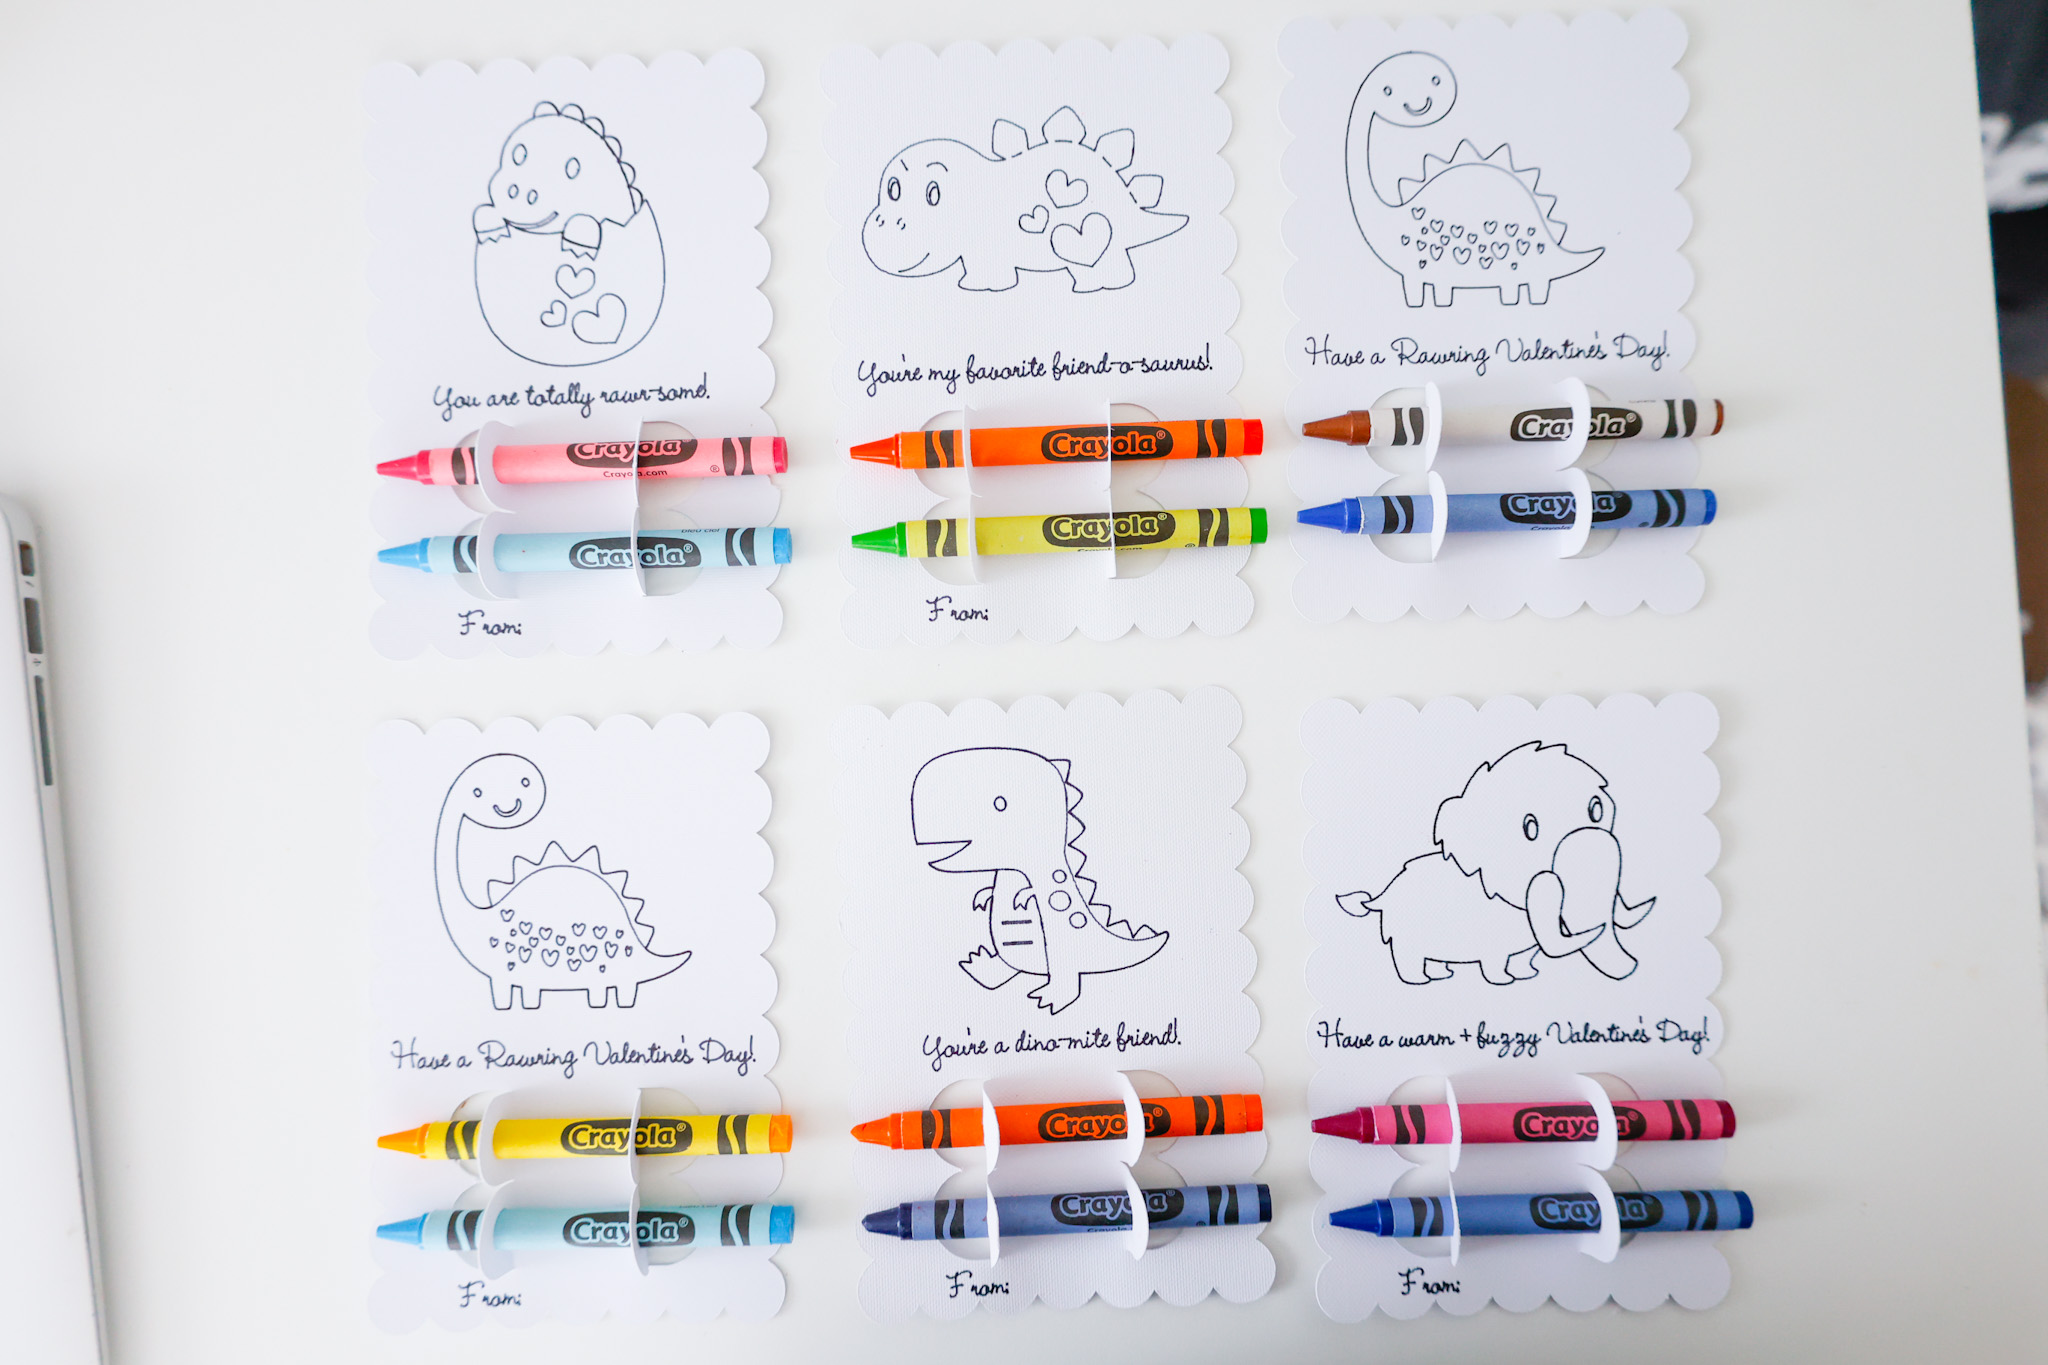
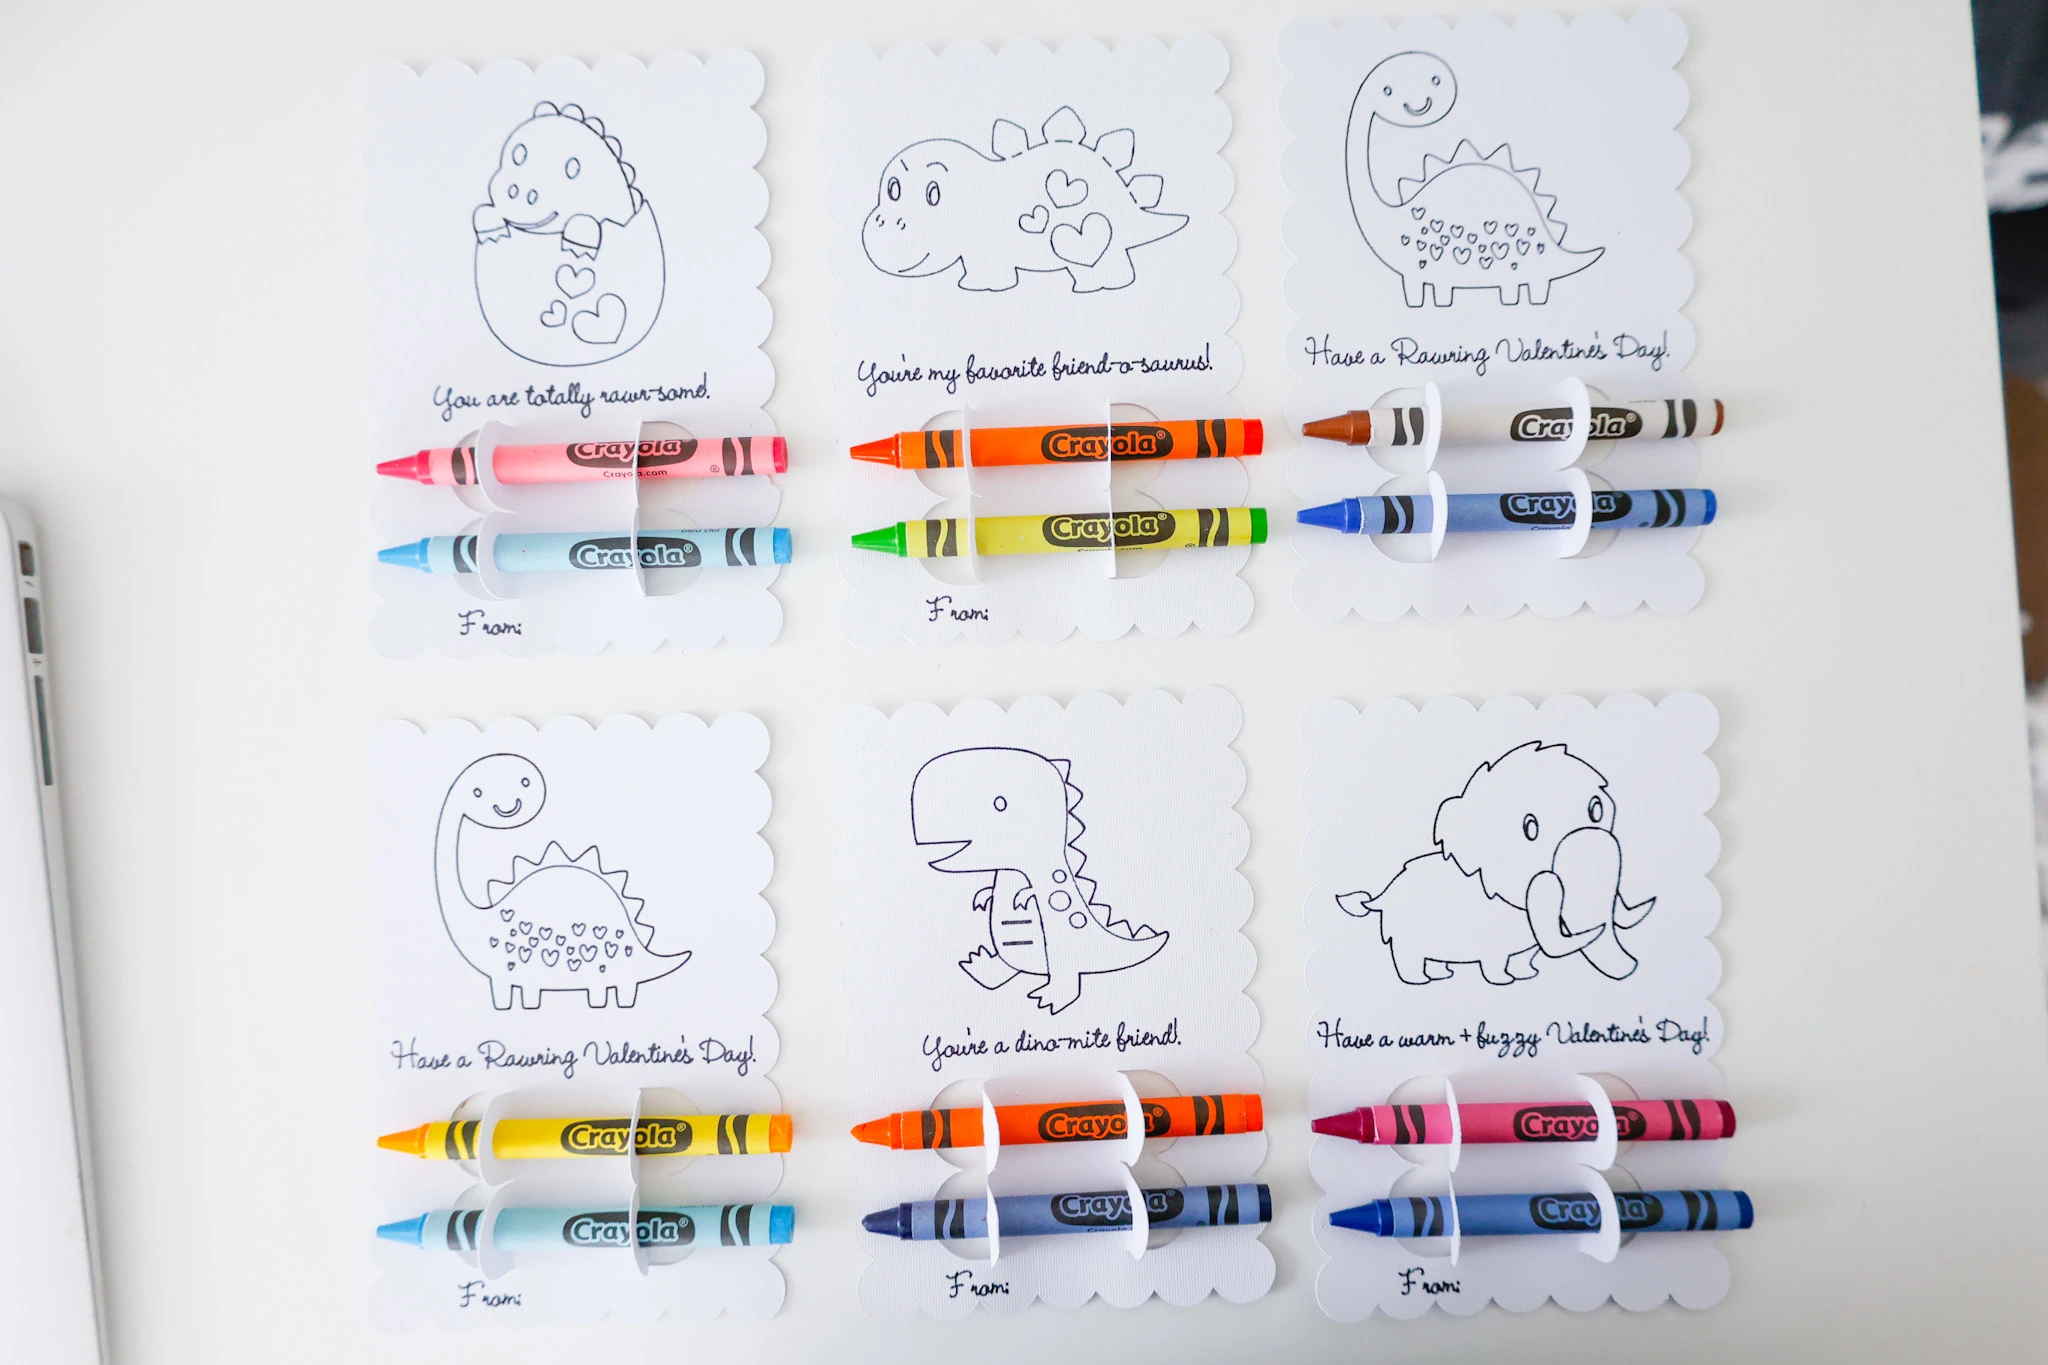
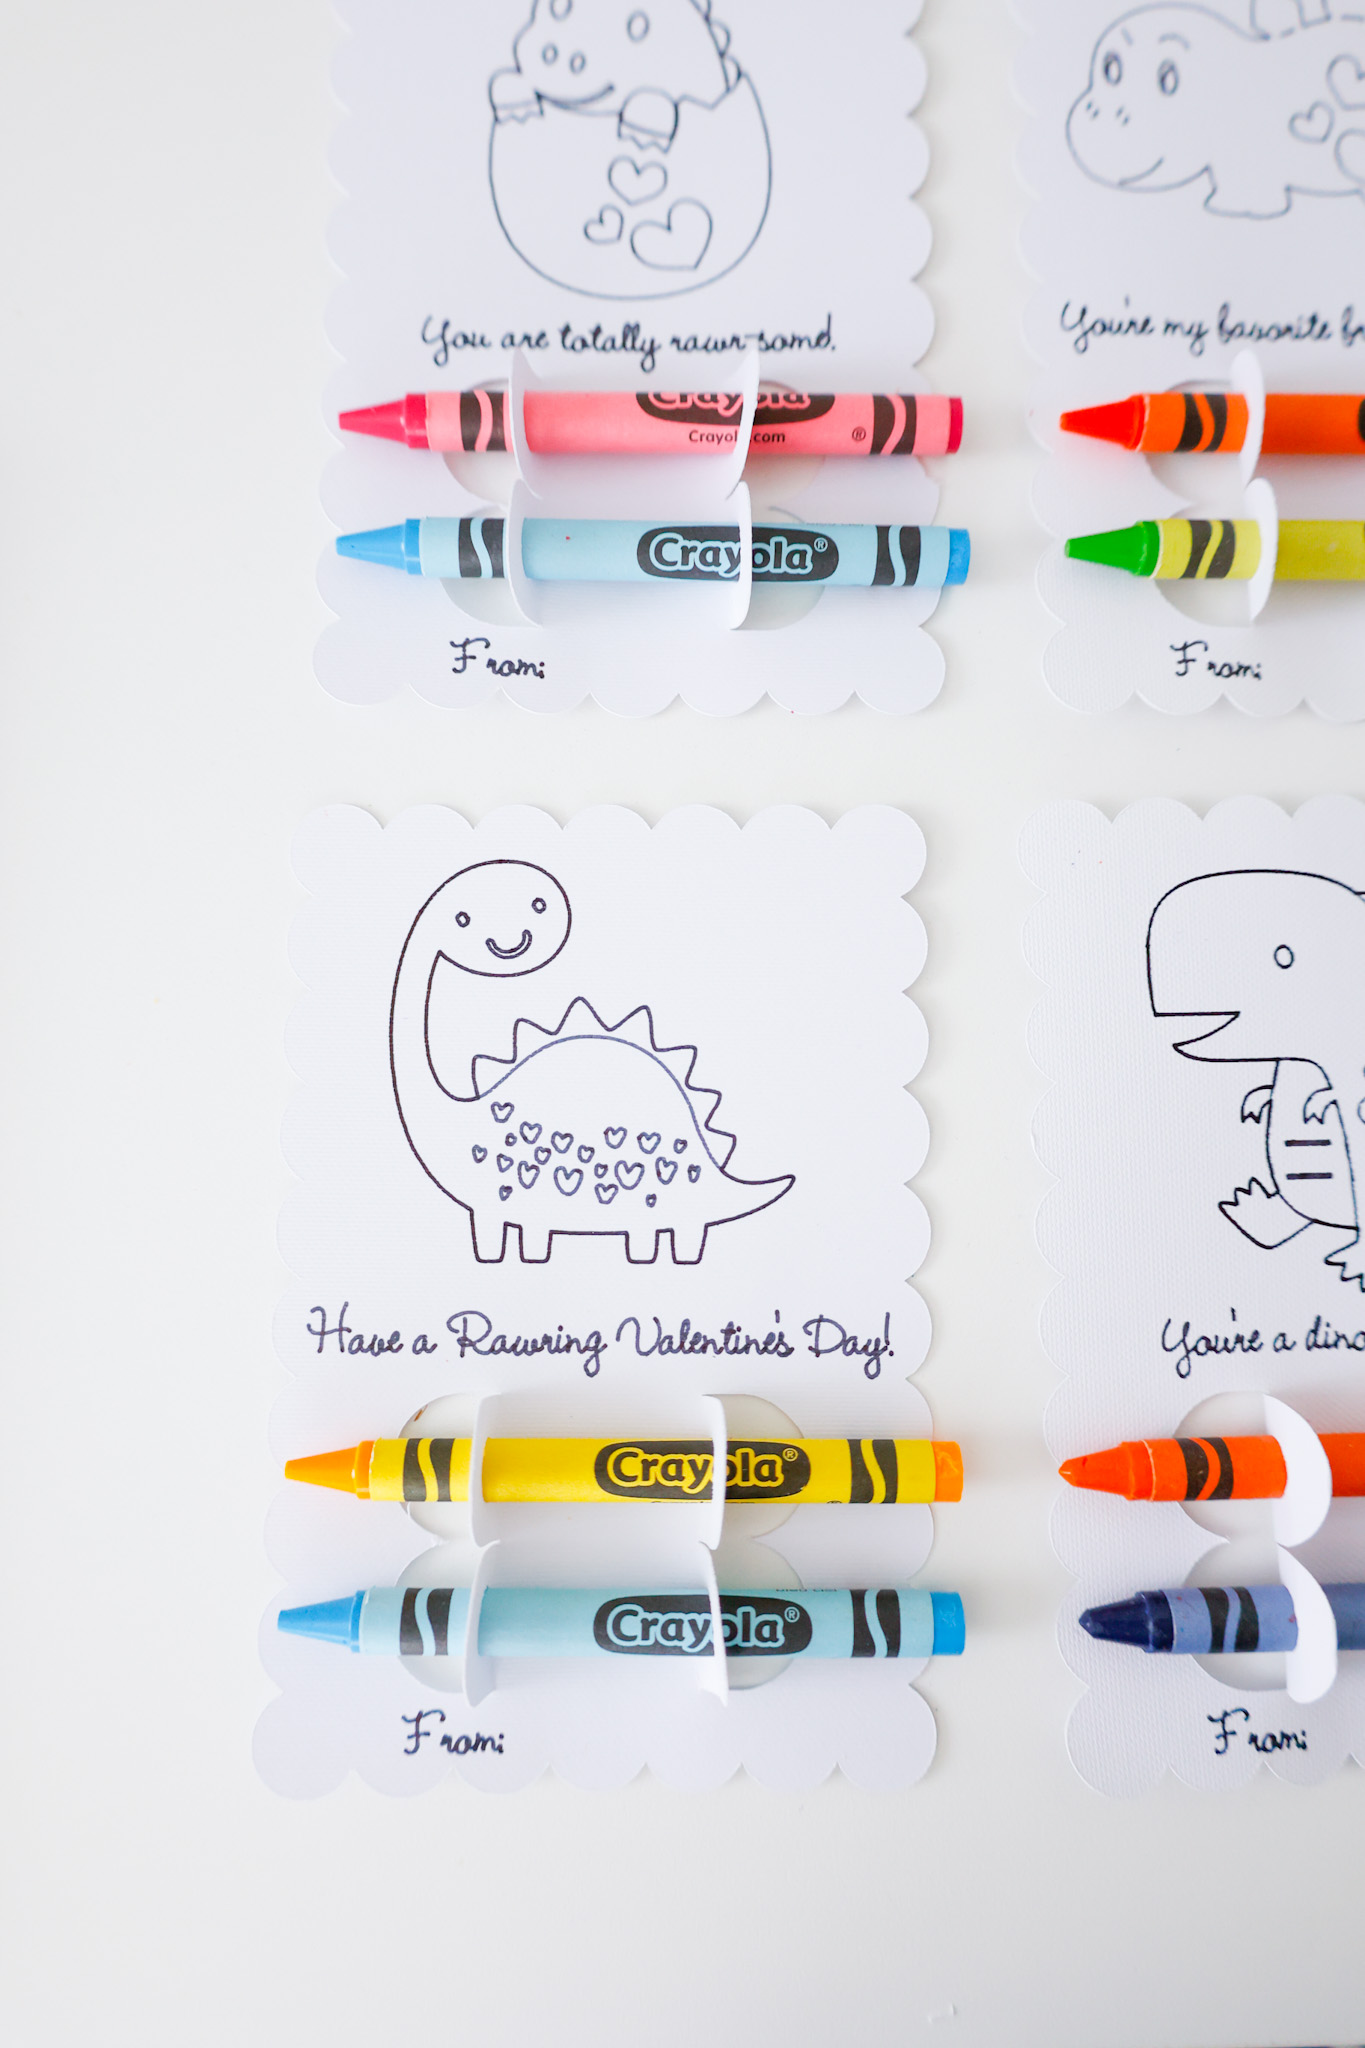
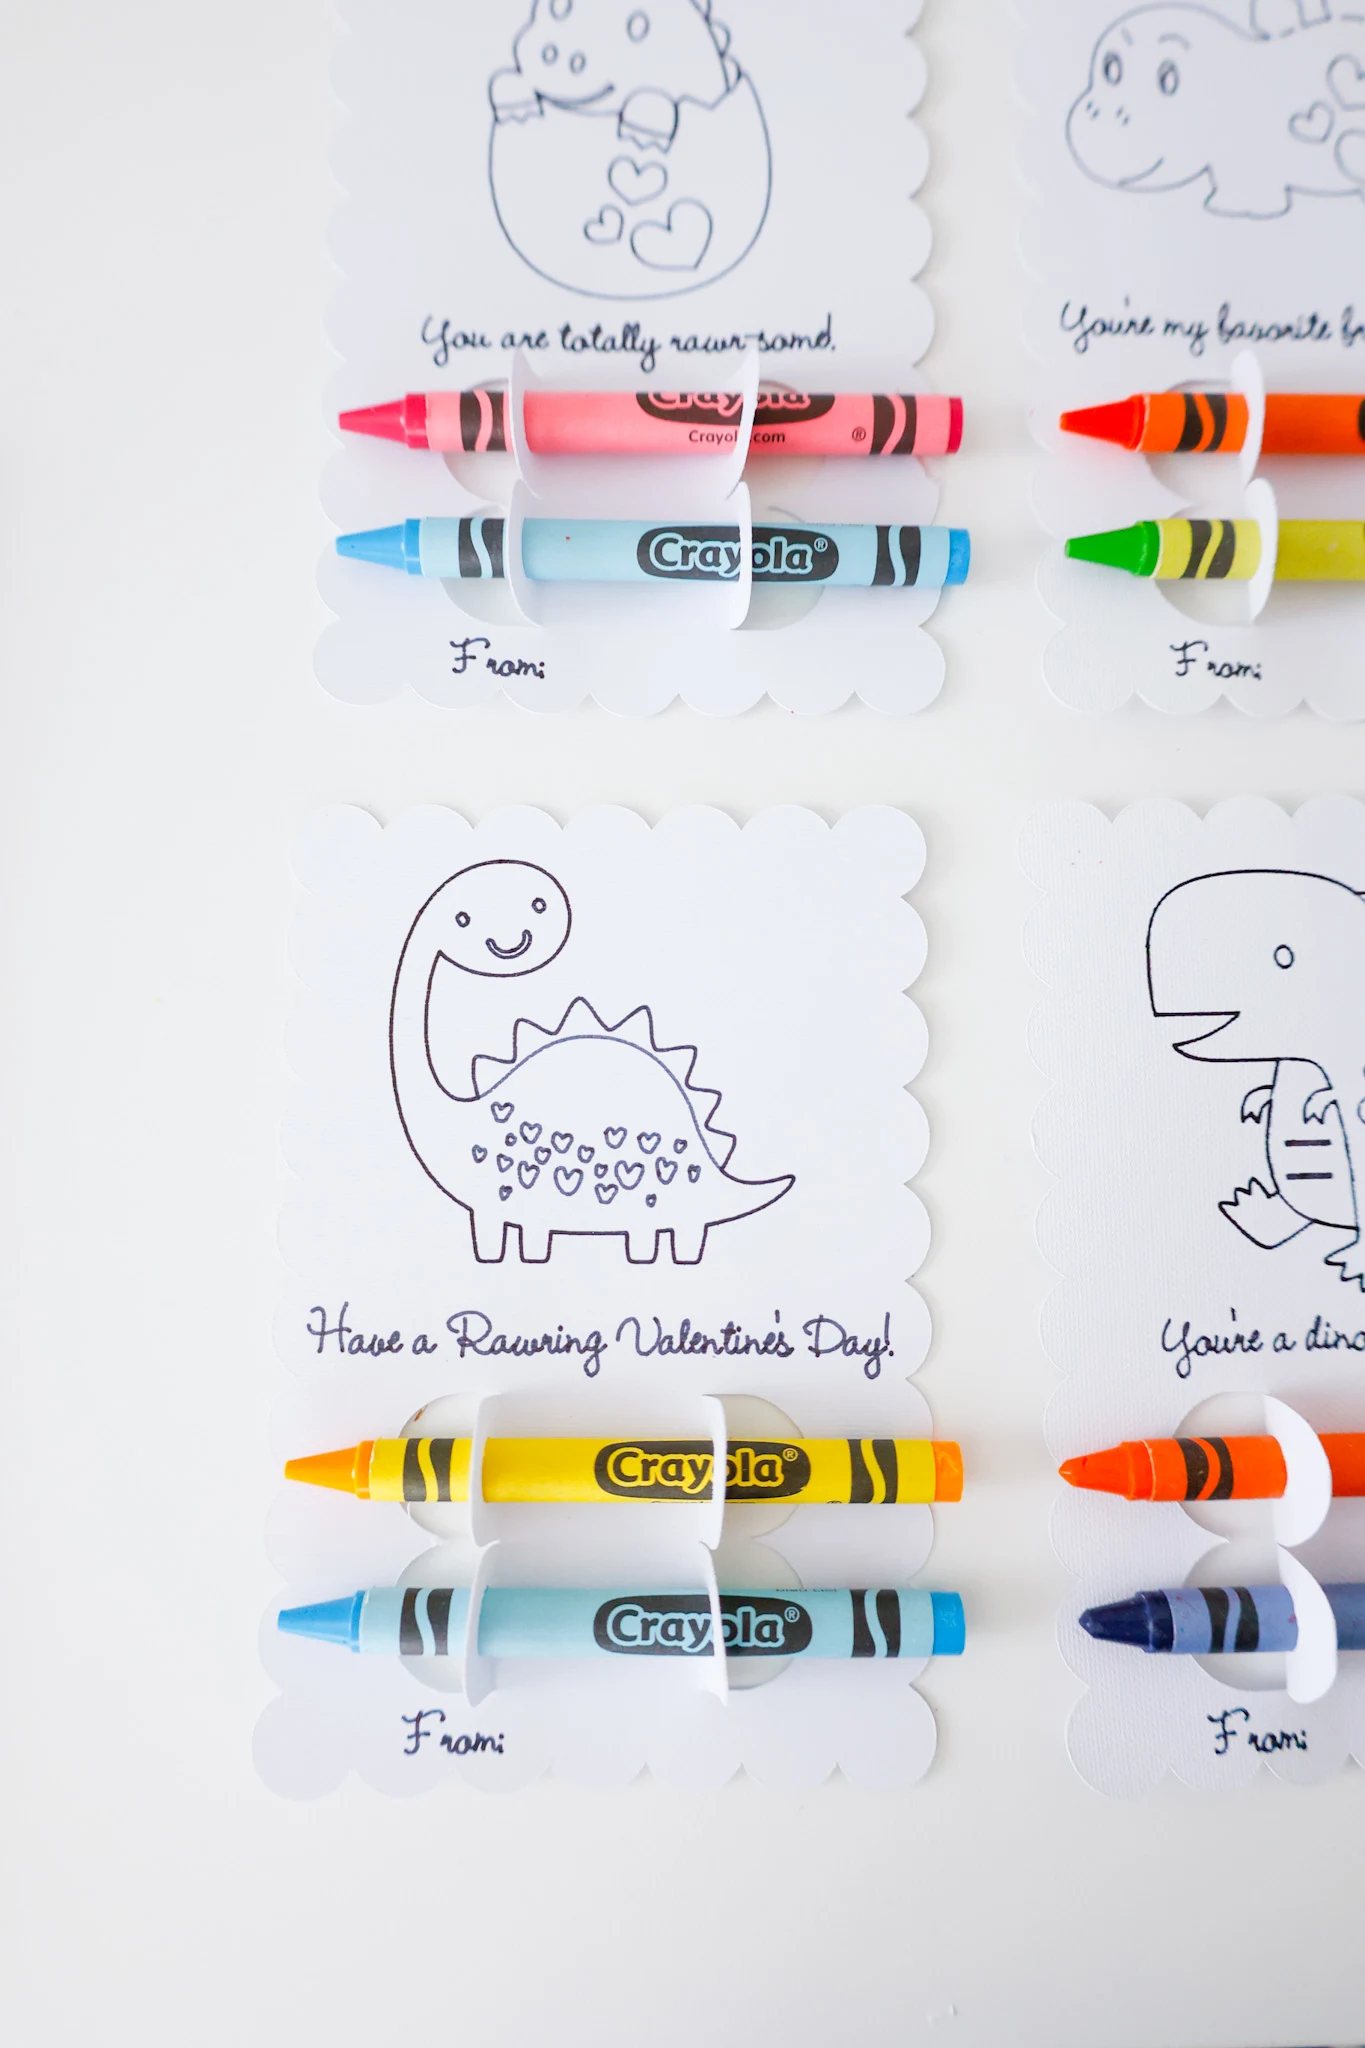
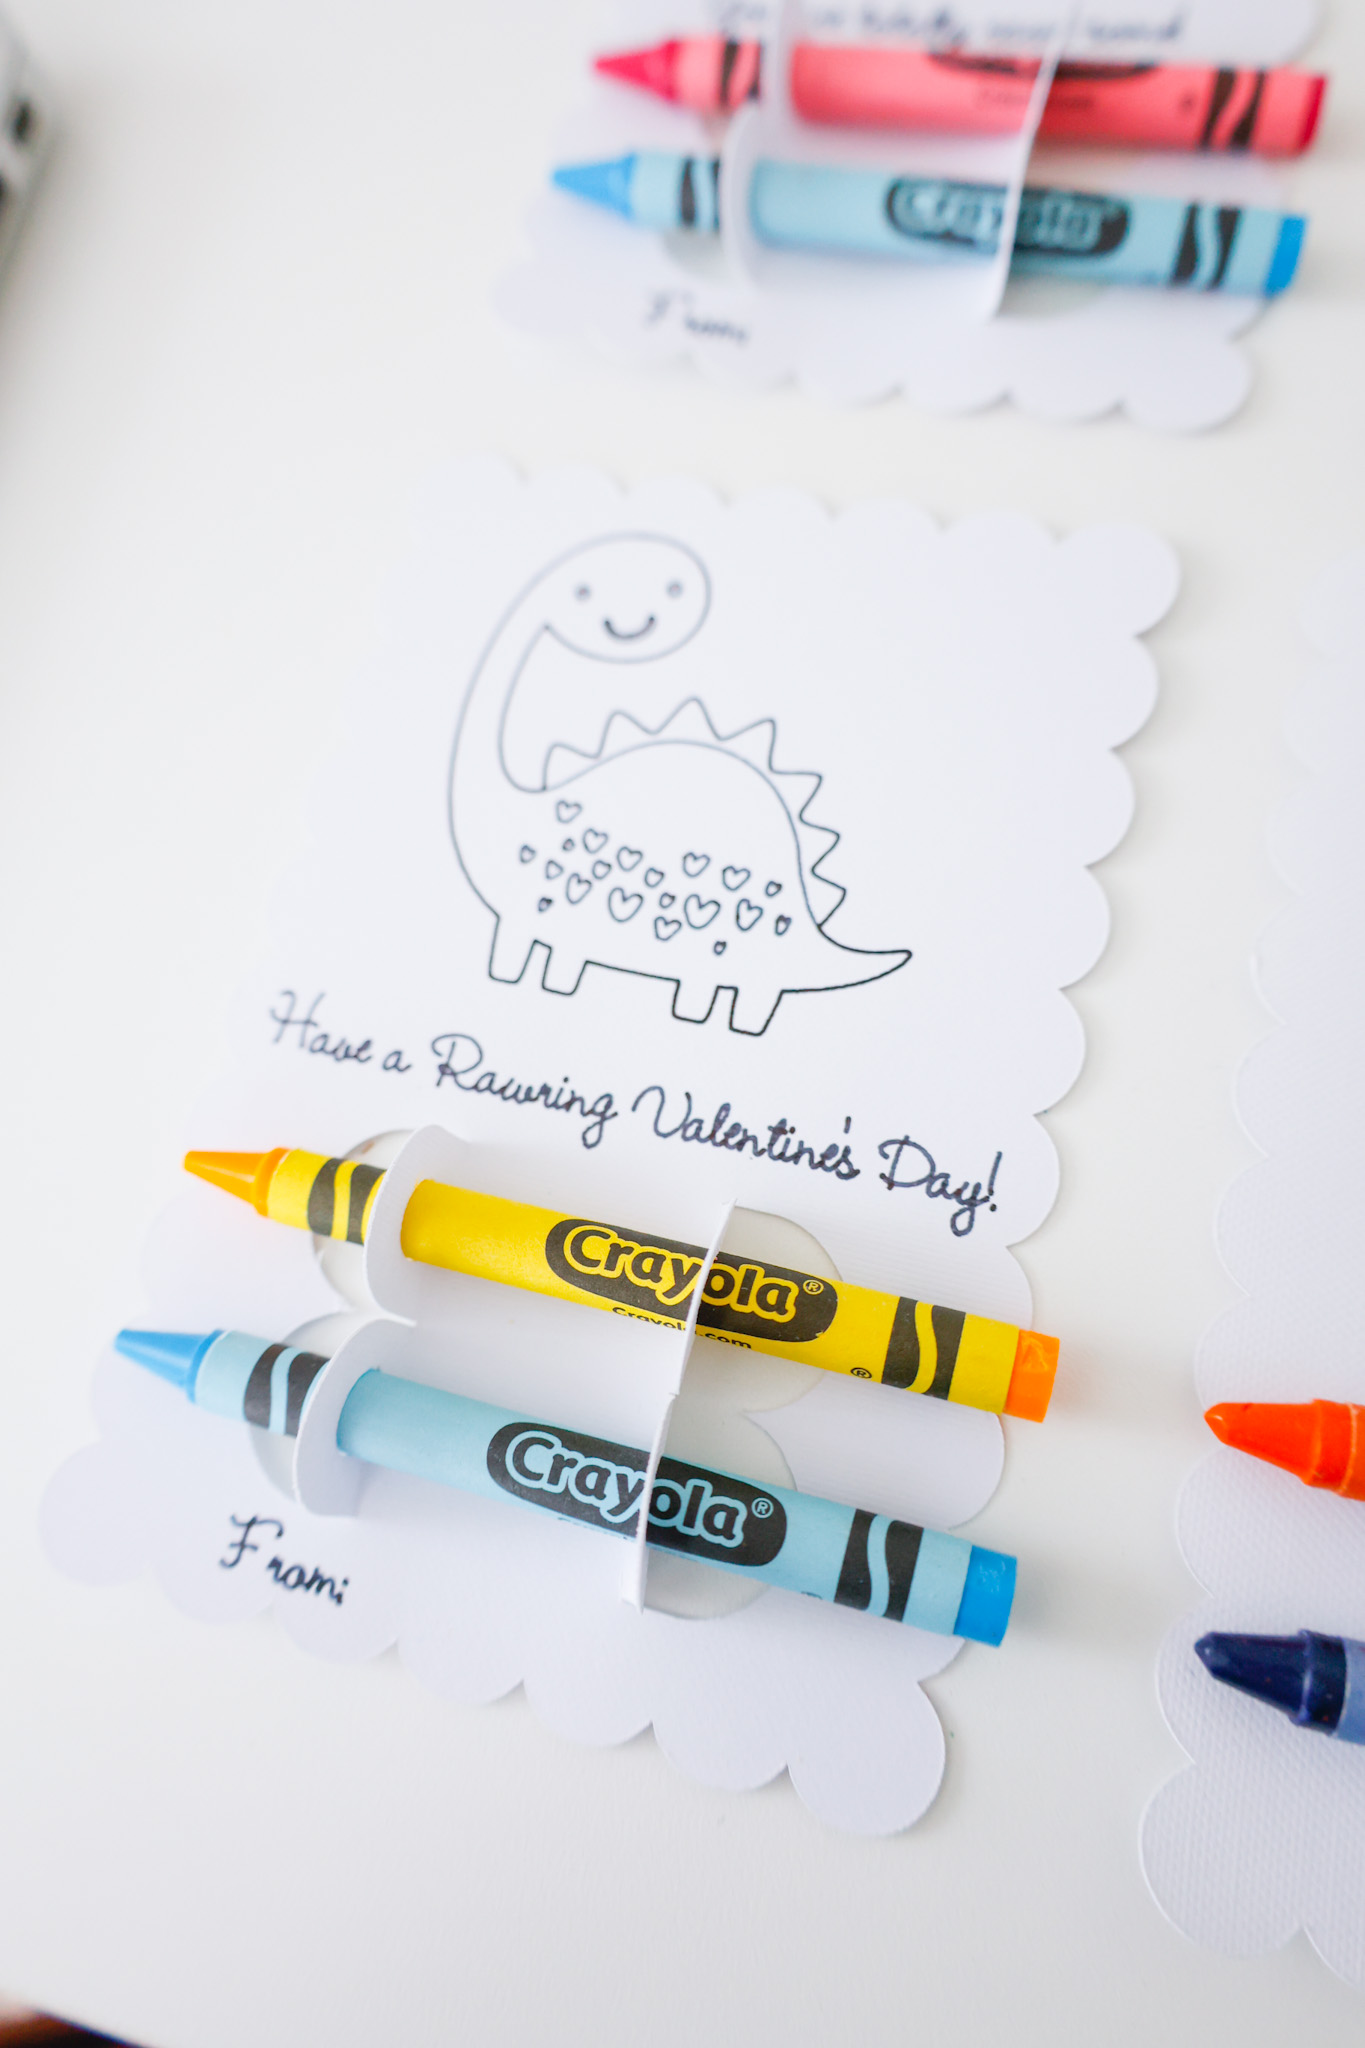

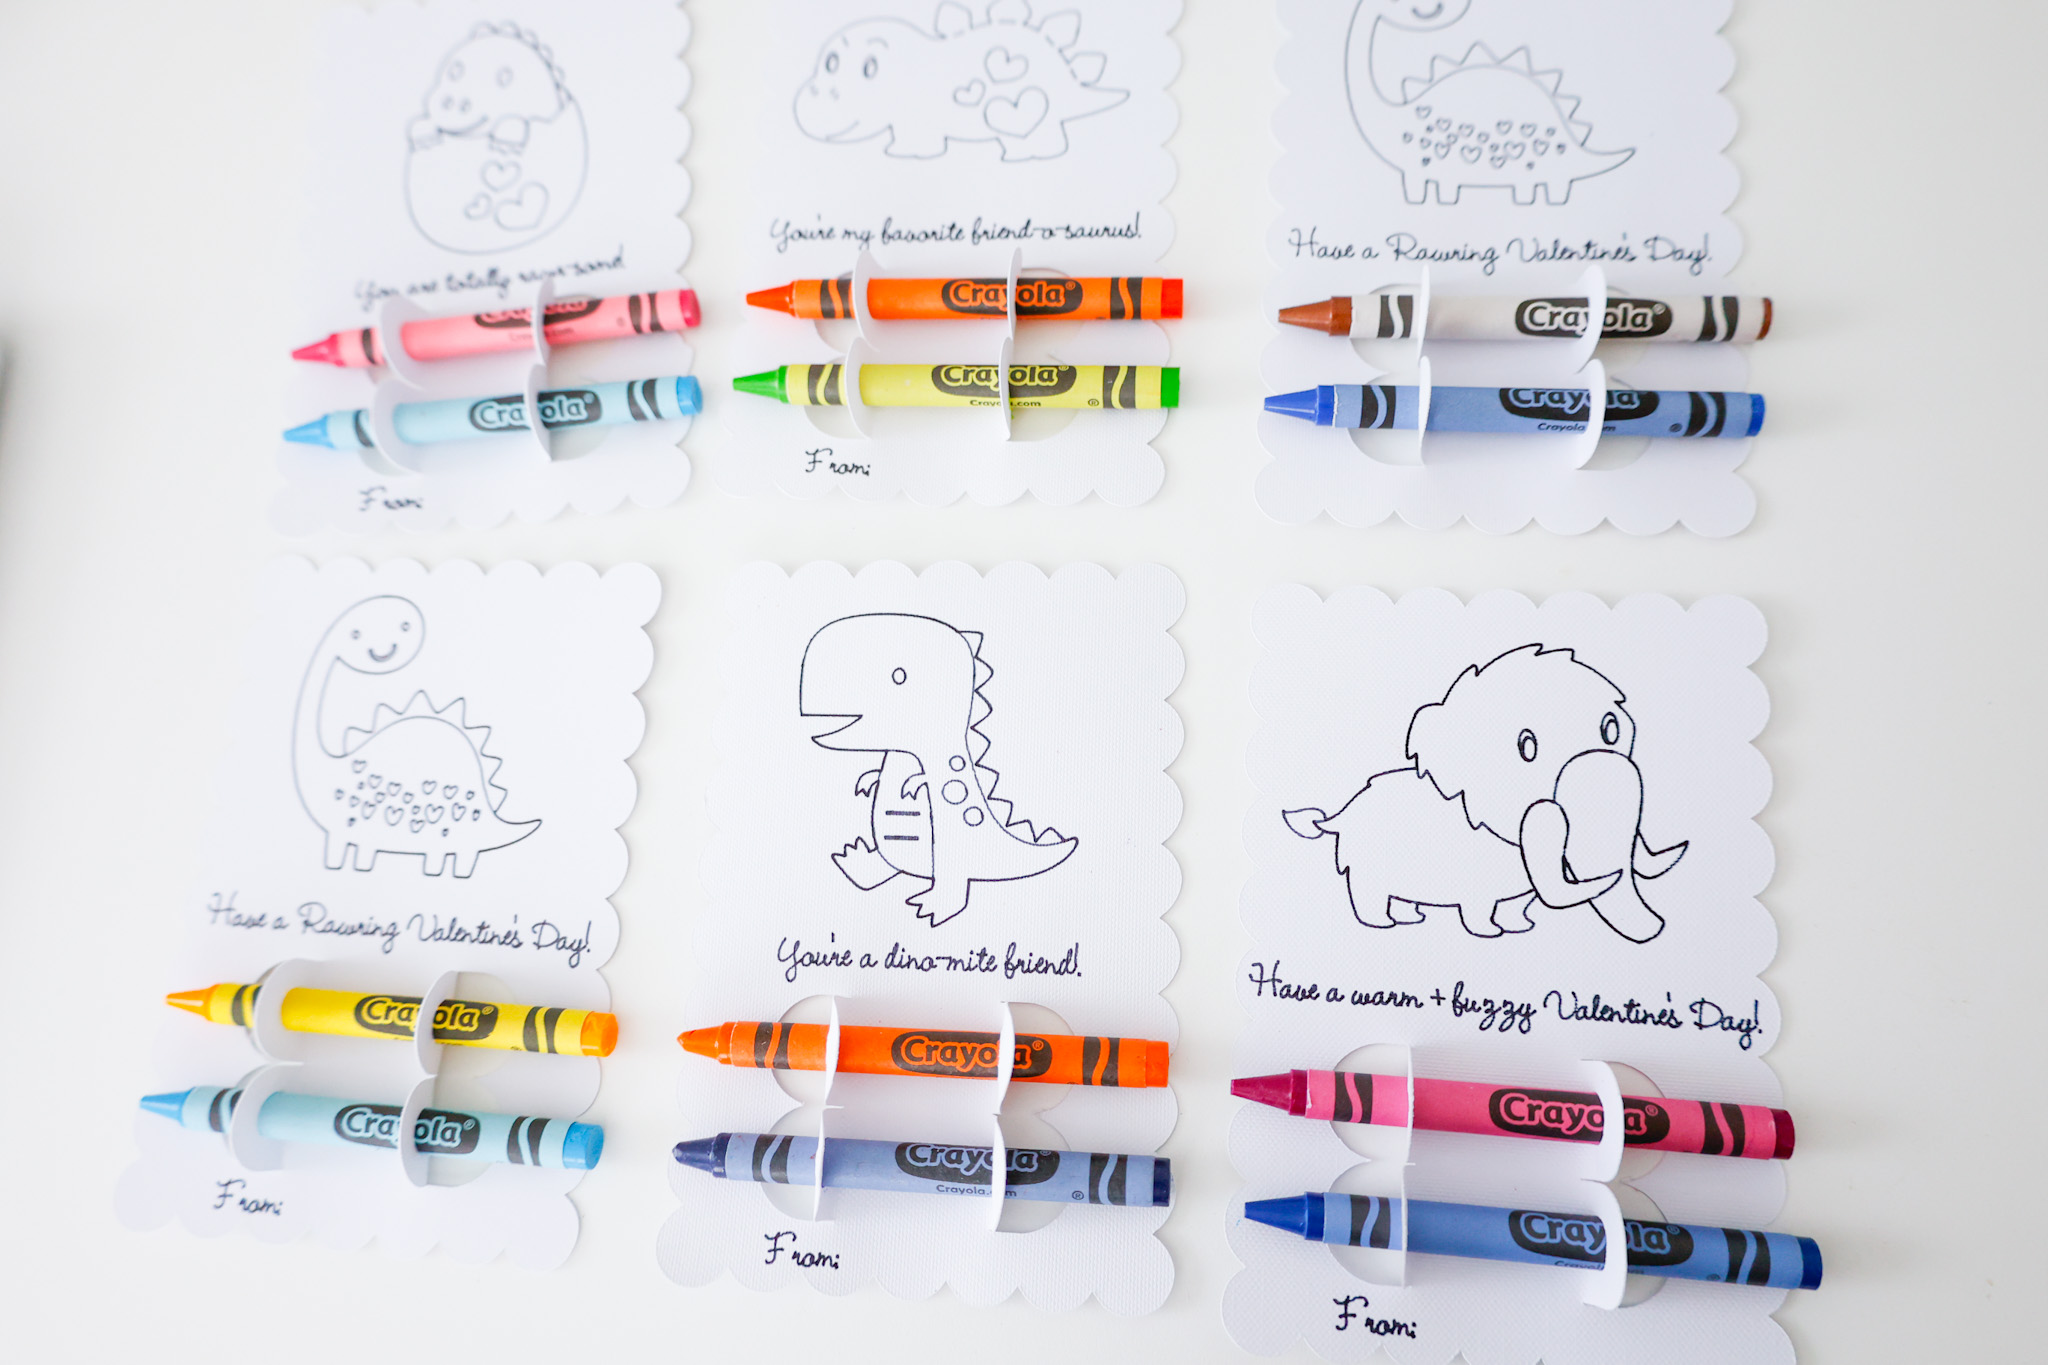
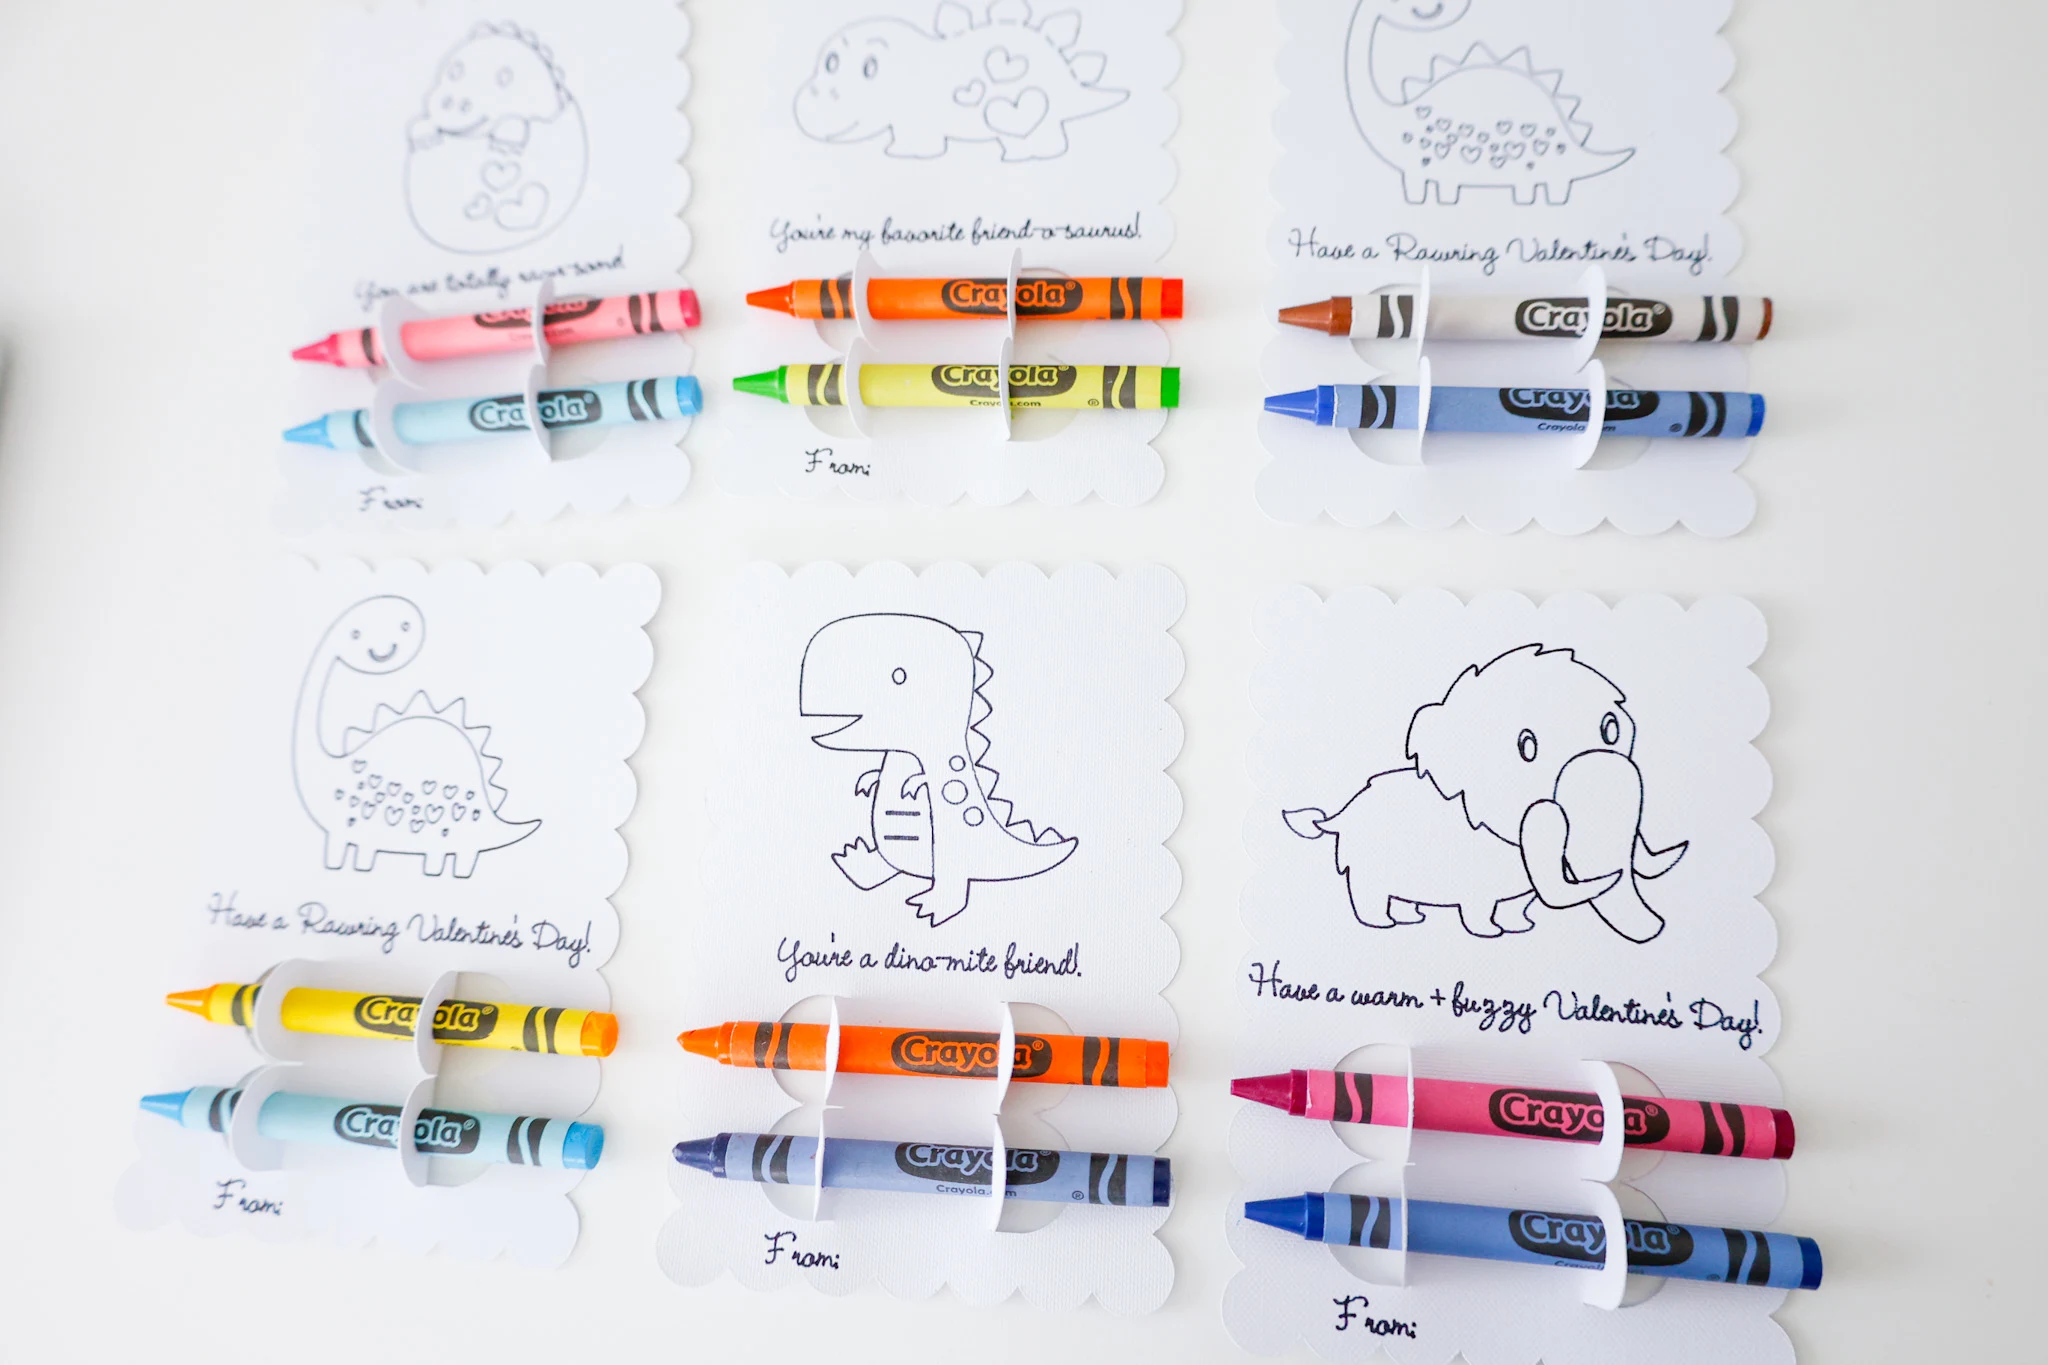

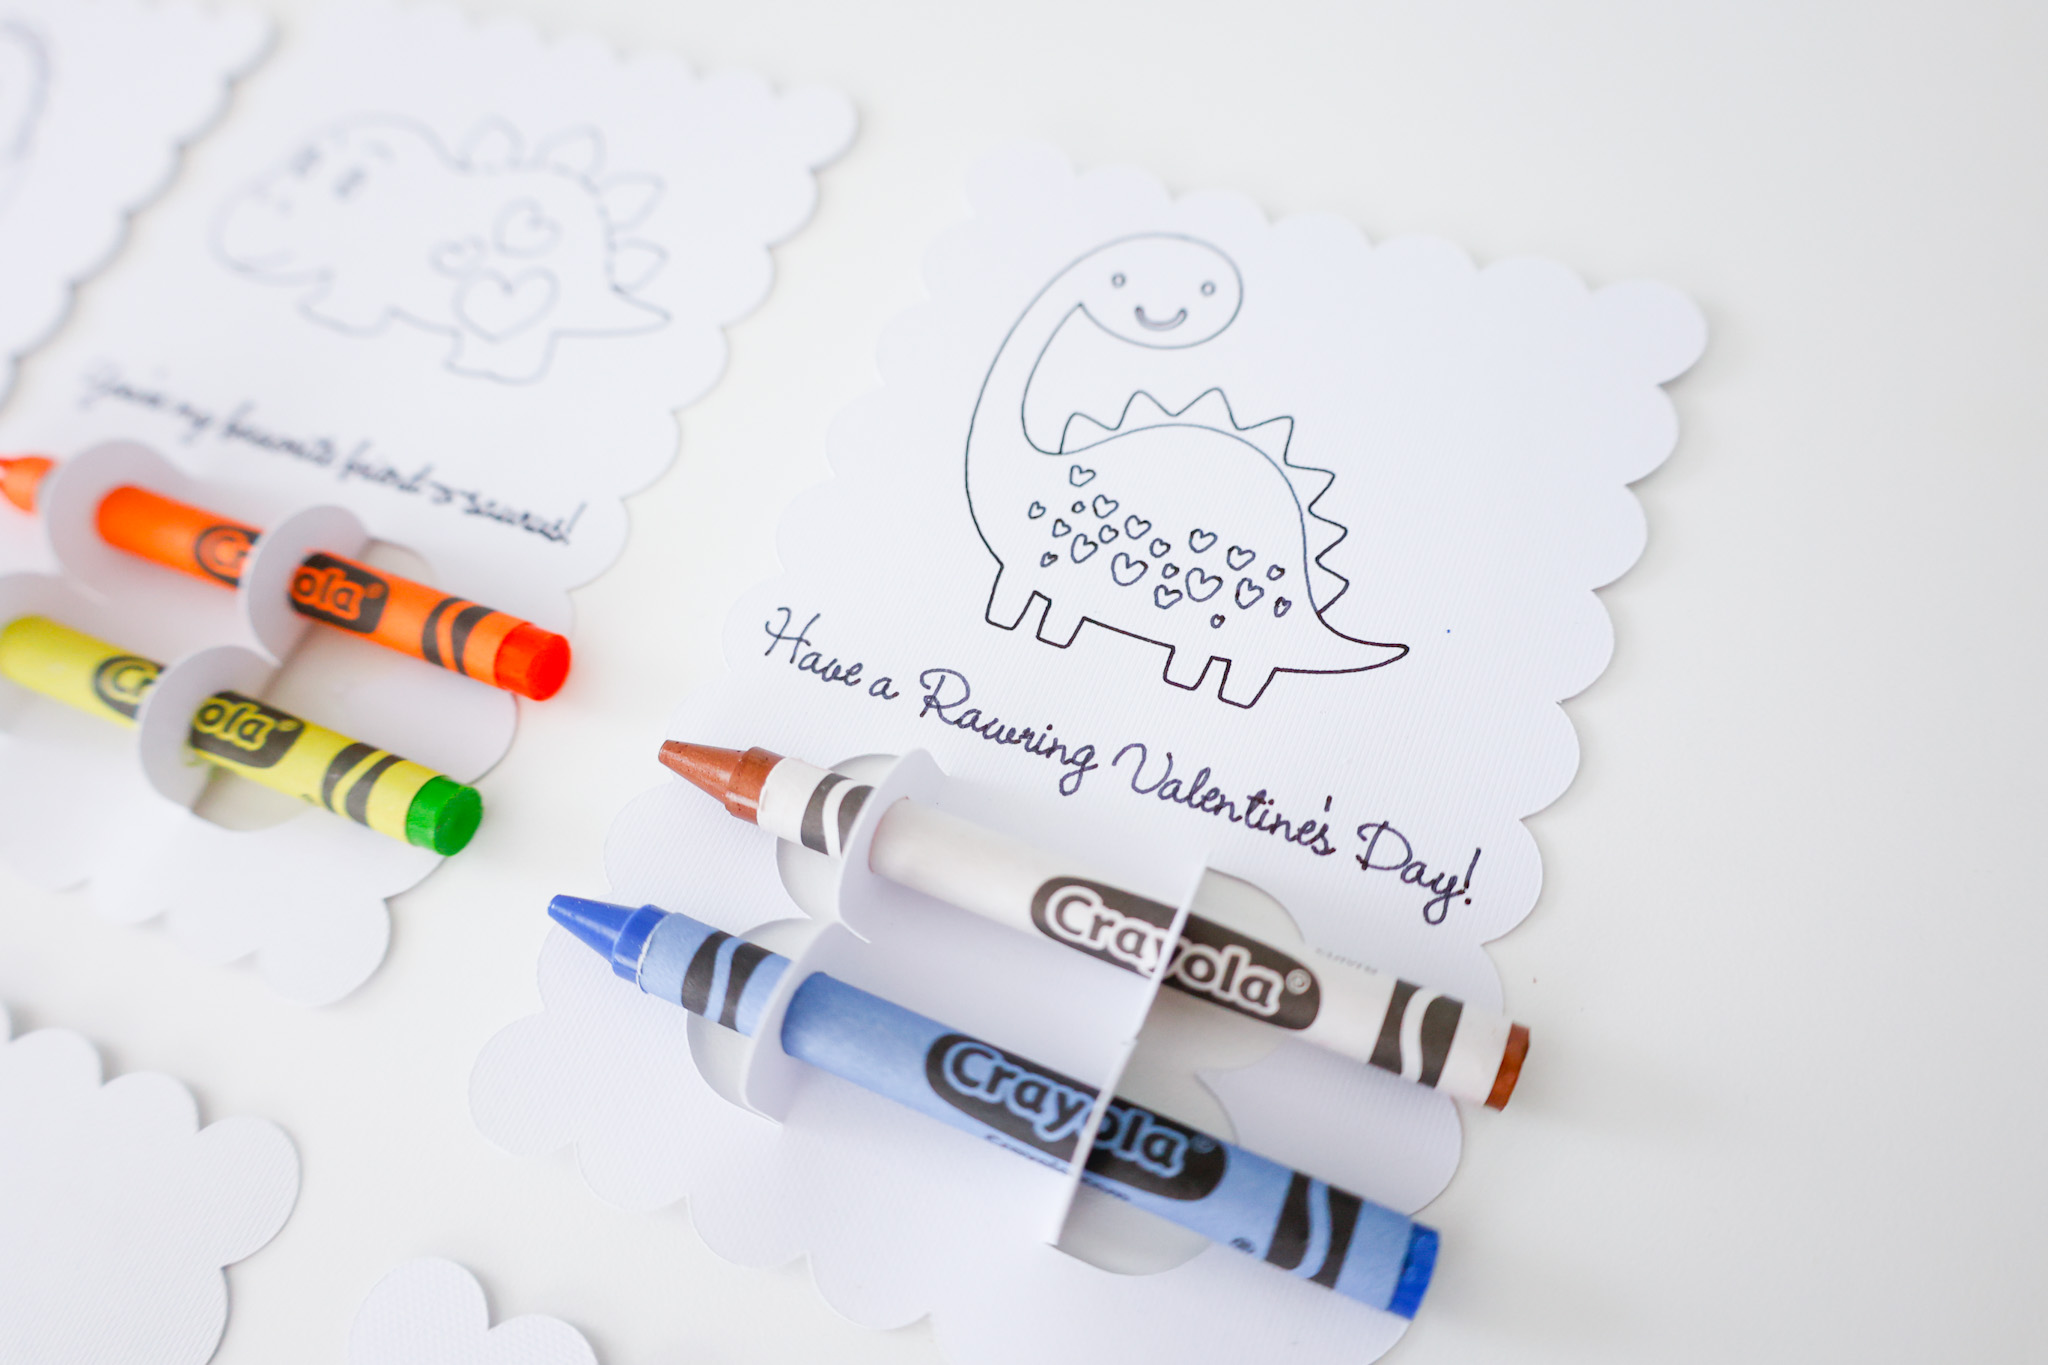
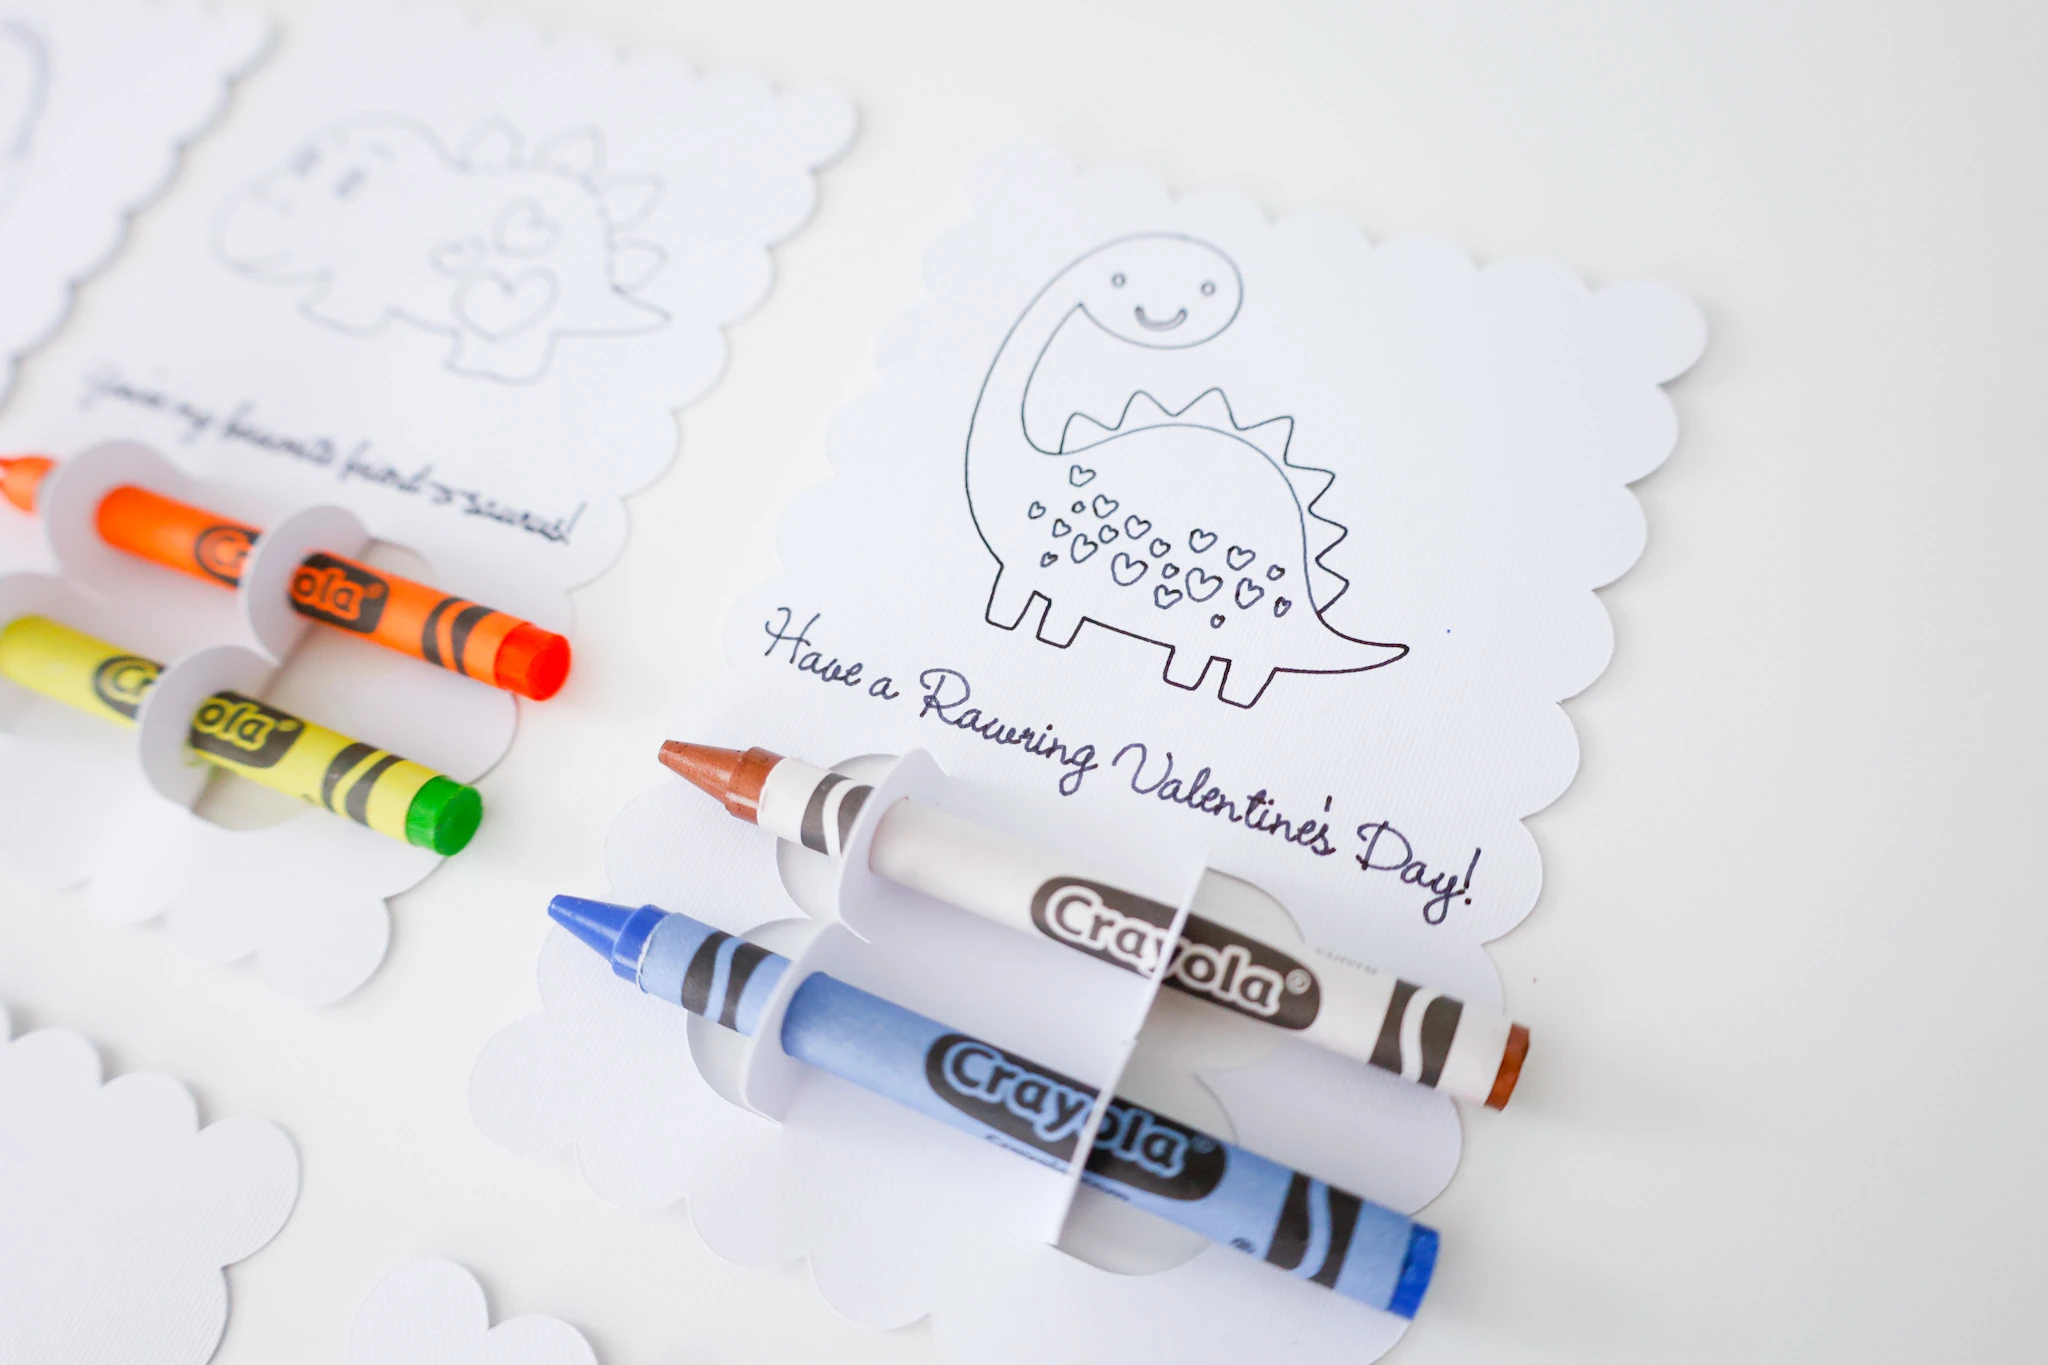
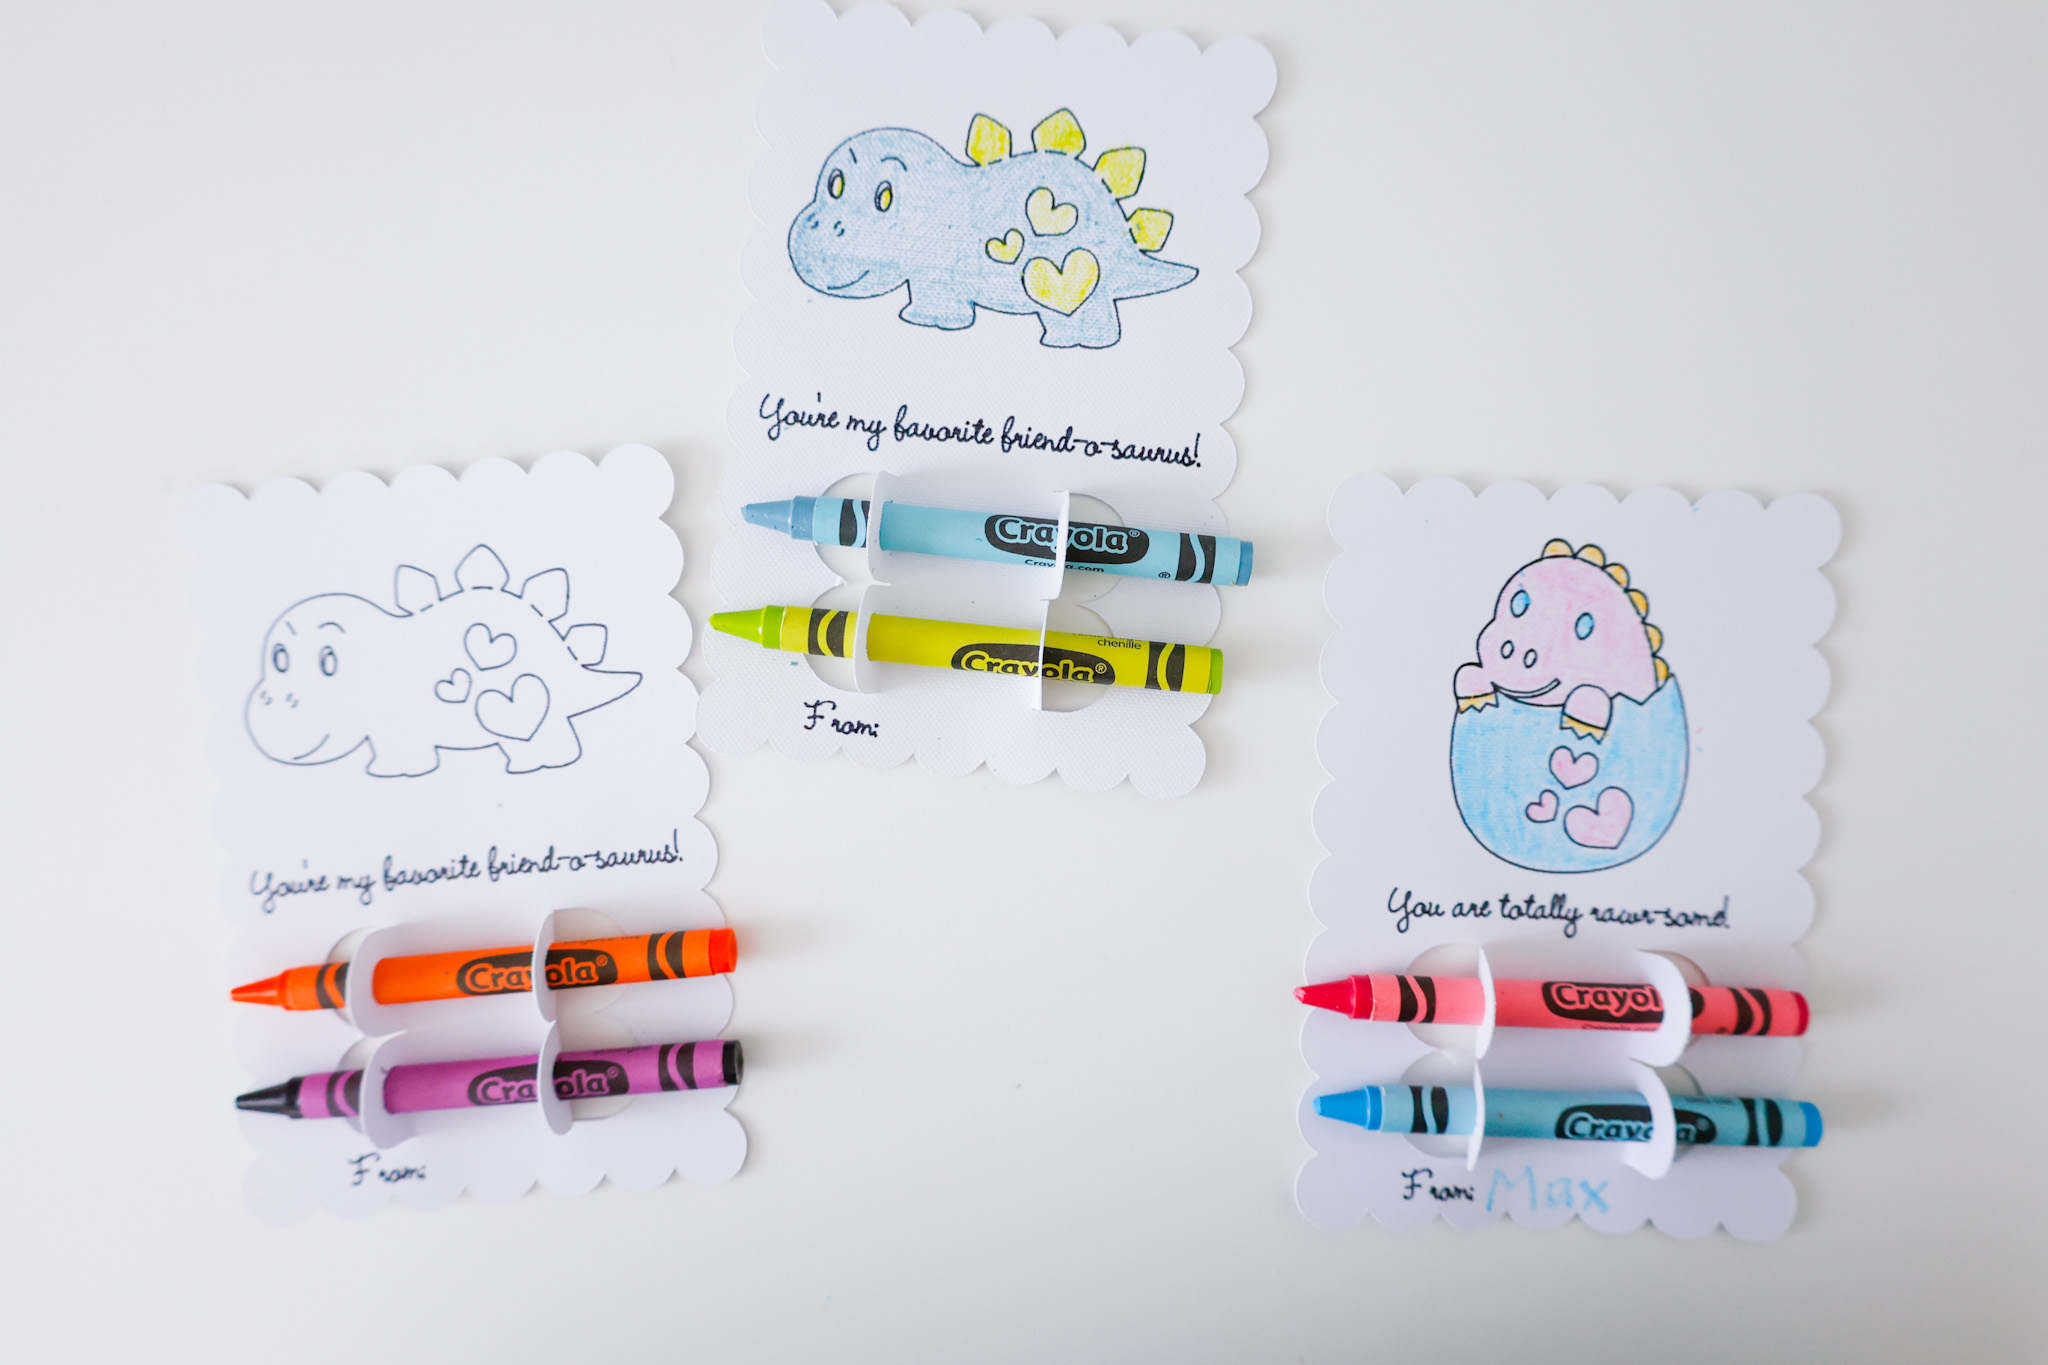

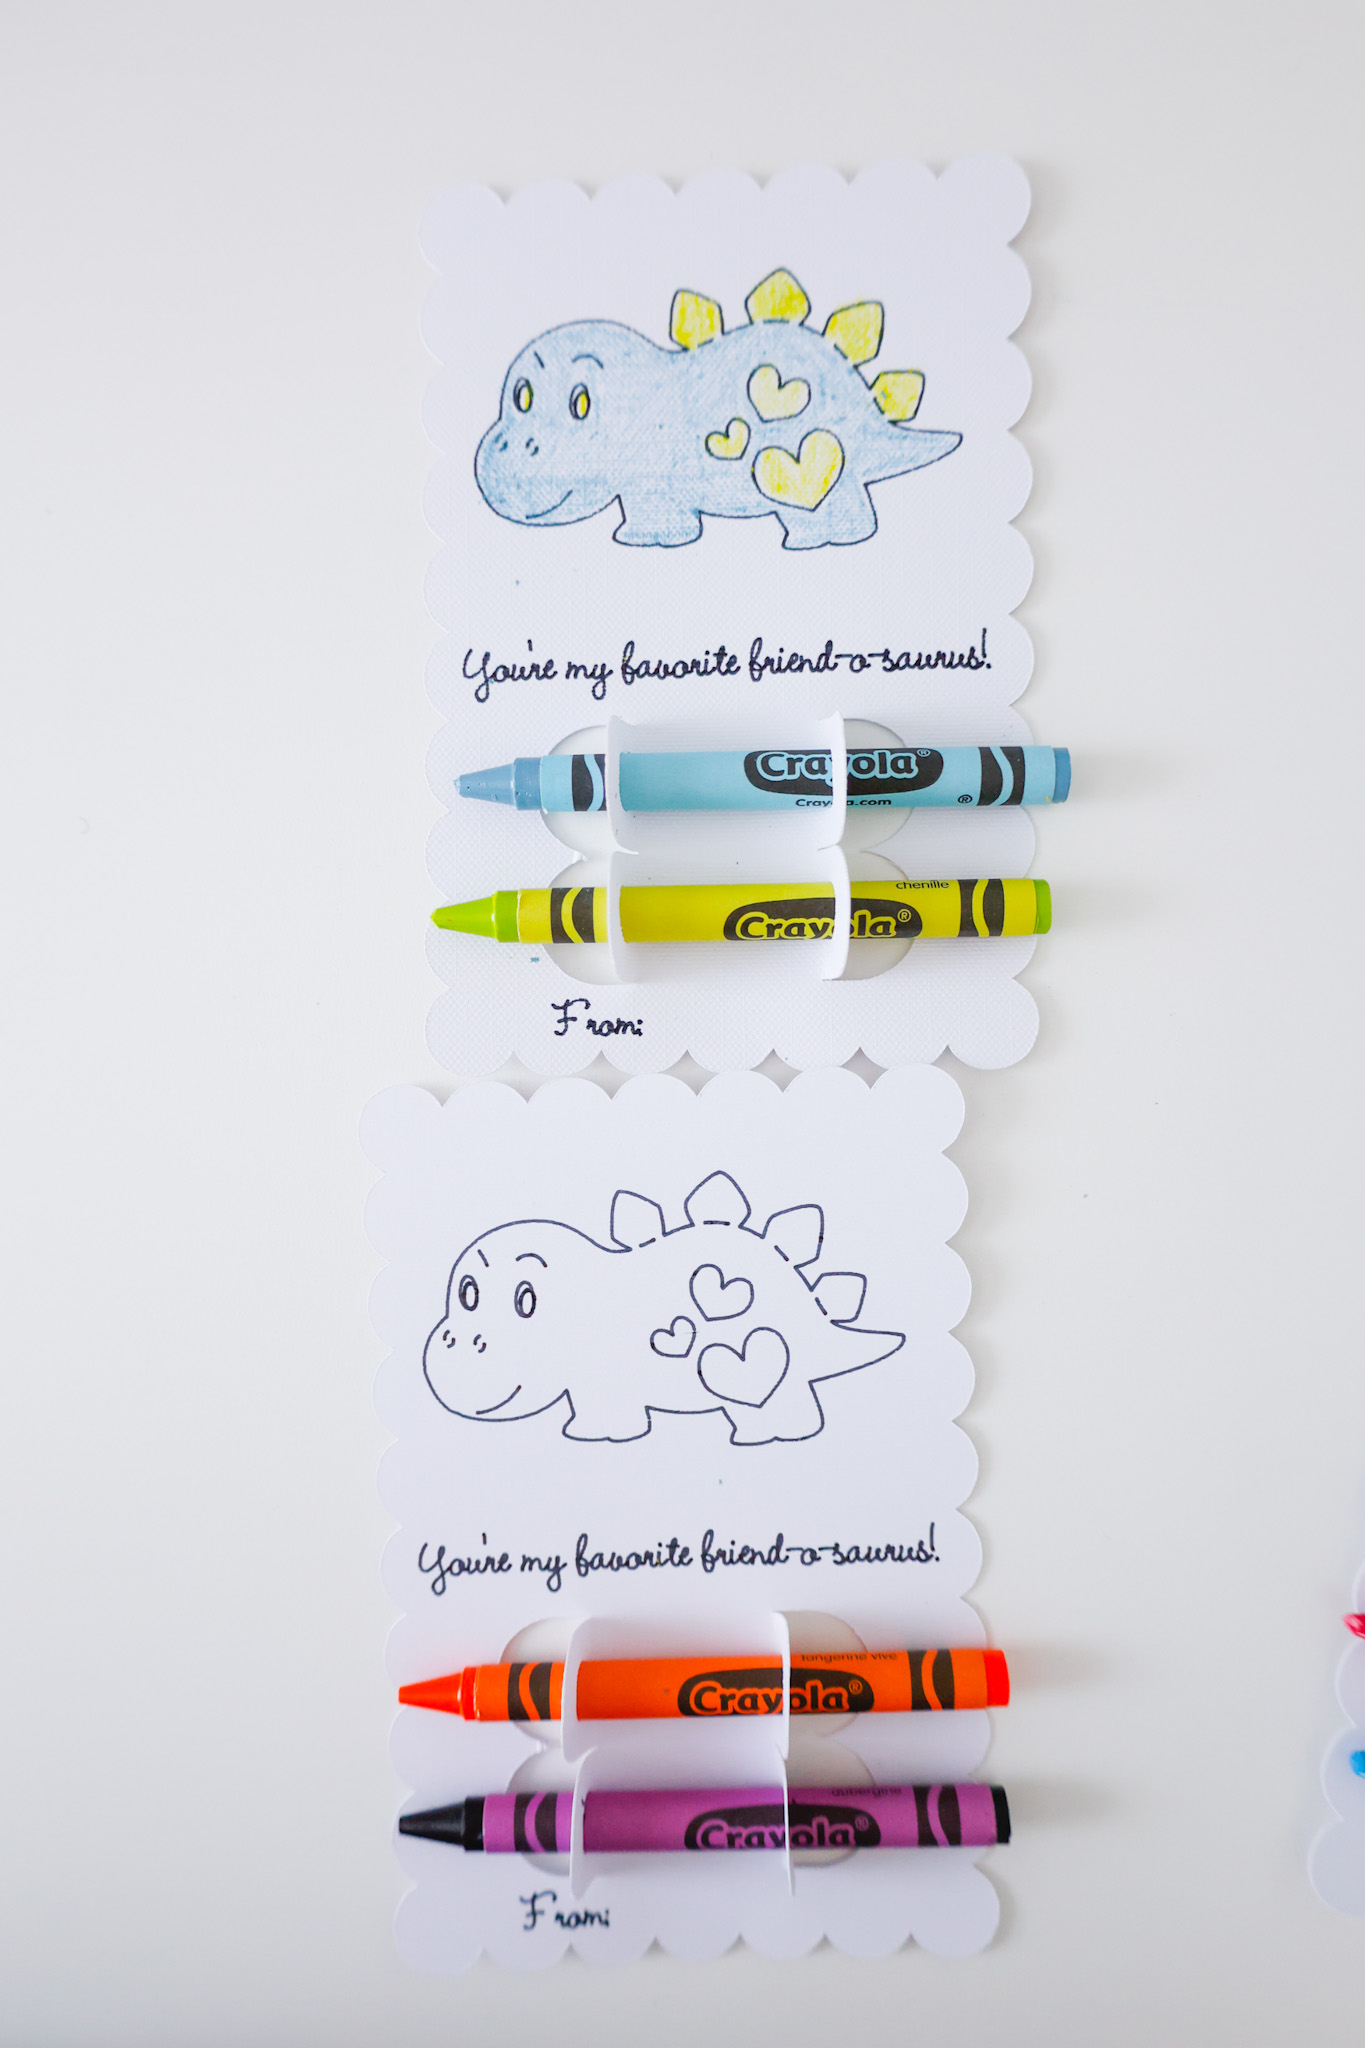
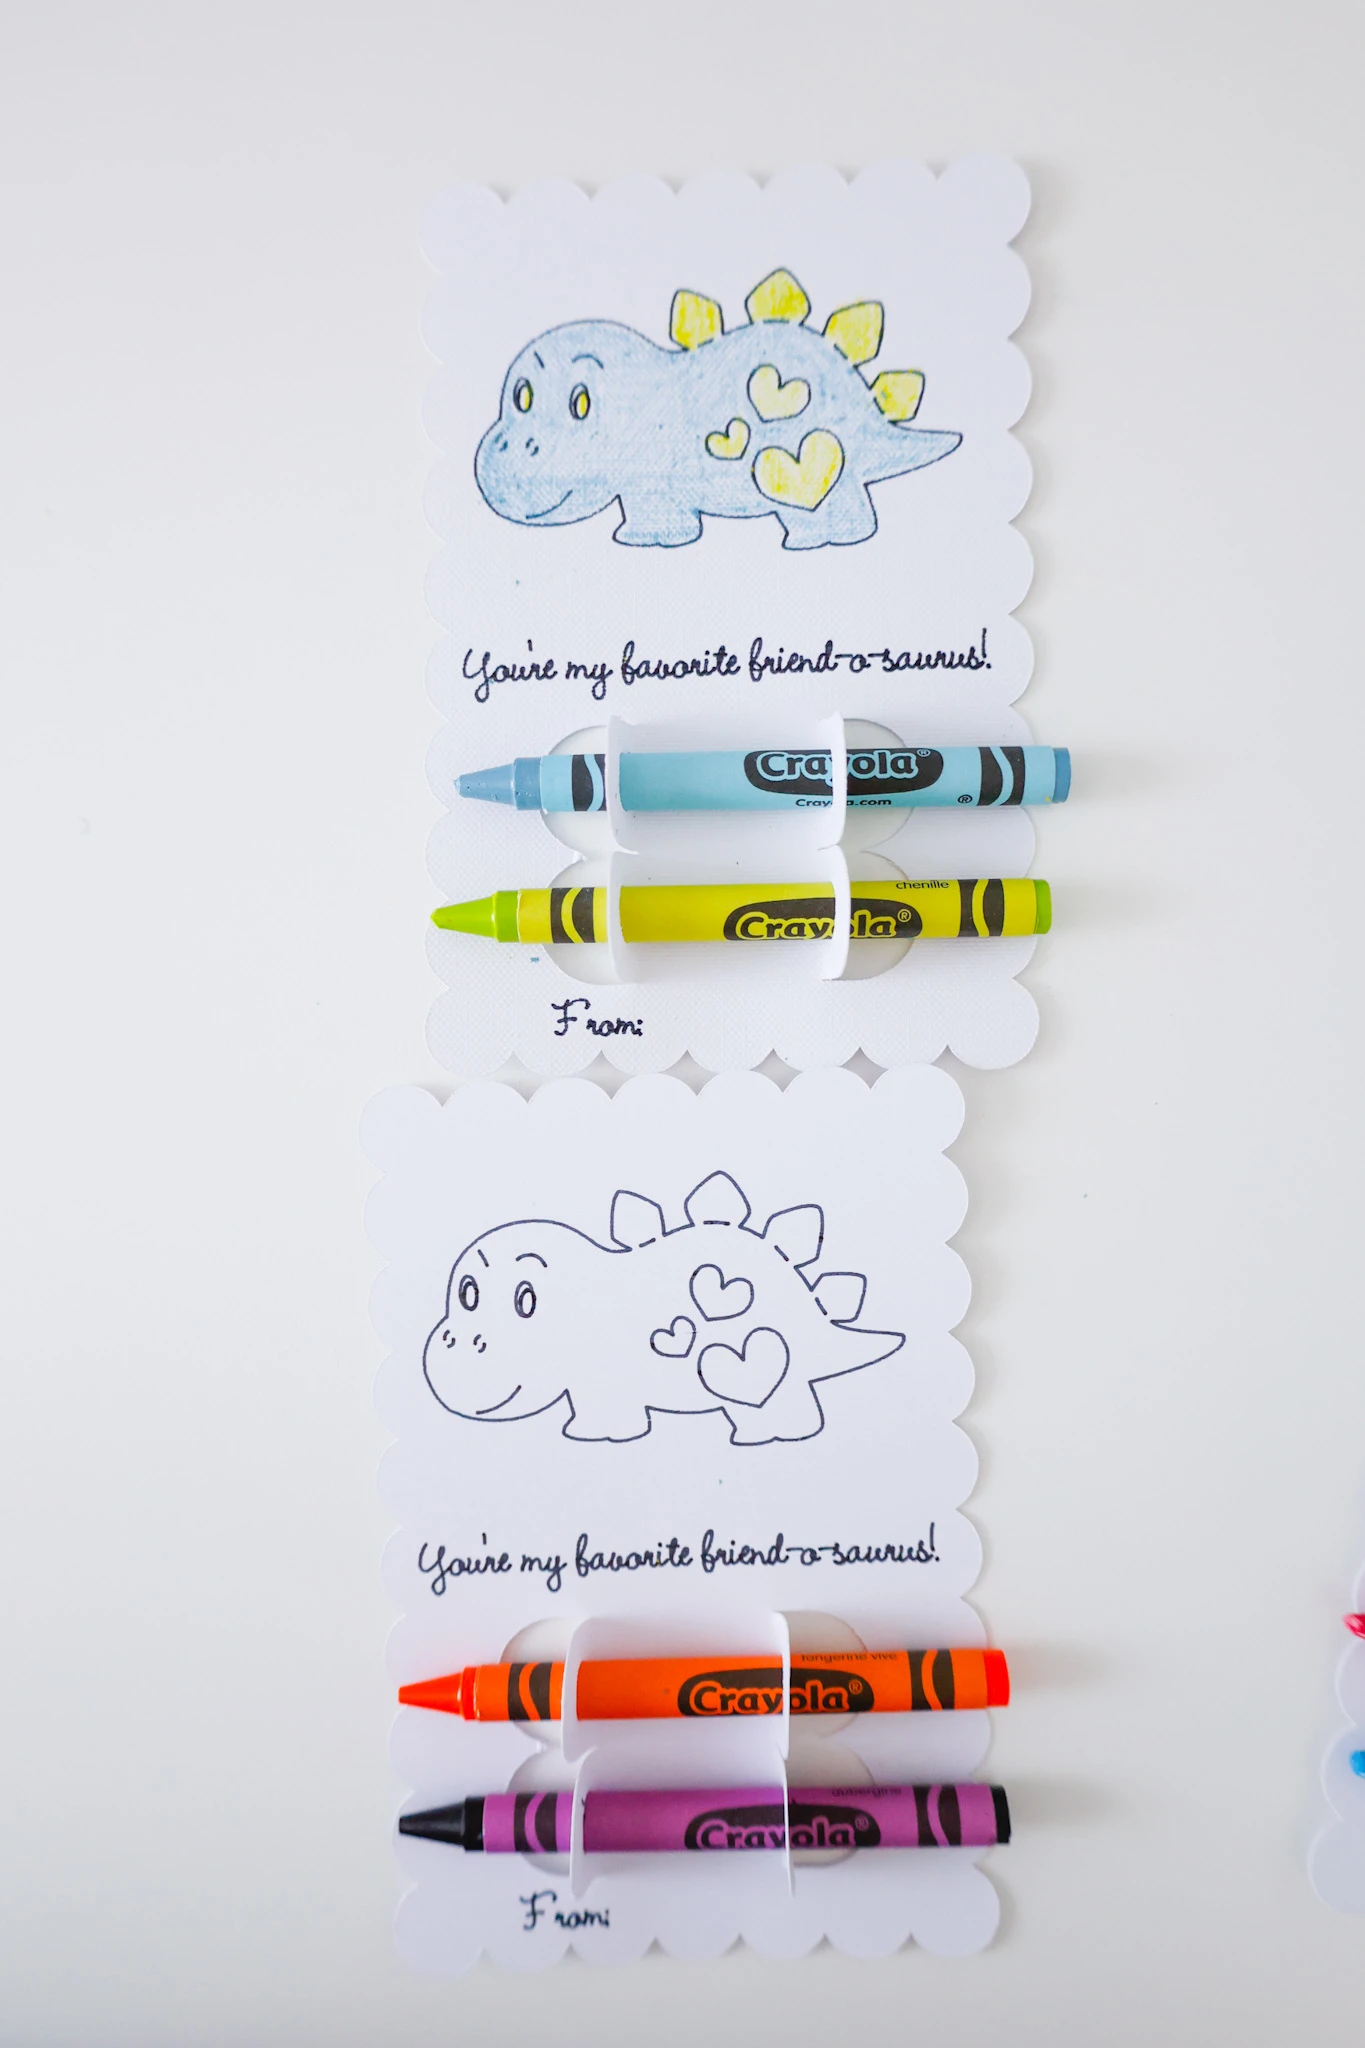
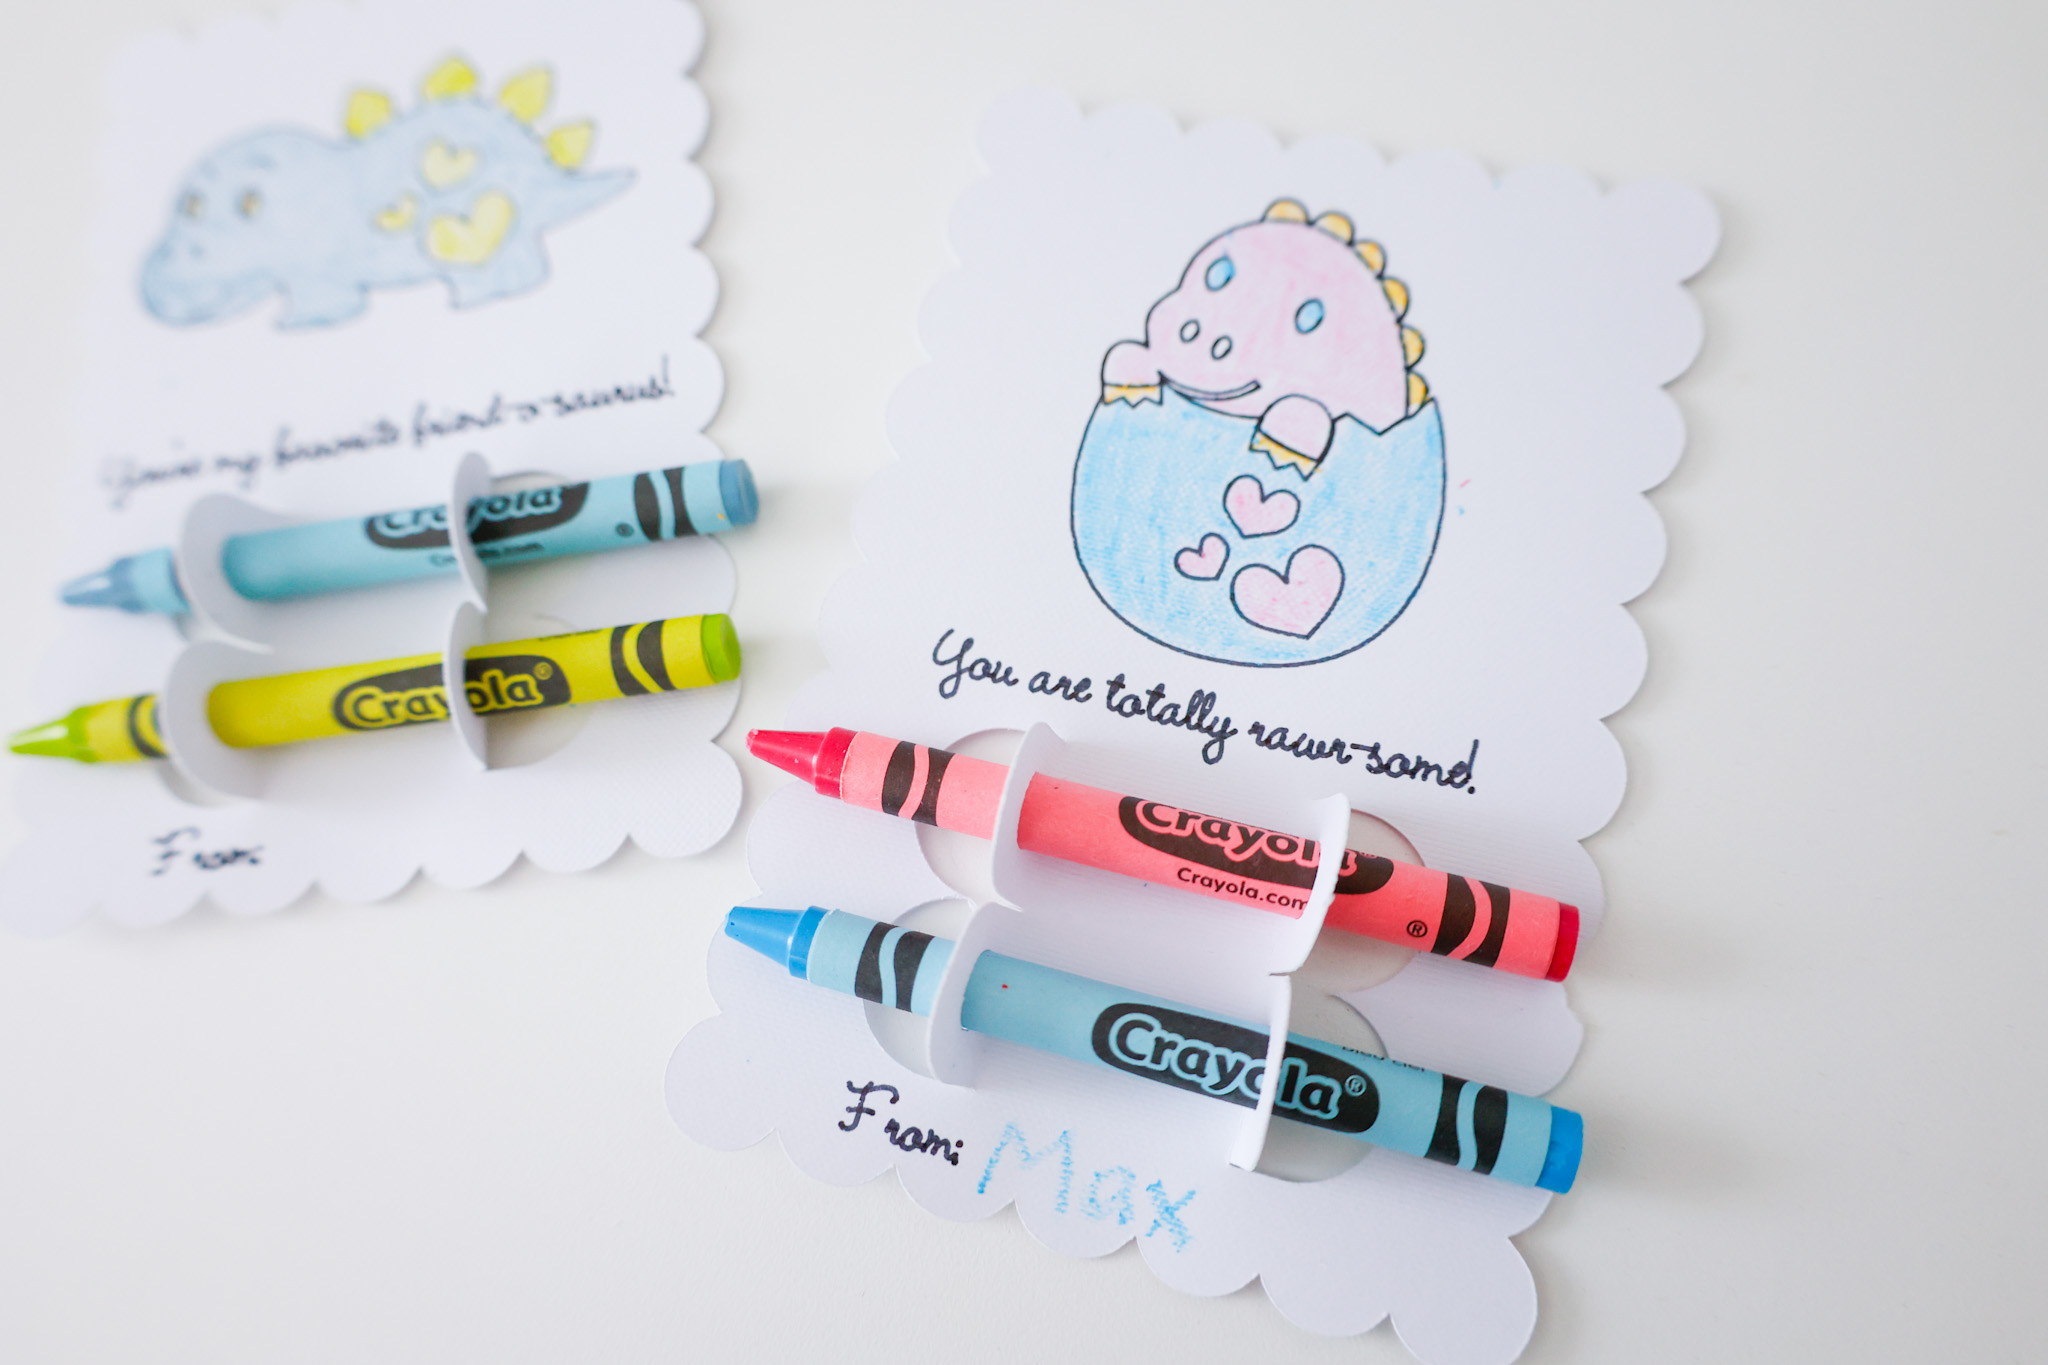
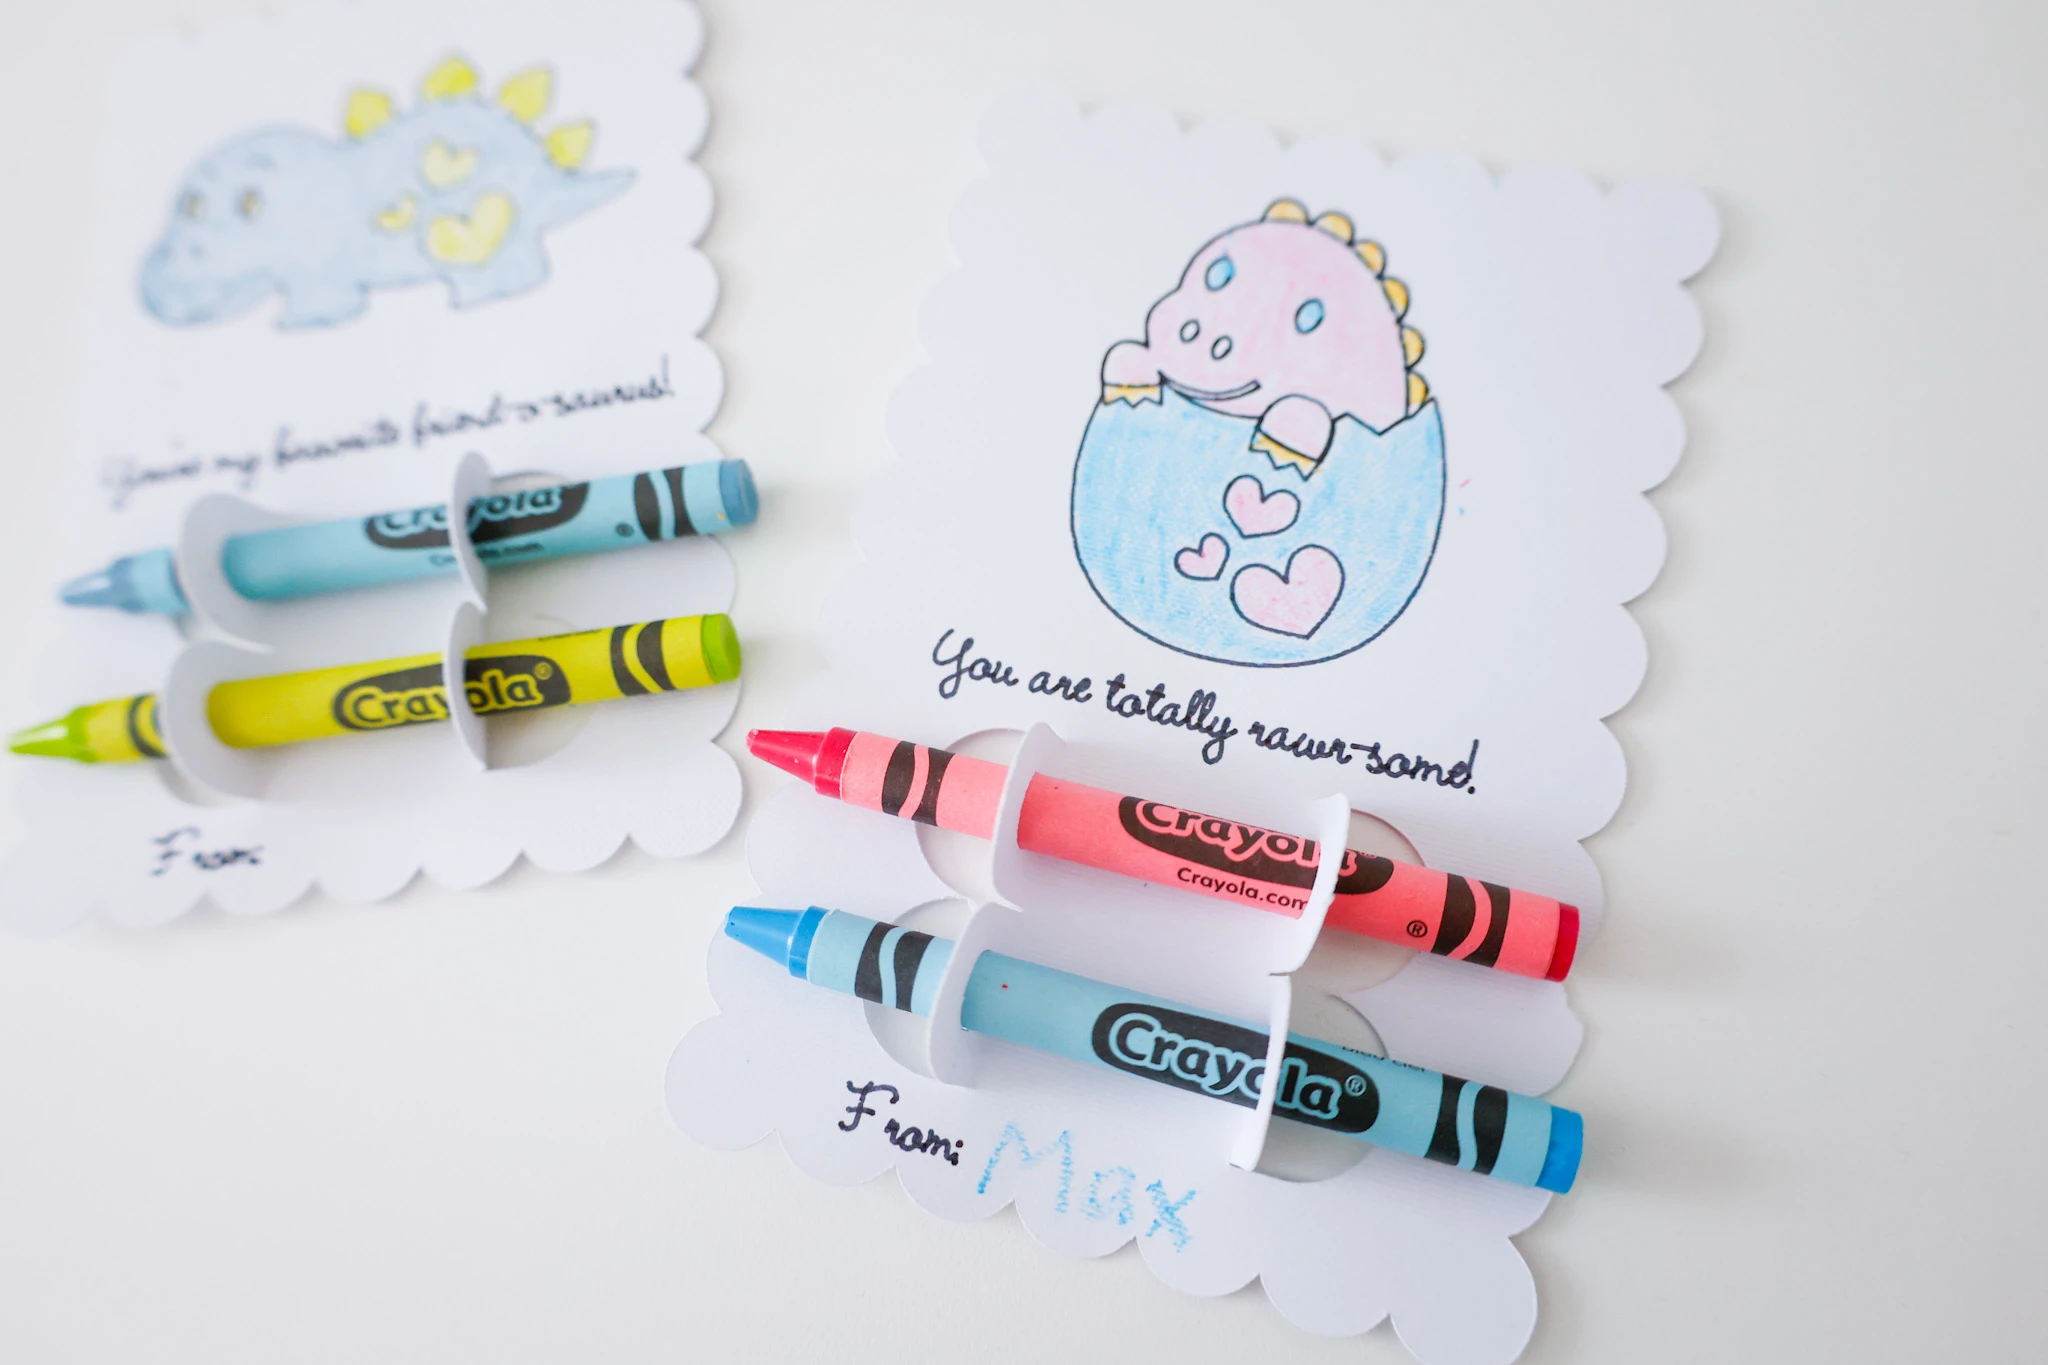

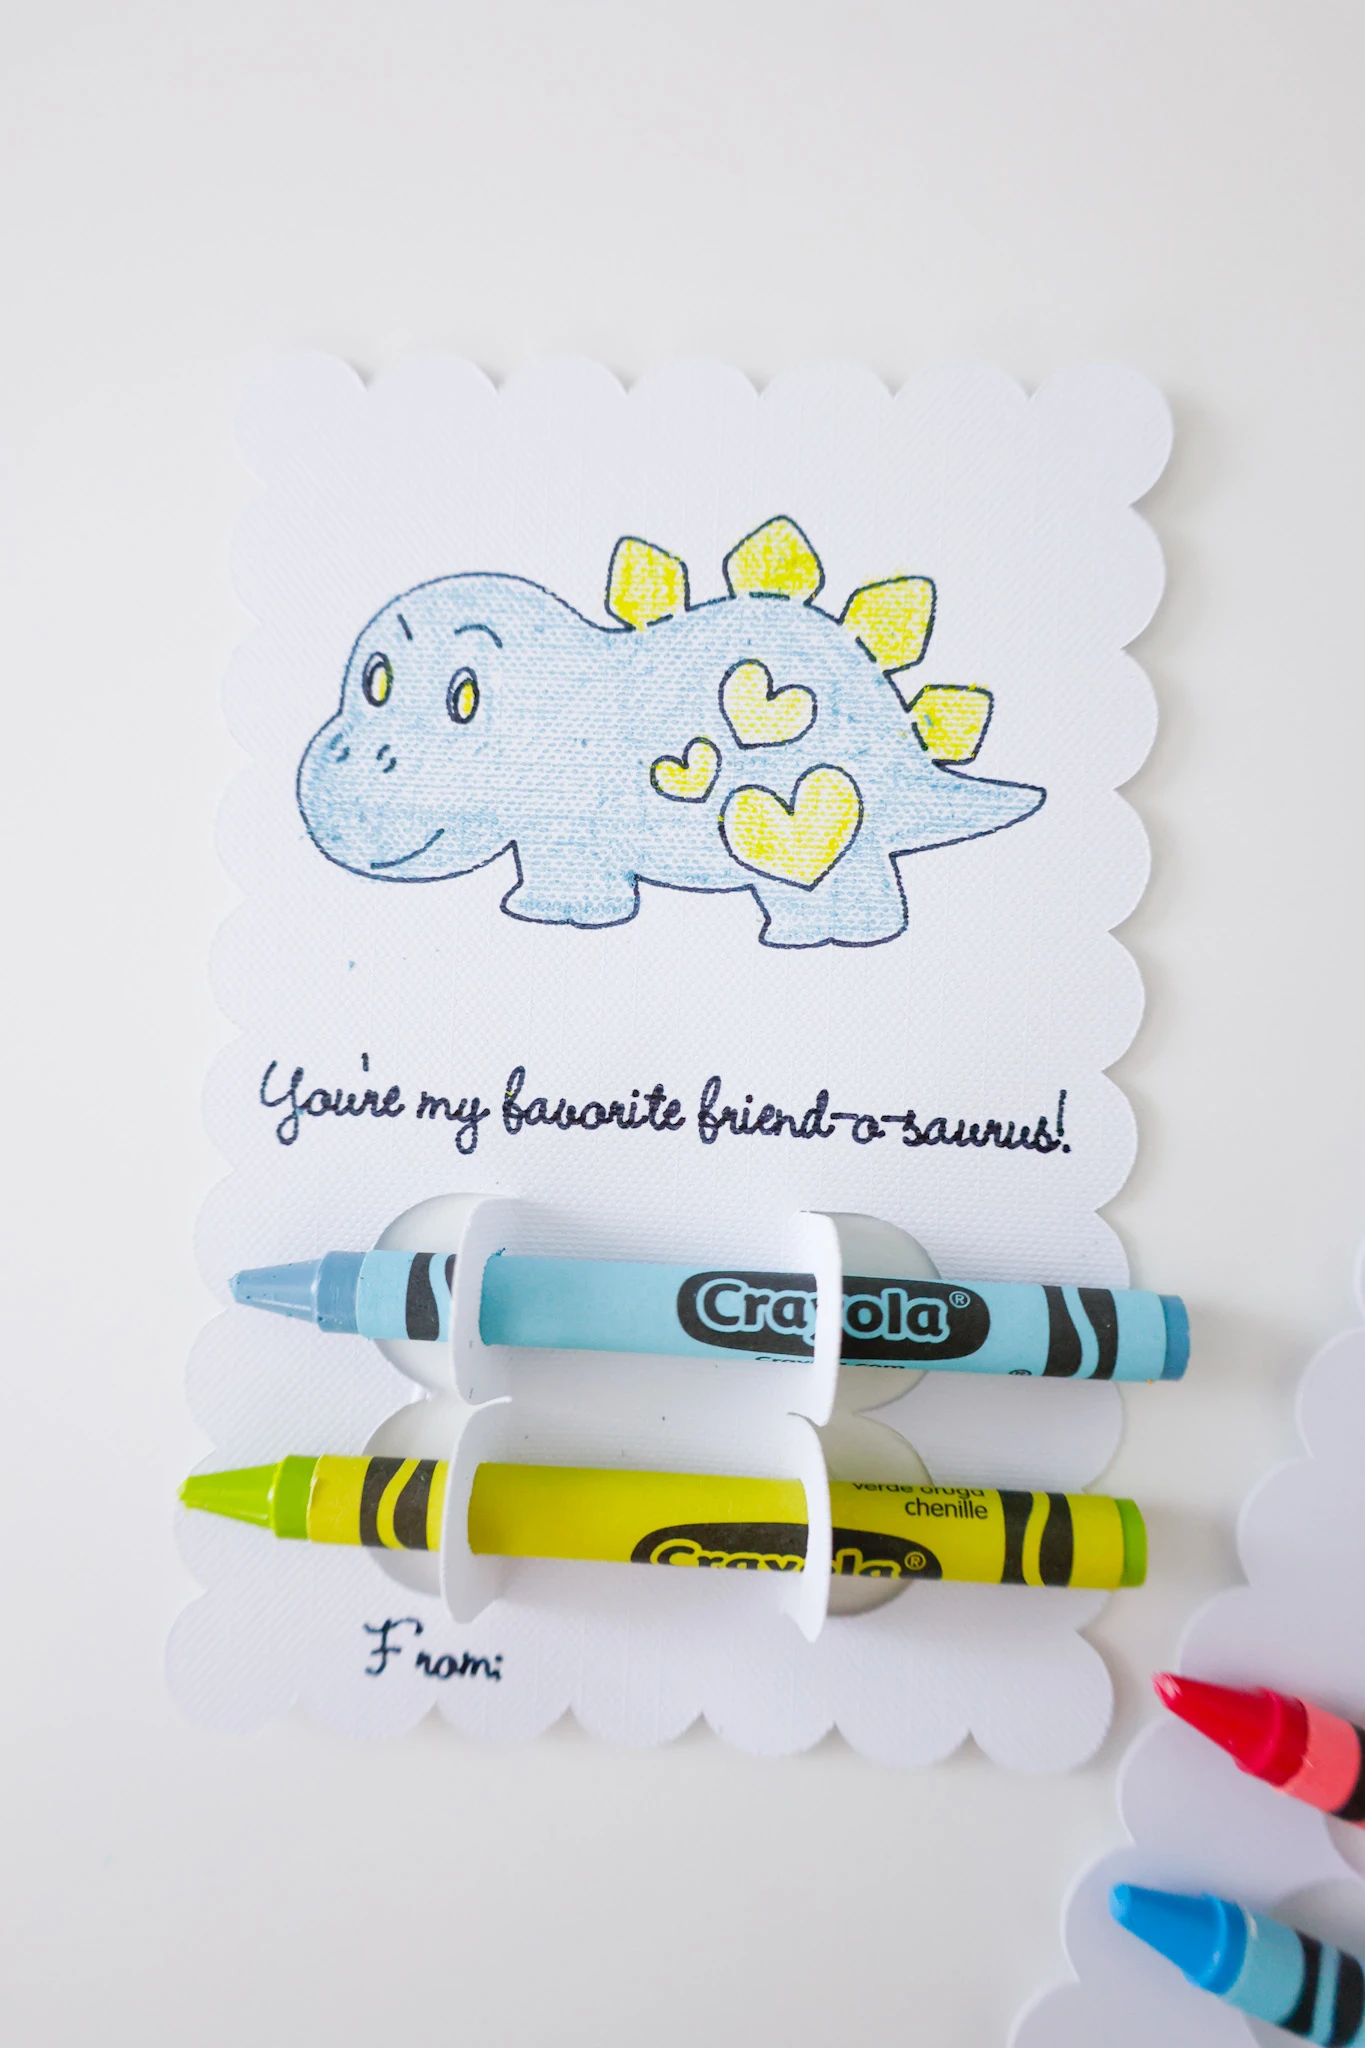
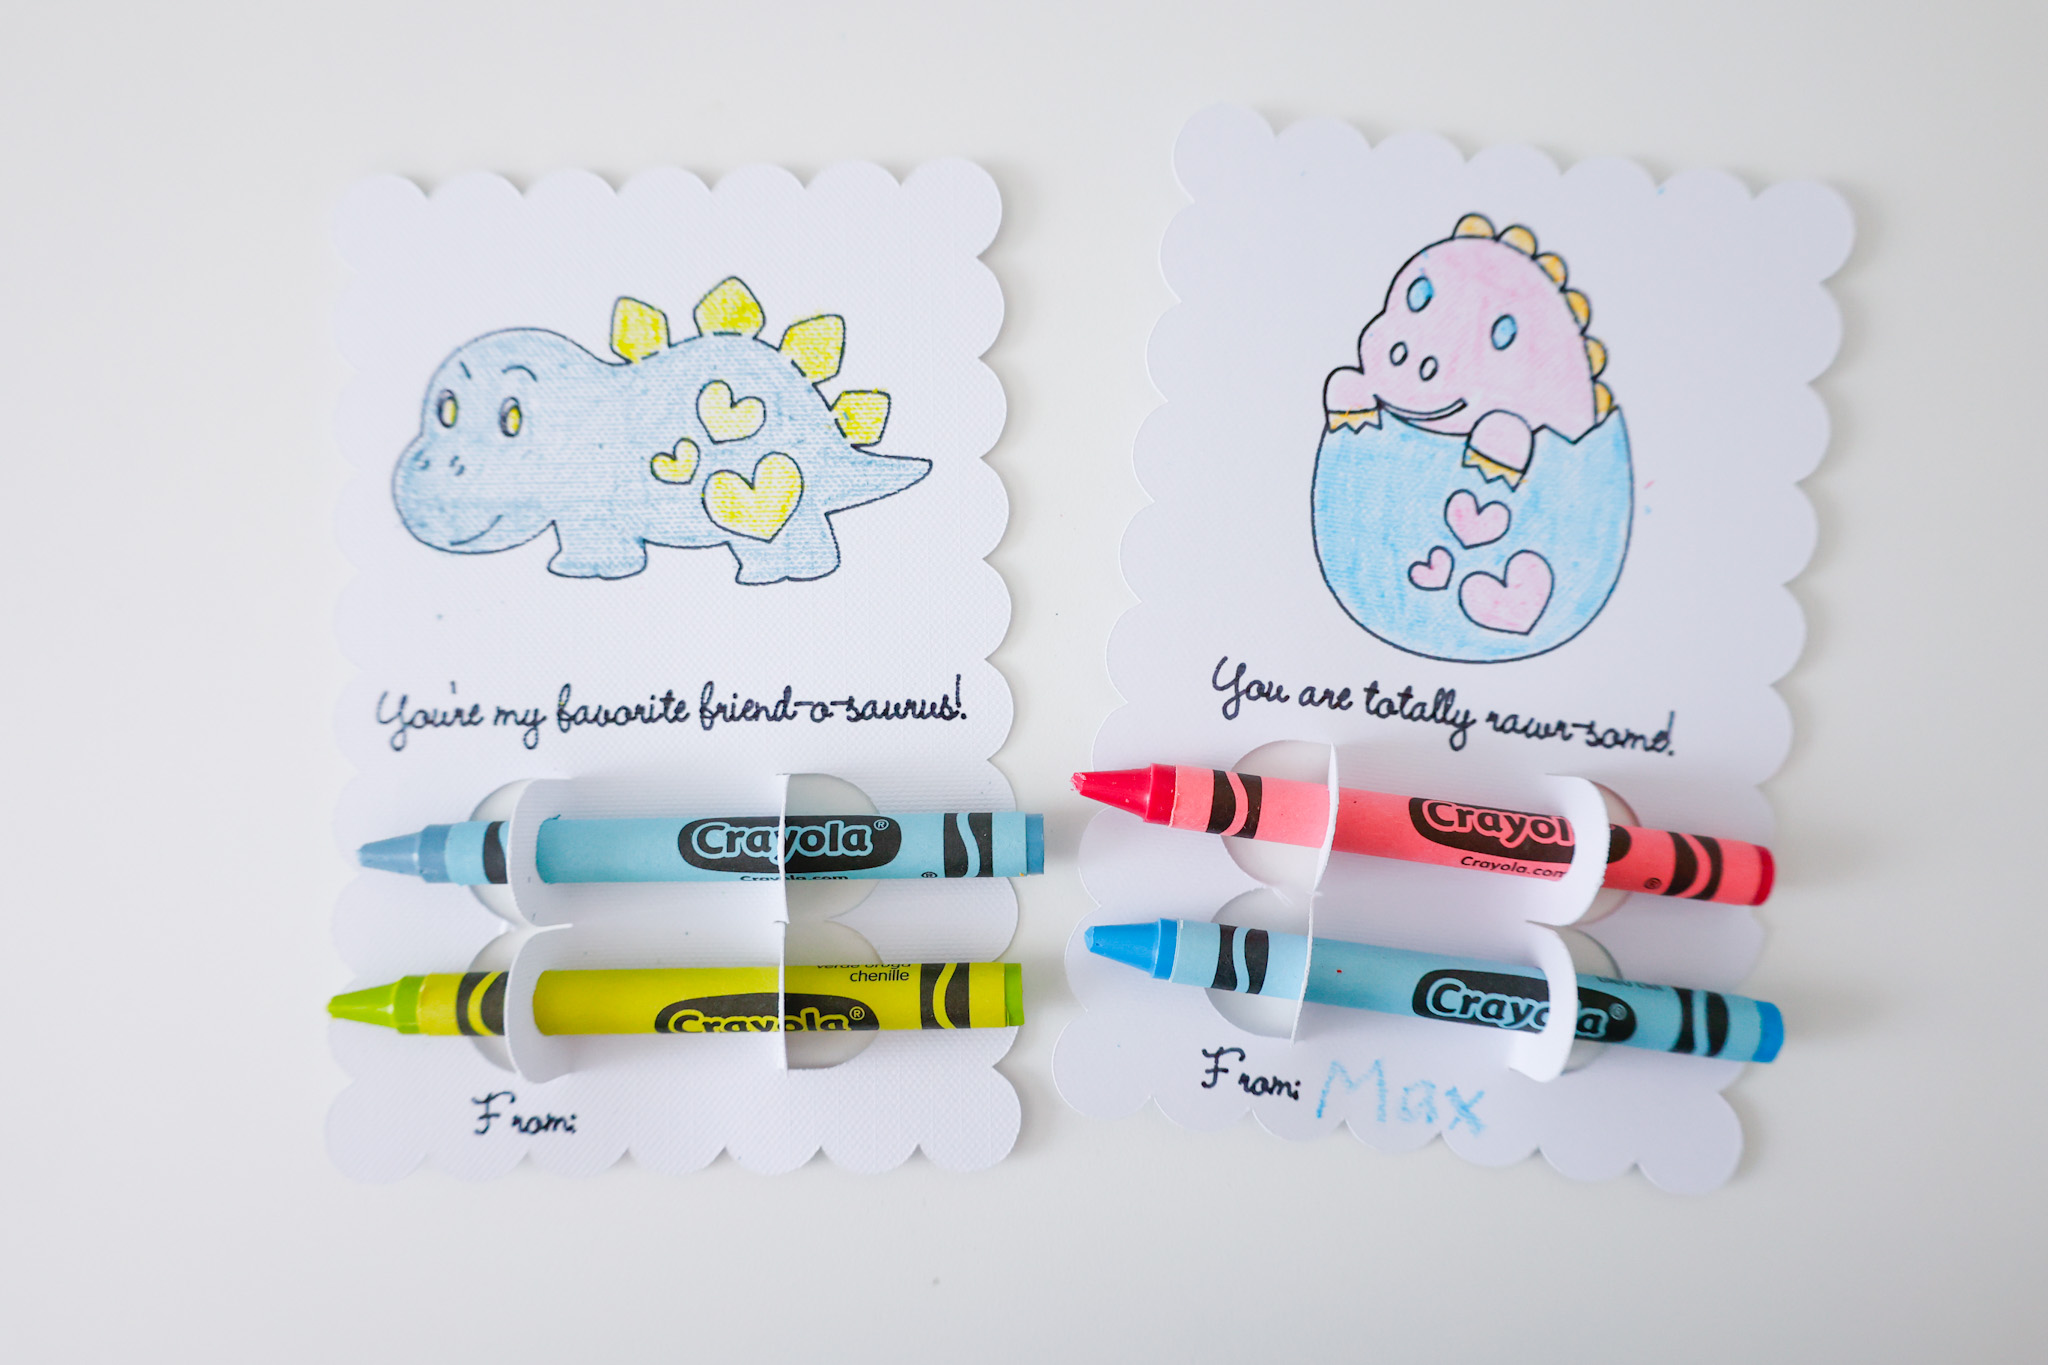
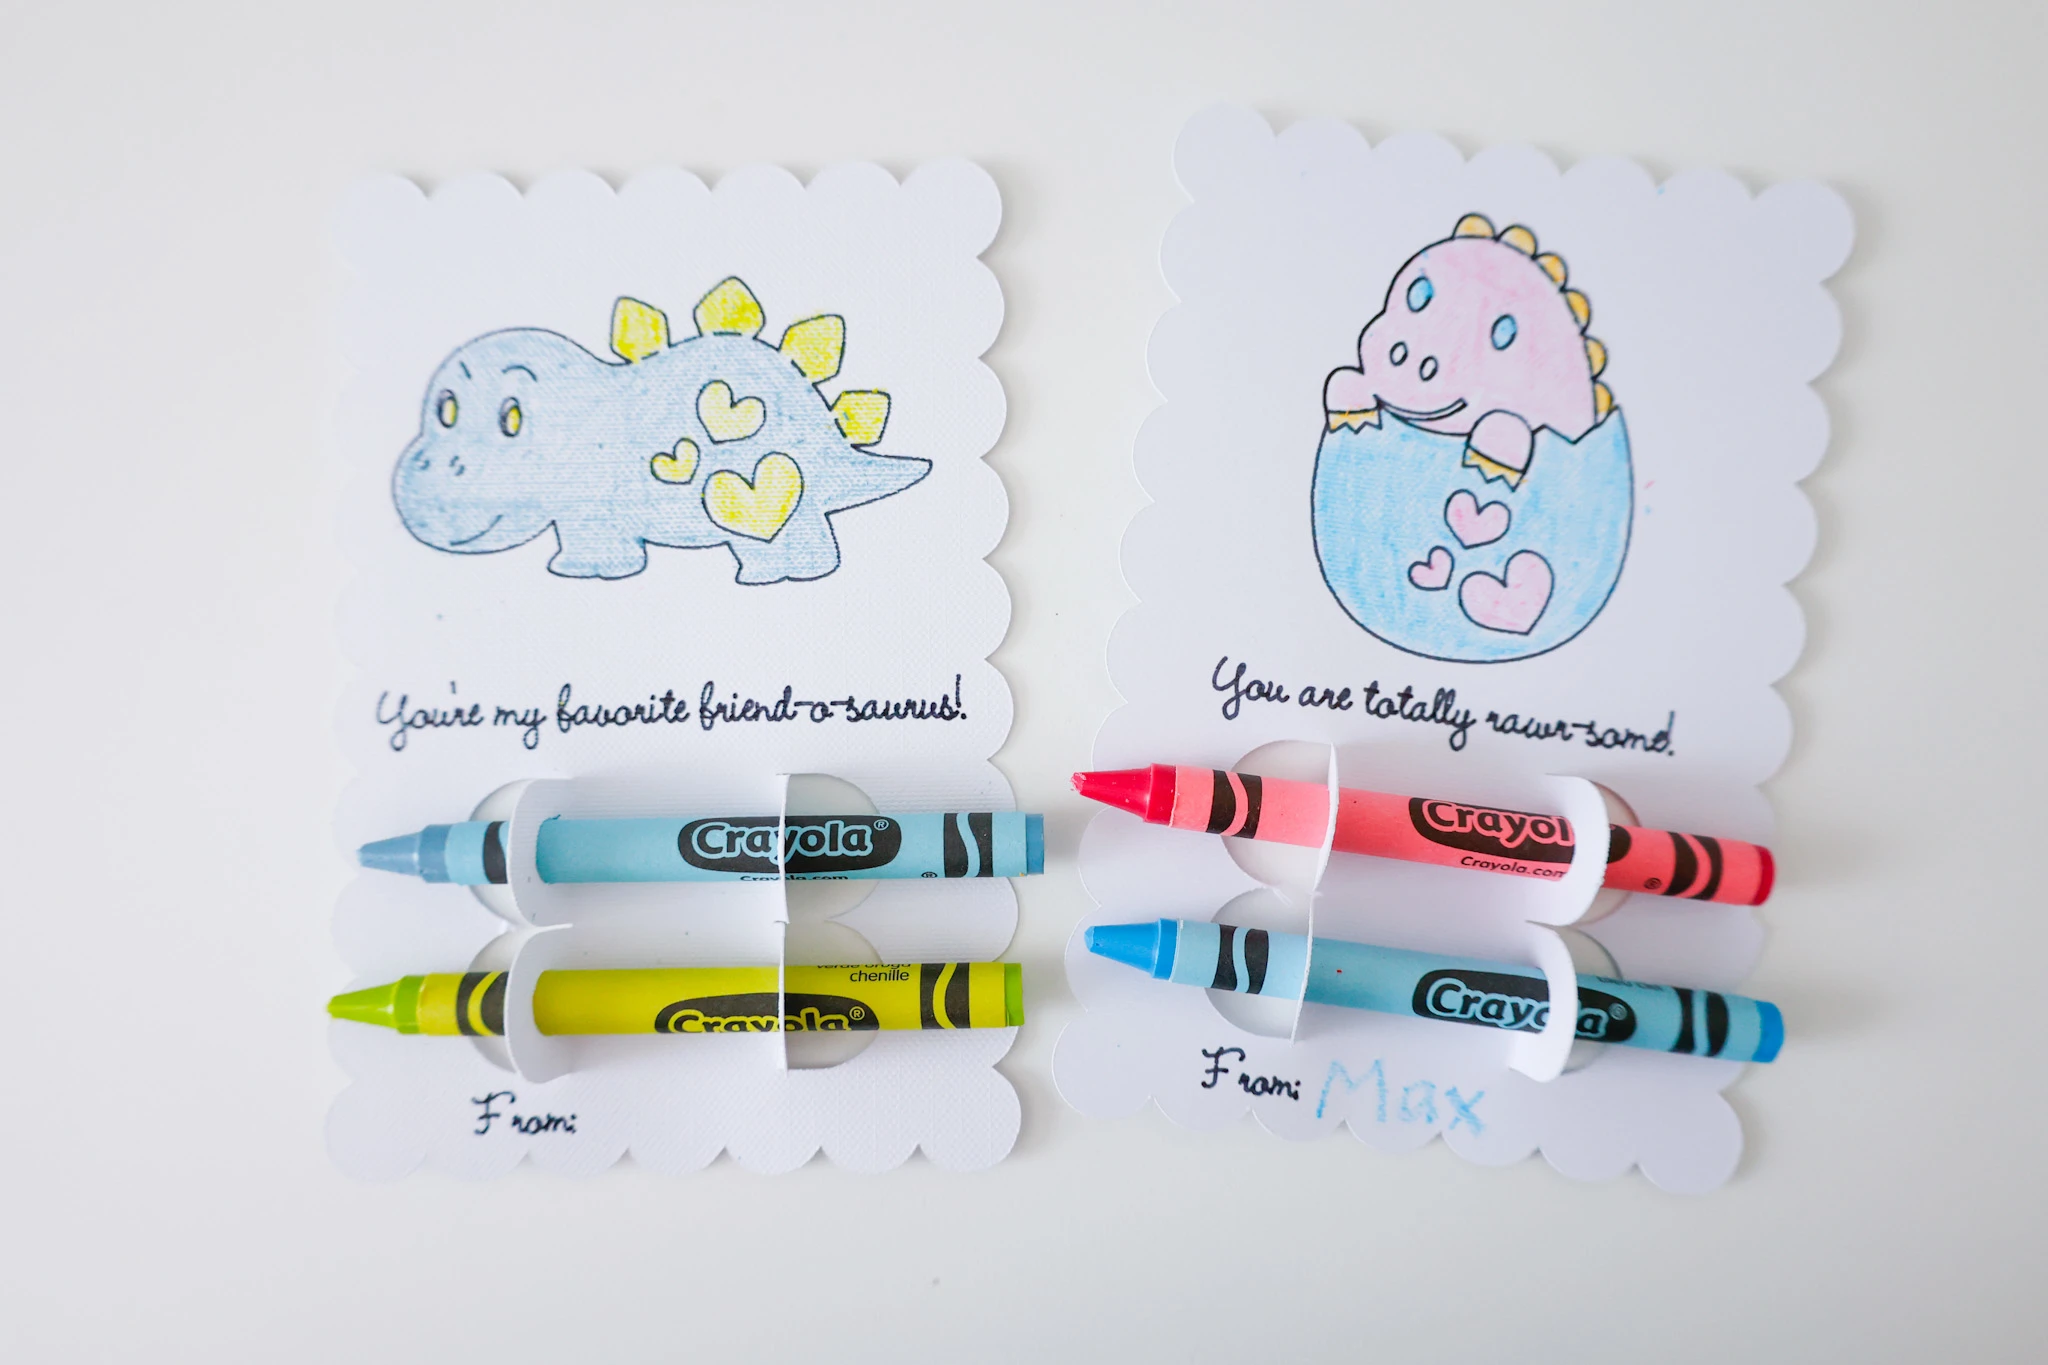
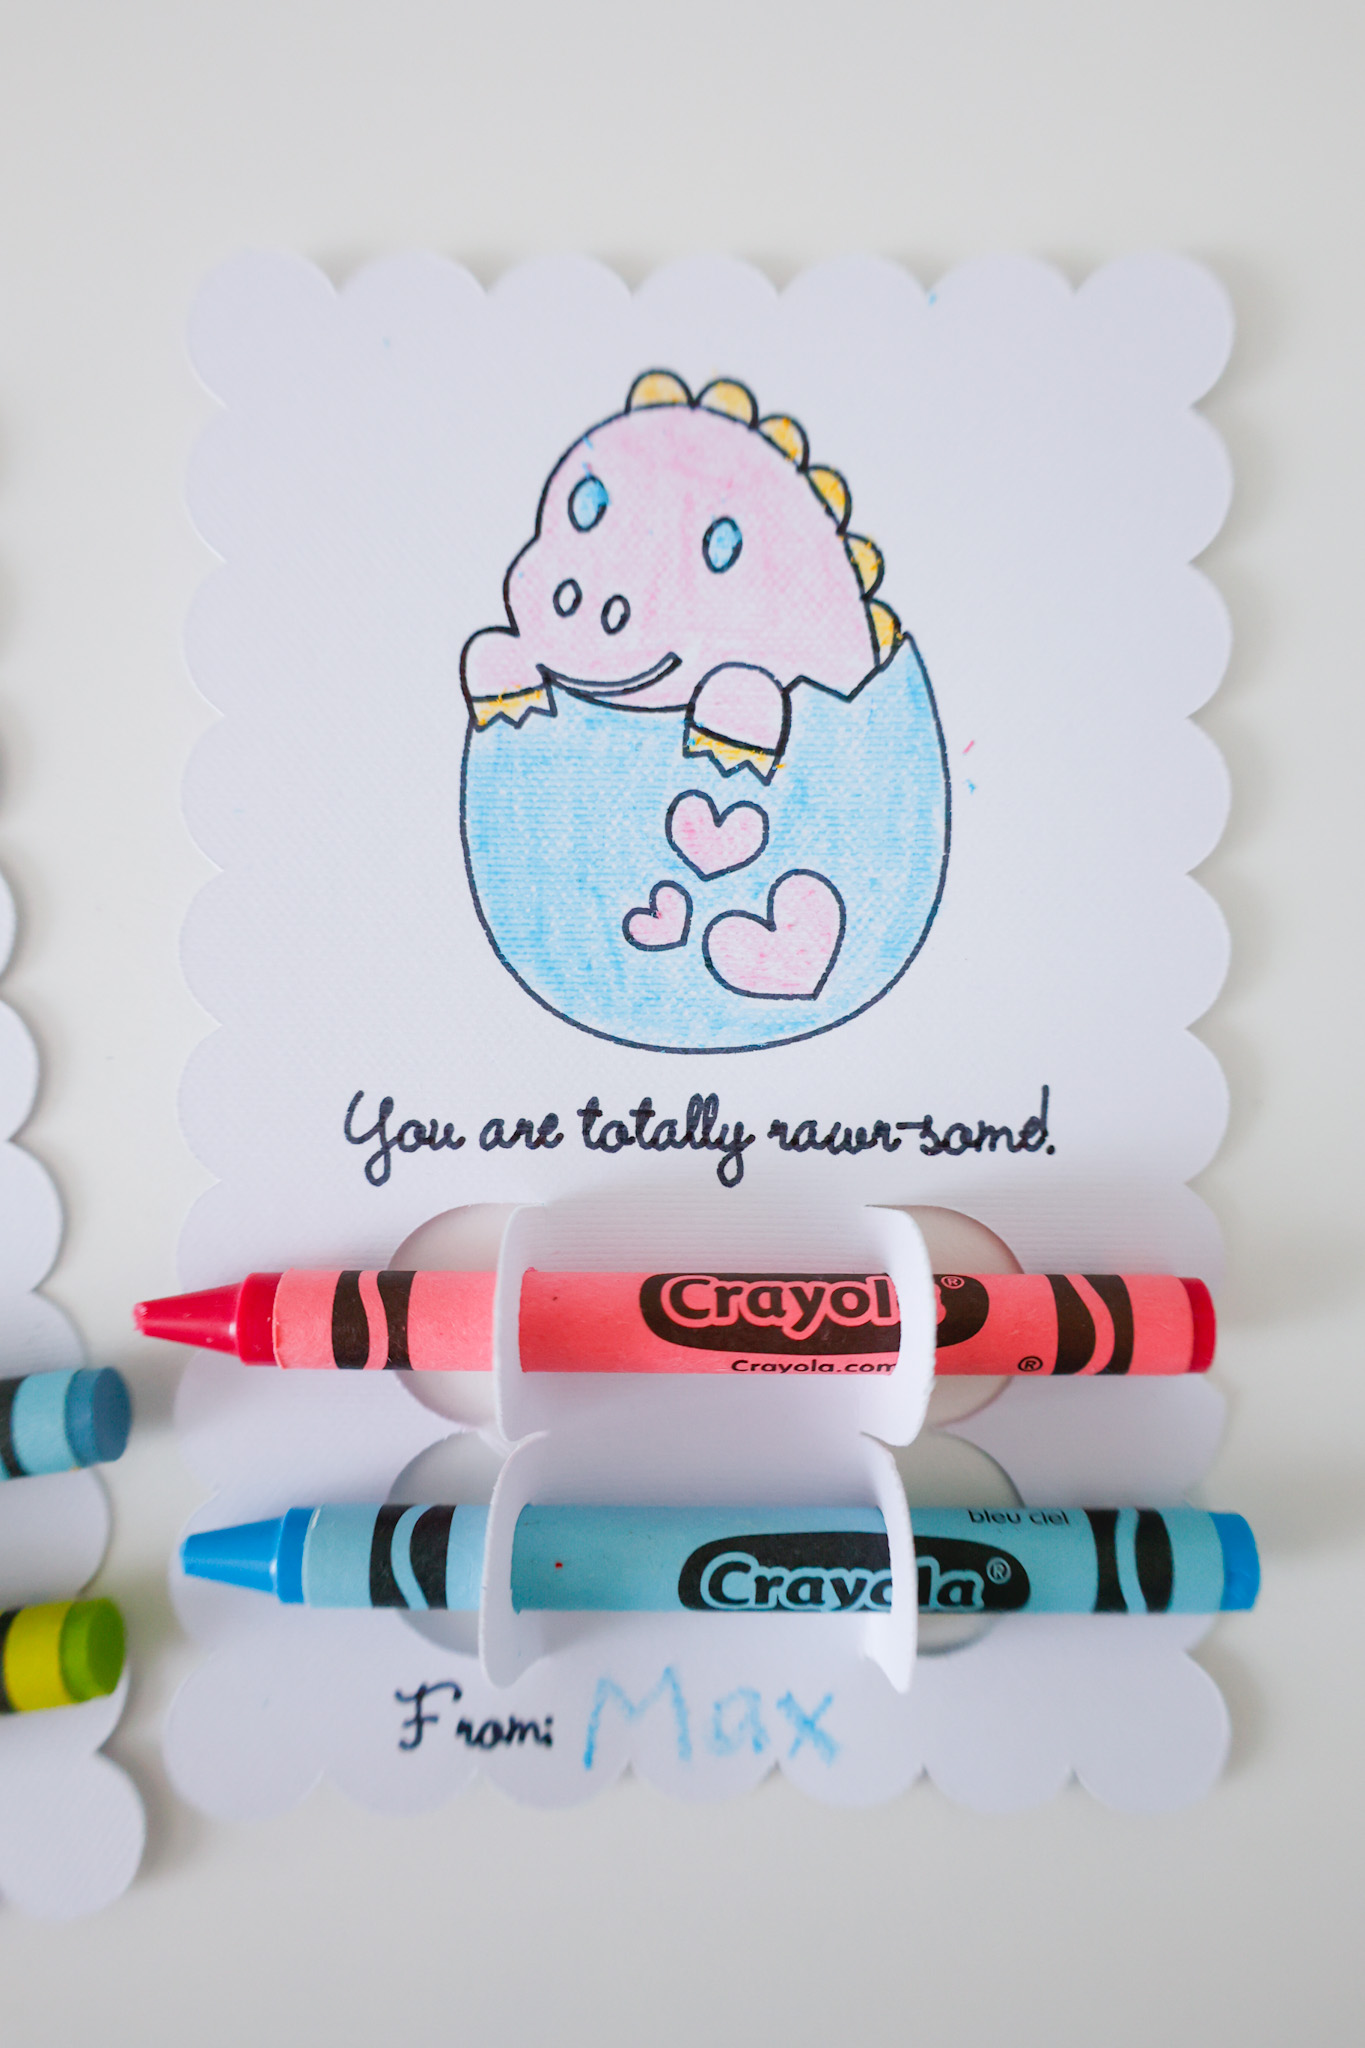


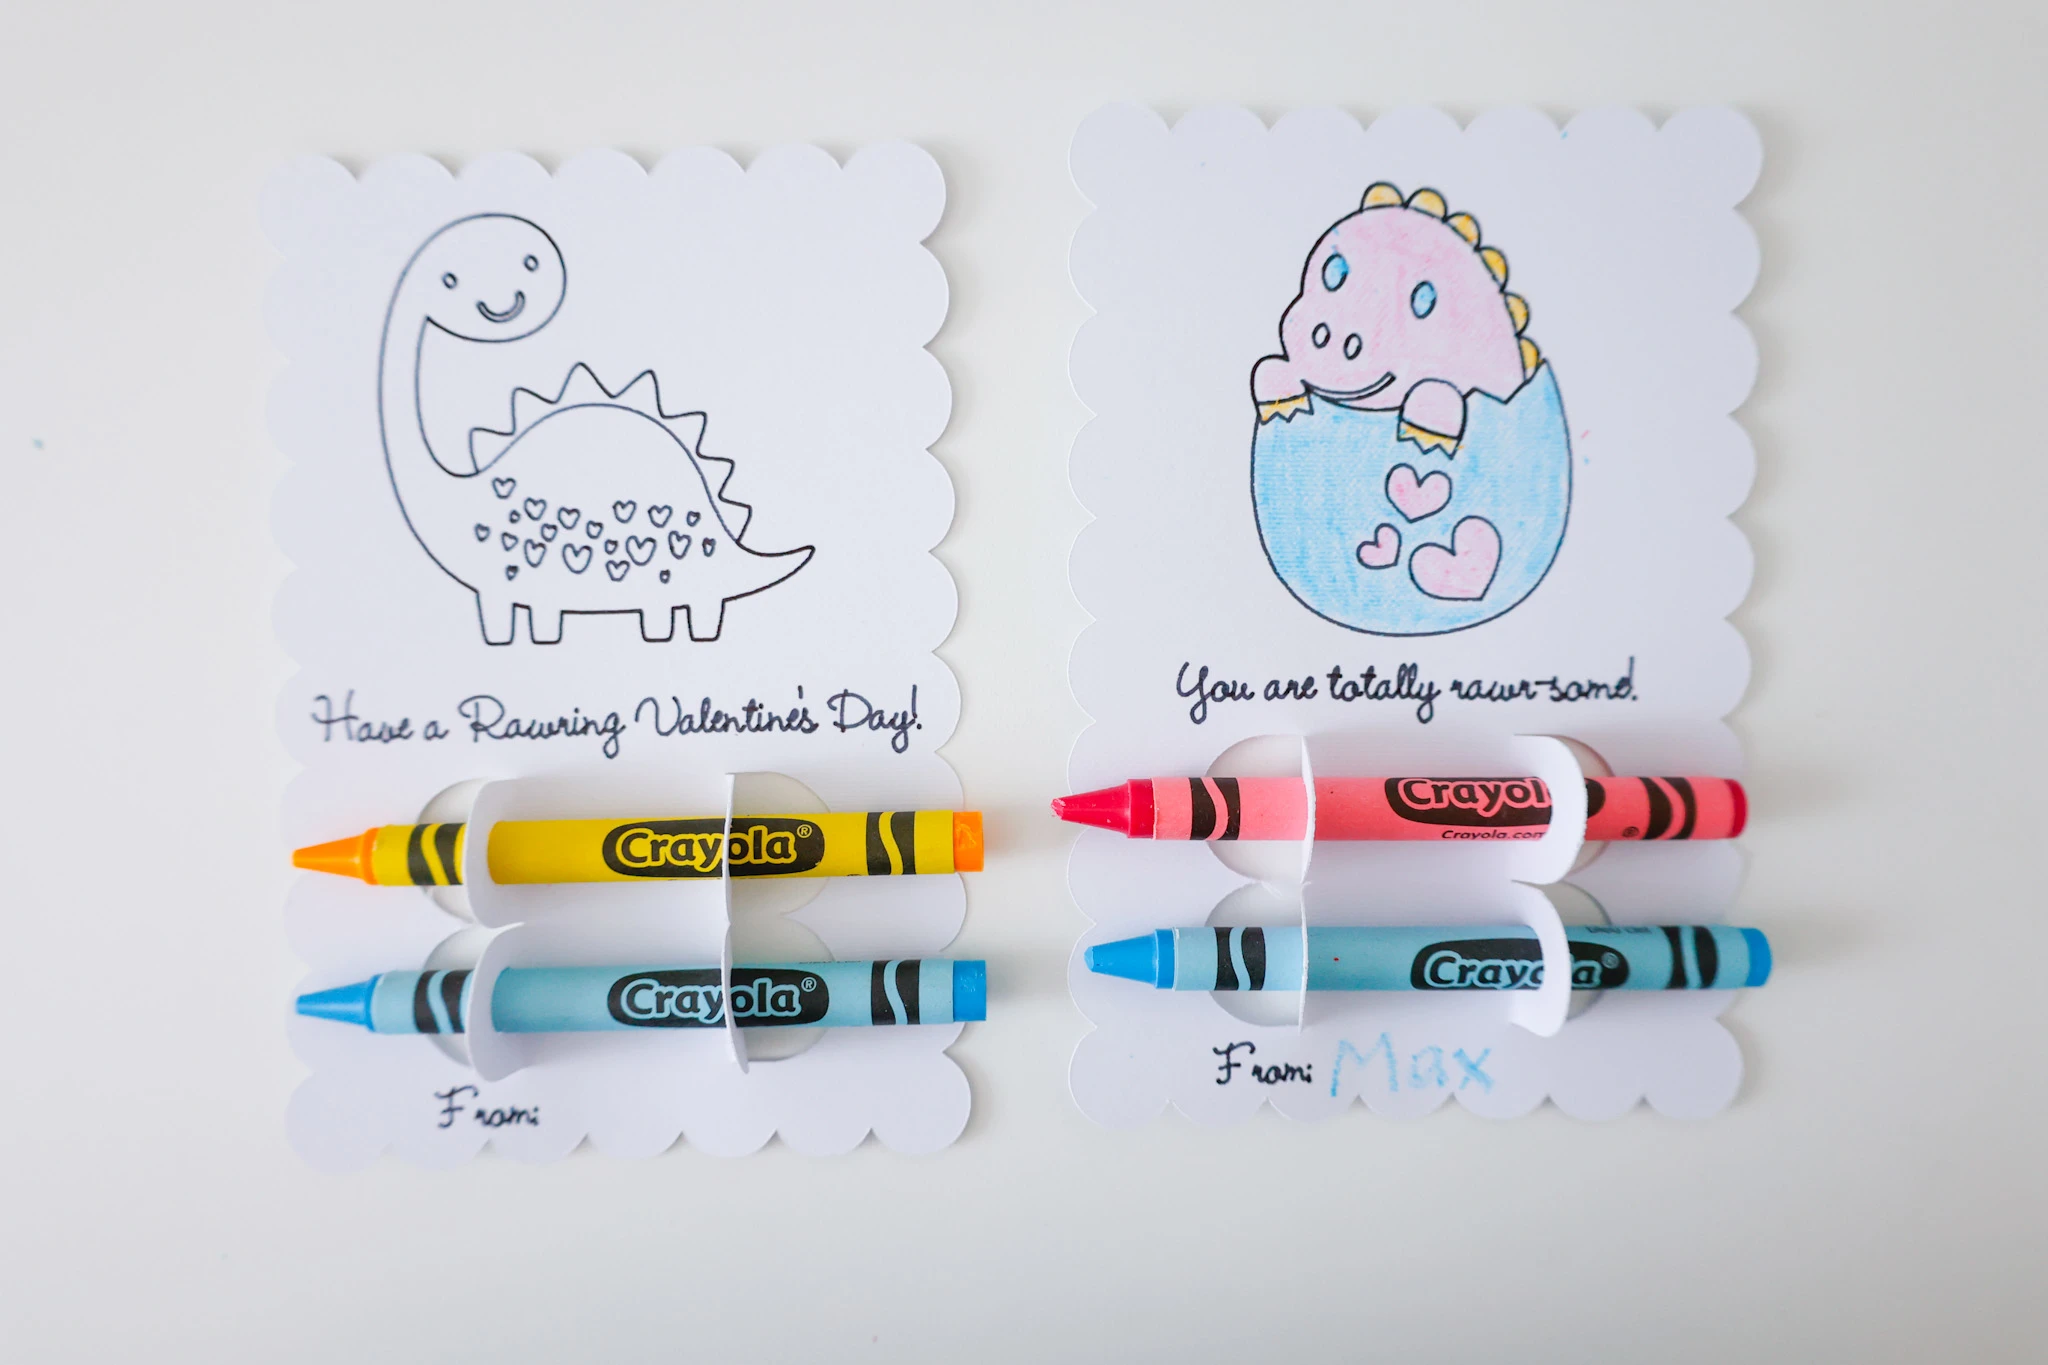
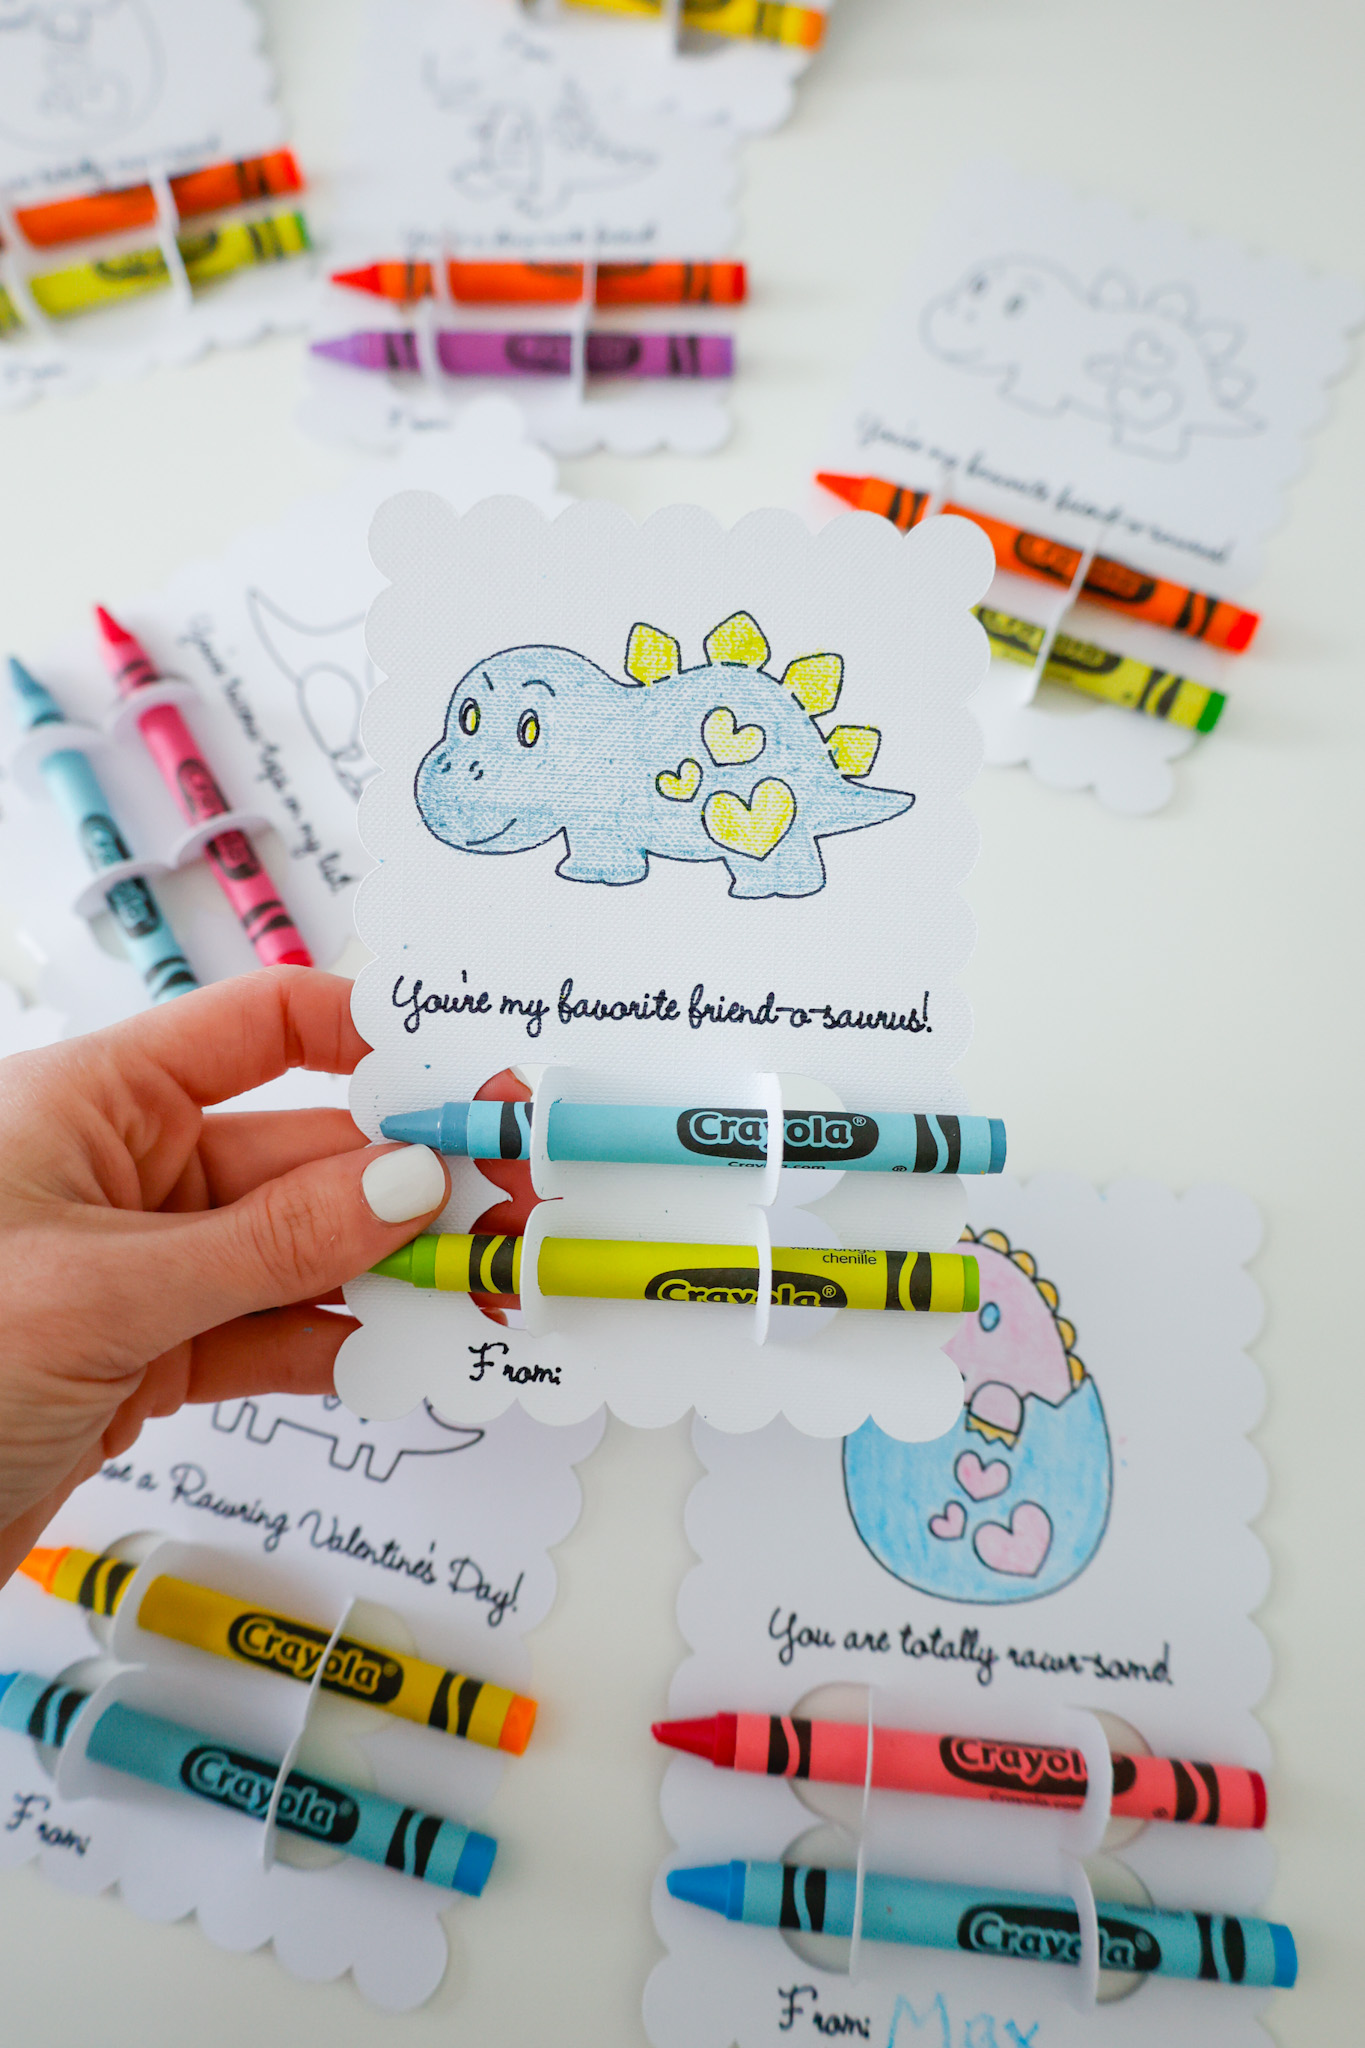
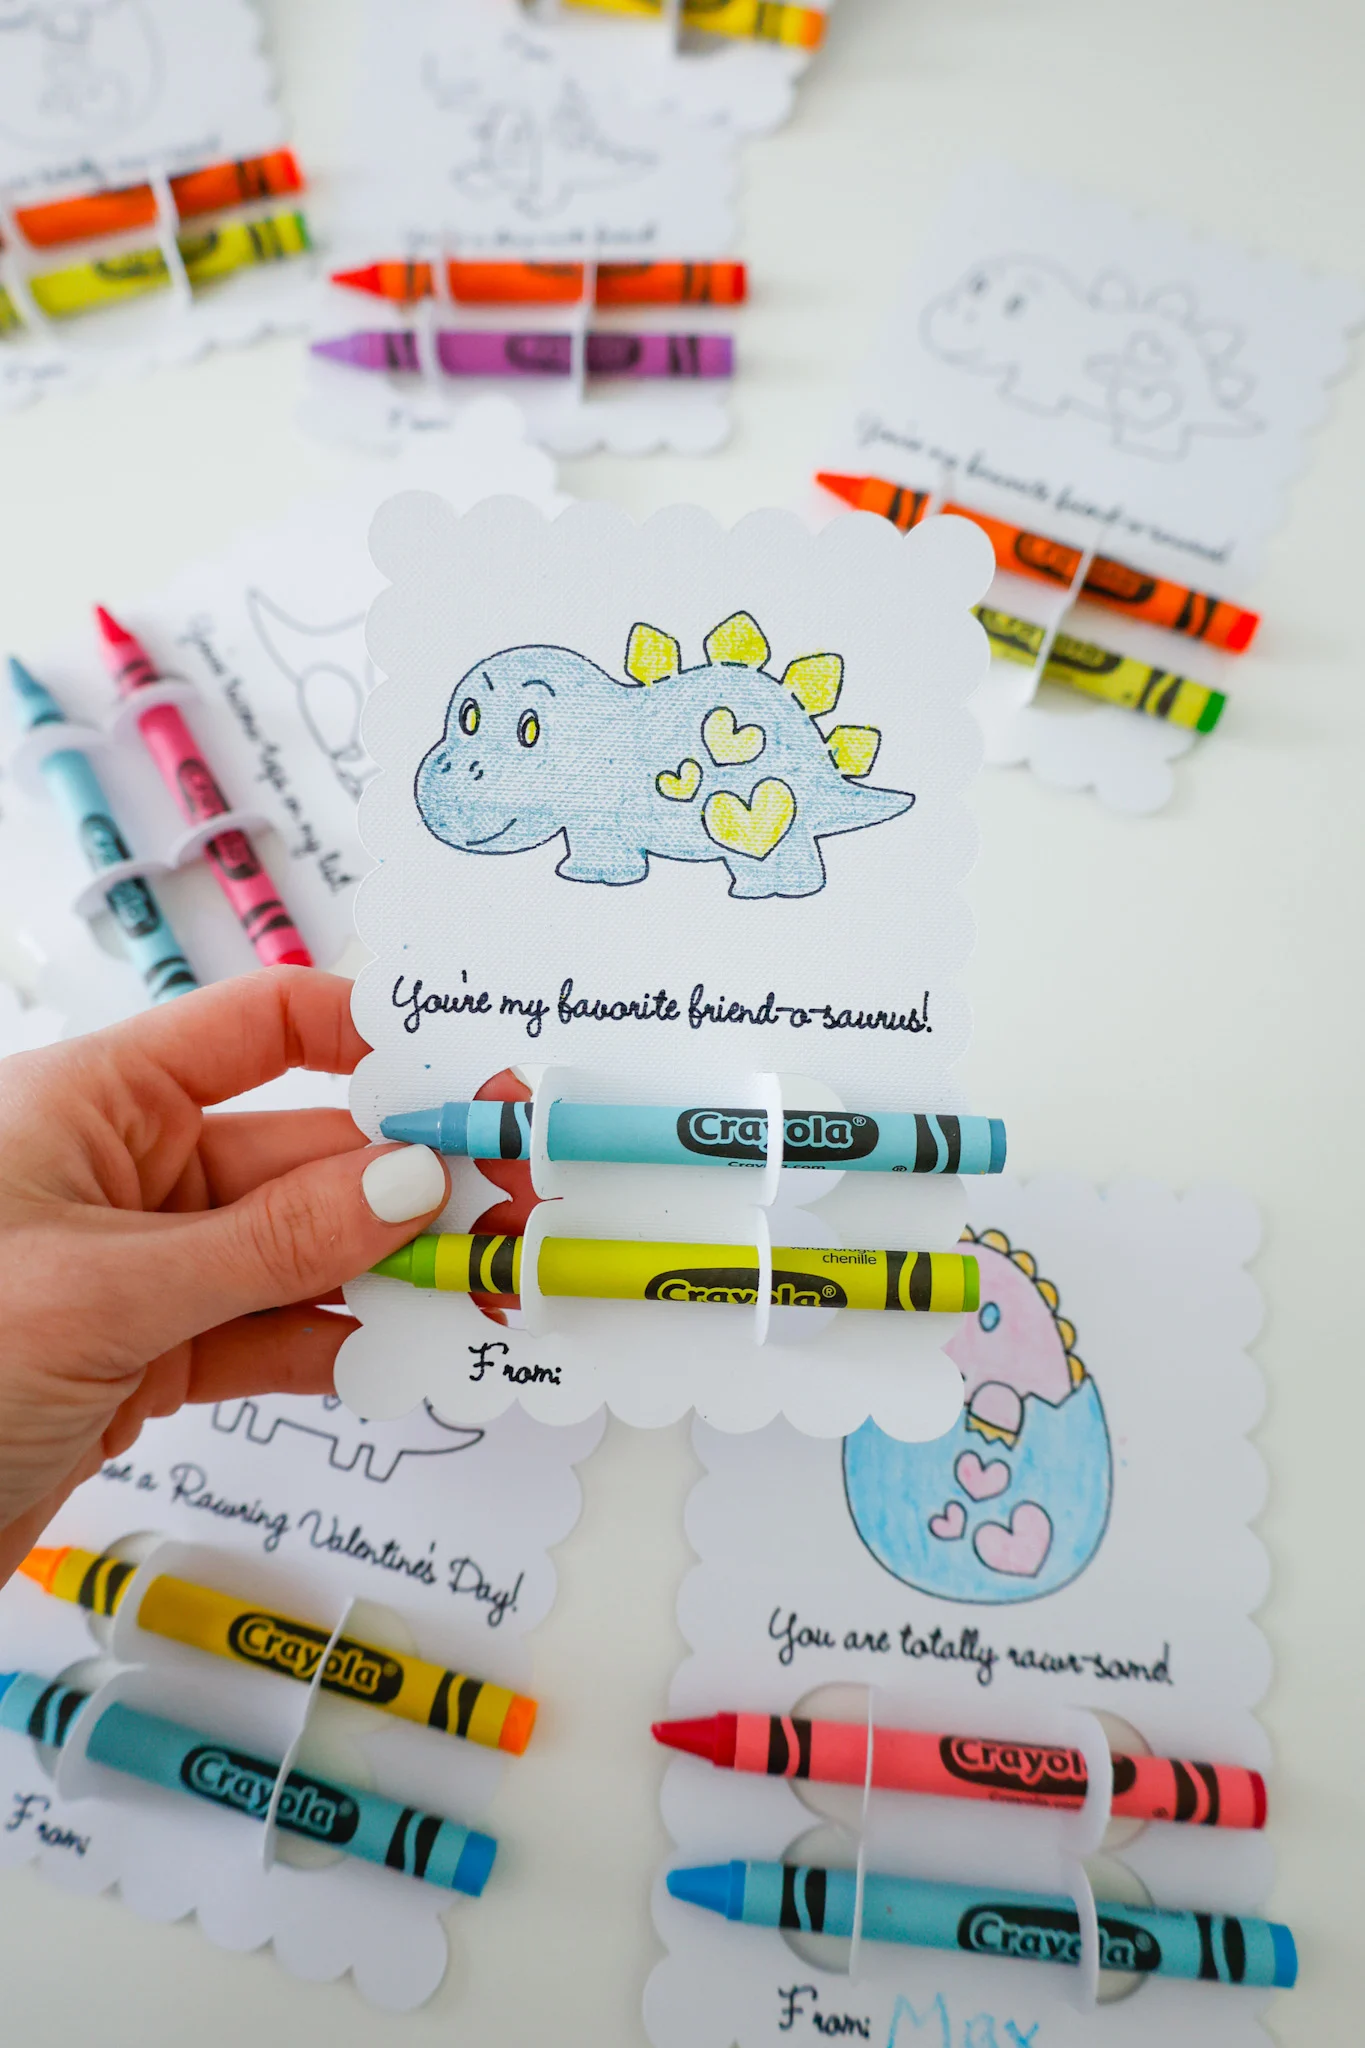


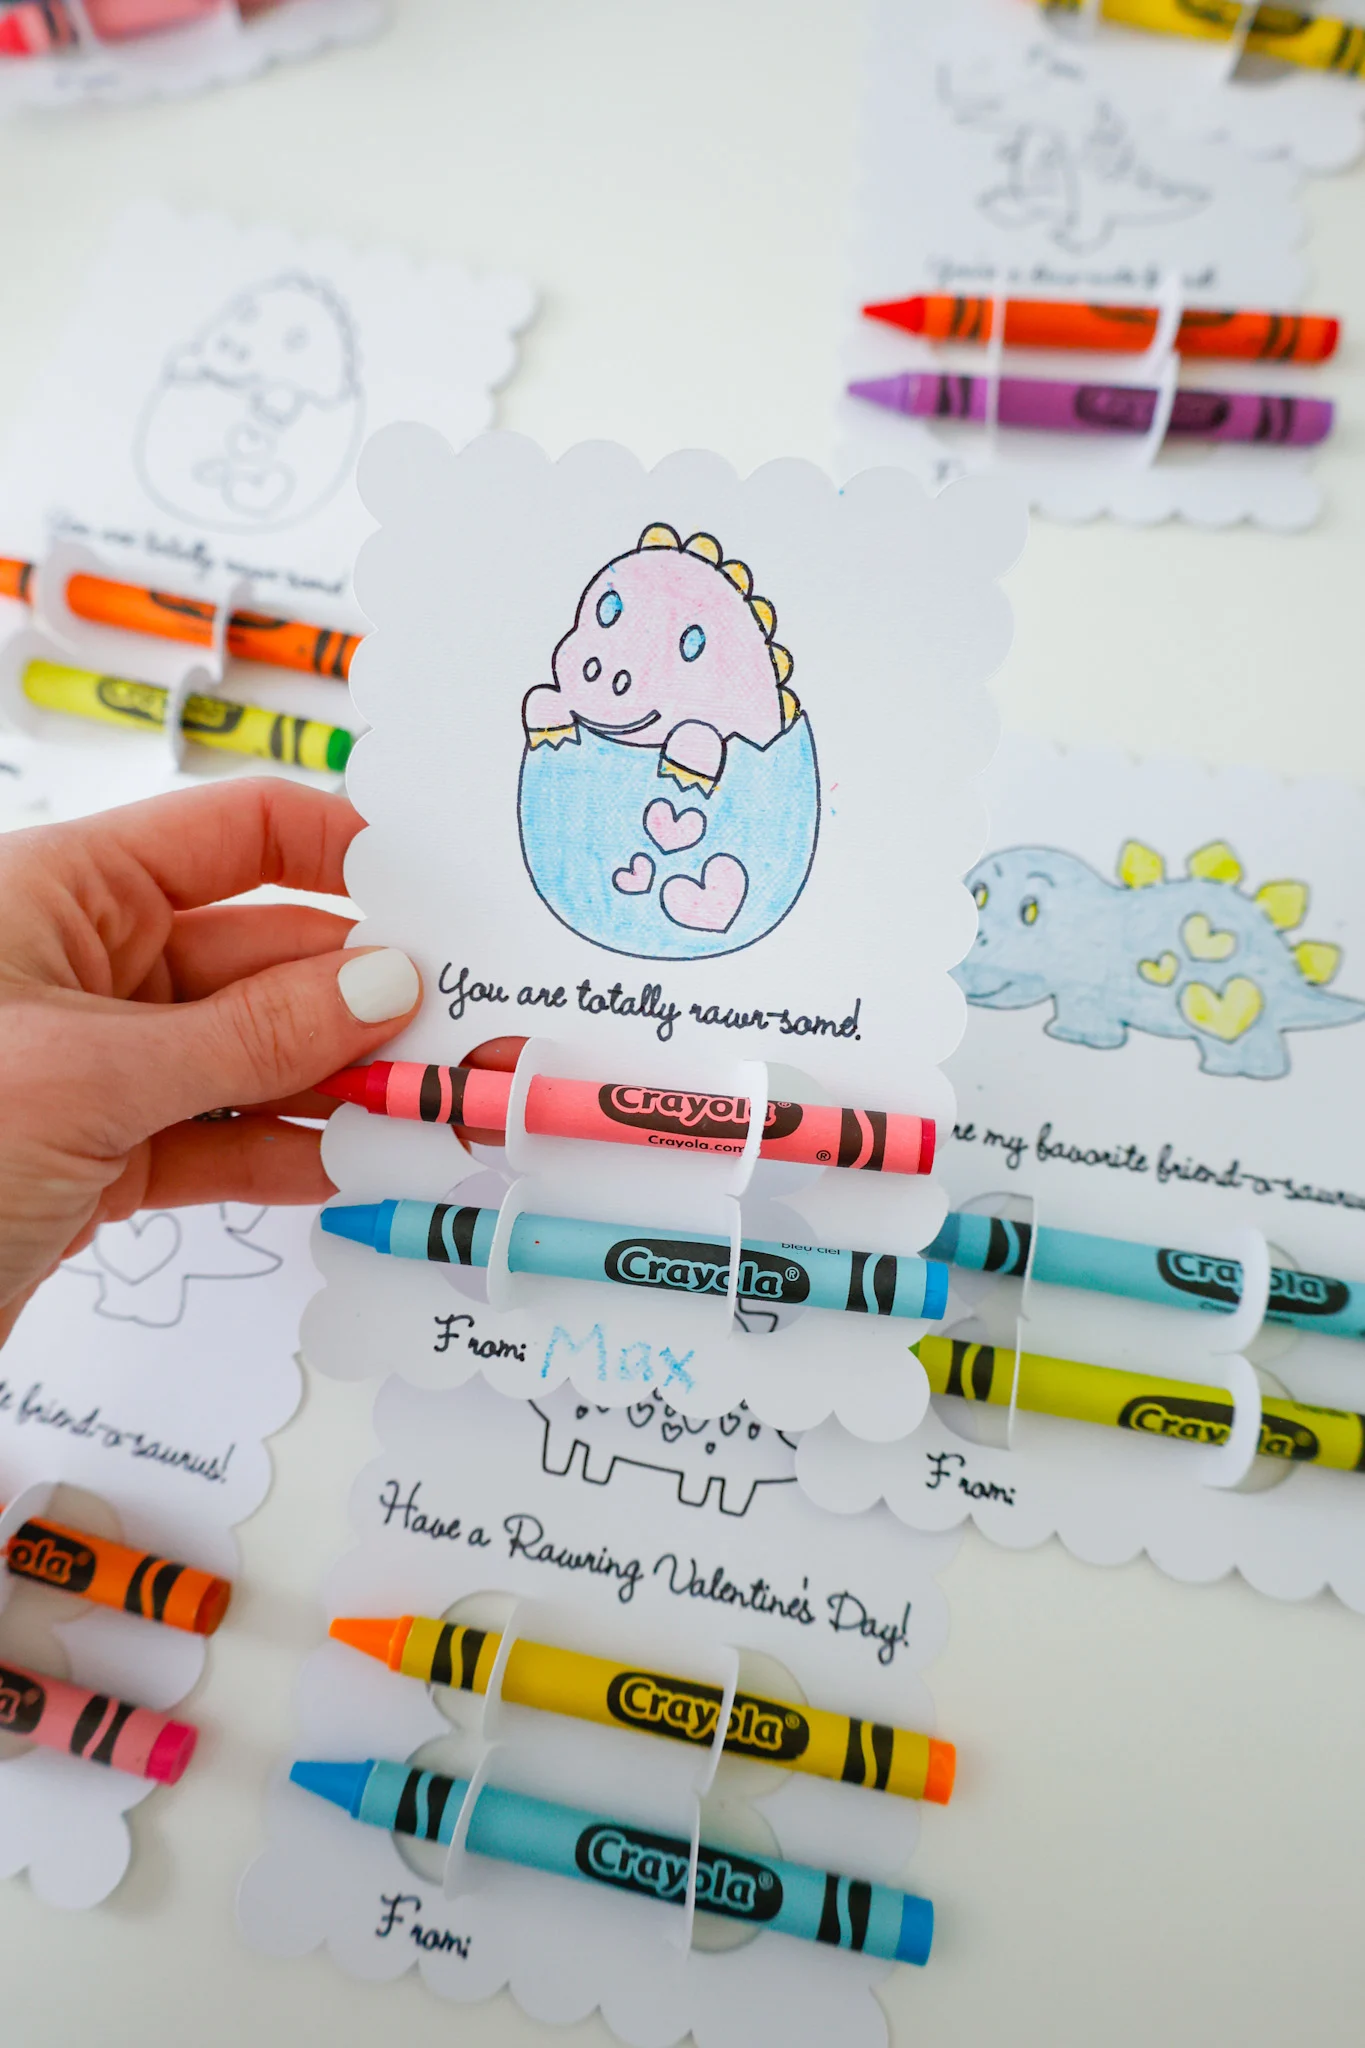

And that’s it! Look how nice they turned out – I can’t wait for the boys to hand them out in class this February! I hope you all enjoyed this tutorial!
Be sure to tag me on Instagram (@slayathomemother) so I can see your creations.
*Post originally published January 2020, updated January 2023.