

Learn how to print a5 size on letter paper for booklets, planners, and more…
If you’ve just downloaded a copy of my Slay At Home Planner (or downloaded another printable A5 planner), you may be wondering how to properly print it out, this post is for you!
You can access my printable planner here.
*This post contains affiliate links, however, all opinions are my own, as always.
How To Print A5 Size On Letter Paper
Adobe Acrobat Paper Settings
To print your A5 planner pages on letter-size paper, first open Adobe Acrobat Reader (this program is free and can be downloaded online).
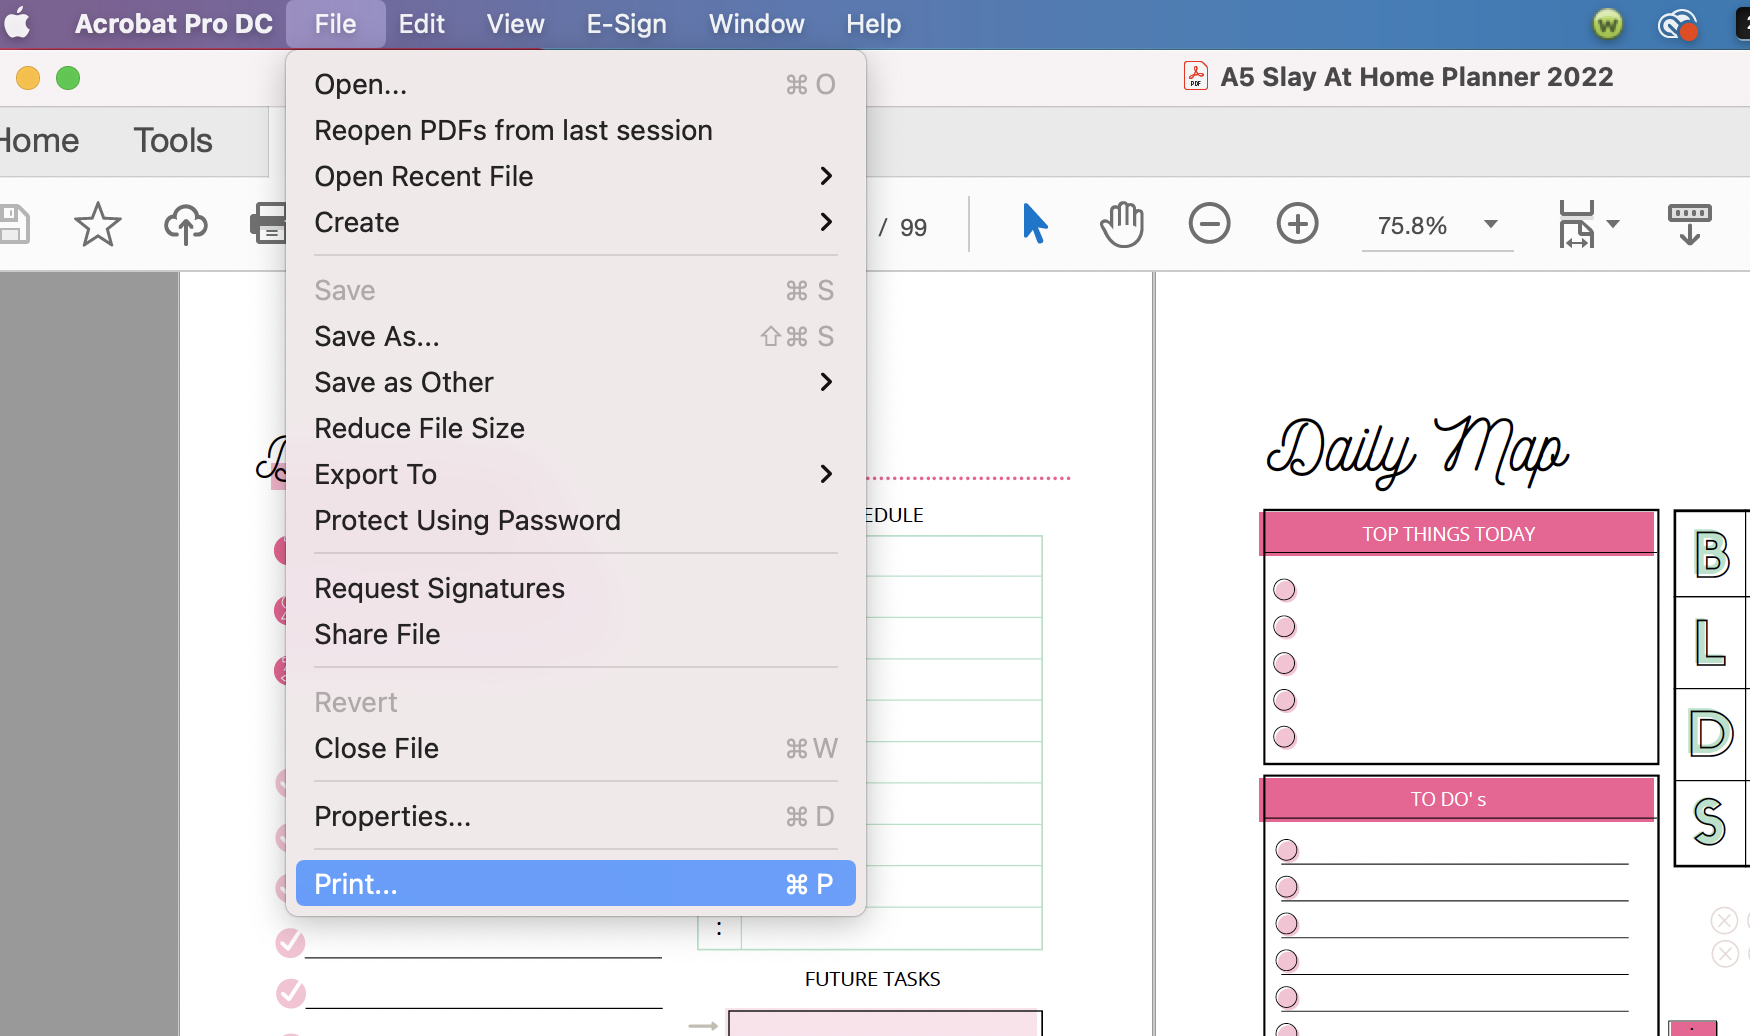
Open your Slay At Home A5 Planner file, and click Command + P (Control + P on Windows), or navigate to the print option by clicking File on the top toolbar.
See the screenshot below to see how to get to the Print pop-up…


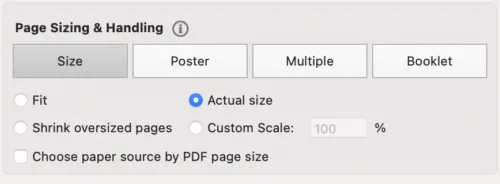
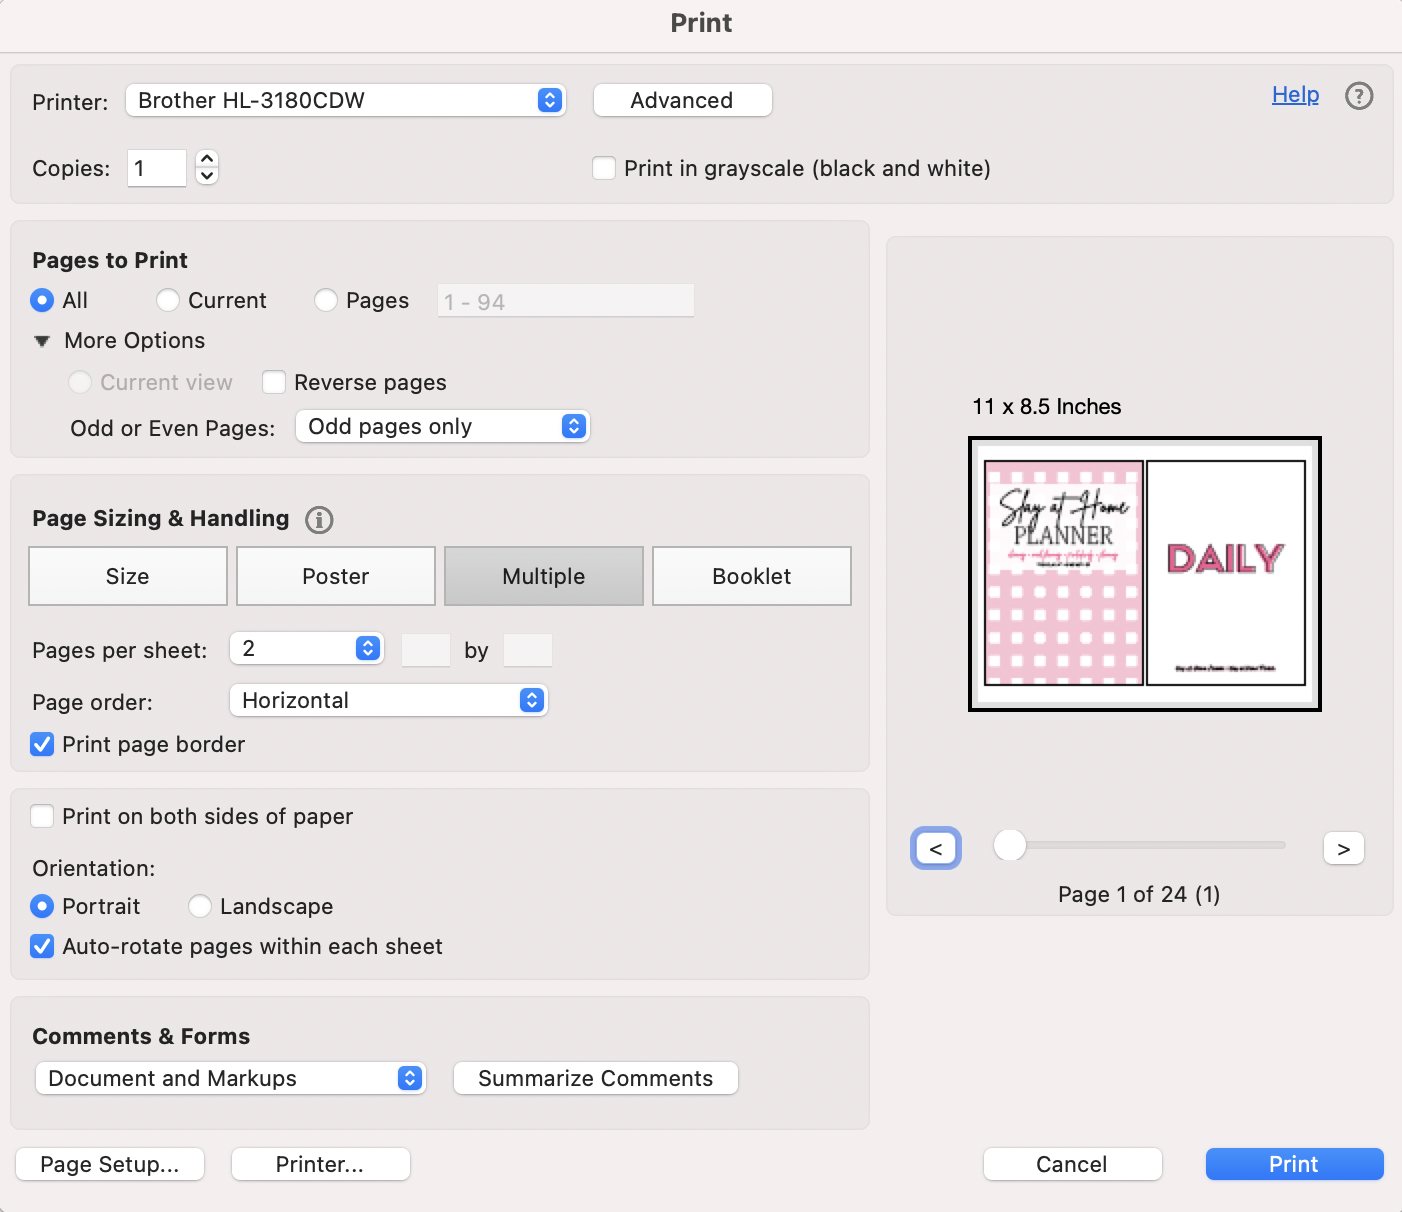
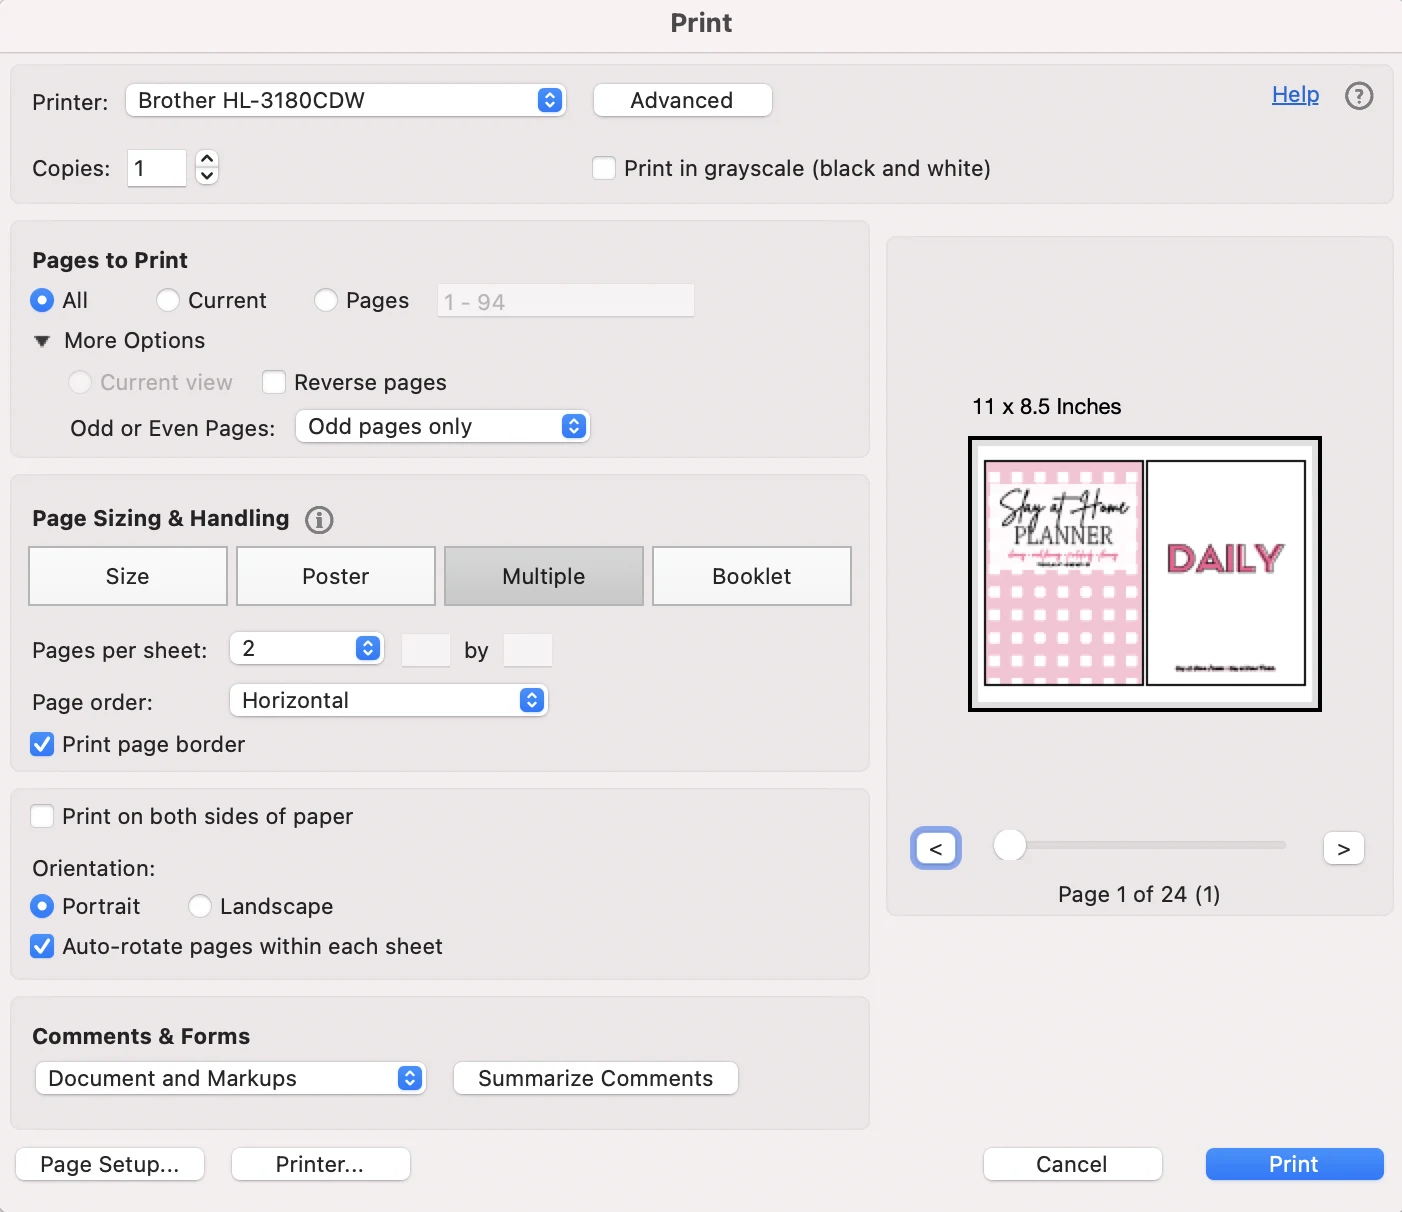
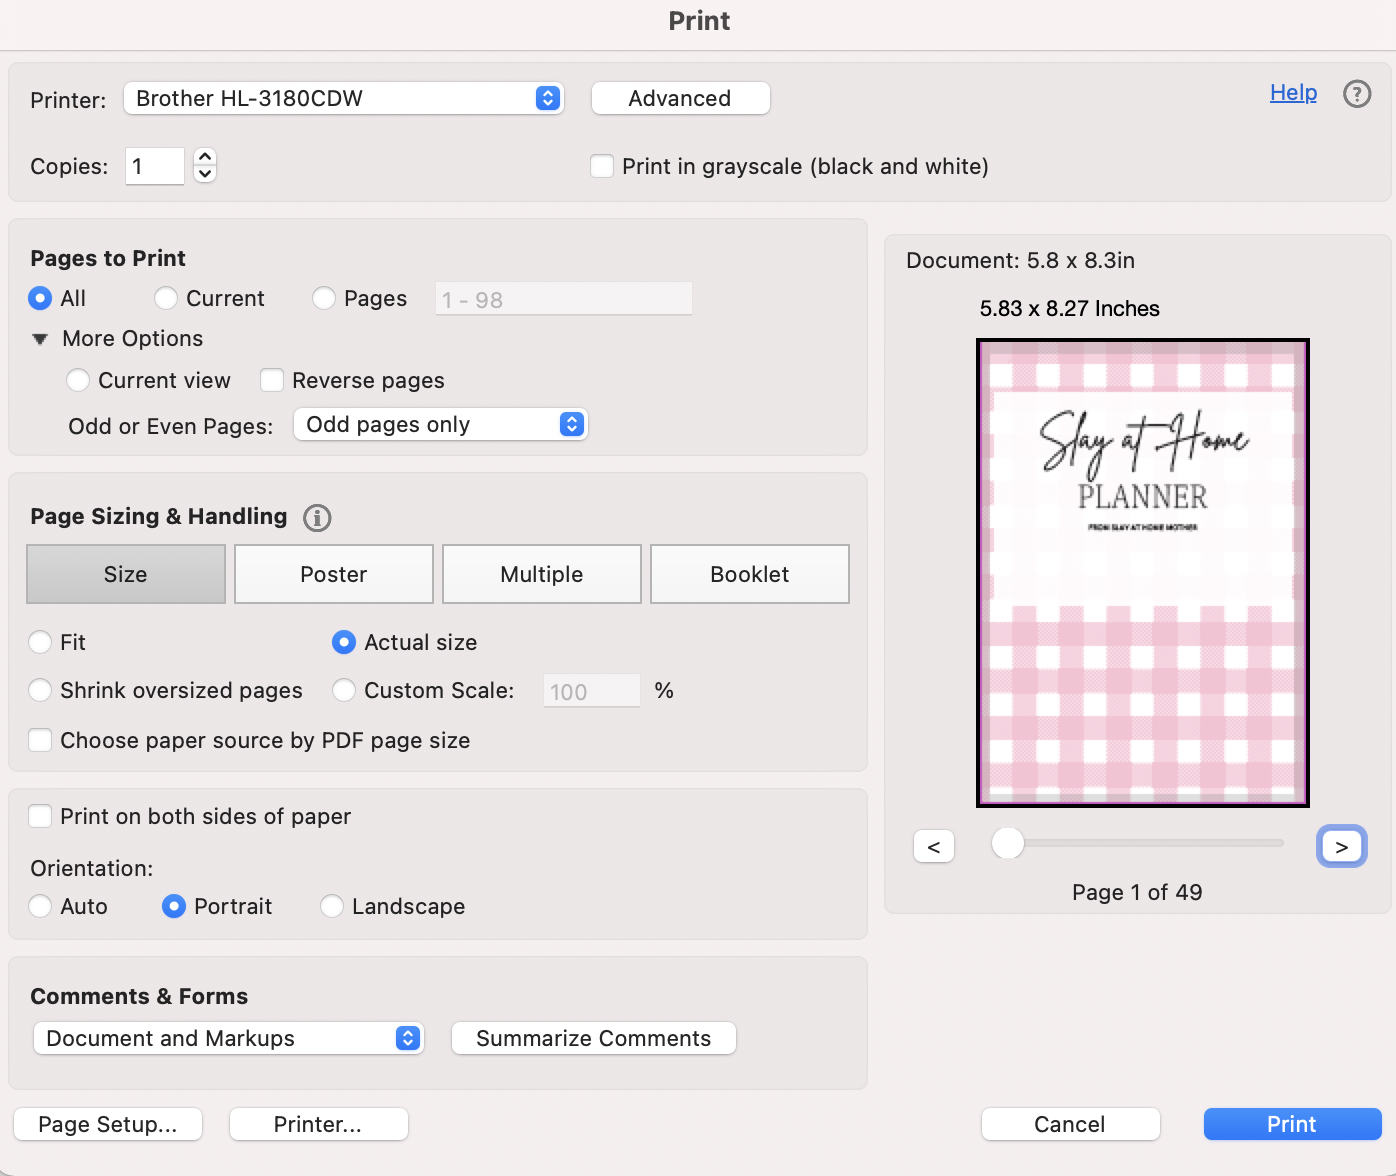
Next, within the Print screen pop-up, click on Size under Paper Sizing & Handling.
Click on Actual Size.


After selecting your paper size, click on Multiple under Page Sizing & Handling.

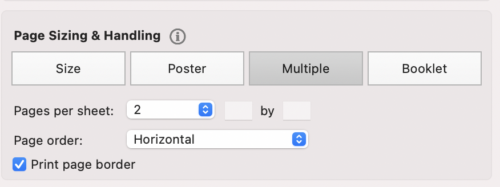
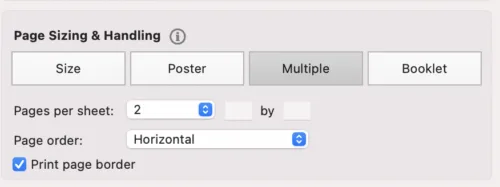
Next to Pages per sheet, click on the drop-down box and select 2.
We want two pages to print per sheet of letter paper to make the most of our paper – see screenshot below for selections.
To make the pages print properly, first you need to print the Odd pages.
Select Odd pages only under Pages To Print.
I always recommend printing the page border as well so you know where to cut your paper.

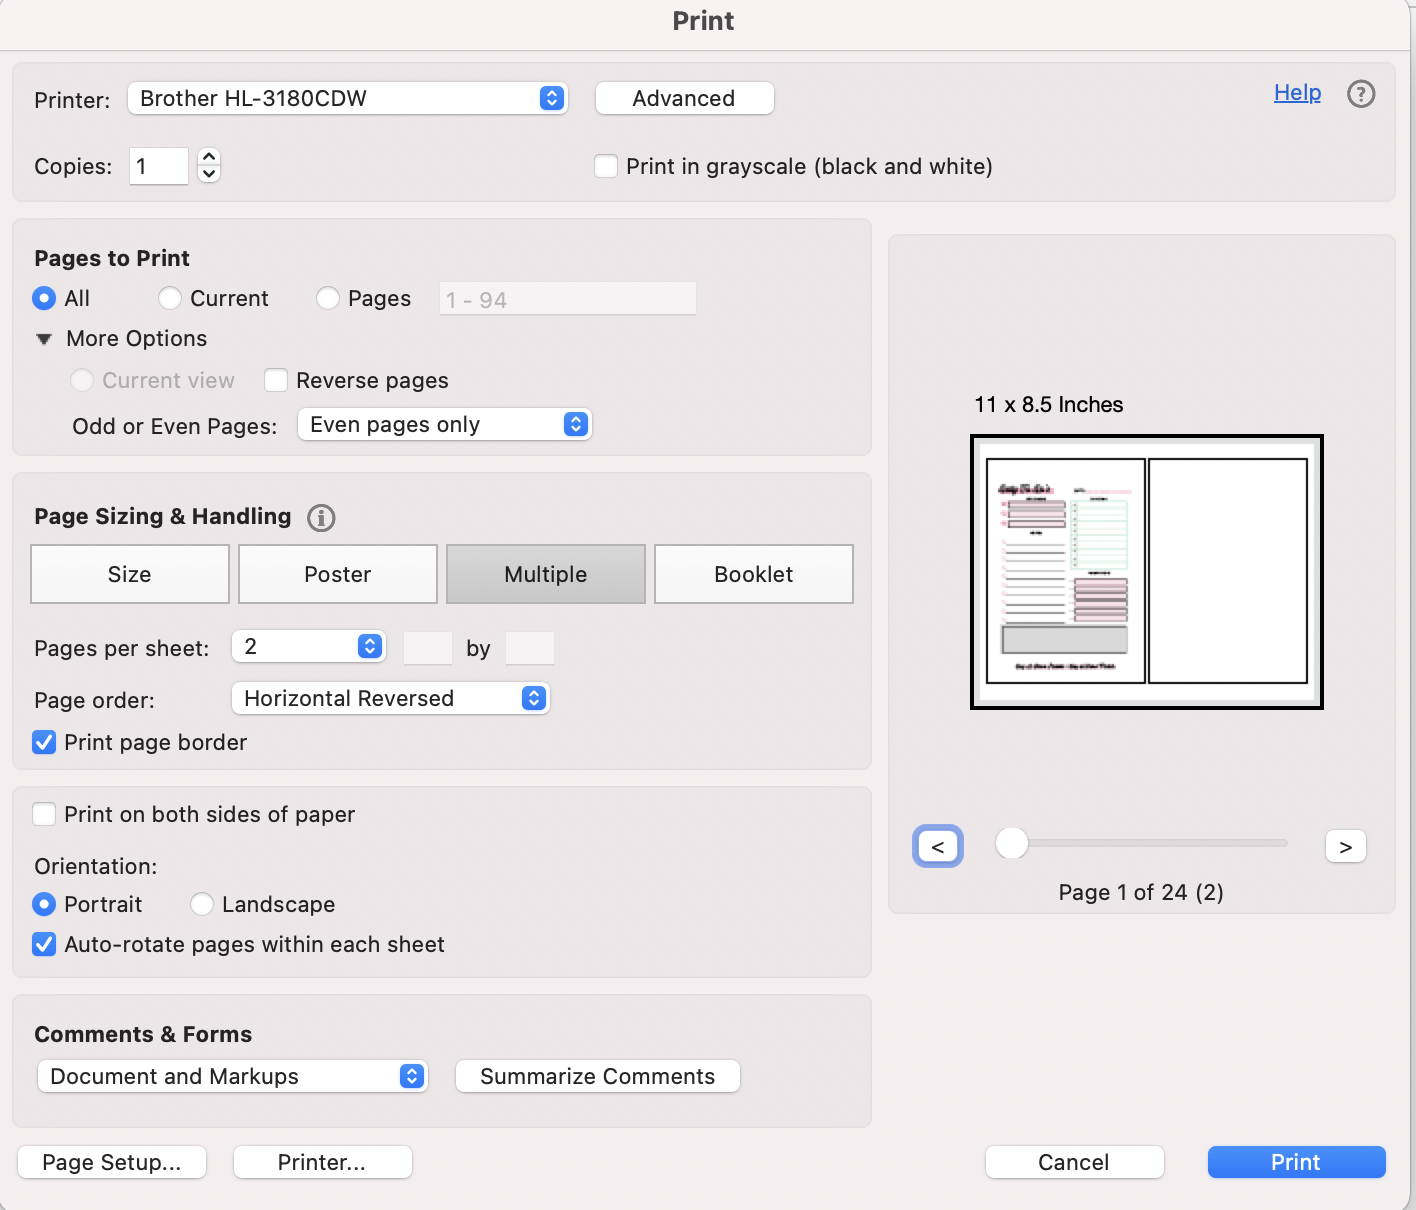
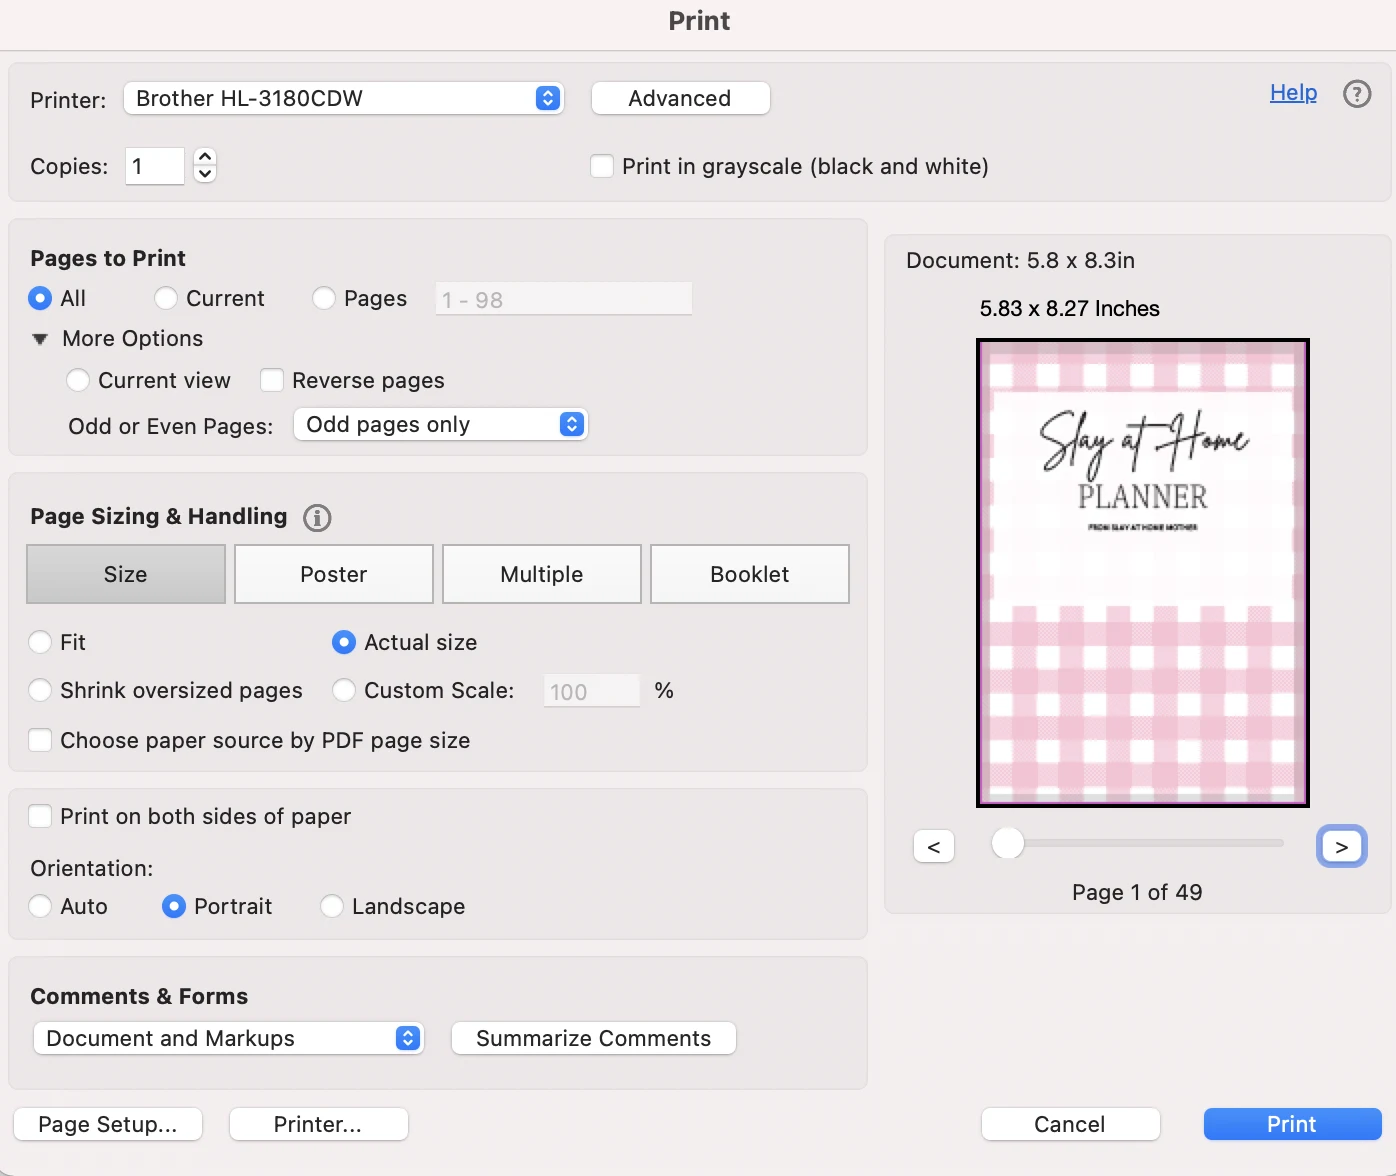
Next, we’ll be printing on the backside of these pages with the Even pages.
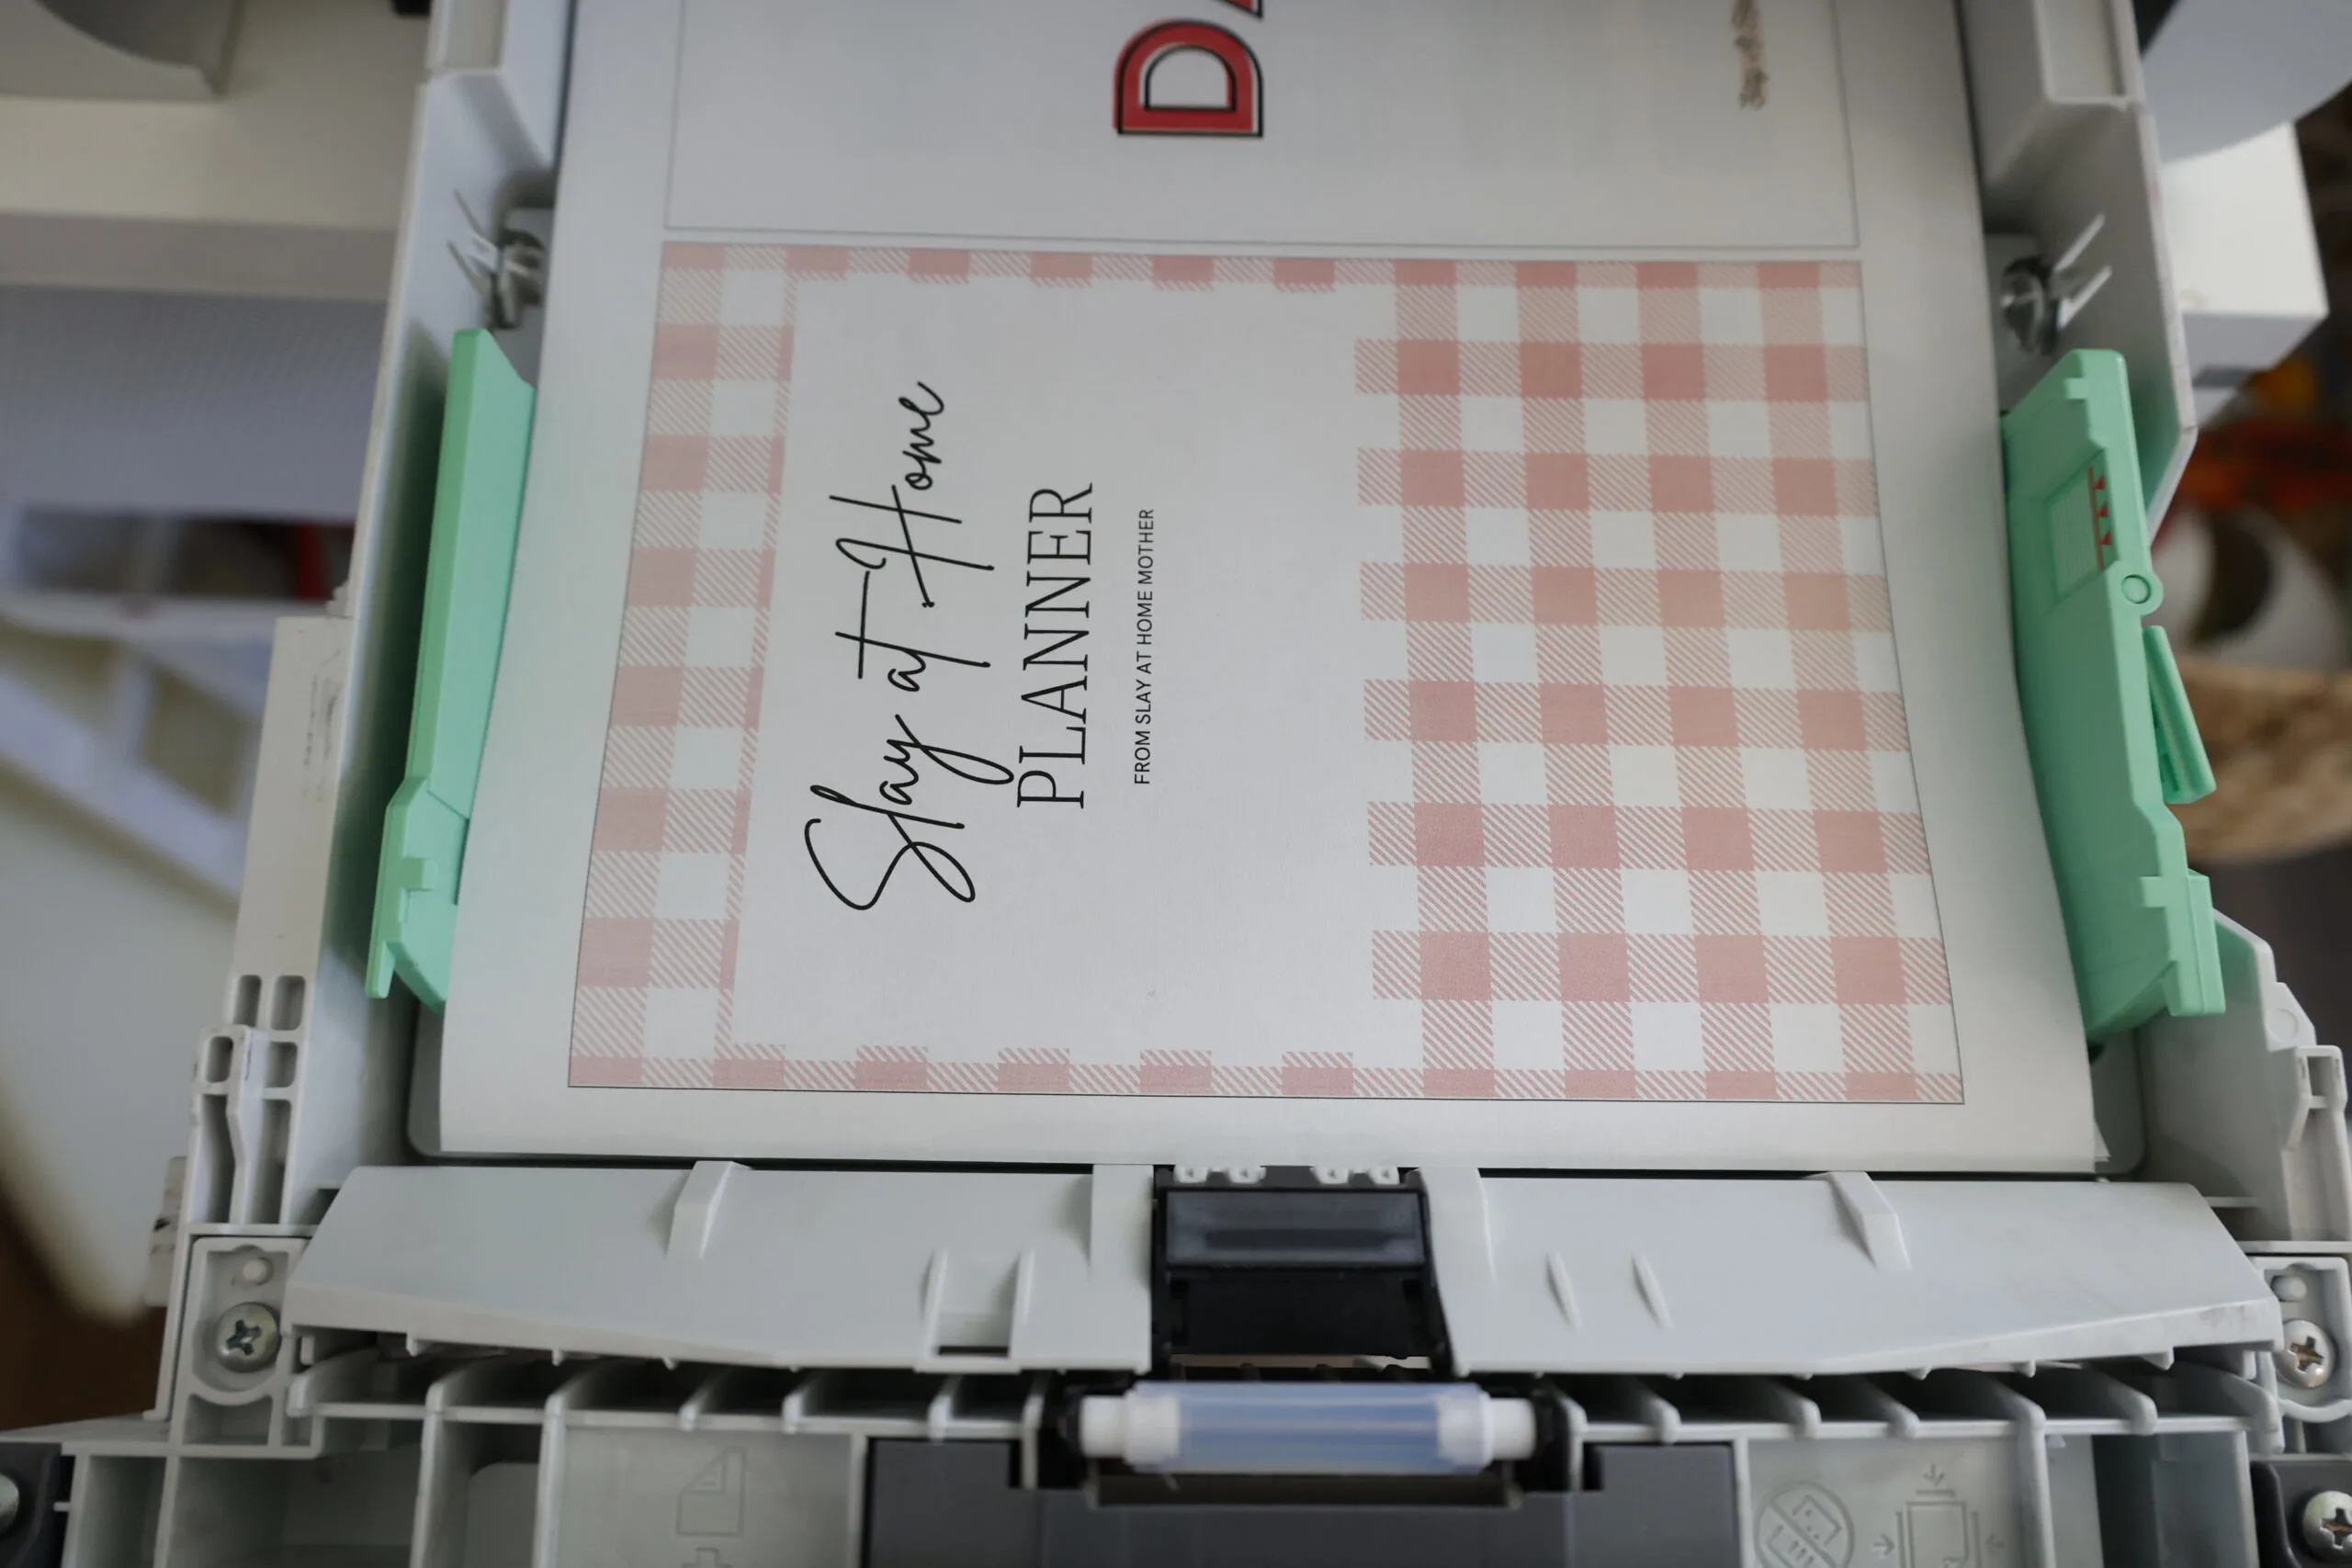
After printing your odd pages on one side of the paper, put your paper back into your printer’s paper tray the way YOUR PRINTER needs it to be loaded.
Here is how mine needs to be loaded, for reference, but this may differ from your printer…


This can be different for each printer, so feel free to test a page so you know which way to insert the paper.
To print the even pages, select Even pages only under Pages To Print…
Also, re-select the paper size settings (A5) like you did above for the even pages, but select Horizontal Reversed for the page order this time.

Once your planner has been printed, use a paper cutter like this one to cut the pages and assemble your planner in order.
I also recommend using a 6-ring clear binder cover like this one.
How To Print A5 Planner Pages On A5 Paper
If you’ve purchased my A5 Slay At Home Planner, here are detailed instructions on how to print yours out on A5 paper…
First, buy or locate your stash of A5 paper.
If your pages are not currently 6-hole punched, go ahead and hole punch them.
This is the hole punch I have.
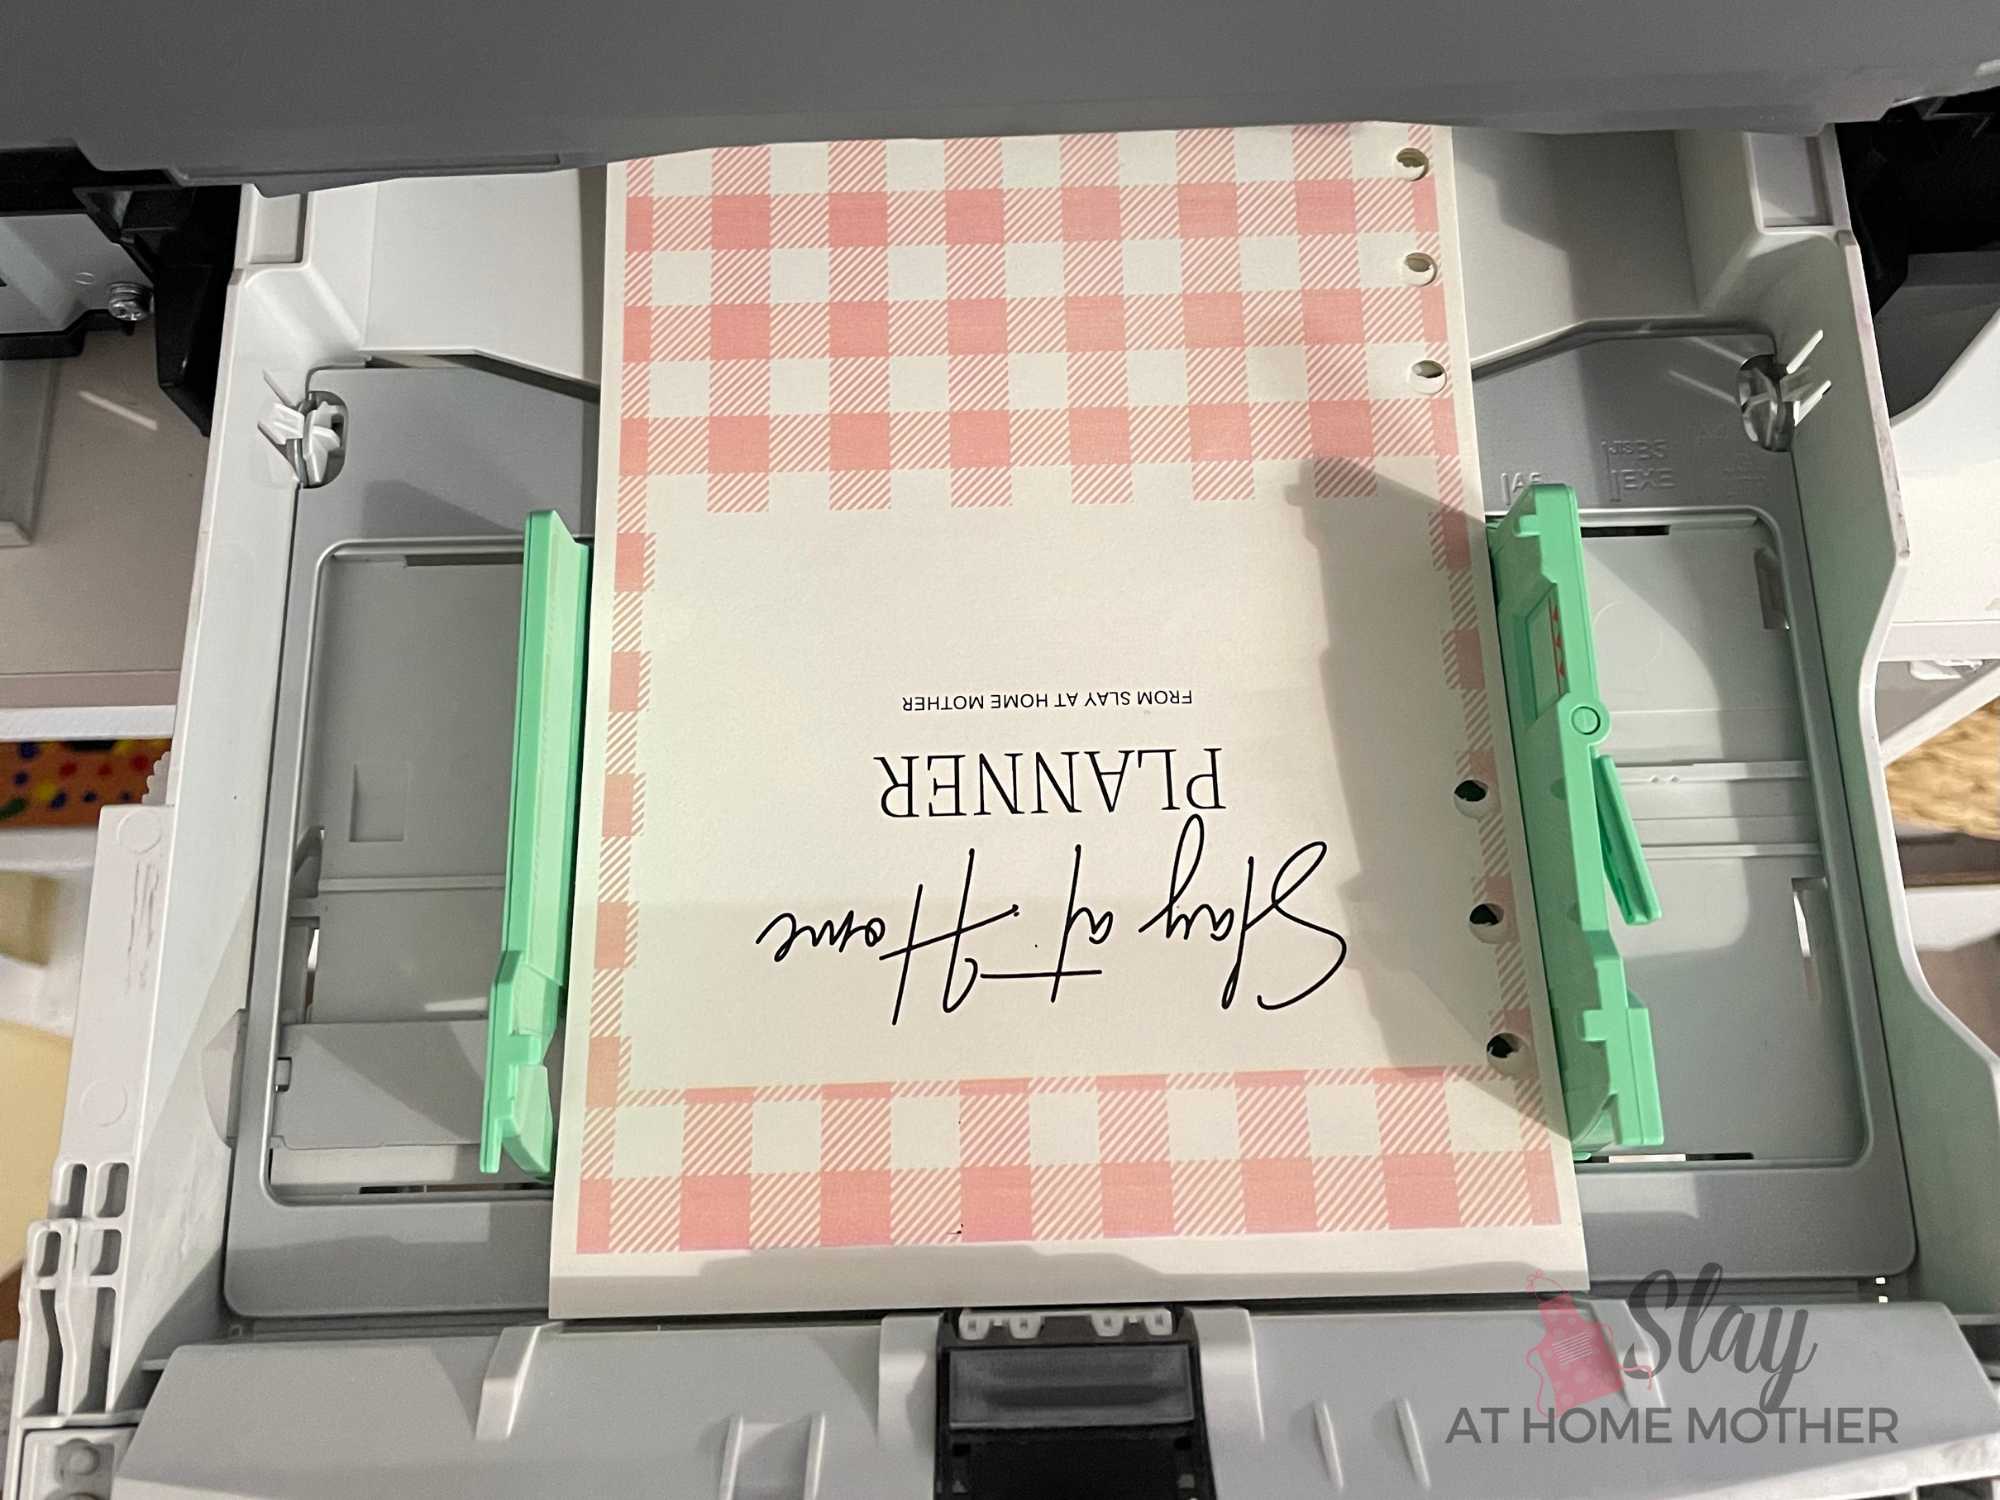
Load your paper in your printer tray the way your printer requires A5 paper.

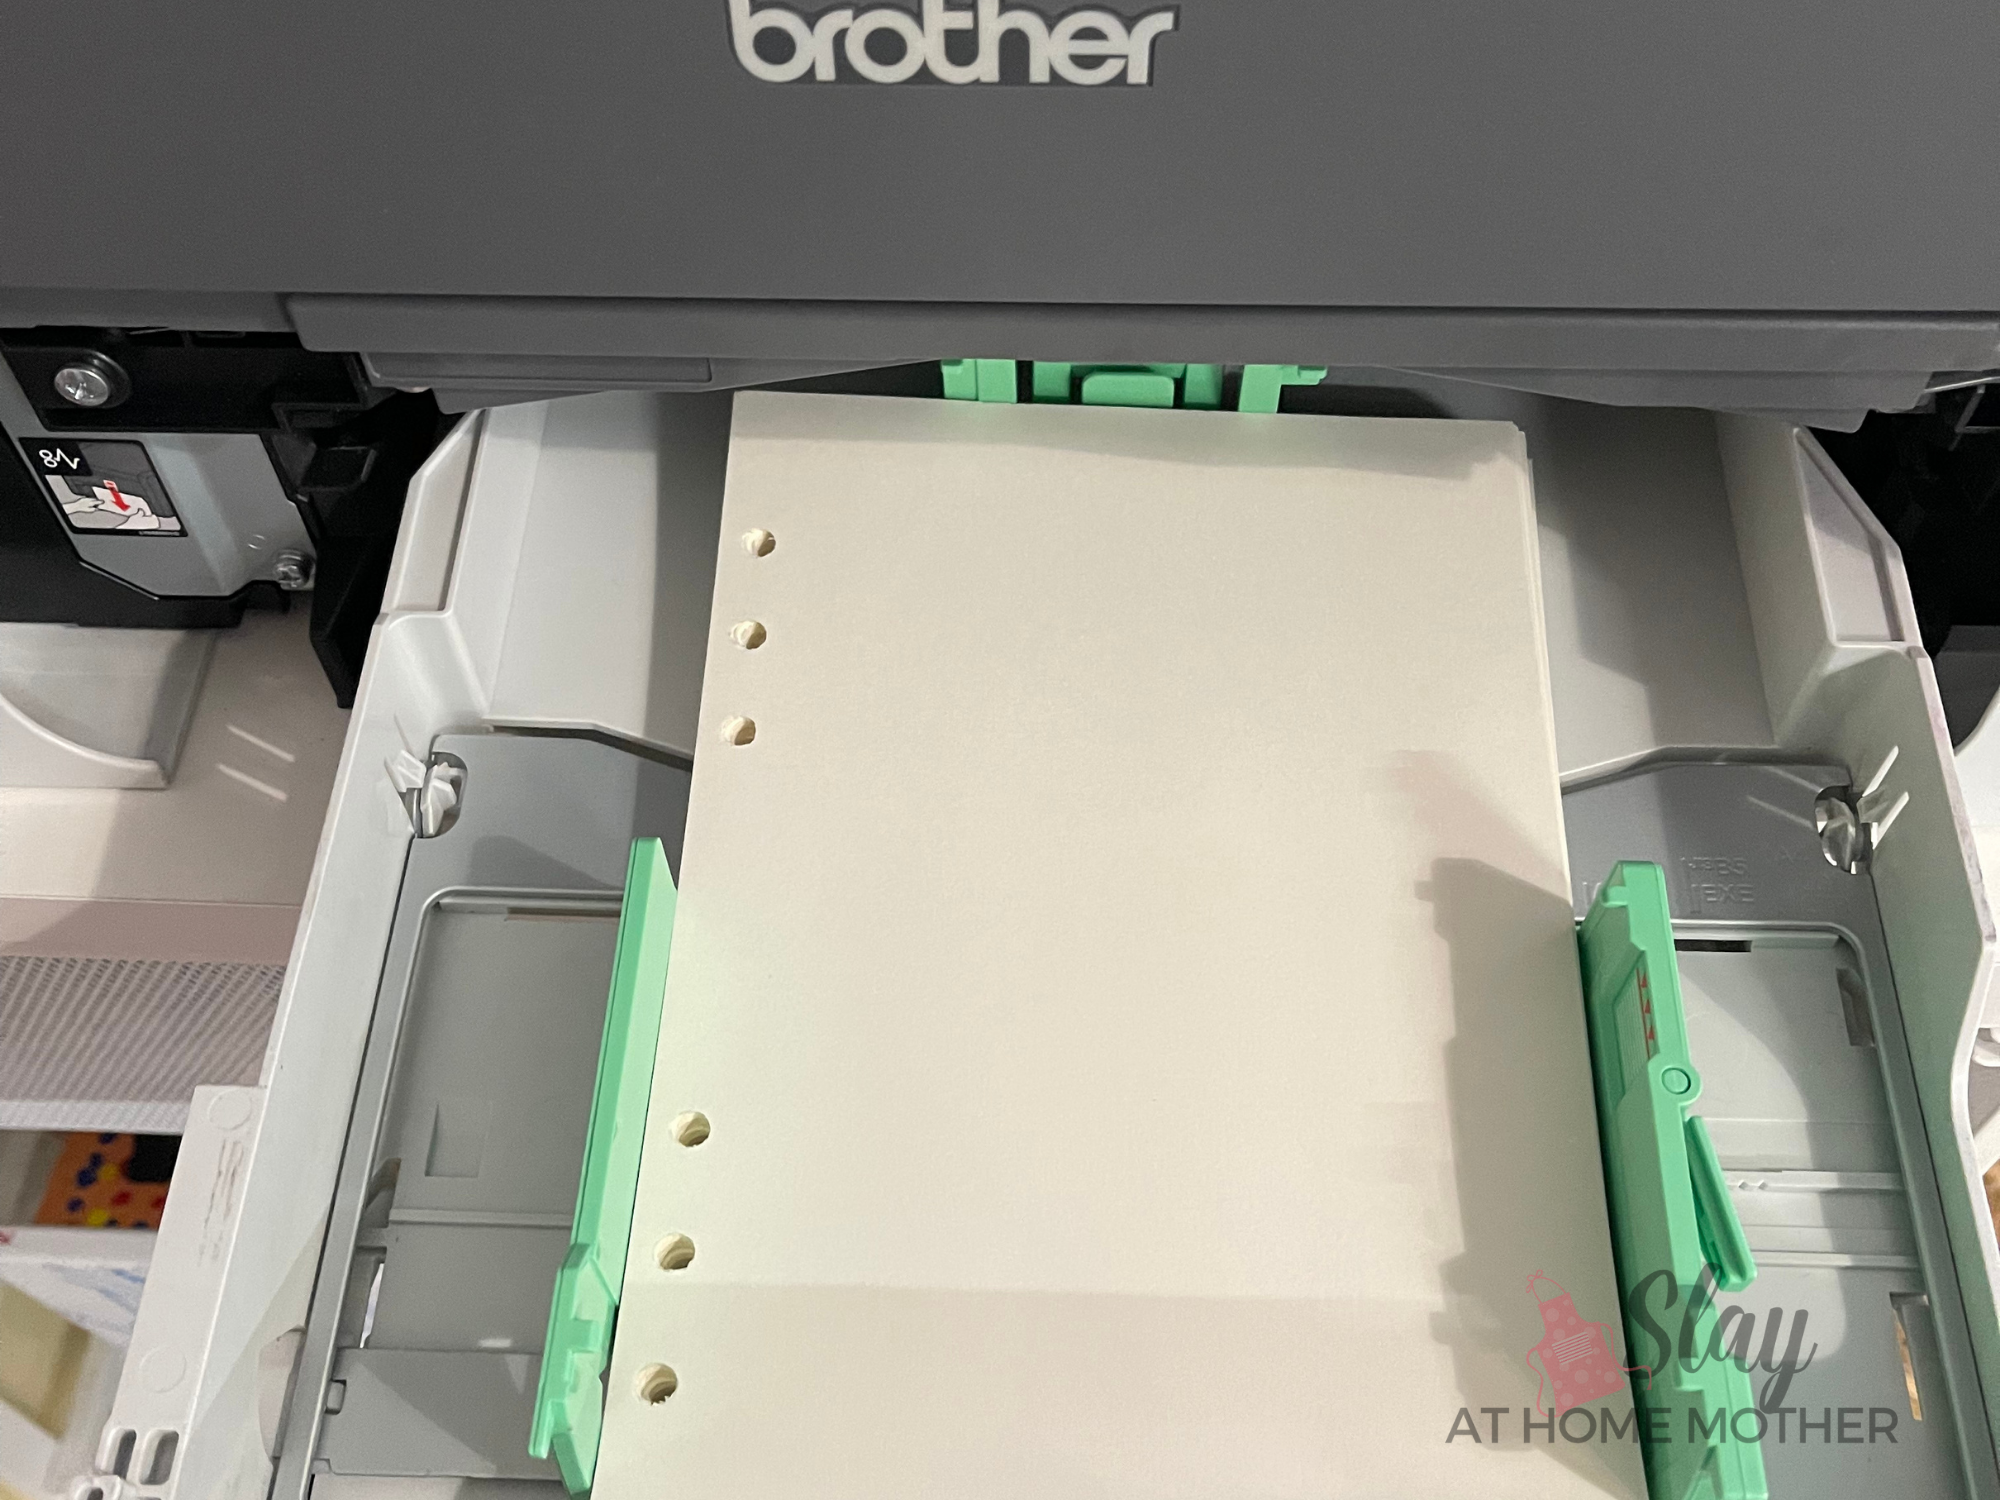
I always recommend, if you’re new to A5 printing, to check online to see if your printer model (which should be located on the front, side, or back of your printer) has a video showing you the correct orientation.
I have the Brother HL-3180CDW, and my printer tray arms have to be moved into a certain position marked within the tray clearly marked ‘A5’.
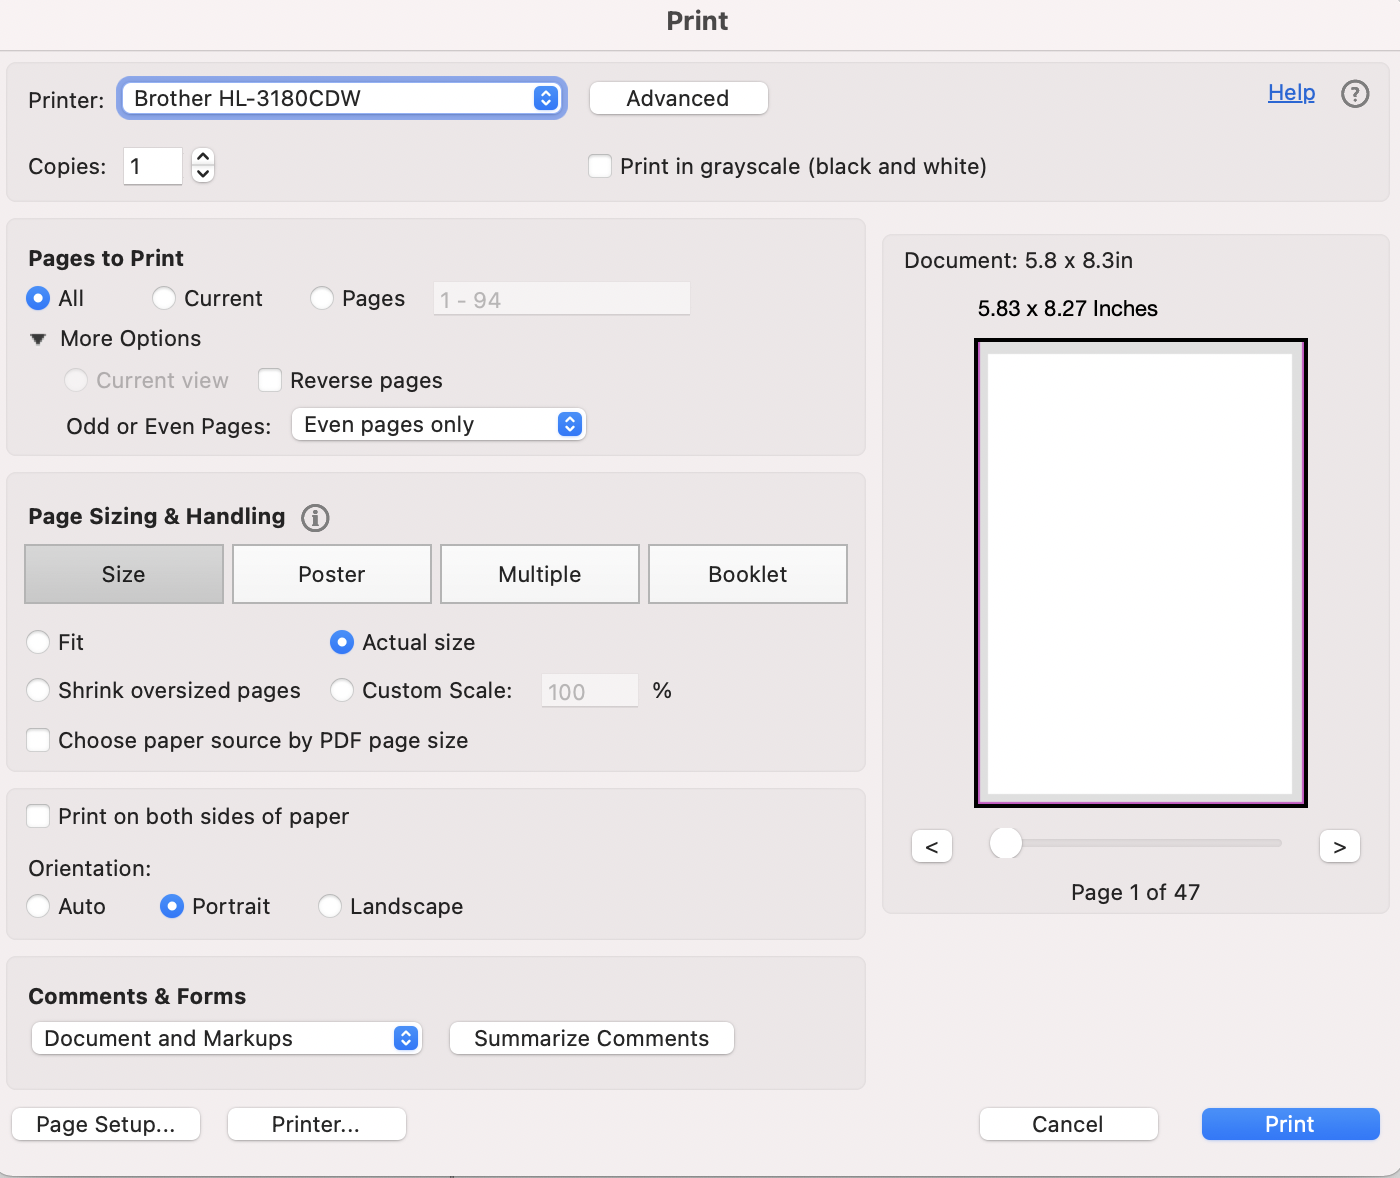
In Adobe Acrobat Reader, open your PDF file and navigate to the Print screen…

First, click on Page Setup at the bottom left of the print pop-up.
Within the Page Setup screen, you will need to set the paper size to A5.

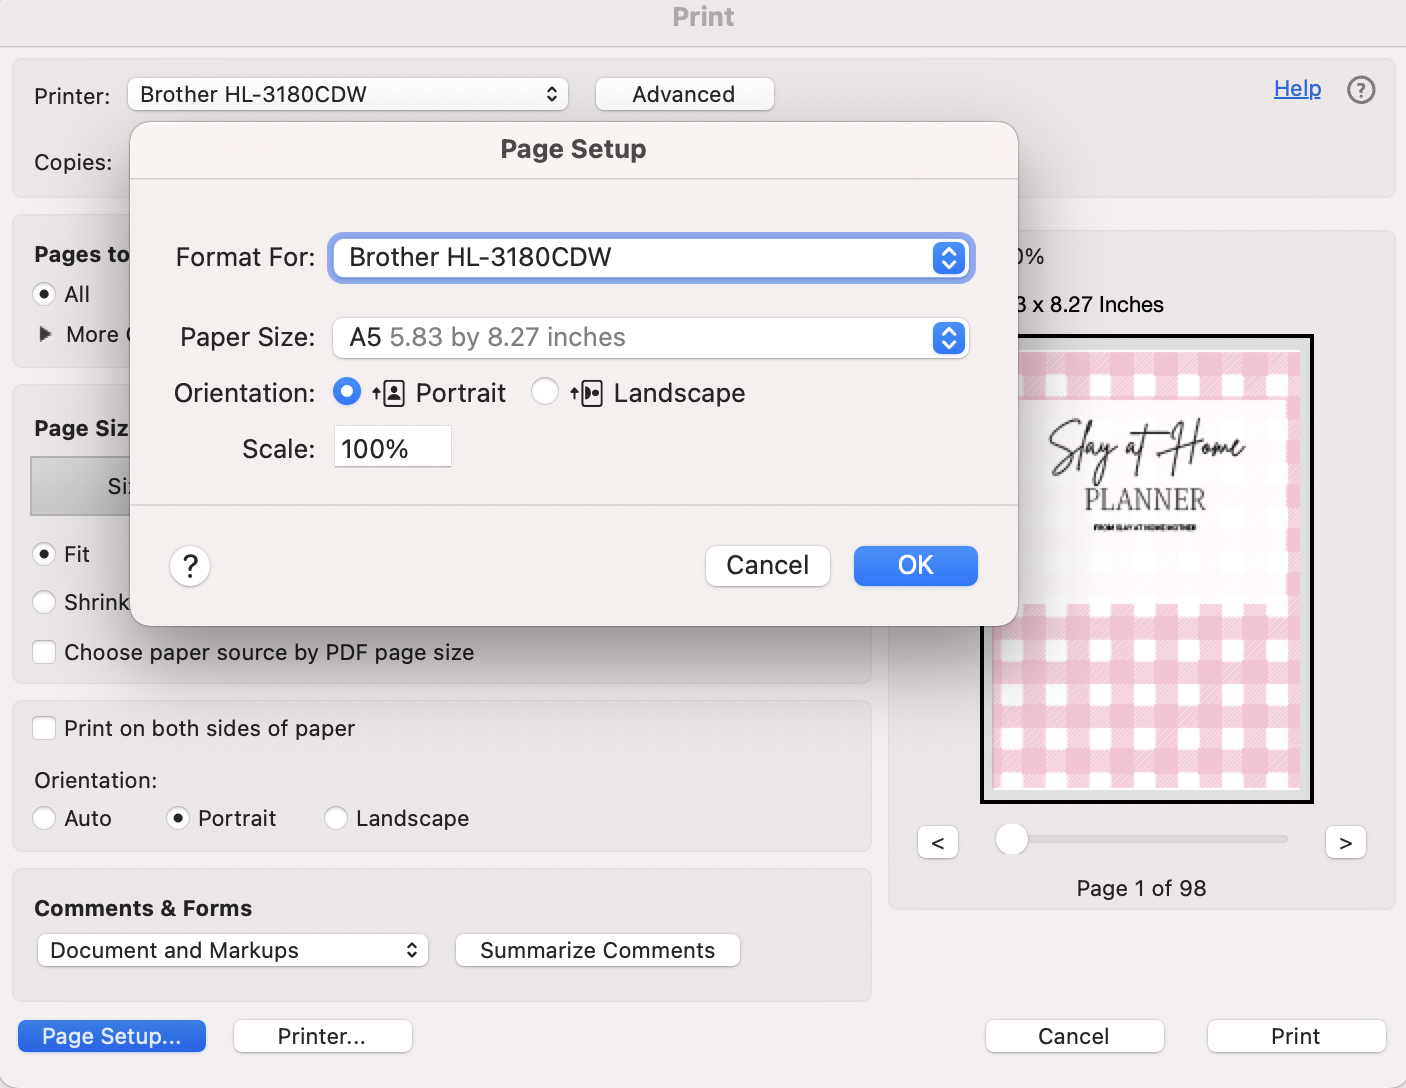
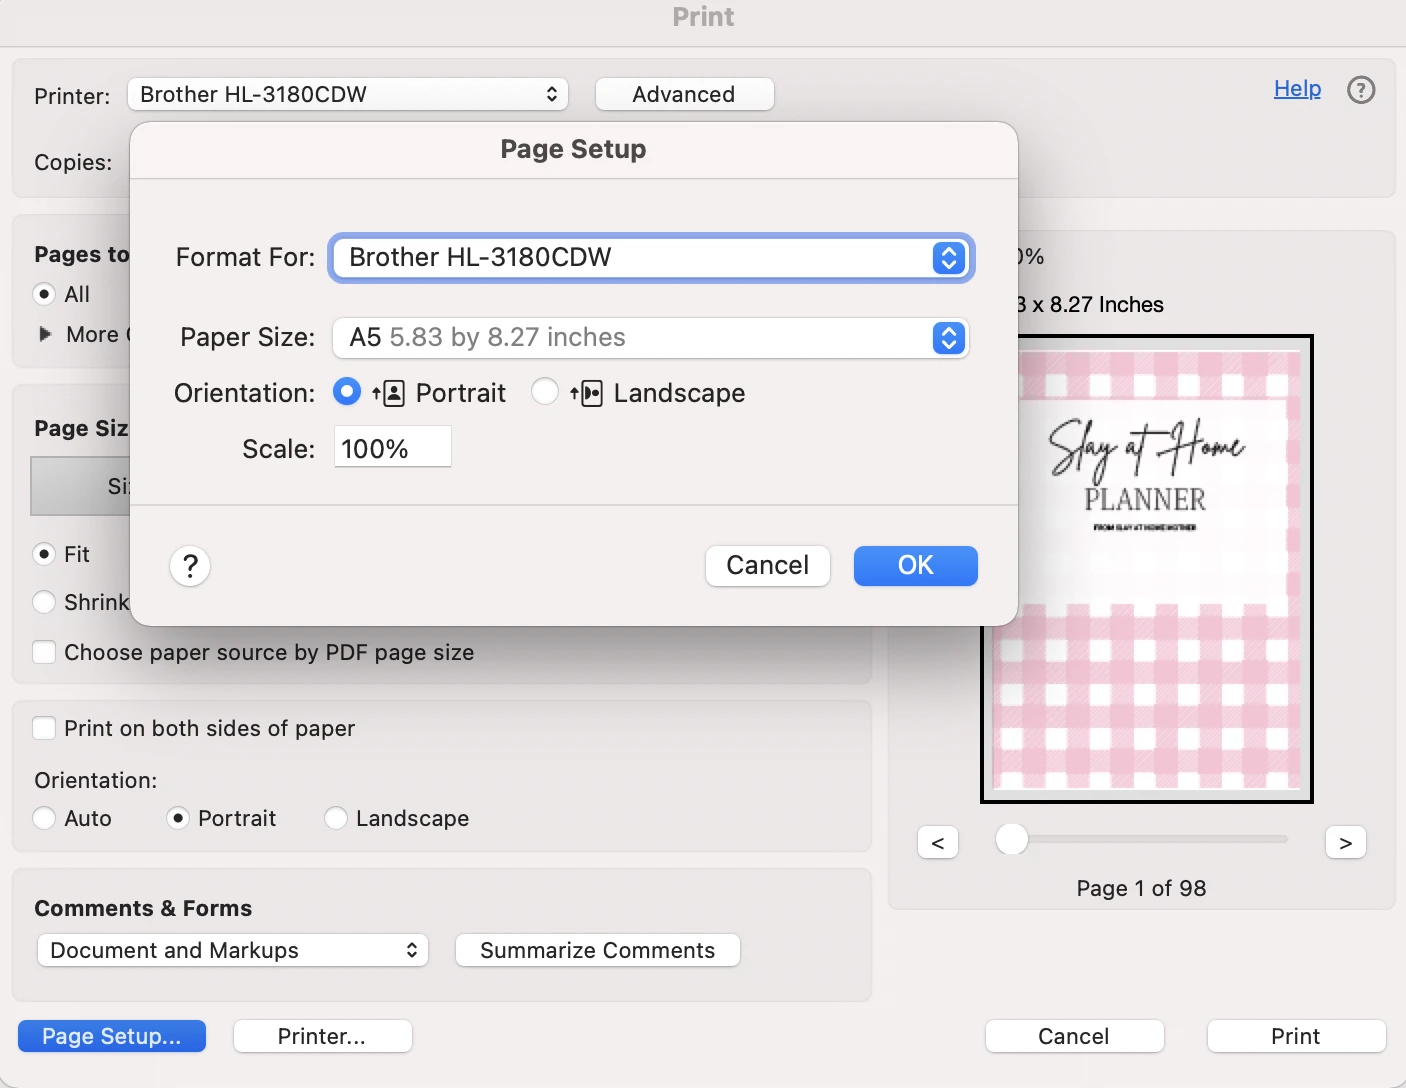
If you skip this step, your printer will try to print on letter-size paper, which isn’t what we want.
Next, select Odd pages only under Pages to print, and Actual size under Page size & handling.

Print your odd pages, checking the first few for accuracy.
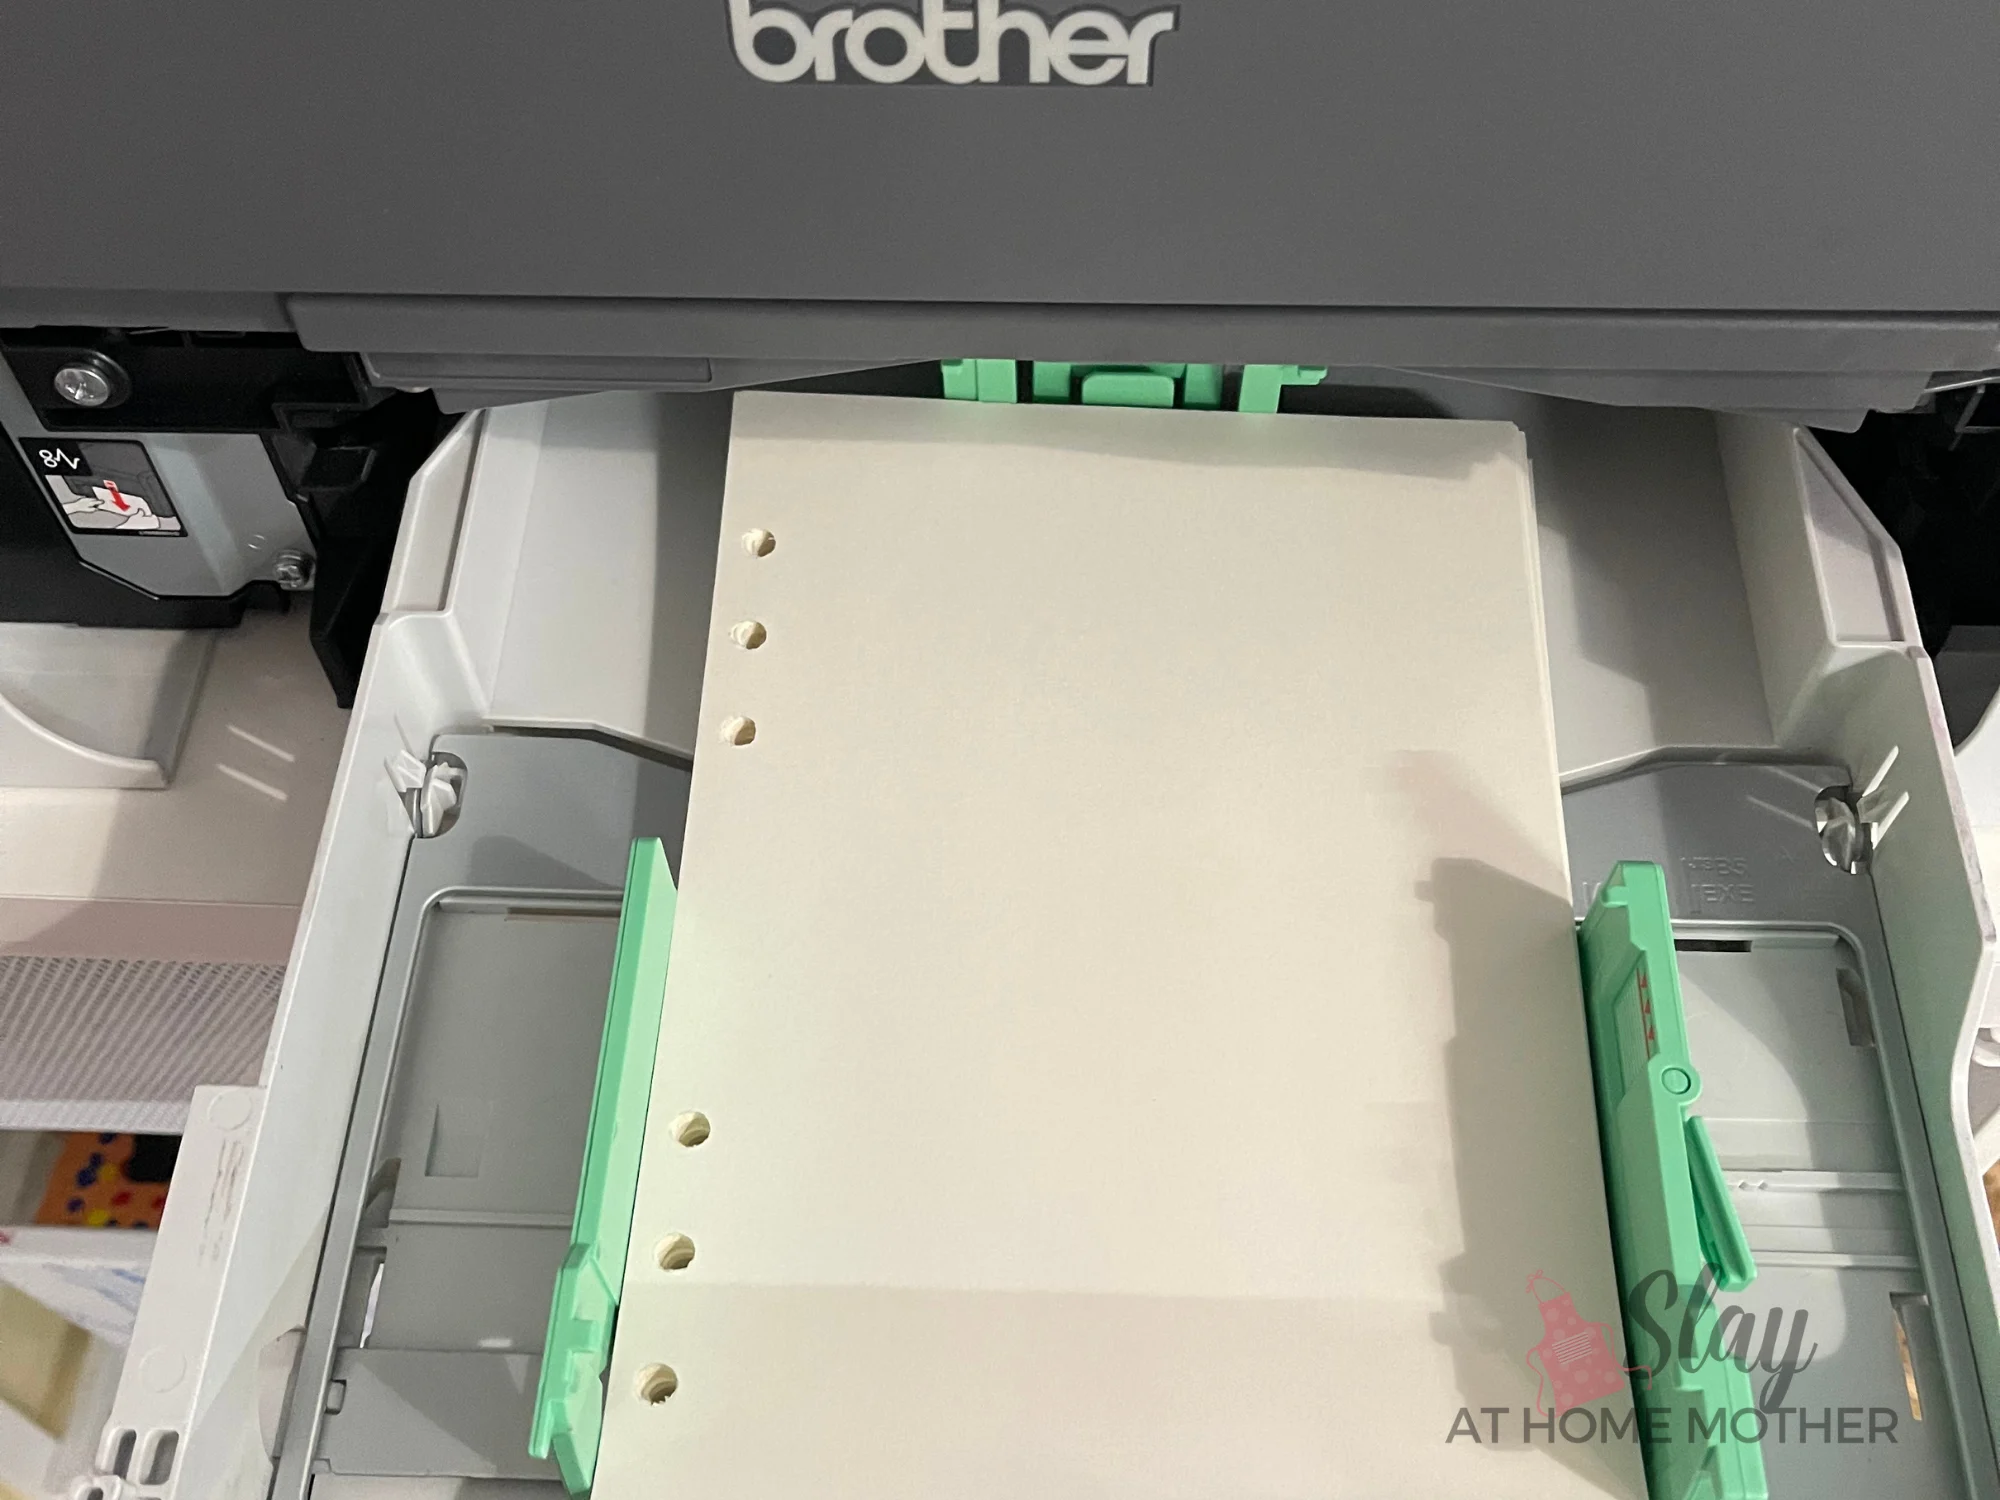
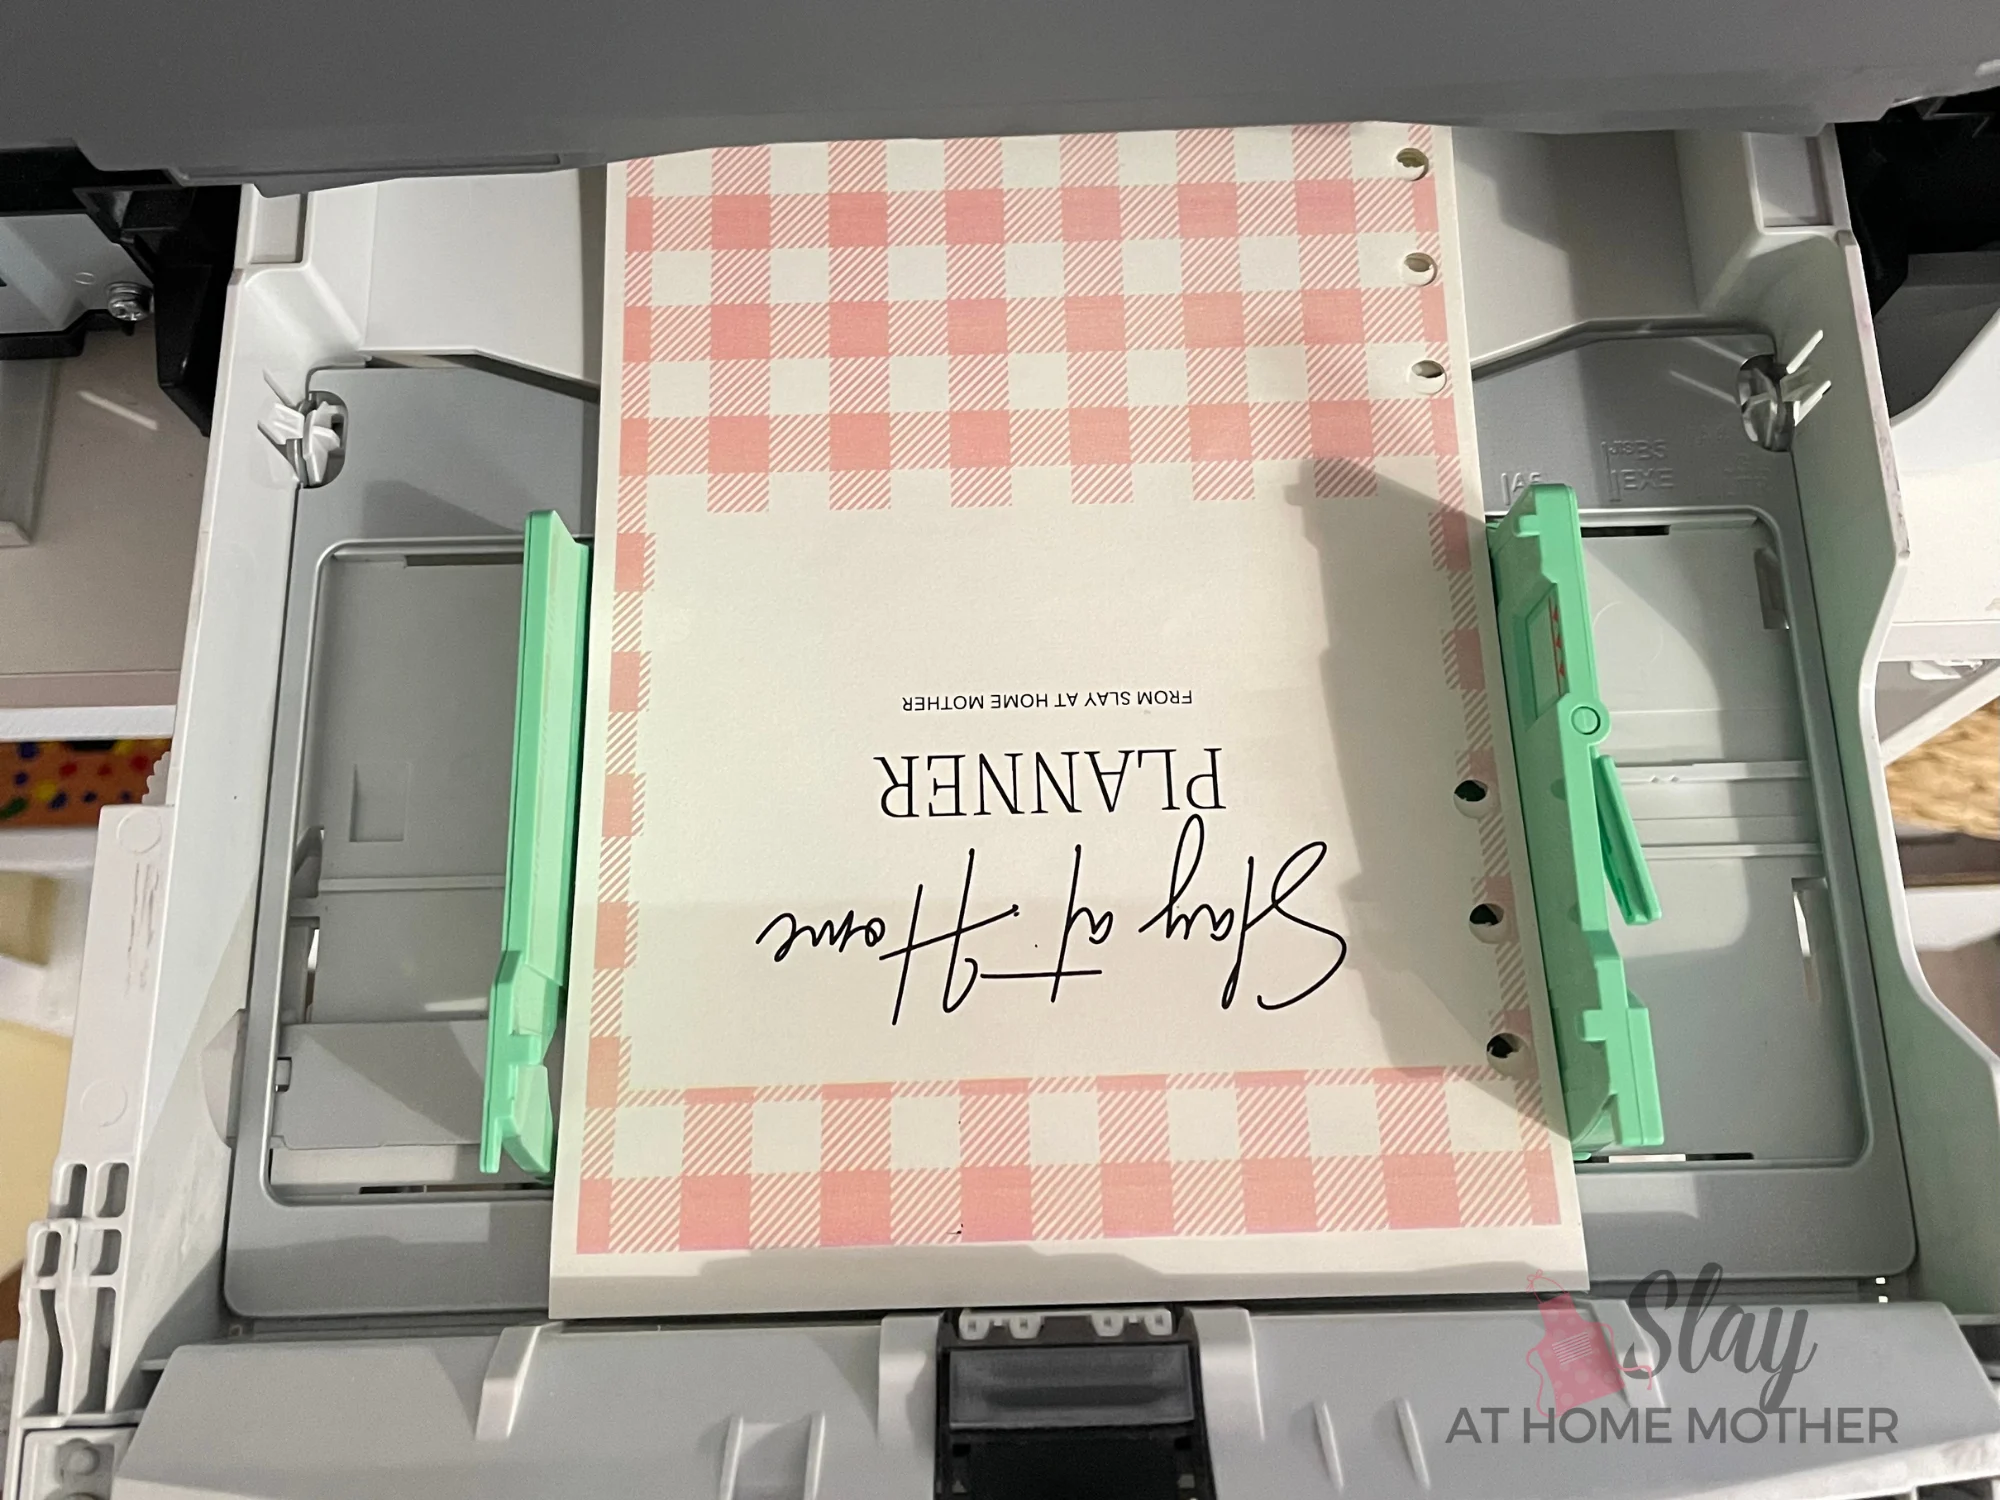
Once you have printed your odd pages, it’s time to flip your pages over and print your Even pages.
Here’s how I have to orient my planner pages to print on the backside of the pages…
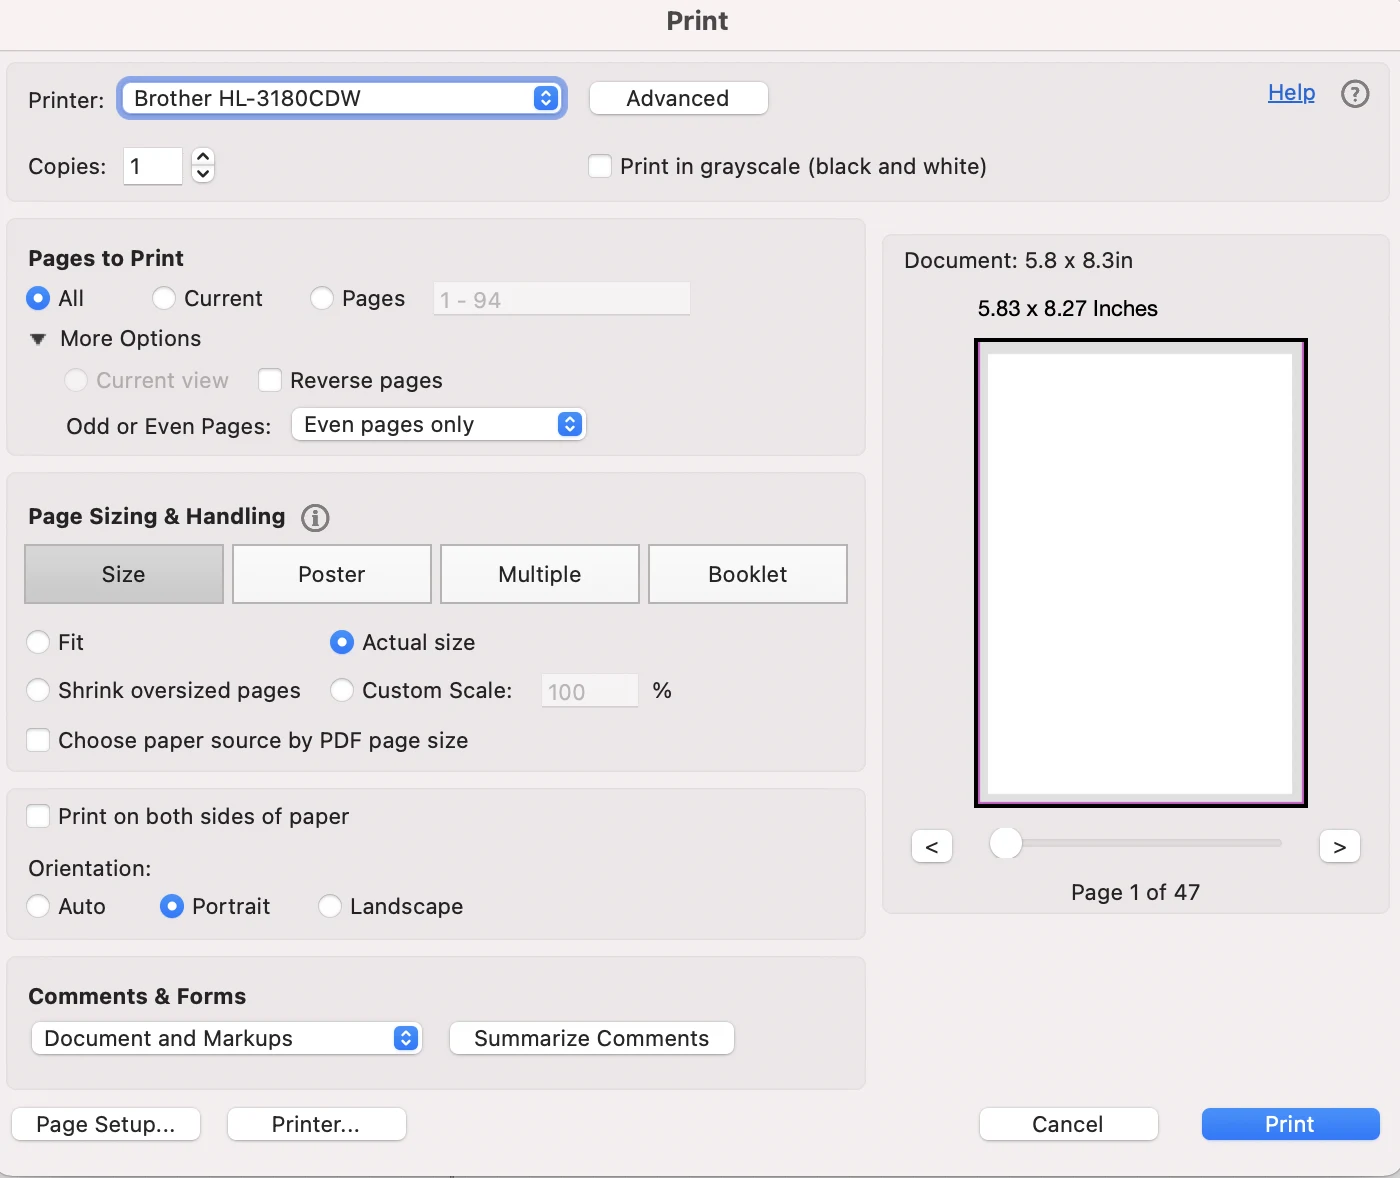
And here is a screenshot of the print pop-up settings I recommend using for the even pages…

And that’s it! Happy printing and planning!