

Make this easy DIY Interchangeable Welcome Sign with your Cricut, and a free design…


I’m so excited to share my latest project with you – this adorable Interchangeable Welcome Sign!
I made this with my Cricut and am providing the free design link for you to use as well.
Each month has a different symbol that you can change out.
If you make this, be sure to tag me on social media (@slayathomemother) so I can see what you created!
*Please note that certain elements used in this project are exclusive to Cricut Access members or can be purchased separately. Cricut can change which elements are included in its membership, and I cannot foresee when or what that change will be.
This post contains affiliate links, however, all opinions are my own, as always.
DIY Interchangeable Welcome Sign Tutorial
For this post, I decided to incorporate a design and project that encompasses all of these reasons and really shows off the versatility and function that this cutting machine has…
So in today’s post, I’m sharing this easy DIY Interchangeable Welcome Sign Tutorial, which includes cutting wood and vinyl.
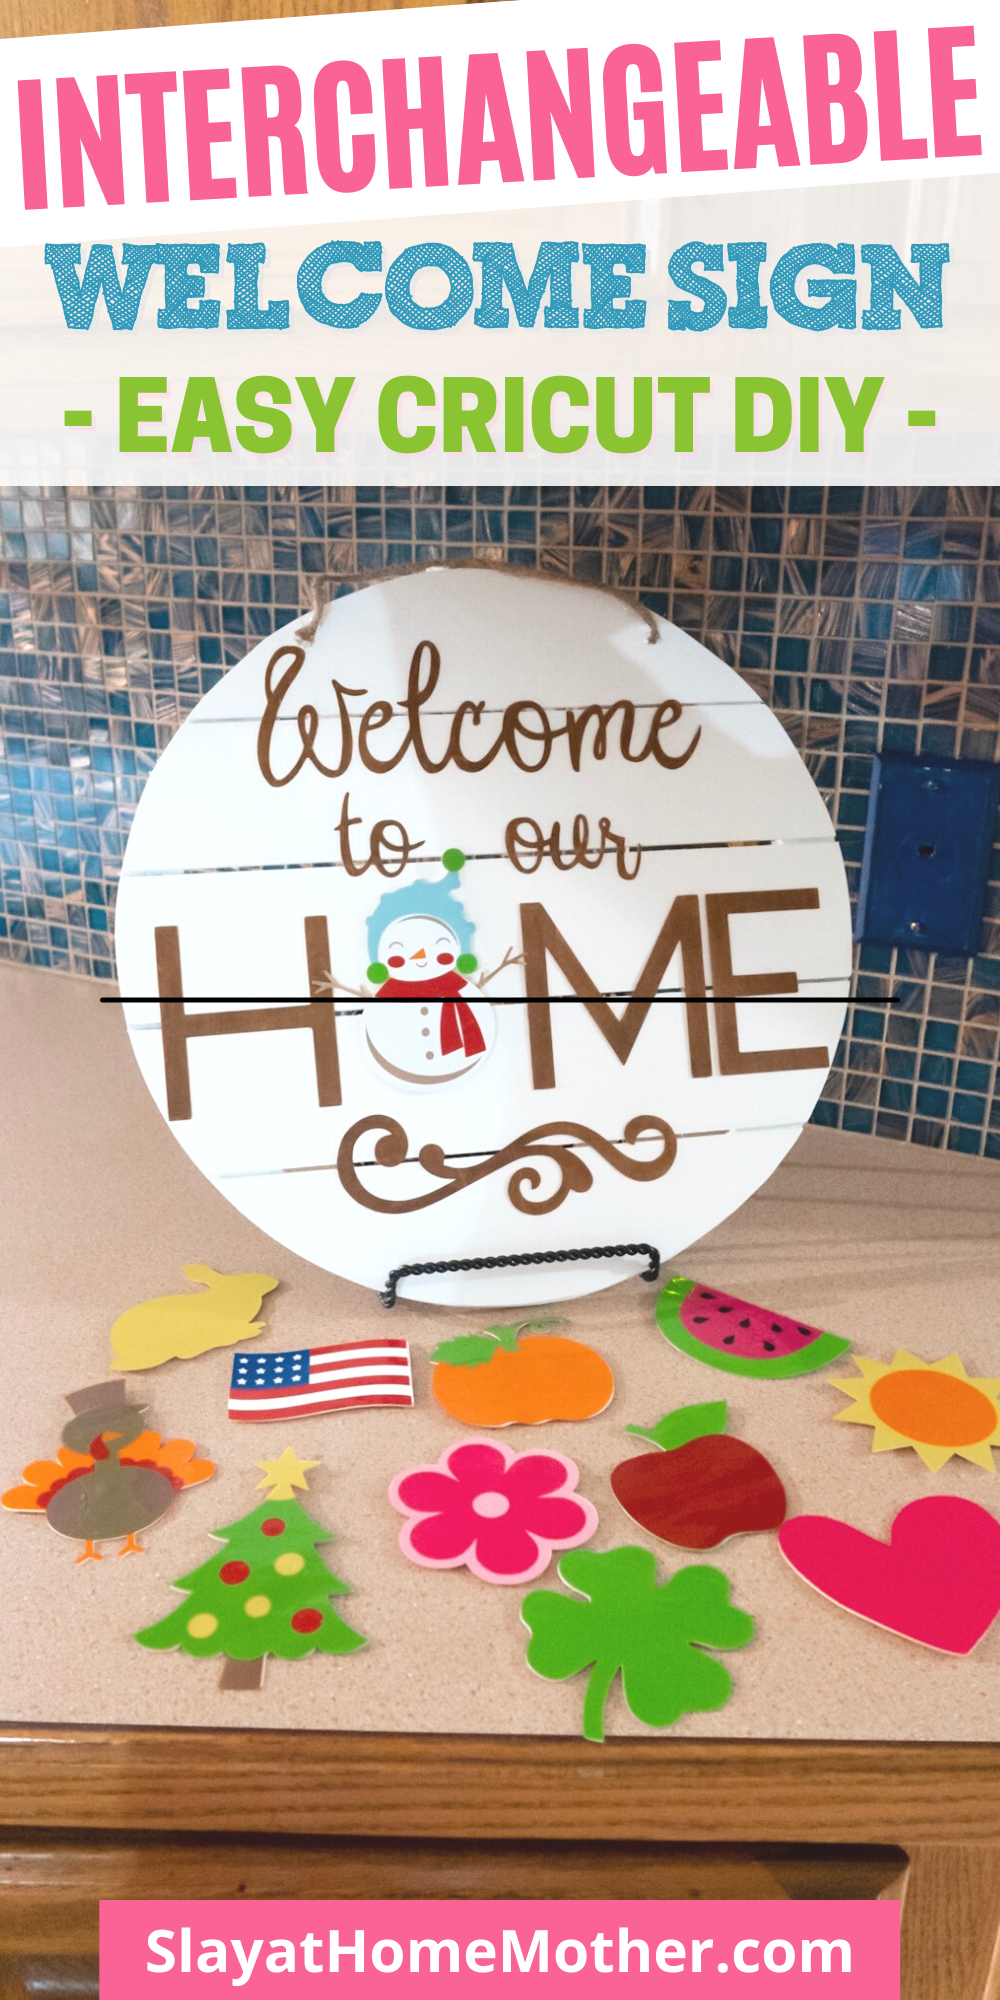
This tutorial will show you how to make a Welcome sign with an interchangeable O.


I’m sharing the design with you so you can immediately craft this beauty, and giving you all the necessary details and tips you need to set you up for success…
**UPDATE: You will need Cricut Access to get these different icons to use in your project**.
While I do not charge to share the project with you all, certain elements used in this project are exclusive to Cricut Access subscribers (or you can purchase certain elements separately.**
This sign makes a perfect homemade gift or home decor item for your own home and can be fully customized to fit your family.
I created 12 different shapes to stand for each calendar month, but you can simplify it to four shapes for the seasons, etc.
In our home, on the first day of a new month, we have the kids pick out the correct shape and switch out the pictures.
It’s really fun for them and initiates a conversation about what will be happening that month (holidays, birthdays, the beginning of school, family parties, trips, etc.).
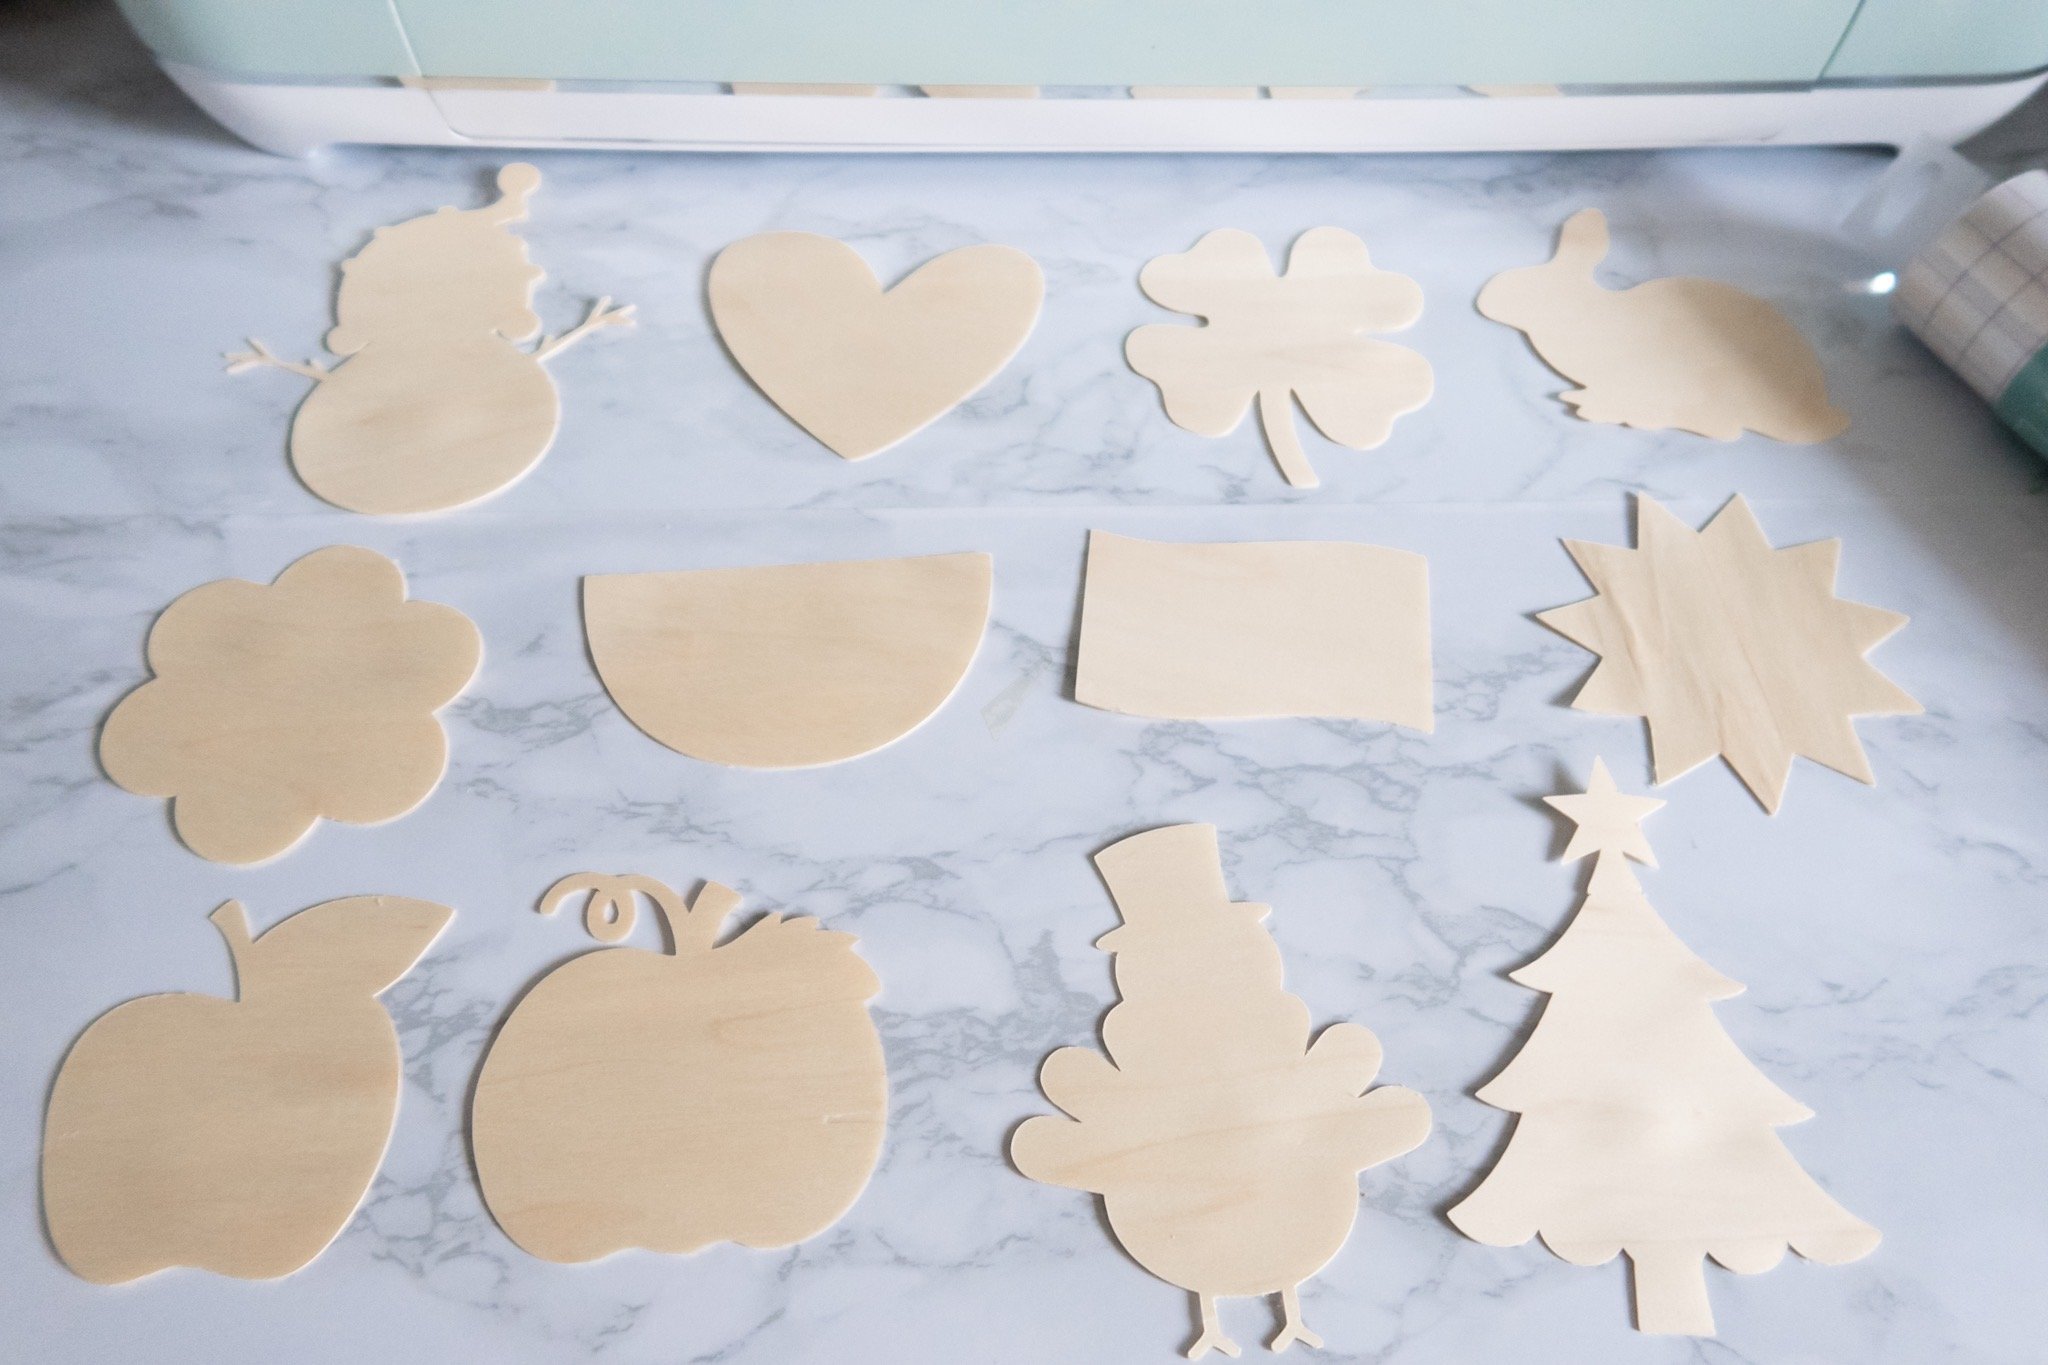
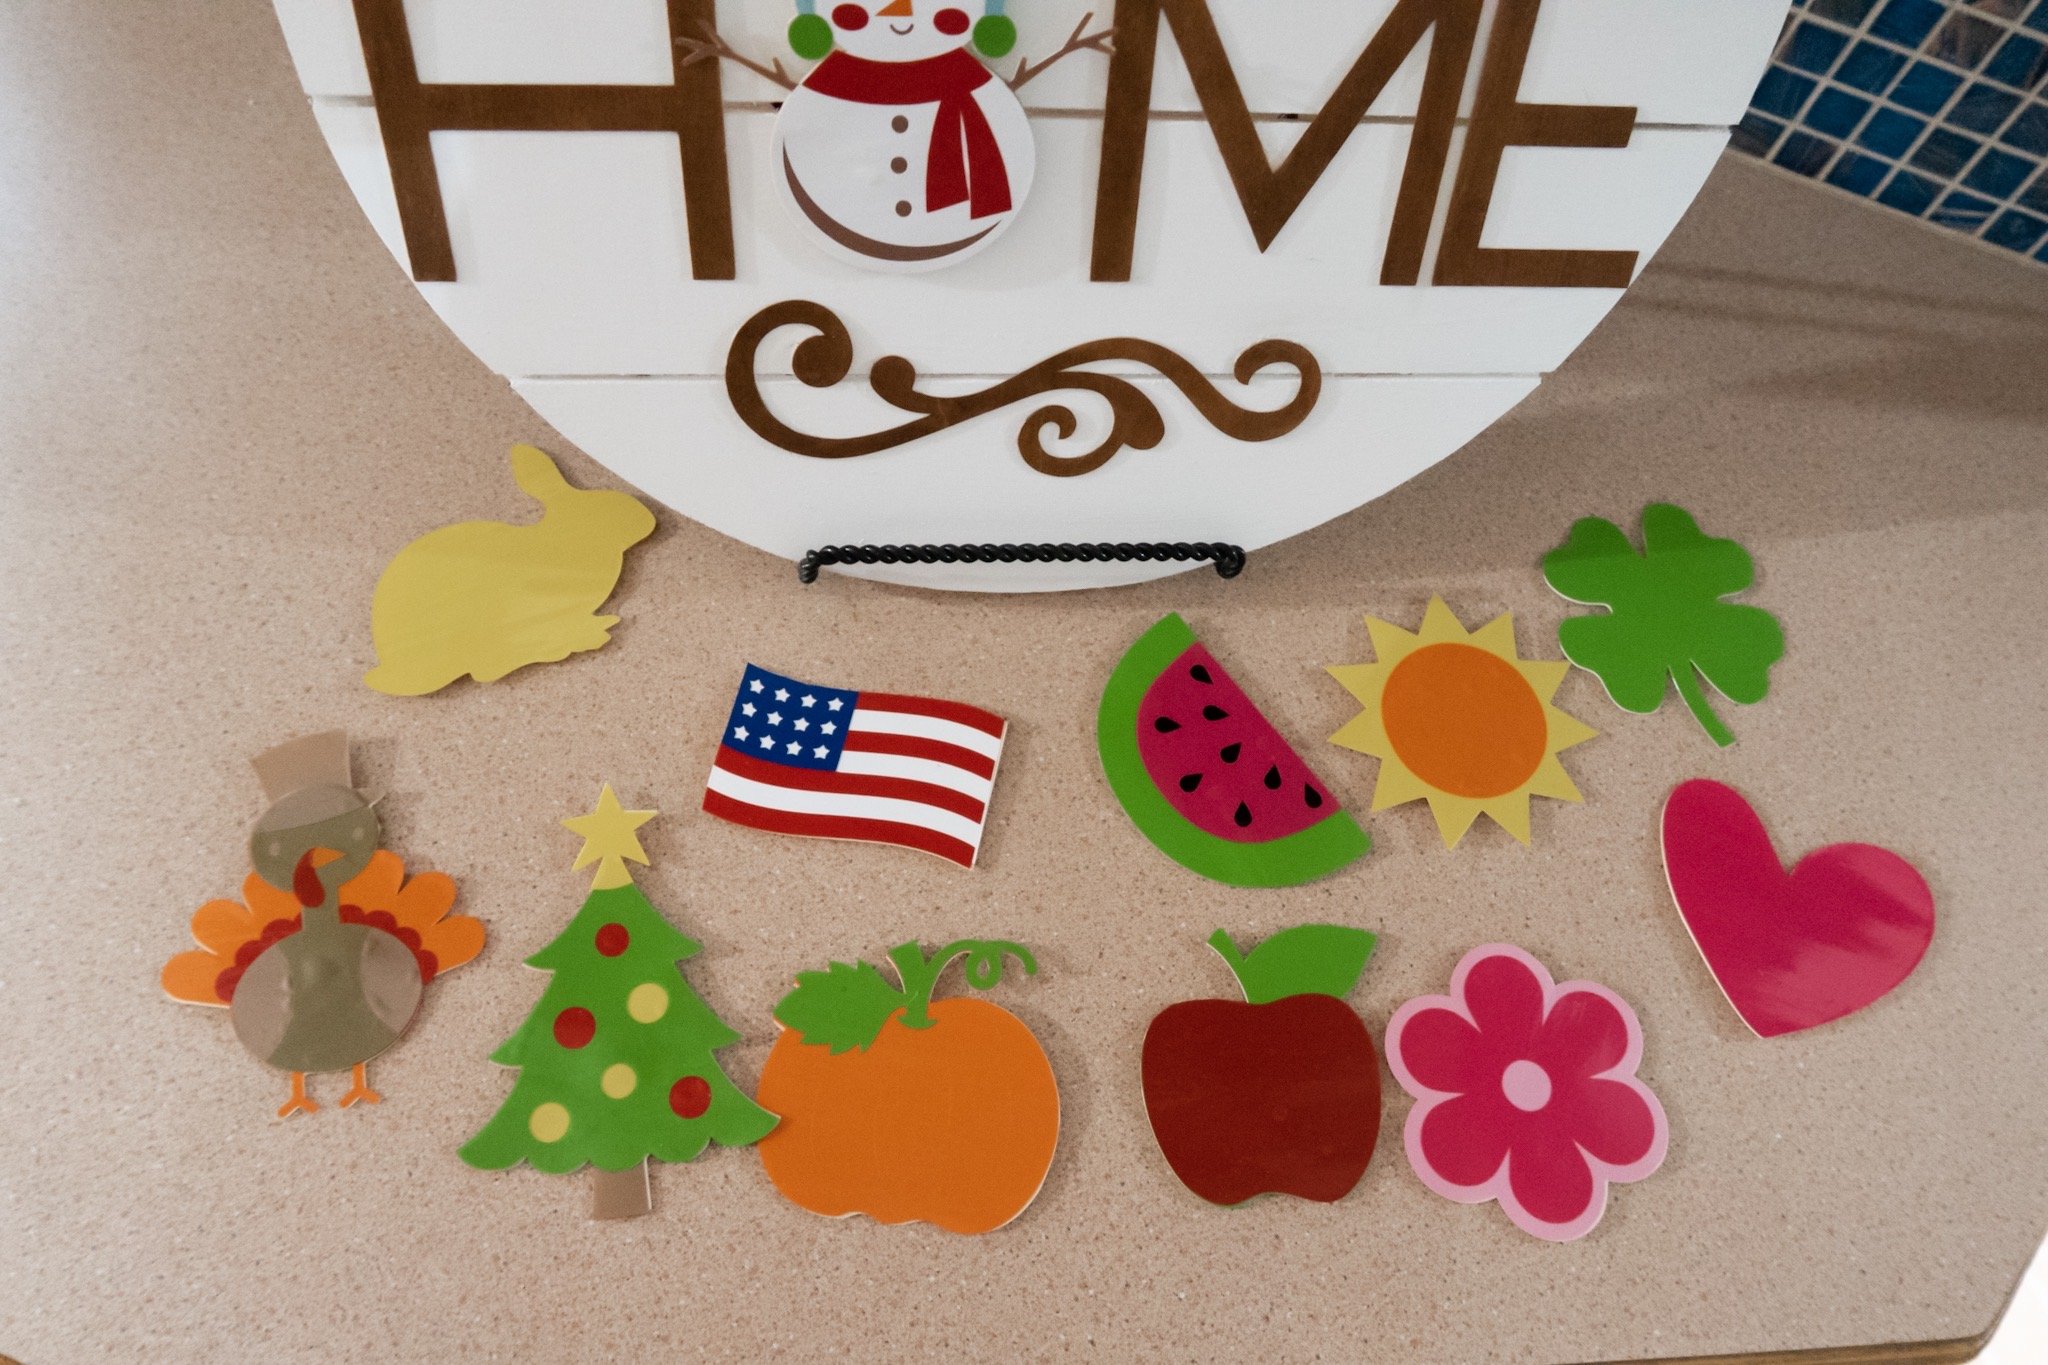
Here are the monthly shapes we’ll be making in this tutorial:
- January: snowman
- February: heart
- March: clover
- April: bunny
- May: flower
- June: watermelon slice
- July: flag
- August: sun
- September: apple
- October: pumpkin
- November: turkey
- December: Christmas tree
Materials Needed For Interchangeable Home Sign
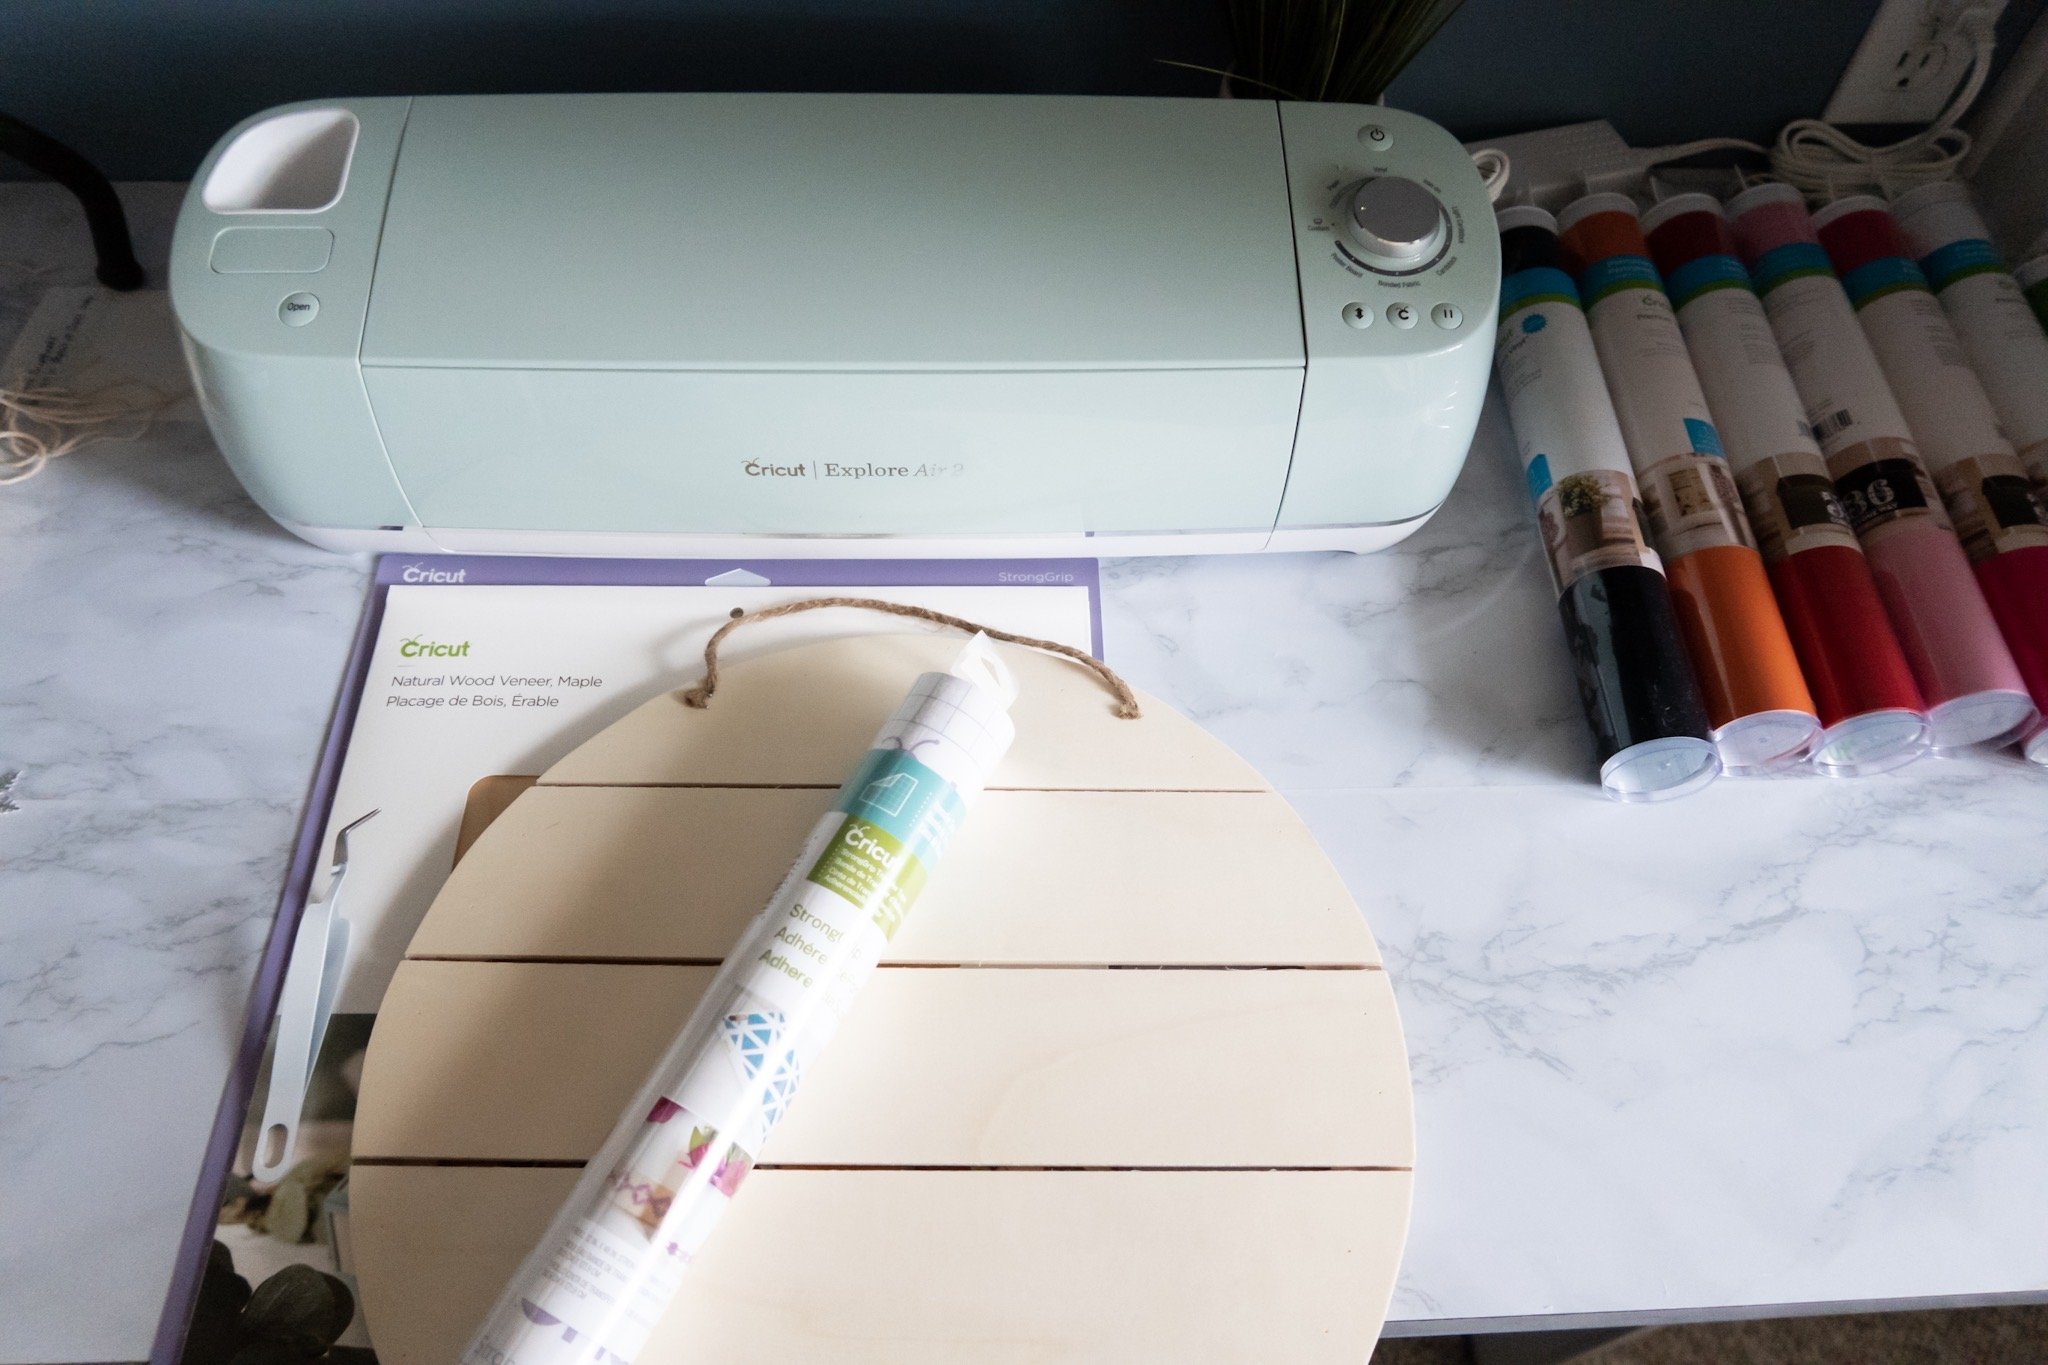

Here’s what you need to make this sign…
- Cricut Explore Air 2, Air 3, or Maker
- fine-point blade
- deep-point blade
- StrongGrip mat (purple)
- LightGrip mat (blue)
- painter’s tape
- Wood sign (prepped however you like it – stained, painted, etc).
- Cricut tweezers (spatula is NOT recommended)
- Cricut weeder
- Brayer
- 2 sets of Maple wood veneer 12″x12″ sheets (you can also use Cherry)
- these come in two-piece sets (so you need two sets), and while you really only need three sheets, it’s nice to have that 4th one to practice on if this is your first time cutting wood veneer
- transfer tape
- Permanent vinyl in multiple colors depending on your design. Here are the colors I used:
- red
- pink blush
- light pink
- stone yellow
- lime green
- dark orange
- white
- black
- brown
- gold
- stain or paint for the wood lettering depending on your preferences
- glue to adhere the lettering to your wood sign
- adhesive-backed velcro strips
The wood sign I’m using is a 15″ round circle I scored at a craft store with a deep discount coupon for just $8.
Feel free to use whatever piece of wood you would like that will work for the space you intend to put your finished sign.

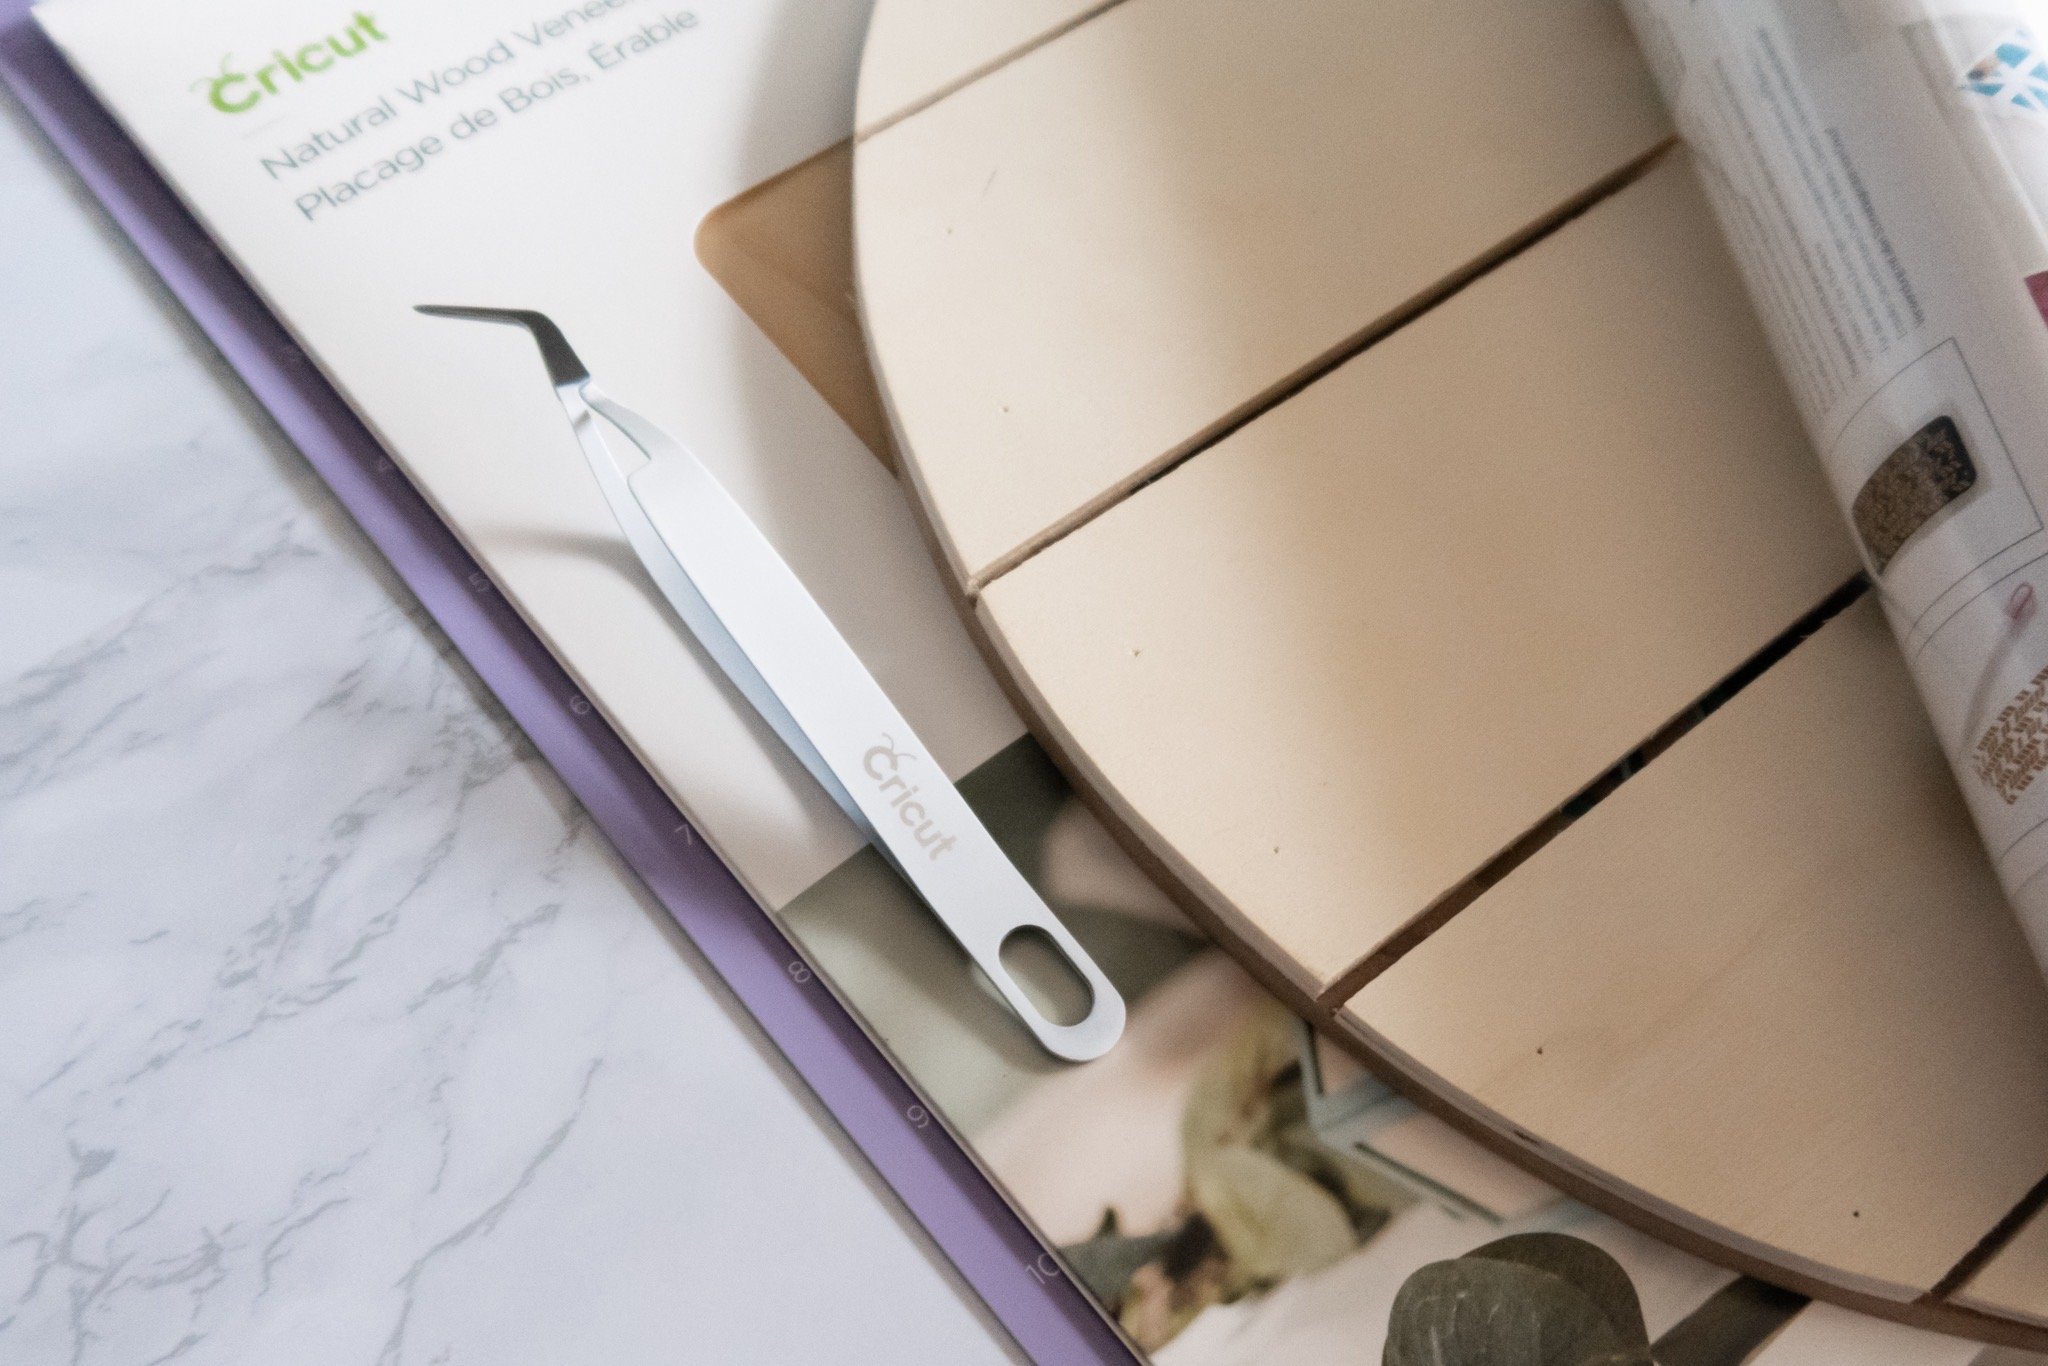

The recommendation for tweezers in this tutorial is a serious one – it will come in handy when you remove the wood shapes and cursive lettering from the StrongGrip mat.
Cutting Wood Veneer With the Cricut Explore Air 2

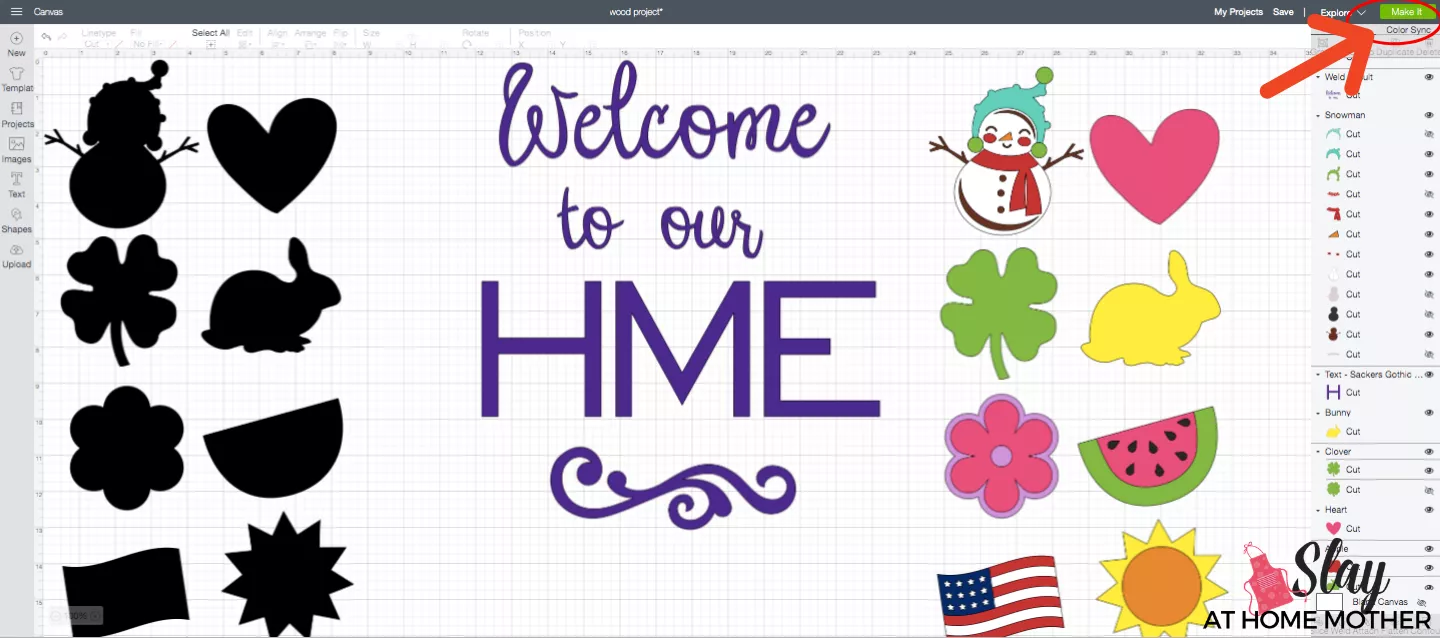
First, you can either design your own lettering and shapes in Cricut Design Space, or you can access this exact design with the link here to get to crafting.
In my design, you will be cutting the wood shapes (there are twelve of them, one for each month) and the lettering first using the StrongGrip mat, deep-point blade and housing, maple wood veneer sheets, and your Explore Air 2.
Cricut recommends pressing your veneer sheets to the StrongGrip mat firmly, rolling a brayer over top to create a firm seal for cutting, and lining the edges of the veneer with blue painter’s tape.
These steps ensure the veneer will hold in place for accurate cutting.
Cricut Design Space Custom Settings For Cutting Wood Veneer


You’ll need to turn the dial on your Explore Air 2 to the ‘Custom’ setting, select ‘Make It‘ in Design Space, and select ‘Wood Veneer‘ under custom materials before your cut.
If you can’t find ‘Wood Veneer‘, simply search for ‘Wood’ in the search bar.
See the screenshot below…

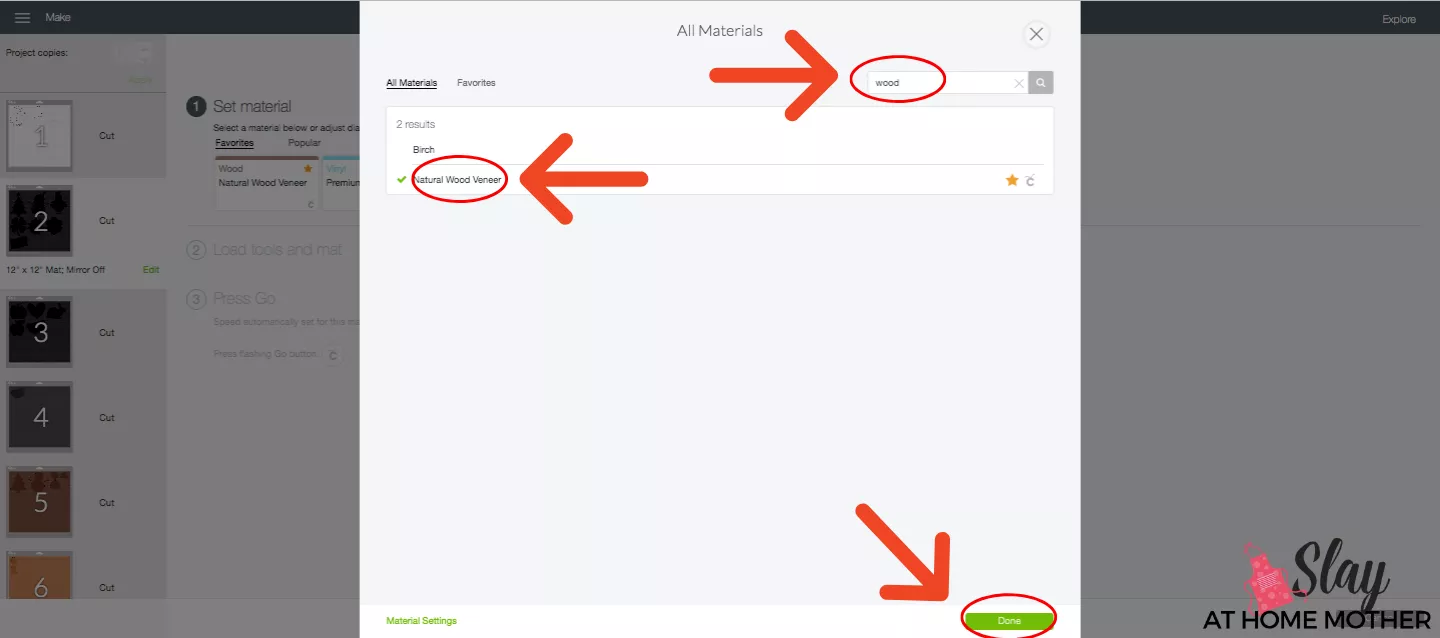
P.S. The star next to the material is something I selected, it’s marked as one of my favorites.
So if your material does not have a yellow star next to it, that’s only because you haven’t favorited that material.
Now, assuming your deep-point blade and housing are mounted and wood veneer is secured on your mat and loaded, you can begin cutting!
While your Cricut Explore Air 2 is cutting the veneer, you can step away and begin prepping, painting, or staining your wood sign however you like to get it ready.
Removing Wood Veneer From The StrongGrip Mat


This was probably one of the most helpful tips I’ve ever heard, and one I commonly use when cutting veneer or paper, cardstock, etc:
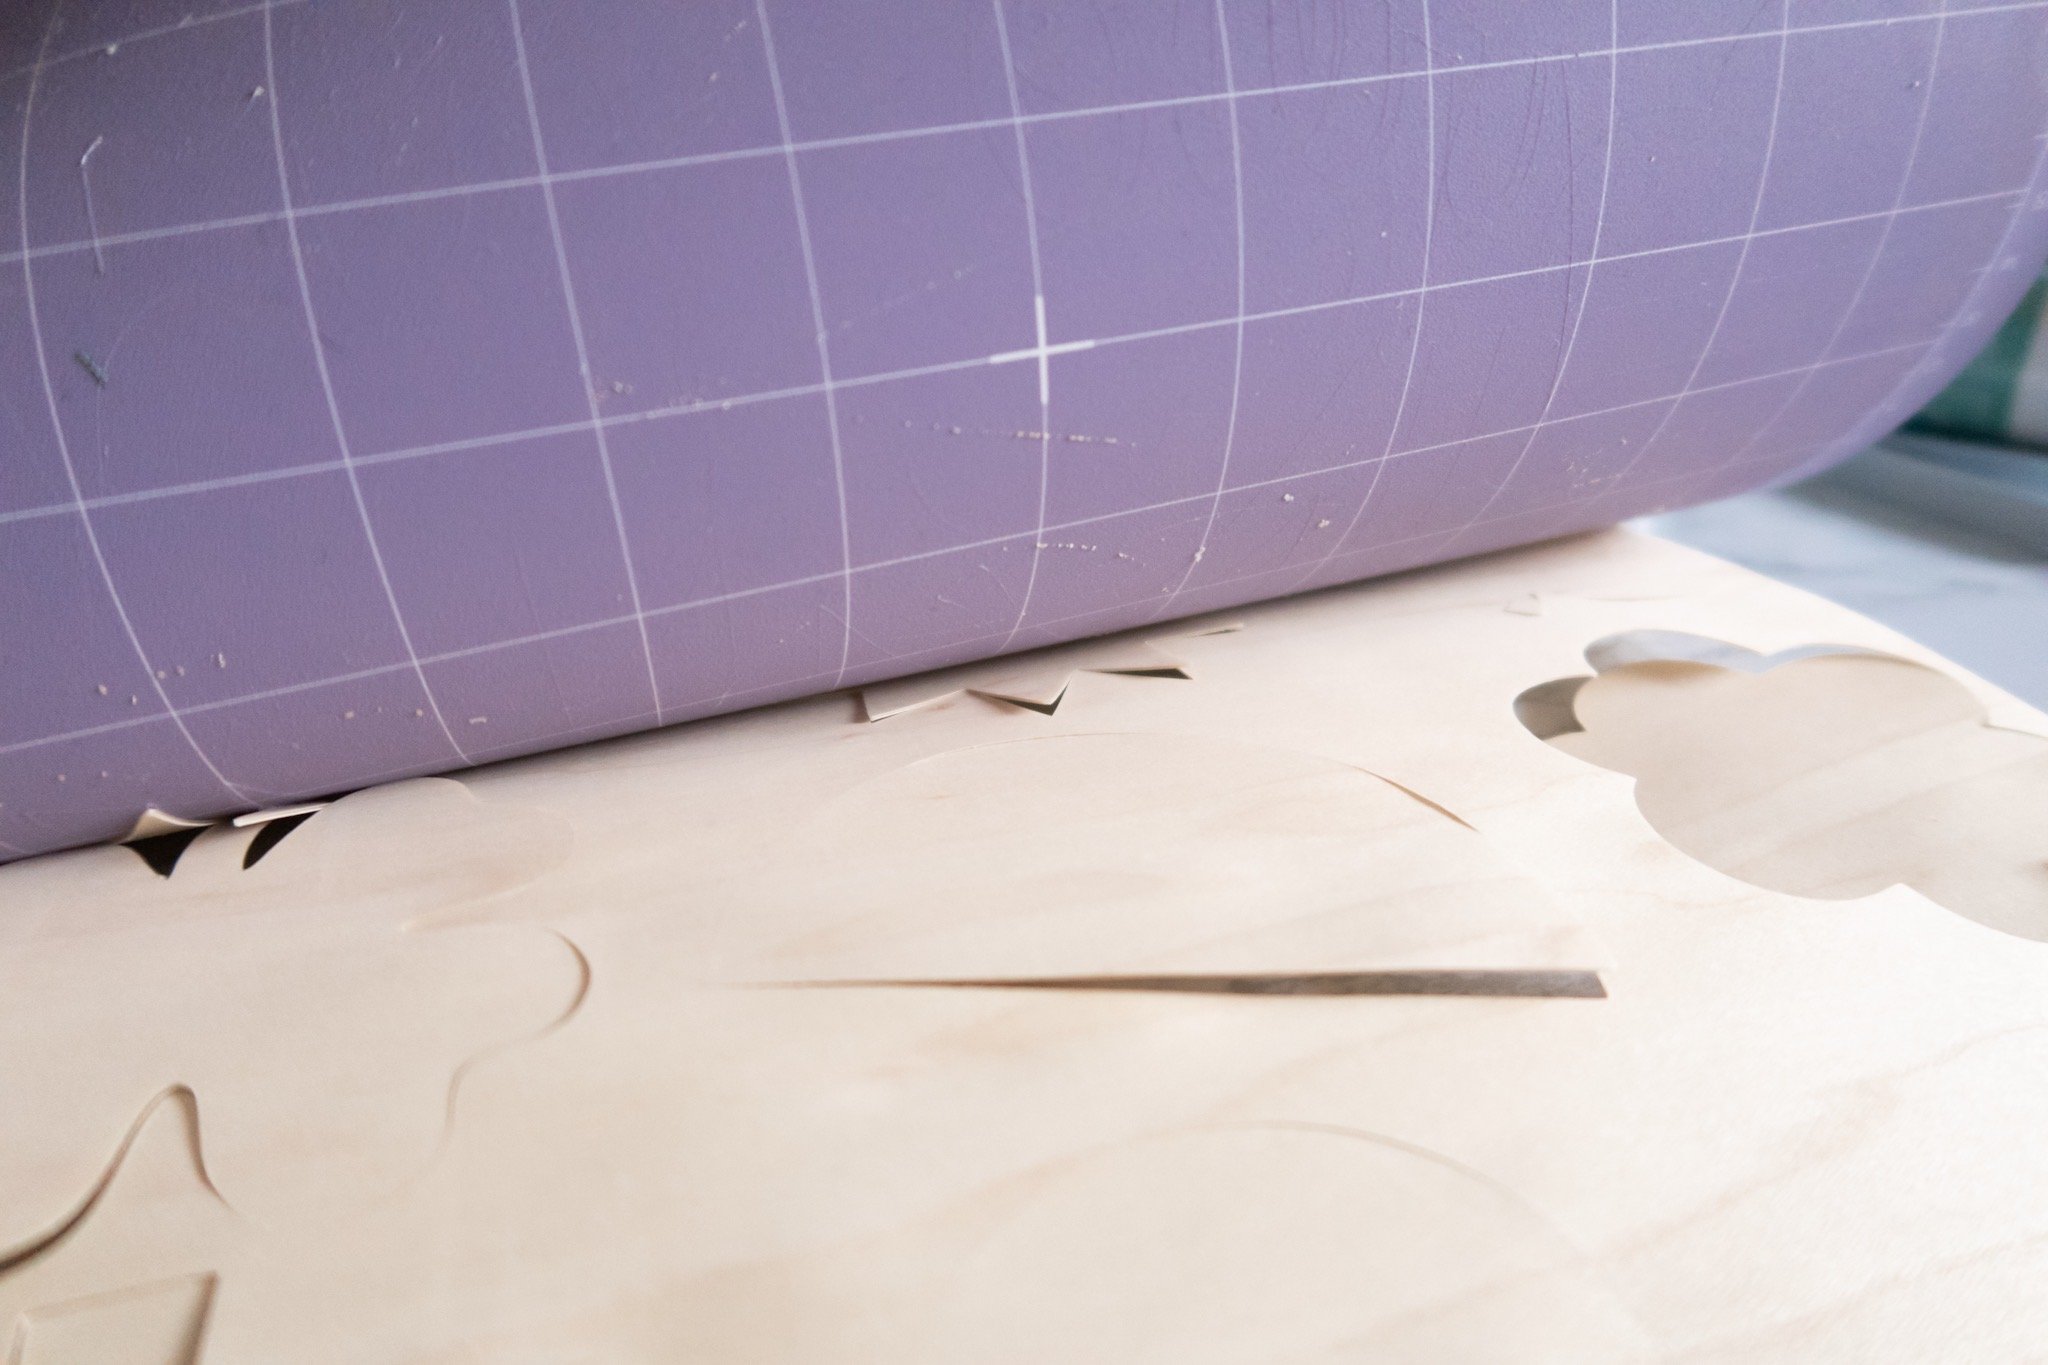
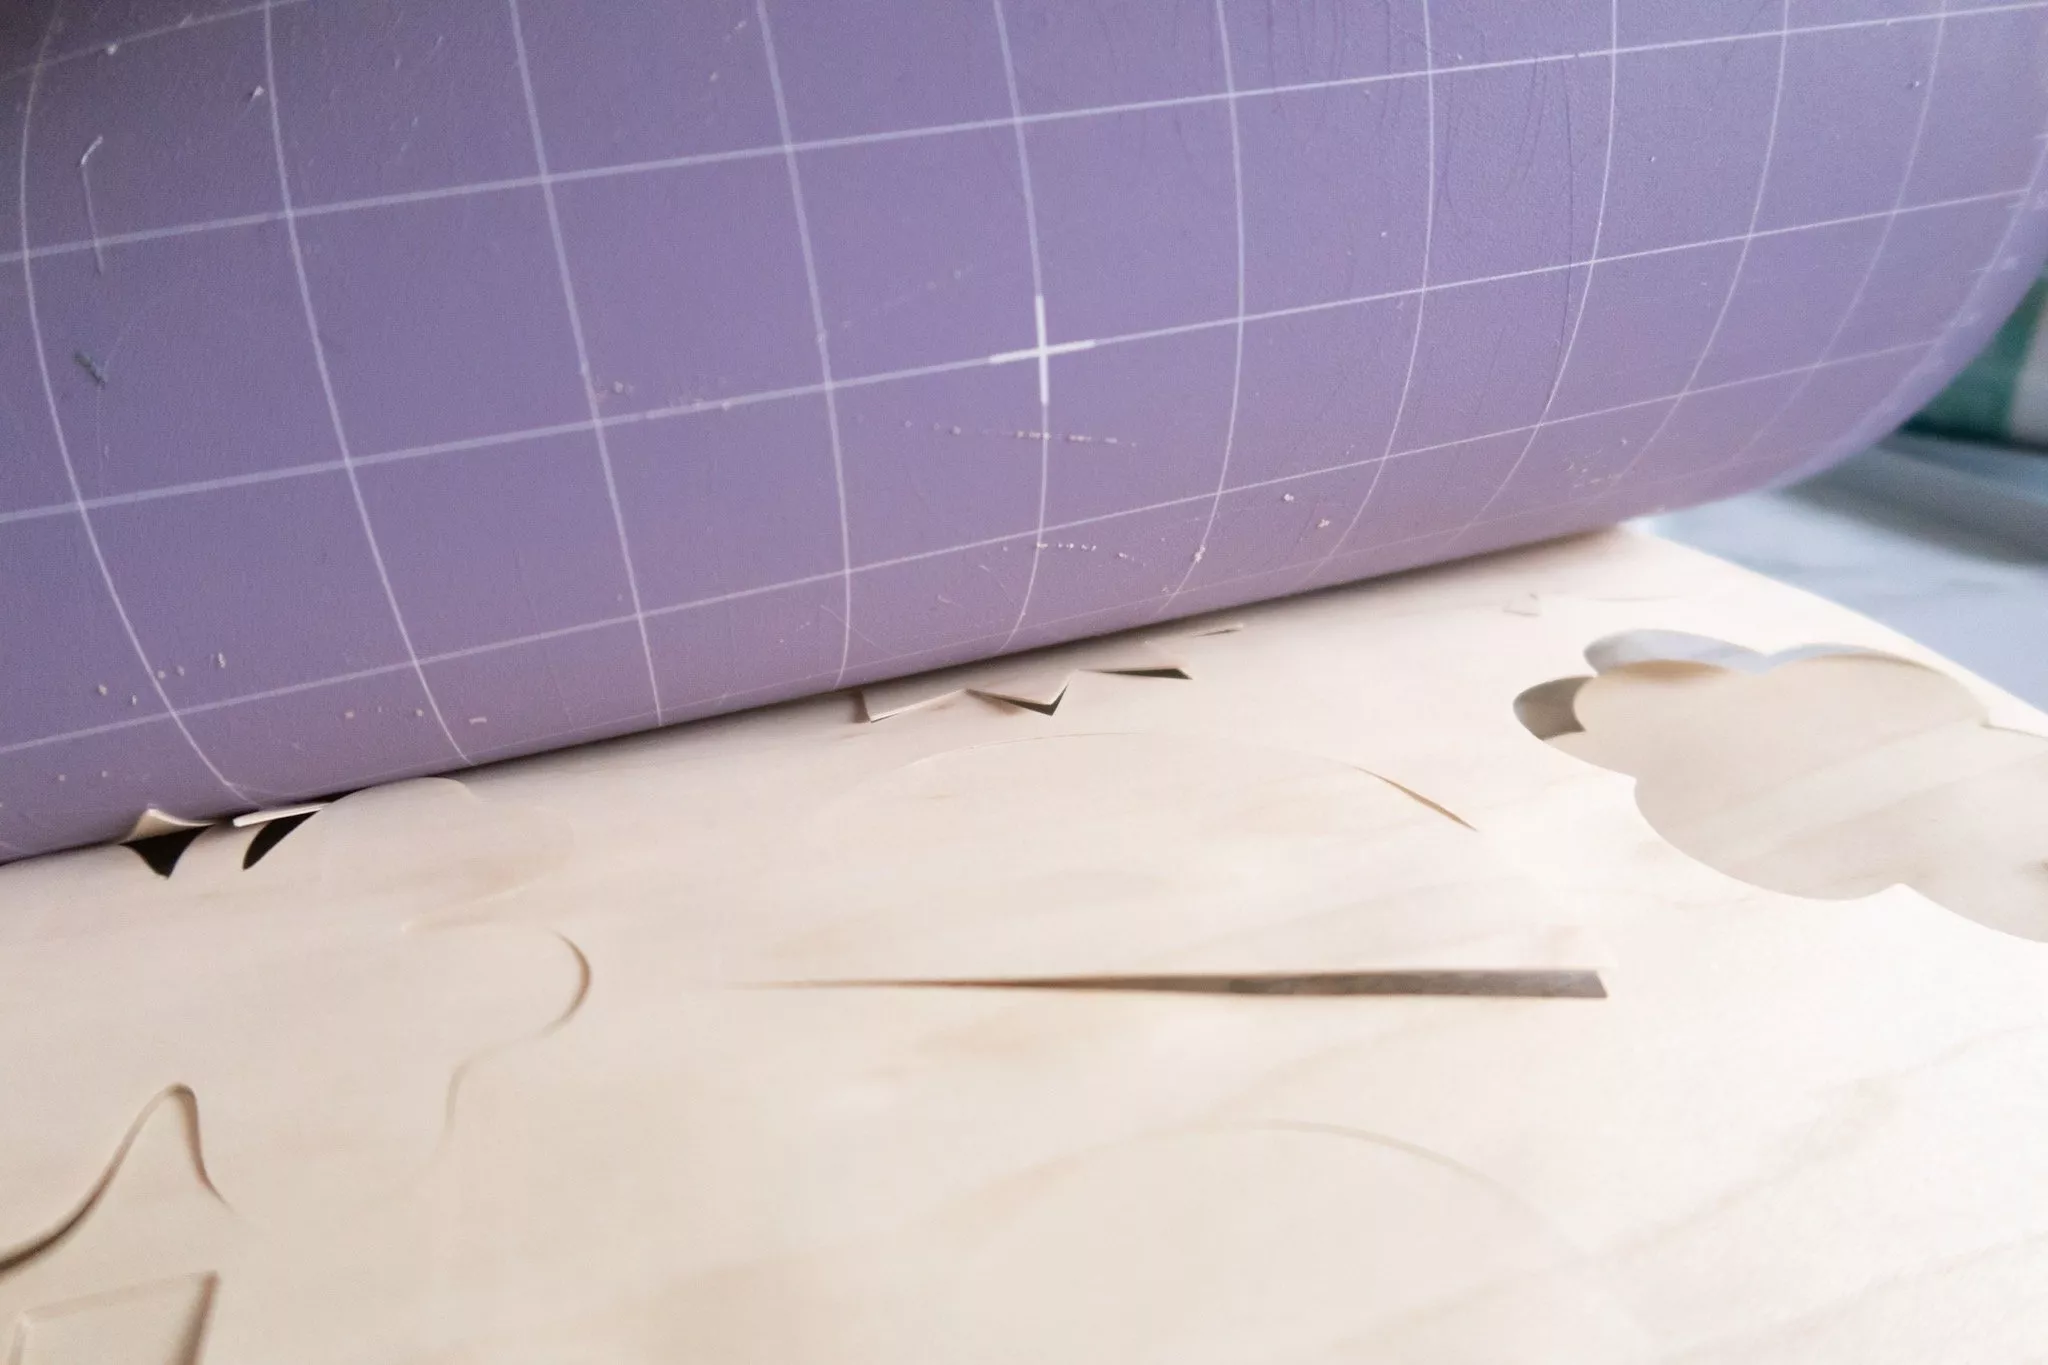
Once your machine is done cutting the veneer, remove the painter’s tape around the edges, place your mat face down on your working surface, and peel the mat up from the wood.
You want to curl your mat up and away from the wood to break the seal – this keeps you from having to bend your thin wood veneer and possibly break/waste materials.
Certain pieces of the cut design may want to continue sticking to the mat as you peel it up and away from the wood – just wedge your Cricut tweezers between the two and lift it from the mat as you continue to curl the mat up.
The tweezers especially come in handy when it comes to removing the cursive lettering from your mat.
Here are the finished cut letters…

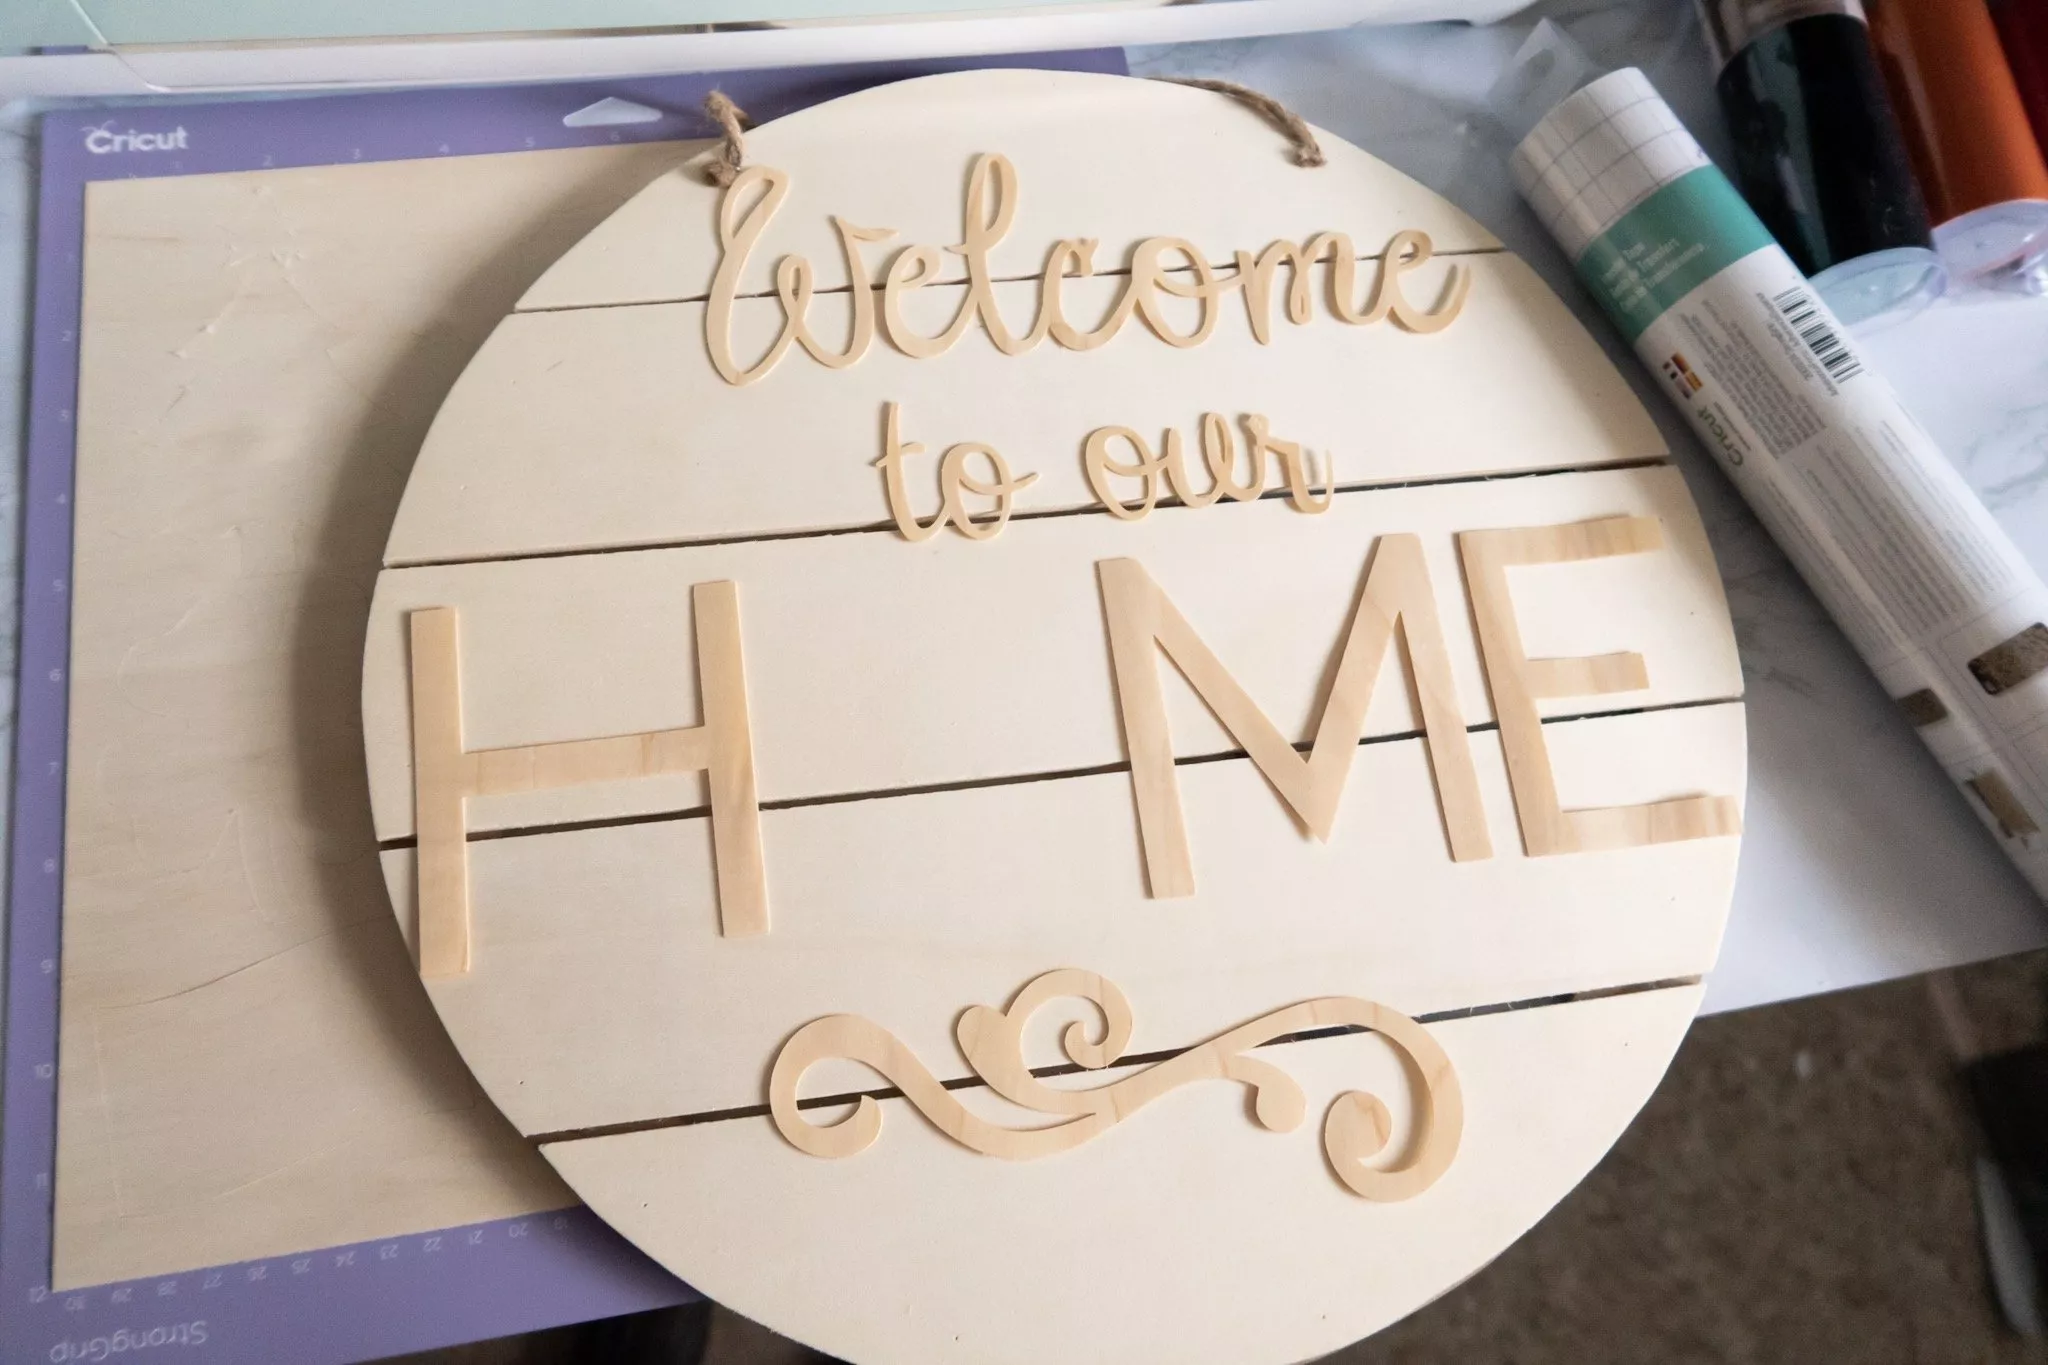
I ended up cutting the edges of the veneer on the letter ‘E’ to make them a tad bit shorter using regular kitchen scissors, just FYI!
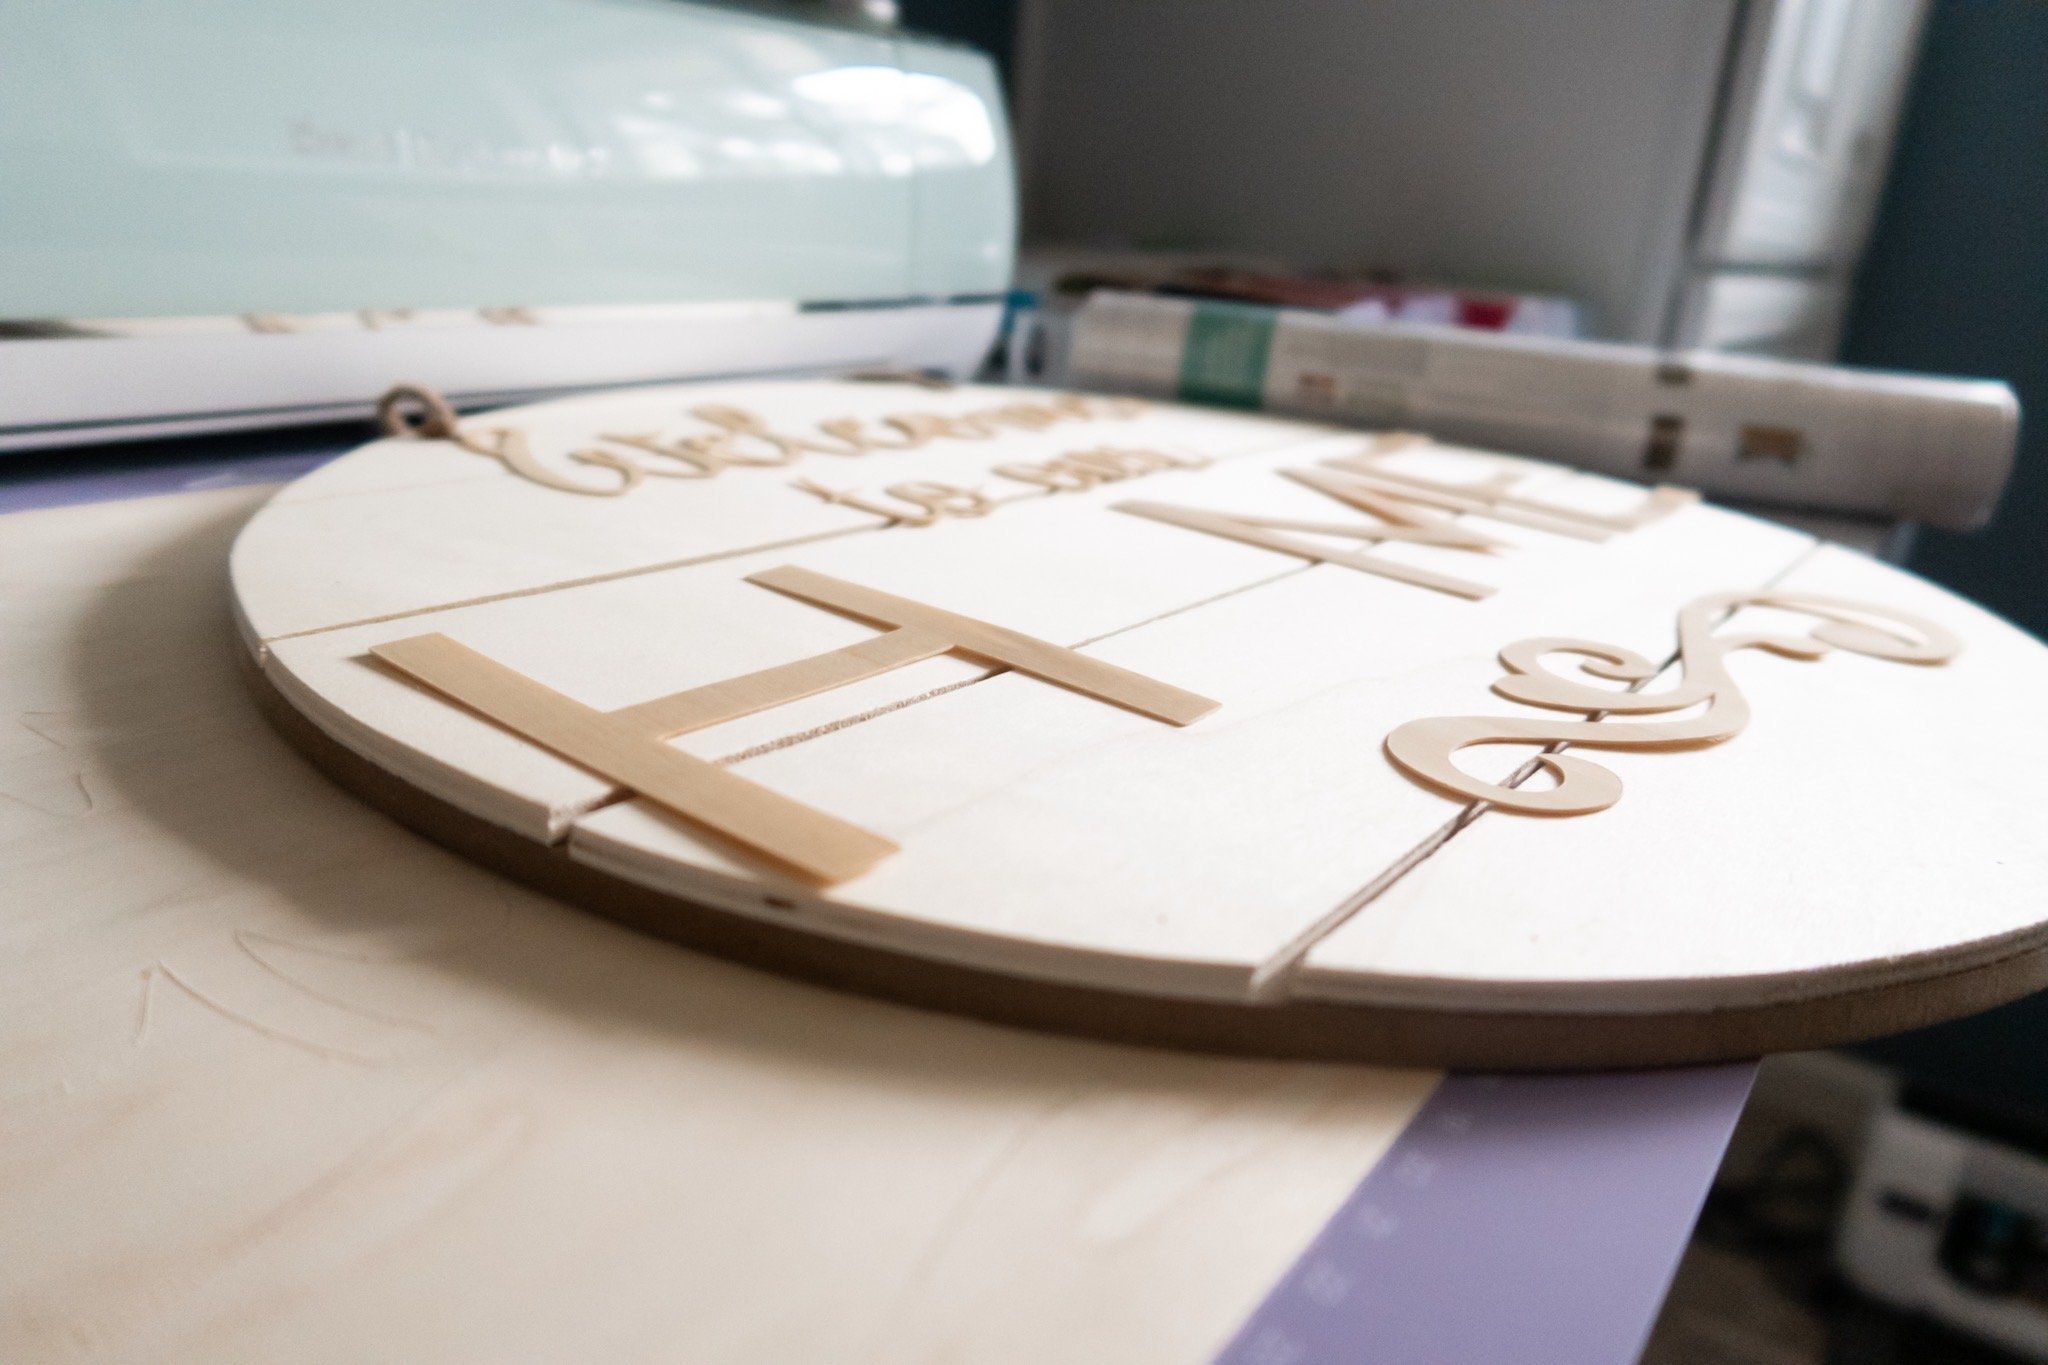
I’ve included a side view to show just how thin the wood veneer is – perfect for homemade signs and home decor!

And here are the 12 finished cut shapes to represent each calendar month…

CUTTING permanent vinyl WITH THE CRICUT EXPLORE AIR 2
Now onto cutting the permanent vinyl to adhere to the veneer shapes!
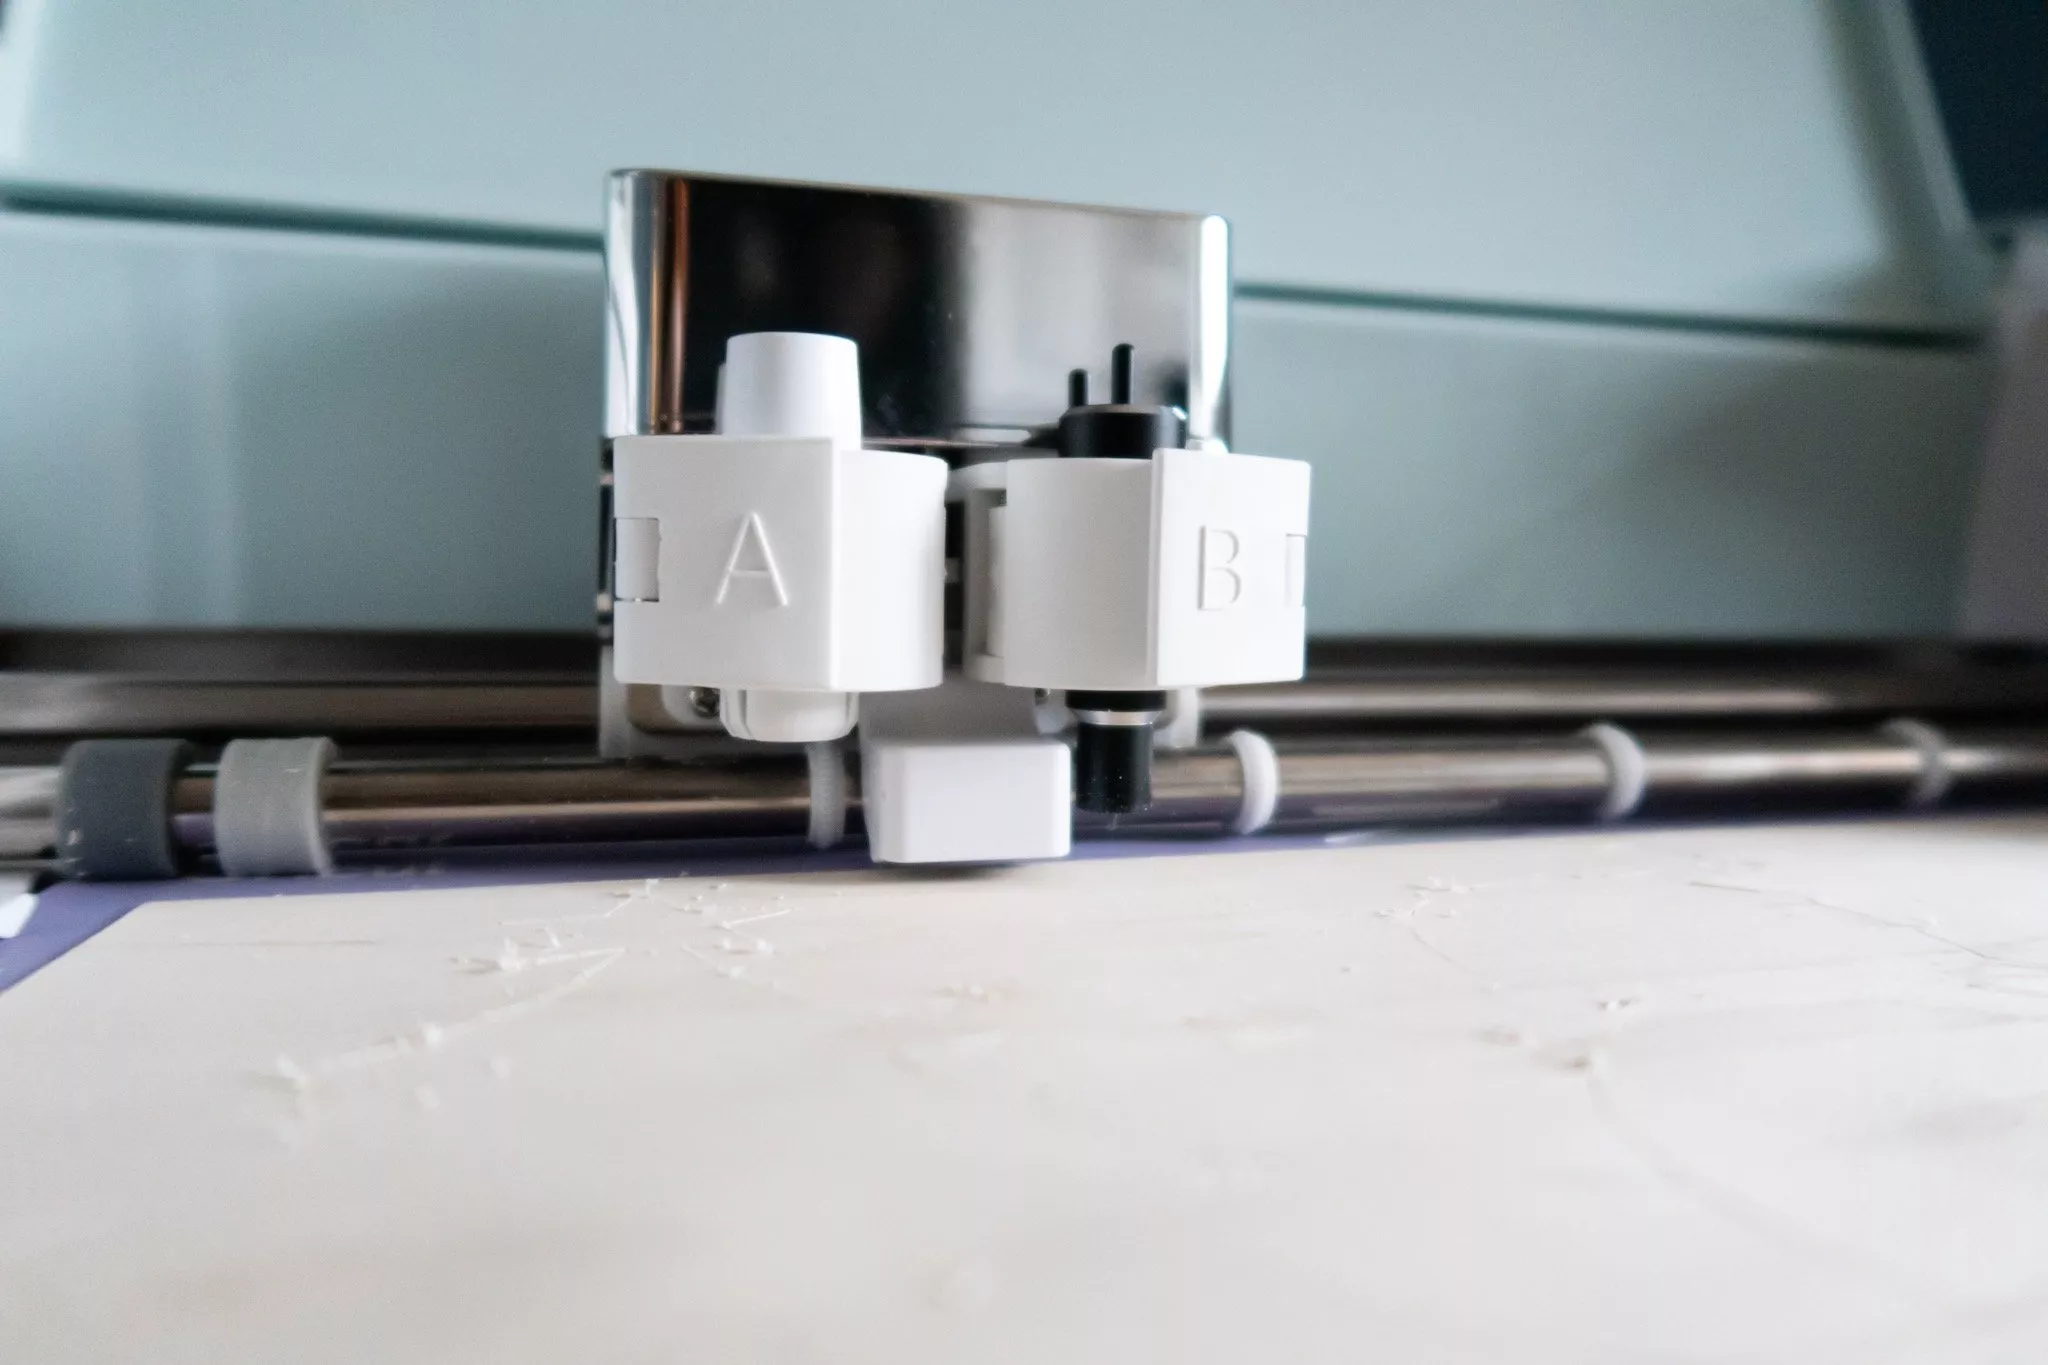
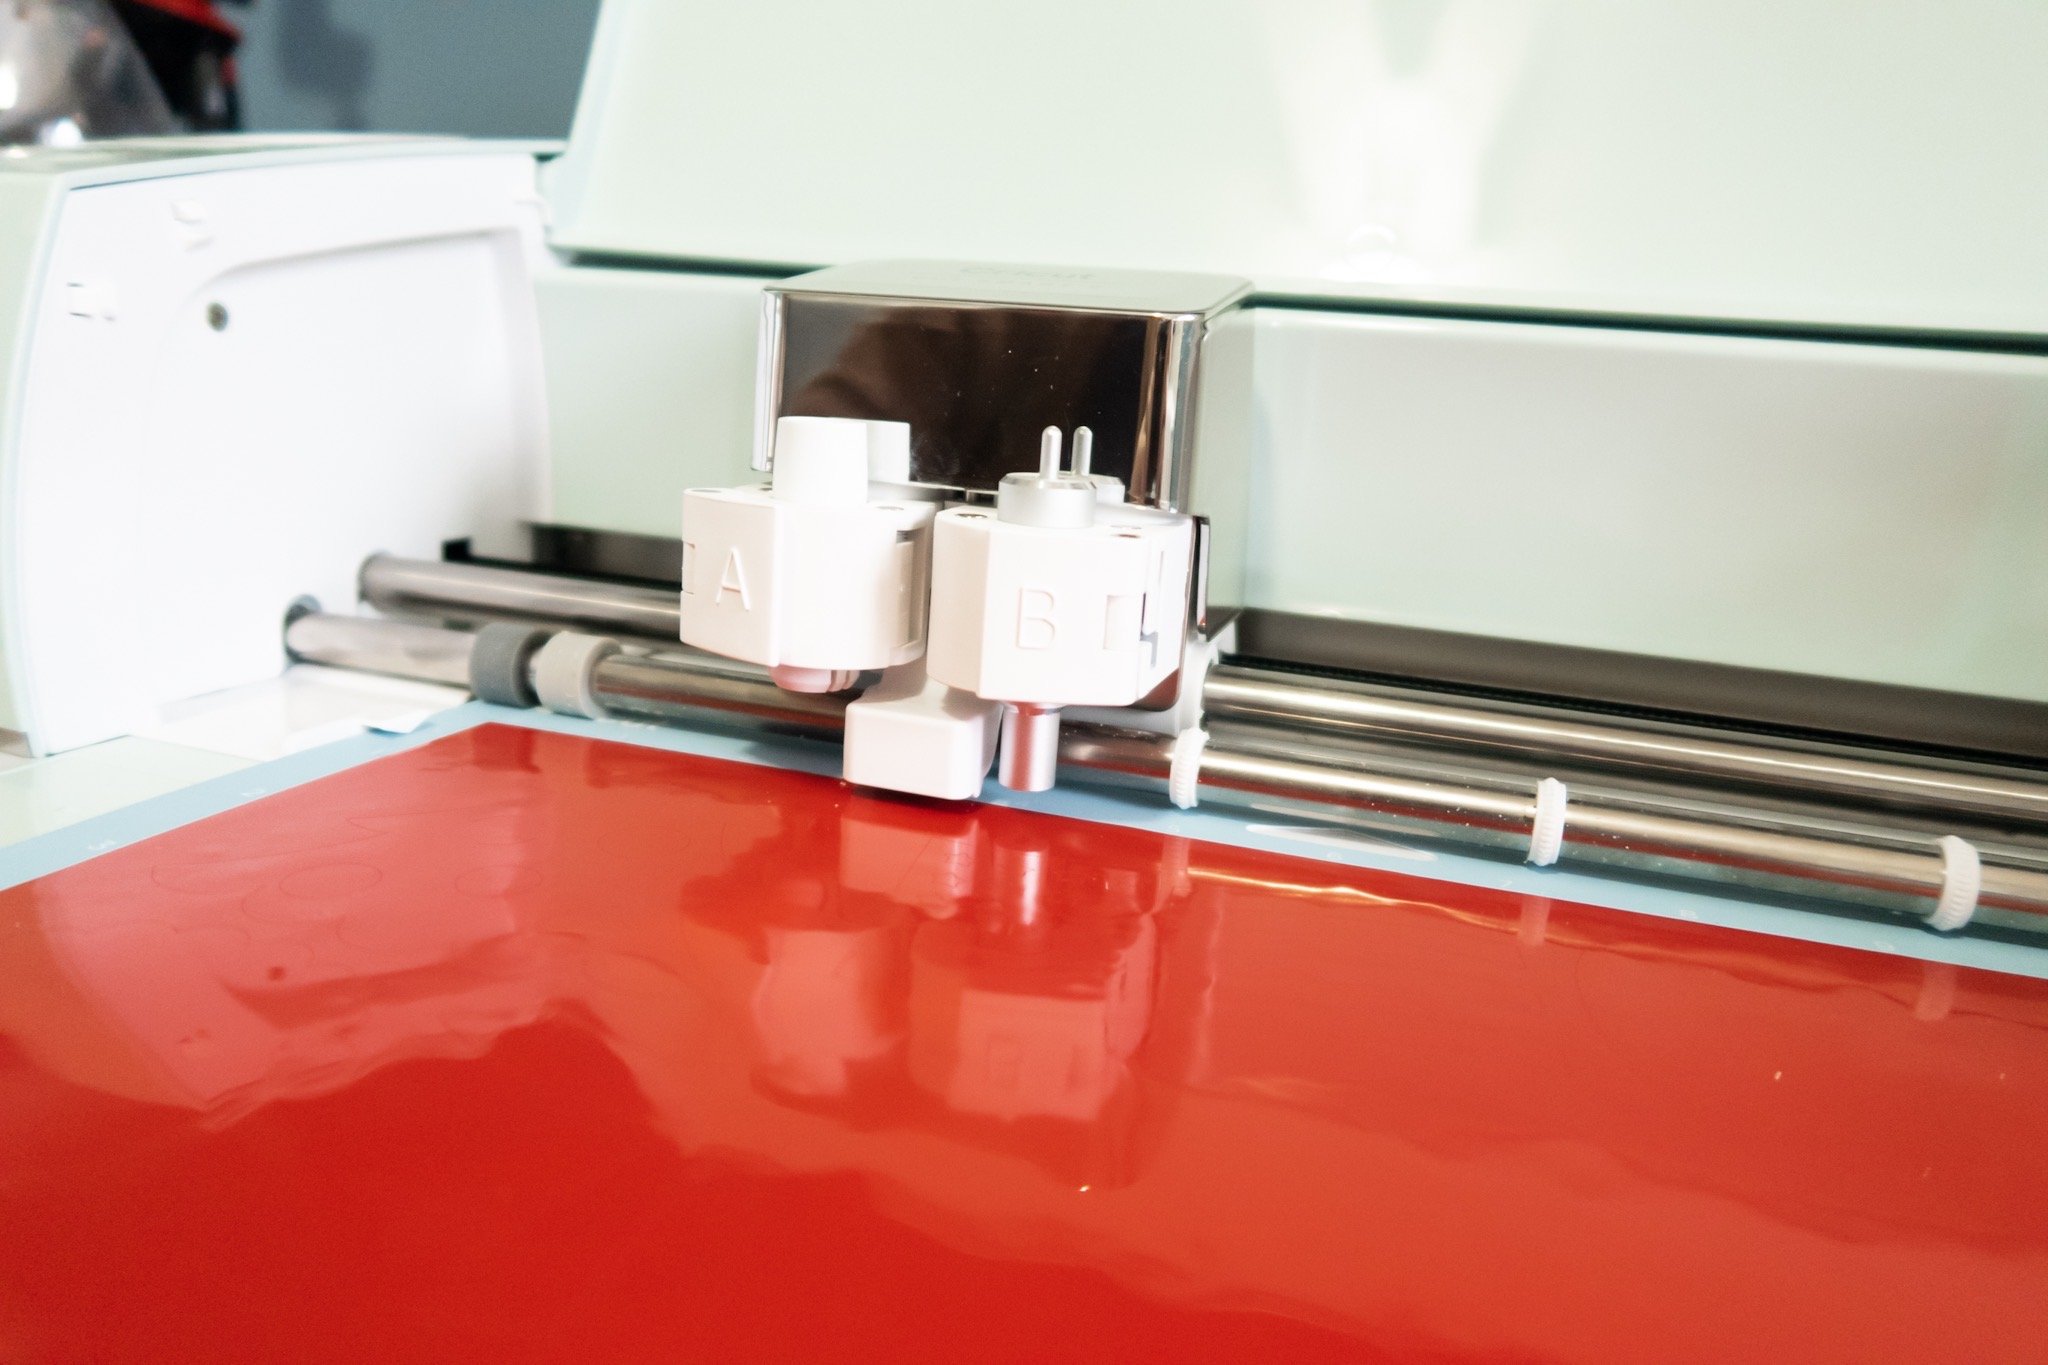
To cut the vinyl, you’ll need to switch the housing and blade in ‘B’ from the deep-point to fine-point.
Press the vinyl onto your LightGrip mat and start cutting out the shapes you’ll need for each wood piece.
I like to work by color and cut out all of my red shapes first, then my blue, and so on and so forth.

Design Space Settings For Cutting Vinyl
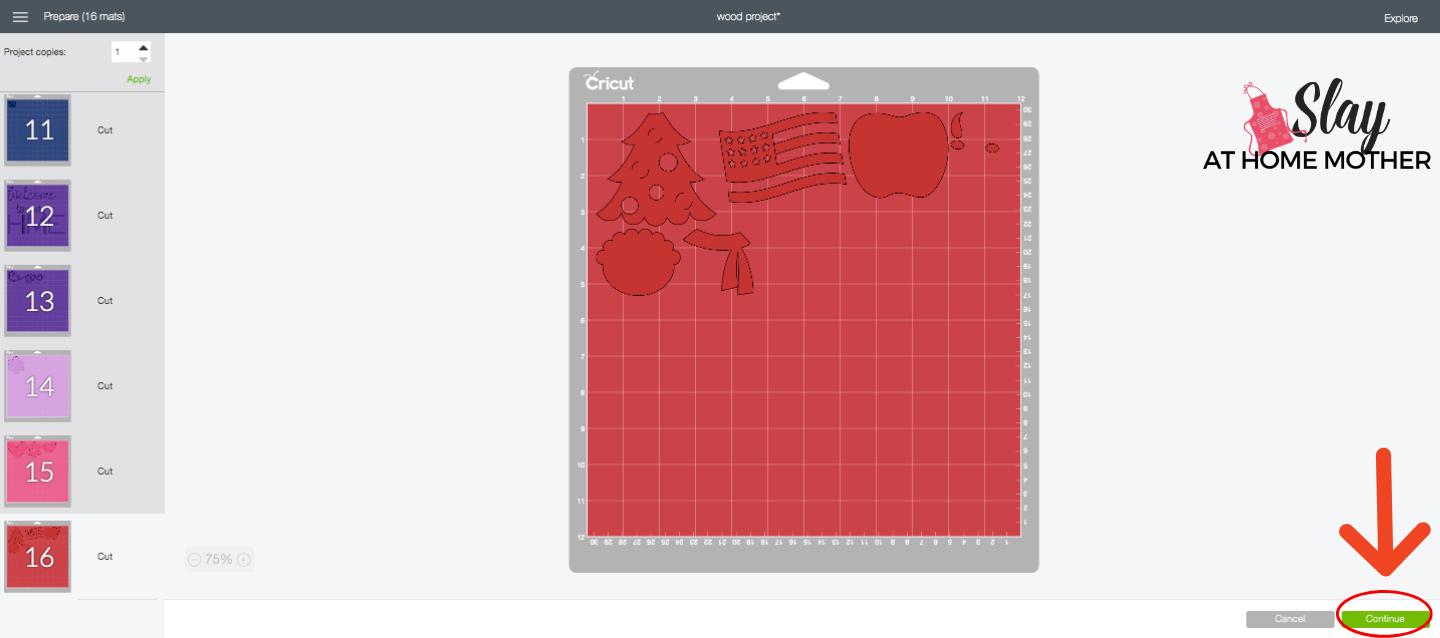
Select the mat you’ll be cutting first (in this example, I’m cutting the red), and then ‘Continue‘.
Feel free to move the shapes around on the mat before cutting if one seems too close to another, especially if you are a beginner.

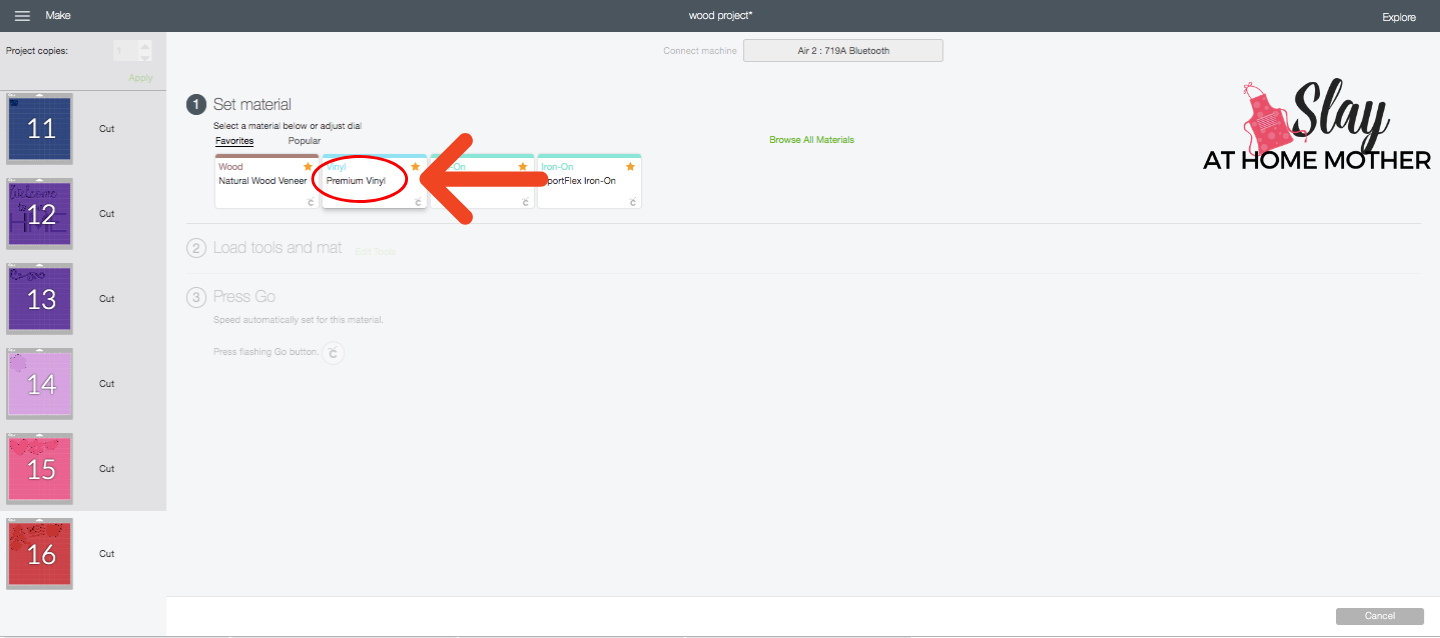
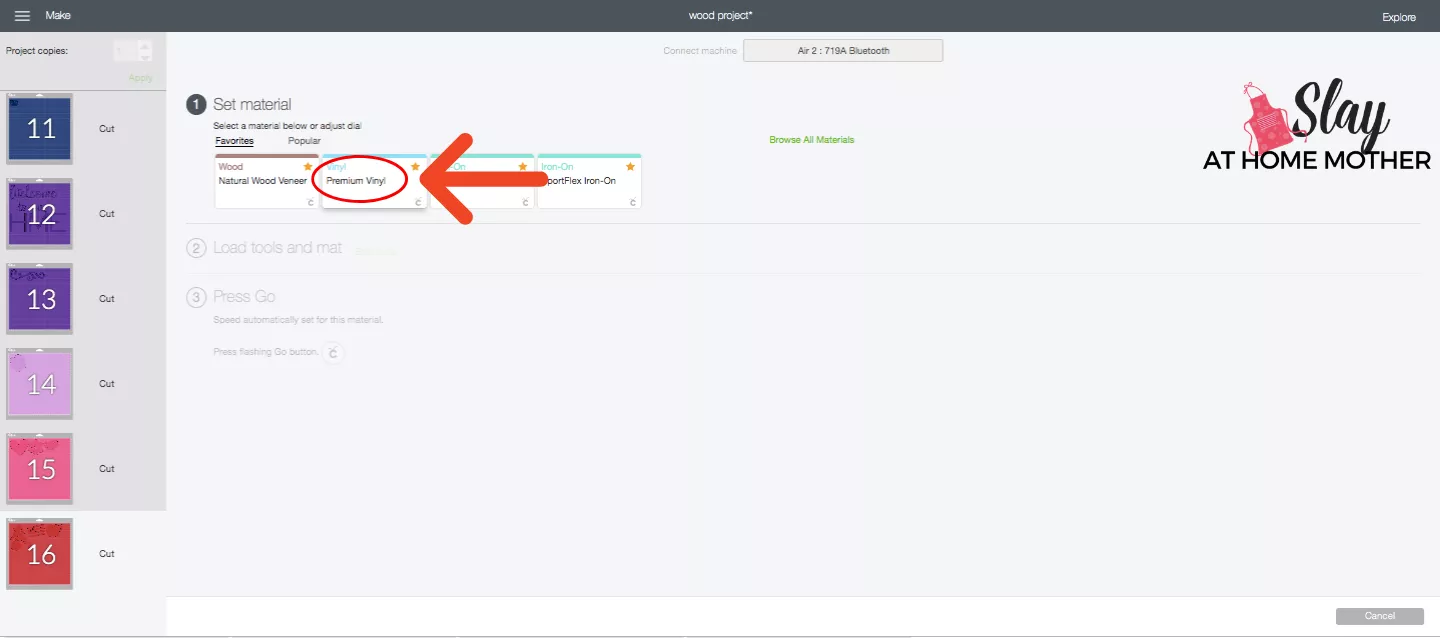
On the next screen, select your custom material as ‘Premium Vinyl‘. Be sure to install your fine-point blade and housing prior to cutting.
Layering Vinyl Pieces After Cutting
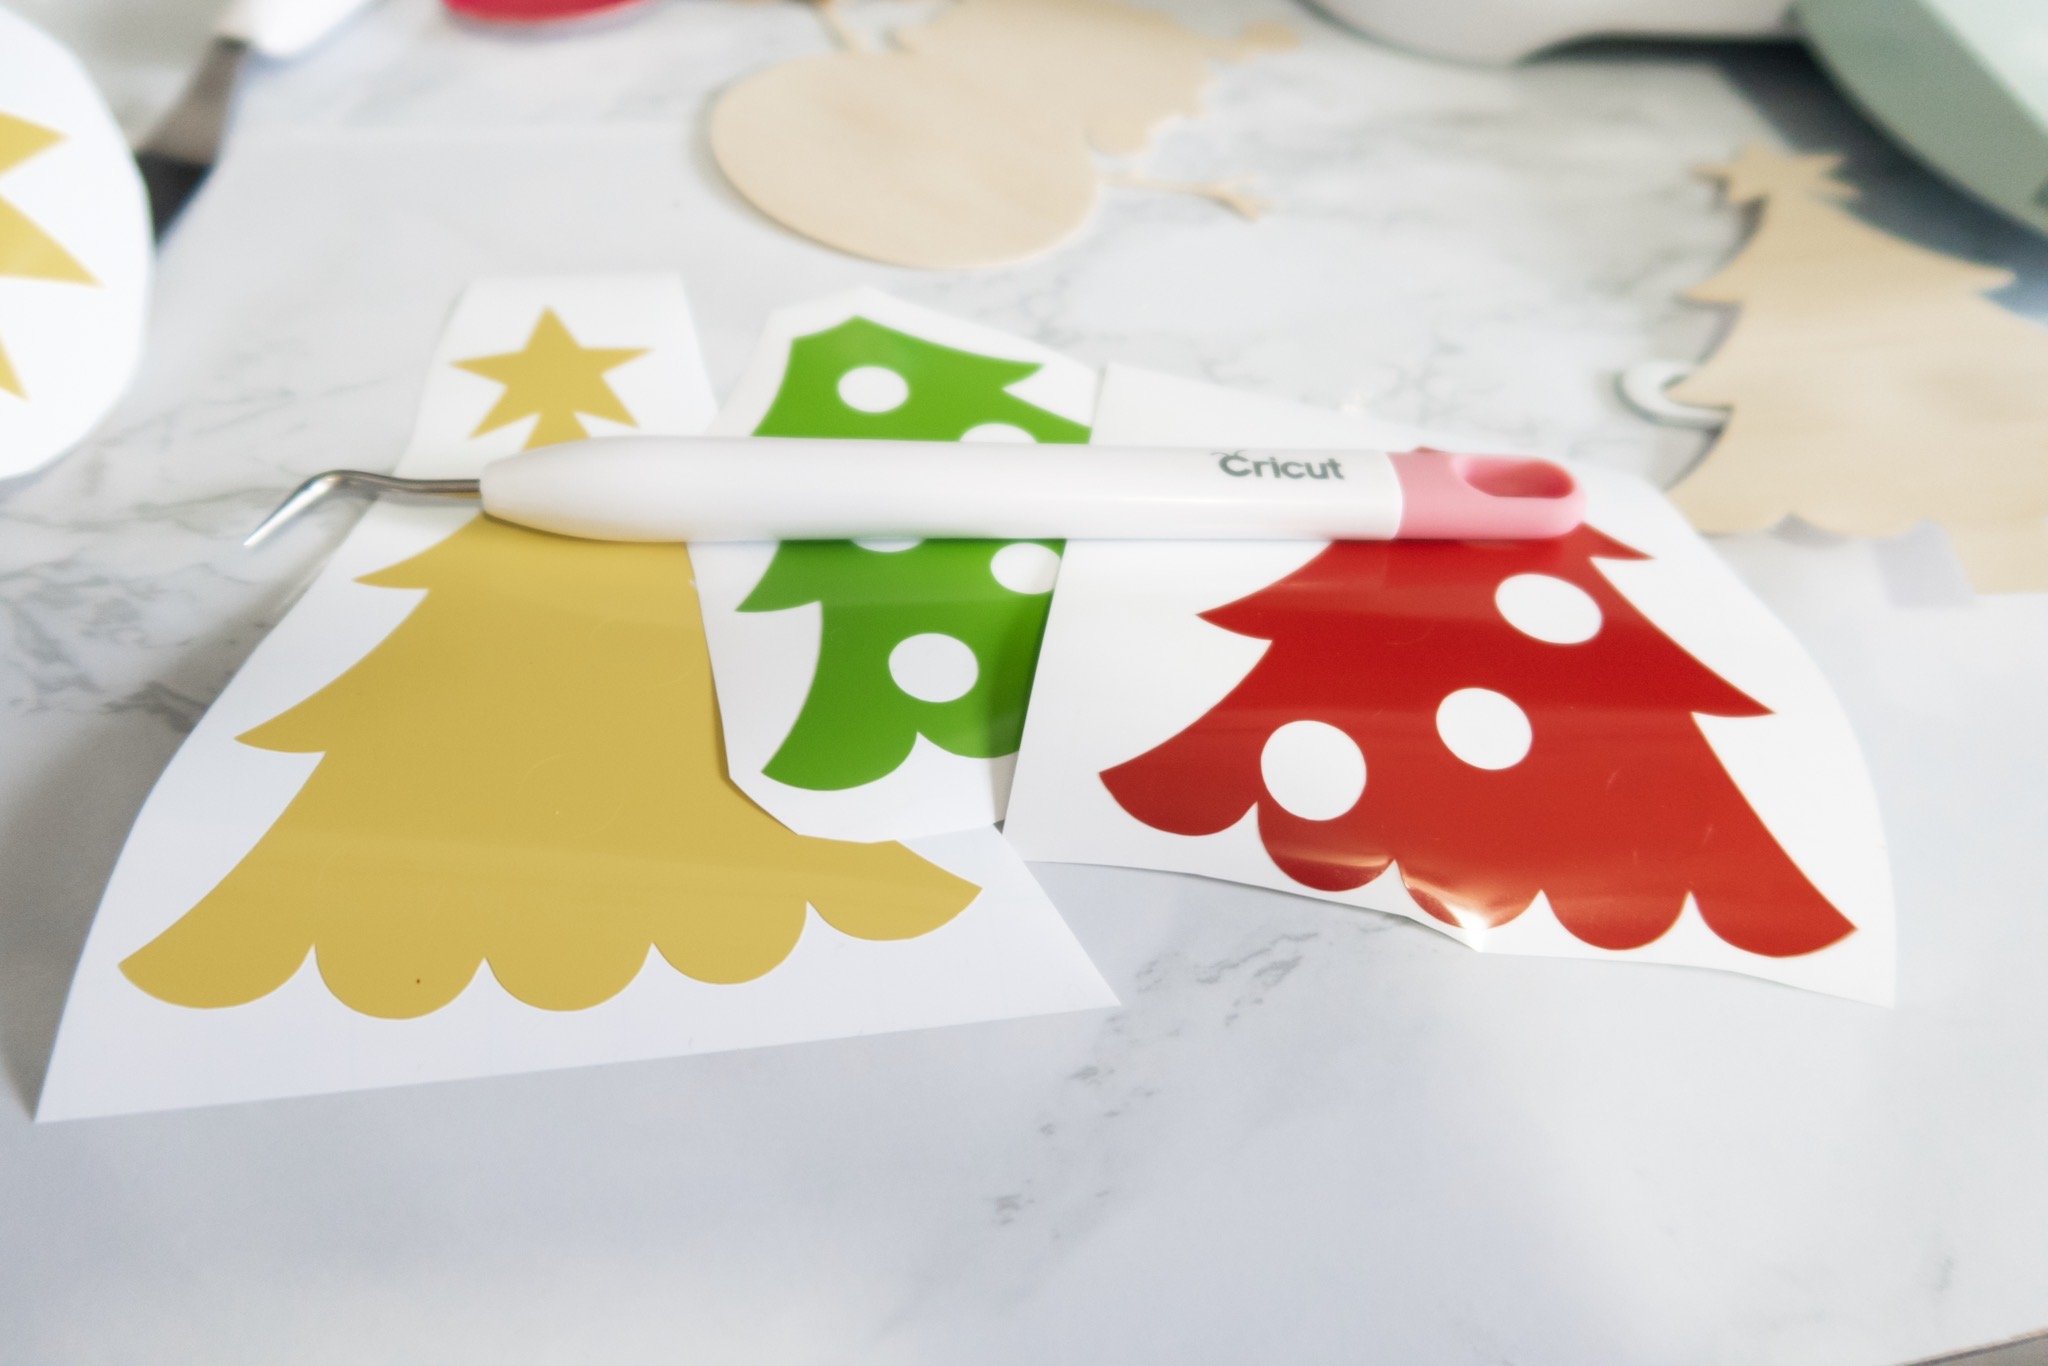
Once I’ve finished with each color of vinyl that I need, I weed away the negative vinyl and then cut the shapes apart, keeping them together with the other shapes and colors for each wood piece.
Here’s an example of the Christmas tree design, made up of three pieces of vinyl…
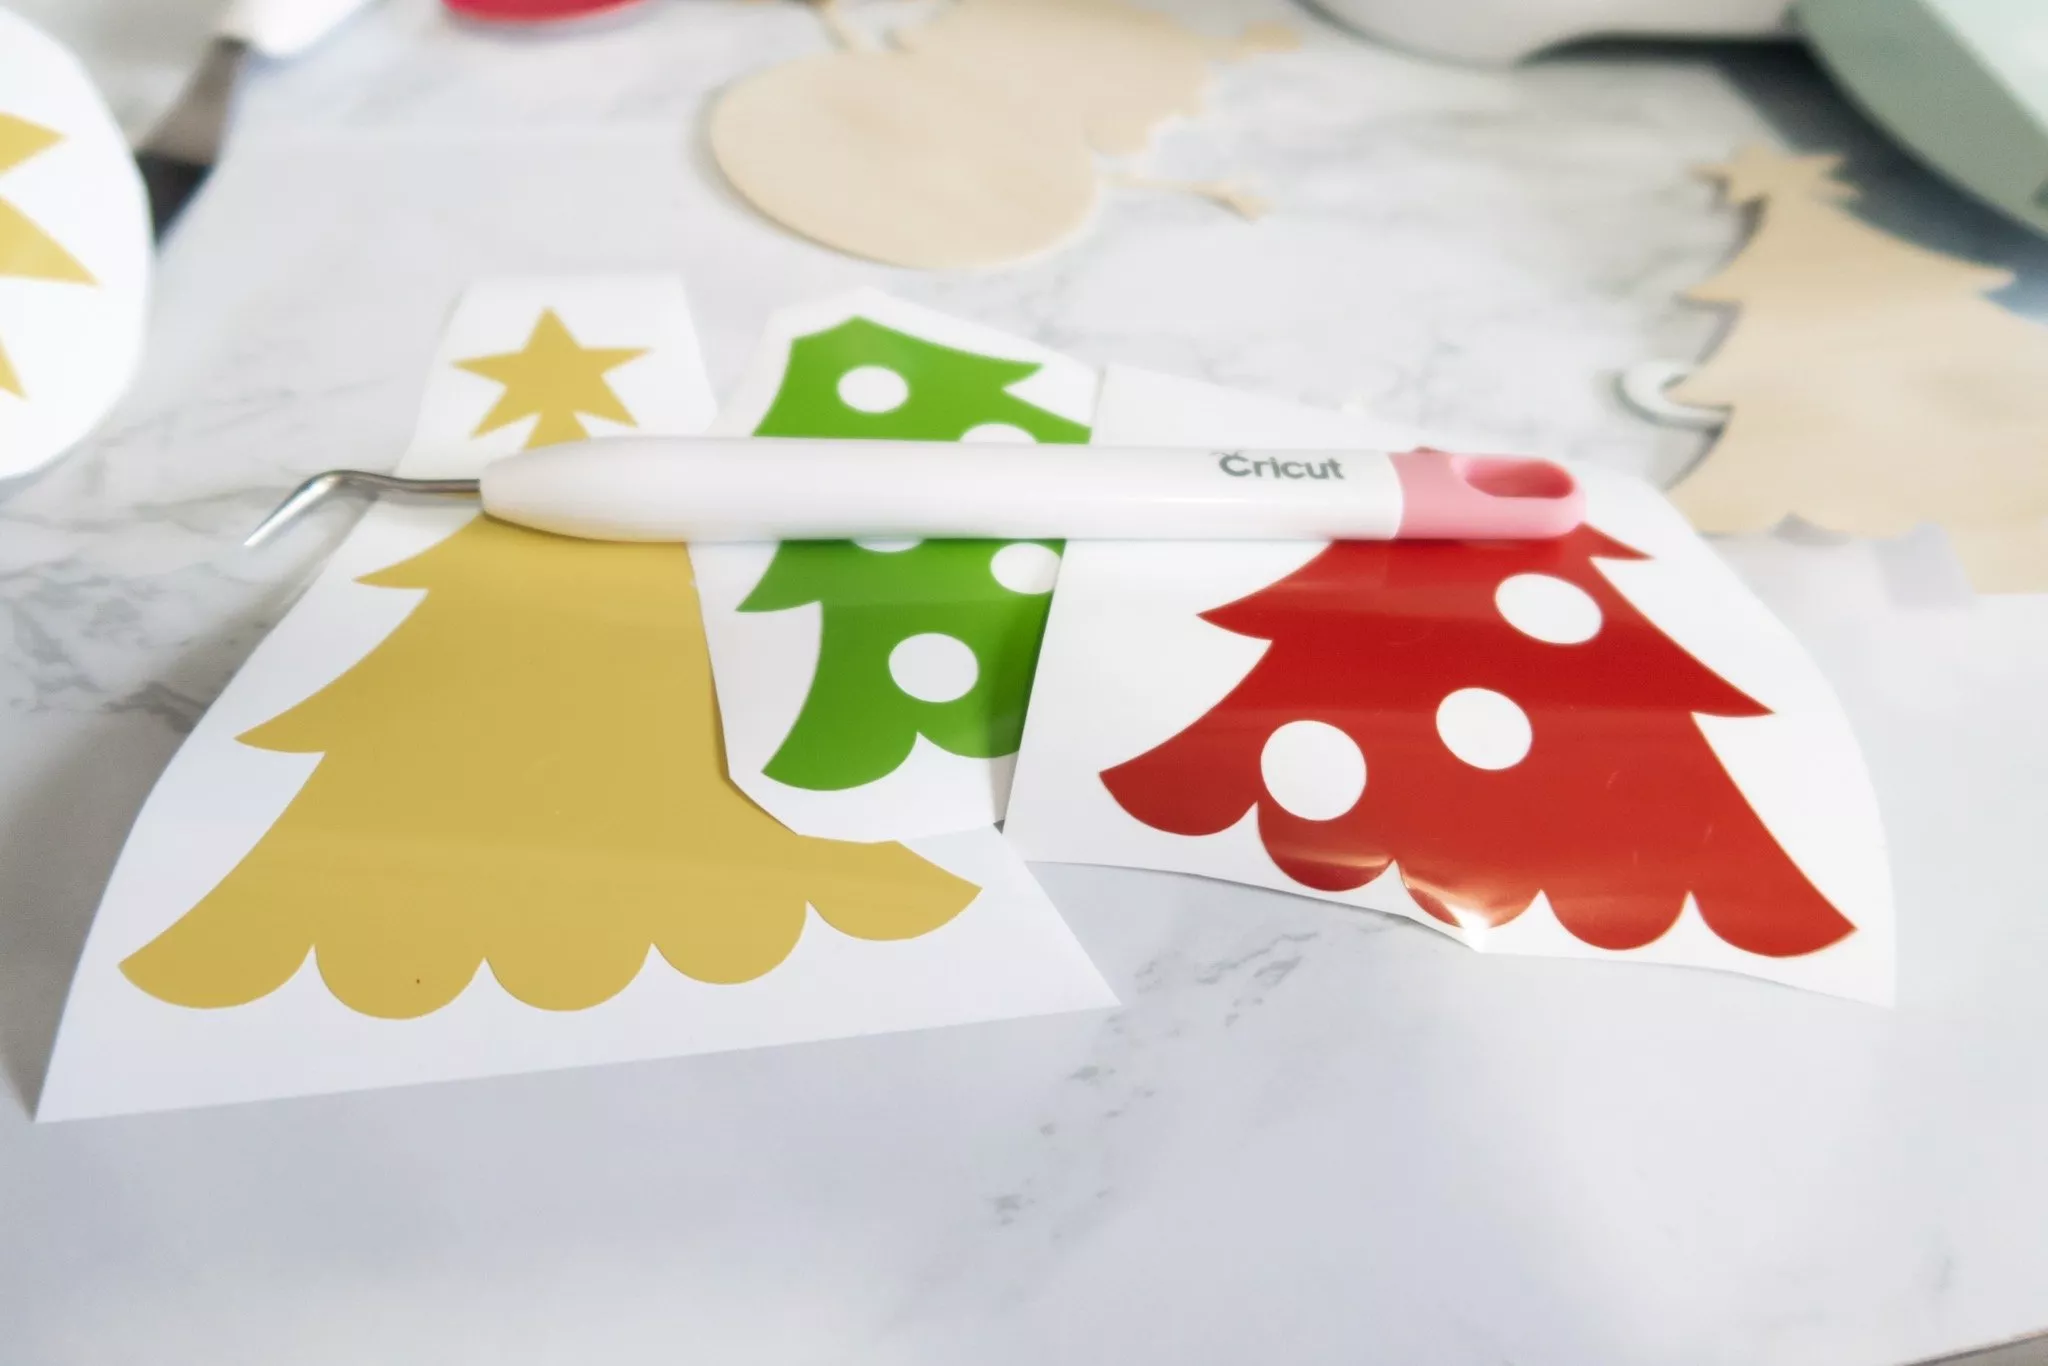
Now, using some transfer tape, start with the topmost layer. In this Christmas tree example, that would be the green tree layer.
Rub a piece of transfer tape over the green vinyl so that it sticks to the tape and peel away the white backing.
Layer this green piece over top of the red, and then over top of the yellow, and finally over the final brown piece (not pictured due to pregnancy brain).
Once those shapes are all layered together, transfer the design with transfer tape to the Christmas tree wood shape, lining up the shape of the star and the branches.
To do this, you’ll rub these layered pieces of permanent vinyl onto the Christmas tree shape so that they stick, and then peel away the transfer tape.
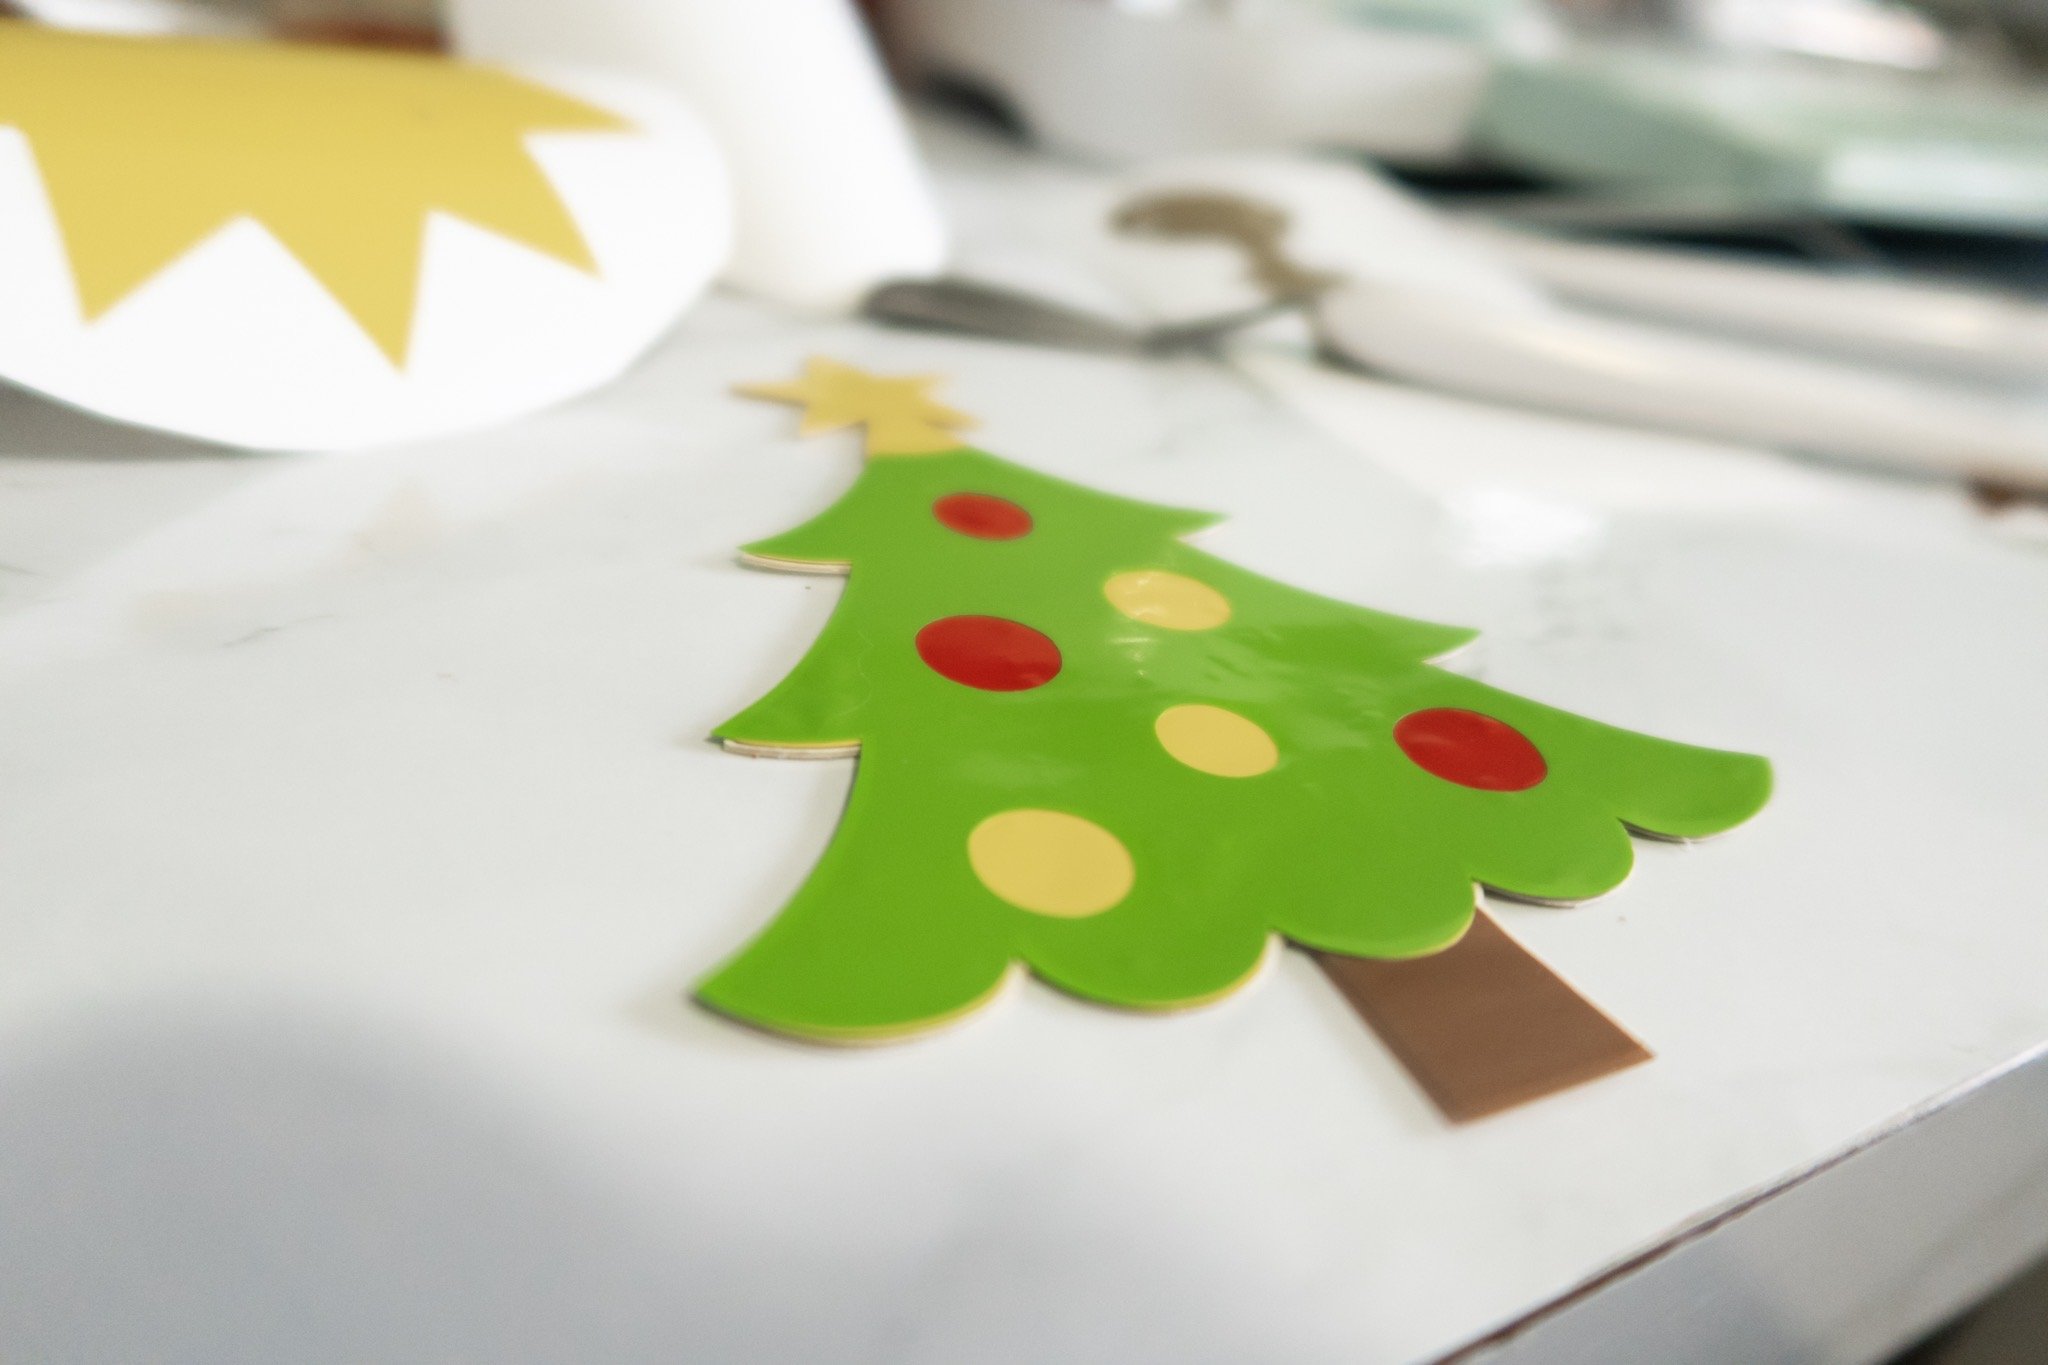
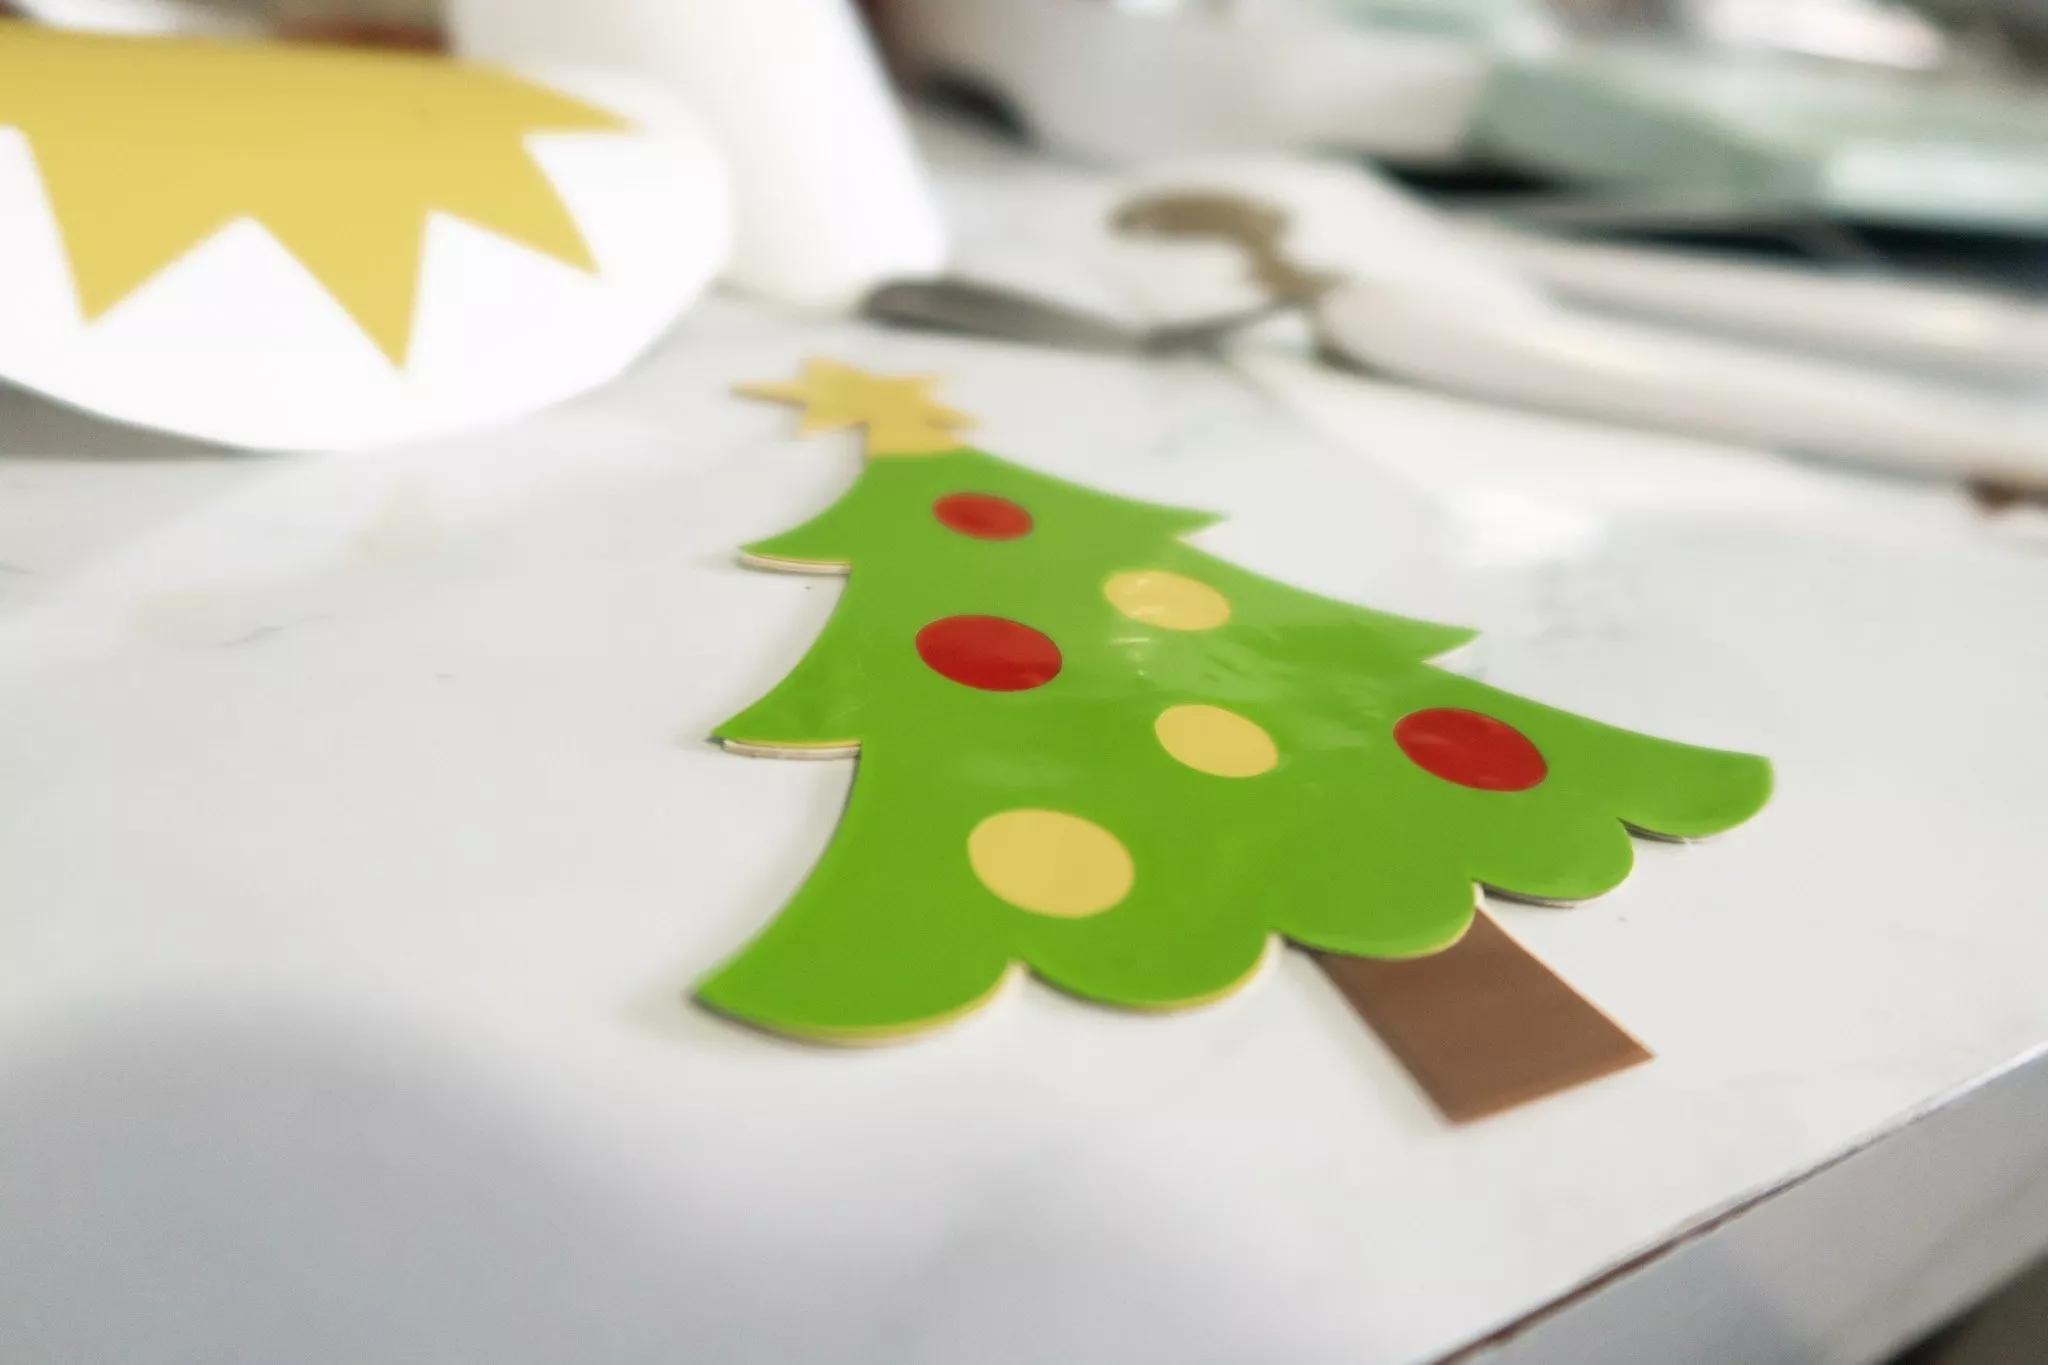
Go through each shape until you’re done.
P.S. For the snowman, I waited until the end to layer on the cheeks, nose, and scarf individually to make sure I liked the placement.
The regular grip transfer tape works best for this.
Prep Your Wood Sign And Cursive Lettering
If you haven’t done so already, stain or paint your wood sign to get it ready for the next steps! Mine is painted with three light coats of white acrylic paint we had on hand.
You can also take this time to paint or stain your wood veneer lettering. I used three light coats of stain in the color Early American for my lettering.
Once dry, adhere your lettering to your sign, giving yourself some extra room between the ‘H’ and ‘M’ letters.
Be sure to place each vinyl-covered wood piece between the letters before adhering the lettering to your sign to ensure you’ve given yourself enough room.
I would recommend using strong glue to attach your lettering to your sign because of how thin the wood veneer is to prevent warping or lifting.
For my sign, I used Duco-Cement to attach the lettering because that’s what we had on hand and it worked very well.
Secure Velcro To Sign And Wood Shapes
Now place a small square of adhesive-backed loop (soft) velcro to your sign. If you are working with strips of velcro like I did, just cut a small square about 1″x1″ of it off with scissors, remove the adhesive cover, and stick it to your sign appropriately.
You could also use sticky dots like this!
Cut roughly the same size square of hook (rough) velcro.
Remove the adhesive backing on the hook velcro and attach the rough and soft velcro to one another lightly with the adhesive of the second piece of velcro exposed and facing up towards you.
Hover each of your wood pieces over the pieces of velcro to determine the best position for the adhesive to stick to each individual wood piece, and press the wood piece so it sticks to the exposed adhesive.
Because each shape is generally the same size but all a different shape, this helps to position the velcro on each piece individually so each one is centered.
In other words, one piece of velcro may work better attached higher on the back of one particular wood piece while another may work better centered, etc., depending on the shape and placement you would like for your sign ;).
Carefully remove the wood piece with the hook velcro from your sign, and press it firmly to ensure the best stick.
Do this with all 12 wood pieces.
Finished Interchangeable Welcome Sign
And here she is, beautifully crafted in a day with my Cricut Explore Air 2…

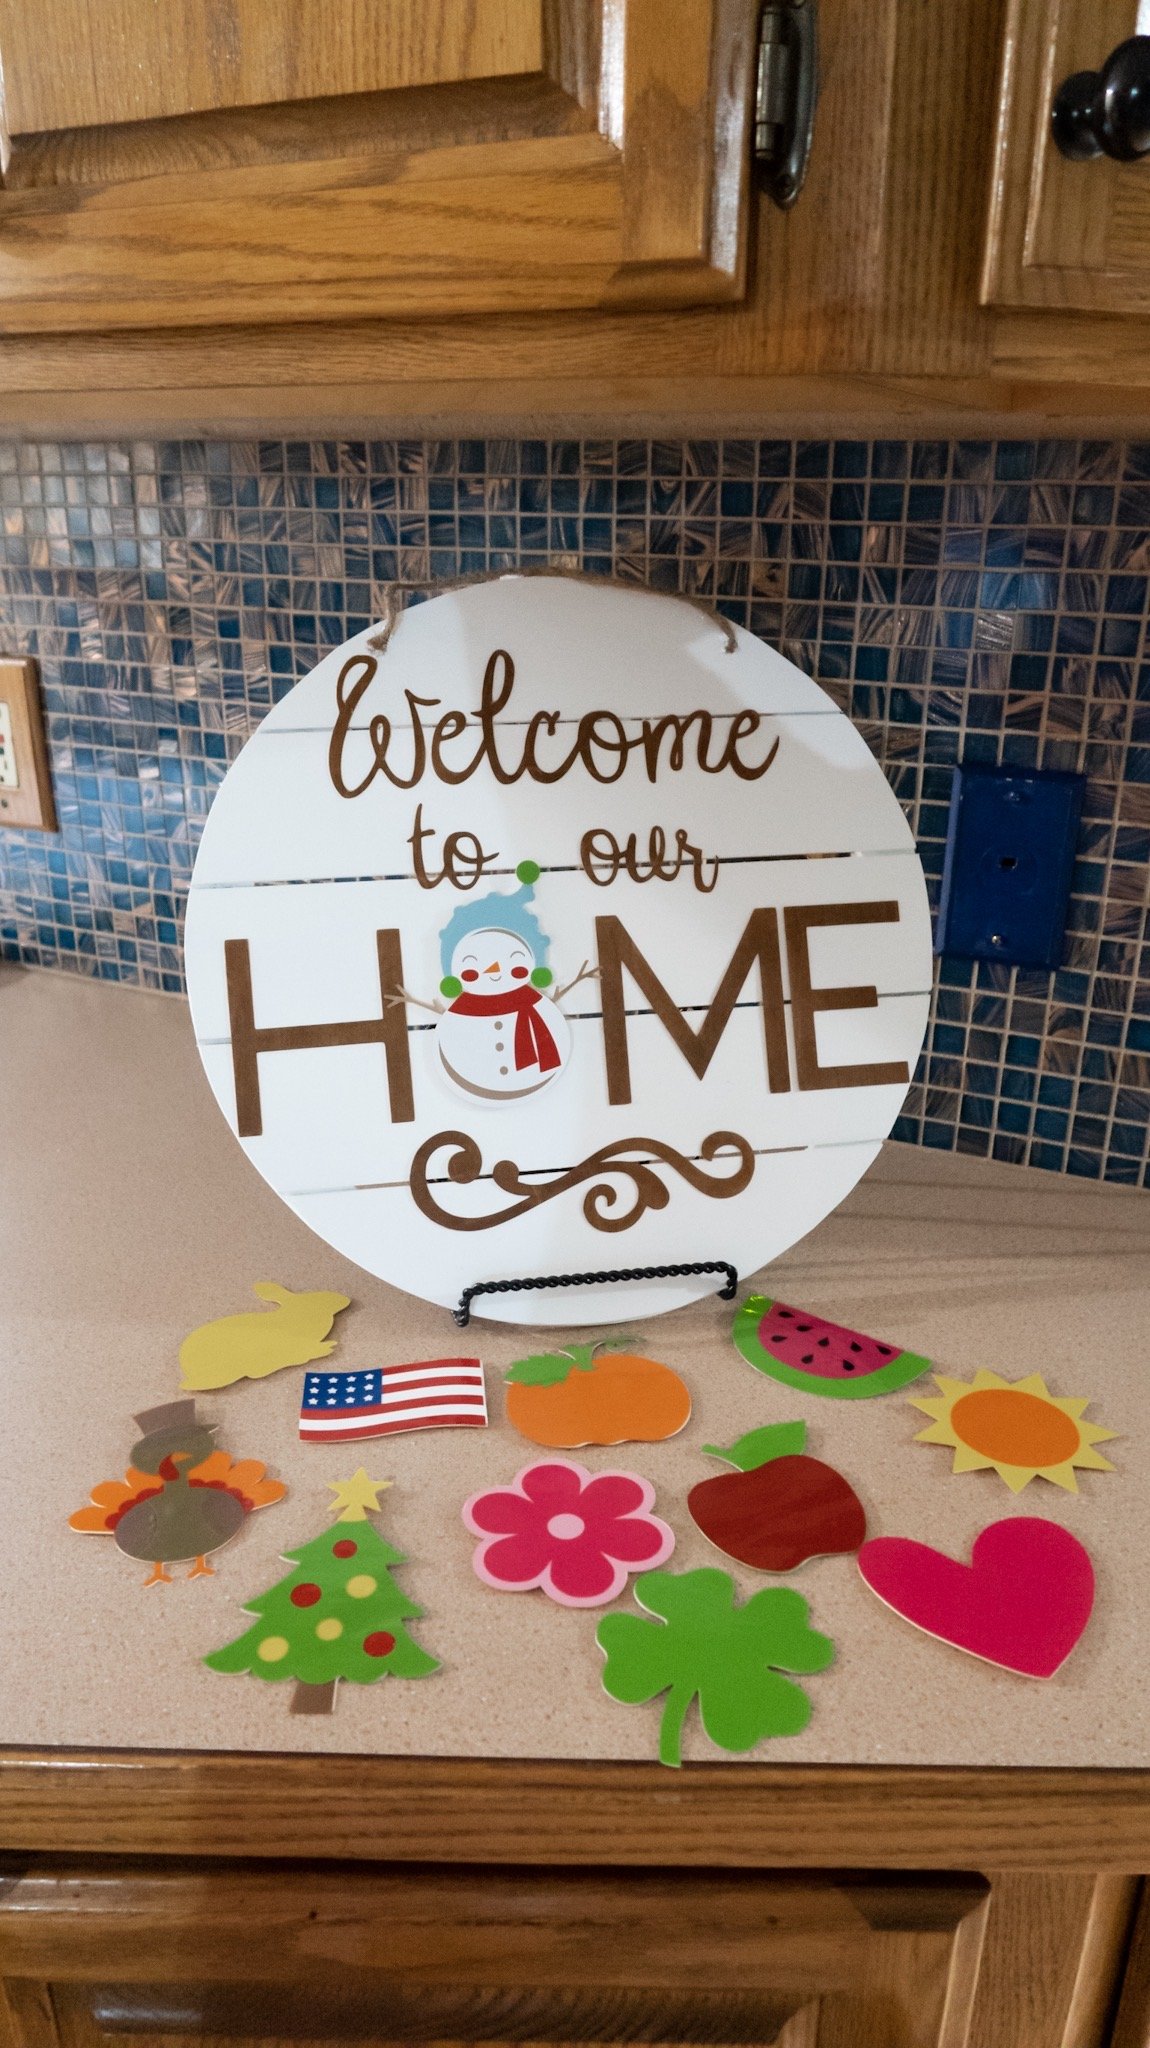

I’m thrilled with how the wood pieces came out, how easy it was to cut both wood and vinyl with my Explore Air 2, and how gorgeous the finished sign is for being something I created myself at home!
This project truly encompasses everything I love about crafting with this machine, from using a range of different materials to being able to easily craft and share my design with others!

What Does Cricut Say About Cutting Wood Veneer With The Explore Air 2?
I wanted to address this because I’m sure I will get some comments or even some DMs in my Instagram inbox after posting this as there are concerns with cutting wood using your Explore Air 2 machine.
You absolutely CAN cut wood veneer using both the Maker and the Explore Air 2 machines (see Cricut’s guide here), but you cannot cut thicker wood pieces like Balsa wood.
Balsa wood can only be cut using the knife blade and the Maker (with which the knife blade and housing work exclusively).
I hope you all enjoyed this tutorial and learned something new. Tell me what project you are currently working on in the comments below!
*Post originally published Dec 2019, last updated November 2025.