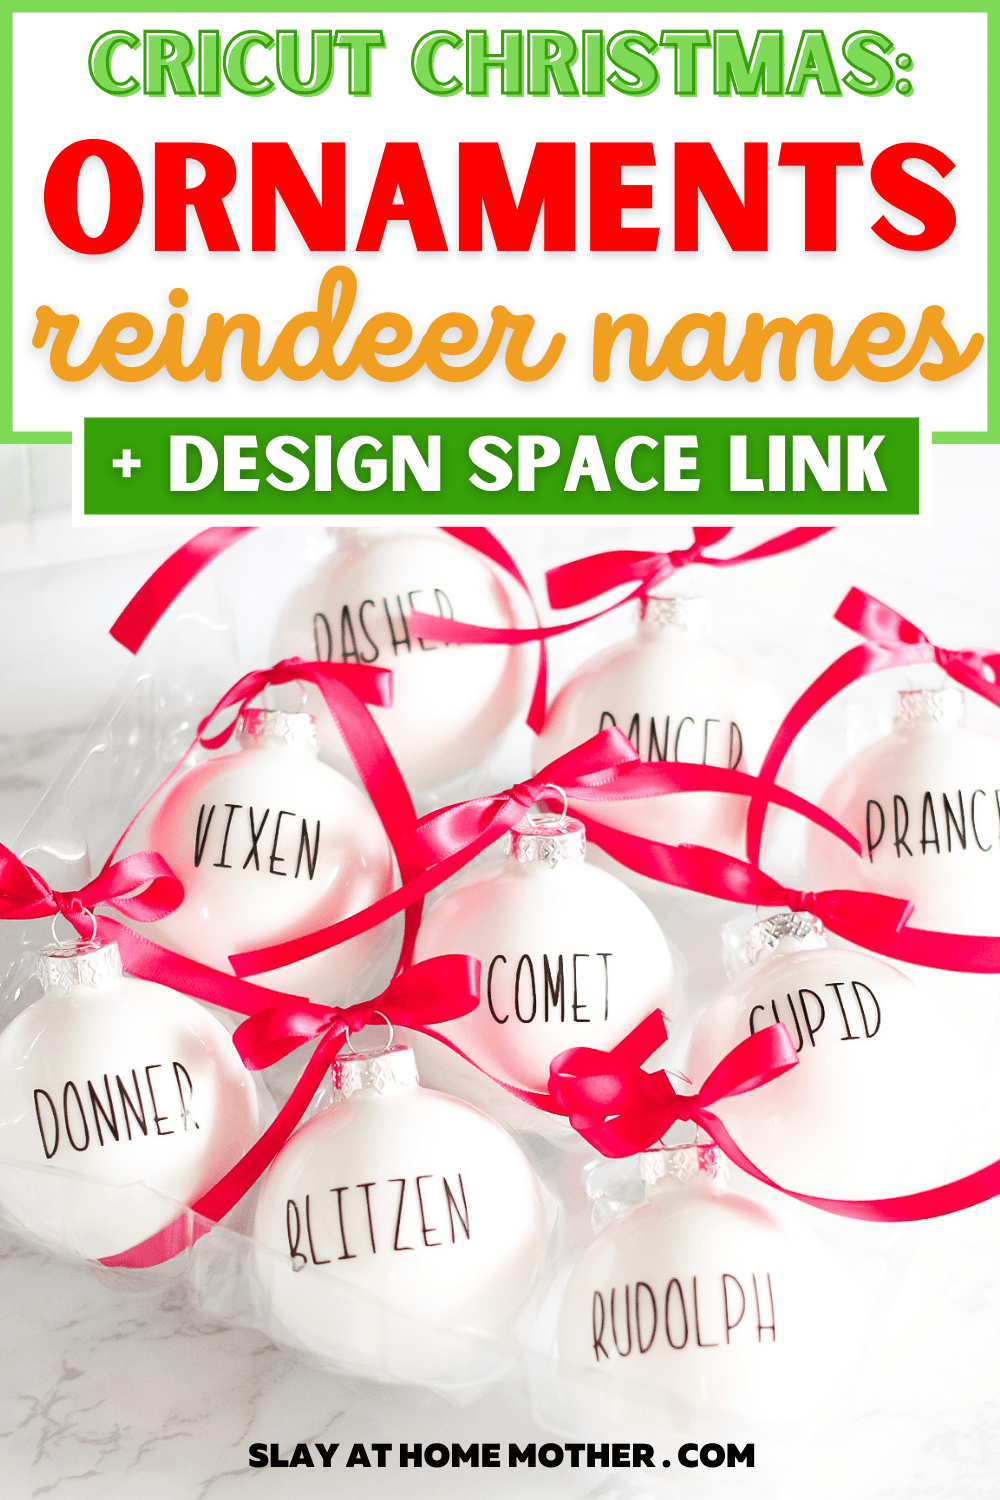
Try this fun Reindeer Names Cricut Christmas Ornaments DIY this Holiday season, with all 10 reindeer names and a free Design Space link…
DIY Cricut Christmas Ornaments
Hi friends!
I’m back at it with another crafting post.
This one is just in time for Christmas – get ready to make some gorgeous DIY Cricut Christmas ornaments!
If you’re a longtime reader or one of my loyal Instagram followers, you might have noticed that I’m doing a ton of crafts lately.
I normally try to mix my posts up, but now that I’m in my 8th month of pregnancy I’m finding that I have to take it easy.
I’ve found that, with the way this baby is sitting, I’m feeling more out of breath and exhausted than I have ever felt in previous pregnancies.
That probably has something to do with me having to chase around my sweet little wild child three-year-old, Jax.
He seriously keeps me on my toes – as a toddler should.
I might not be able to pick up a hammer and show off with one of my beginner-friendly home DIYs these days, but I’m still able to come up with some easy and beautiful DIY crafts for you guys which take no more than my imagination and a seat at my design desk.
These ornaments are so adorable, and they are THE perfect beginner project I’m seriously going to grab some more bulbs so I can make some personalized ornaments for my nieces and nephews.
I have plenty of step-by-step photos and screenshots to take you through this easy tutorial, including how I put my letters on a rounded surface!
*This post is not sponsored, however, it does contain relevant affiliate links at no cost to my readers. All opinions are my own, as always.*
What You Need To Make Your DIY Reindeer Ornaments
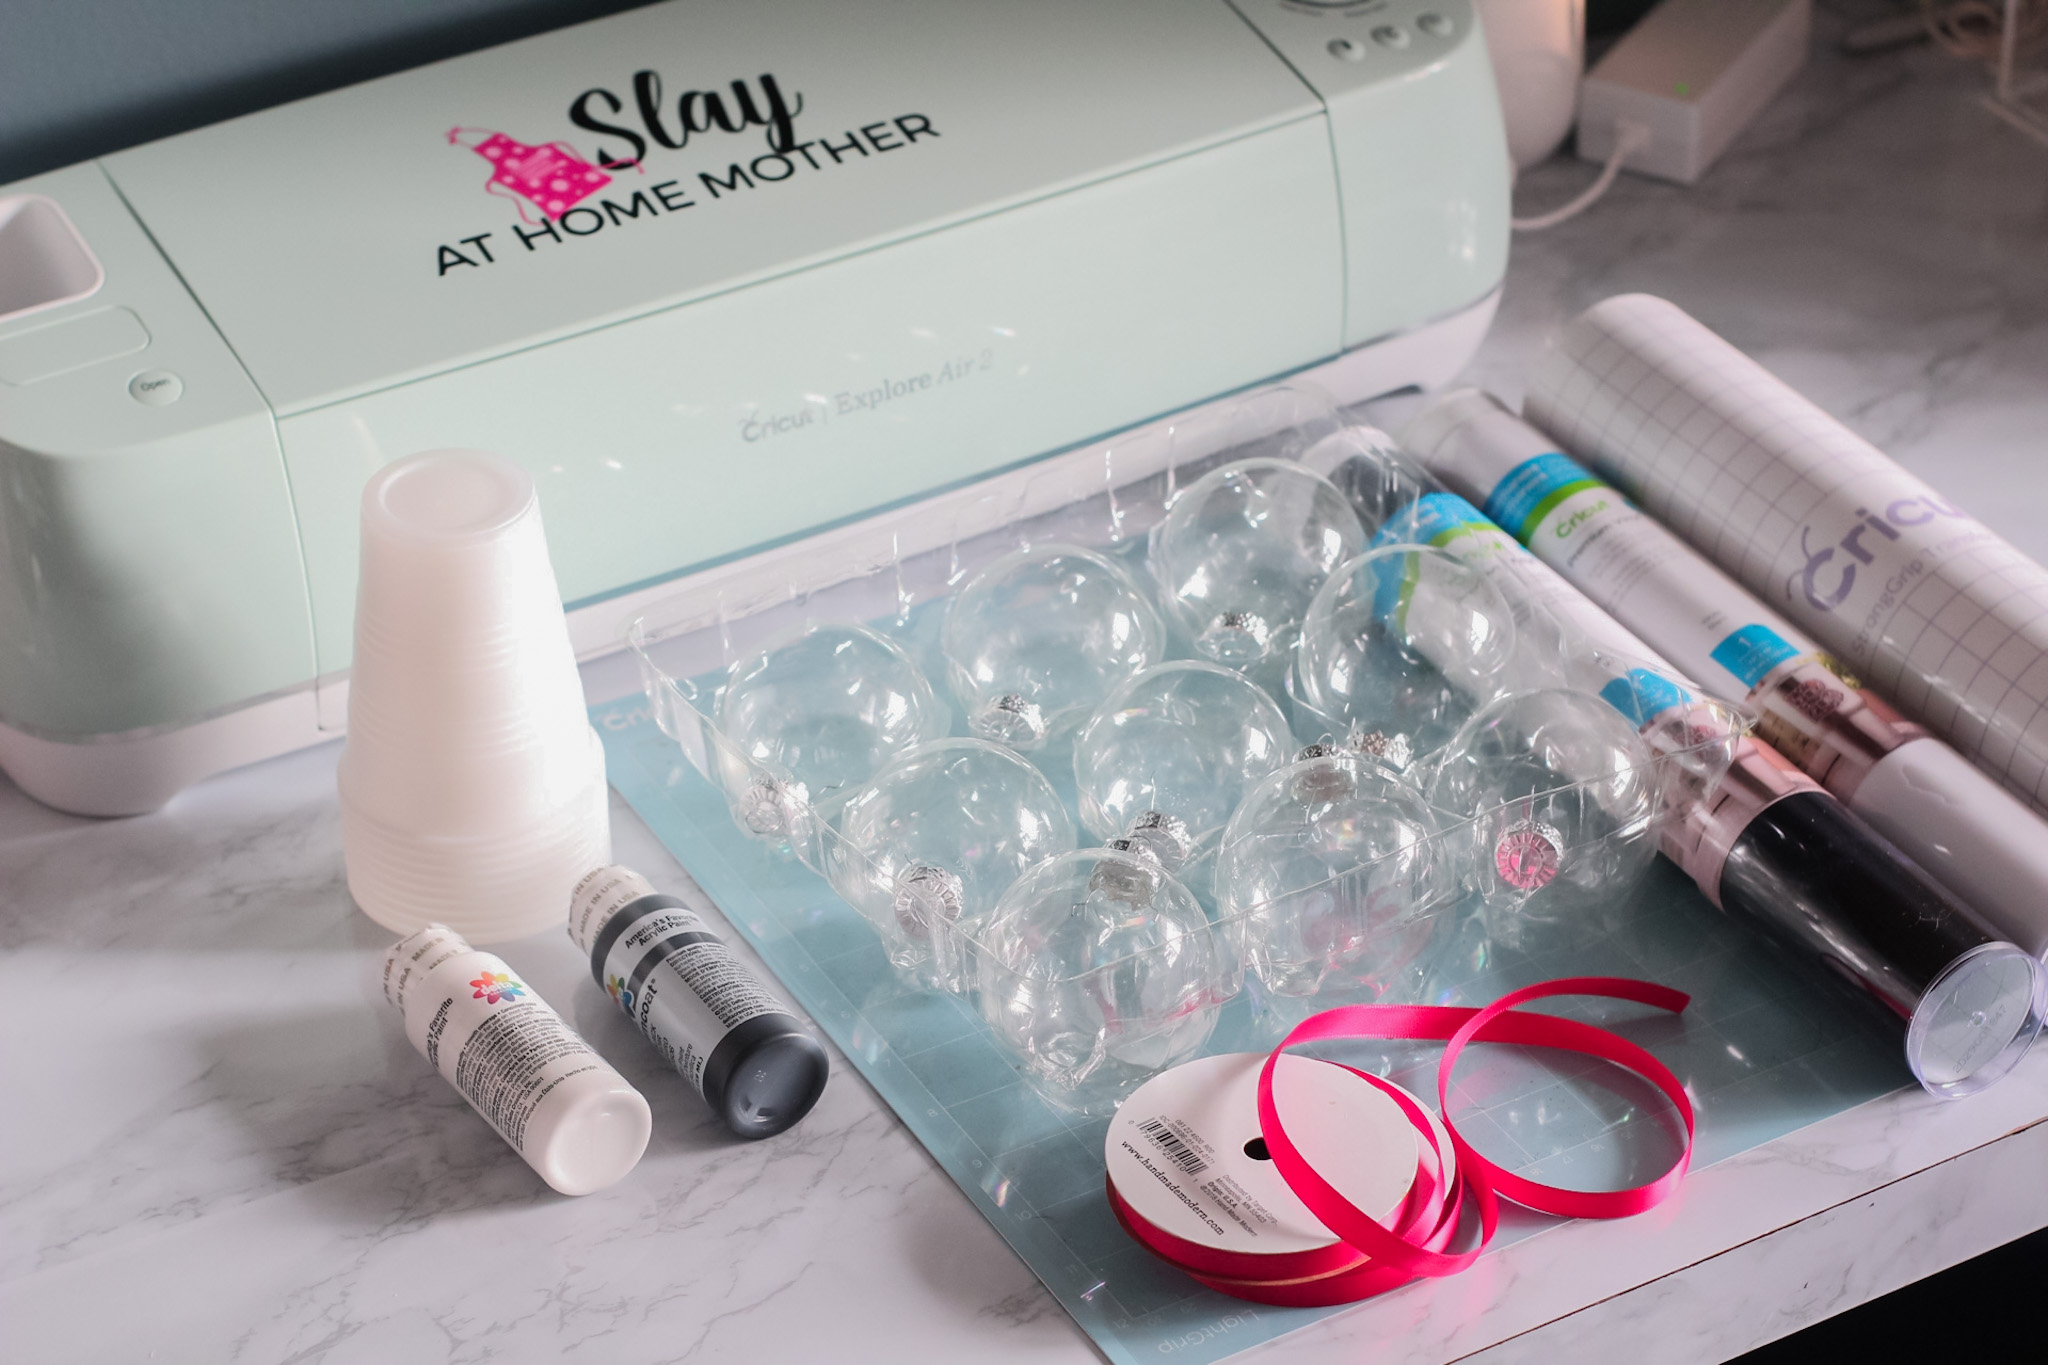
Here’s what you’ll need to make these adorable DIY Christmas ornaments…
- LightGrip mat (the blue mat)
- 3/8″ satin ribbon (I bought a 21 ft. spool and still had plenty left)
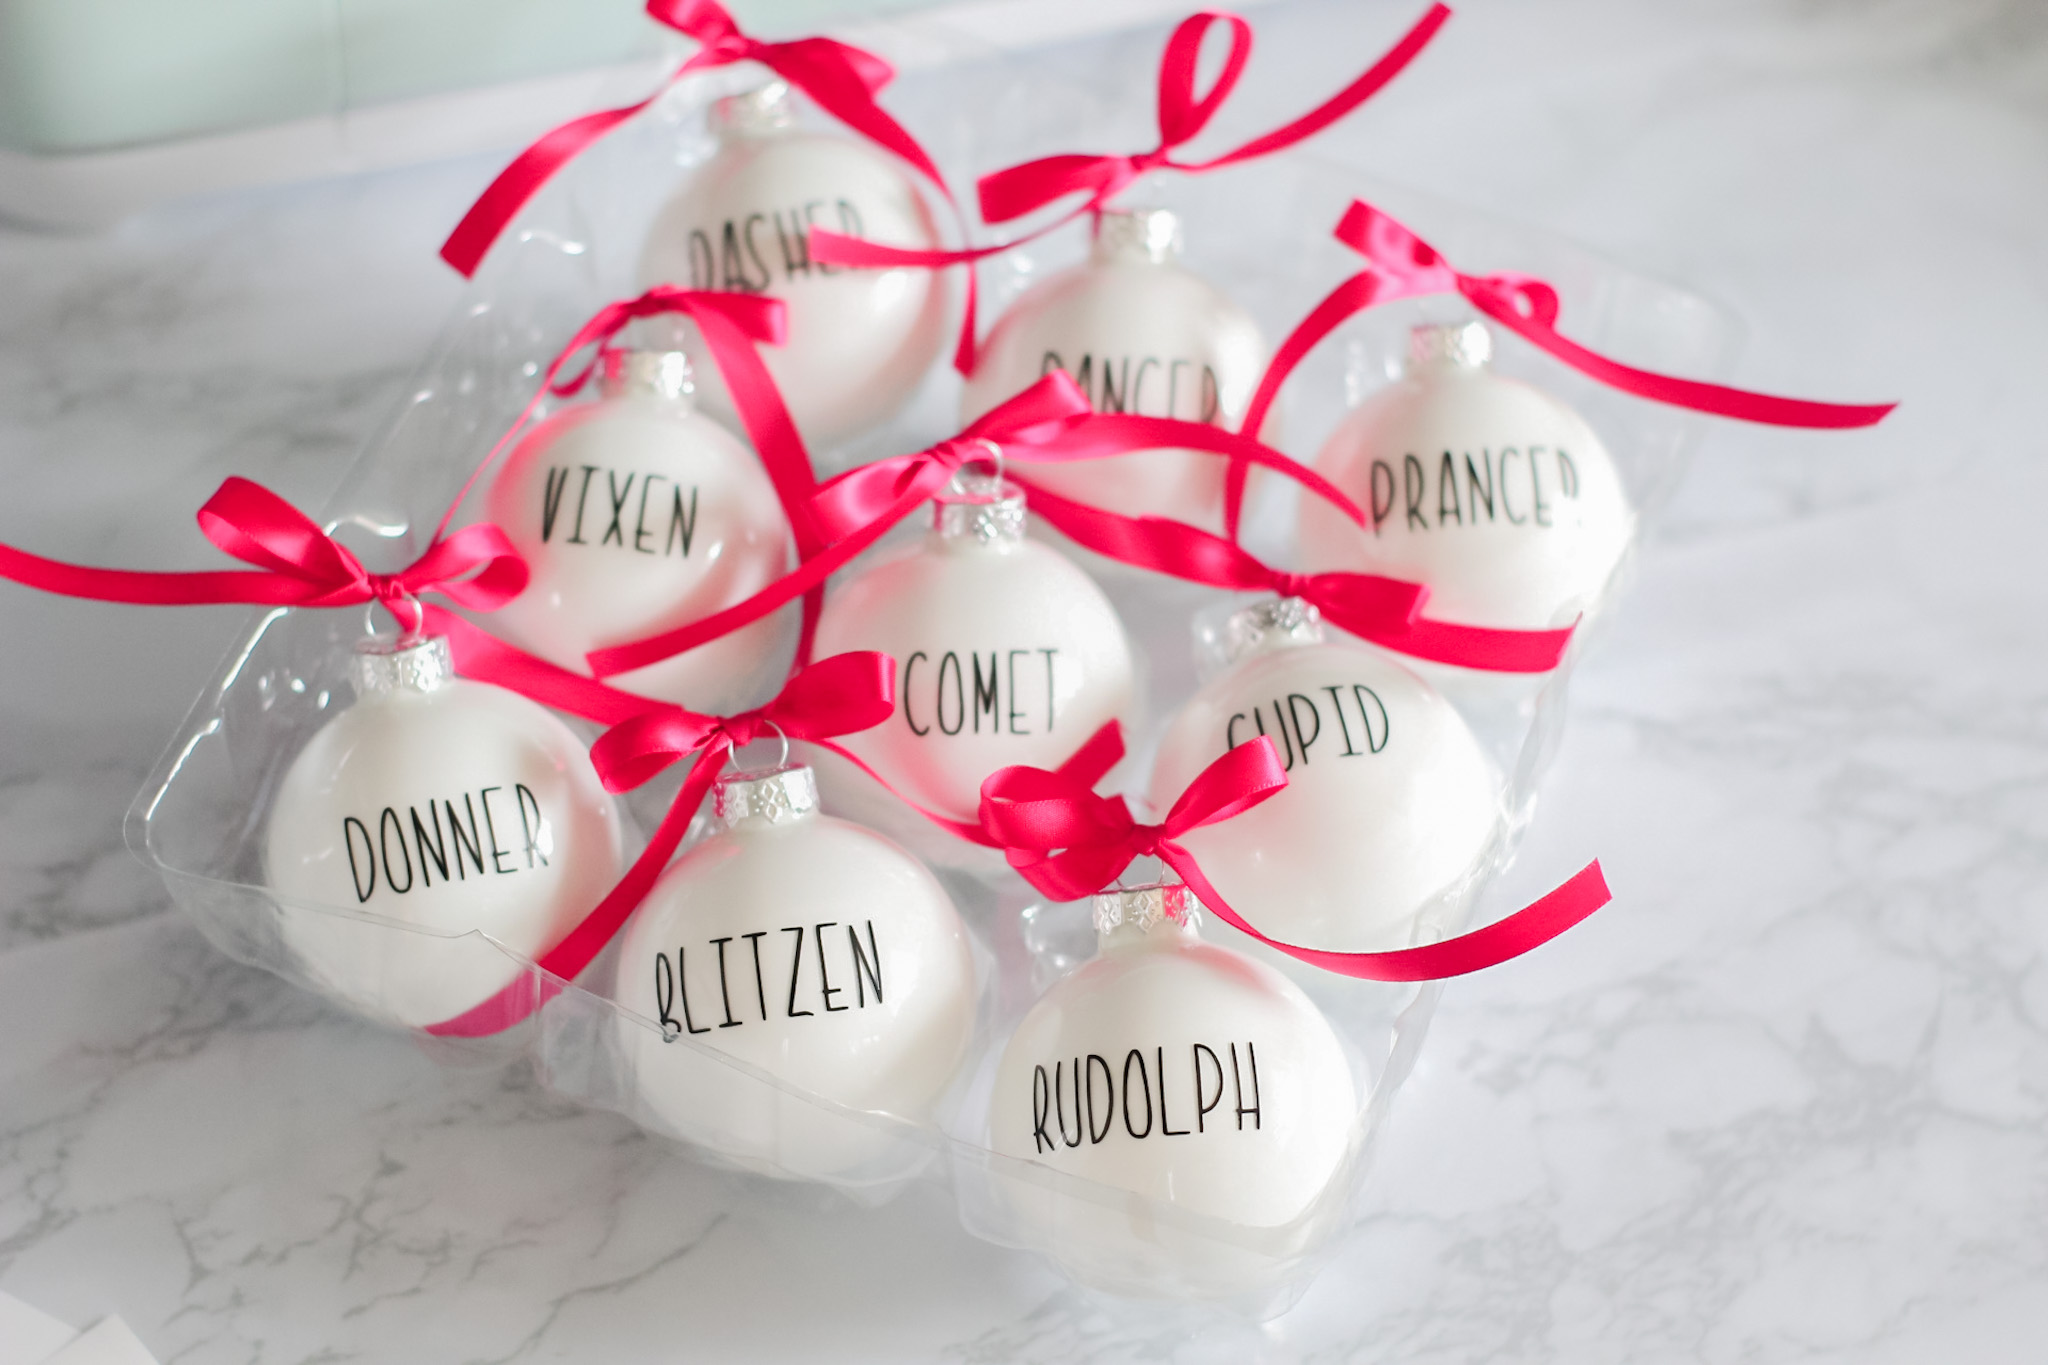
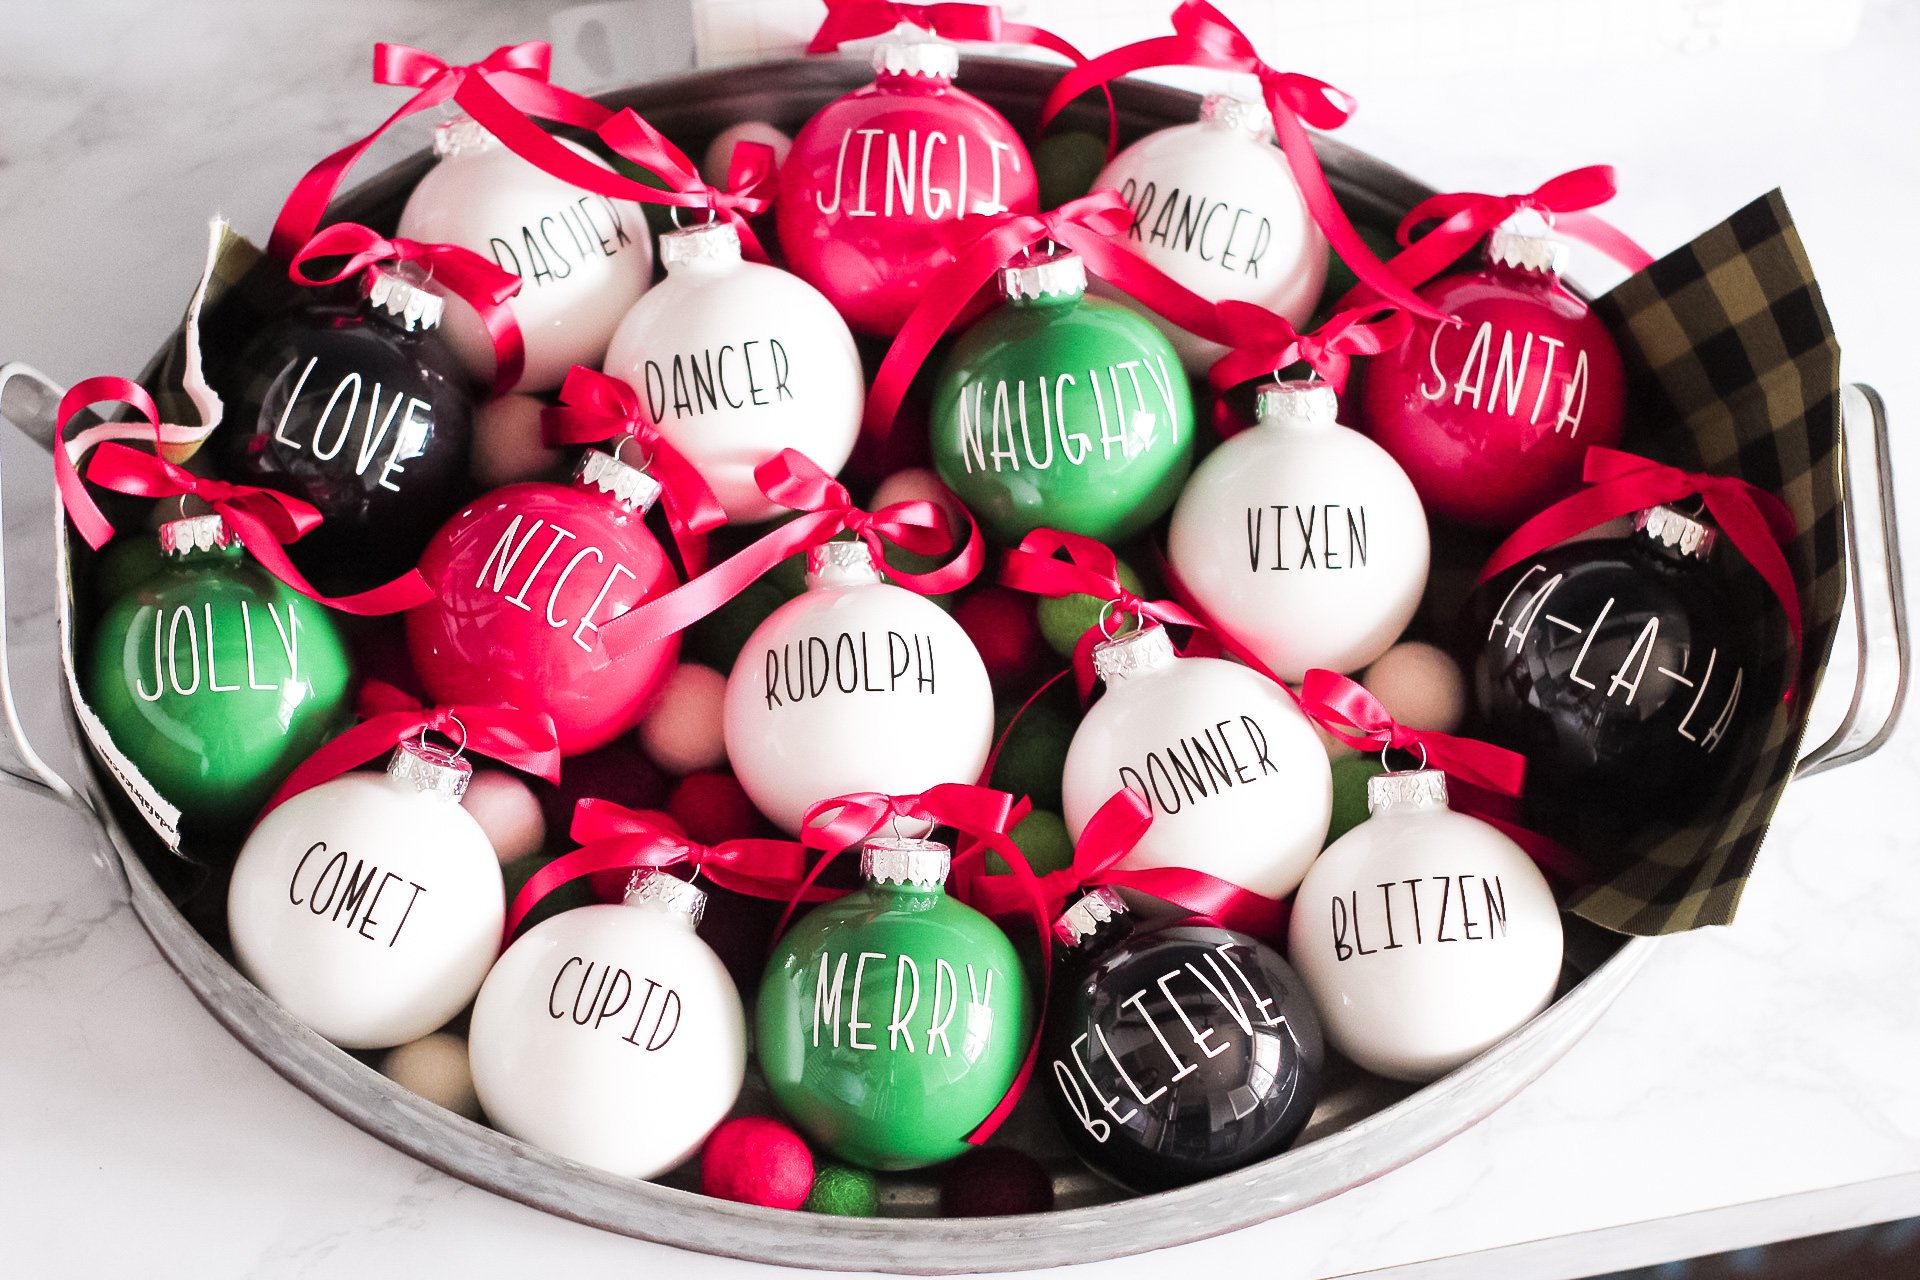
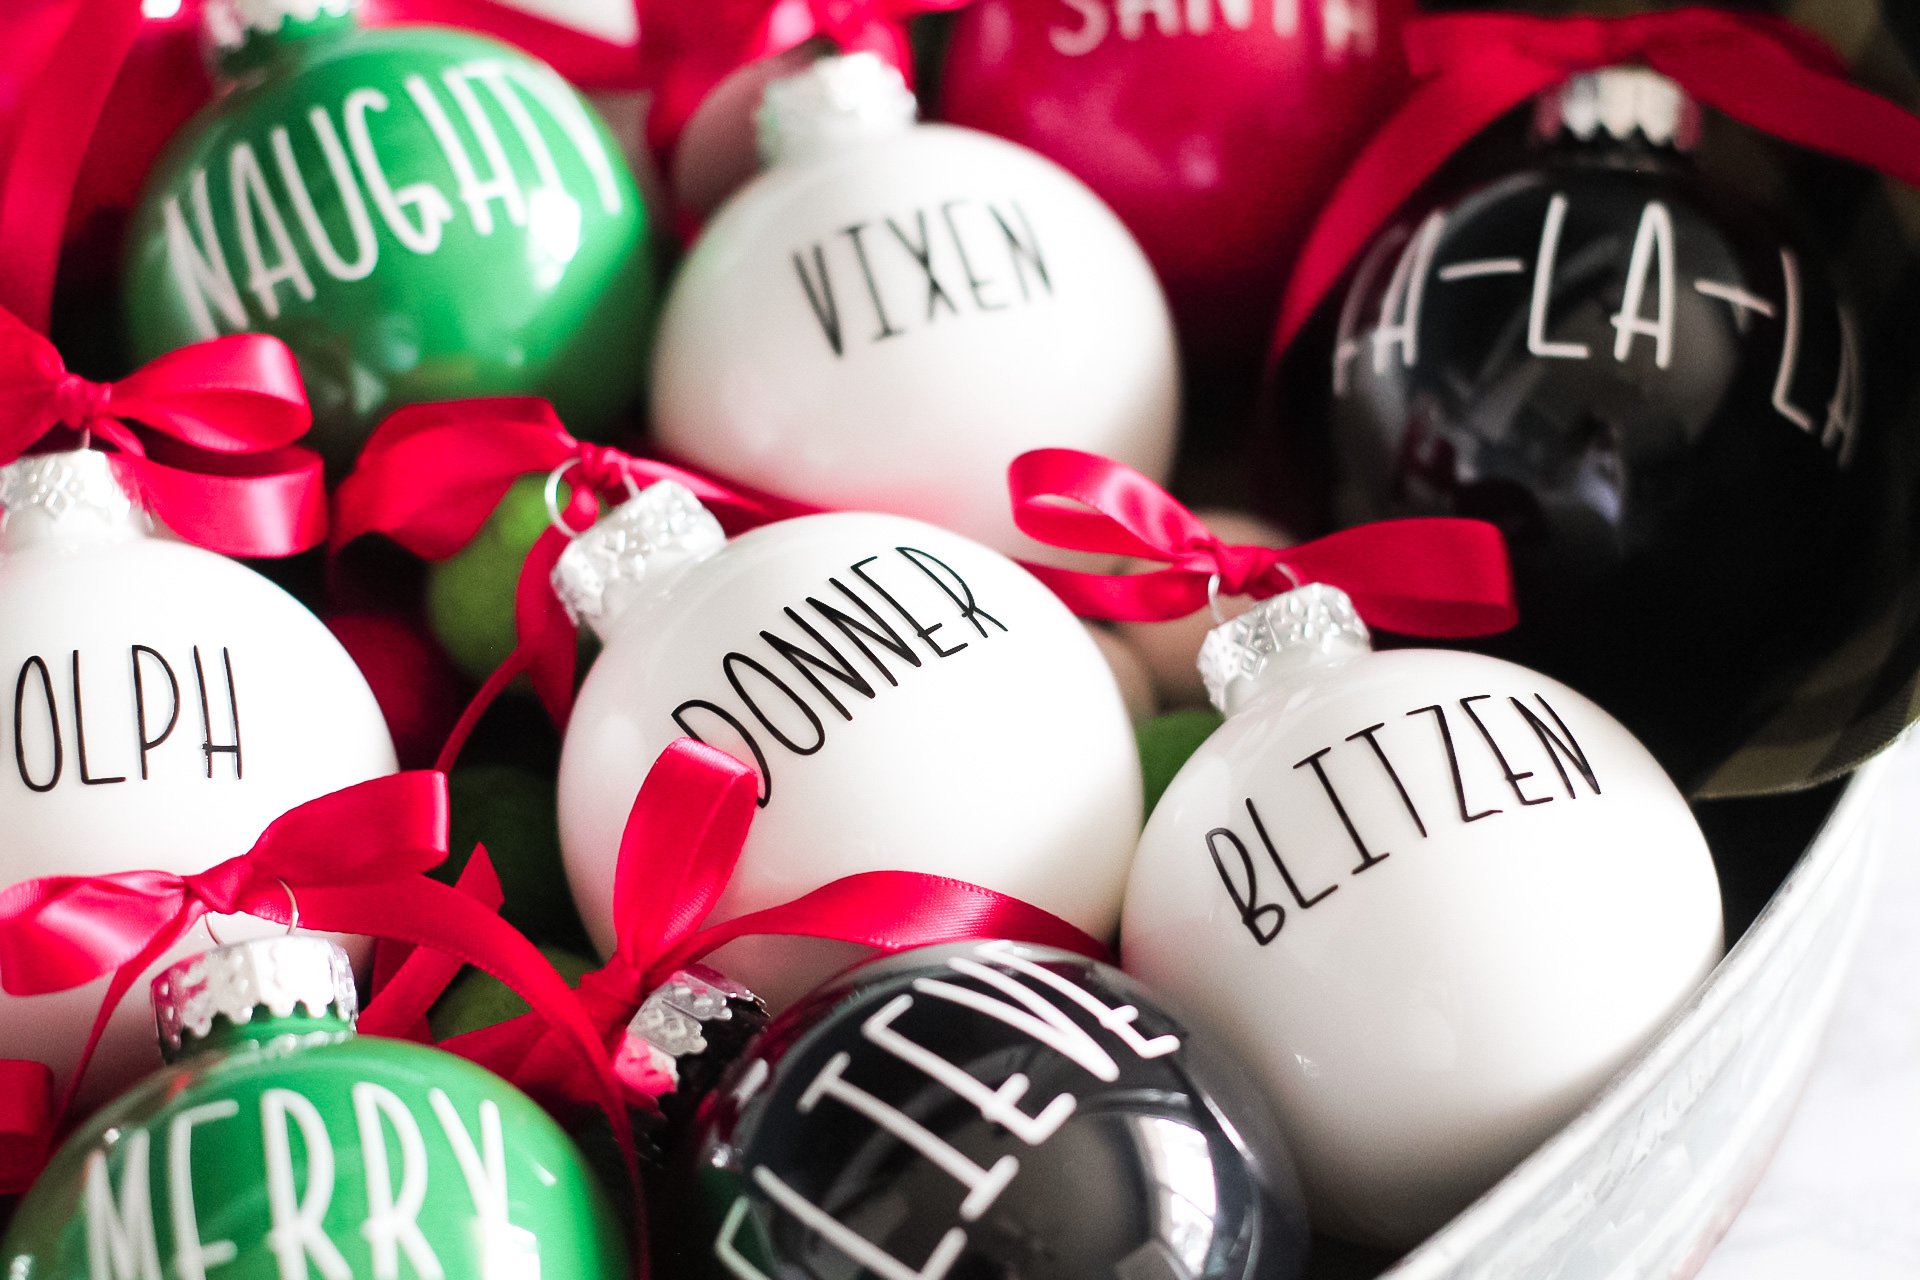
- 9 glass or plastic bulb ornaments
- approximately 6 oz. acrylic paint in the color of your choice
- permanent vinyl in the color of your choice
- 10 plastic cups
- transfer tape
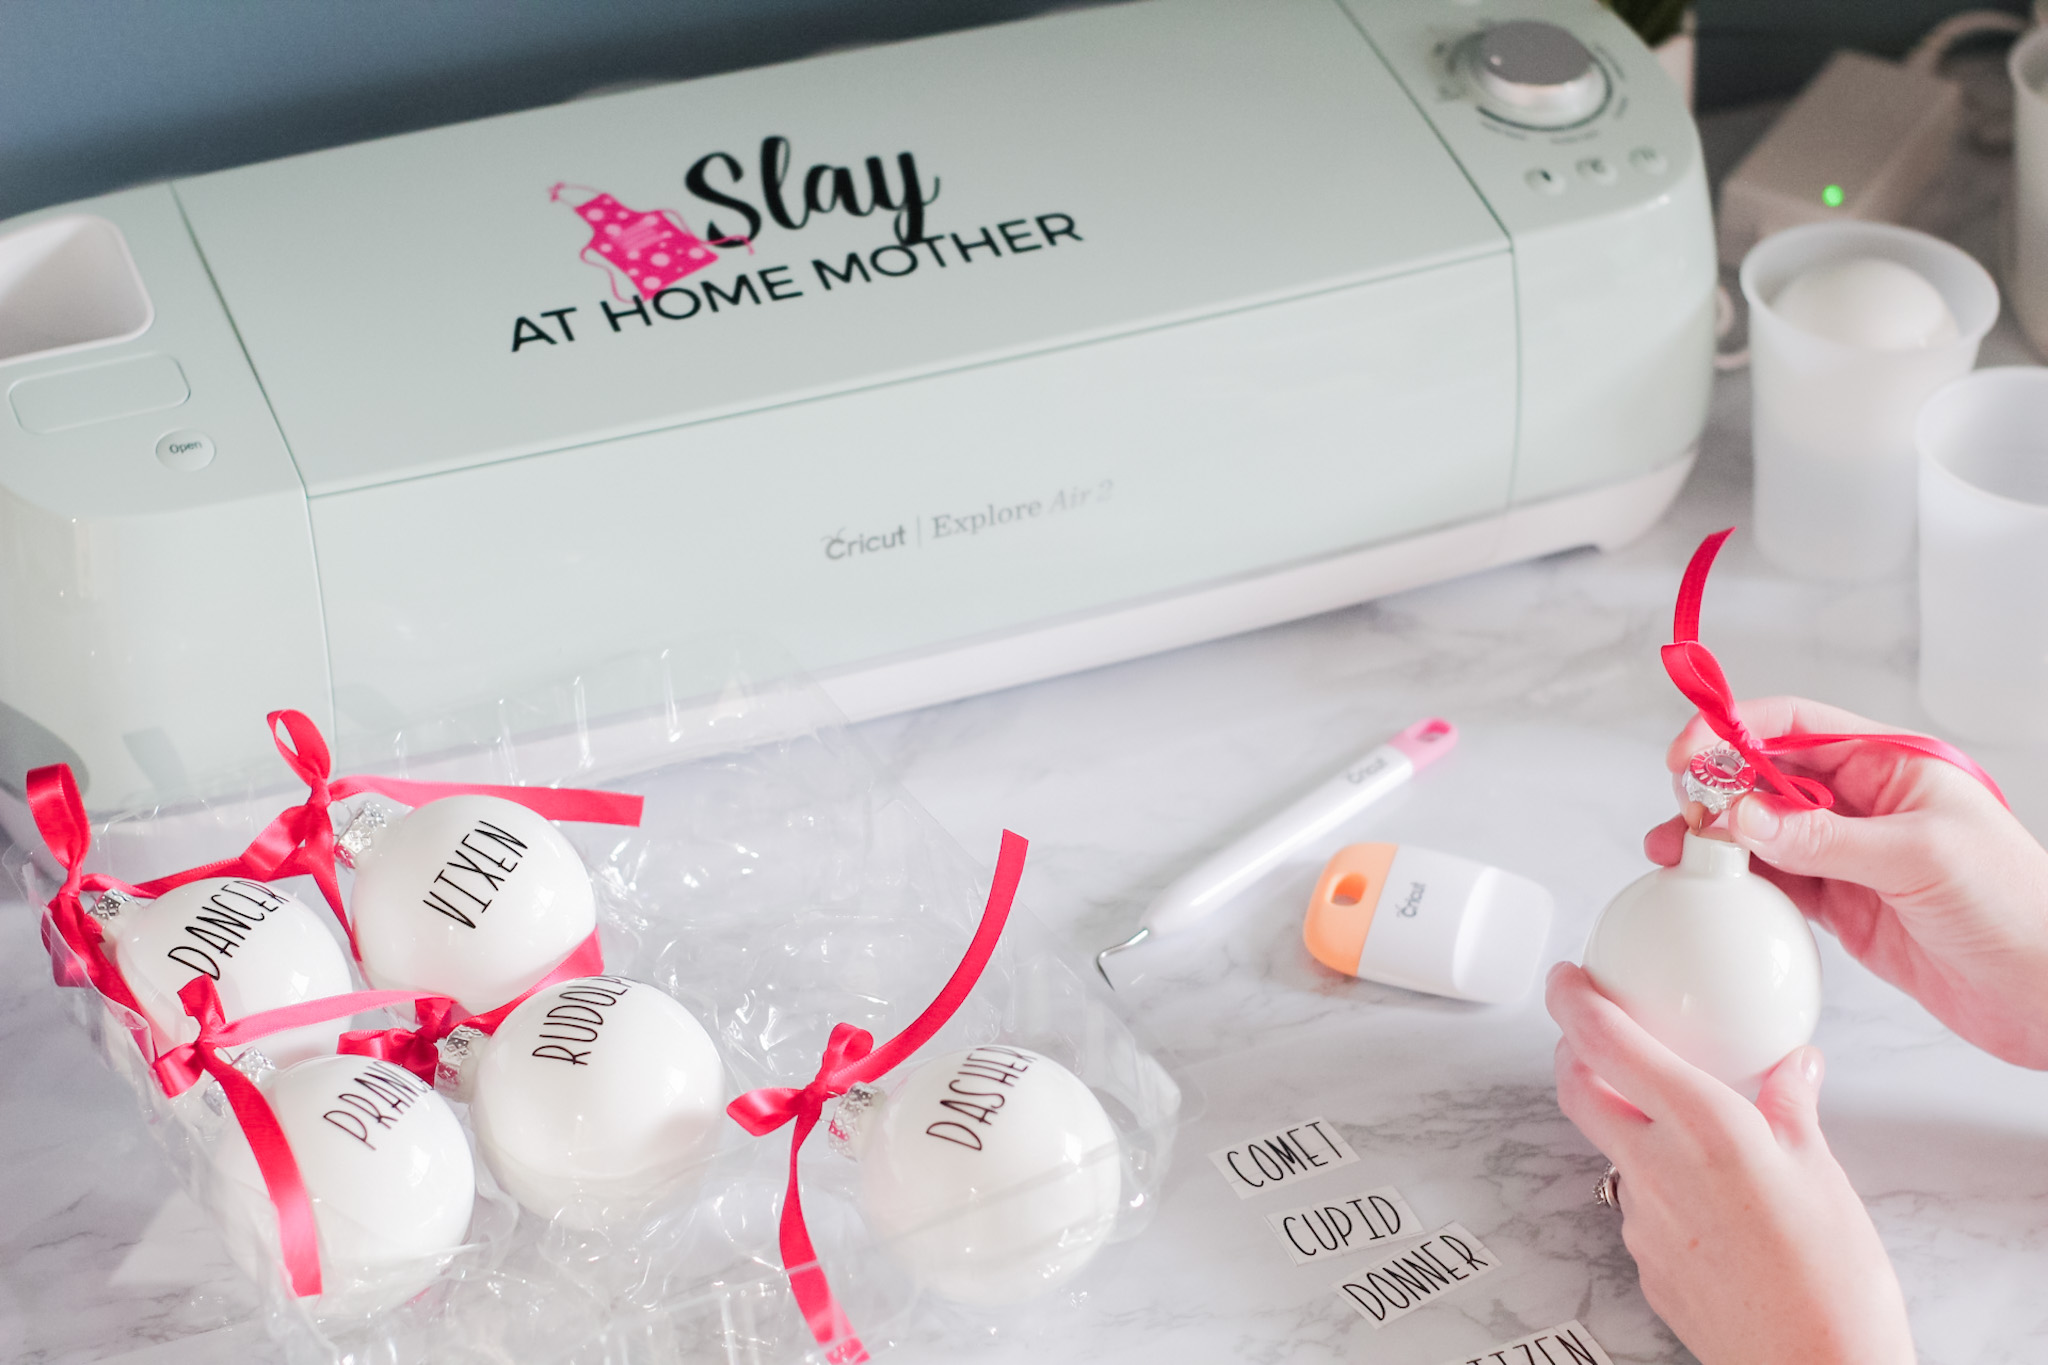
- Cricut Explore Air 2
- fine-point blade (this comes with your Explore Air 2)
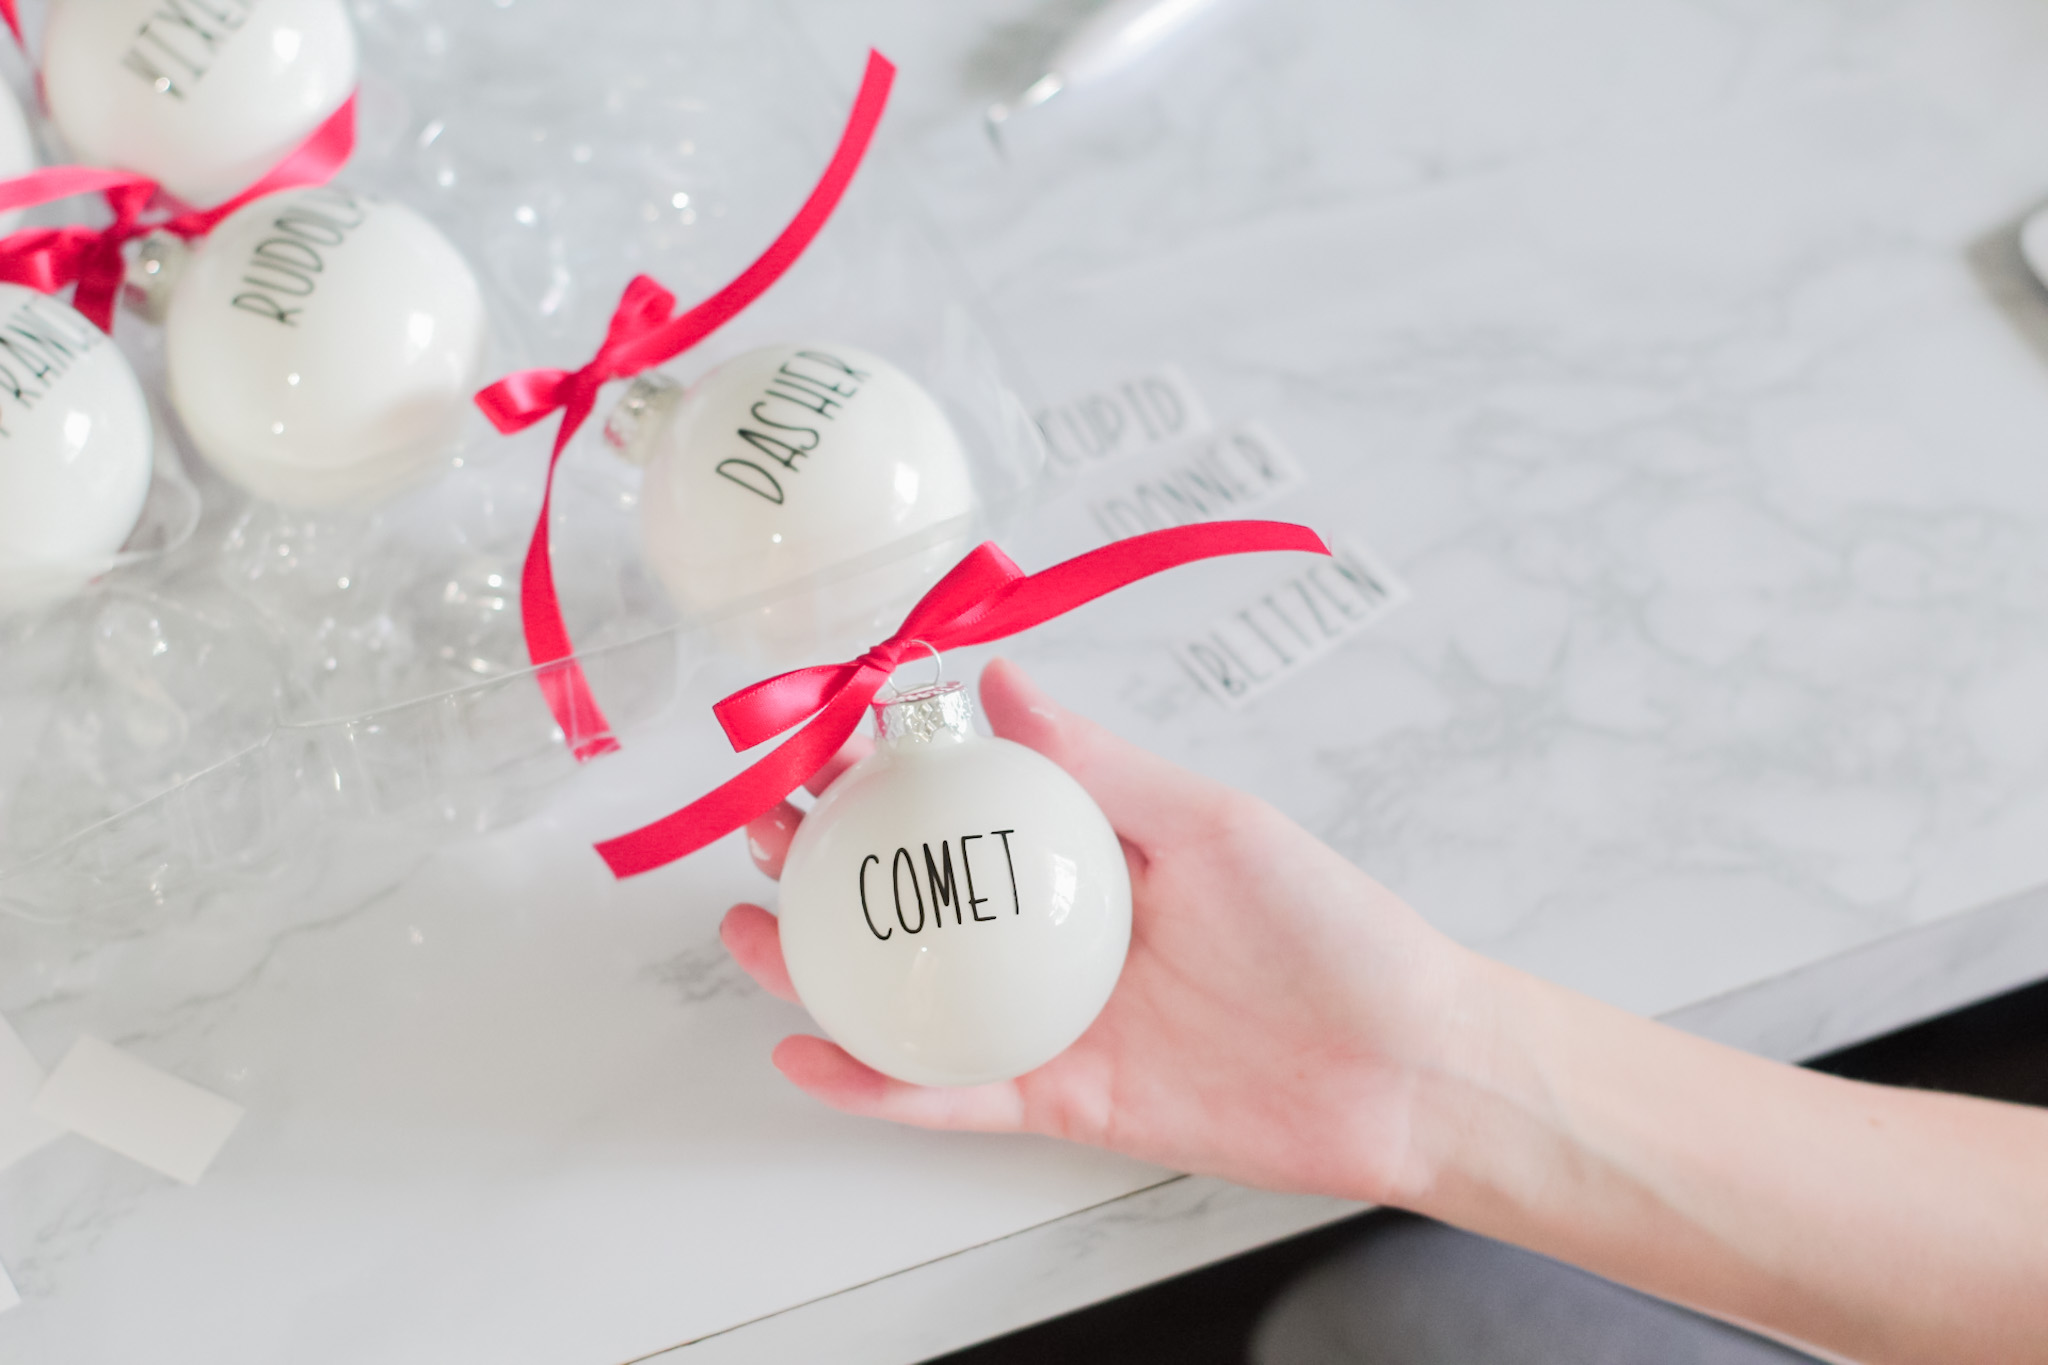
The bulbs I purchased for this project were listed as 2.6″ bulbs and fit perfectly in the palm of your hand.
I used both glass and plastic bulbs in this post, so I can tell you that I prefer and recommend plastic bulbs over glass when painting inside the ornaments.
Painting Inside The Ornaments
The first step to making your painted ornaments is to paint your ornaments ;).
I like to start with this step first so I can complete the rest of the project while the bulbs dry!
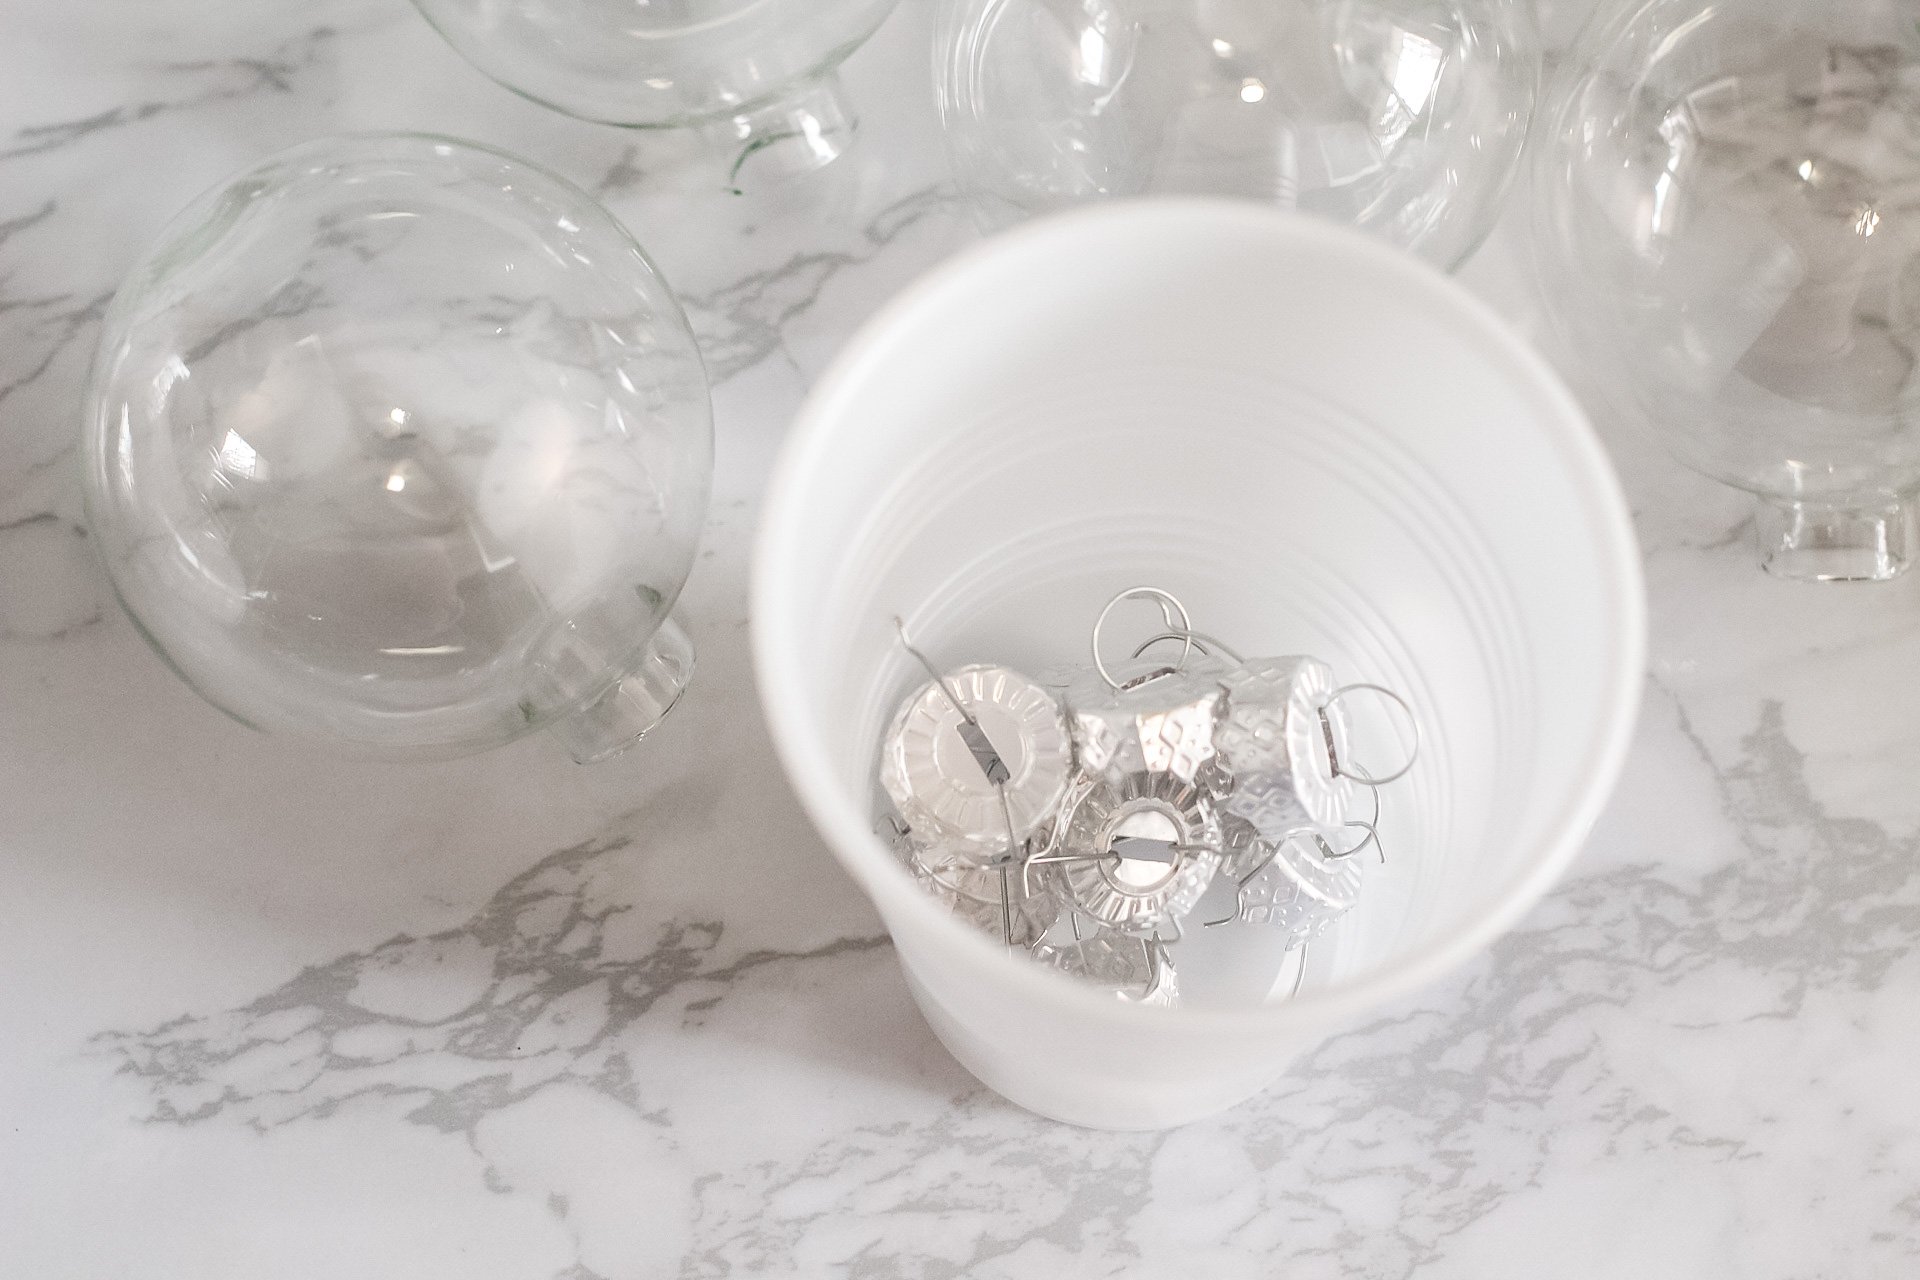
You’ll need to remove the tops from your ornaments, which can be done by lightly pinching and lifting the tops.
Use one of the 10 plastic cups to put these tops in so you don’t accidentally lose any.

FOR GLASS ORNAMENTS: Squirt some acrylic paint in your glass bulb ornament and slowly spin the bulb to coat the insides.
Try to add just enough to coat the insides so they don’t end up taking forever to dry.
FOR PLASTIC ORNAMENTS: Squirt in some acrylic paint and gently tap the bulb on your working surface to move the paint around faster.
Once you are done with each ornament, suspend each bulb upside down in a plastic cup to allow excess paint to drip out.
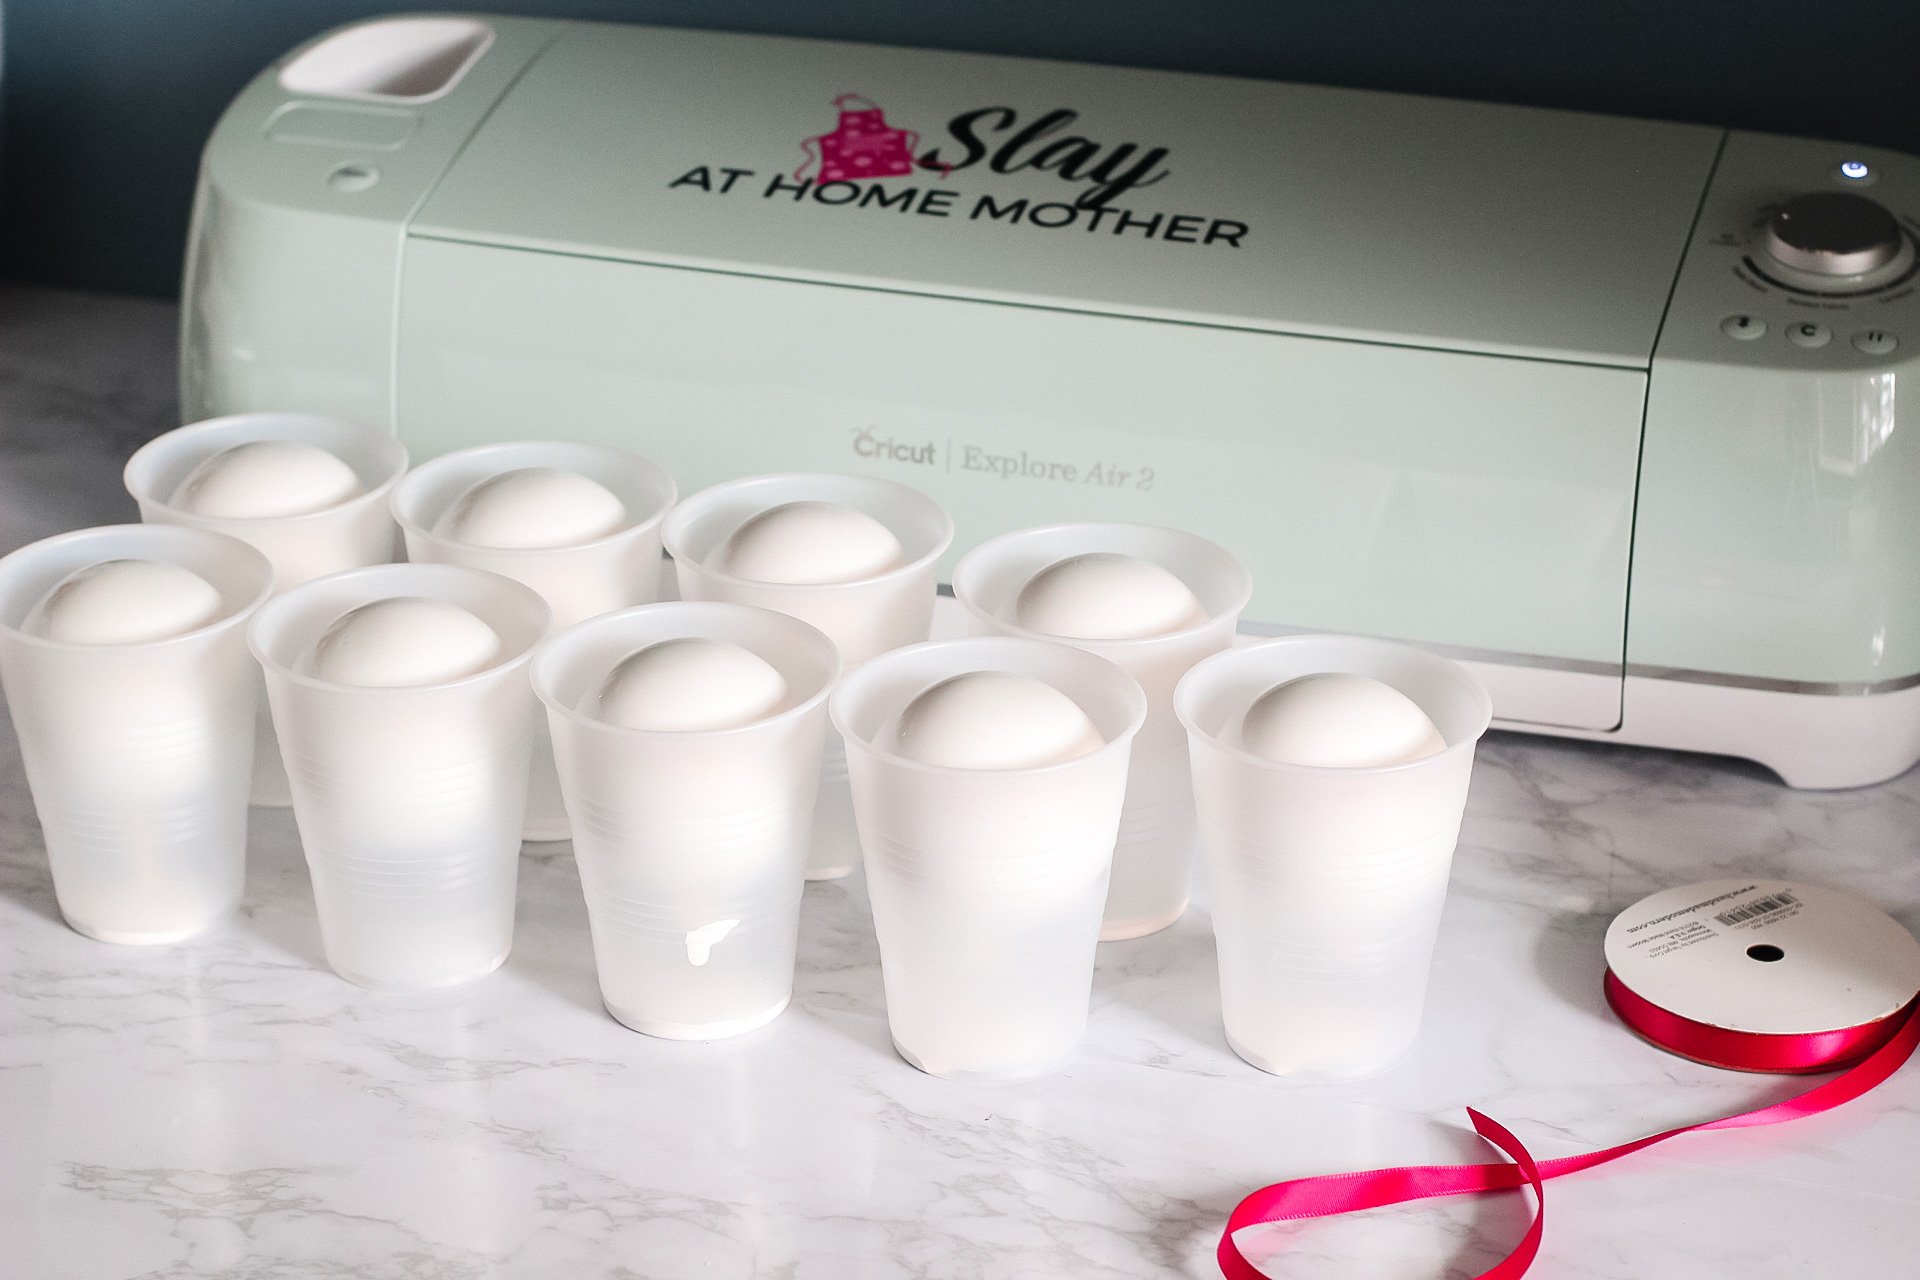
I gave my bulbs a good 16 hours to dry, but I’m a very busy and very pregnant mom of two so that was the earliest I could even check on them to see if they were dry. Your bulbs will most likely dry in much less time depending on how much paint you used!
To test if they still need more drying time, gently run your finger along the interior of the opening – if it’s still wet, give it more time.
Cutting Permanent Vinyl With The Explore Air 2
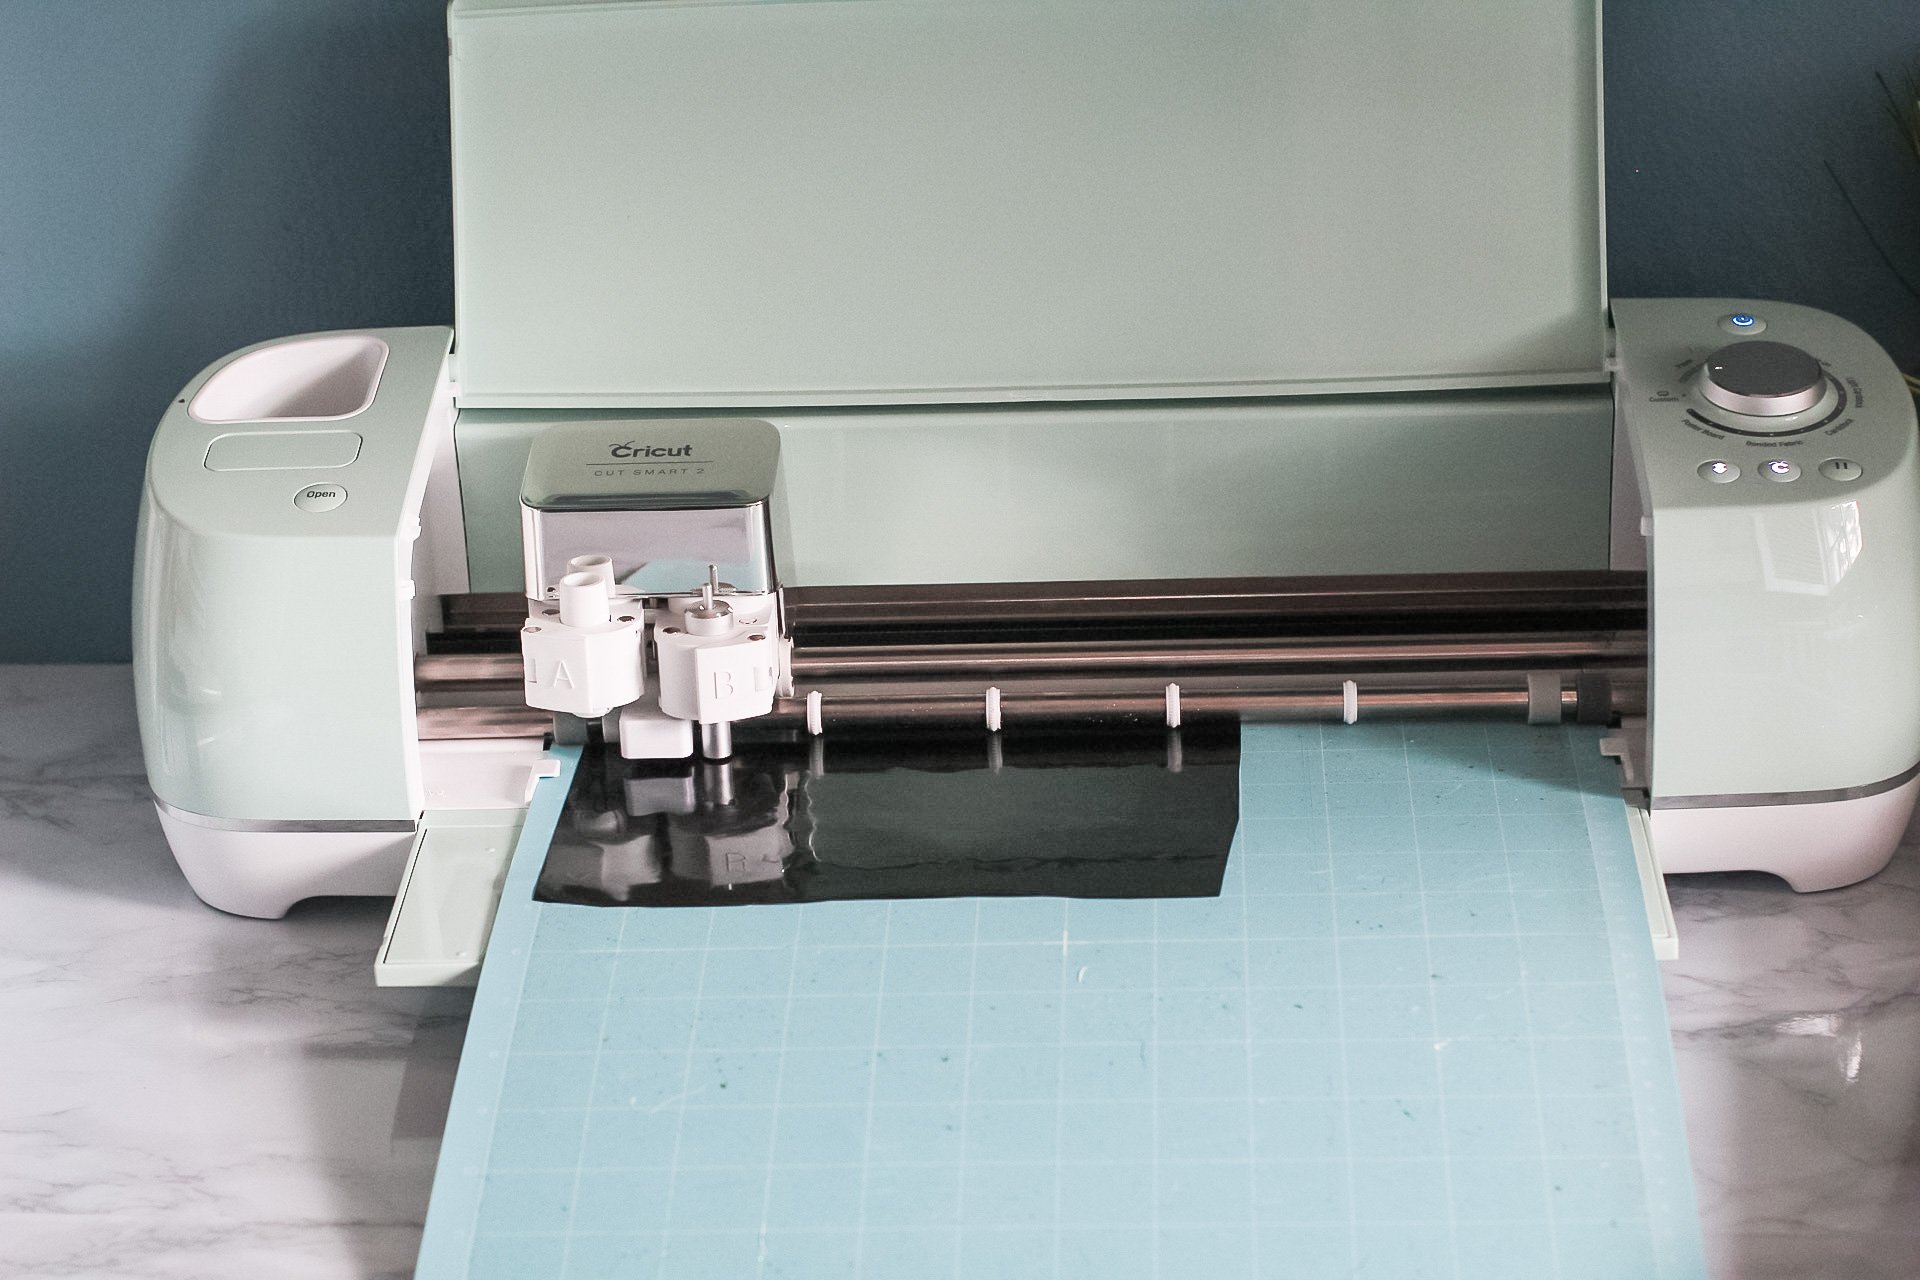
Now that your ornaments are drying, you can move on to the next step, which is cutting your vinyl.
I highly recommend using permanent vinyl given how skinny the letters are, and to help ensure the bulbs can withstand being hung on the tree and being packaged away after the holiday season is over.
Think of the artificial or real pine needles from your Christmas tree poking at your lettering over time, or your children hanging these ornaments on the tree – you want vinyl that will last!
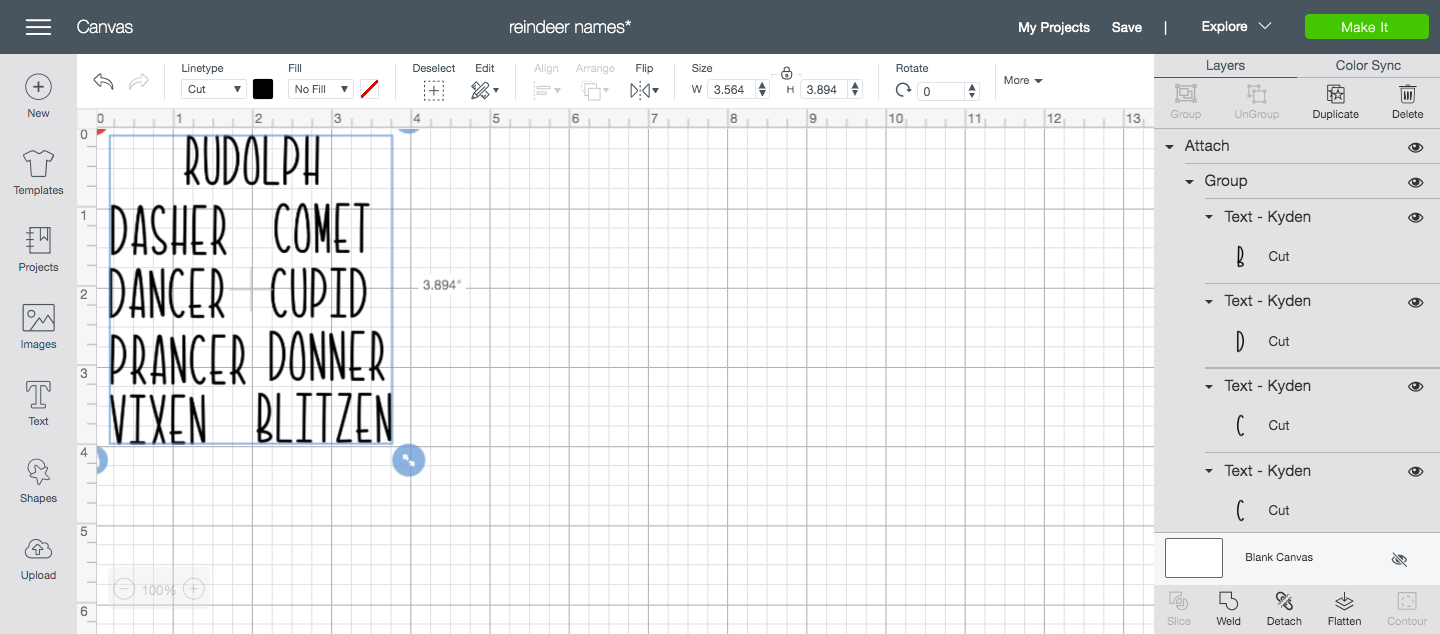
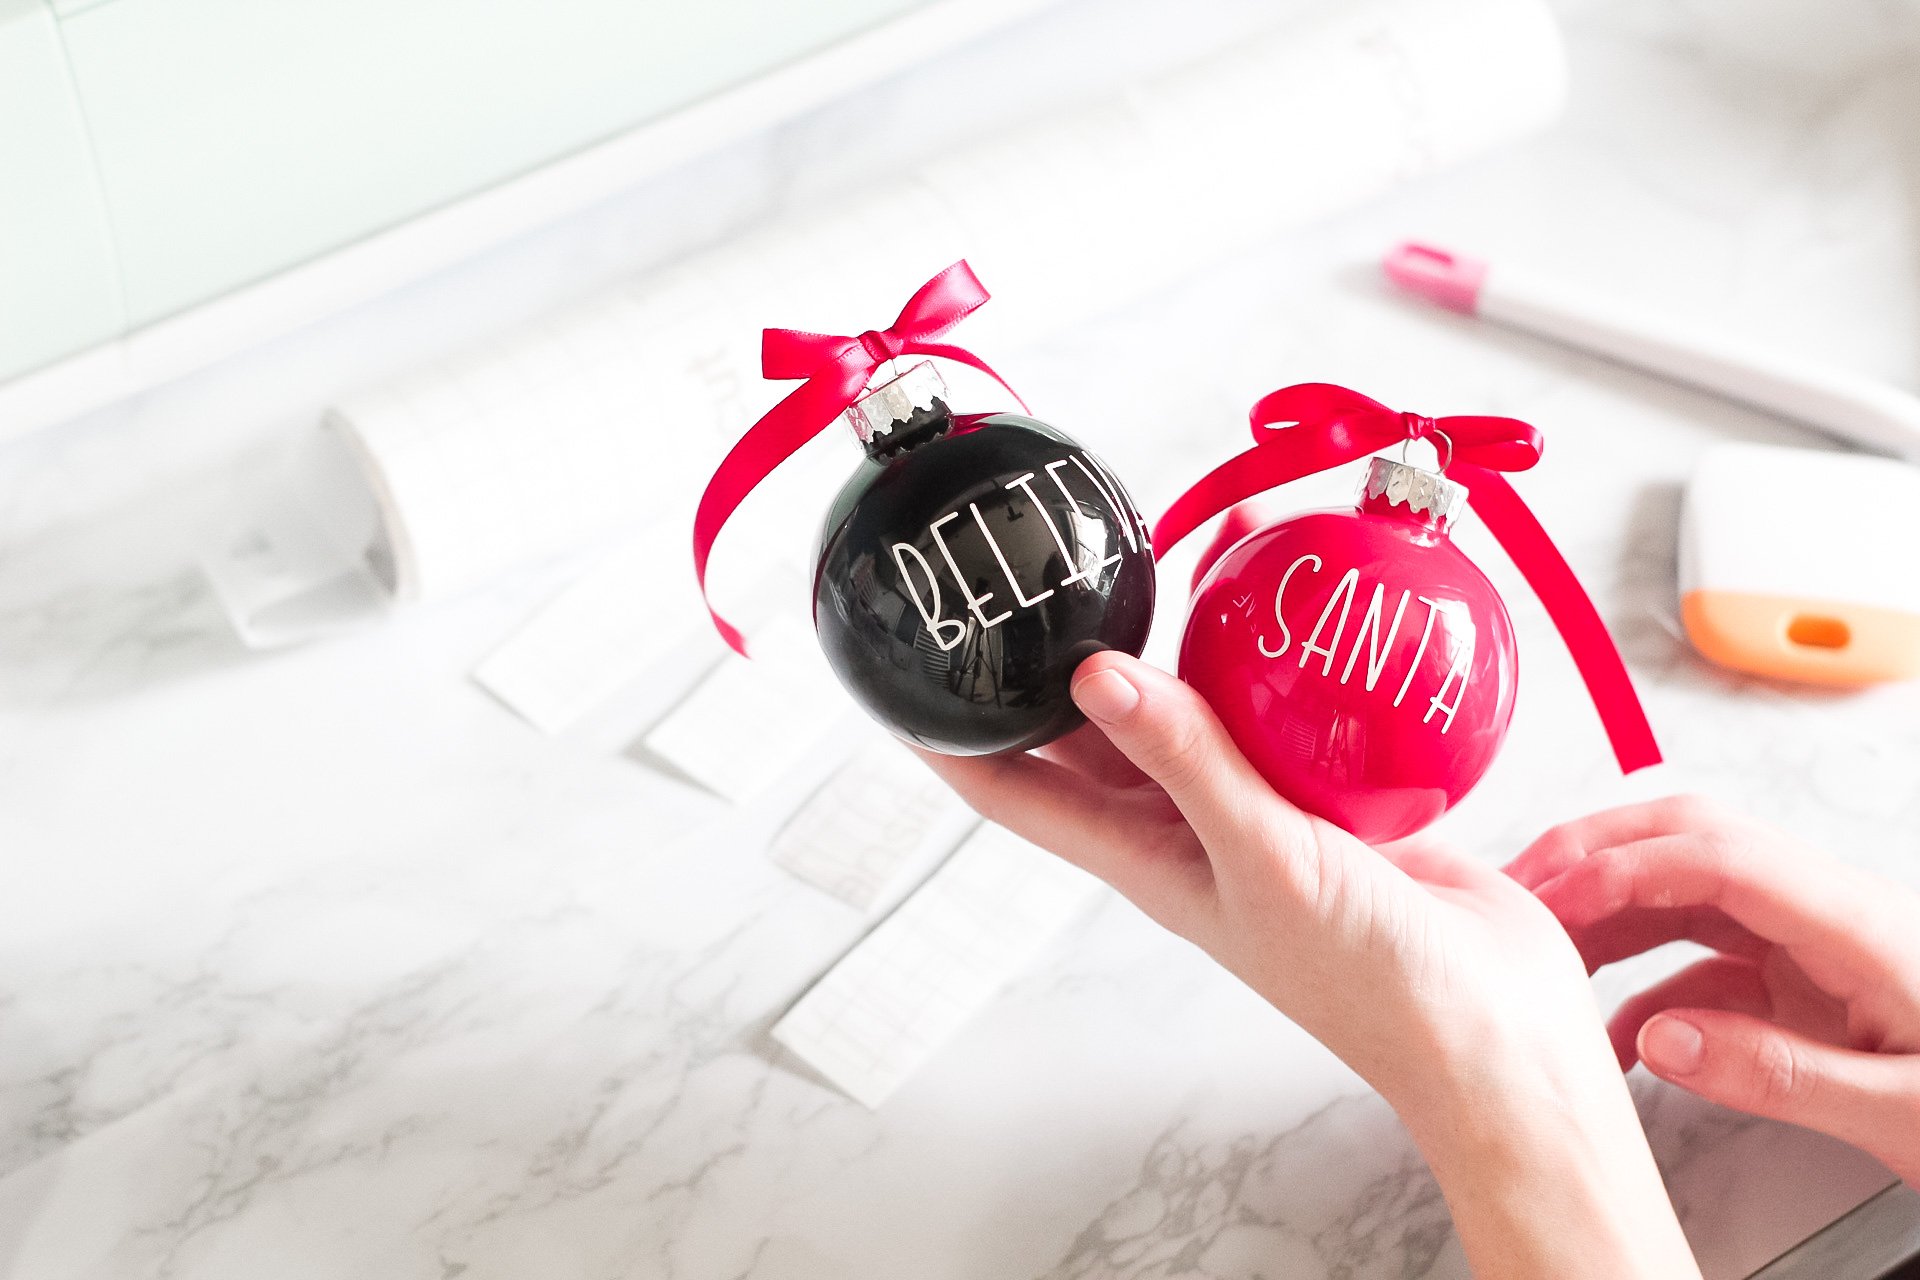
Because I used white paint inside my first set of ornaments, I will be using glossy black permanent vinyl for my lettering so it POPS.
For this design, I used the font ‘Kyden‘ in Cricut Design Space.
You can access my exact design used in this tutorial by clicking HERE.
If you aren’t feeling the reindeer names for your ornaments, here are some other ideas for your lettering:
- Peace, Love, Joy, Family, Faith
- family names (kids, grandkids, cousins, mom/dad, grandma/grandpa, etc)
- pet names
- Christmas-themed words (like Santa, Joy, Elf, Tree, Stocking, Hot Cocoa, Cookies, etc.)
- important numbers (like your house number, anniversary, the year)
Get creative, and have fun with it!
For a thorough tutorial on cutting vinyl using your Cricut Explore Air 2, see this project post. I included tons of Design Space screenshots to help you out if you’re a beginner with your Cricut!
Once your vinyl is placed on your LightGrip mat and loaded into your machine, select the proper material (premium vinyl)…
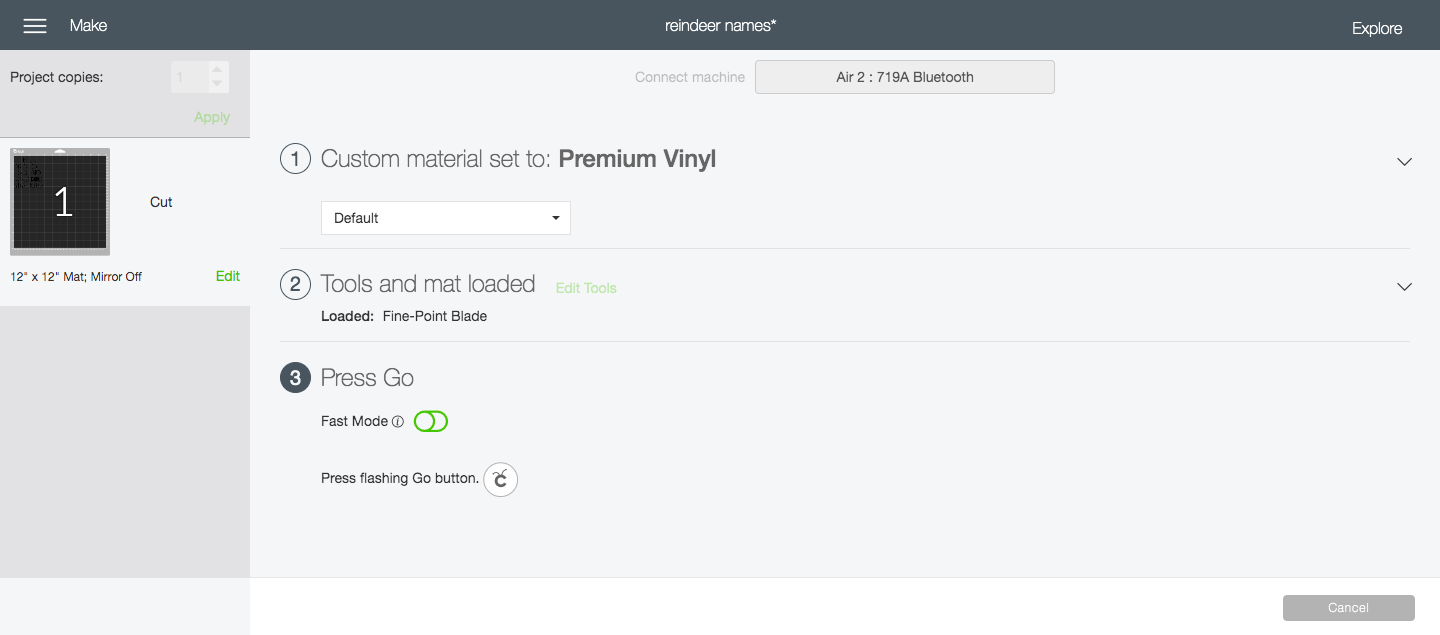
For this project, you DO NOT need to mirror your design before cutting.
You’ll notice on the ‘Make’ screen by the picture of your mat that it reads the size of the mat you’re using, as well as ‘Mirror Off’.
That’s what you want to see!
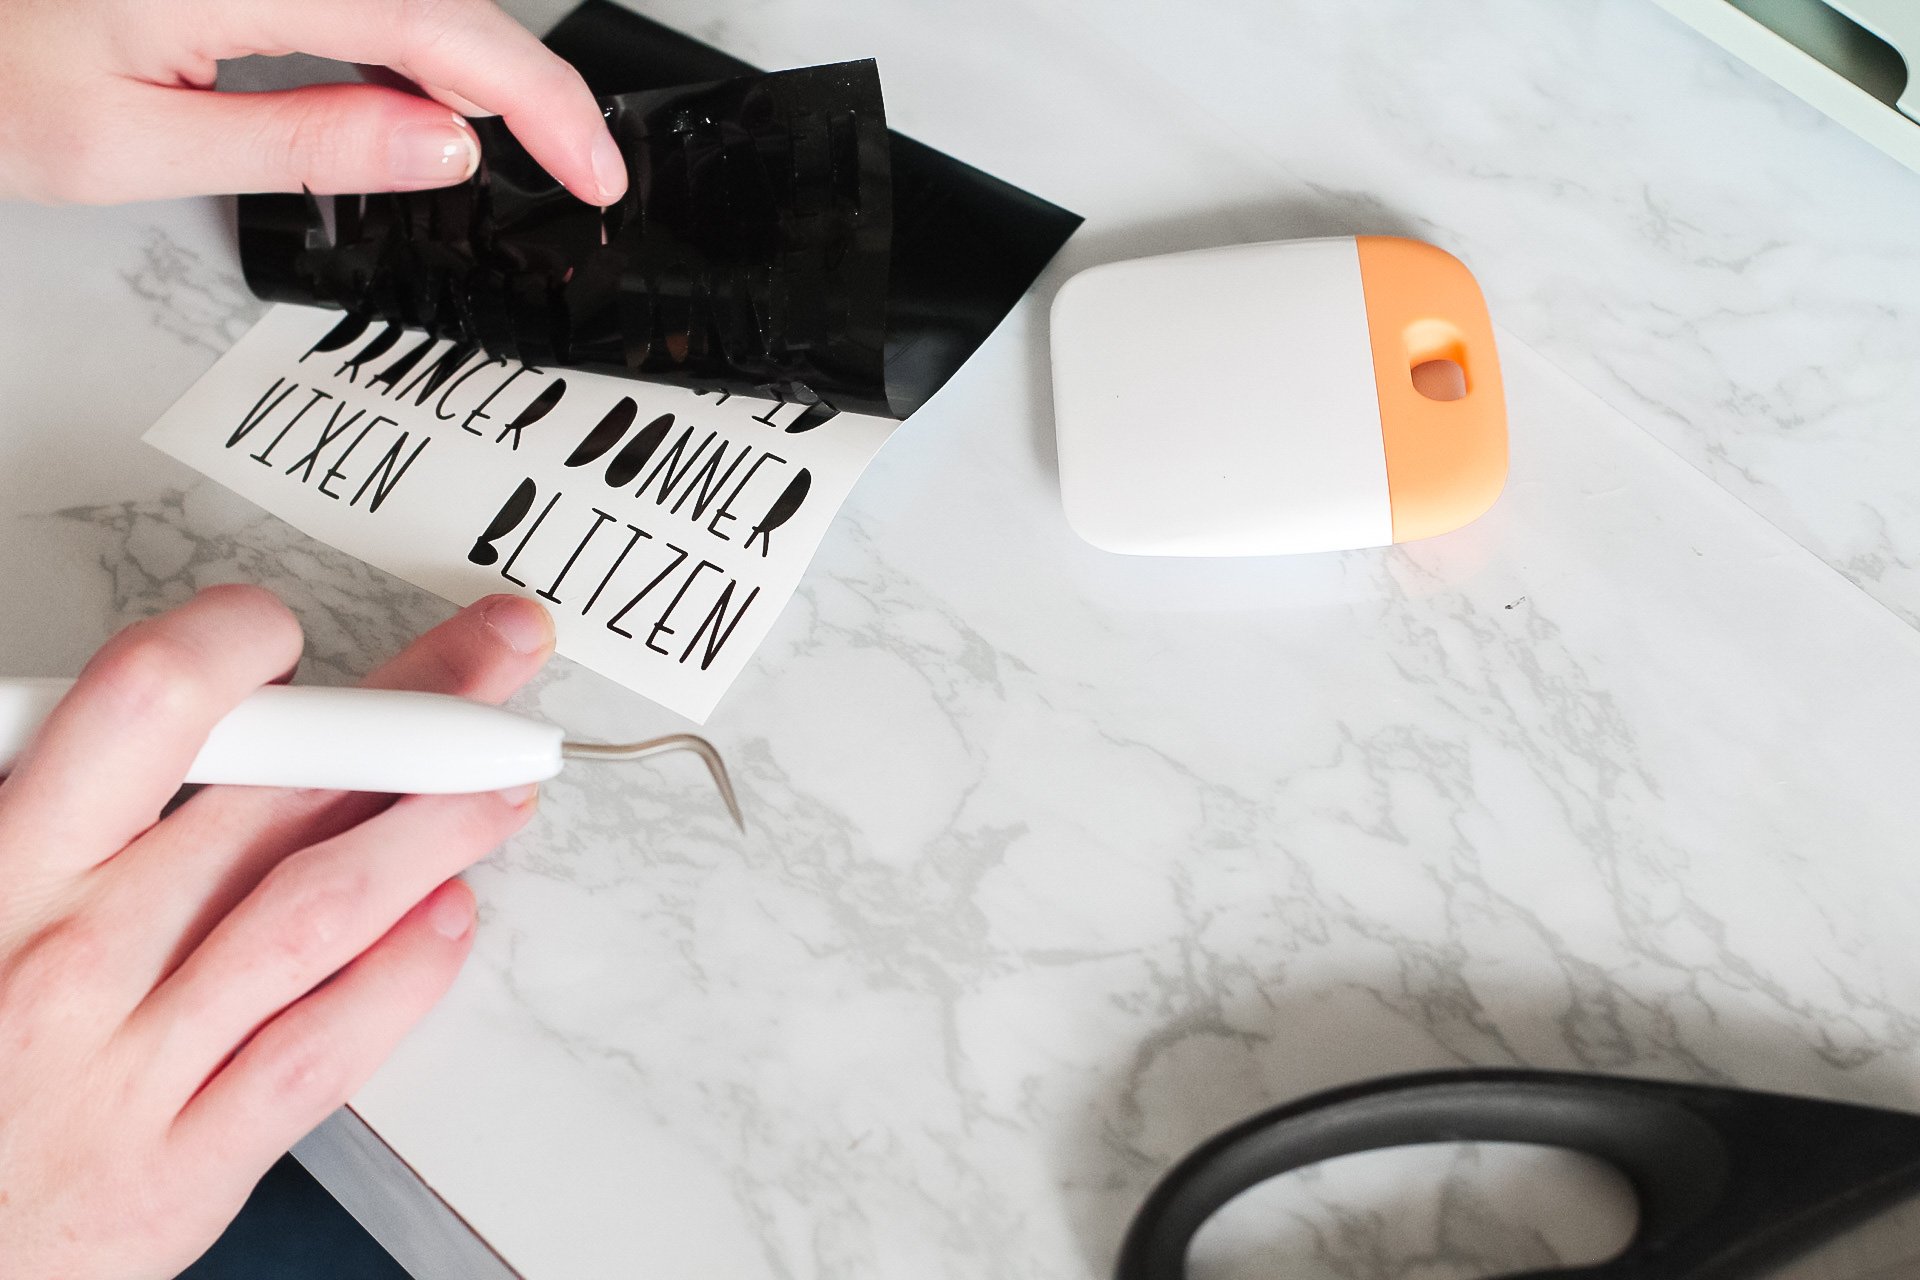
Once your machine is done cutting, remove the vinyl from the mat and begin removing the excess vinyl around your cut design/letters.
Related: DIY Glitter Christmas Gift Tags With The Cricut Explore Air 2
The Cricut weeder (included in the basic tools set) is my BFF and easily weeds away excess vinyl from inside letters and images.
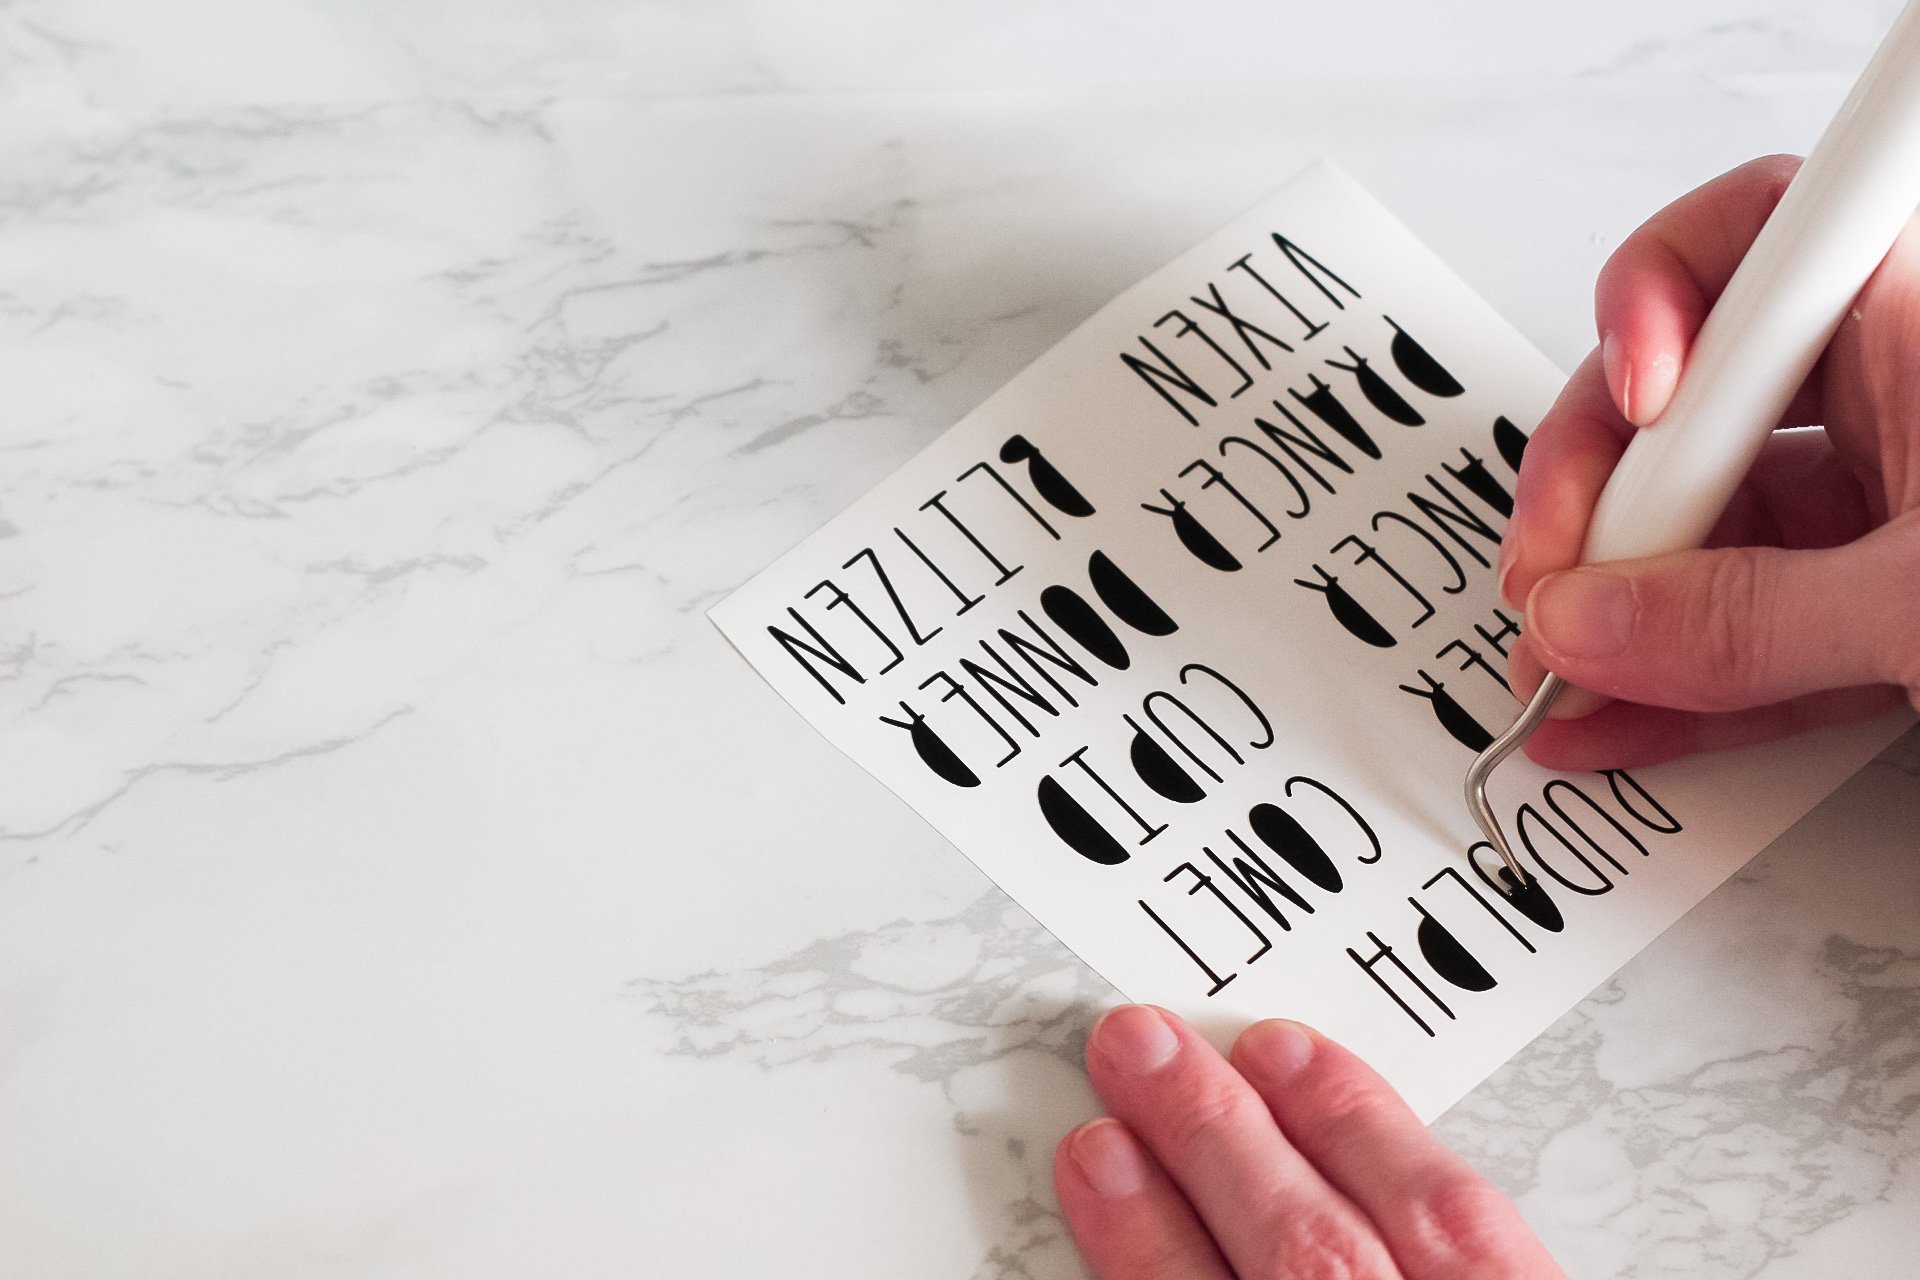
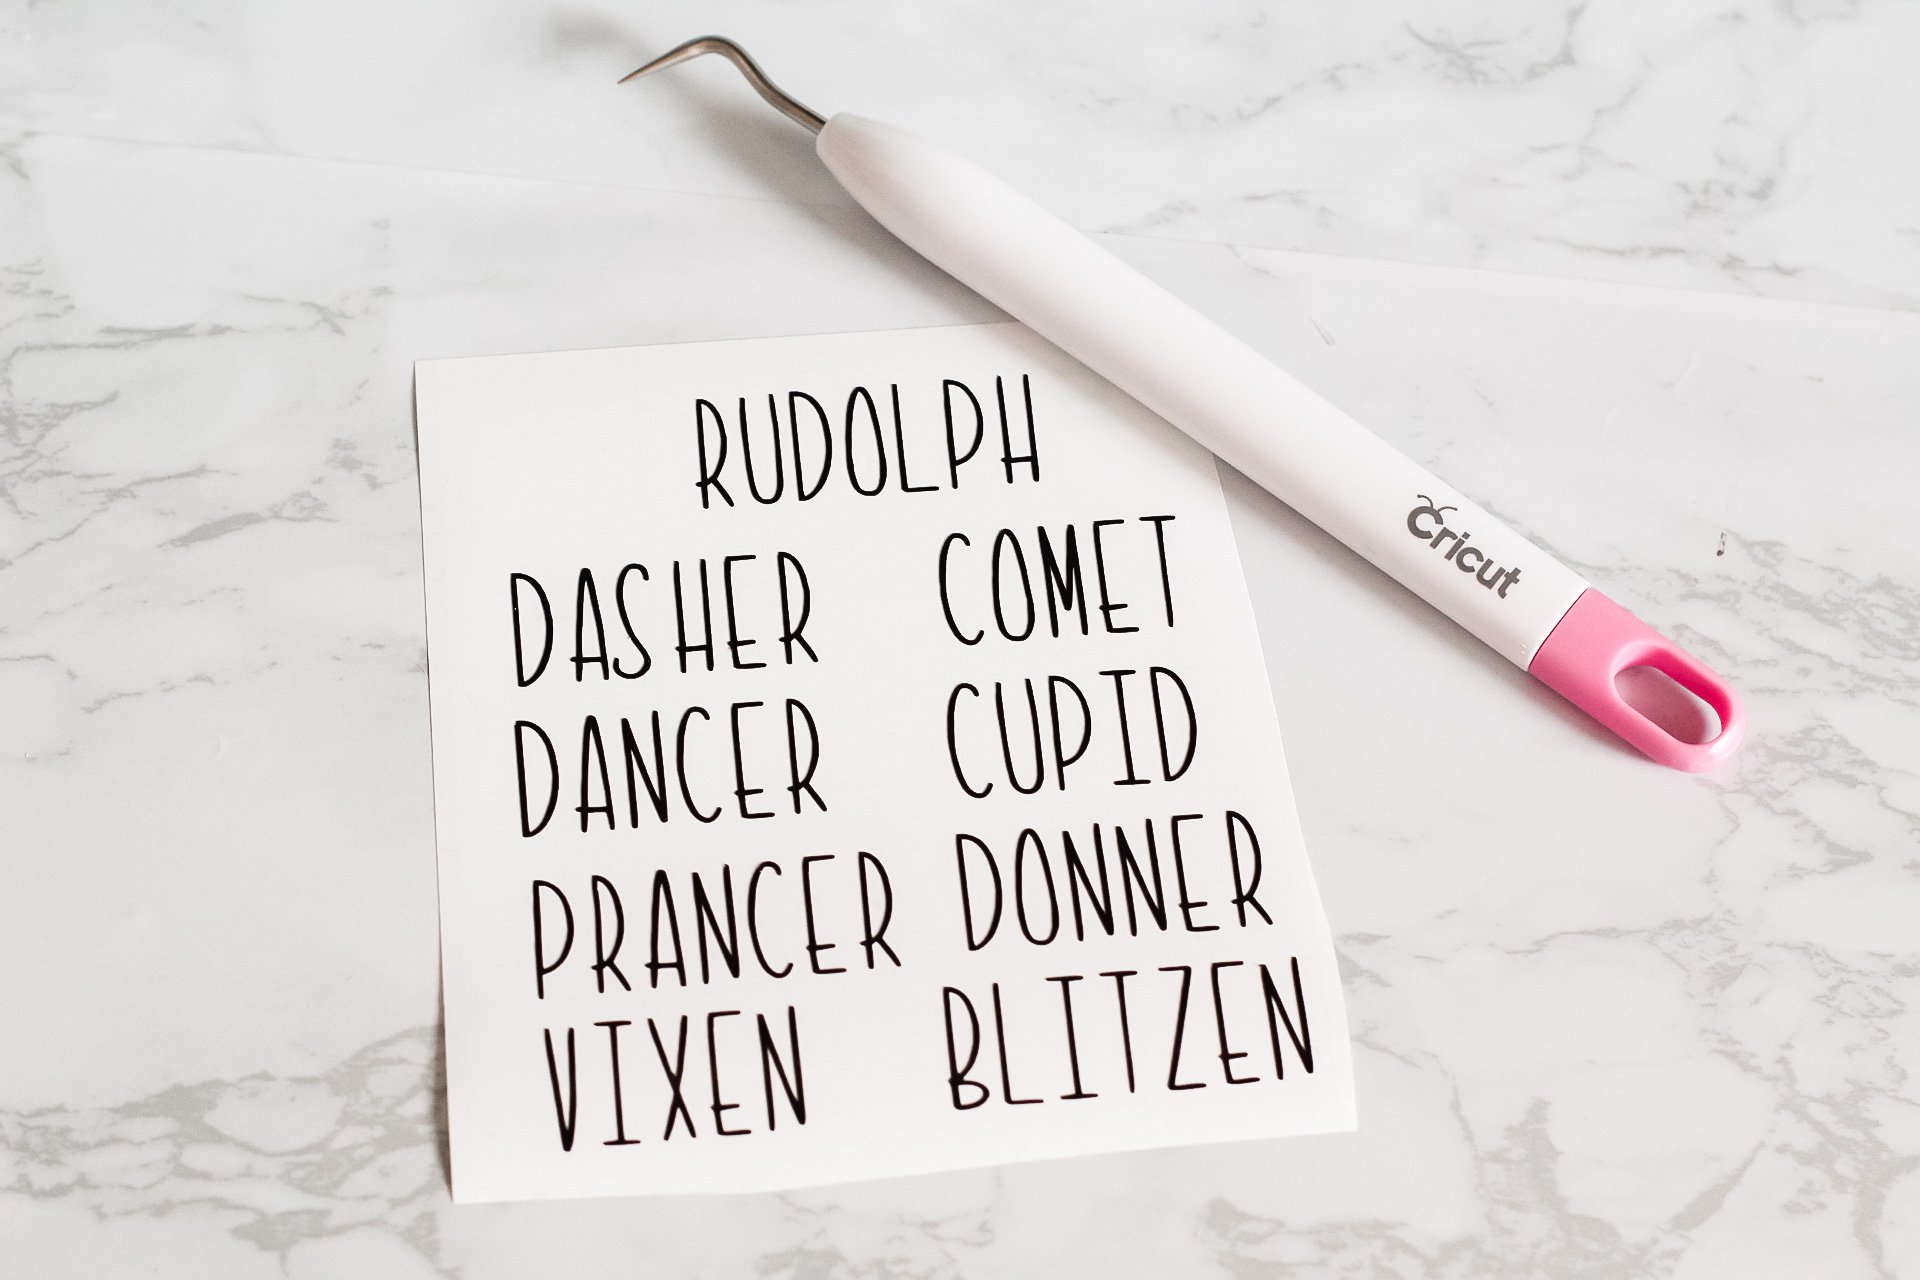
Here are my letters, weeded and ready to transfer…
I cut between each reindeer name to separate them before moving on to the next step…
Tying Ribbons On Ornament Hooks
Now it’s time for some ribbon!
Whenever I pull out my spools of ribbon, I always picture Cinderella surrounded by cute furry animals and her fairy Godmother spinning her around as she transforms out of her rags and into a beautiful dress for the ball…
Anyone else? Just me? 😉
There’s just something magical about ribbon – I love adding it to projects because I feel it brings some life to whatever I’m working on!
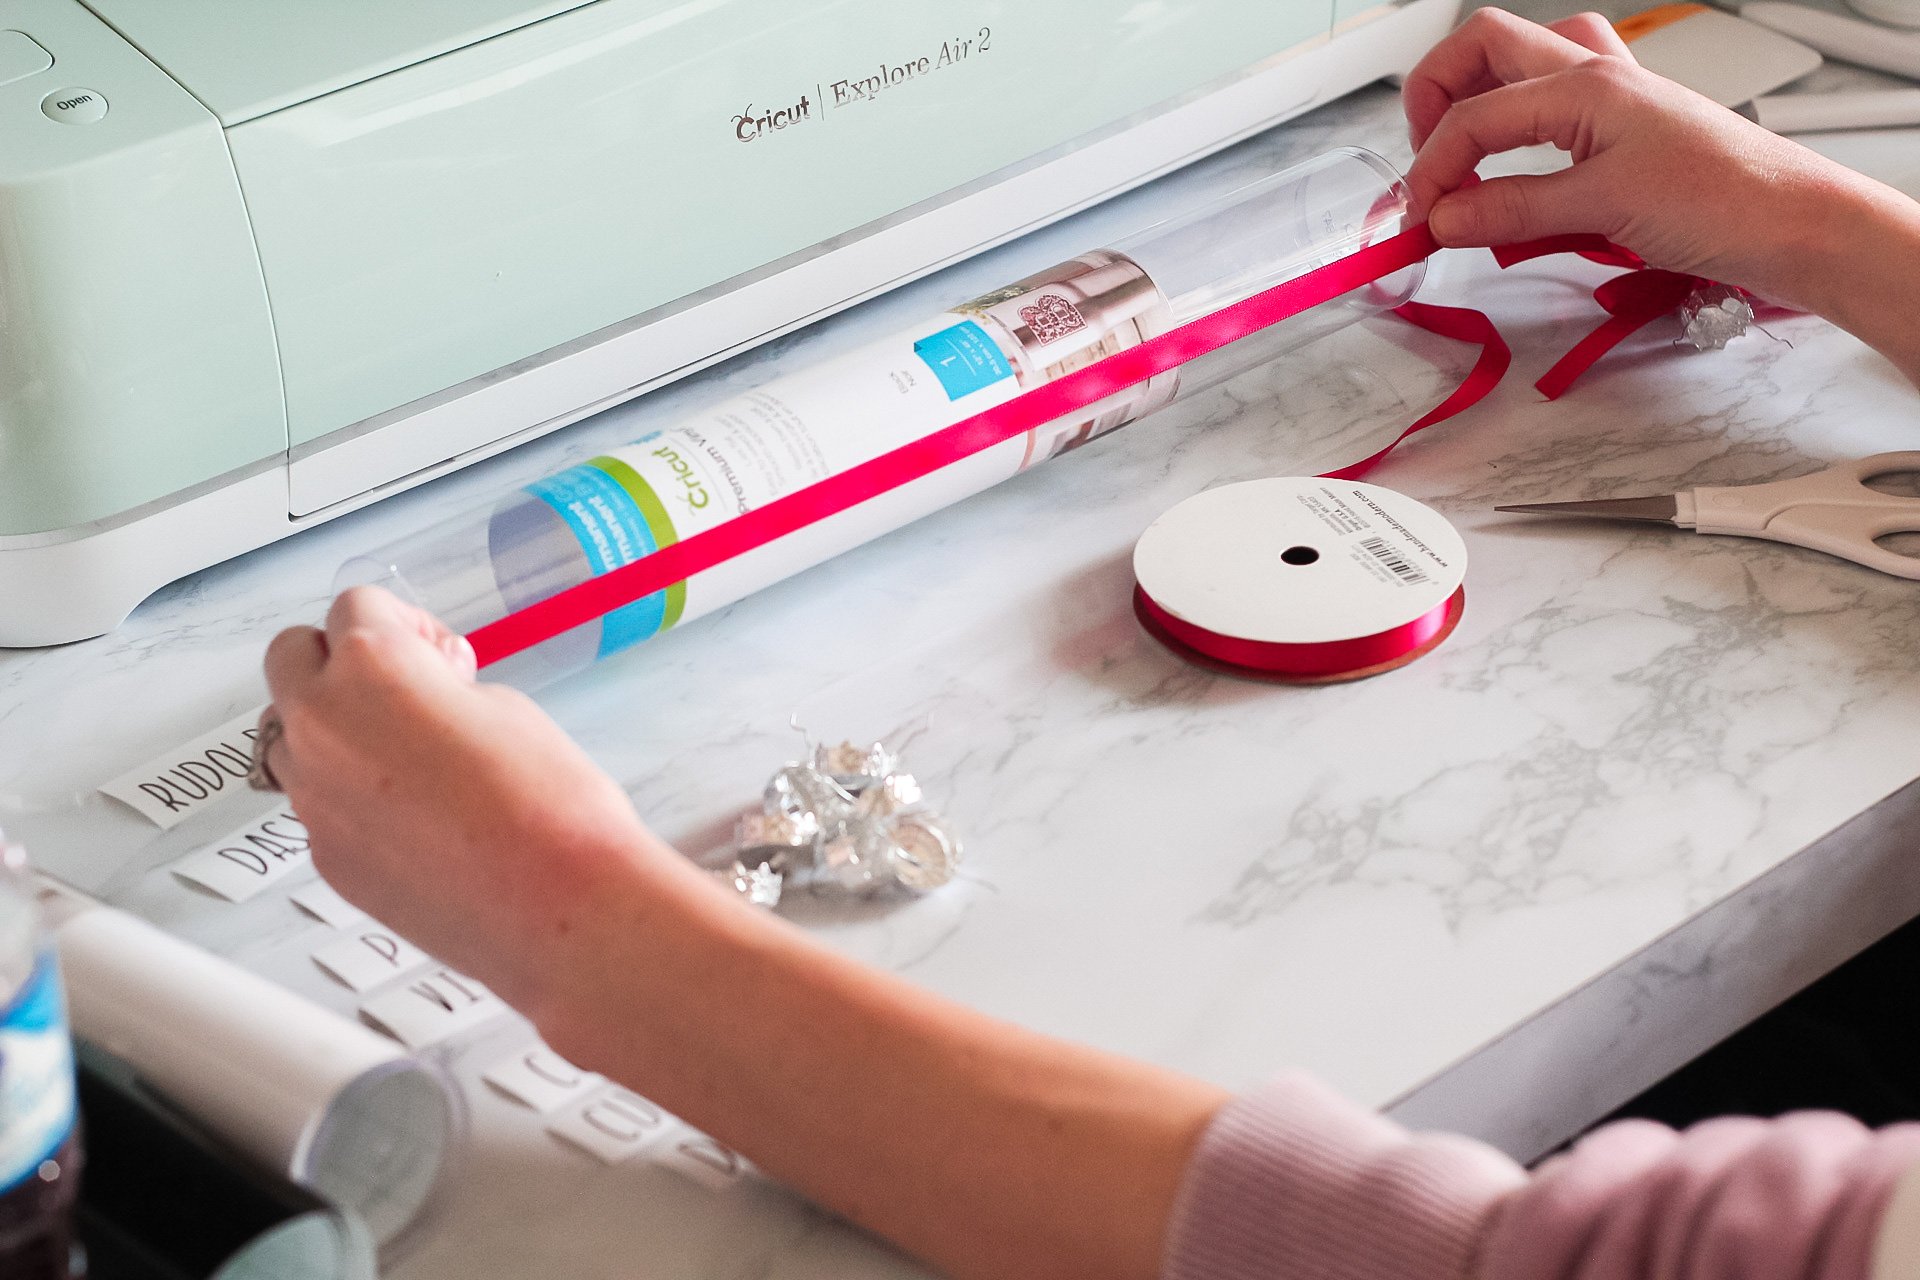
For these bulbs, I cut the ribbon the length of a Cricut vinyl tube (which is about 13″ long).
I’m not sure what possessed me to do this, but it ended up being the perfect length for this project.
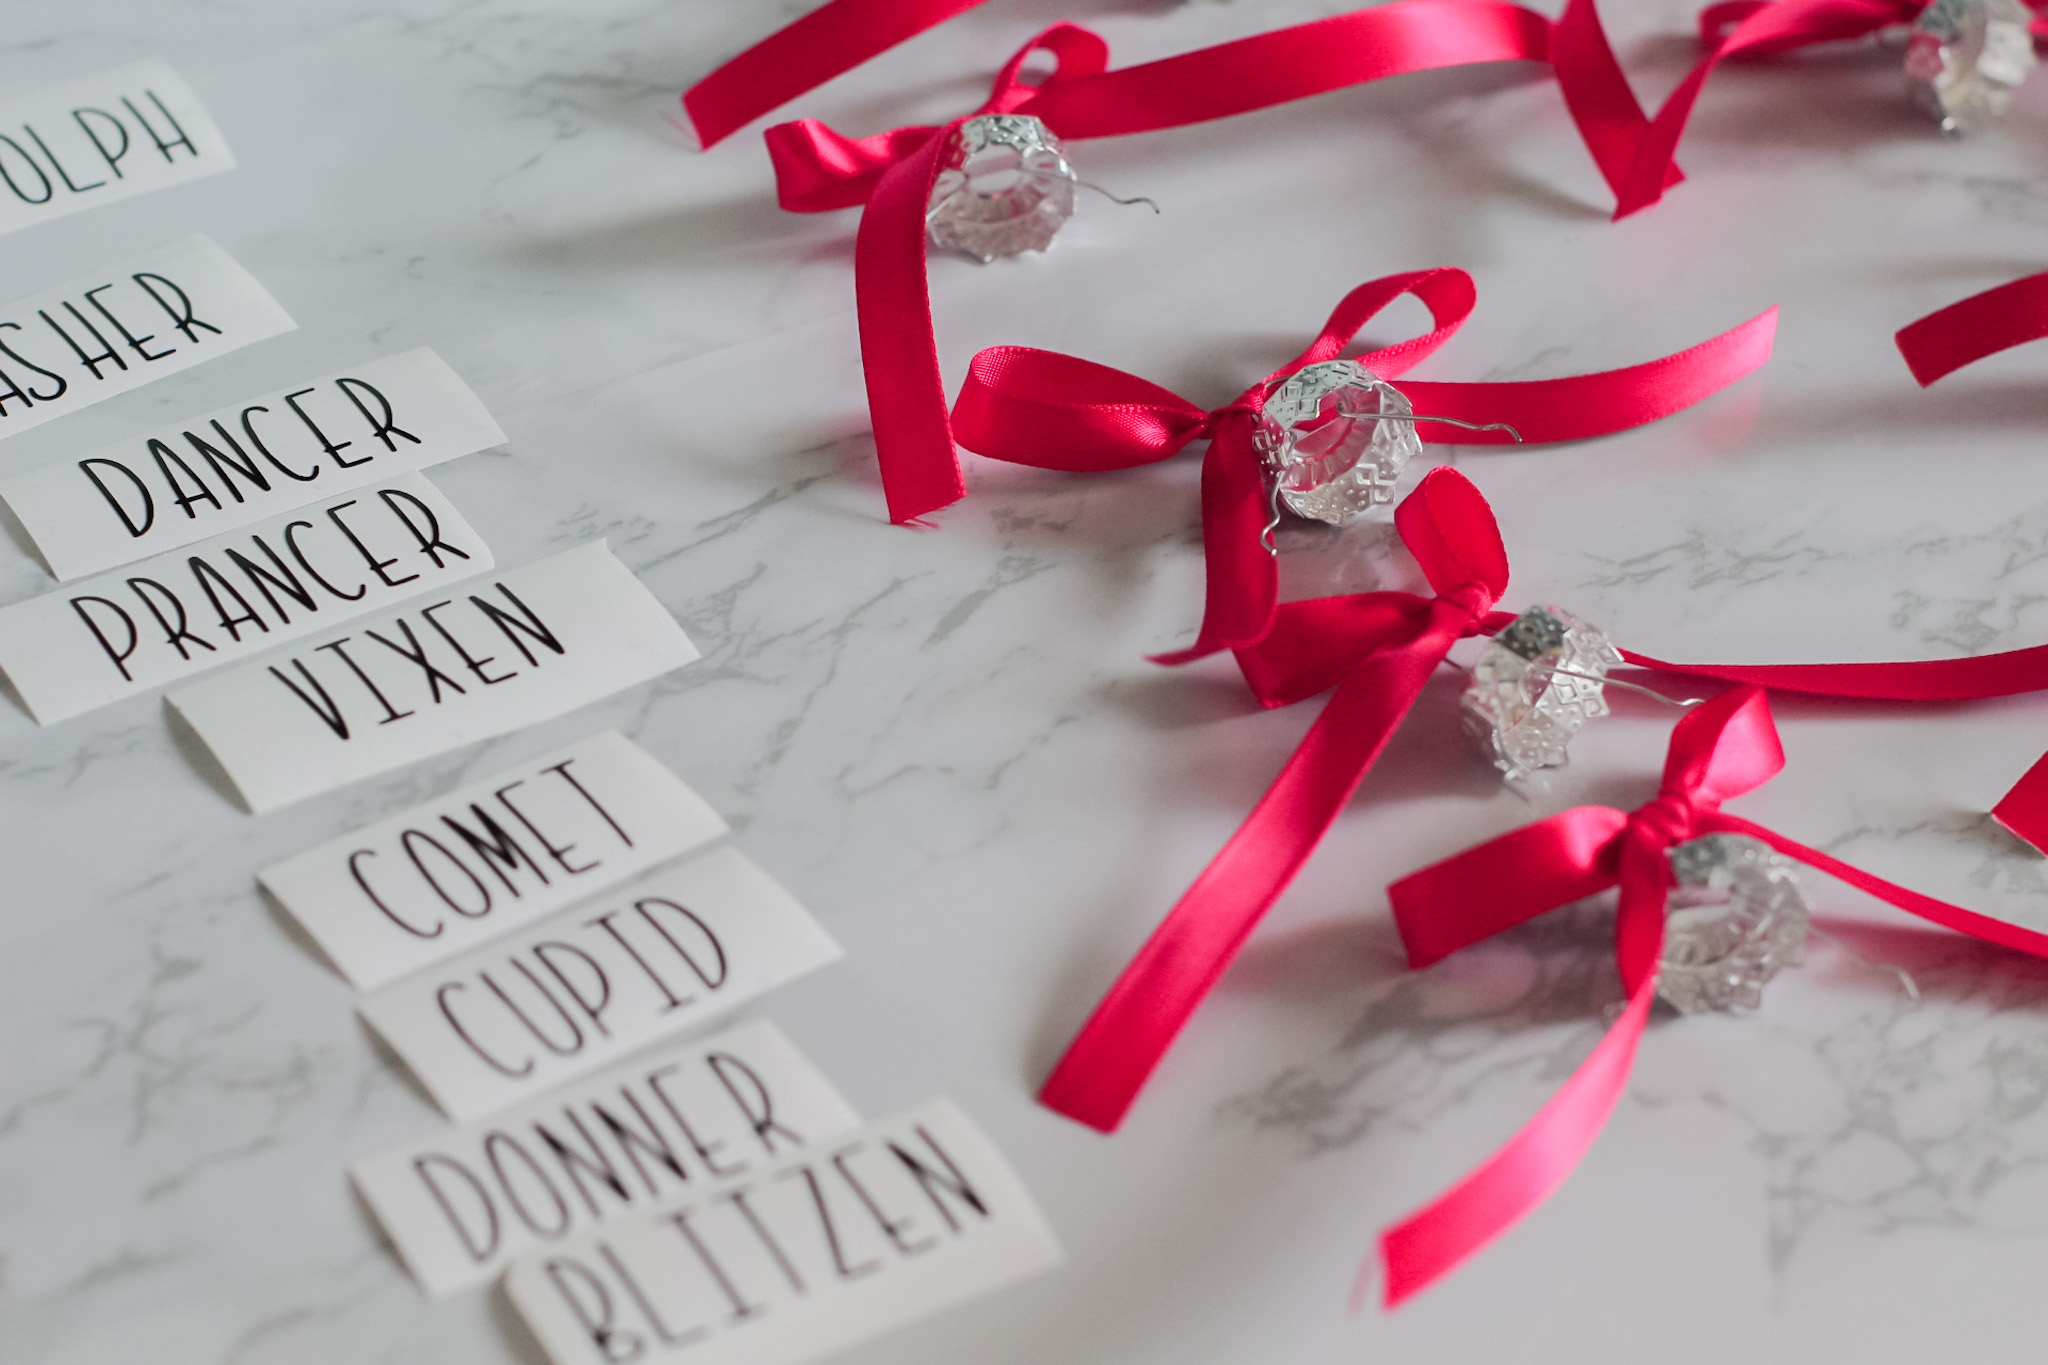
I chose a satin red ribbon for these ornaments to add just the right amount of Christmas color to this project while still keeping the main bulbs neutral.

You May Also Like: DIY Holiday Pillow Covers With Cricut EasyPress 2
How To Put Vinyl On A Curved Surface
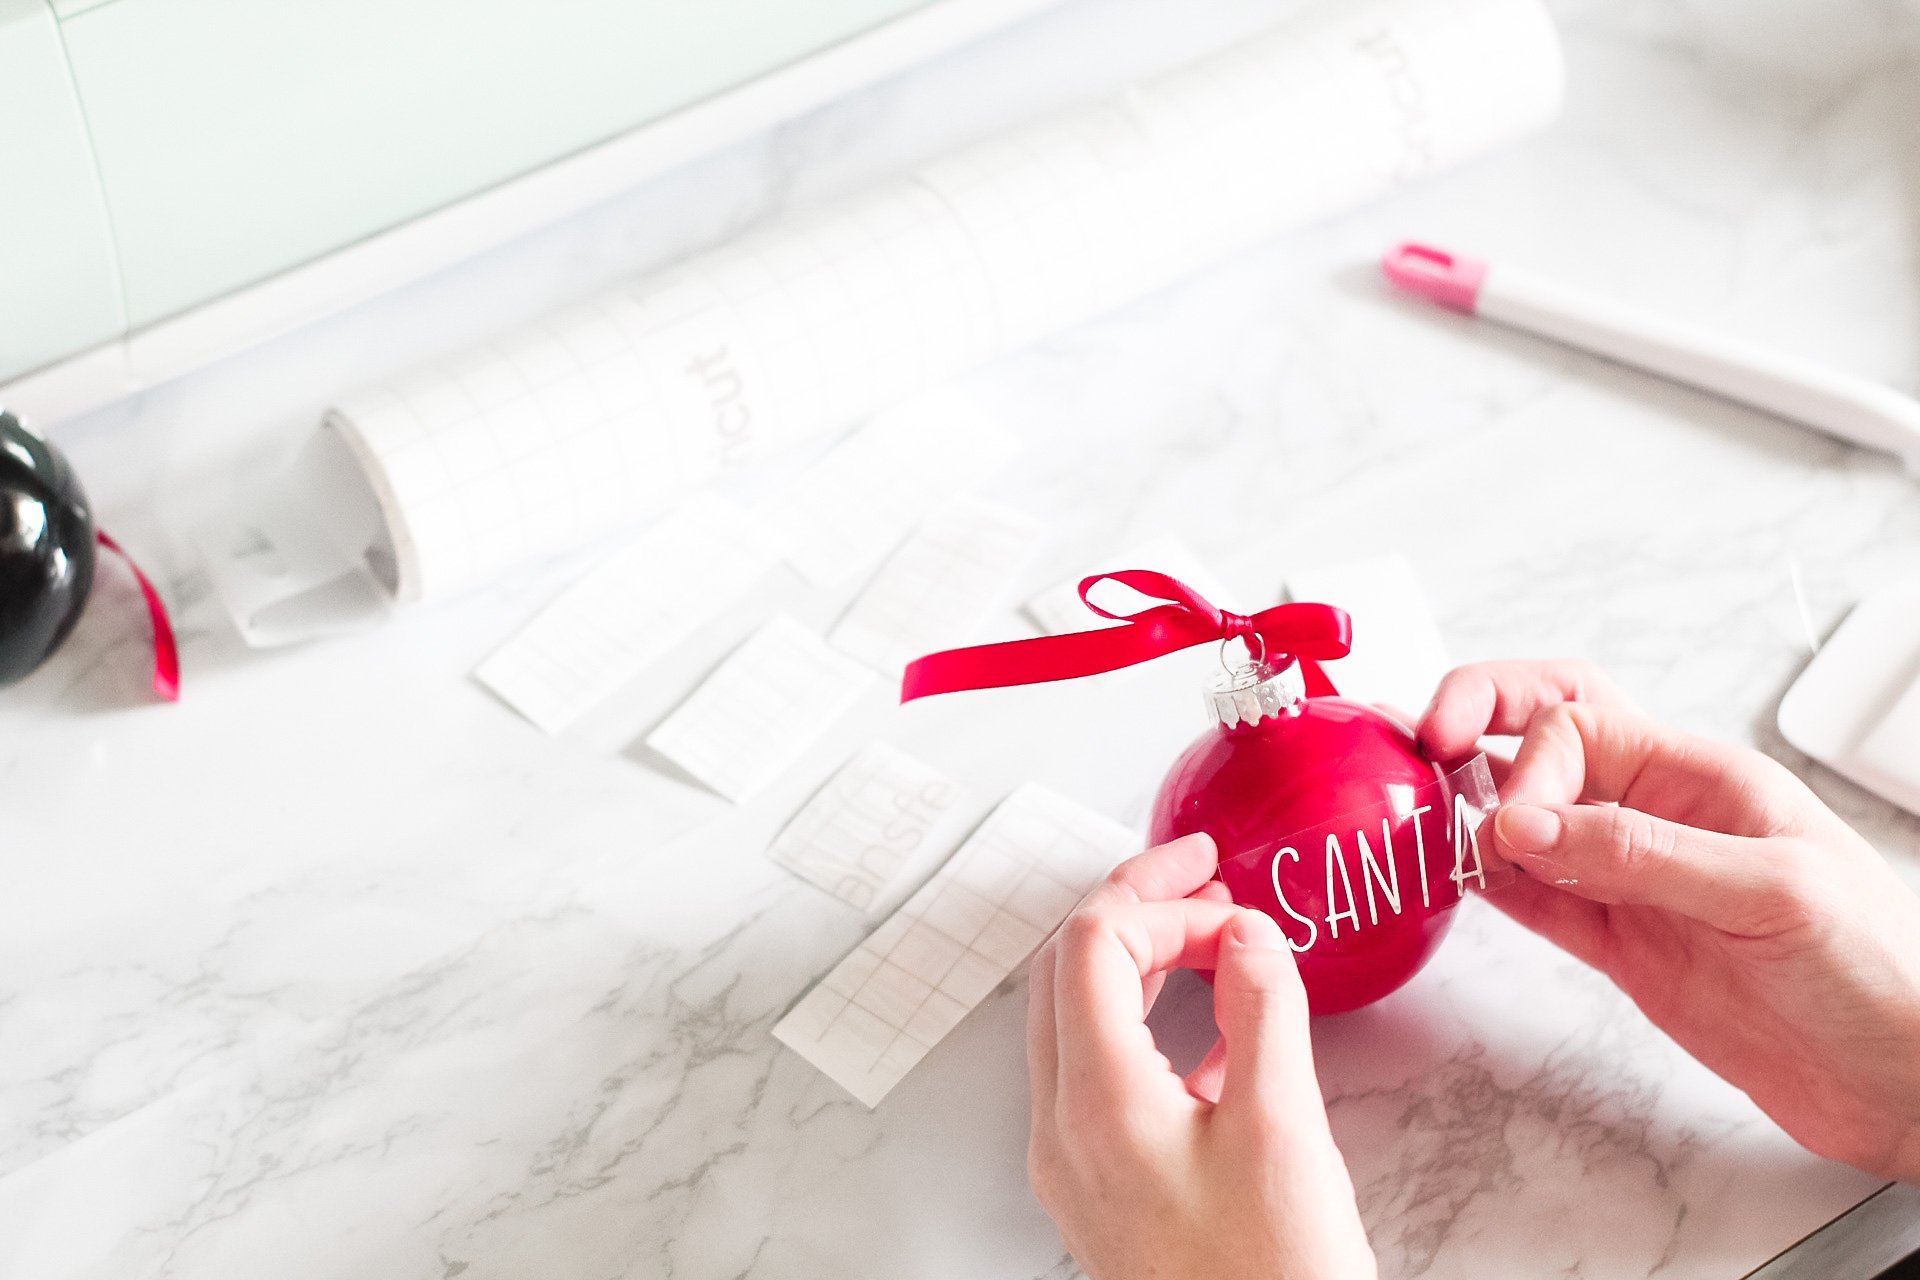
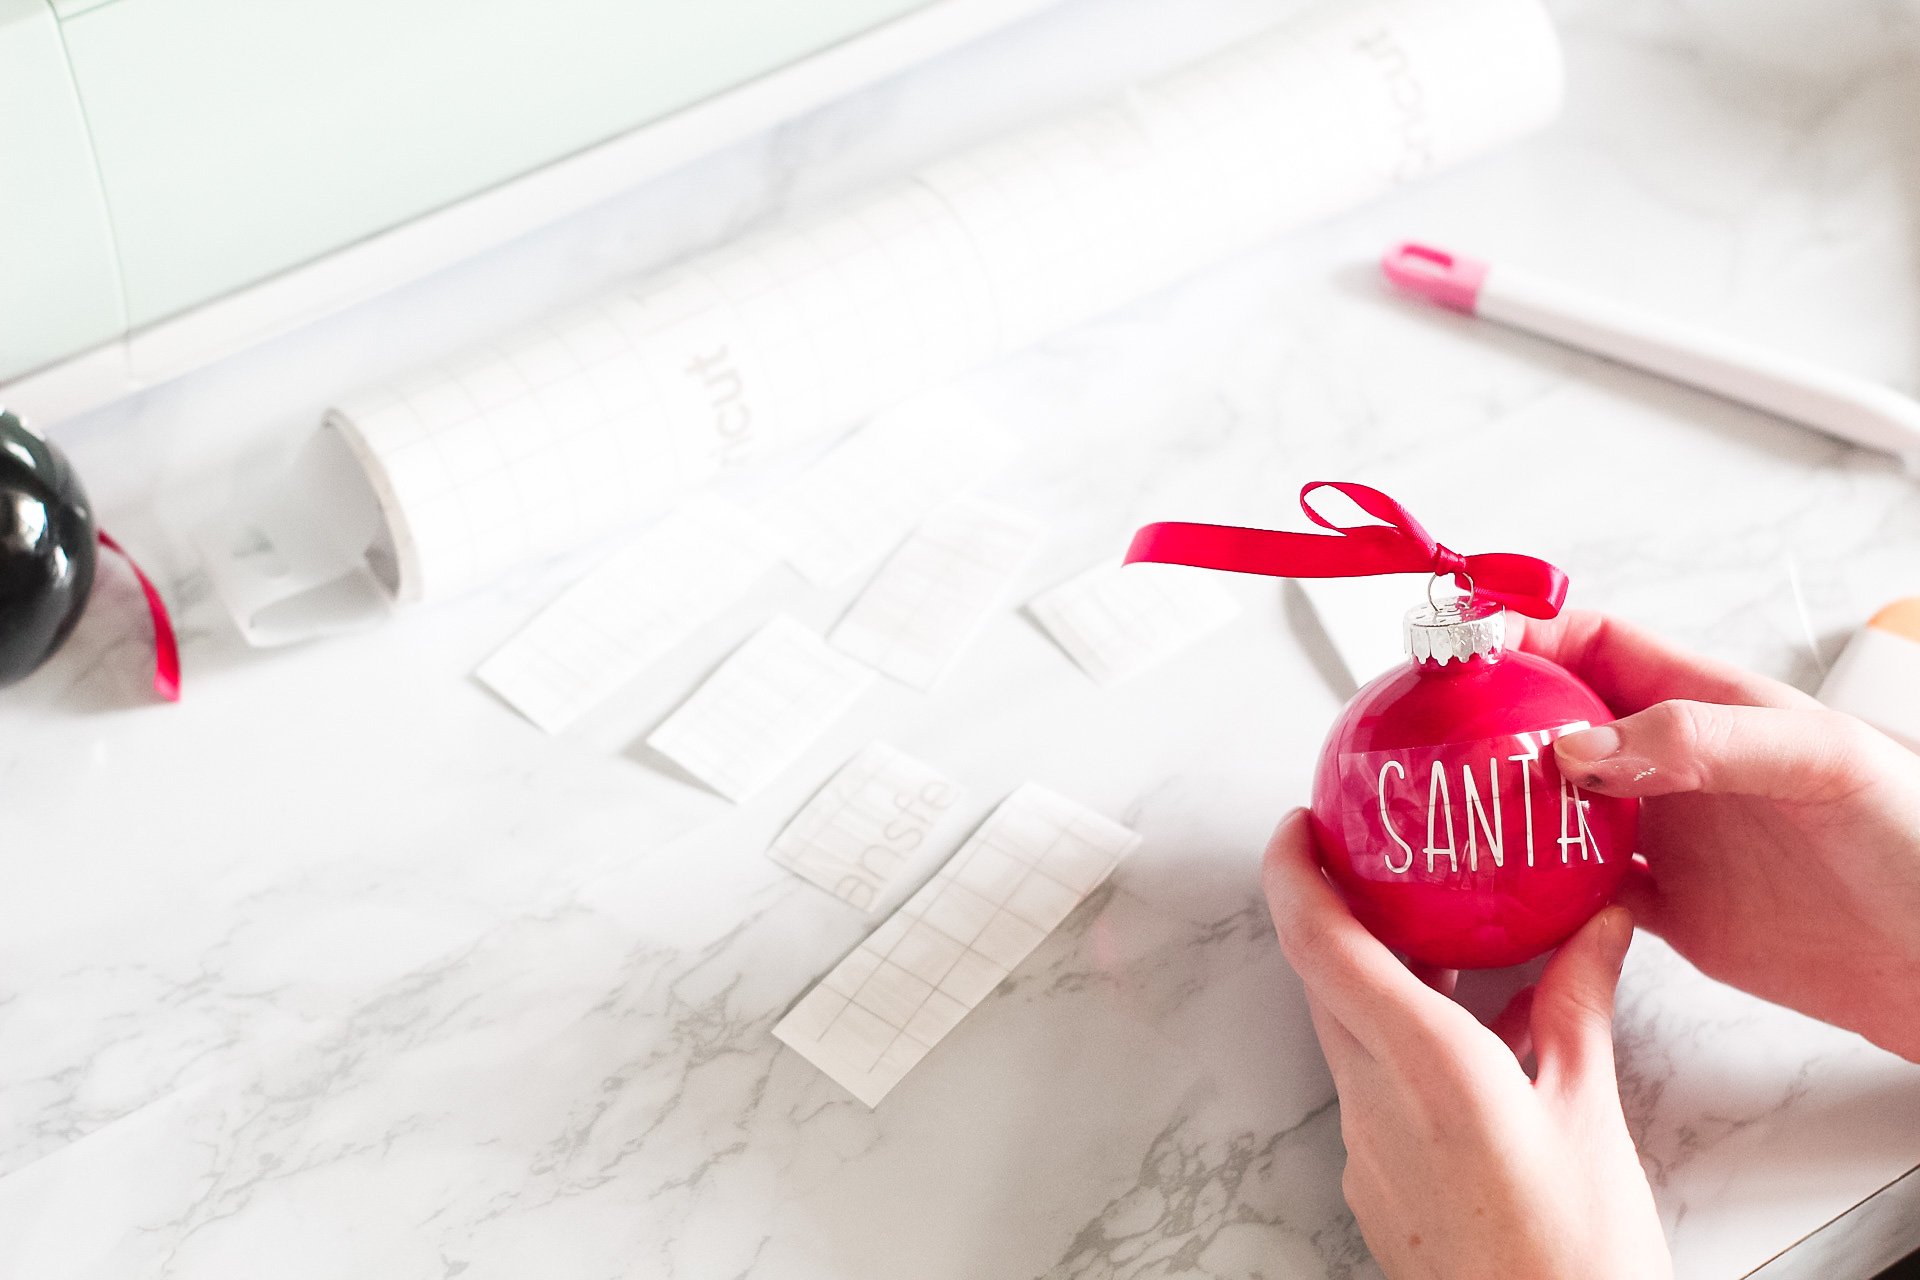
Now that your ornaments are dry, it’s time to transfer the reindeer names to the bulb ornaments!
Place the tops of the ornaments back onto the ornaments, taking care not to scratch the paint on the inside if it is thin.
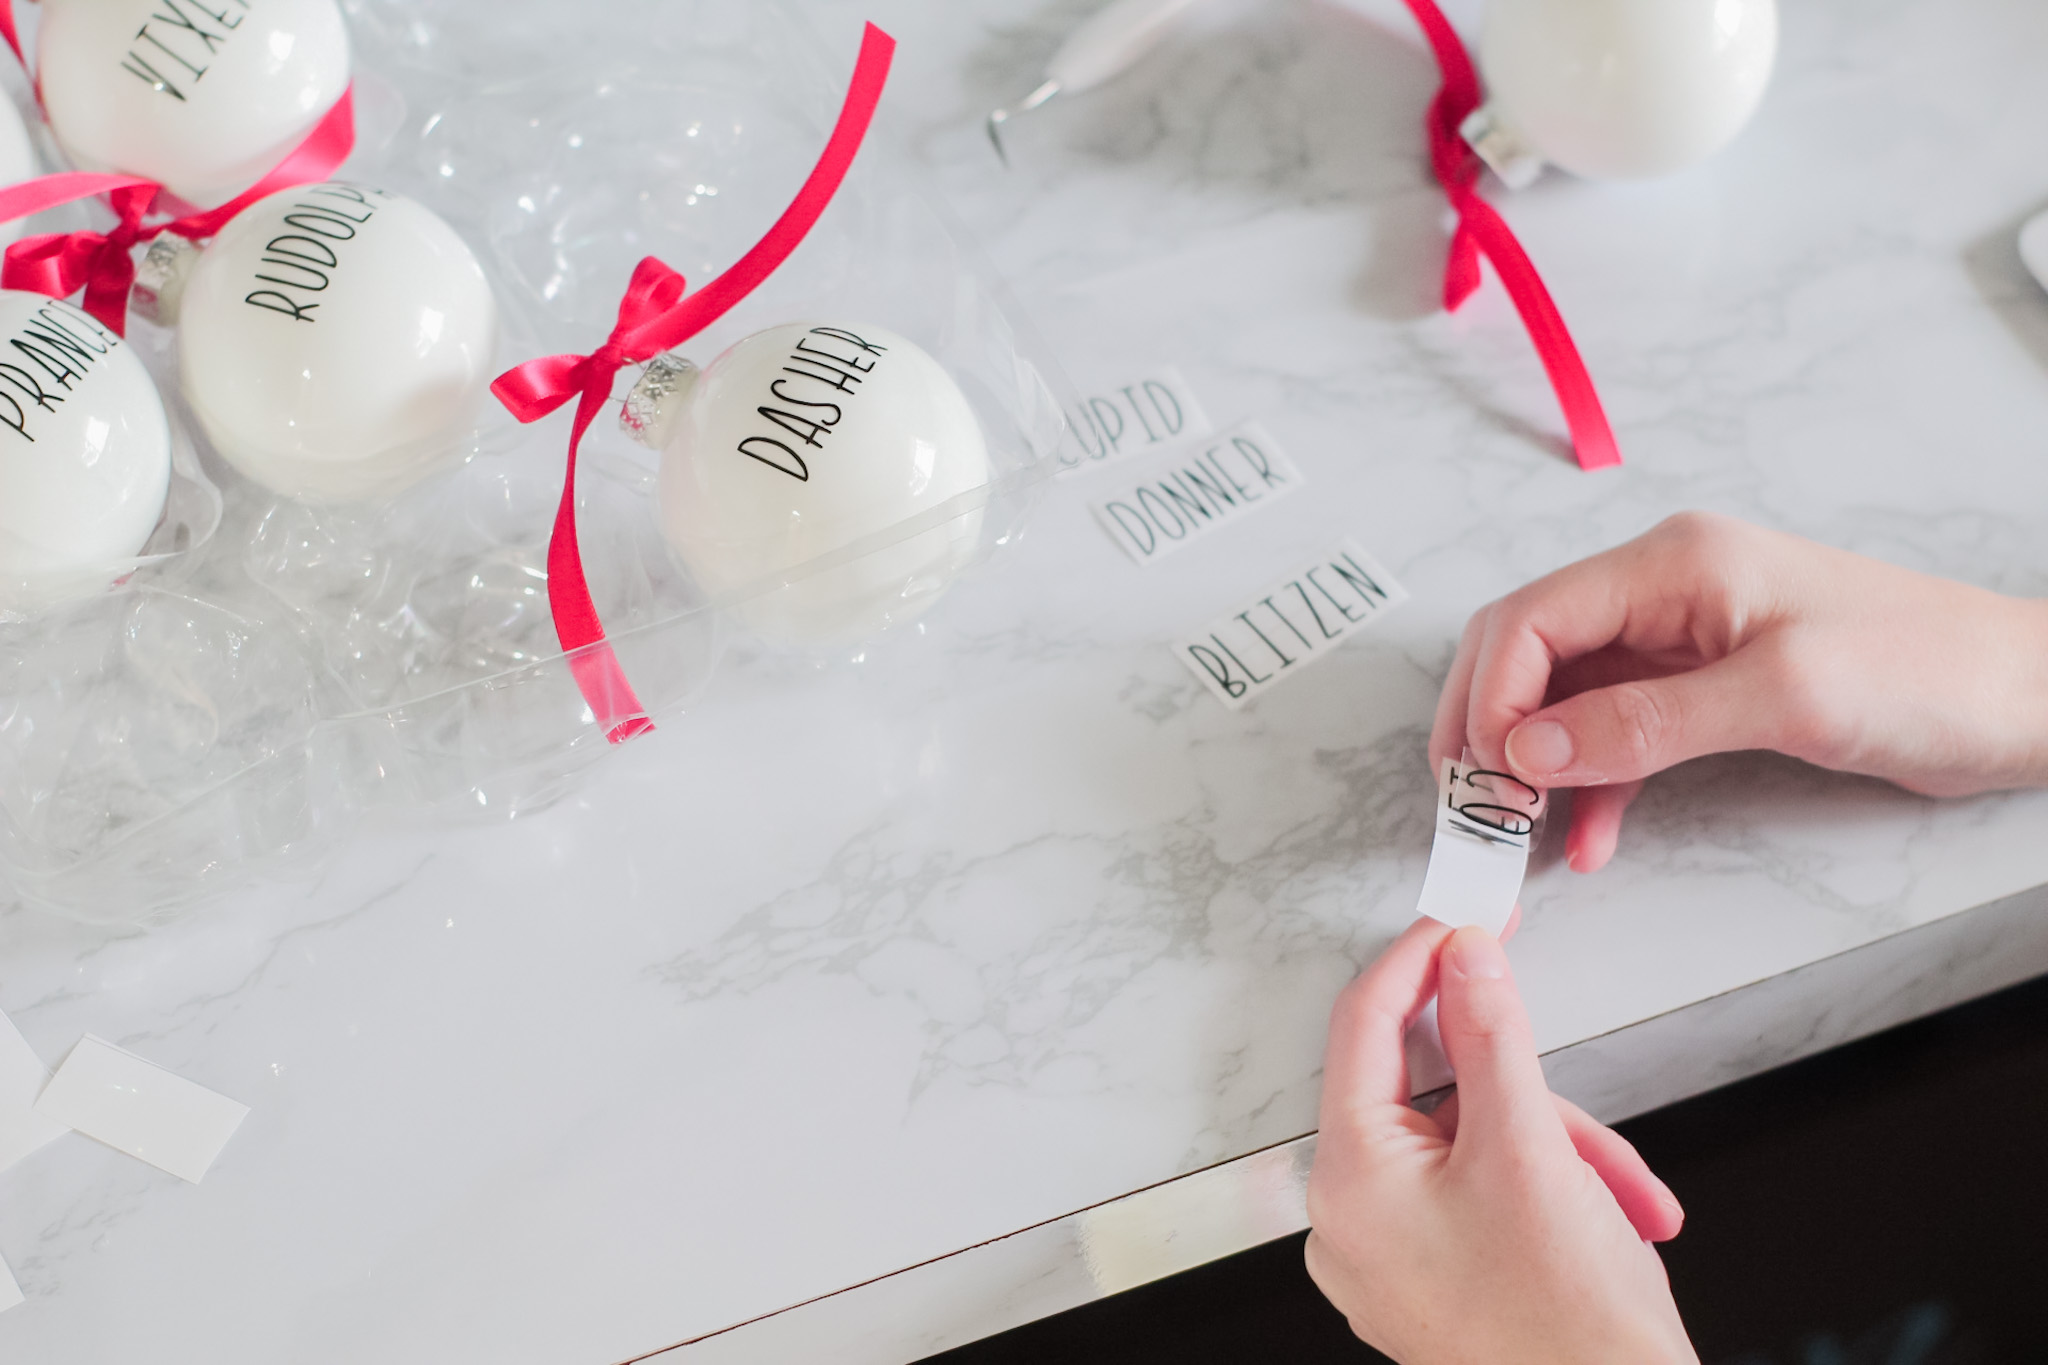
Place some transfer tape over your letters and rub a scraper (included in the basic tools set) over the transfer tape.
The transfer tape will stick to the letters and remove them from the paper.
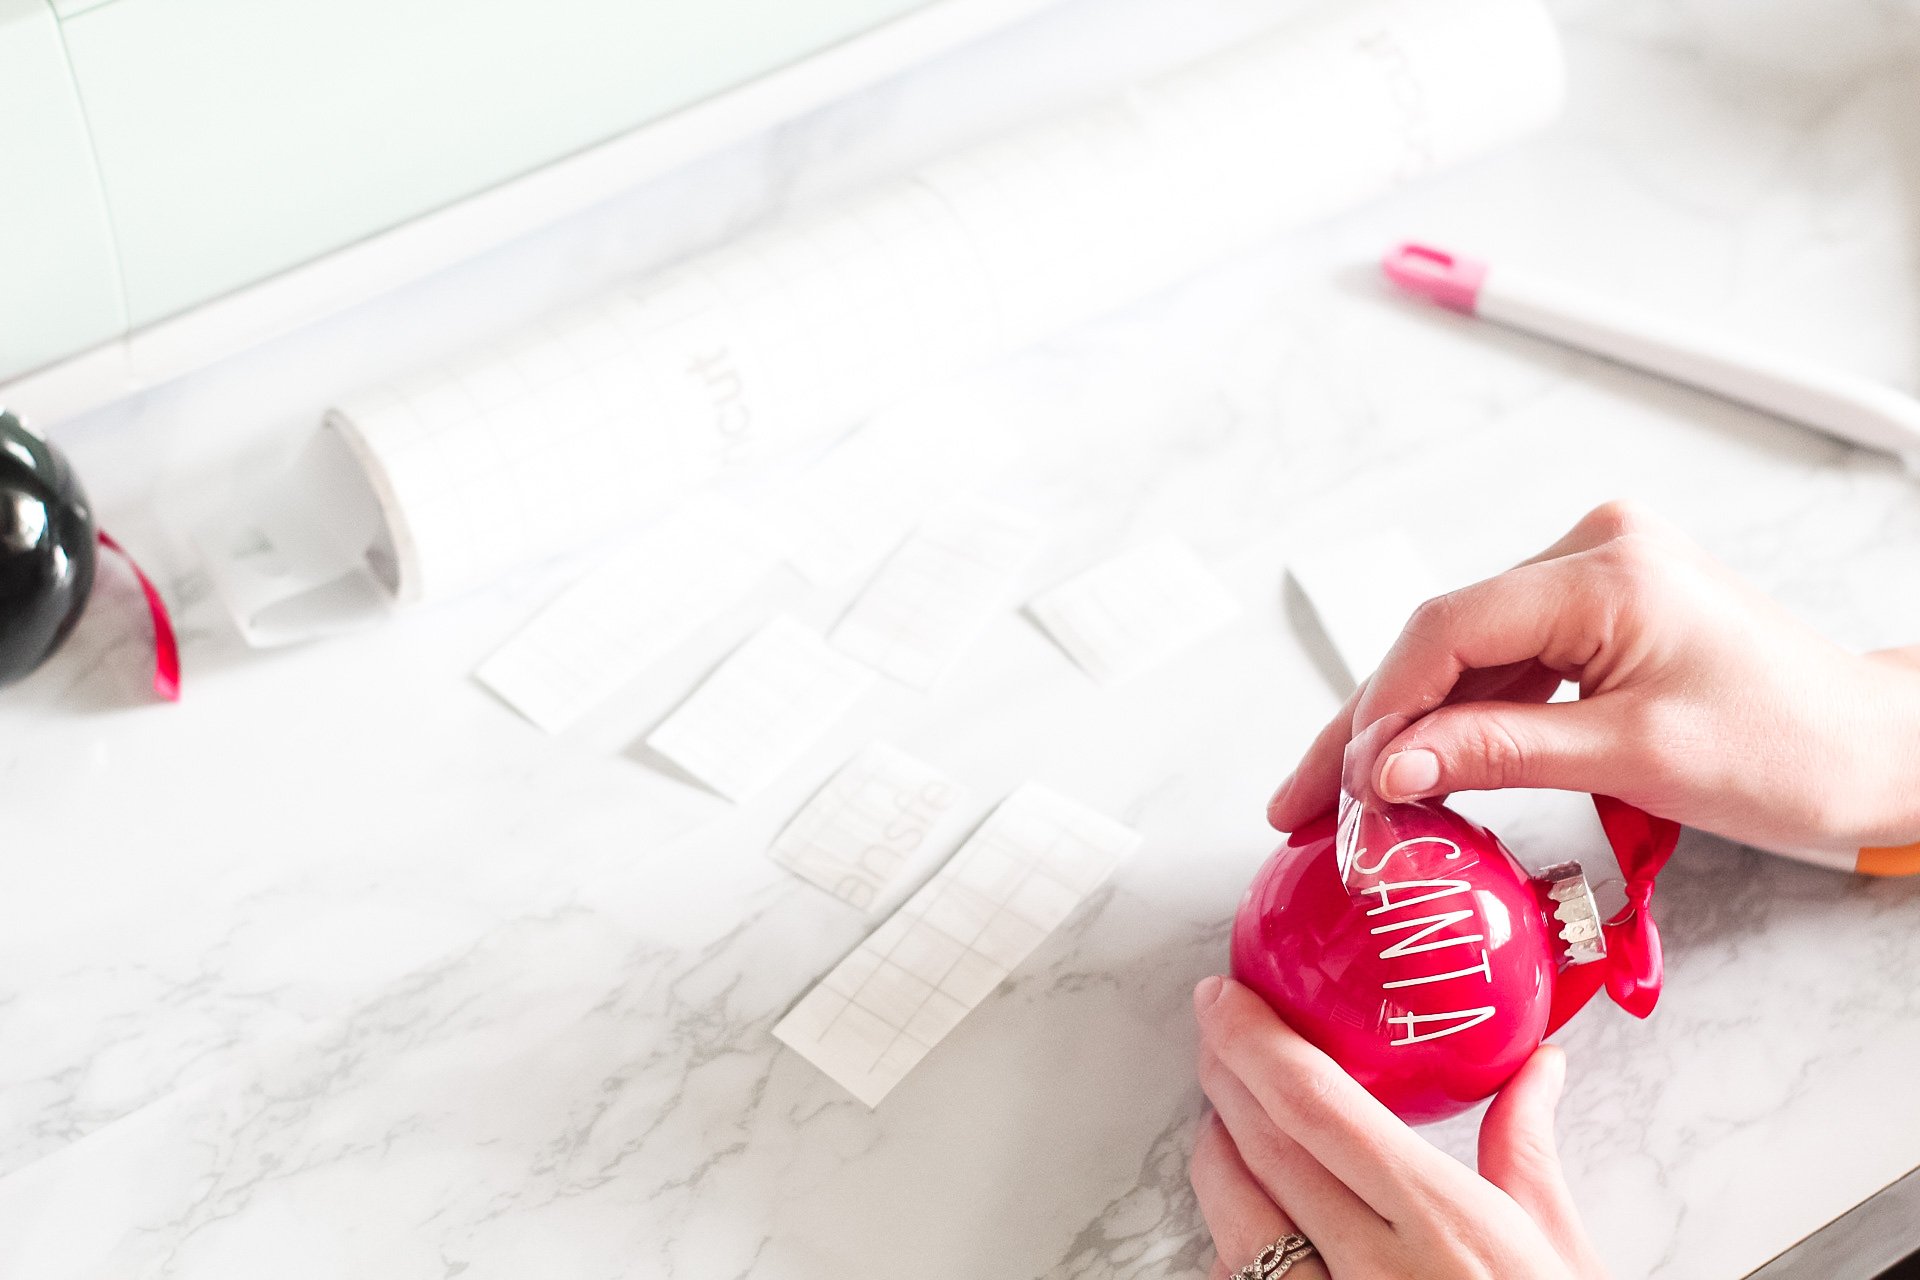
Place the transfer tape with your reindeer names onto your bulbs and rub so they stick to the bulb.
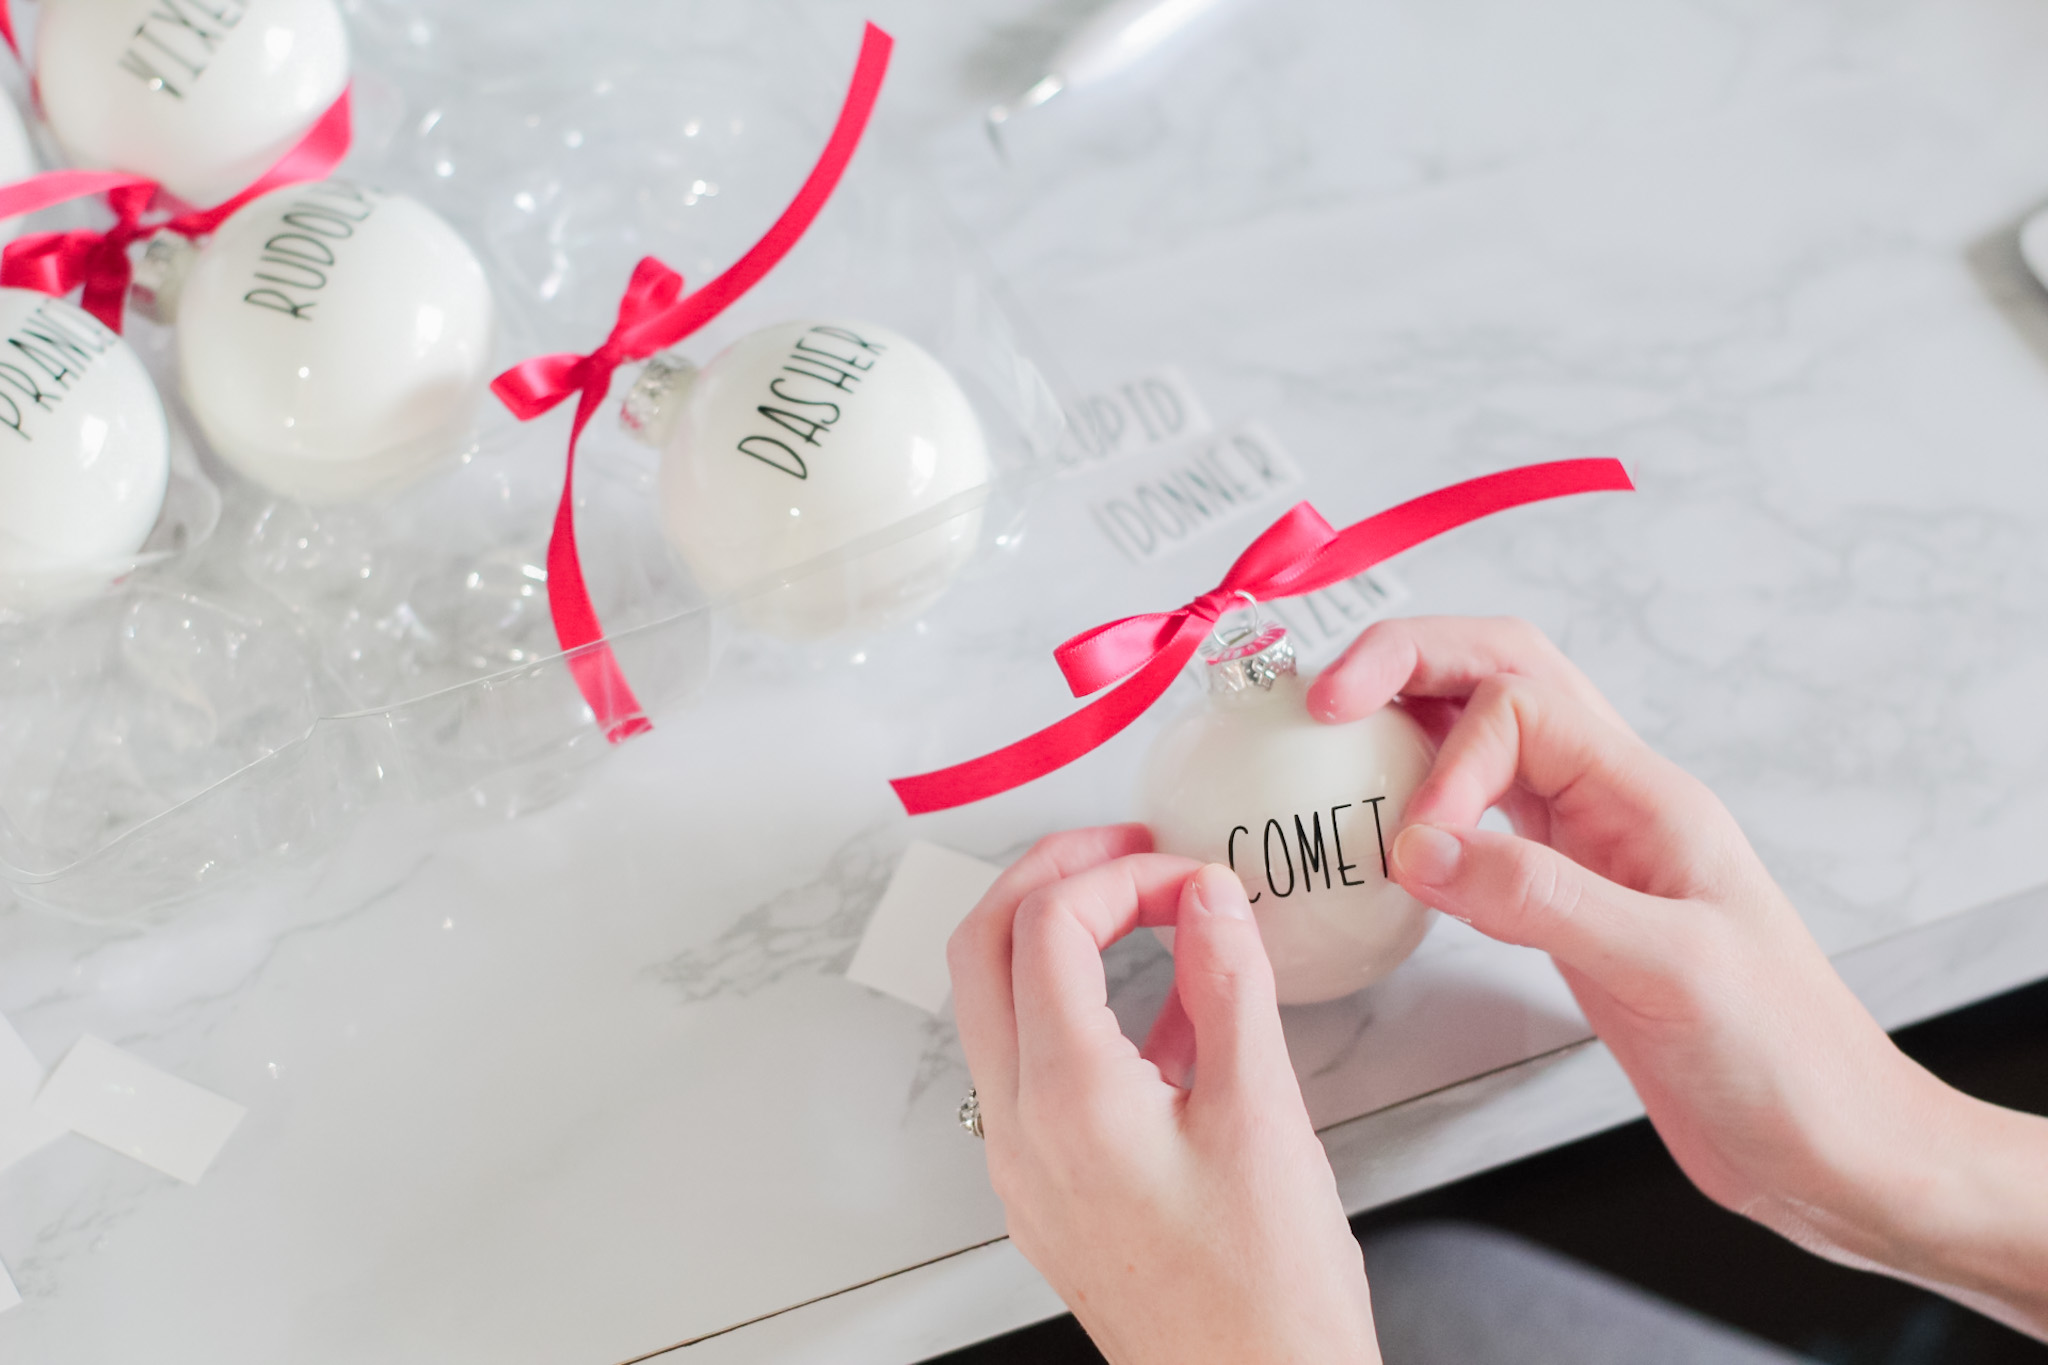
If you’re having trouble with applying your vinyl, here’s how to put vinyl on a curved surface…
Because you’re working with a rounded surface, extra care goes a long way when attaching the letters.
For my bulbs, I ran my thumb across the center of the letters to ensure they stuck to the ornament.
Then, I used my fingers to push up and down the length of each letter separately.
The transfer tape did not lay flat because the ornament is not a flat surface.
There were folds between each letter, but that is necessary when applying to a rounded surface.
Here is a side view of what my transfer tape looked like before I peeled it away…
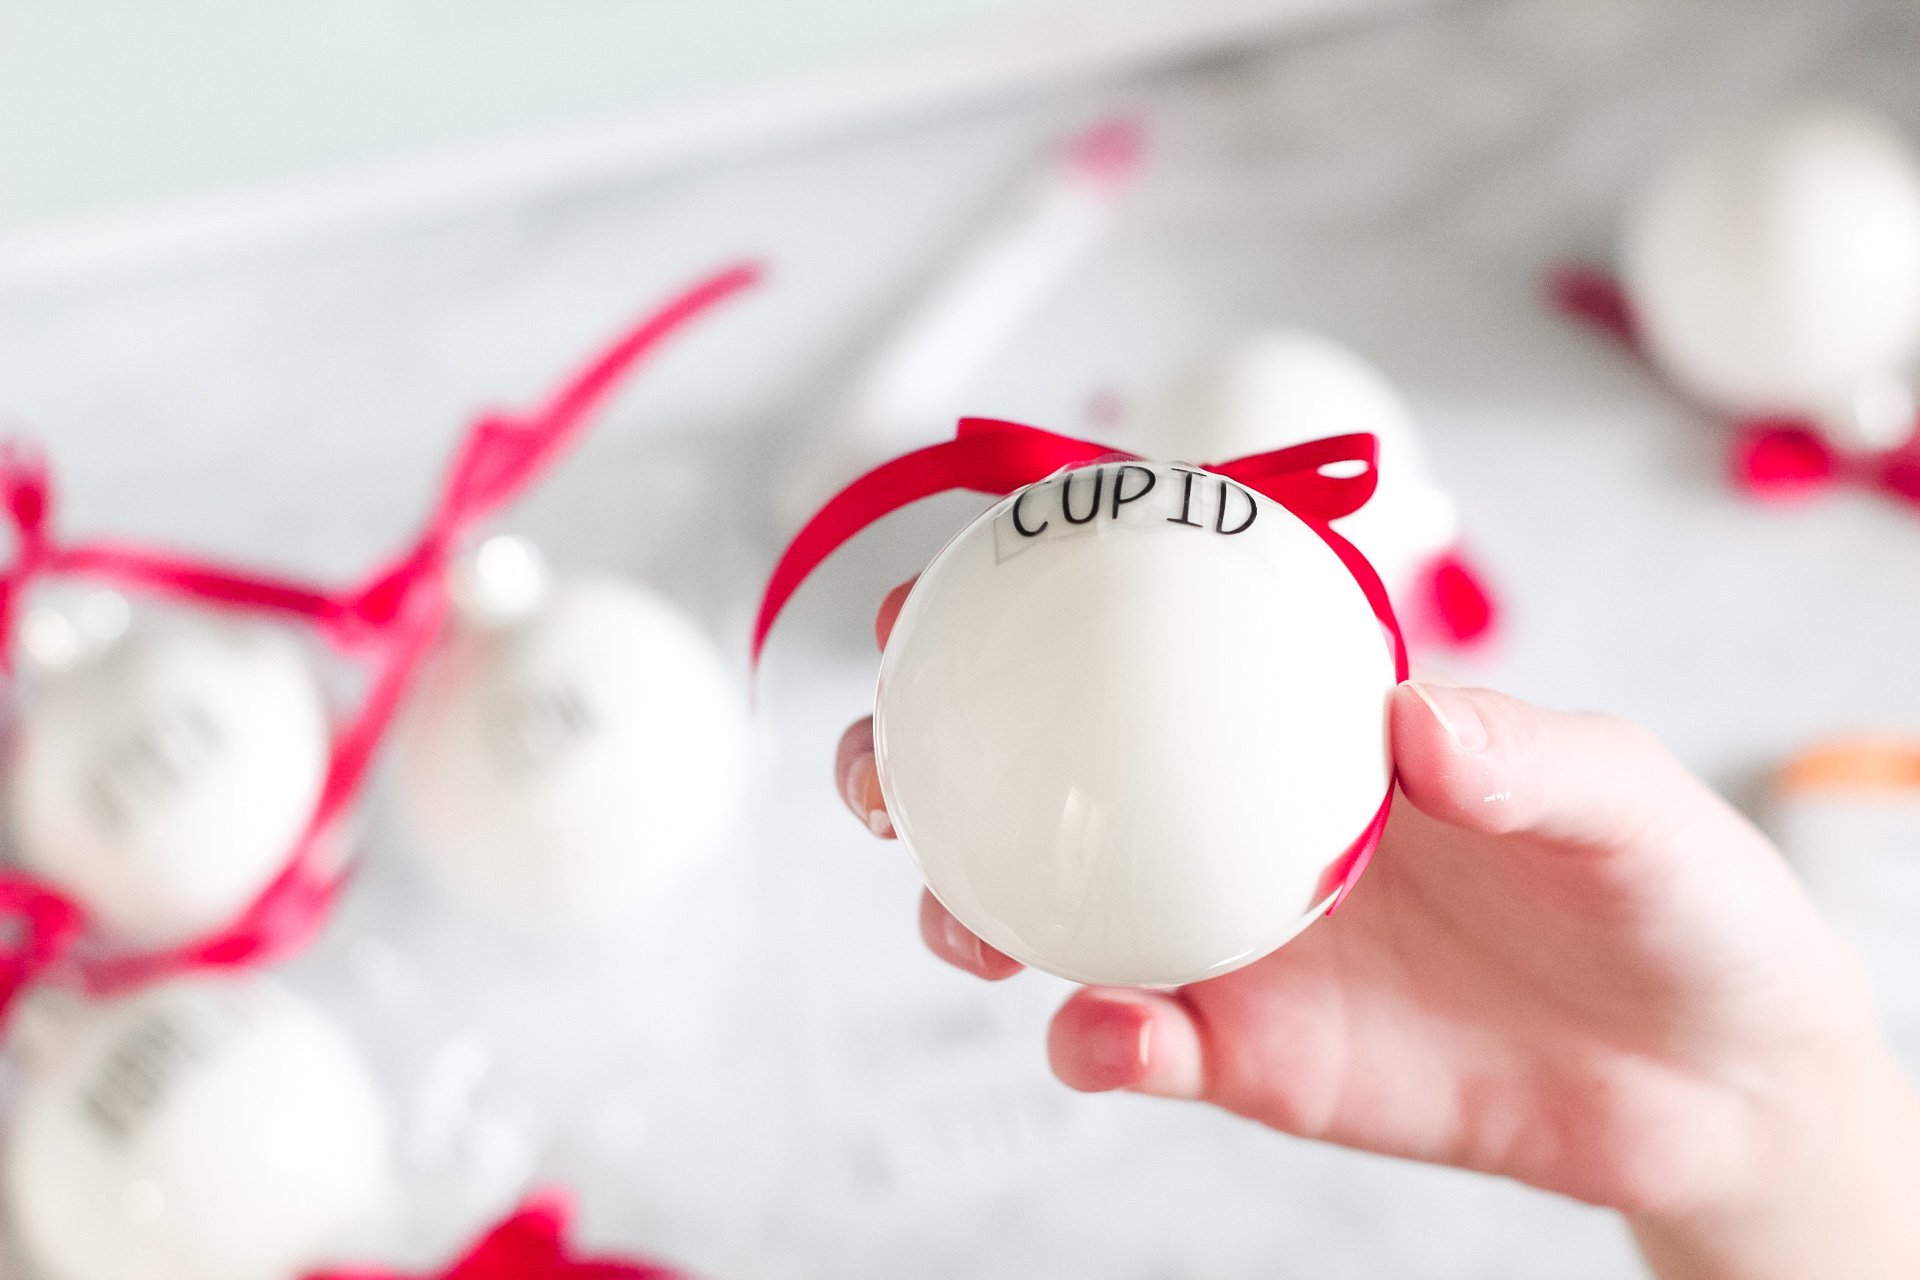
Gently peel your transfer tape away from the letters with care as the Kyden font has thin letters.
And you’re all done!
Repeat the transfer process for all remaining bulbs, focusing more on the way the letters are attaching to the bulb vs. if the transfer tape is laying flat.
Finished DIY Reindeer Ornaments


And that’s it, guys!
I hope you all enjoyed this Reindeer Ornaments DIY post and feel inspired to craft your own beautiful Christmas ornaments.
If you make these, be sure to post a photo of yours on Instagram and tag me in it!
*Post originally published December 2019, last updated February 2023.

Leave a Reply