Free SVG Download for your next Valentines Day Laser Craft! Make these easy DIY Lollipop Holders for your child’s classroom this year.

This post may contain affiliate links, however, all opinions are my own, as always.
Valentine’s Day this year is better than ever because I have our new laser, the Thunder Bolt RF 30W!
I have been finding endless crafts to make with the Bolt since we received it in December.
Any excuse to make something for friends or family, and we’re all over it!
This year, I wanted to try to make something with wood for our children’s classrooms.
Last week was our daughter’s birthday and she wanted to make some wood coloring cut outs for her classroom. With the extra birch wood I had on hand, we created some and made up goodie bags with crayons to hand out to her classmates.
The extra fun part was that parents could easily use a magnet to adhere to the backside of the colored wood cutouts to make their own fridge magnets at home!
They were a big hit, and were so fun and easy to make with our Thunder Bolt laser.
That gave me the idea to make some lollipop holders for the classroom this year using wood.
The beauty of using wood is that it can be easily recycle din a number of ways!
While card stock is really nice (in fact, I have some great cardstock crayon cards you can make with your Cricut here!), I love that the kids can recycle them in a number of ways:
- color them and hang on the fridge as a magnet
- use them to regift a sucker to mom and dad (or a friend)
- parents can use them as a firestarter for bon fires 😉
- and more!
Watch the reel of me making these lollipop holders on Instagram here.
In this post, I’ll be detailing my settings for the Thunder Bolt that I used, sharing some tips, and including a free SVG file for you to use to make them yourself with your laser!
This post is written in partnership with Thunder Laser, however, all opinions are my own as always.
Materials Needed To Make DIY Lollipop Holders
Here’s what I used to make this craft:
- 3mm baltic birch wood (I get my wood sheets from a local supplier – they deliver super fast)
- Thunder Bolt 1.5″ lens (comes standard)
- 120-grit sand paper
- microfiber cloth (optional)
- twine or ribbon for tying
- lollipop of your choice (these holders work great with Dum Dums but I can also picture them working well for Blow Pops as well!)
- risers (optional)
- SVG File – download below
You can also add your child’s name with a “From:” along the side of the hearts, or if you’re feeling confident enough you can carefully flip the hearts over after cutting and engrave this on the backside.
We wanted to make these easier to recycle, so we skipped adding any kind of personalization to them.
Cutting Your Lollipop Holders
Time to cut the file!
When I cut wood or acrylic, I like to raise it from the honeycomb to prevent flashback.
I currently use some triangular prisms from xTool that came with my diode laser machine. They work to lift the wood from the honeycomb.
This is entirely optional, but it can really help get a cleaner cut so I recommend raising the material.

In LightBurn, ensure that you have your machine set to ENGRAVE first, and CUT second.
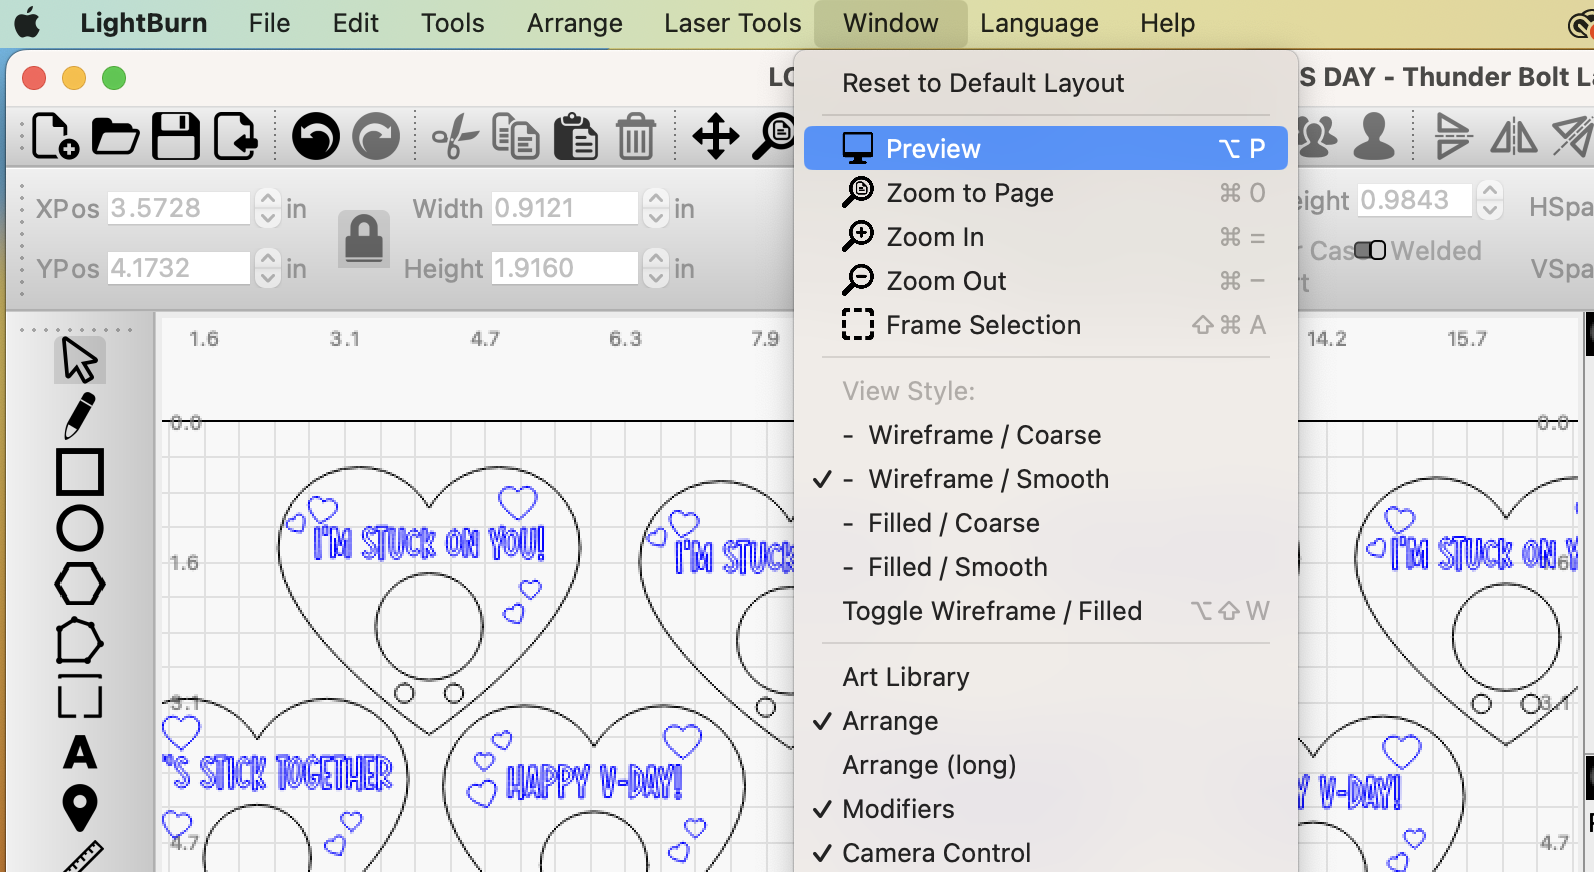
I like using the Preview option in LightBurn before cutting.
To use this feature, go to Window >> Preview (pictured in the screenshot below).
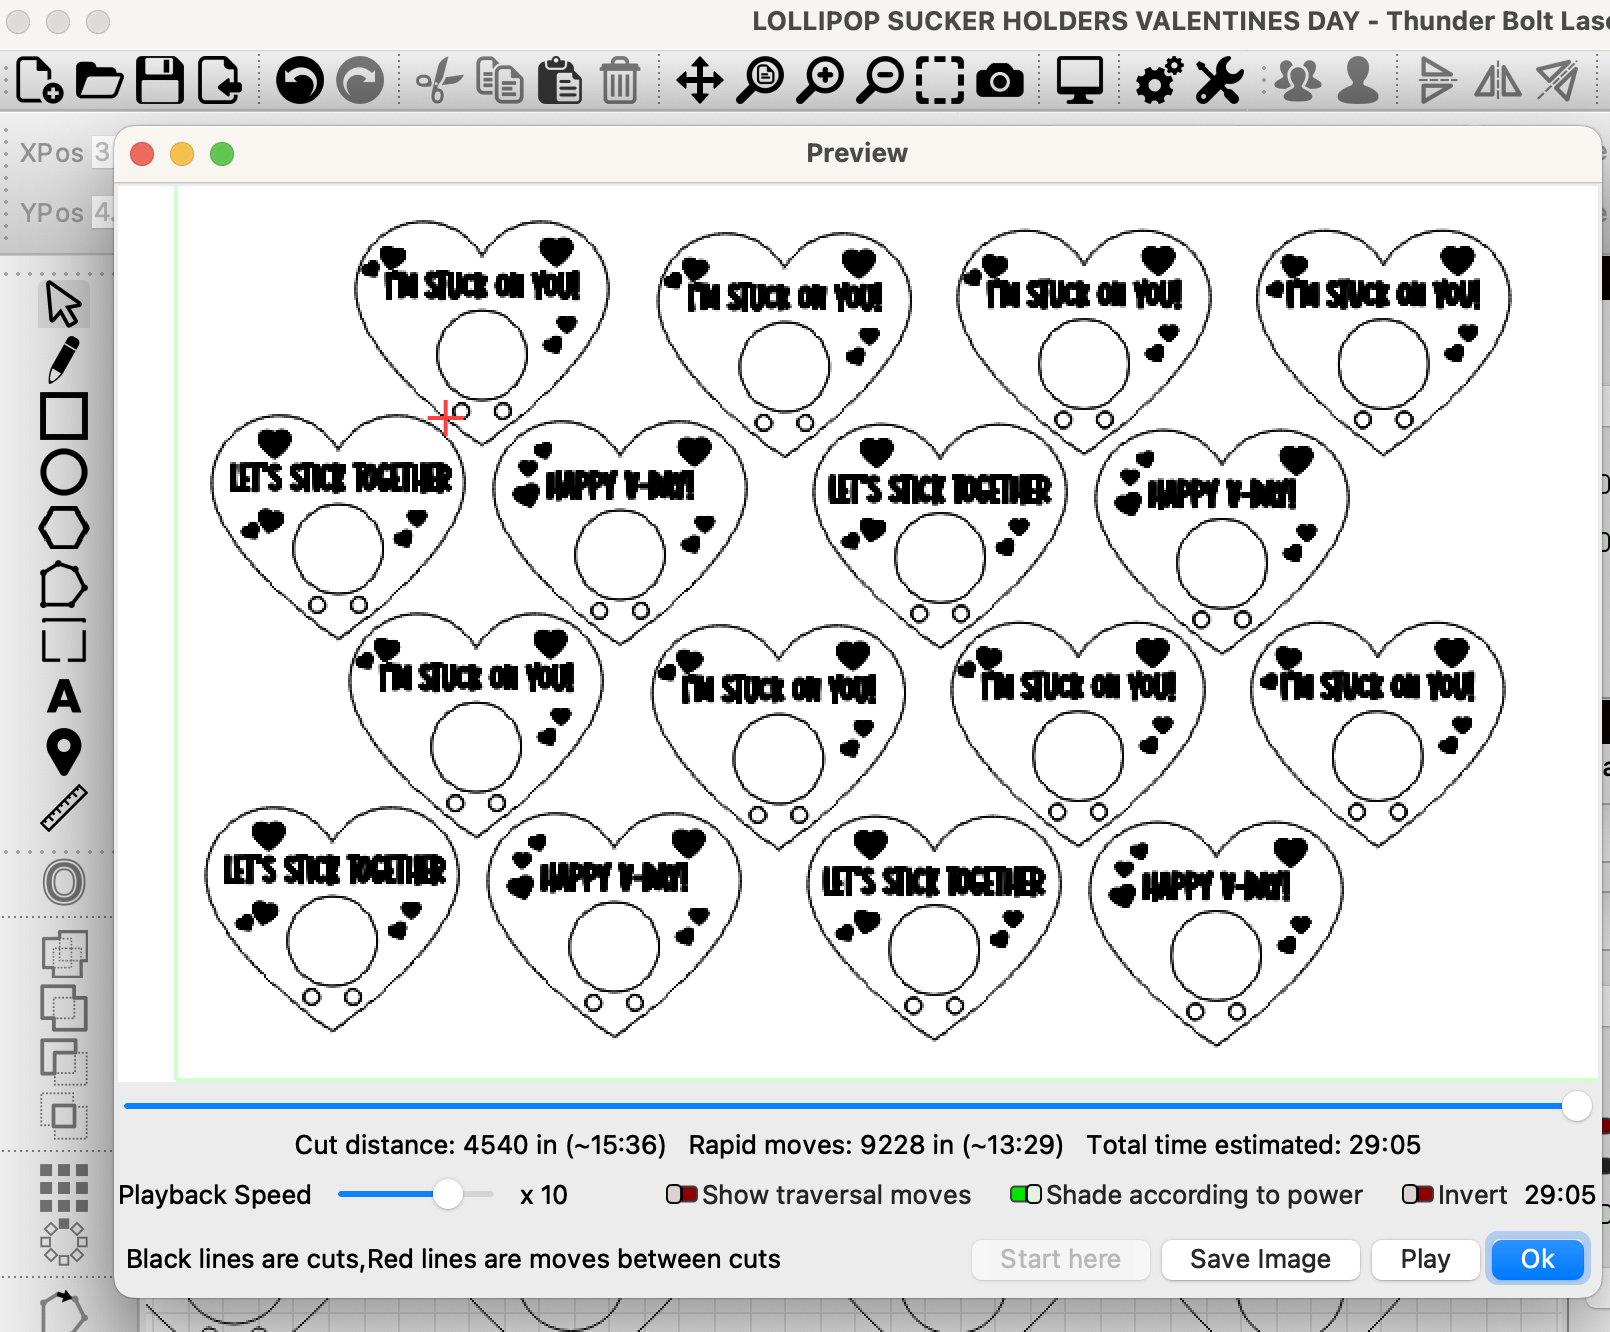
Here is what the Preview screen looks like. To watch your project cut, press the Play button.
As a beginner, this was a mistake I made a ton, so I want to make sure I mention that each chance I get to help save you some headache and material.
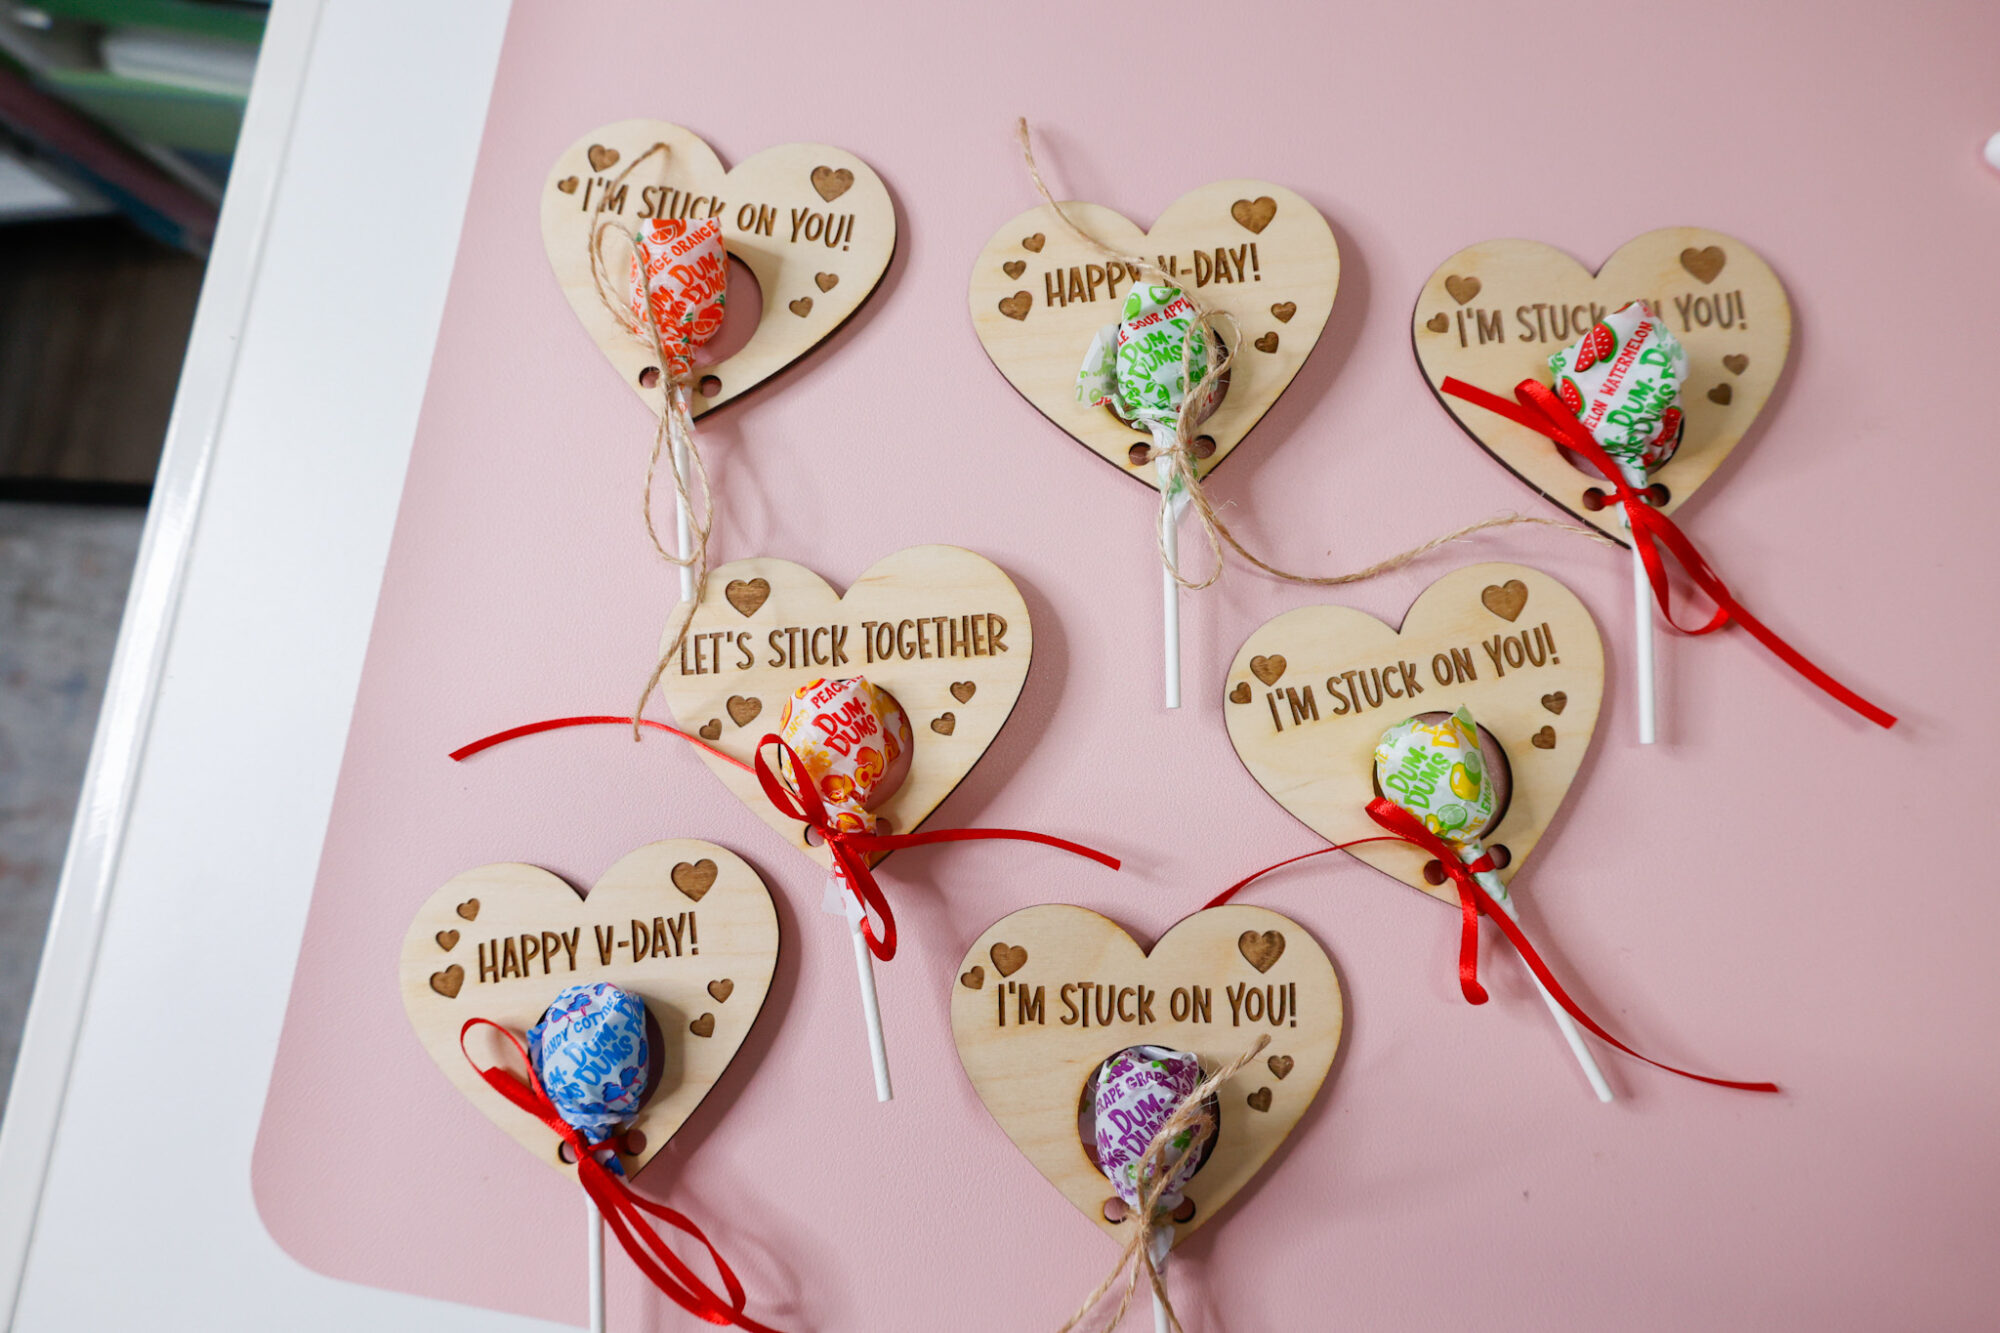
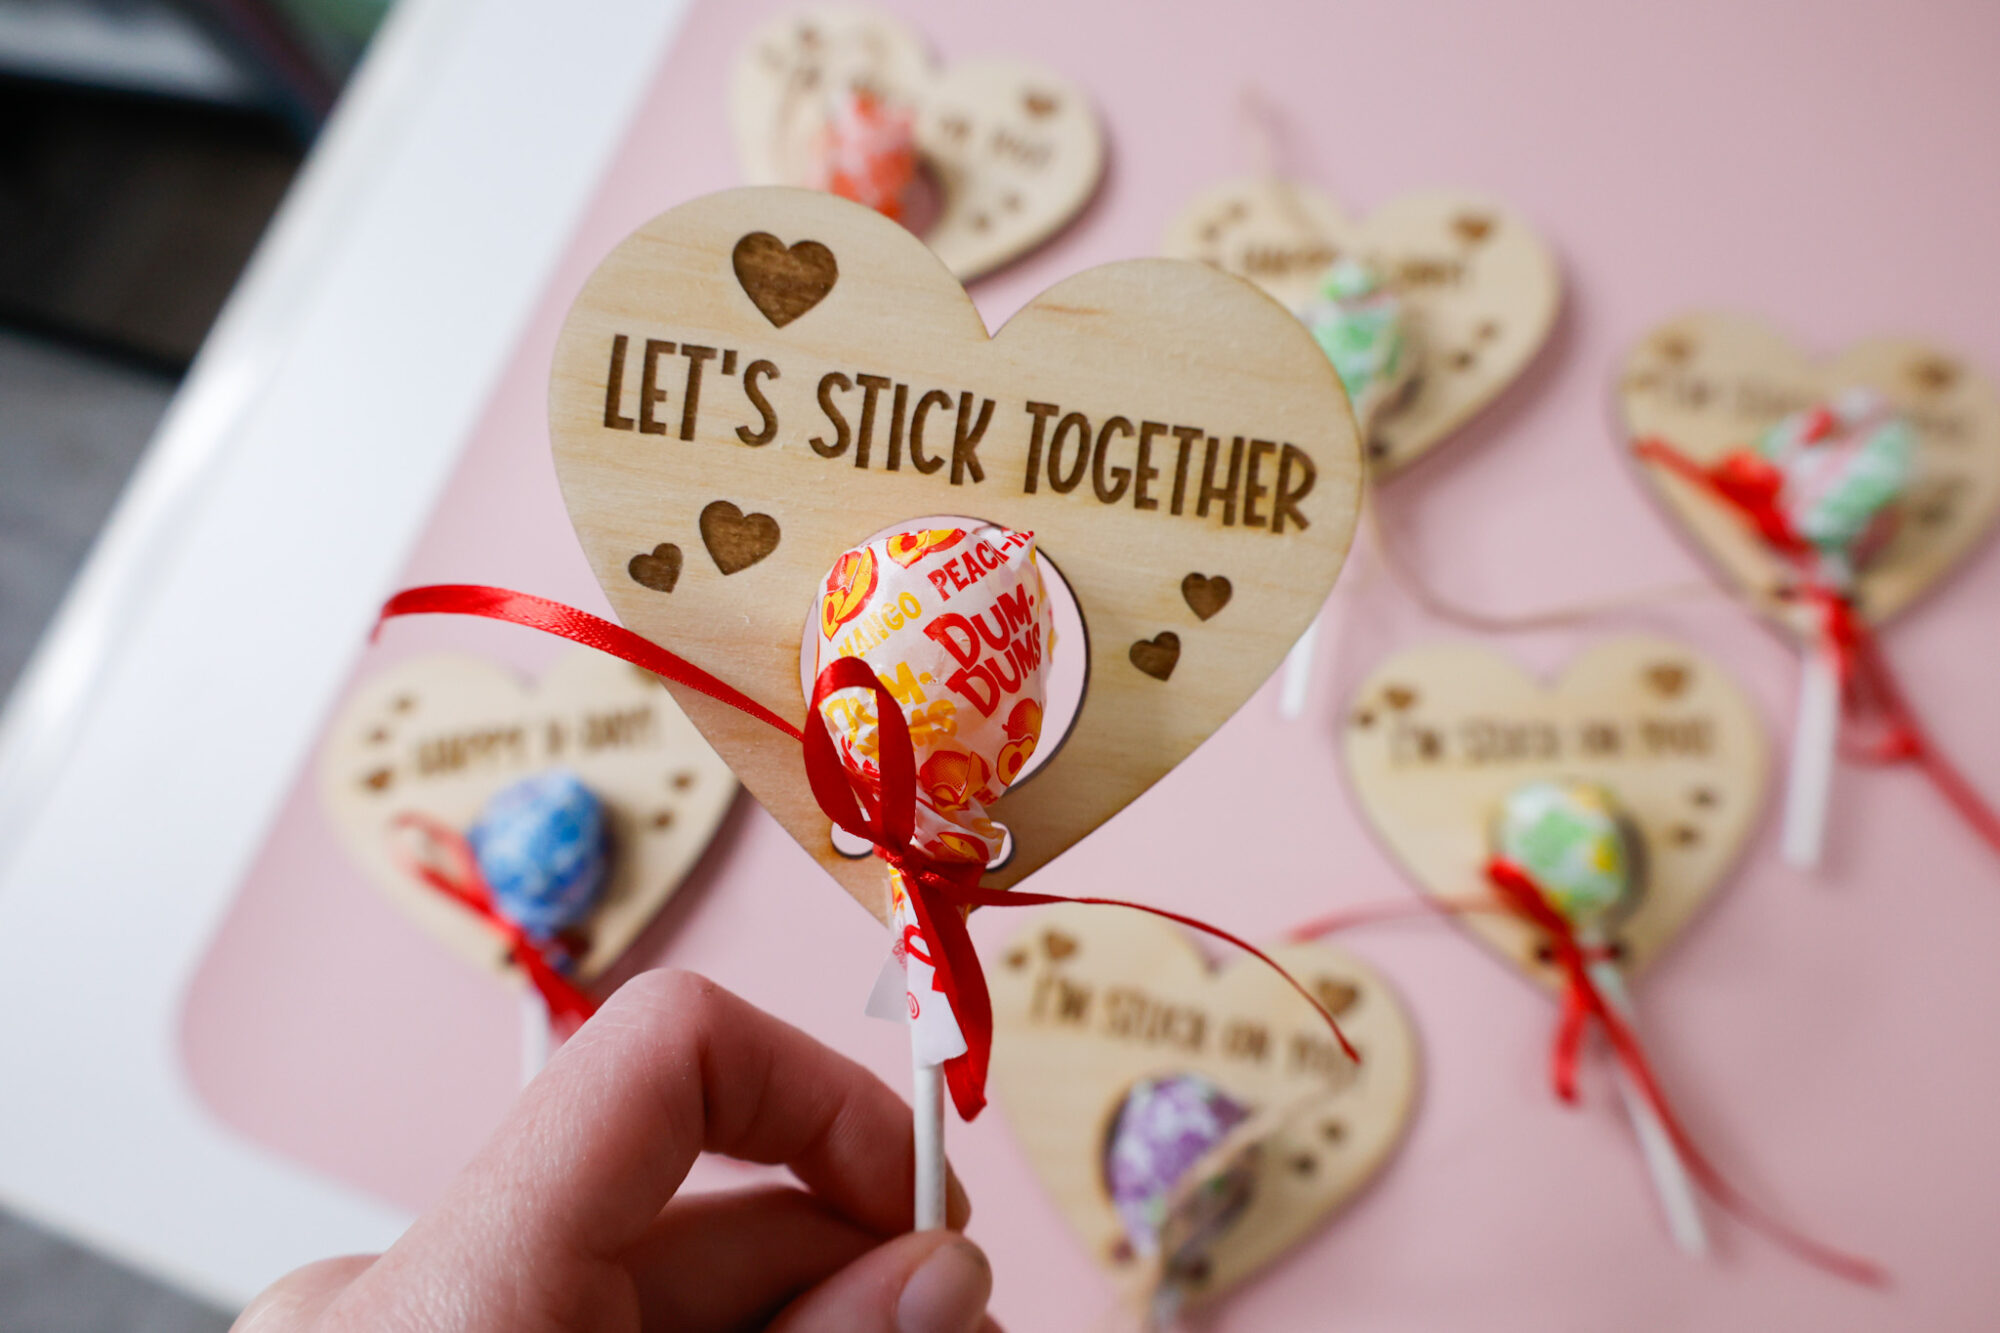
First, the machine will engrave the wood with all of the cute sayings like “I’m Stuck On You!” and “Let’s Stick Together!”
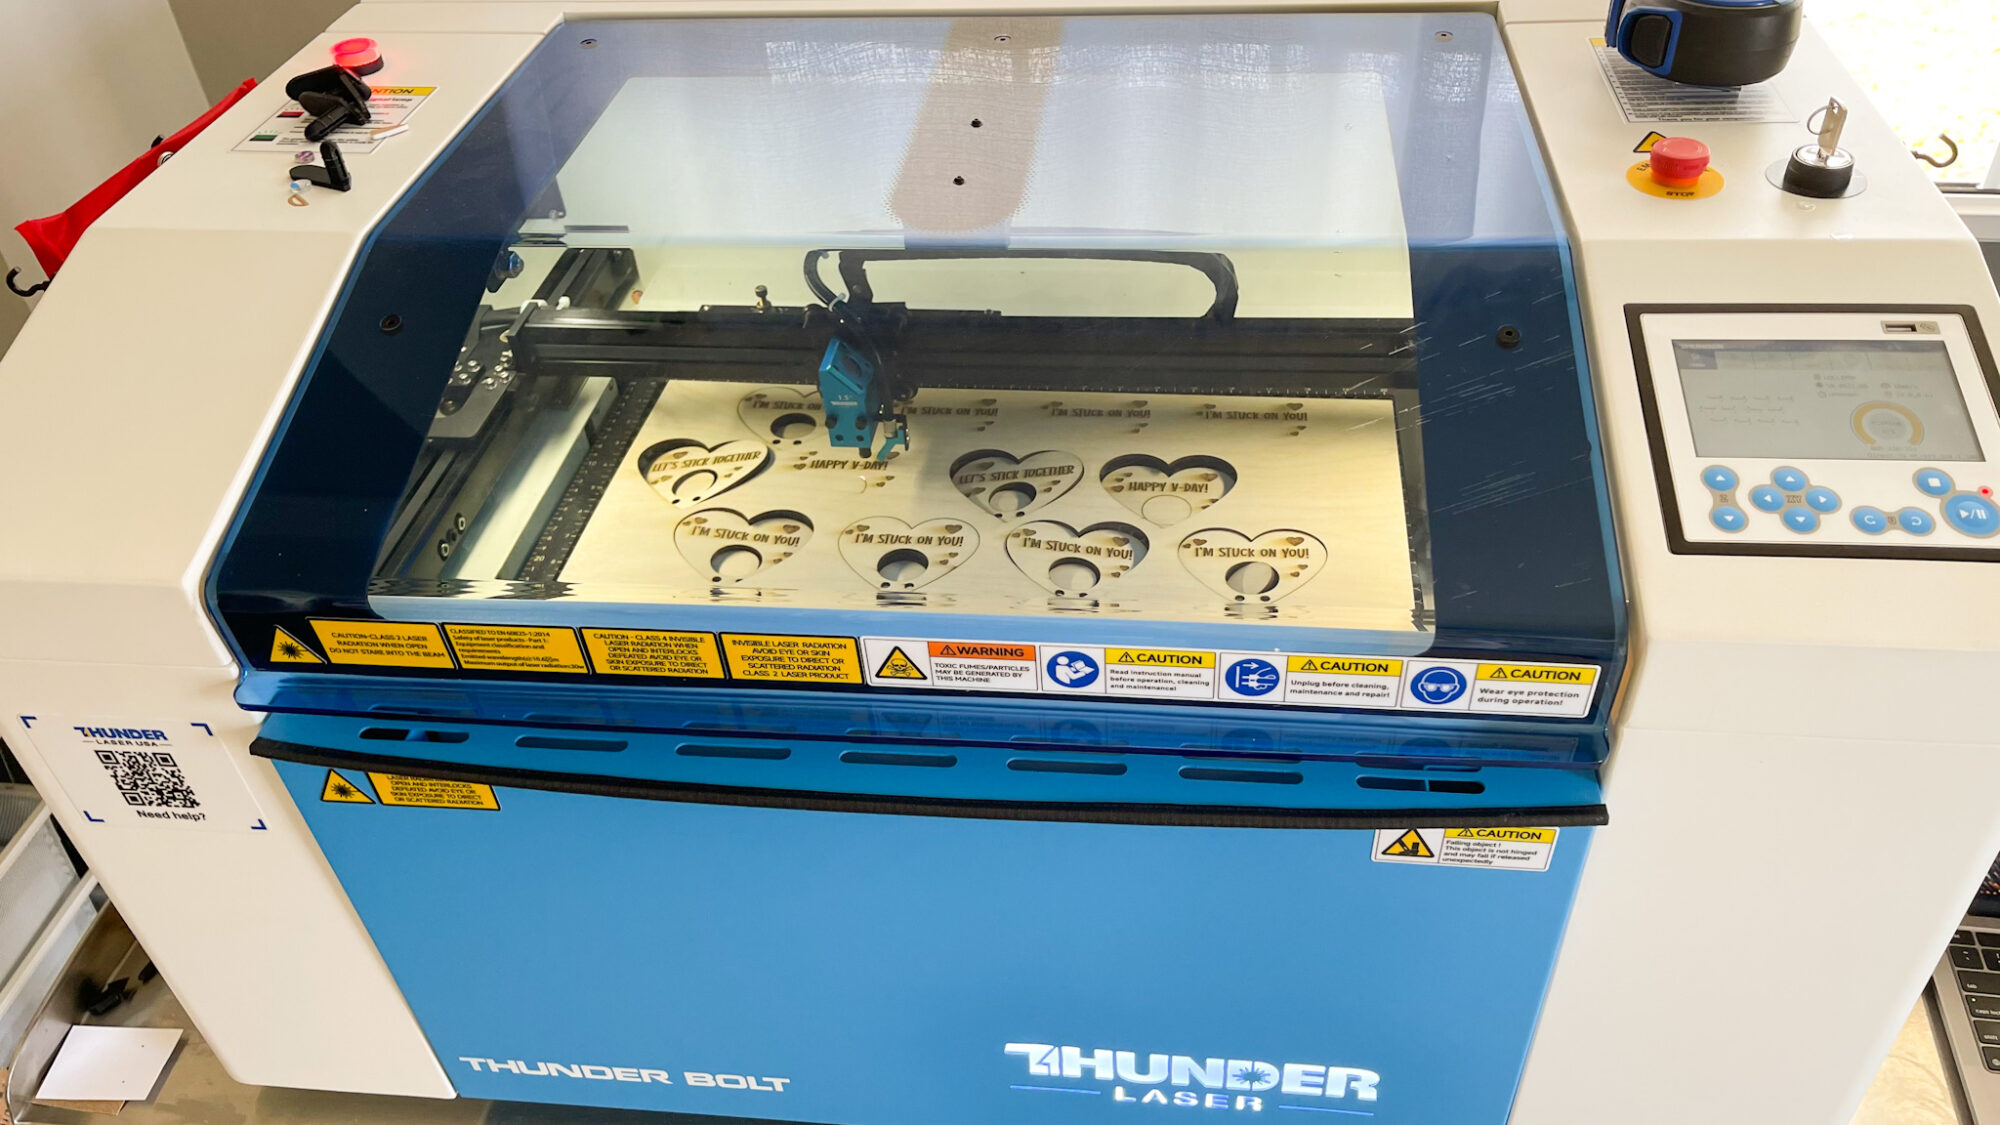
Once it’s done engraving, the machine will start to cut out each shape.
There are 3 internal shapes that will be cut first before the outer heart shape is cut.

The large circle shape is where the lollipop will fit, while the two smaller circles will be for the ribbon or twine ends to weave in and tie together to make a bow.
This helps secure the lollipop.
Once they are done cutting, you can sand the engraved parts with some 120-grit sandpaper for a smooth finish.
Engraving And Cut Settings
Engraving settings: 350 Speed, 50% Max Power, 1% Min Power, .060 Interval, 1 Pass
Cut Settings: 10 Speed, 50% Max Power, 1% Min Power, .060 Interval, 1 Pass
I had Air Assist turned on throughout the entire project for both engraving and cutting.
Finished Lollipop Holders
Here’s what the finished lollipop holders look like:
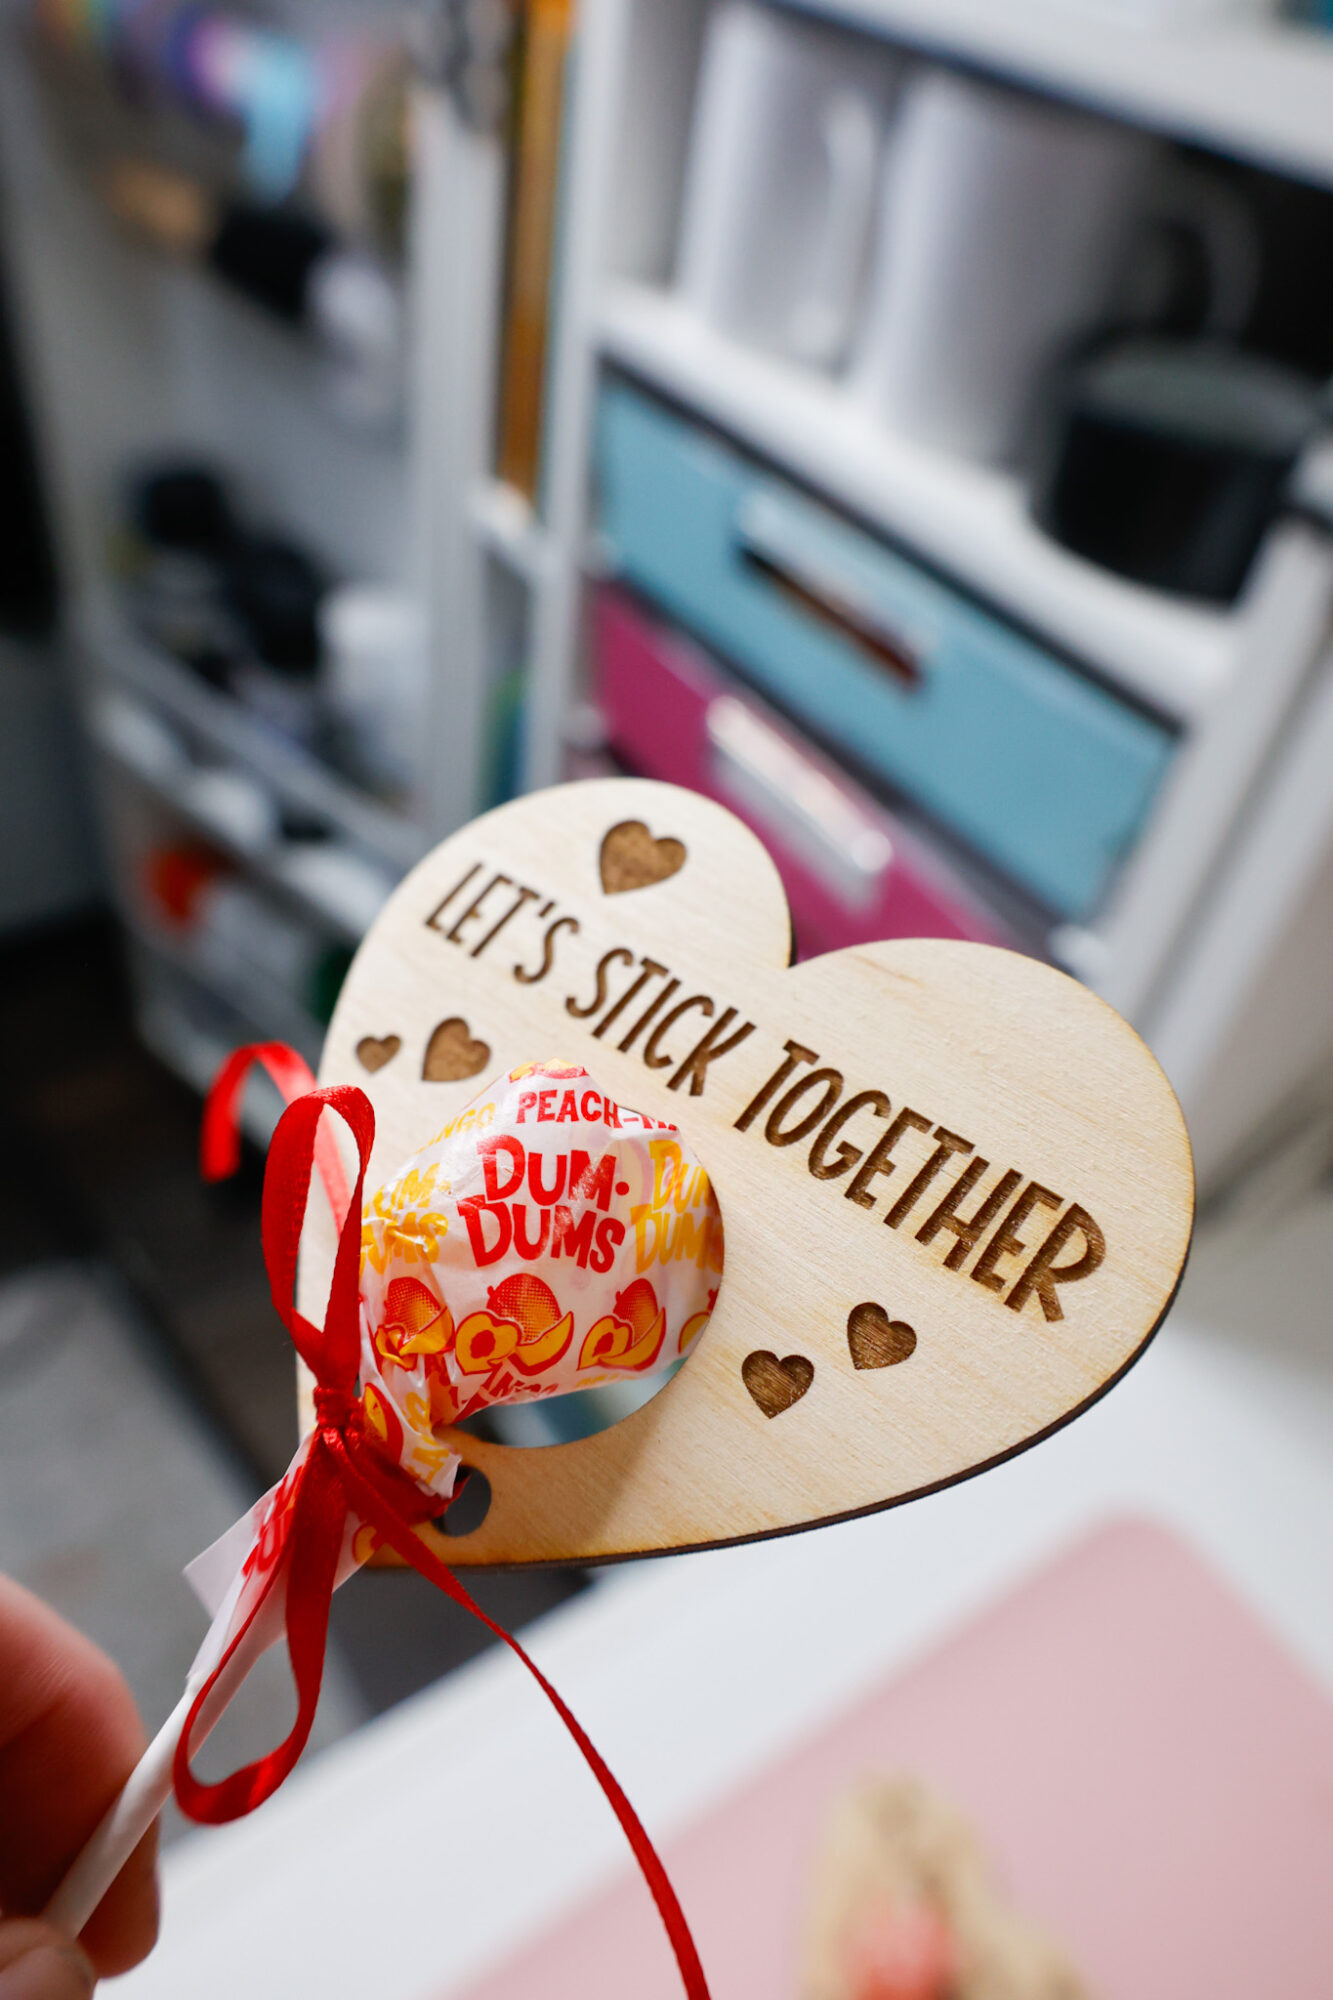
I started out using some red ribbon for them, but ran out and didn’t realize until I was halfway through!
Silly me…
But I finished up with twine, and love the look of both.
This was such a fun and easy laser project!
I love the way they turned out, and our children are excited to hand them out to their friends and classmates next week.
Feel free to download this free SVG file for this craft to make your own at home.
Download my Free SVG File for this craft below!

Leave a Reply