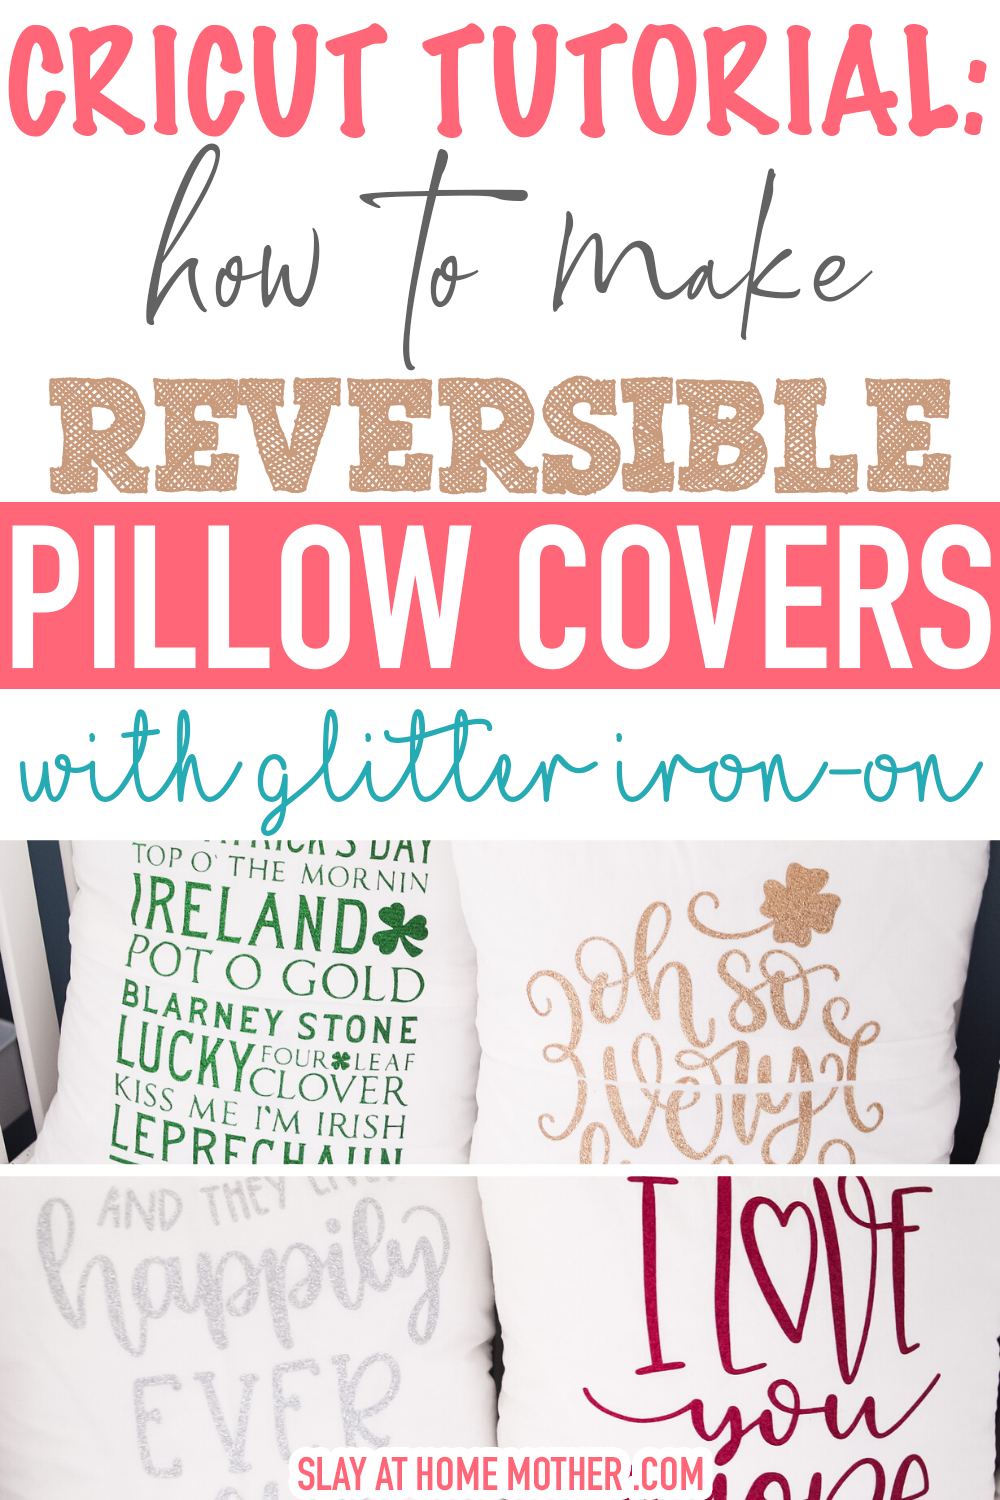
Glitter iron-on vinyl can be tricky – learn how to use it, cut it, and apply it in this post and make some gorgeous DIY reversible pillow covers in this free project post!
Raise your hand if you looooove glitter!
I have tons of glitter iron-on, and it’s definitely one of my favorites to complete projects with because it’s so darn pretty ;).
After finishing my Christmas holiday pillow covers a couple of months back (see that post HERE), I realized I didn’t use quite as much colored glitter vinyl as I was expecting to. So I had tons of gold, silver, red, and green glitter HTV laying around, all glitzed up, with nowhere to go.
Most of that is because I bought bright red pillow covers, and I found that I loved the way white glitter iron-on letters looked so much that I didn’t even bother tearing open the other rolls with my teeth.
Okay, I don’t really tear them open with my teeth – but I do get pretty crazy excited when it comes to glitter. I blame that on being a boy mom 100%. I hardly ever get to buy anything with glitter on it unless it’s for my nieces ;).
And it got me thinking – since I didn’t use these glitter HTV colors for Christmas, what else could I use them for?!
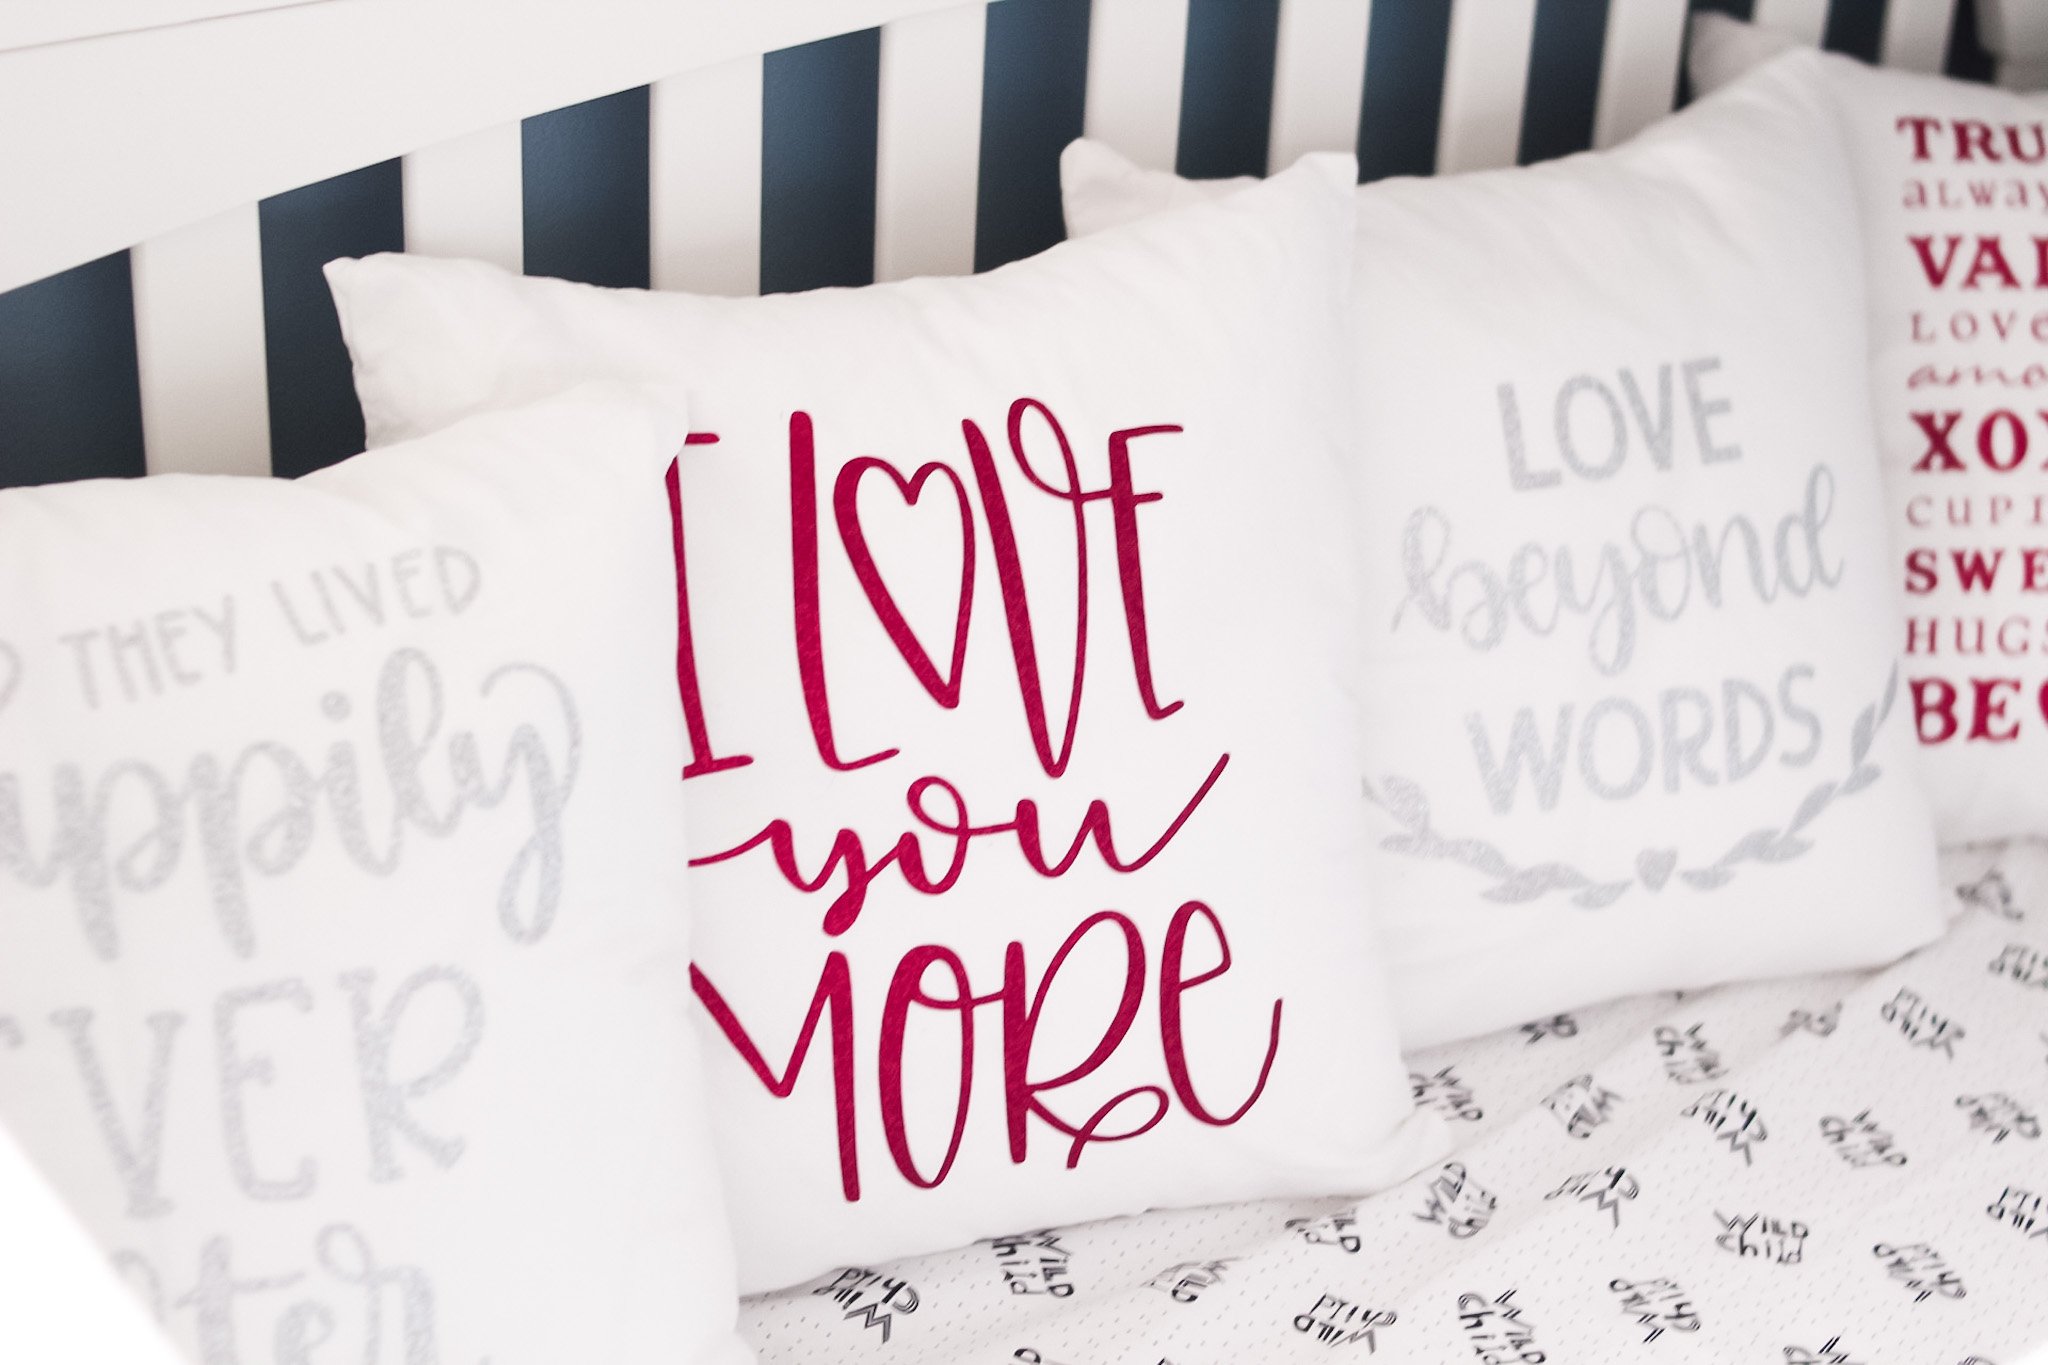
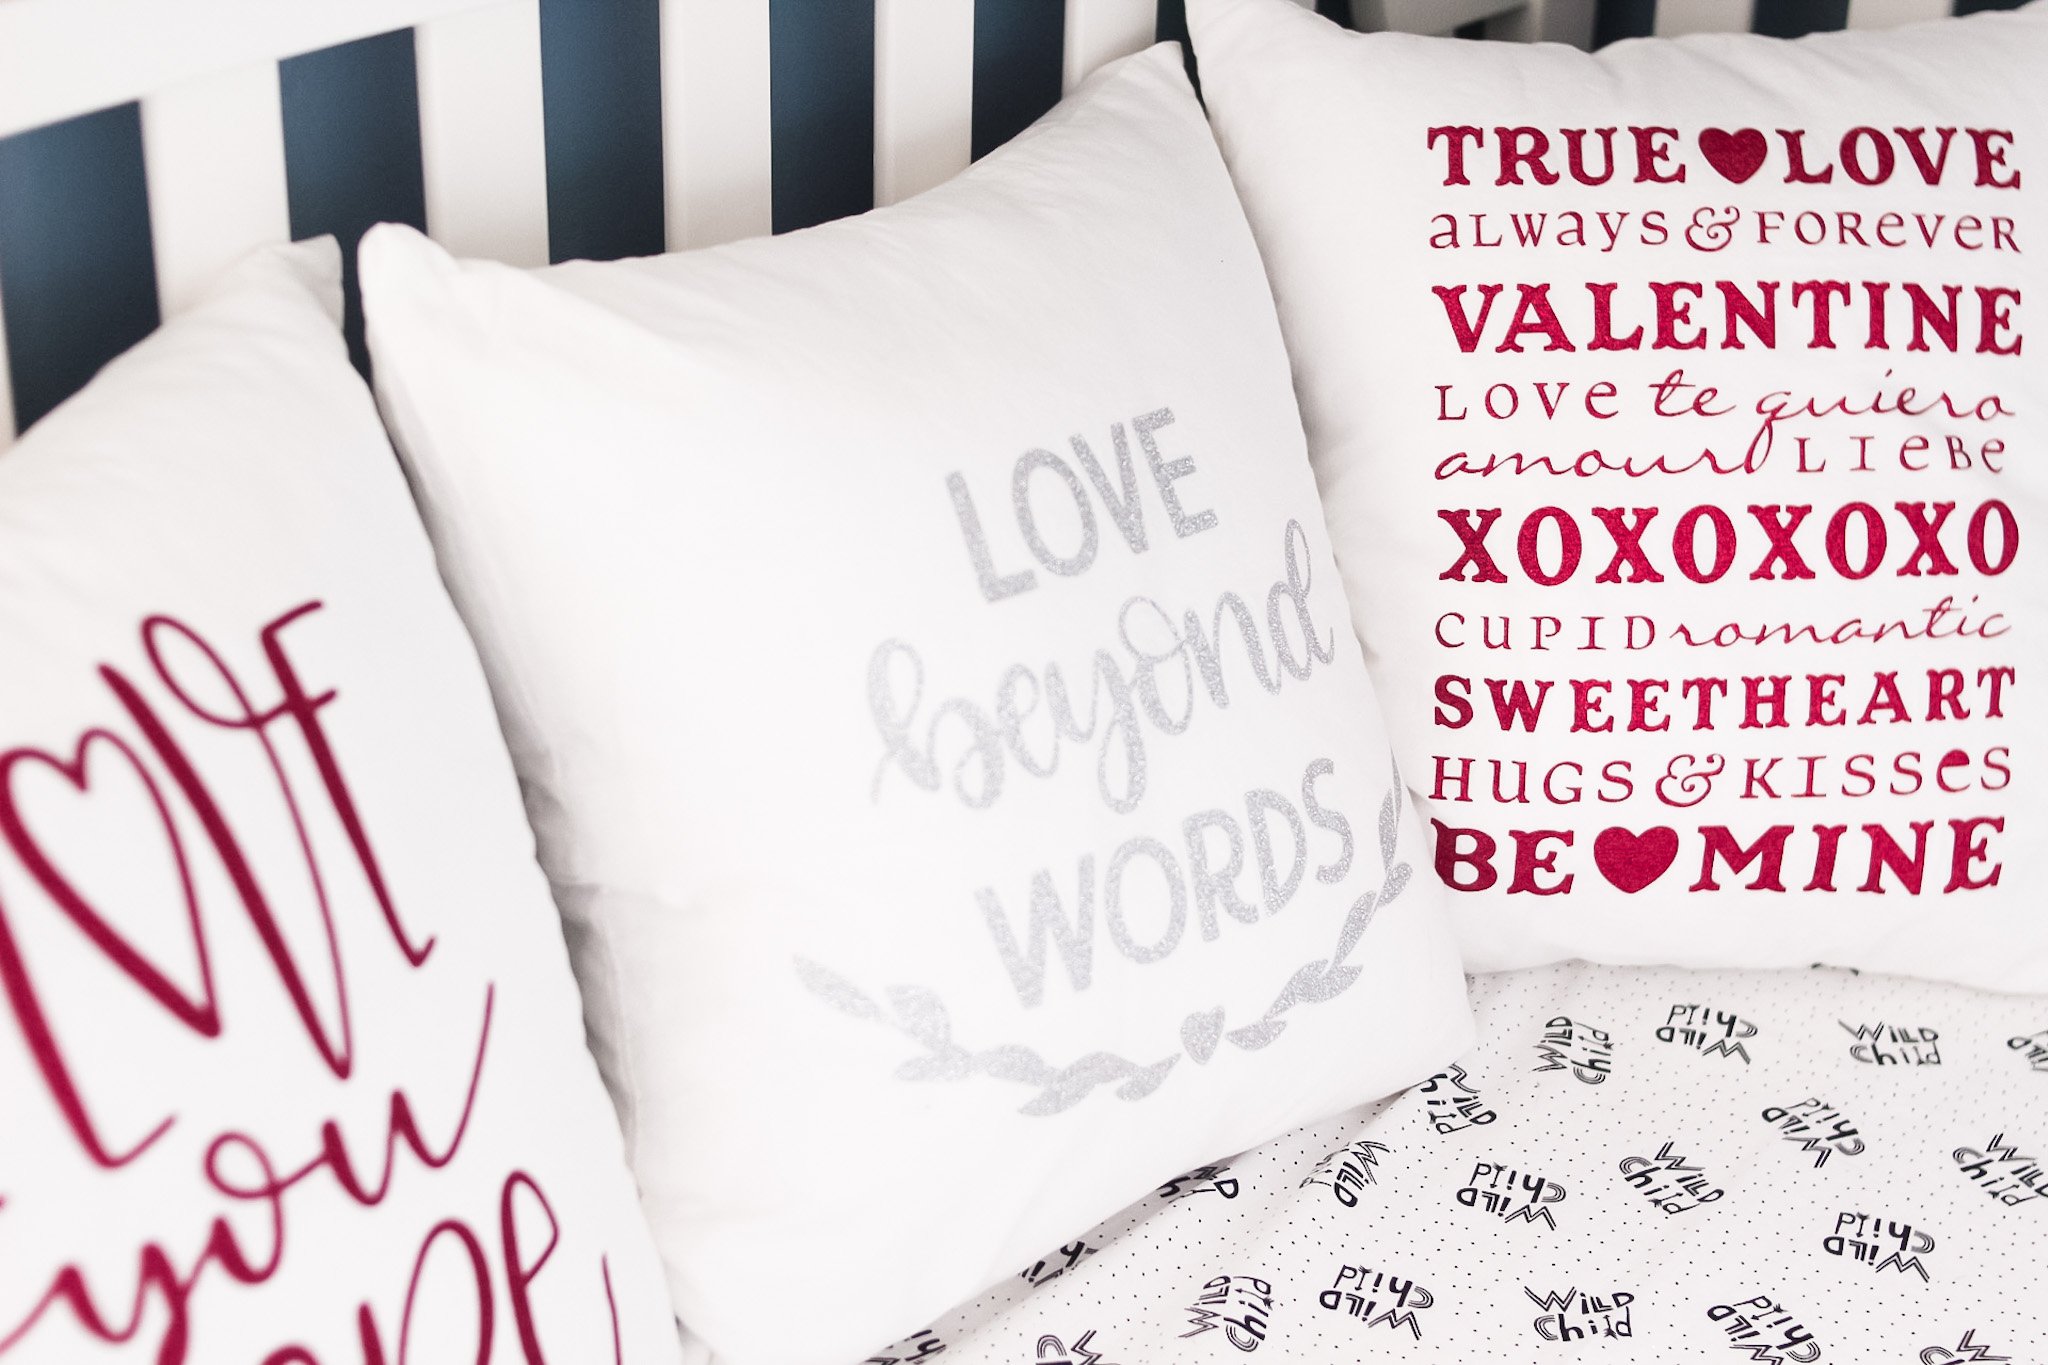
And then it hit me – silver and red could easily translate into Valentine’s Day colors, while gold and green could easily represent St. Patrick’s Day!
So if you’re in the same boat as I am and wondering what the heck to do with your leftover Christmas colored glitter HTV (or even just everyday iron-on, not only glitter), this is a great tutorial and design to help you use those colors wisely while still decorating your home like a BOSS.
I’ll also be answering some questions about glitter iron-on in this post, but feel free to drop your questions in the comments below if I missed something!
Here’s how to work with glitter iron-on vinyl, and a free pillow covers project…
*This post contains affiliate links, however, all opinions are my own, as always.*
Materials Needed For Reversible Pillow Covers
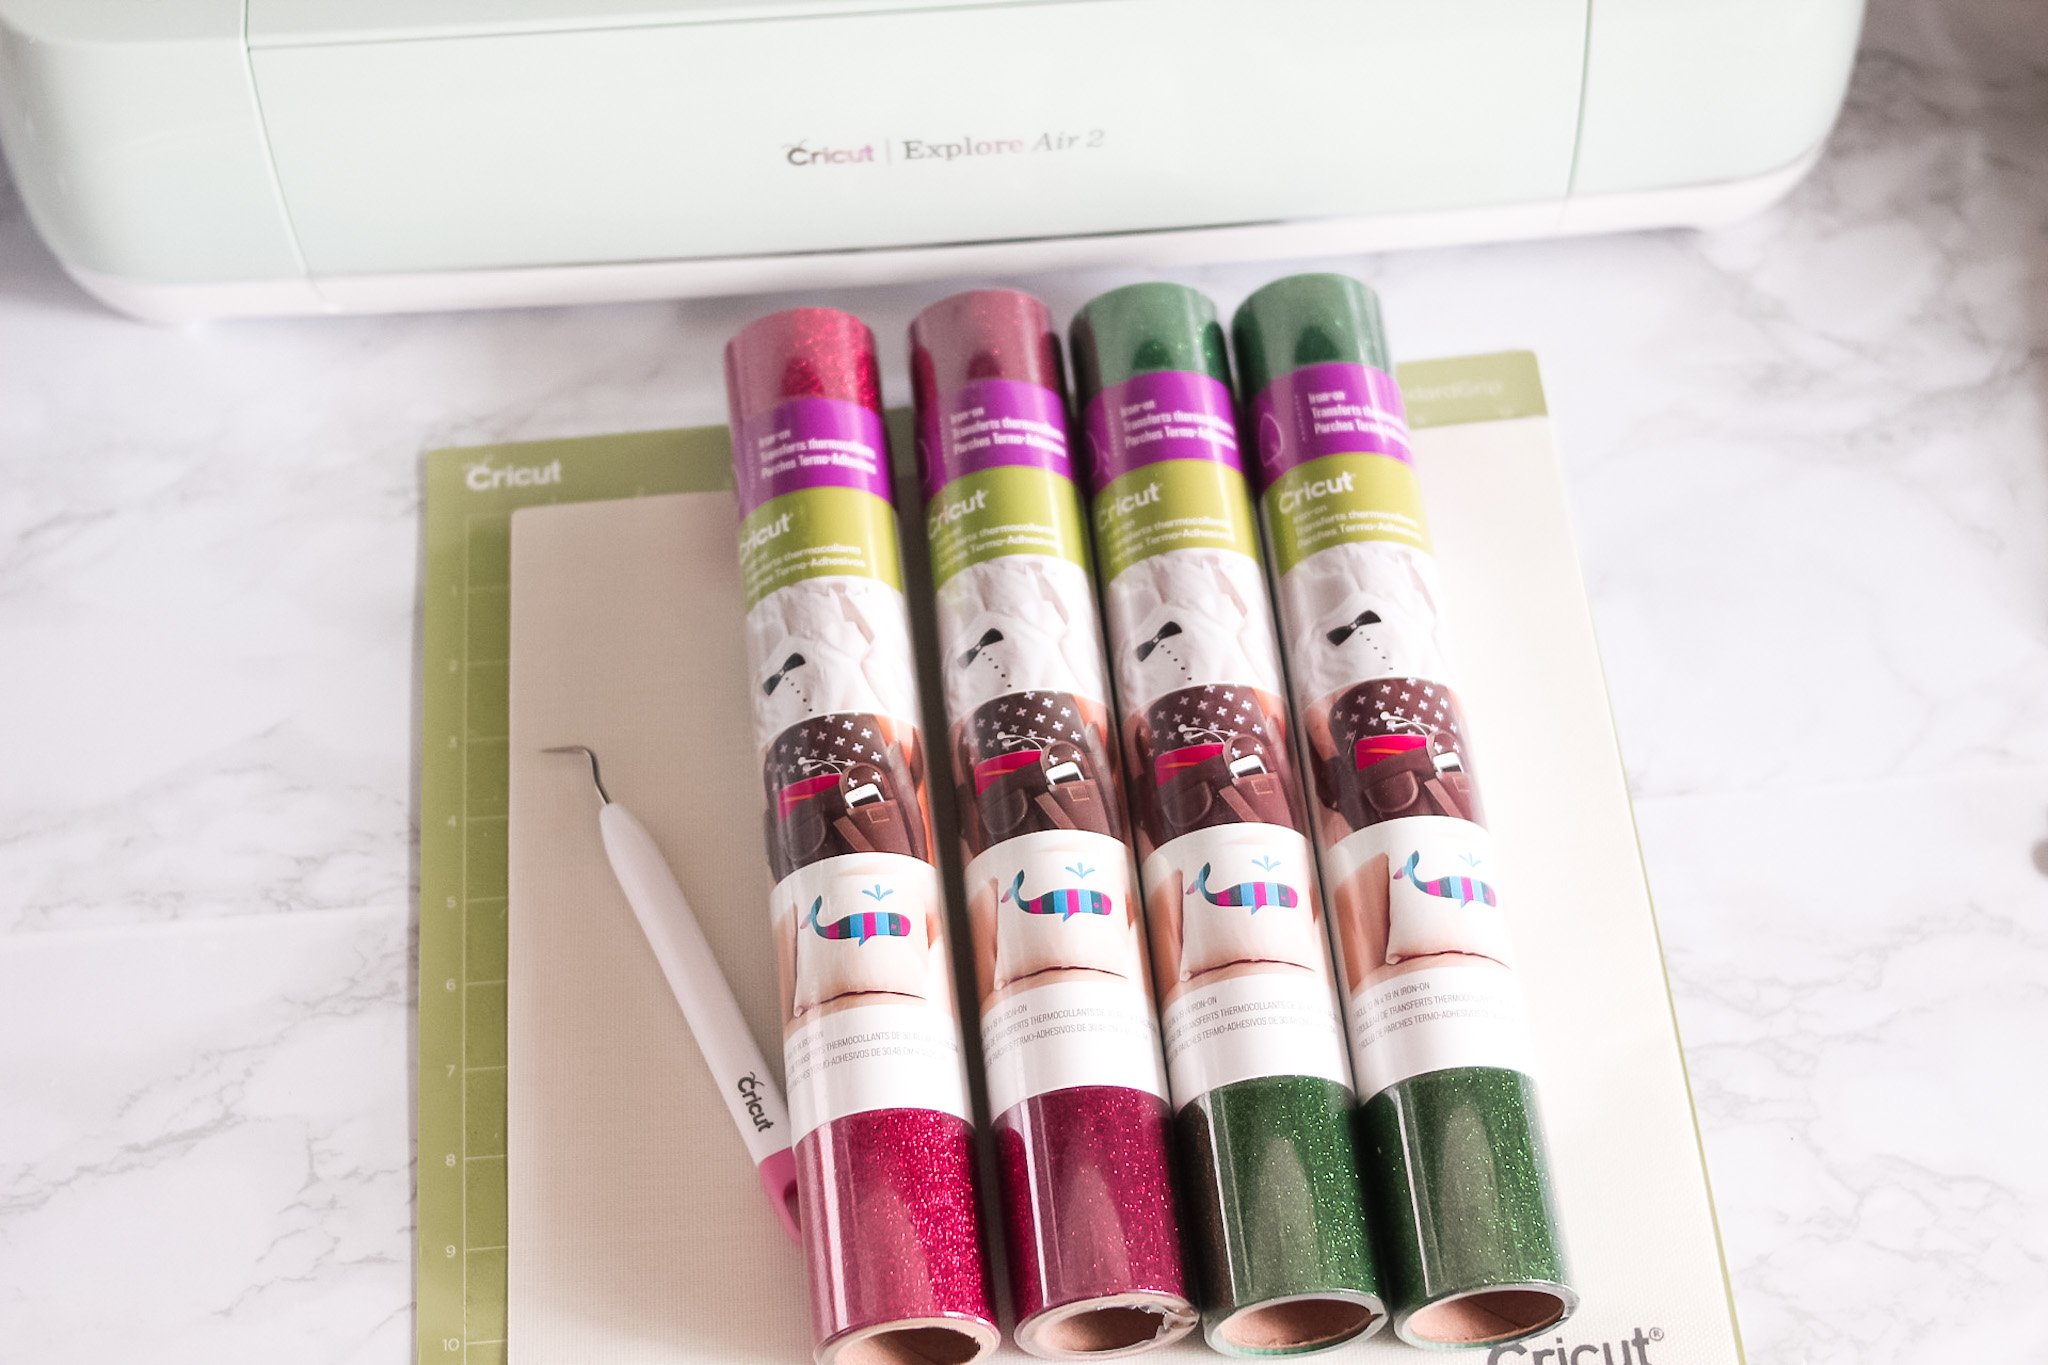
Here are the materials you need to complete this project:
- Cricut glitter iron-on vinyl (I grabbed some rolls on sale for about $4 a roll on the Cricut website a few weeks back!)
- green StandardGrip mat
- weeder (AKA your best friend)
- iron-on protective sheet or butcher paper
- Cricut machine (either the Explore Air 2 or the Maker)
- fine-point blade and housing
- 100% cotton pillow covers (here are the exact ones I used – but I would recommend using ones that have a top zipper like these do)
- scissors
- Easypress 2 (I’m using my 12″x10″, which is perfect for pillow covers!)
For this tutorial, I’ll be using my Cricut machine which is an Explore Air 2.
*The interesting thing to note about Cricut glitter iron-on is that the length of the roll differs from traditional rolls of iron-on in that it is only 12″x19″ (whereas other rolls are 12″x24″). This means that where other rolls of HTV could get you two full-size mat cuts considering each regular-sized mat is 12″x12″, the glitter HTV rolls give you once full-sized mat’s size, and then only a 12″x7″ piece of material to work with.
Be sure to gently wash and dry your cotton pillow covers before applying any iron-on material to them, and refrain from using fabric softener as this can affect how well the iron-on adheres to the cotton.
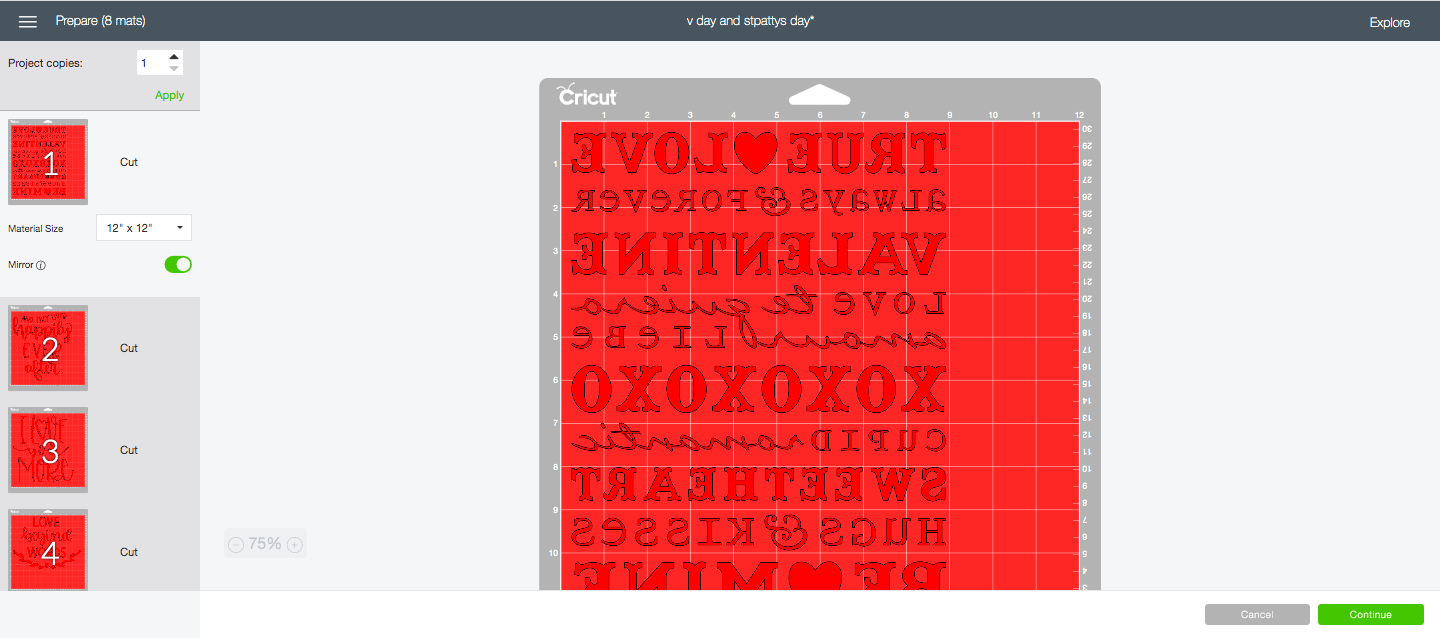
Cutting Glitter Iron-On (HTV) In Design Space
Let’s cut some glitter iron-on letters!
For this project, you’ll either need to create your own design or access mine for free HERE.
If you’re new to cutting and weeding with glitter iron-on, try to keep your design simple and without too many small details. Weeding glitter iron-on takes a little time and practice, but once you’ve got it down it’s super fun!
When you’re ready to cut your design, be sure to select ‘MIRROR ON’ for each cut.
Set your machine dial to ‘Custom‘, and select Glitter Iron-On as your custom material on the Design Space screen (see below).
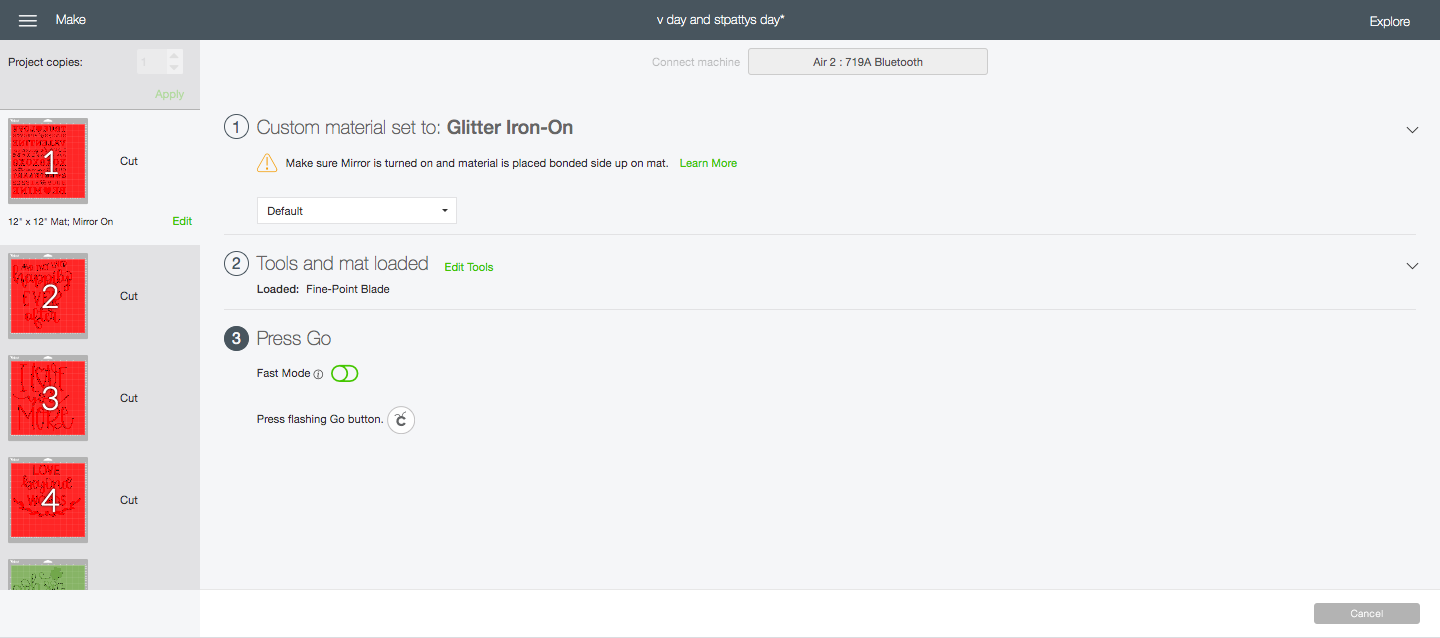
Be sure to load your fine-point blade and housing in clamp B if it isn’t already installed, and place your glitter iron-on vinyl onto the green StandardGrip mat with the shiny clear liner side DOWN.
Load the mat into your machine, and press the flashing Go button (which has the Cricut logo symbol on it).
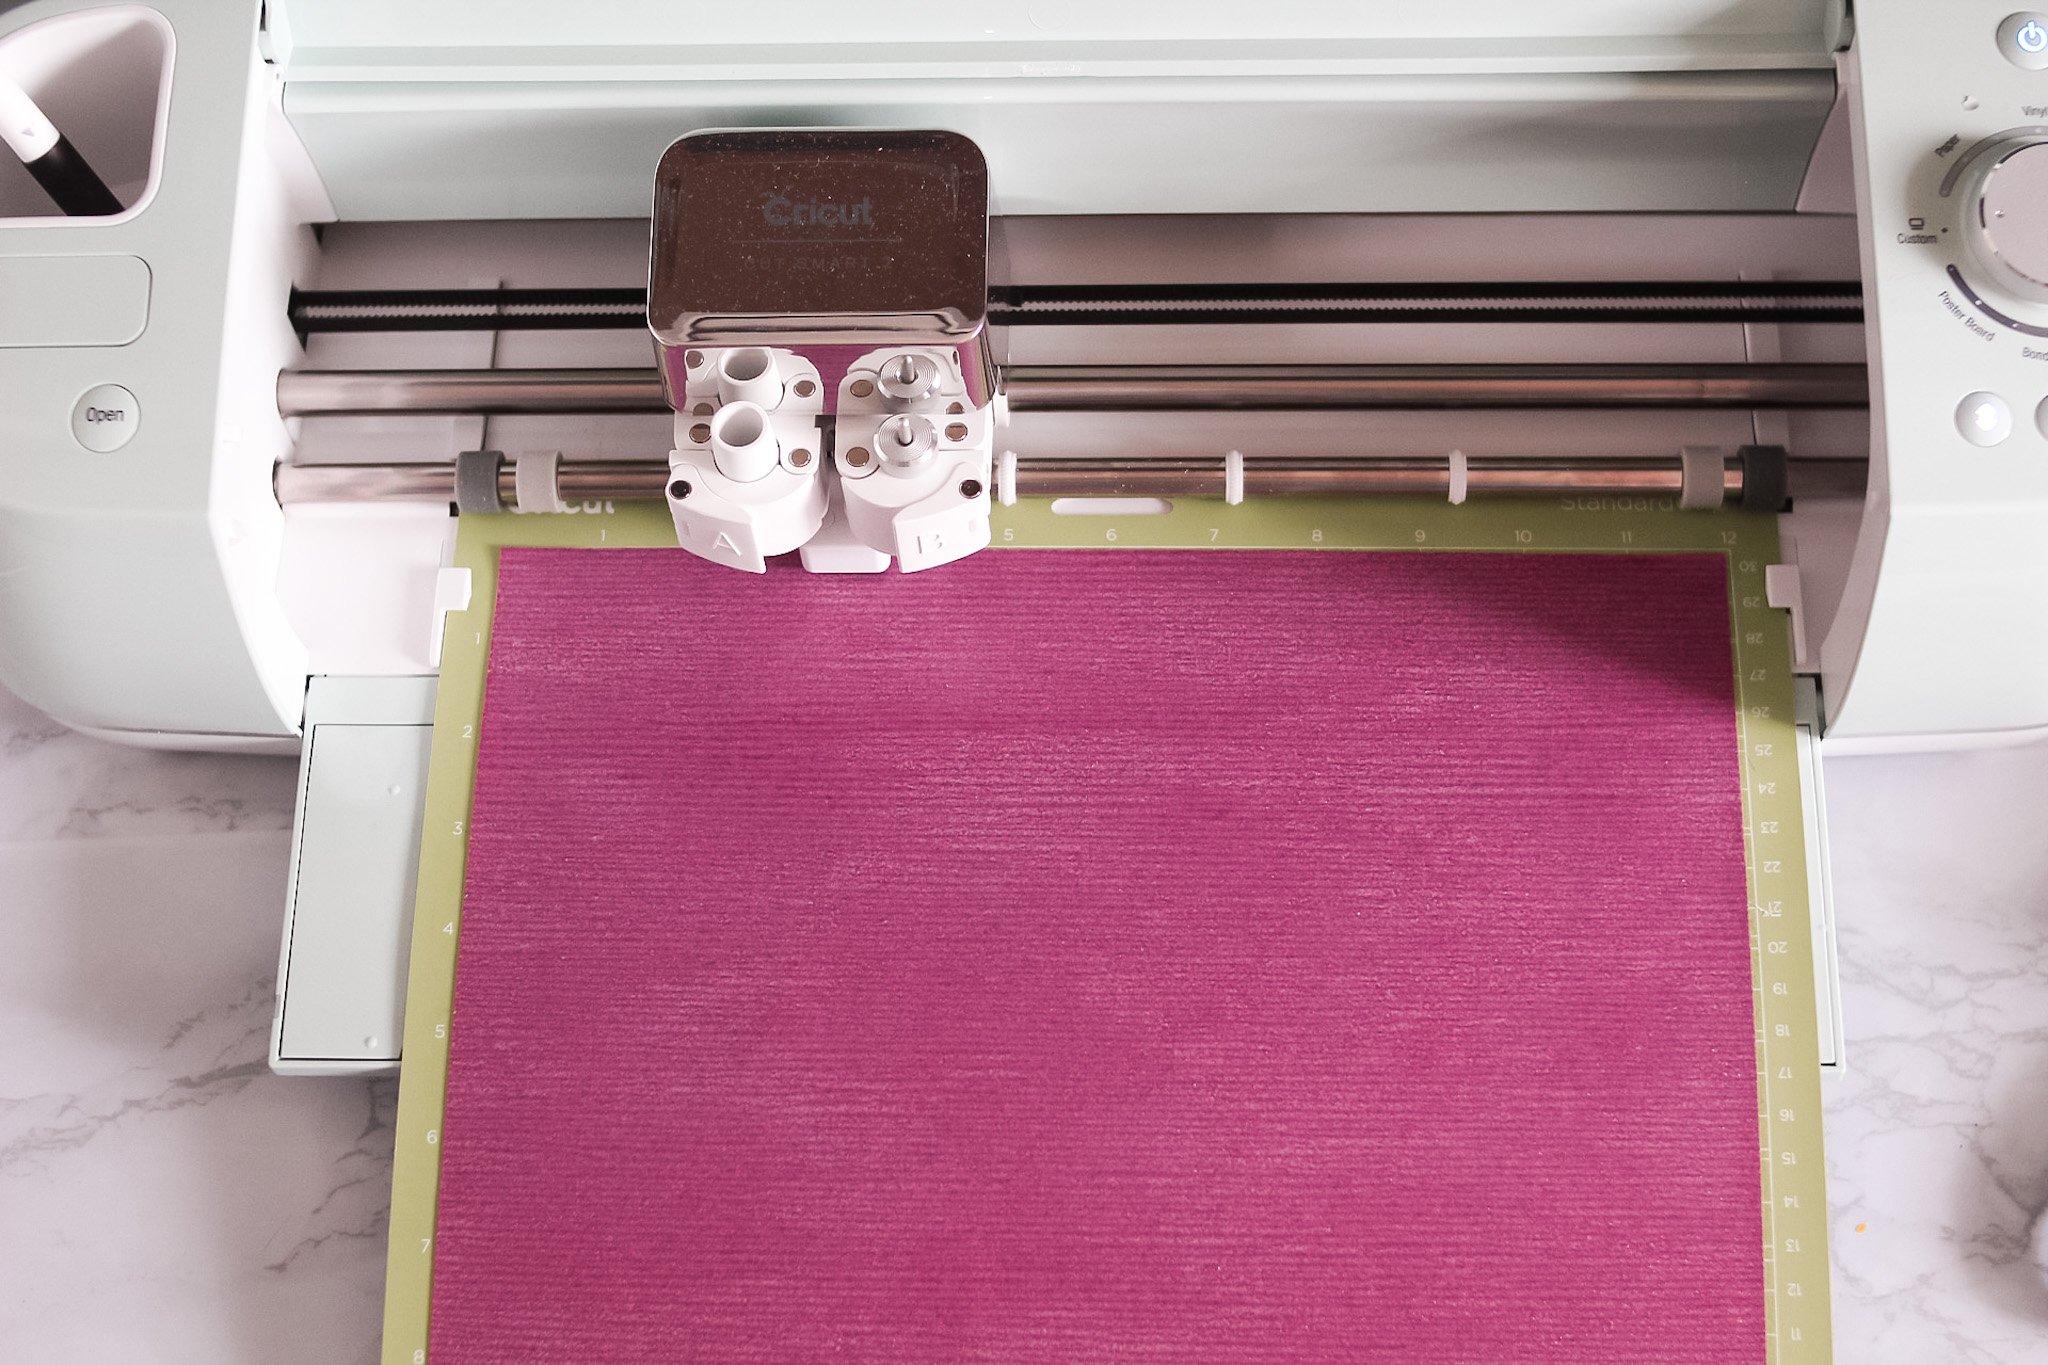
Your machine will begin cutting your iron-on material with the fine-point blade. I like to use this cutting time to measure out and cut the material size I’ll need for the next cut to keep things going.
You know, because I’m a busy mom and all, and time is precious when it comes to crafting or doing anything for myself ;).

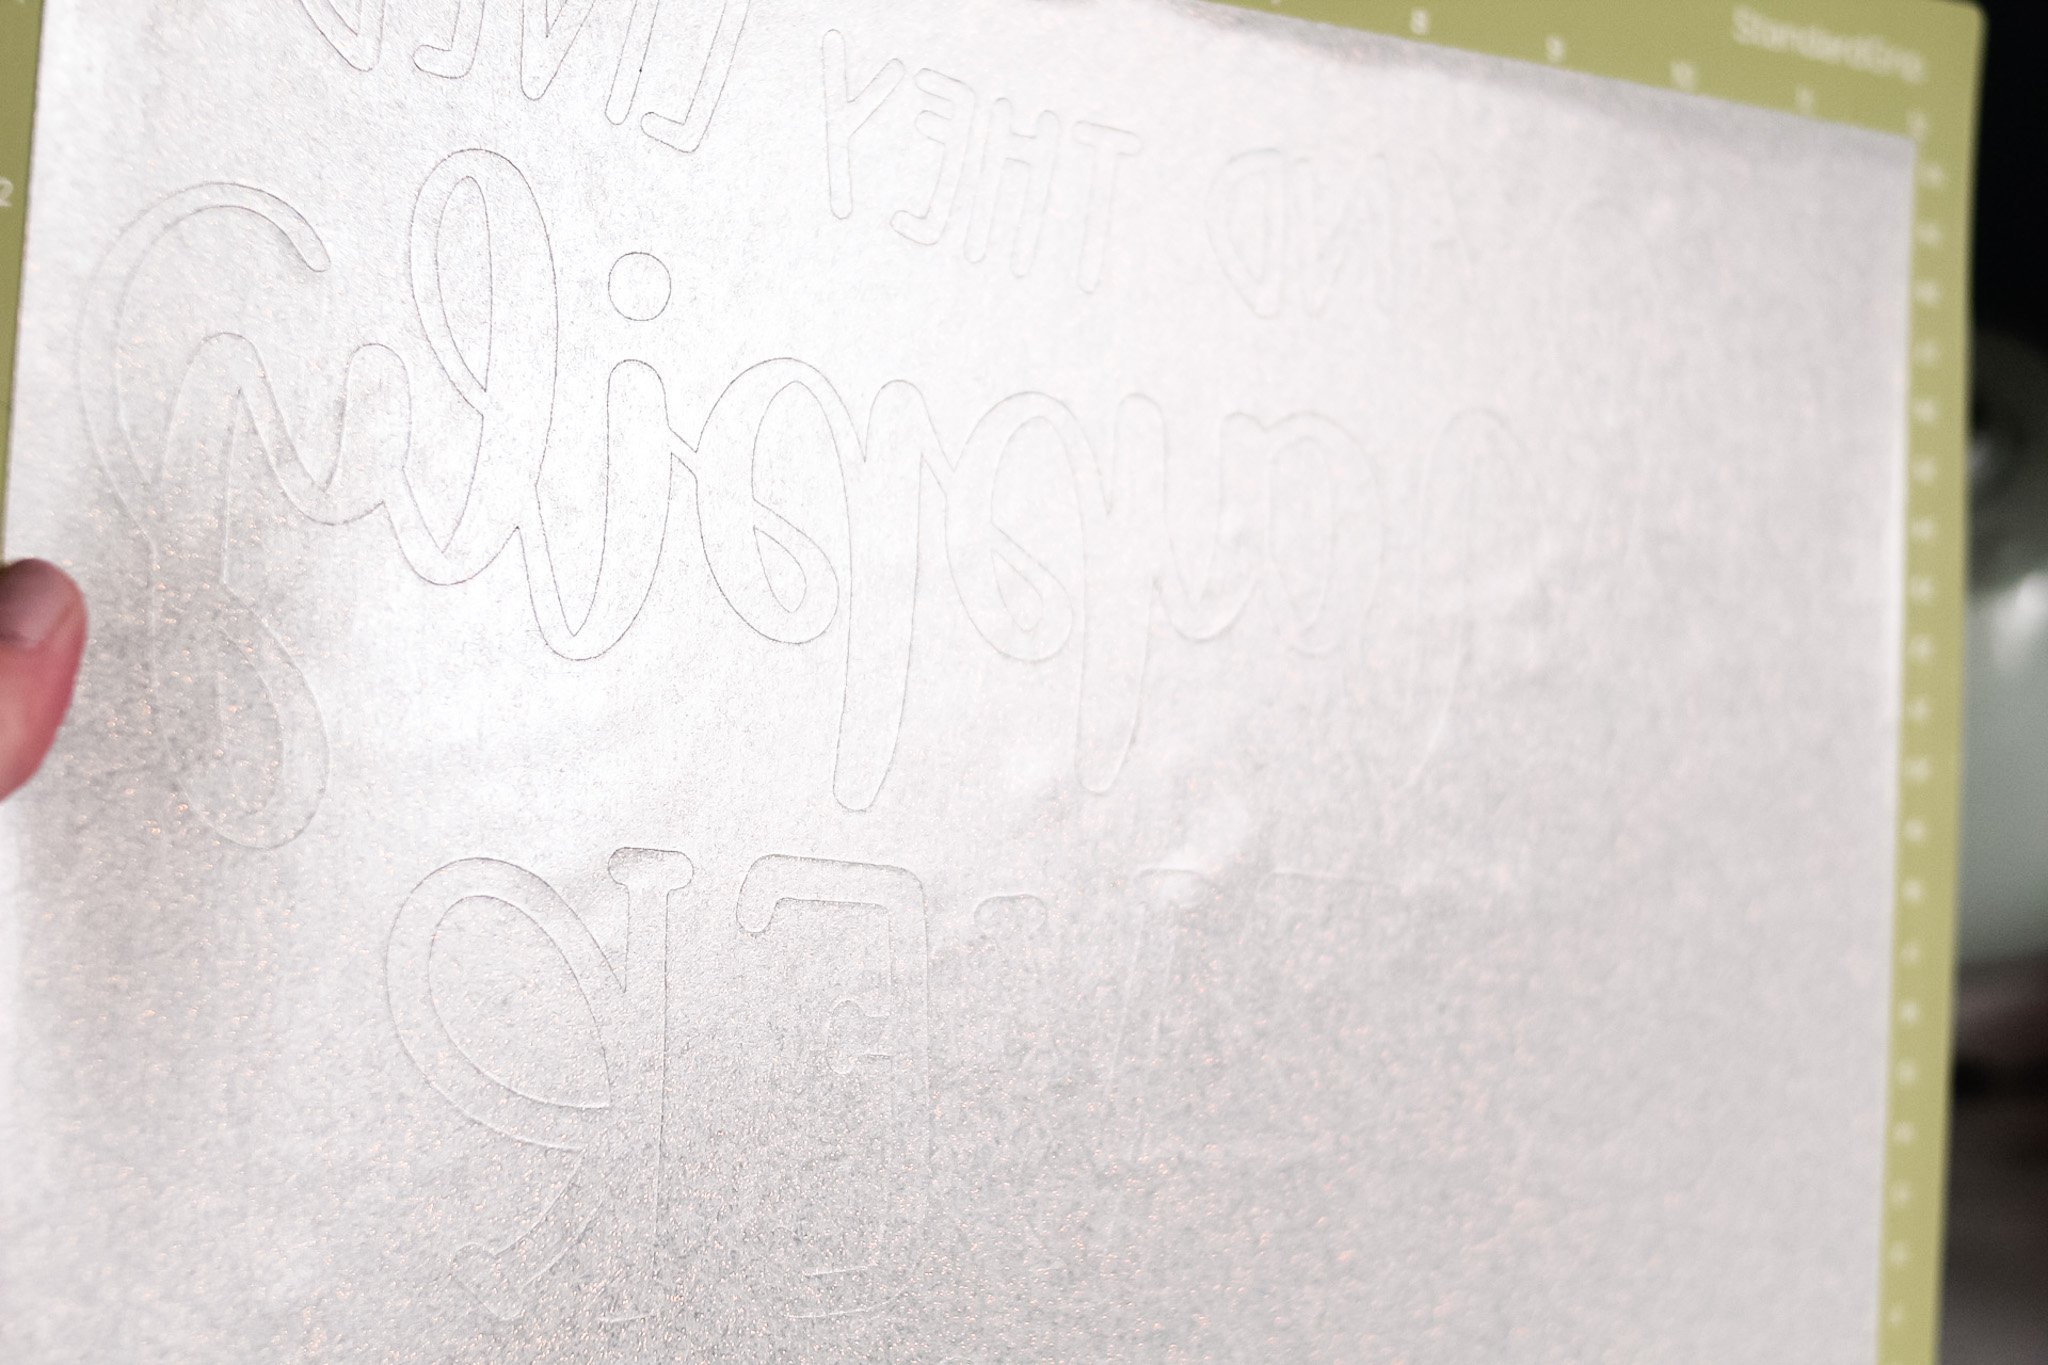
Below I’ve included a shot of some of my silver glitter iron-on that’s been successfully mirrored and cut…
Weeding Glitter Iron-On letters
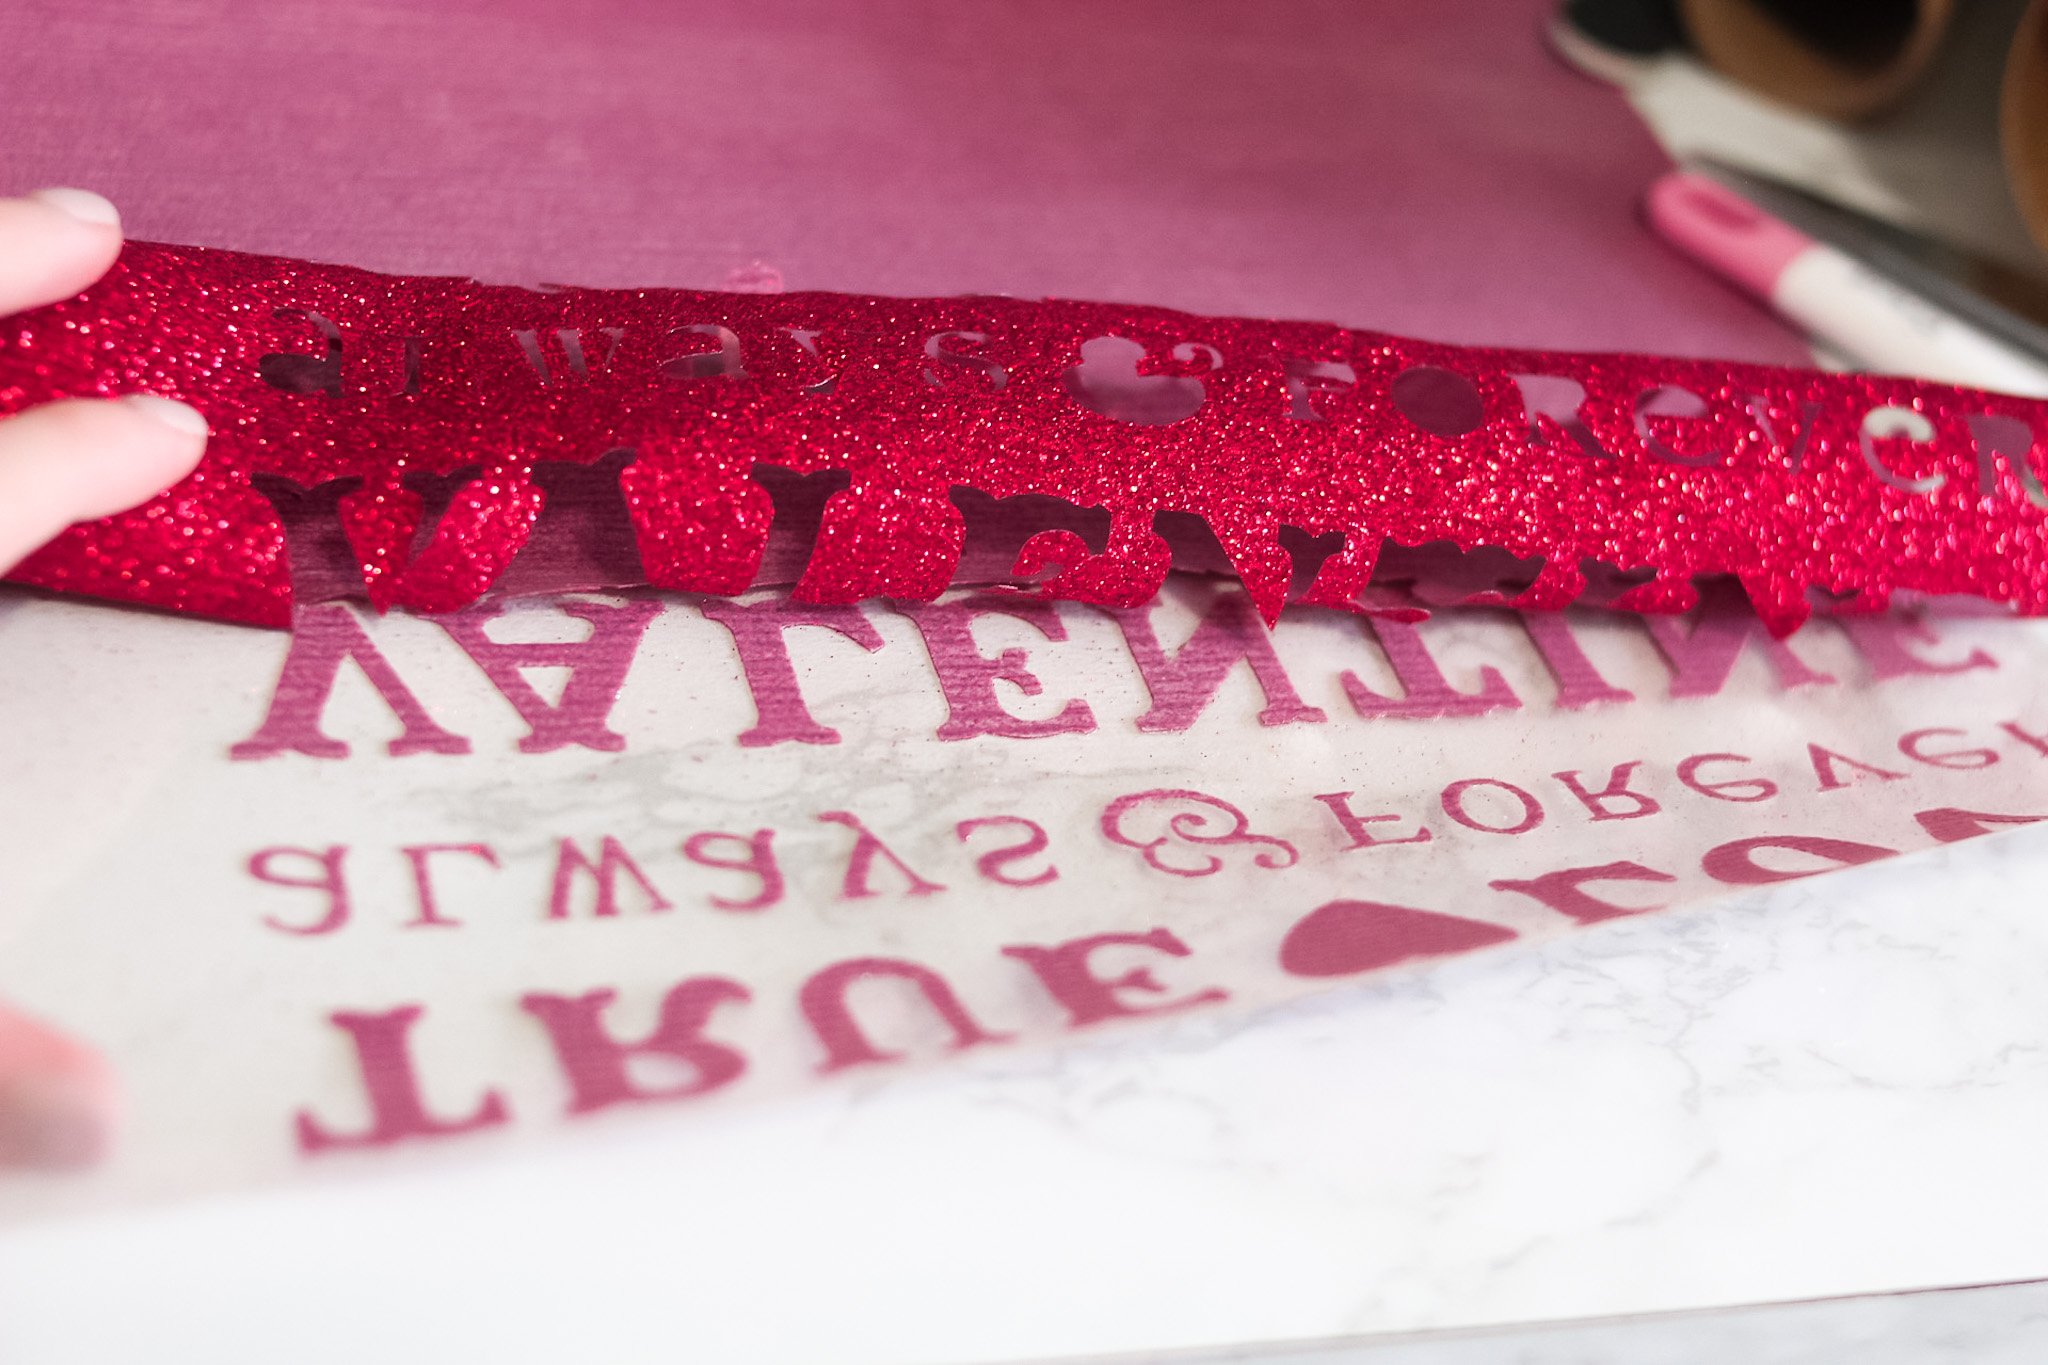
Once your material is all done being cut, it’s time to remove it from the mat and get to weeding!
Peel the iron-on from your mat and replace the mat cover to prevent any debris from sticking to it.
Gently start lifting up the excess glitter iron-on material from the clear liner. Use your weeder to help prevent skinny letters or stubborn designs from lifting up from the liner as you weed.
I recommend weeding glitter iron-on in an area with tons of light, so if you’re crafting at night, turn on a nearby lamp or the flashlight on your phone so you can see the cuts more clearly ;).
Take your time, especially if you are new to glitter HTV, as it can be a tricky material to work with at first. And as I mentioned before, your weeder is your best friend.
You can also keep the design up on your screen so you can follow along with where certain letters or images are supposed to be to ensure you don’t accidentally lift those from the liner.
Applying Glitter HTV With EasyPress 2
With your design completed weeded and ready to be pressed to your pillow covers, it’s time to close up and unplug your Cricut and pull out your EasyPress 2.
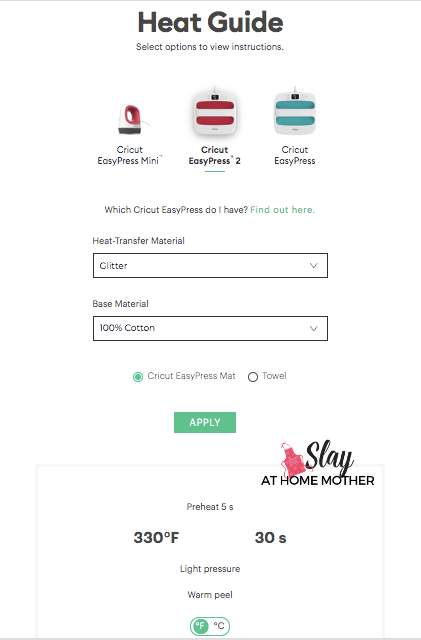
The EasyPress 2 is very easy to use, and Cricut has a handy online Heat Guide to help you find the perfect temperature, pressure, peel, and time settings you need for a project.
For this project, as an example in the screenshot above, I entered all the information it requested and learned that I need to set my EasyPress 2 to 300 degrees Fahrenheit and my timer to 30 seconds. I will need to also apply light pressure once adheres my design to the pillow covers, and peel the liner away while it is still warm.
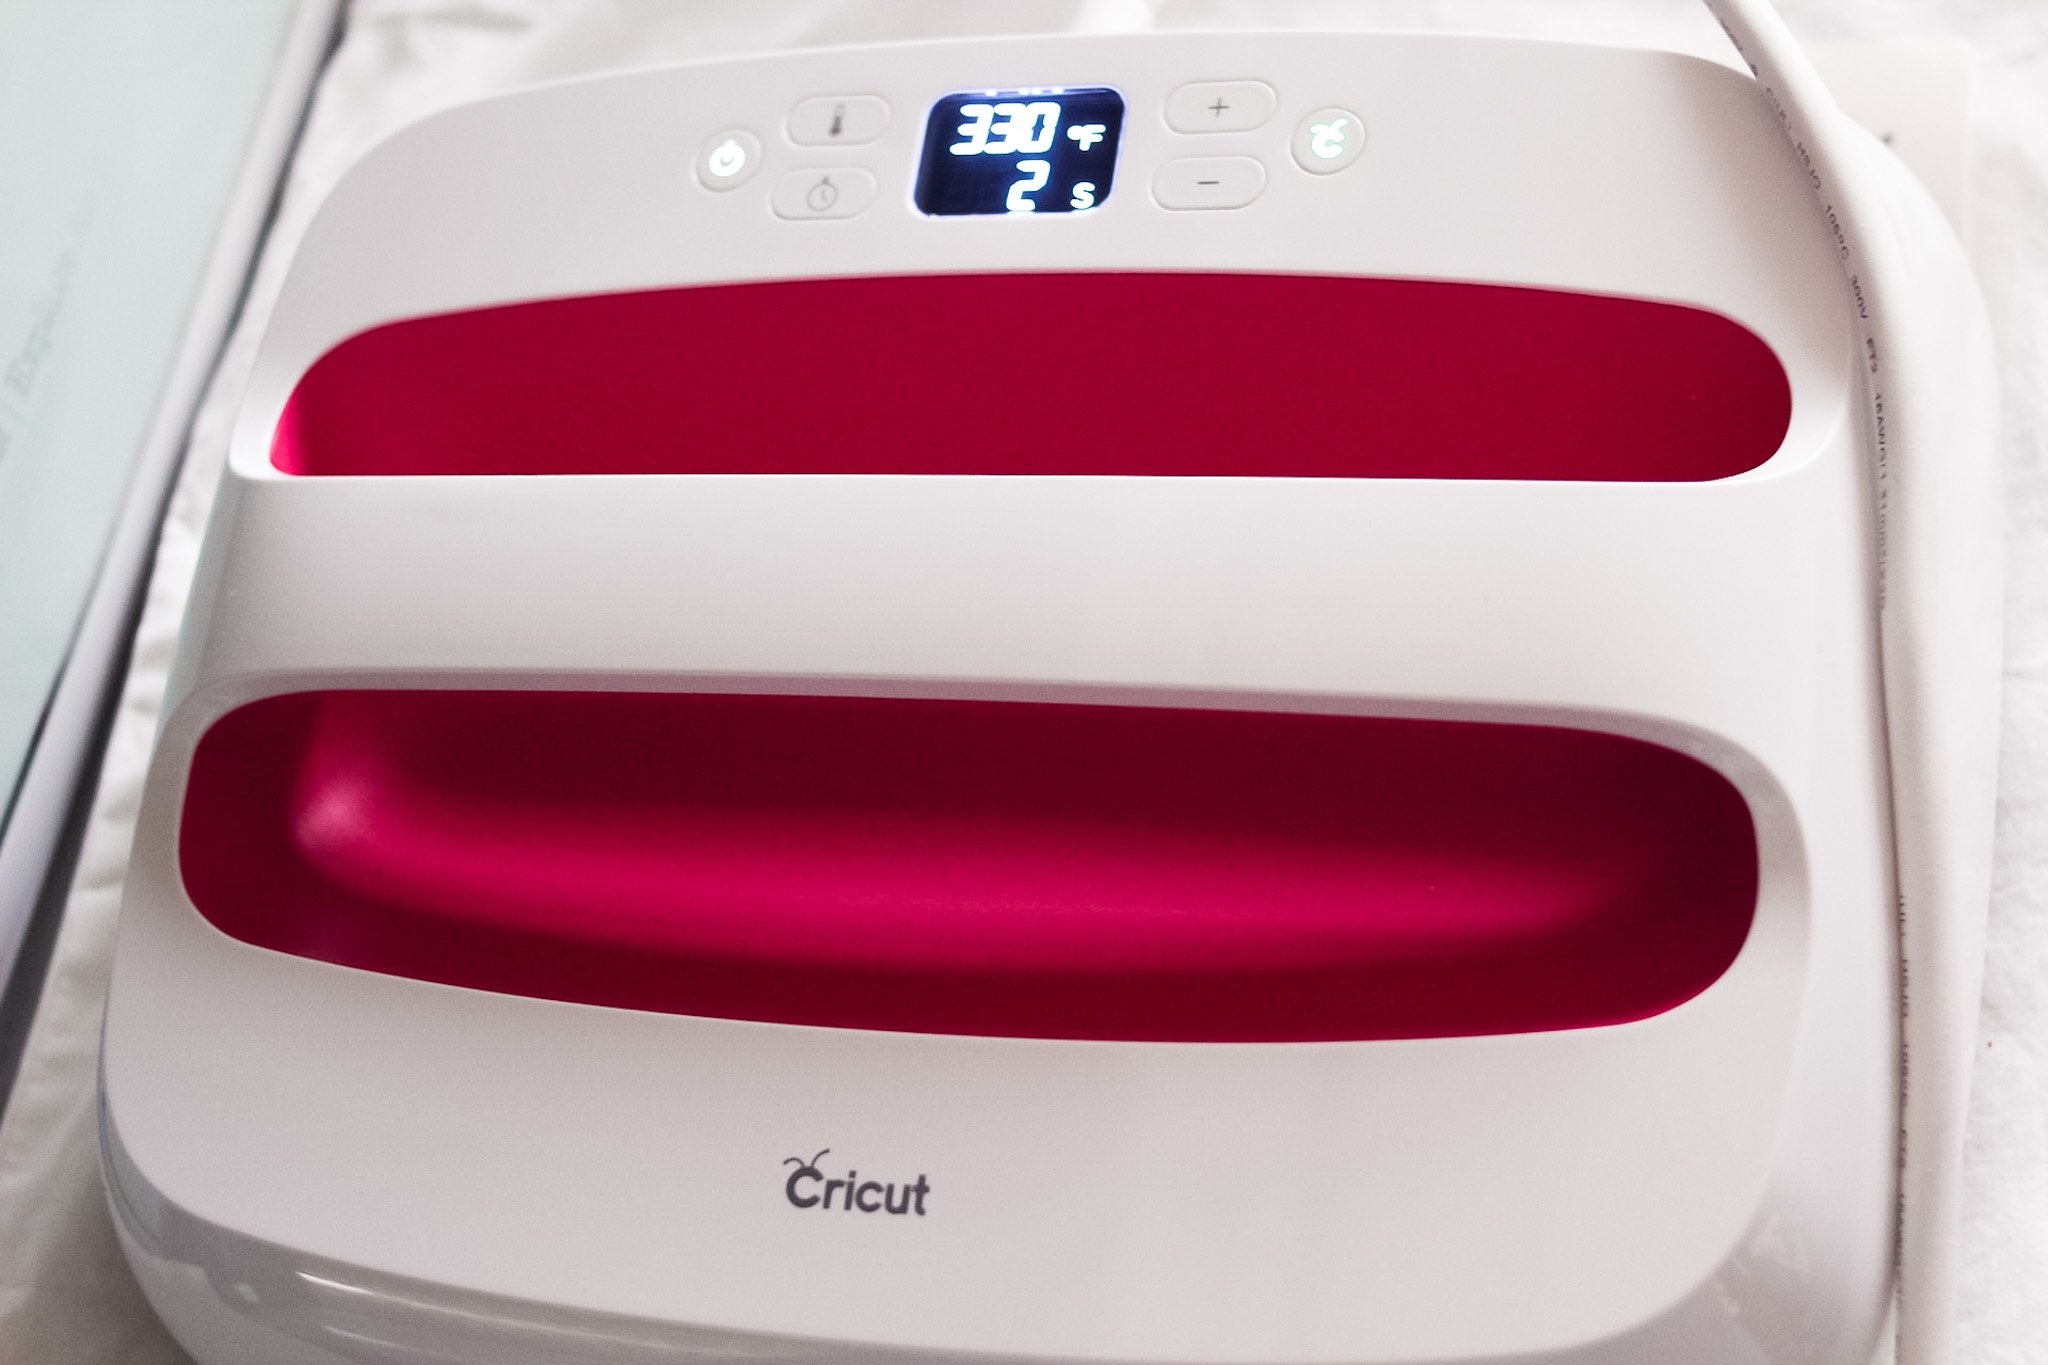
First, though, I need to preheat my cotton pillow covers for 5 seconds.
These extra instructions are available in the same Heat Guide as I featured above, you’ll just need to scroll down on your screen after putting in the information to see it.
Once it’s preheated for 5 seconds, I can place my glitter iron-on down onto the pillow cover with the liner facing up, place the protective sheet or butcher paper over top, and lightly press the EasyPress 2 onto the pillow cover for 30 seconds.
Once the timer goes off, I flipped my pillow cover over, placed the protective sheet to the side, and lightly pressed for an additional 15 seconds to ensure all-around adhesion.
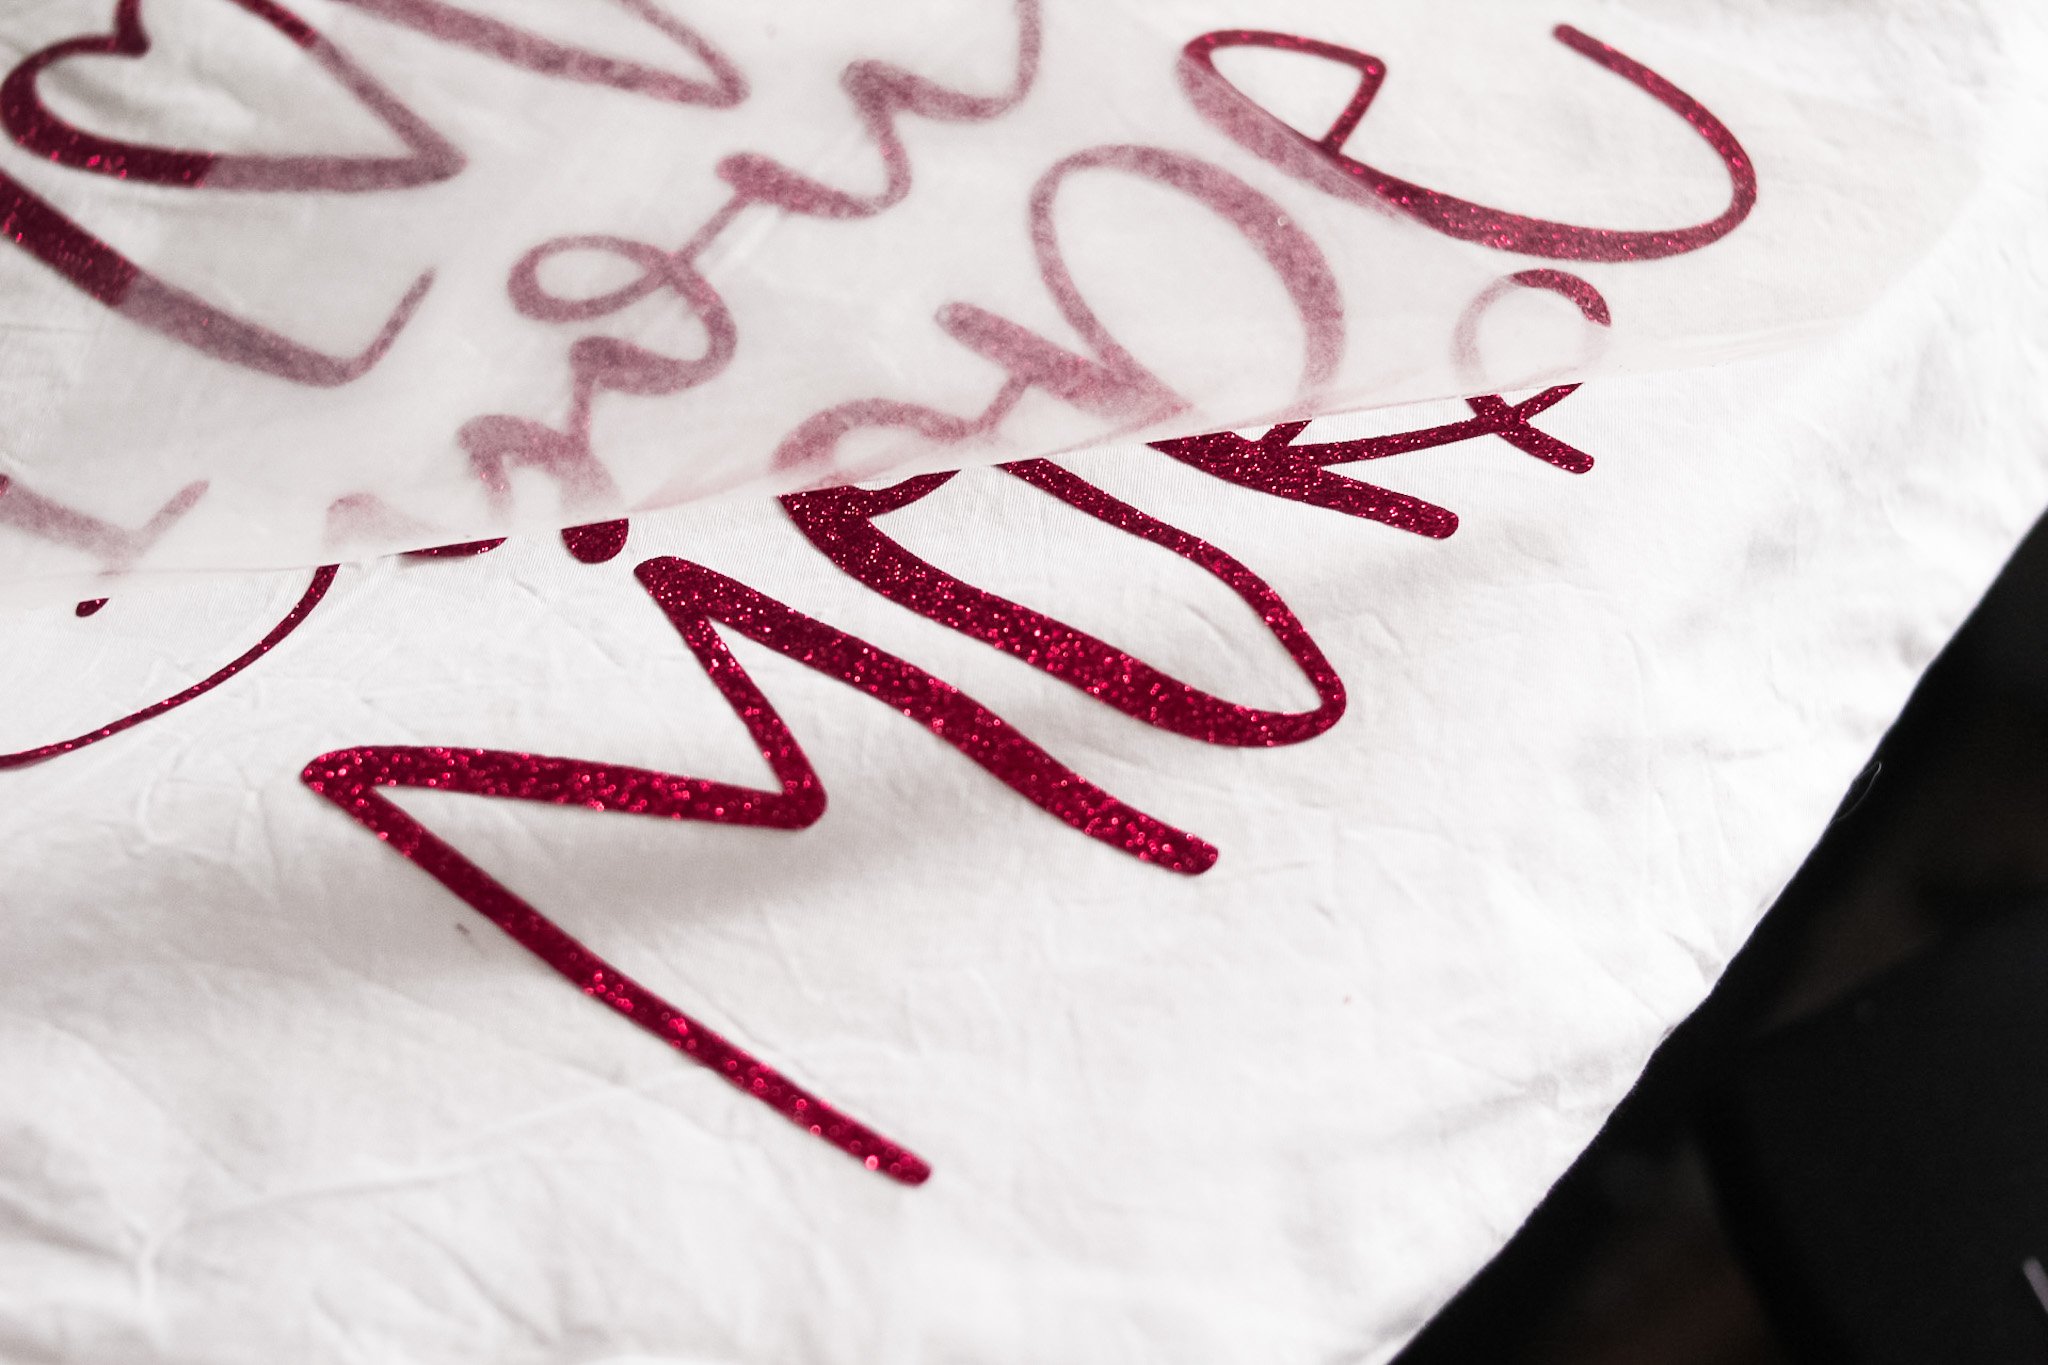
I can then flip the pillow cover over, wait for a minute or so as the liner cools down a tad and can be handled, and peel the liner away while it’s still warm.
Cold peel Or Warm Peel?
Glitter iron-on is a warm peel product, which means that the liner needs to be removed while it is still warm. Peeling the liner away after it ha cooled can cause the iron-on to peel up from the pillow cover along with the liner.
Applying the other side of glitter iron-on vinyl
You might be wondering, after reading the instructions above, how to apply glitter iron-on vinyl to the OTHER side of the pillow if one side already has glitter iron-on on it. Hmmmmm.
Well, I’ve already experimented with it for you, and here’s what I did…
With the blank surface of the pillow cover facing up, I preheated it with my EasyPress 2 just as I did the first side. I also applied the design, and lightly pressed for 30 seconds at 330 degrees Fahrenheit as I did the first side.
Once I flipped the pillow cover over, I placed the protective sheet over the top of the already-adhered first design and pressed for 15 seconds.
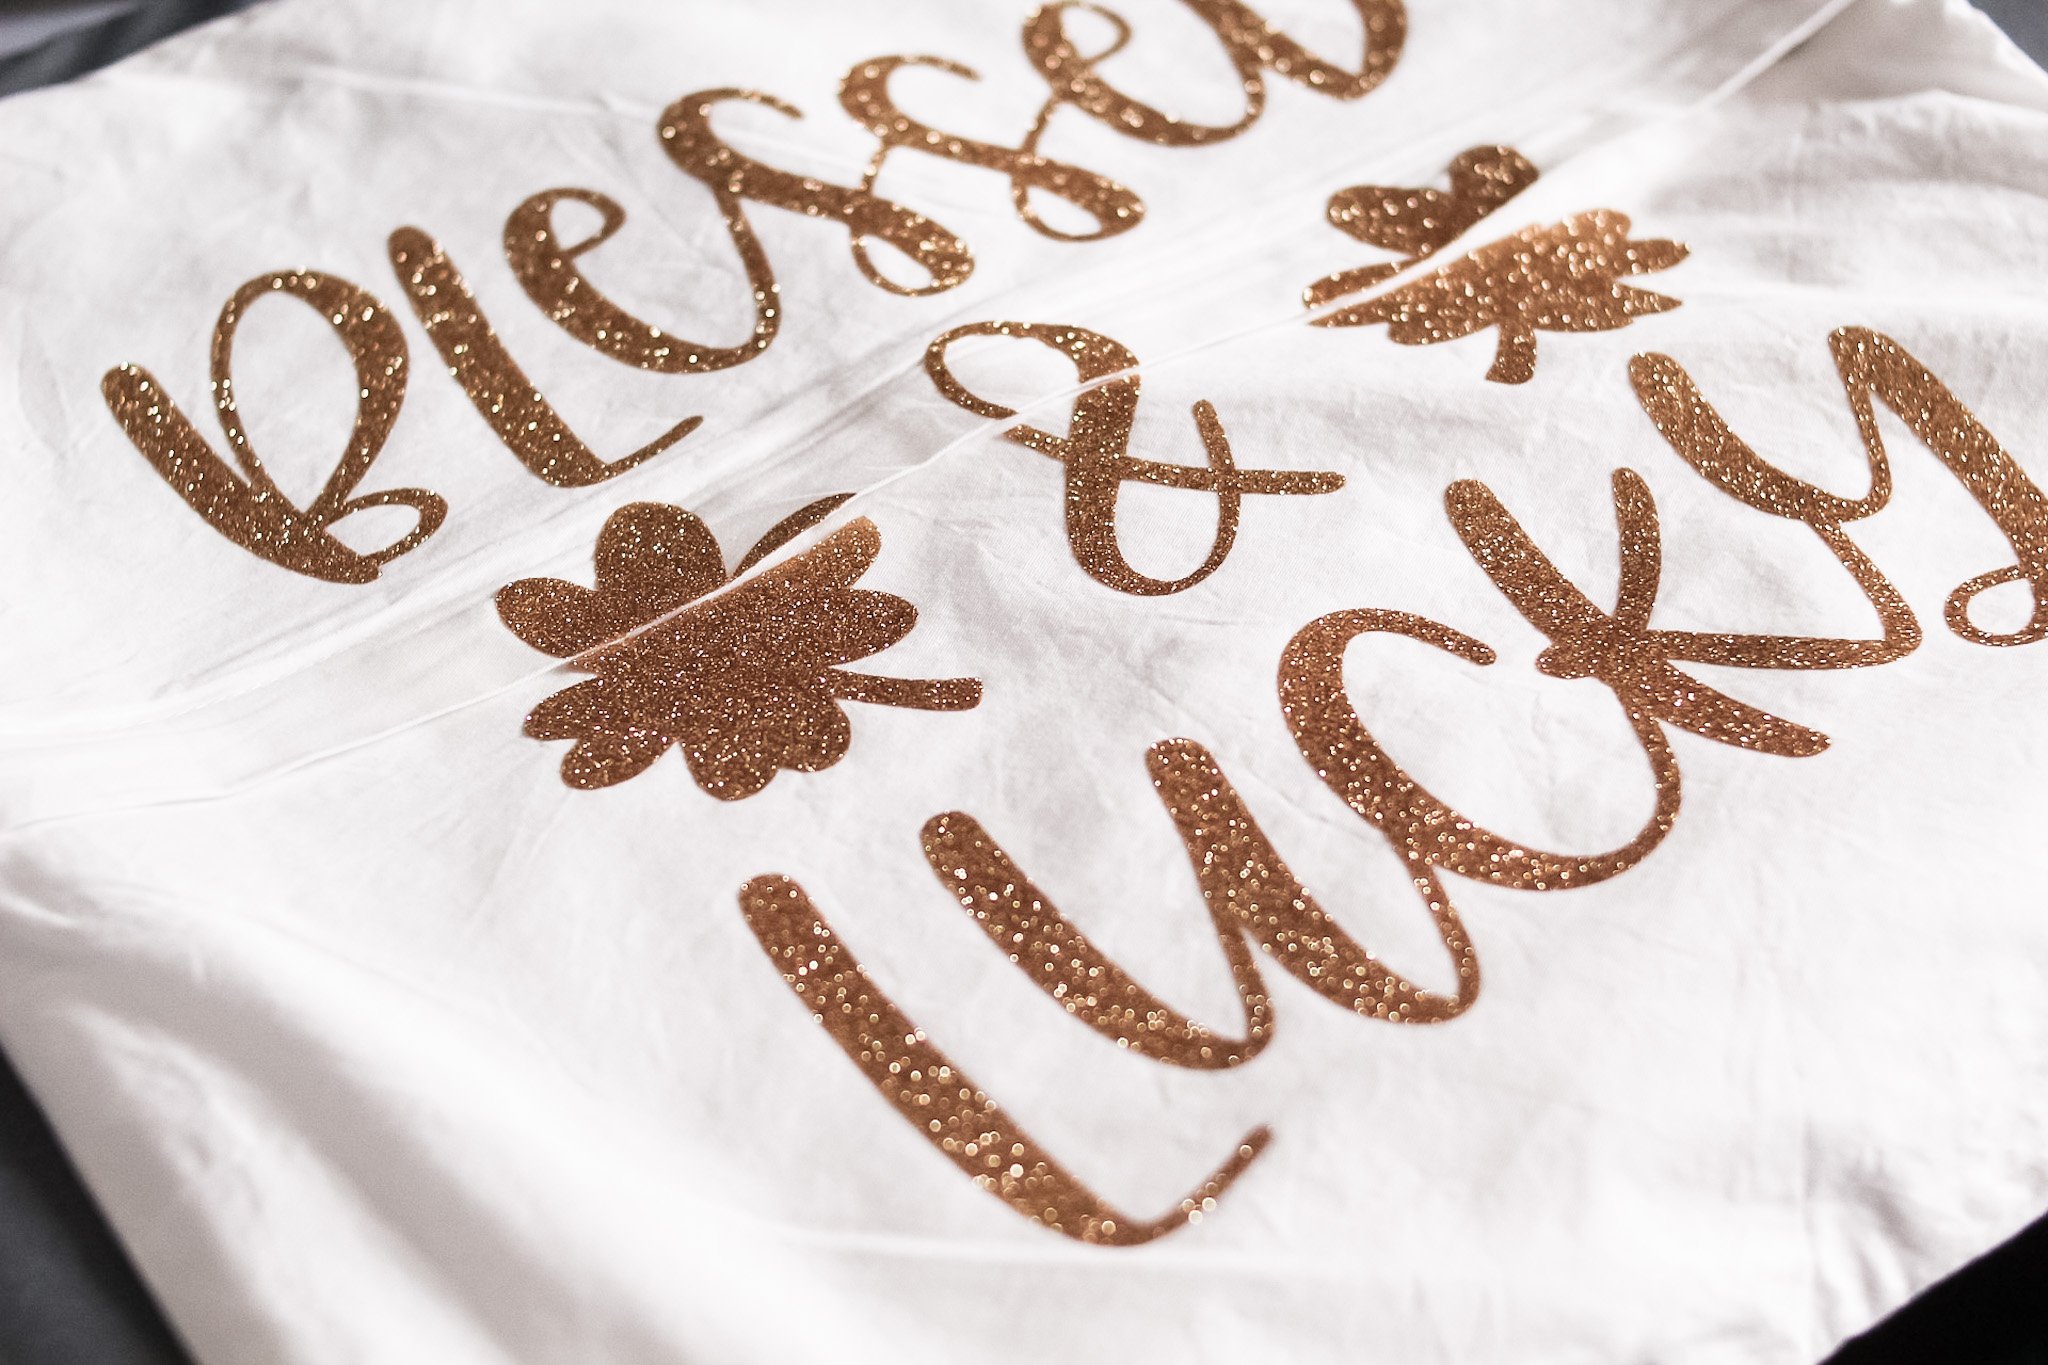
All pillow cover designs adhered perfectly!
Working With Uneven Surfaces To Apply Glitter Iron-On Vinyl
The pillow covers I chose had a zipper across the middle back. Not ideal, but I can work with that.
After the design adhered on the backside of each pillow cover, I peeled away the liner while it was still warm (this is known as a warm peel), and used a razor to trim across the edge of where the fabric parted to make room for the zipper to be opened and closed.
I recommend doing this while the glitter iron-on is still warm as it cuts better.
OR, you can avoid this entirely by purchasing pillows with a top zipper instead of a middle zipper ;).
Finished Reversible Pillow Covers
And here are the finished pillow covers…
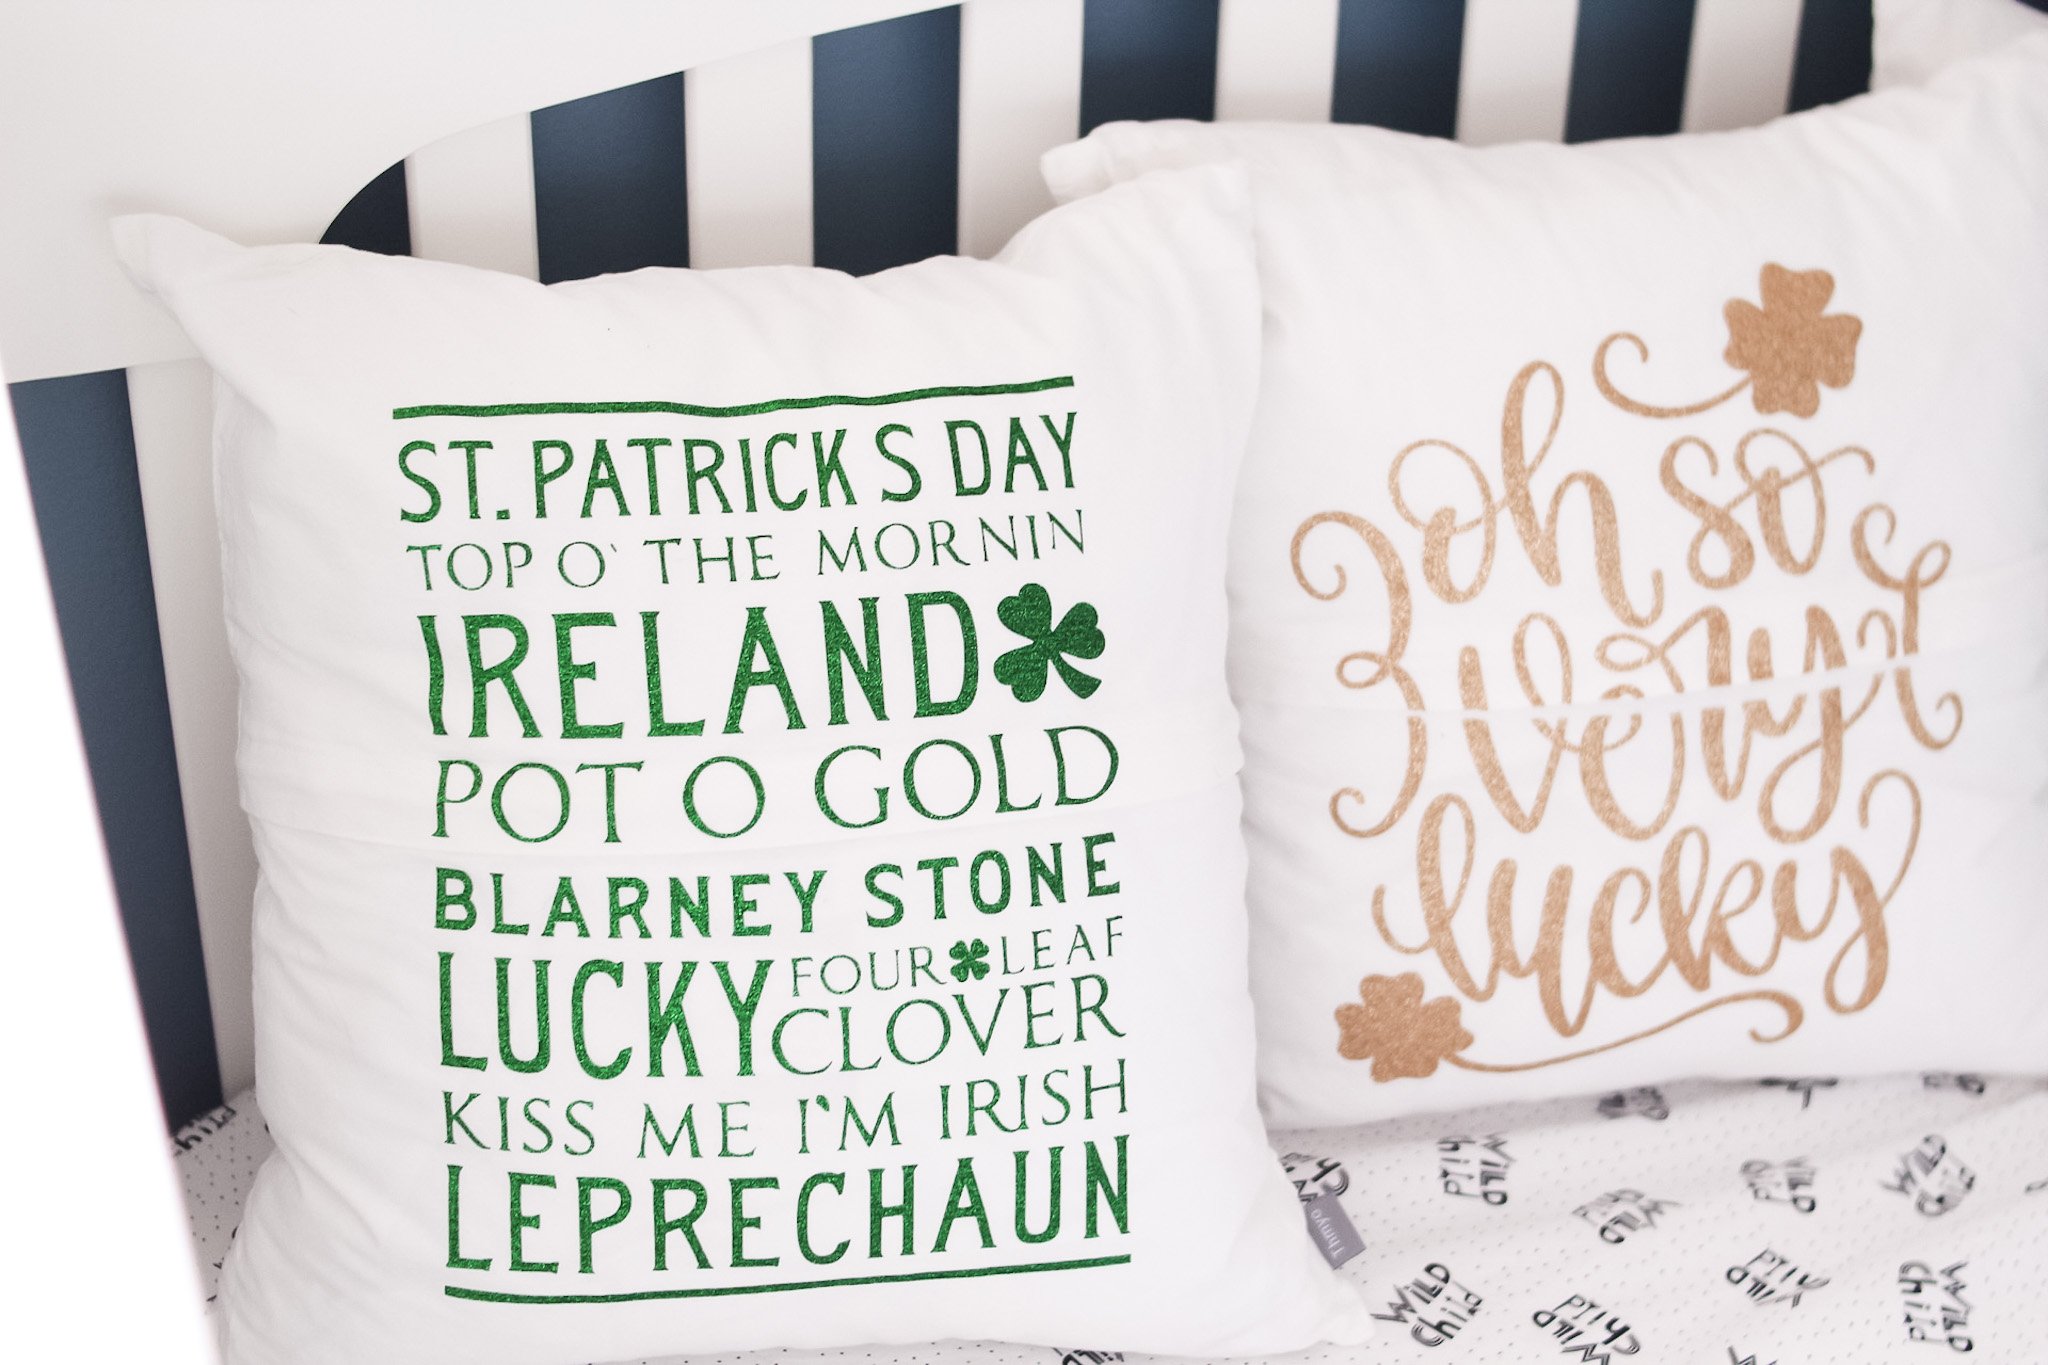
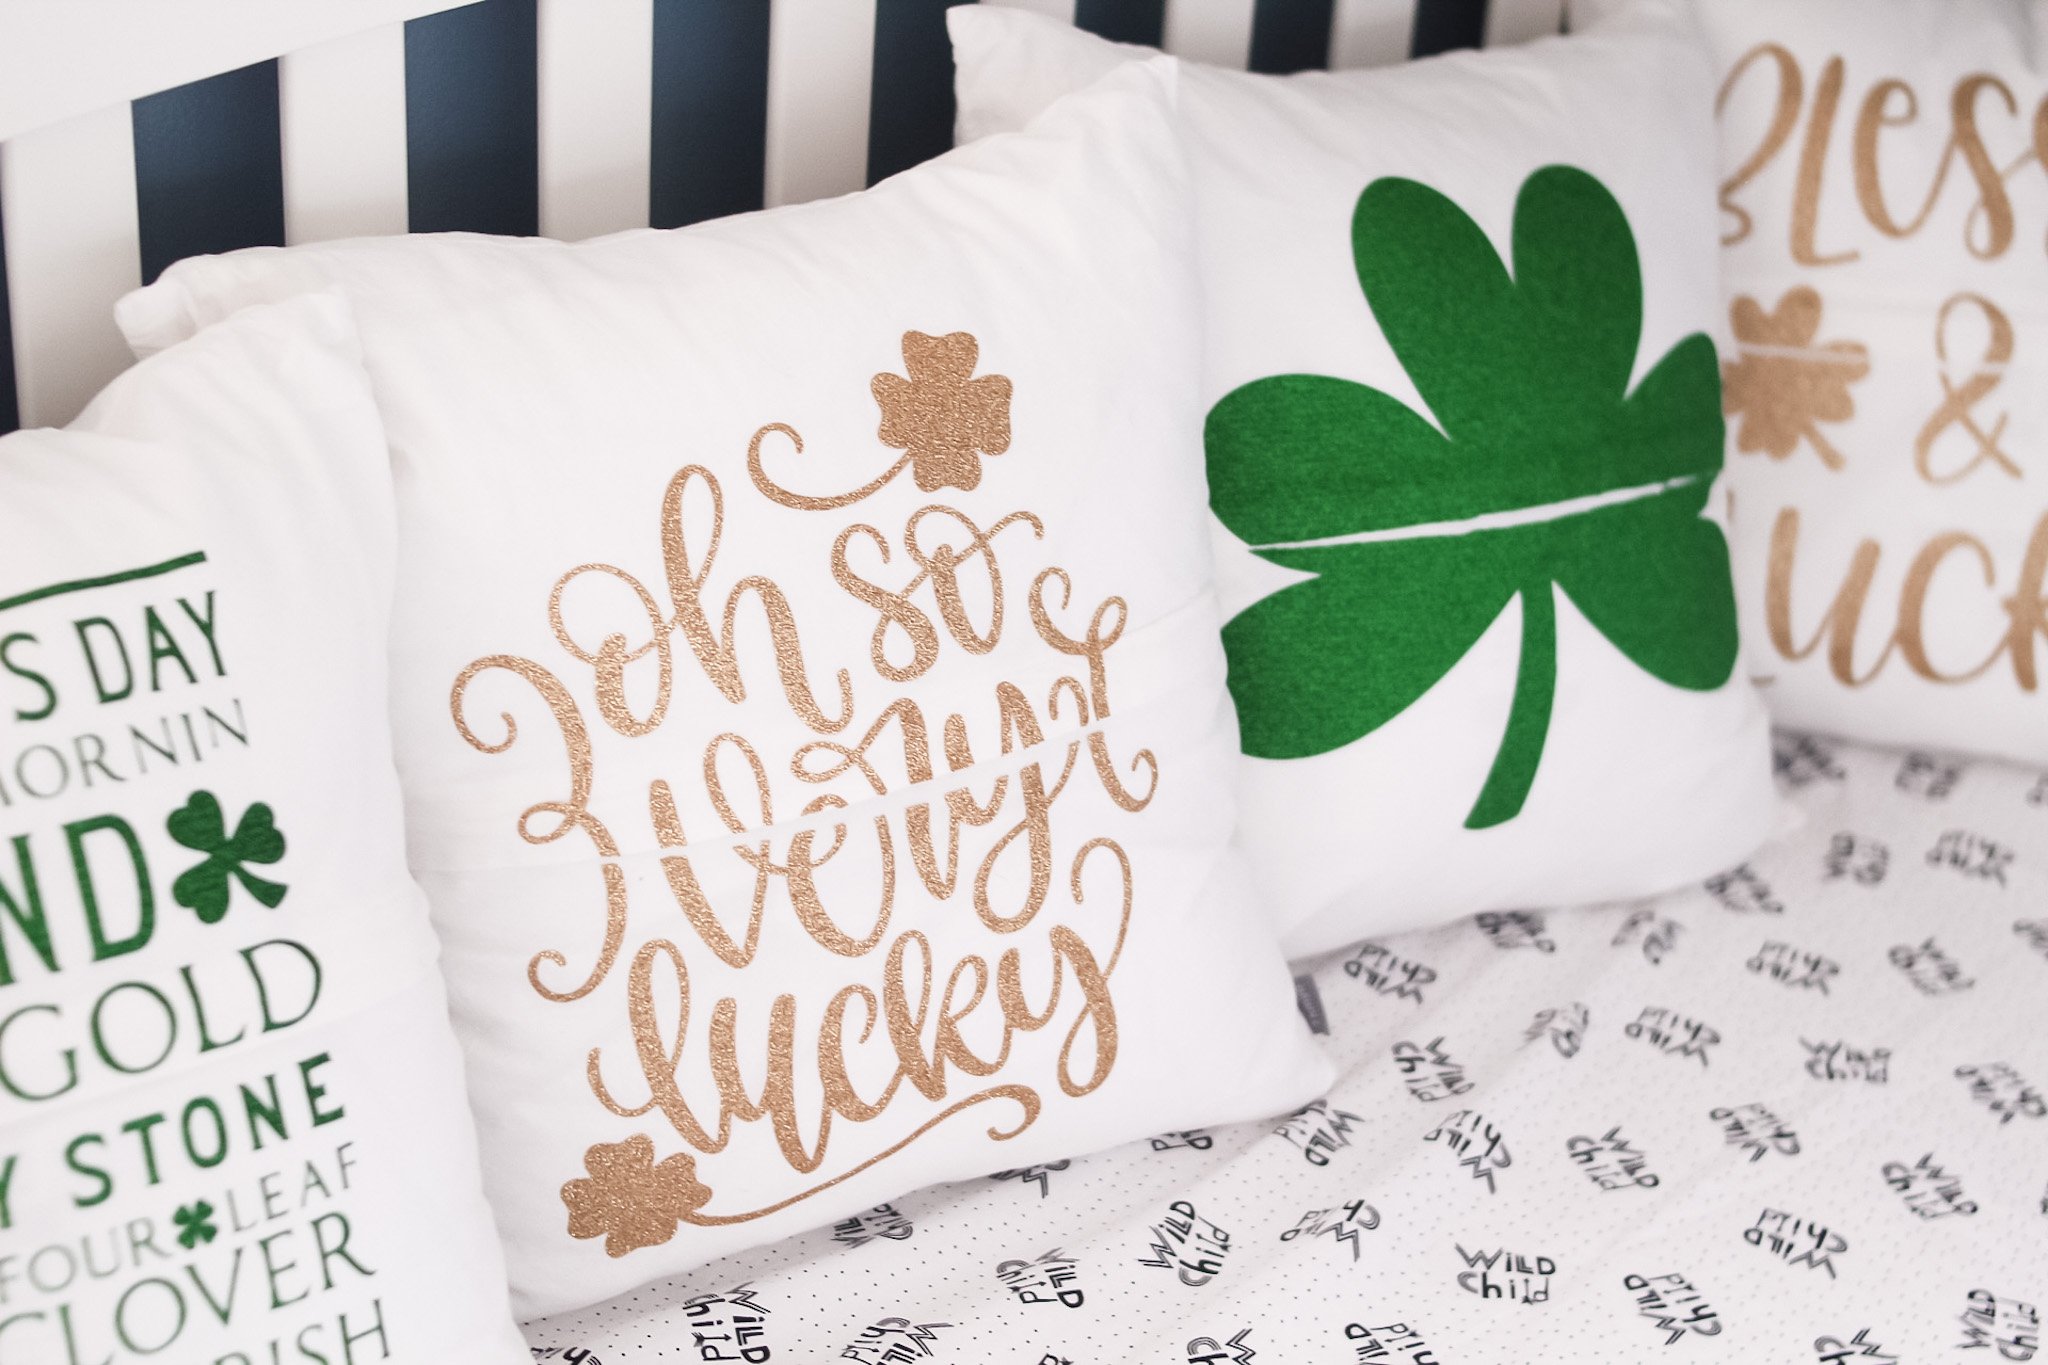
When you’re ready to celebrate Valentine’s Day, flip the pillows sot he red and silver designs show, and when you’re ready to celebrate St. Patty’s Day, just flip them over to reveal the green and gold designs!

I hope you all enjoyed this project and I helped to answer some of the puzzling questions you had about glitter iron-on vinyl, but feel free to drop any additional questions in the comments below! If you create these pillow covers or another craft you’re really proud of, be sure to tag me on Instagram (@slayathomemother) so I can see it!

Leave a Reply