A free Design Space link to help you customize your Lexington 3-tier rolling cart…
Hi there, lovelies!
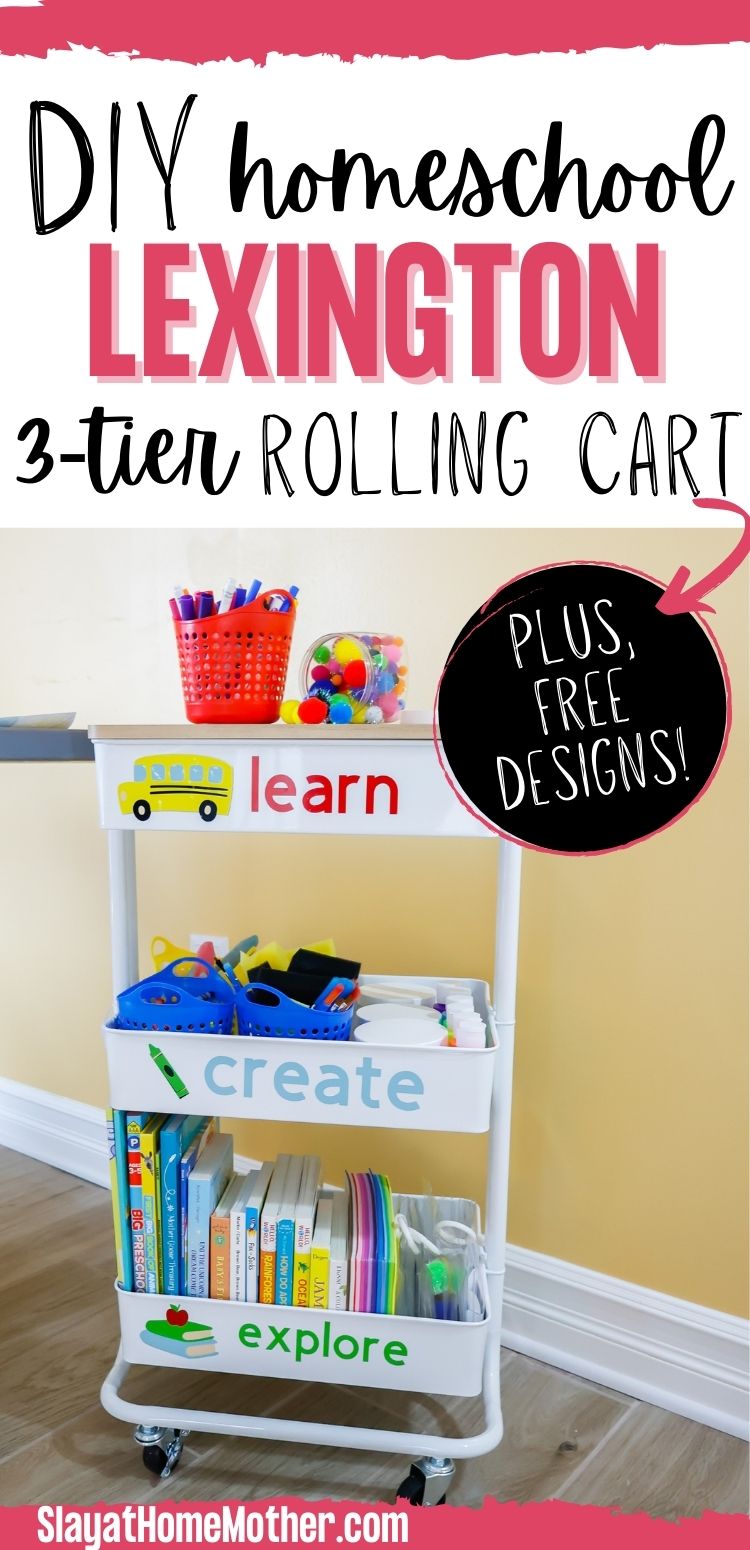
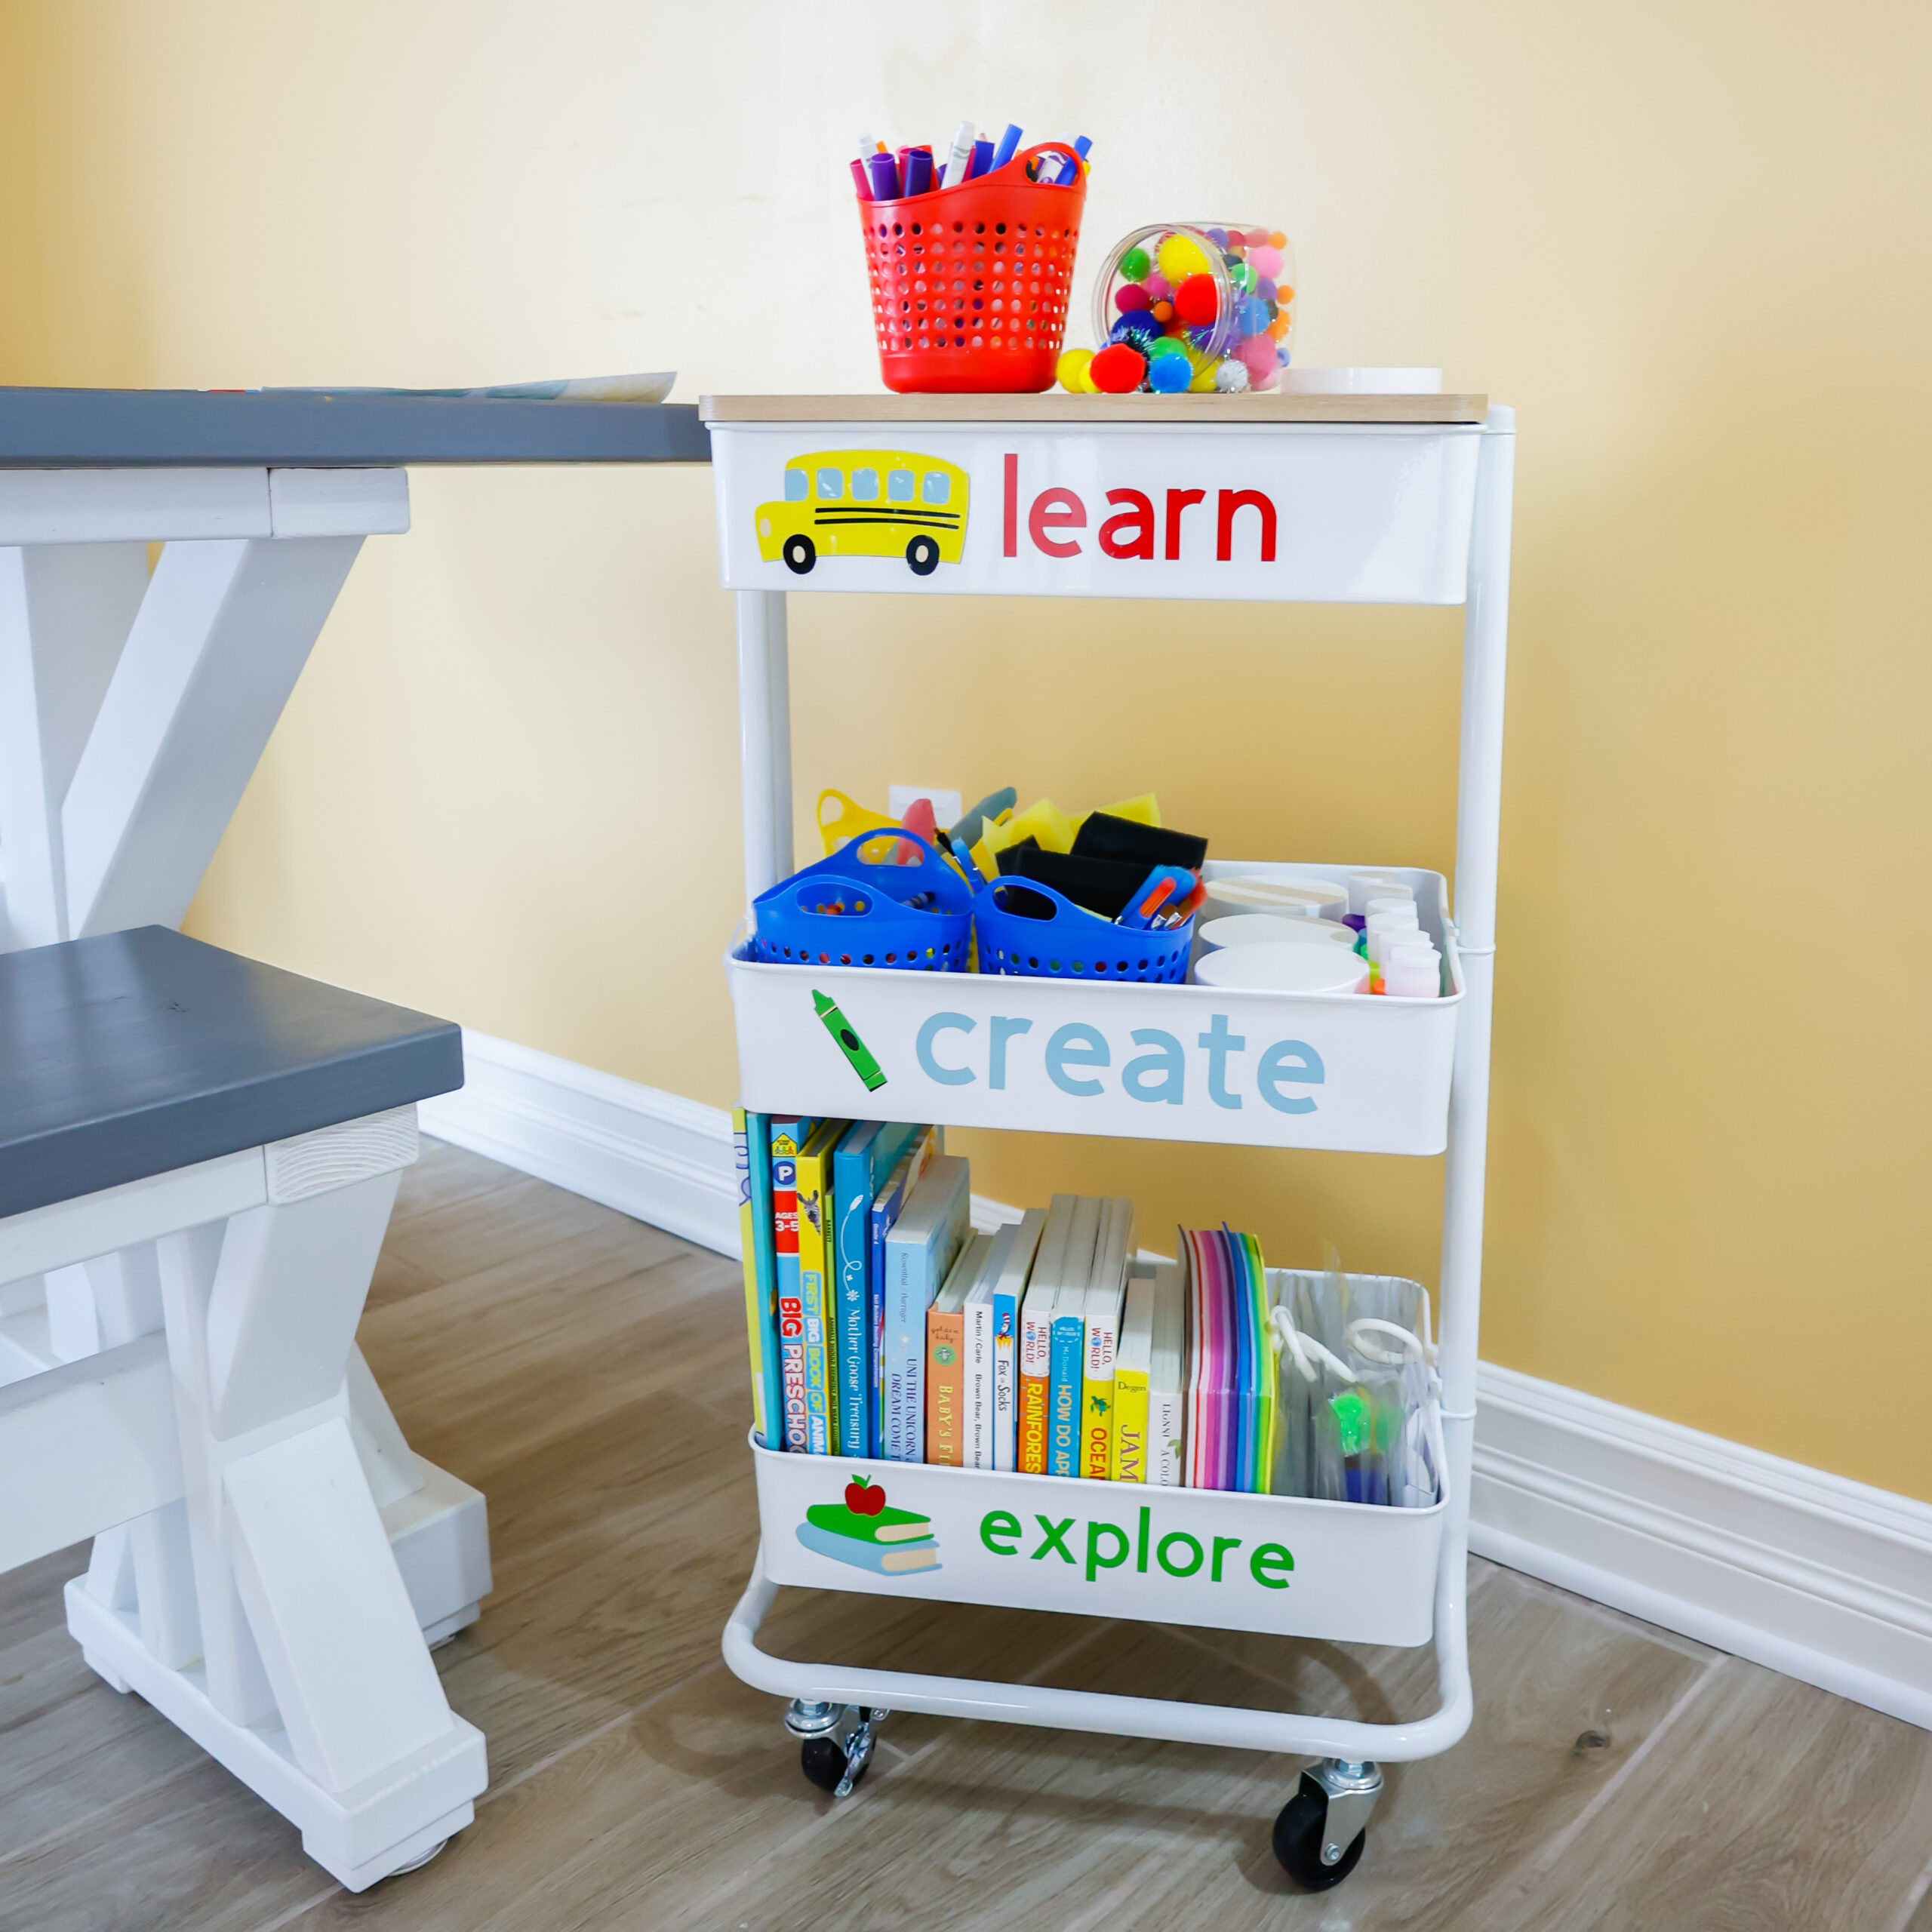
I recently grabbed a Lexington 3-tier rolling cart from the craft store.
It’s actually our second cart.
I figured we’d need one for each boy, especially in the Fall when Jaxson starts Kindergarten.
Man, I am going to miss him during the day!
I love having his playful energy and upbeat personality around.
My kids are seriously THE MOST amazing human beings.
No bias, obviously. 😉
For now, we are homeschooling preschool while big brother Max attends school in-person.
To make things more fun, I decided to personalize his Homeschool Cart with some permanent vinyl and my Cricut…
*This post contains affiliate links, however, all opinions are my own, as always.
I’m sharing the Design Space link with you so you can personalize your Lexington 3-tier rolling cart if you wish, too!
Each image has layers to it, as you can see from the screenshots below…
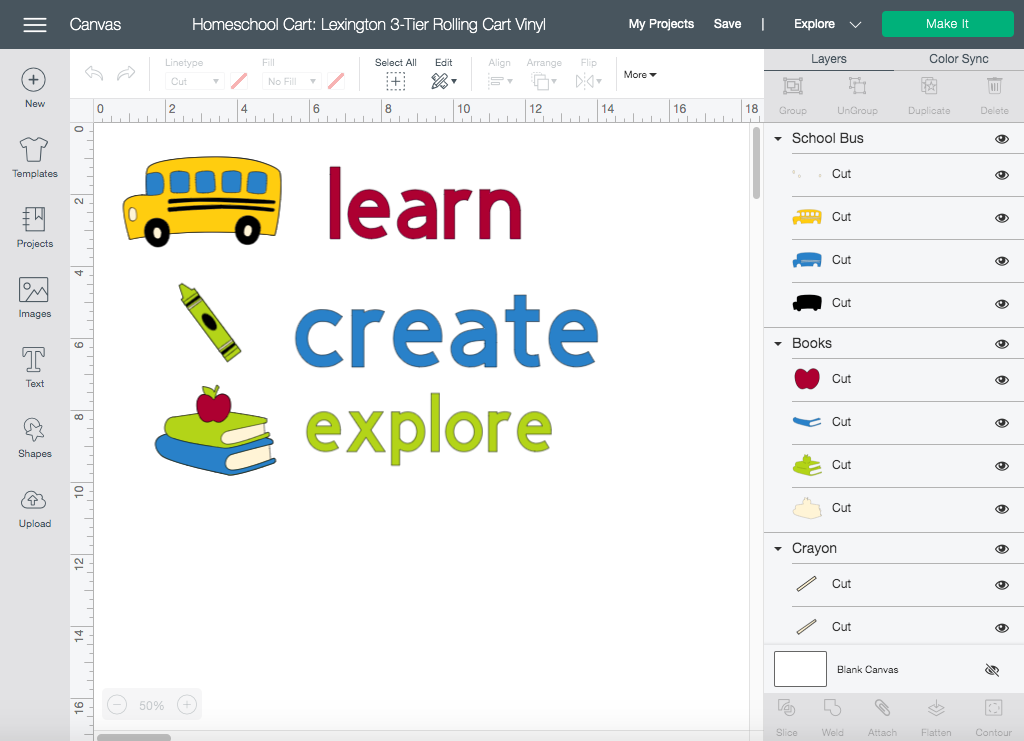
I kept things simple and only used six colors…
- Red
- Green
- Blue
- Black
- Tan
- Yellow
I can sense your laughter from the other side of the screen, but I’m totally serious.
I could’ve easily gone with 10-12 colors if I wanted to!
All you have to do is click on this Design Space link, click on Make It, and get your vinyl ready to cut on a blue Cricut LightGrip mat.
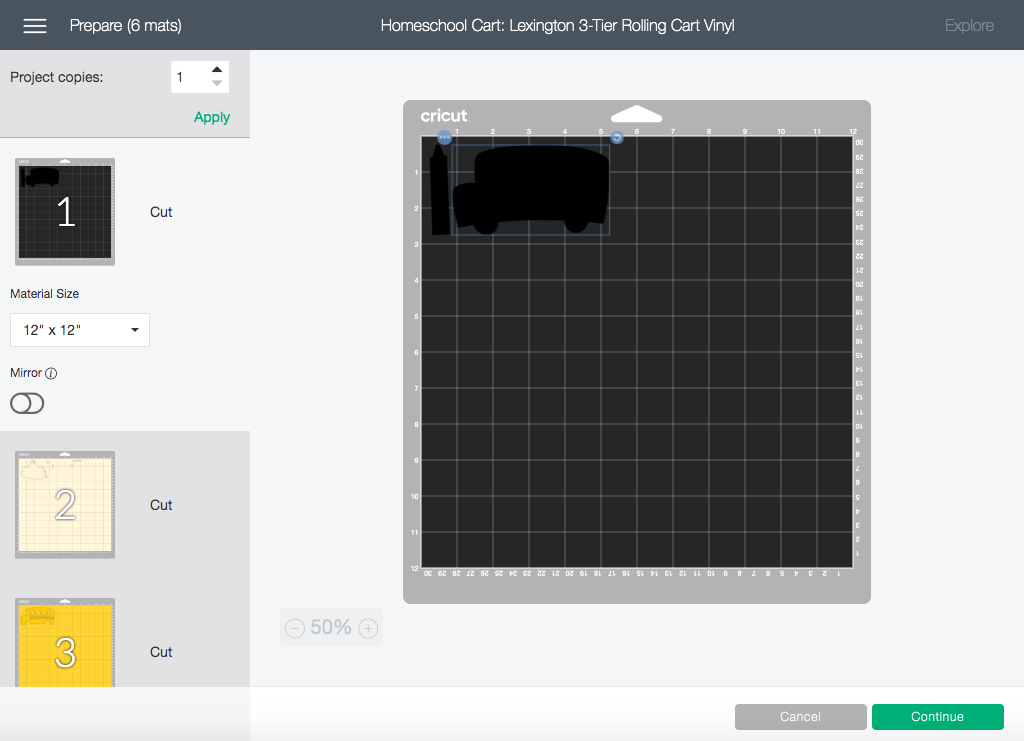
For this design, you will need a subscription to Cricut Access.
Cricut often has some really good sales on the Access membership on their website.
I had Cricut Access, and highly recommend it for the serious Cricut crafter!
Once you cut each color out, layer your designs.
You’ll want to start with the topmost layer.
Transfer the top layer onto the next layer, and so forth.
For the school bus, for example, I started with the tan color for the lights and wheel rims on a transfer sheet and layered those pieces onto the next layer (the yellow bus body).
Then, I layered those pieces onto the blue bus shape, and then onto the black bus outline.
For the books and apple, I started with the topmost layer, which was the apple, and layered that on top of the green, then the blue, then the tan.
And then I transferred the vinyl decals onto the cart itself…
I love the way it turned out!
Access the Design Space canvas with this link, and be sure to tag me on Instagram (@slayathomemother) so I can see your 3-tier Lexington rolling cart creation!

Leave a Reply