

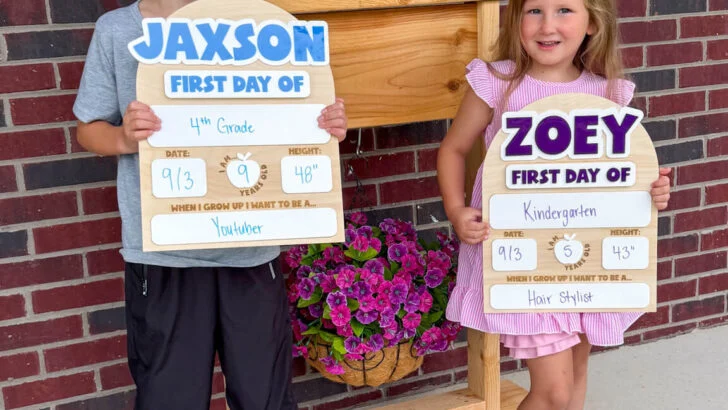
Recreate this DIY first day of school sign with my free SVG file download!

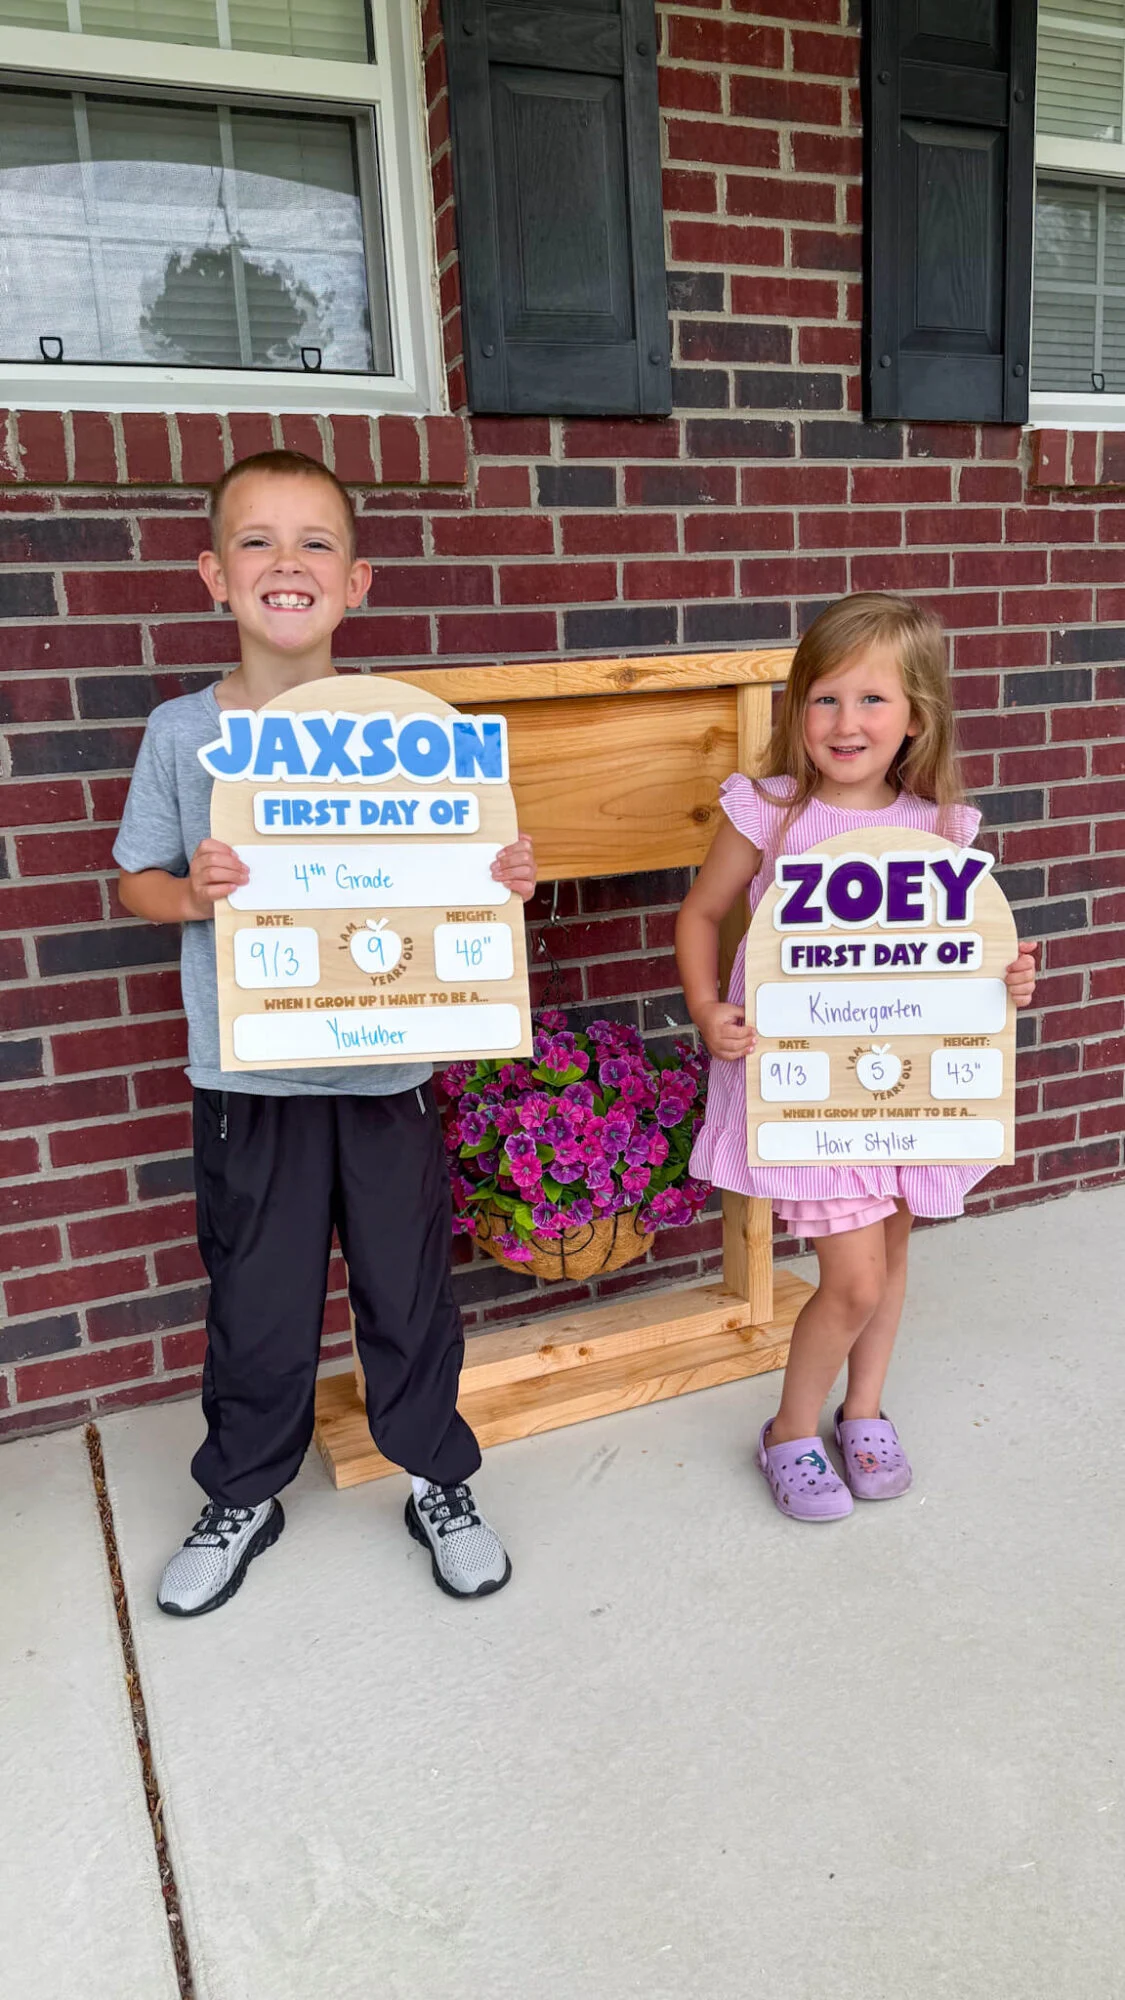
We’re starting our first year of homeschooling for our two littes this year, for Kindergarten and 4th grade.
We’ve been met with a lot of questions, concerns, congratulations, and mixed opinions. But all thoughts and opinions aside, we’re doing it for our own reasons and are loving it so far.
I used to be a big homeschool critic. A big part of that was simply not knowing any different.
Of course, there’s wrong ways to school your children and right ways. We’re lucky enough here to have a strong homeschool community presence and opportunities for enrichment that I am very grateful for.
A mom recently asked me about first day photos and if I would feel my kids were missing out from little things like those photos.
I paused for a second and thought – who said we had to miss out on that? Just because our kids aren’t hopping on a bus this school year doesn’t mean we can’t still take first day pictures!
While I have some signs like this I bought years back, the inside of the sign is made of some type of foam that is getting bent in over the years, so I thought I would go ahead and create our own since I have the material and the machine to get the job done.
If you want to recreate this sign, for homeschool, private, or public school – all are welcome here!) I have a quick sign up form at the bottom where I can send you the free SVG file.
This post may contain affiliate links, however, all opinions are my own, as always.
Materials Needed for this DIY First Day School Sign
Here’s what I used to make these signs, although please feel free to tweak colors and supplies.
If you have a CO2 laser, the settings will differ for you as well as my settings shown in this post are for my RF laser. It’s recommended that you run a test sheet for scoring/engraving/cutting for your laser so you have some go-to settings for the different materials.
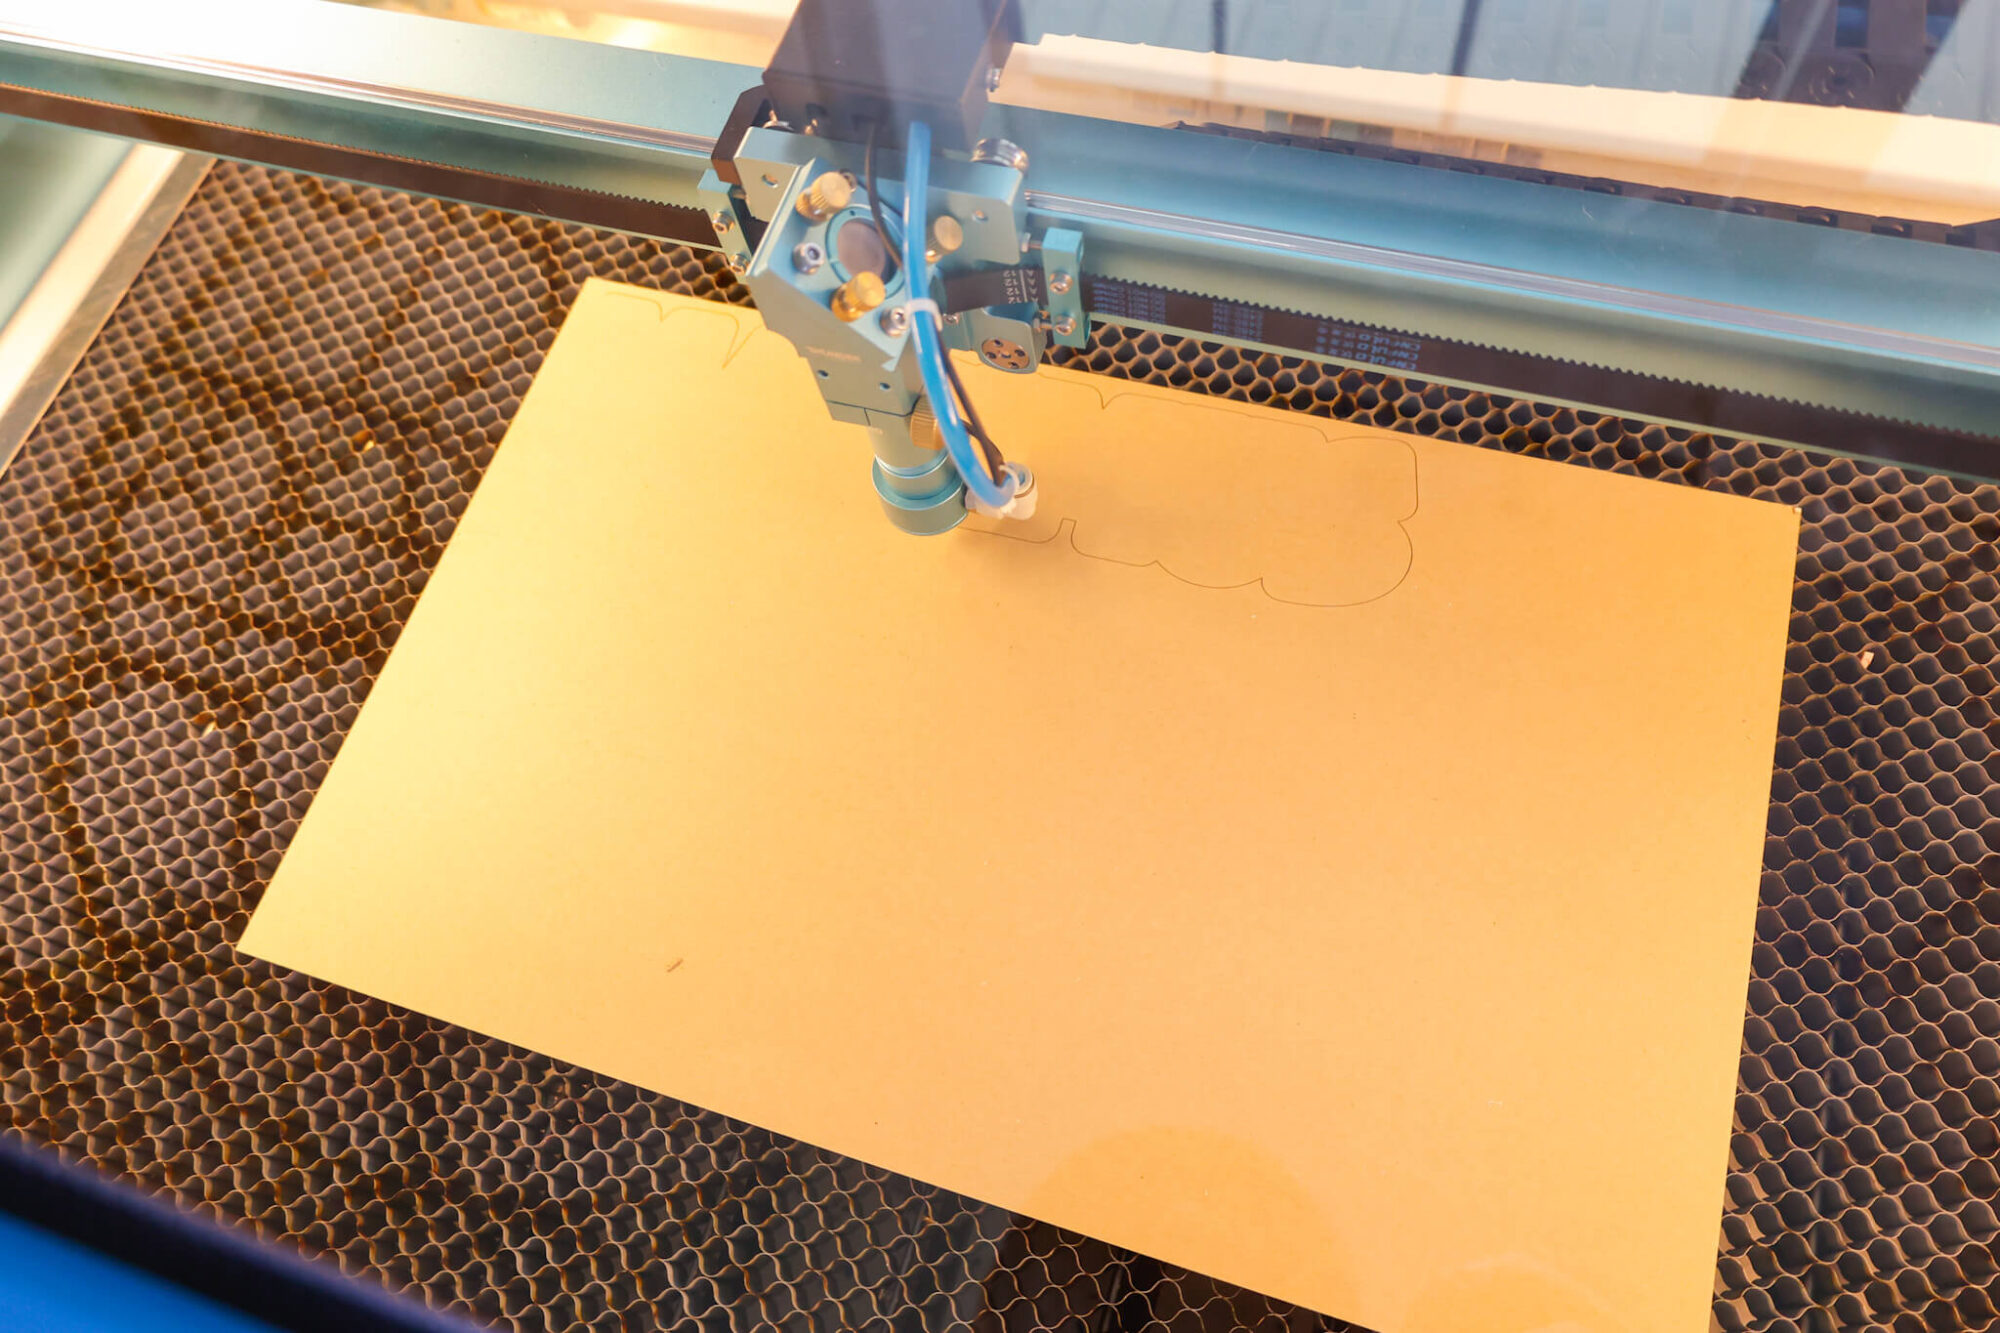
- 3mm baltic birch (i use the 24″x36″ size here, which fits my laser honeycomb bed – use code SLAY to save 10% off your order)
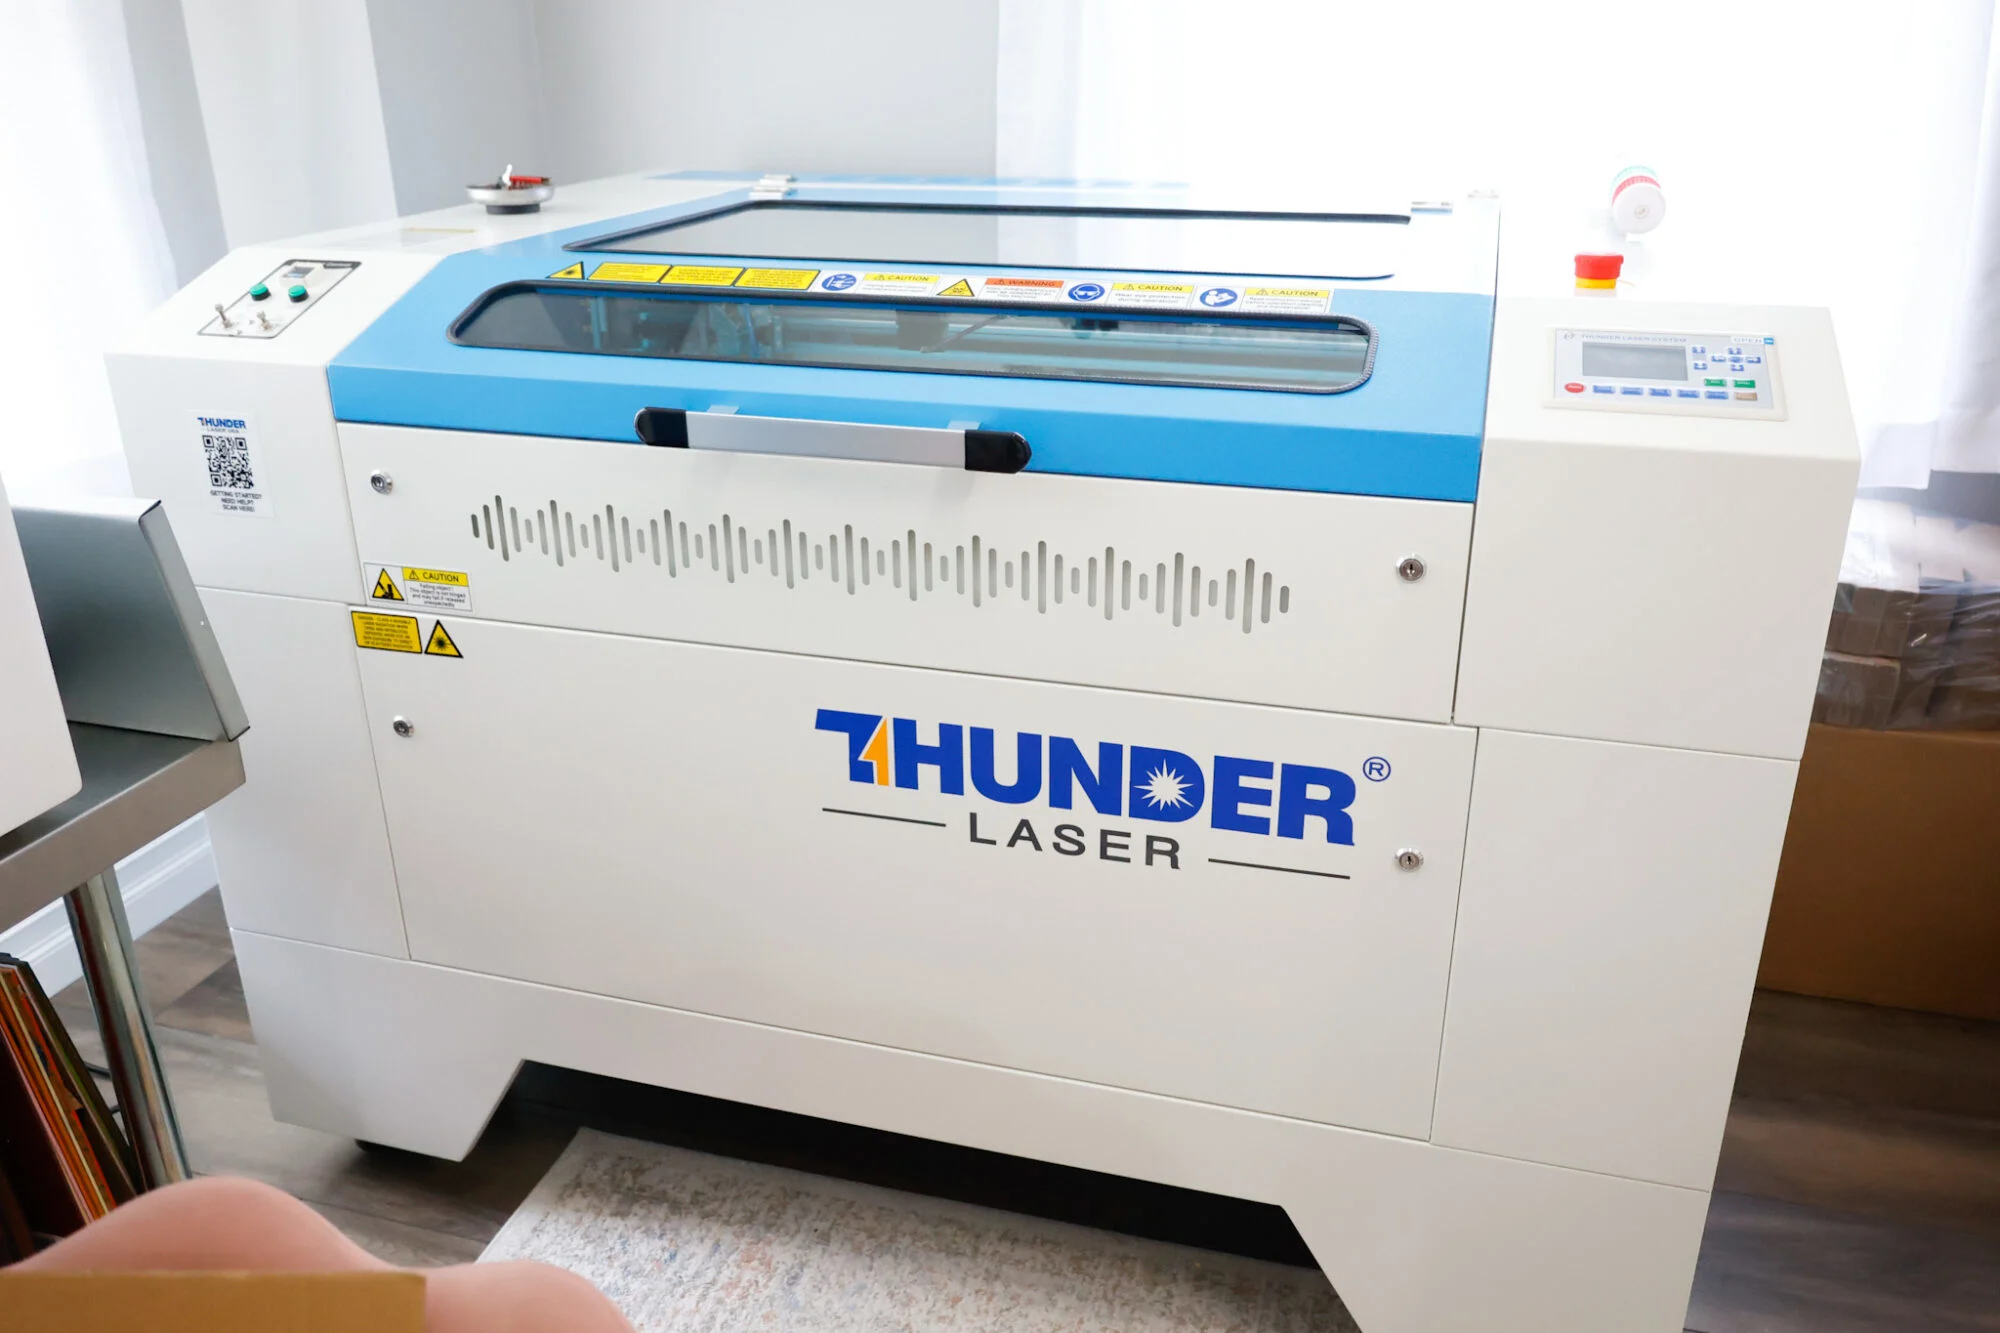
- Thunder Nova Plus 35W laser cutting and engraving machine (or like machine)
- 1/8″ gloss white acrylic (can also use whiteboard)
- 1/8″ acrylic in colors of your choice for lettering
- sanding block
- dry erase markers
- Starbond med glue
Matte white acrylic is not recommended as a gloss finish helps with ease of writing and wiping away, but matte acrylic can hold onto the pigment and increase the chances of marker smearing on the acrylic.
My Laser Machine
If you’re new to lasering and looking at getting a laser cutting and engraving machine, here is mine!
I own two high powered laser machines, the Thunder Bolt RF 30W and the Thunder Nova Plus RF 35W.
In this project, I’m utilizing the Nova Plus 35W, which is a workhorse laser machine – read the specs here.

You can design one of these signs yourself in Lightburn if you choose, or you can download my free SVG file for this project at the bottom of this post.
In the file download, I’ve included a 1″x1″ square for sizing accuracy. Feel free to skip cutting/engraving that square.
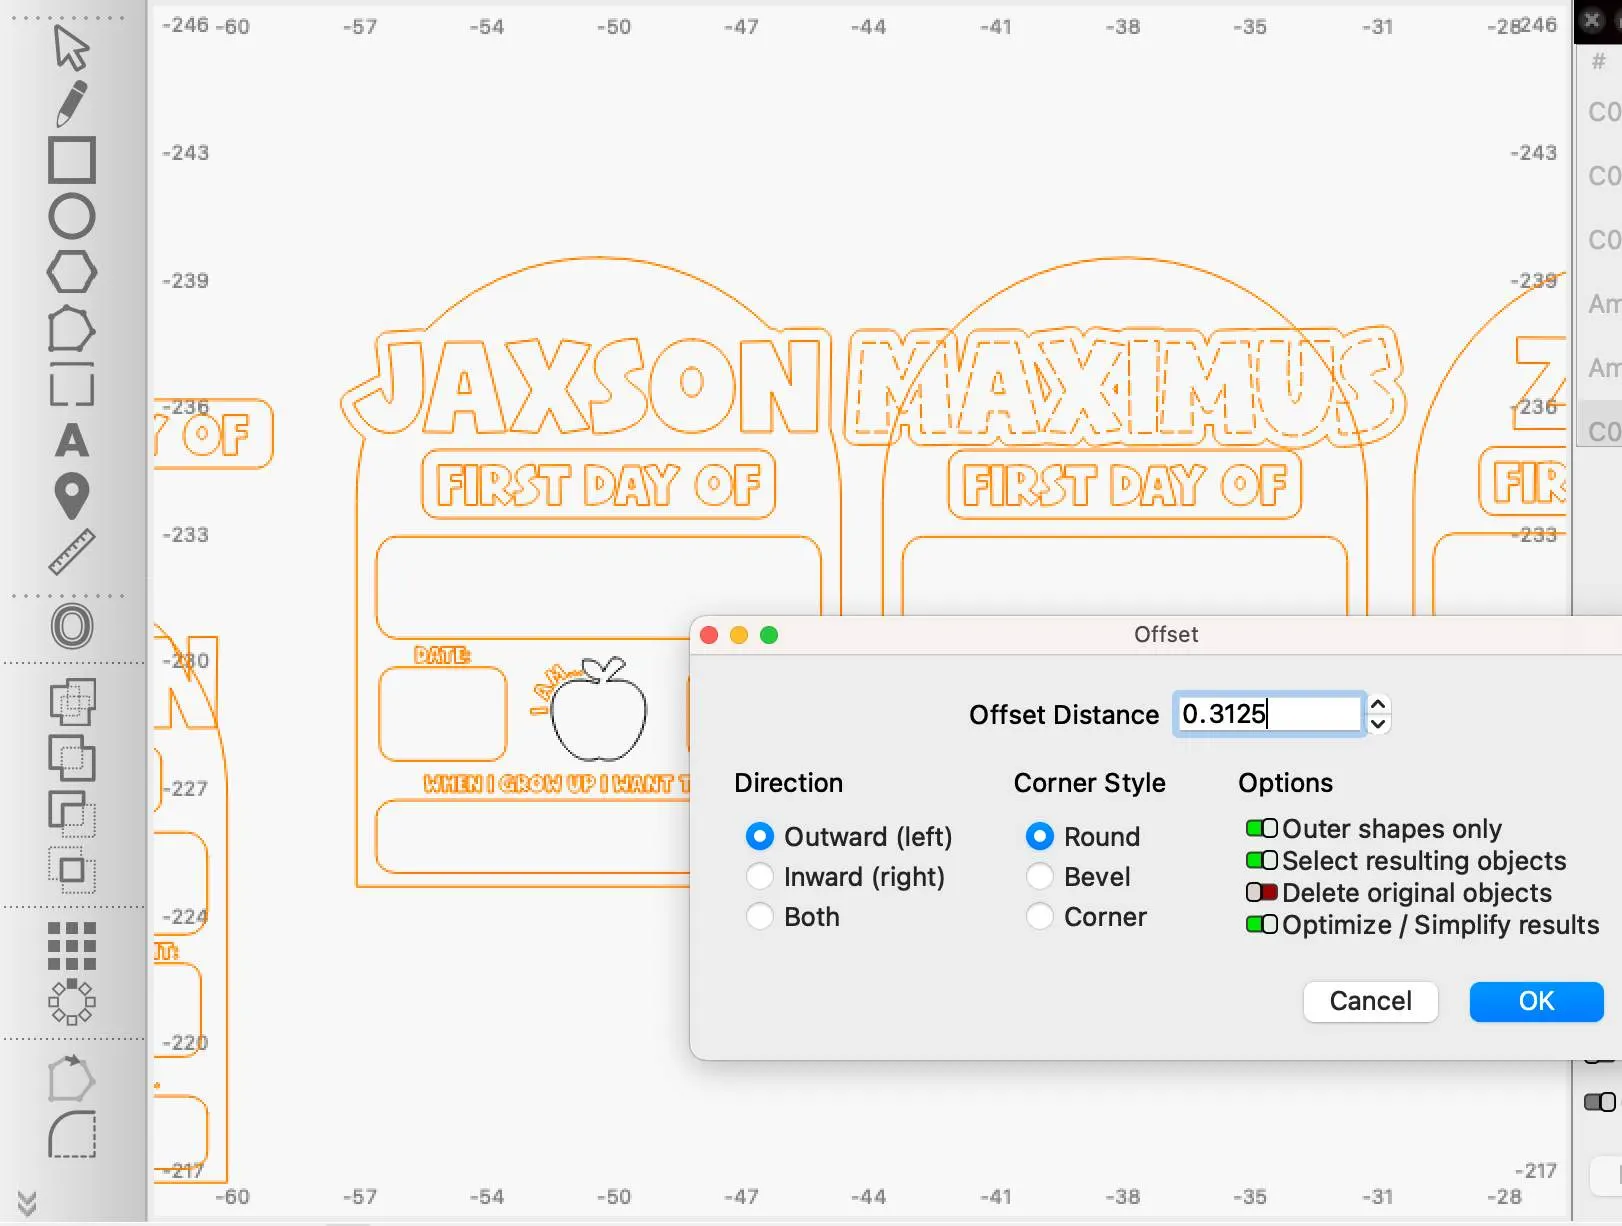
In designing this sign, I wanted to create sections where I could write things on. Using the square icon at the left hand side of the screen in Lightburn (you can see is in the screenshot below as the third icon from the top, pictured as a square right below the pencil icon).
School Sign Laser Cutting and Engraving Settings
Here are the settings I used for this project:
Scoring: 40 speed / 25% Power Max, 5% Power Min, 0.085 Interval, 1 Pass
Cutting: 8 speed / 65% Power Max, 65% Power Min, 0.085 Interval, 1 Pass
Engraving: 250 speed / 20% Power Max, 1% Power Min, 0.100 Interval, 1 Pass
How To Design This First Day School Sign
My finished sign, as a reference, is 12″ W x 15.5739″ H. I find this to be a great size for all kids to use and hold.
For this design, I created all the elements except for the apple outline (which is from Canva) inside Lightburn.
Once I inserted my squares, I rounded the corners using the icon on the left hand of the screen at the very bottom.
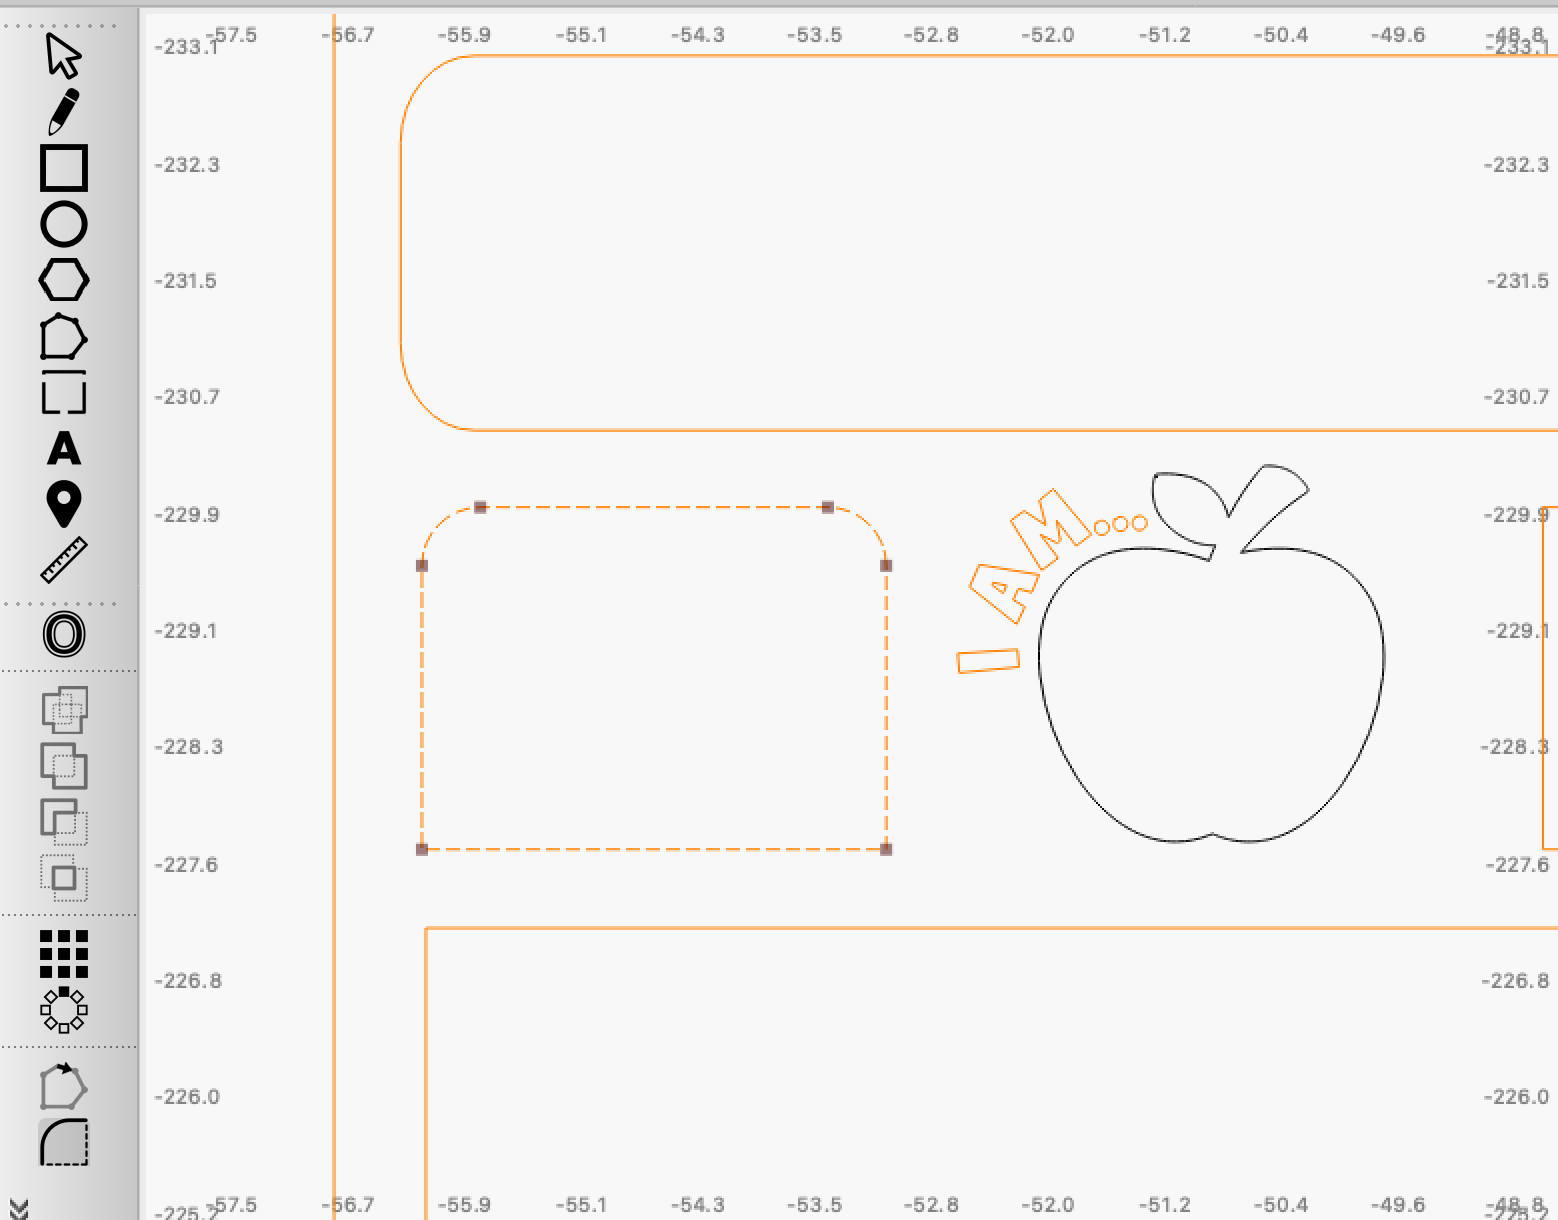
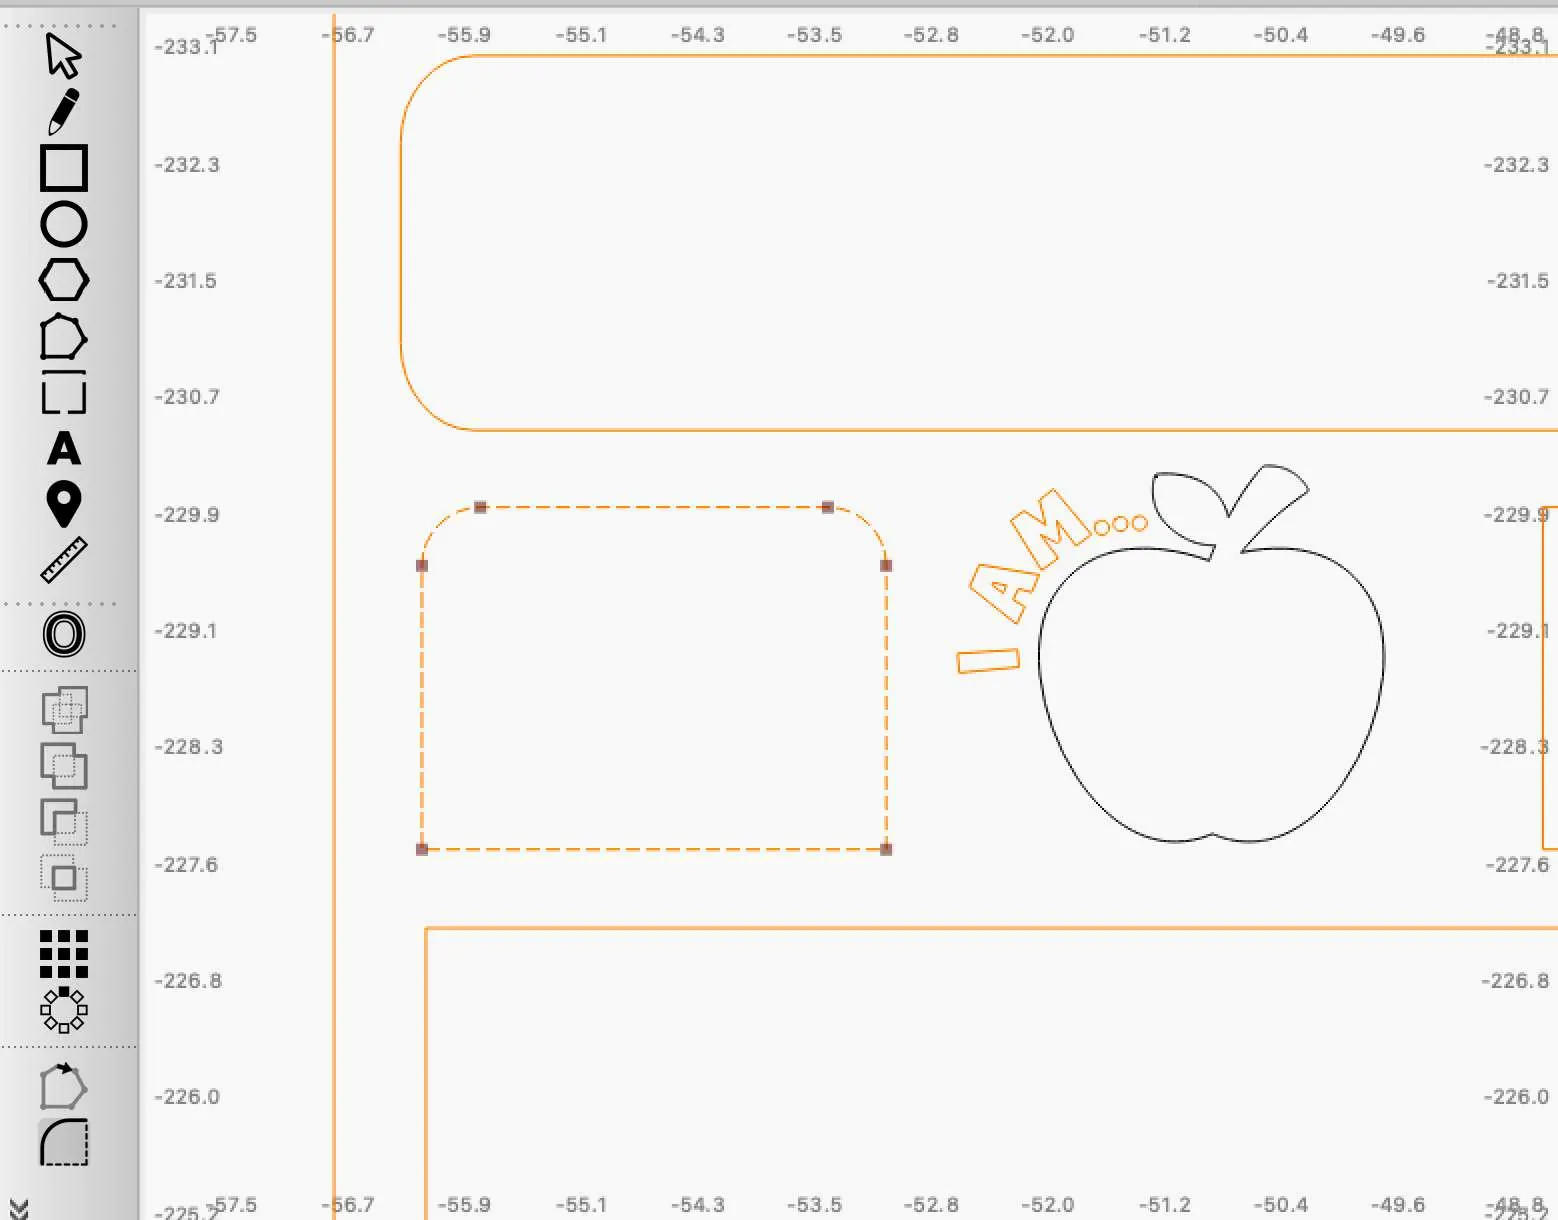
You can click on that ’rounding corners’ icon and then click on the corners you’d like to round. In the screenshot above, you can see that I’ve rounded the top two corners of that shape so far. I wanted to include this screenshot so you could see what difference rounding the corners makes.
You can also skip this step completely.
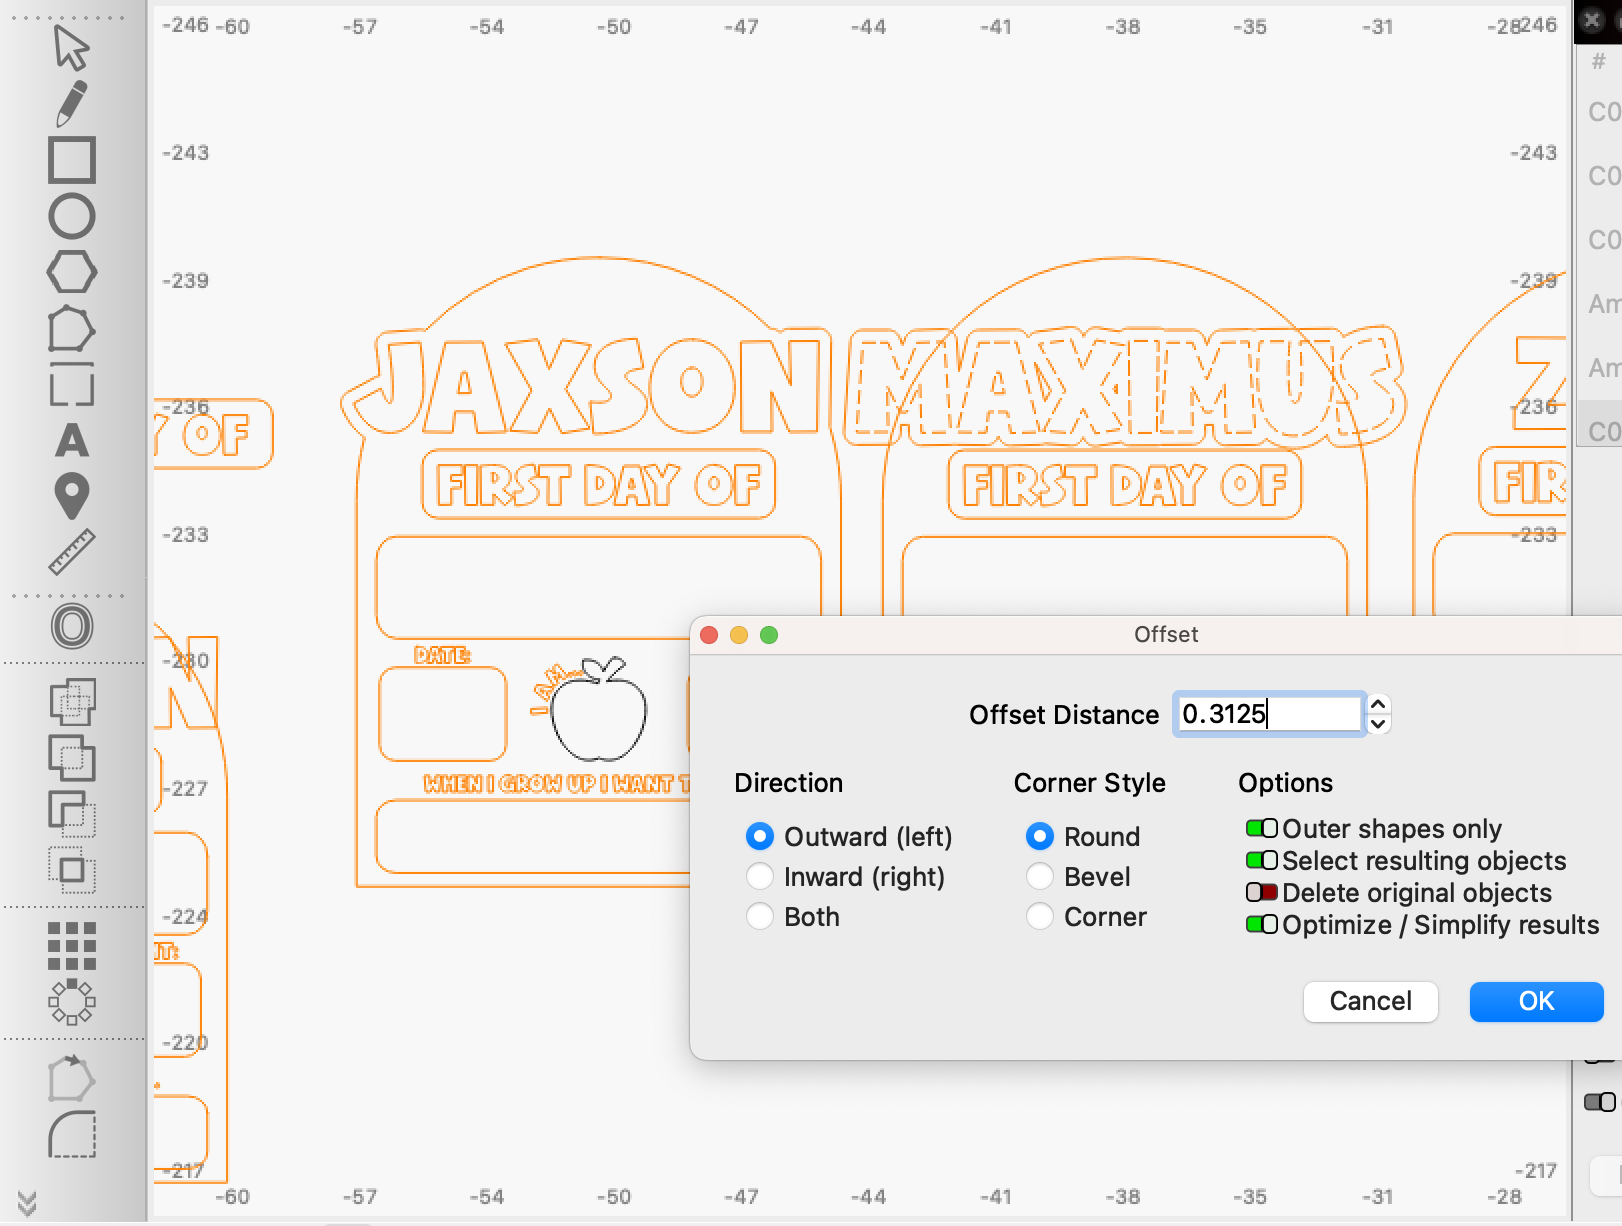
For the names on your First Day of School Signs, I wanted to include our children’s names at the top, but make they stand out a bit from the overall shape.
Of course, you can design this any way you like, but I oversized the name for ours, and created an offset.
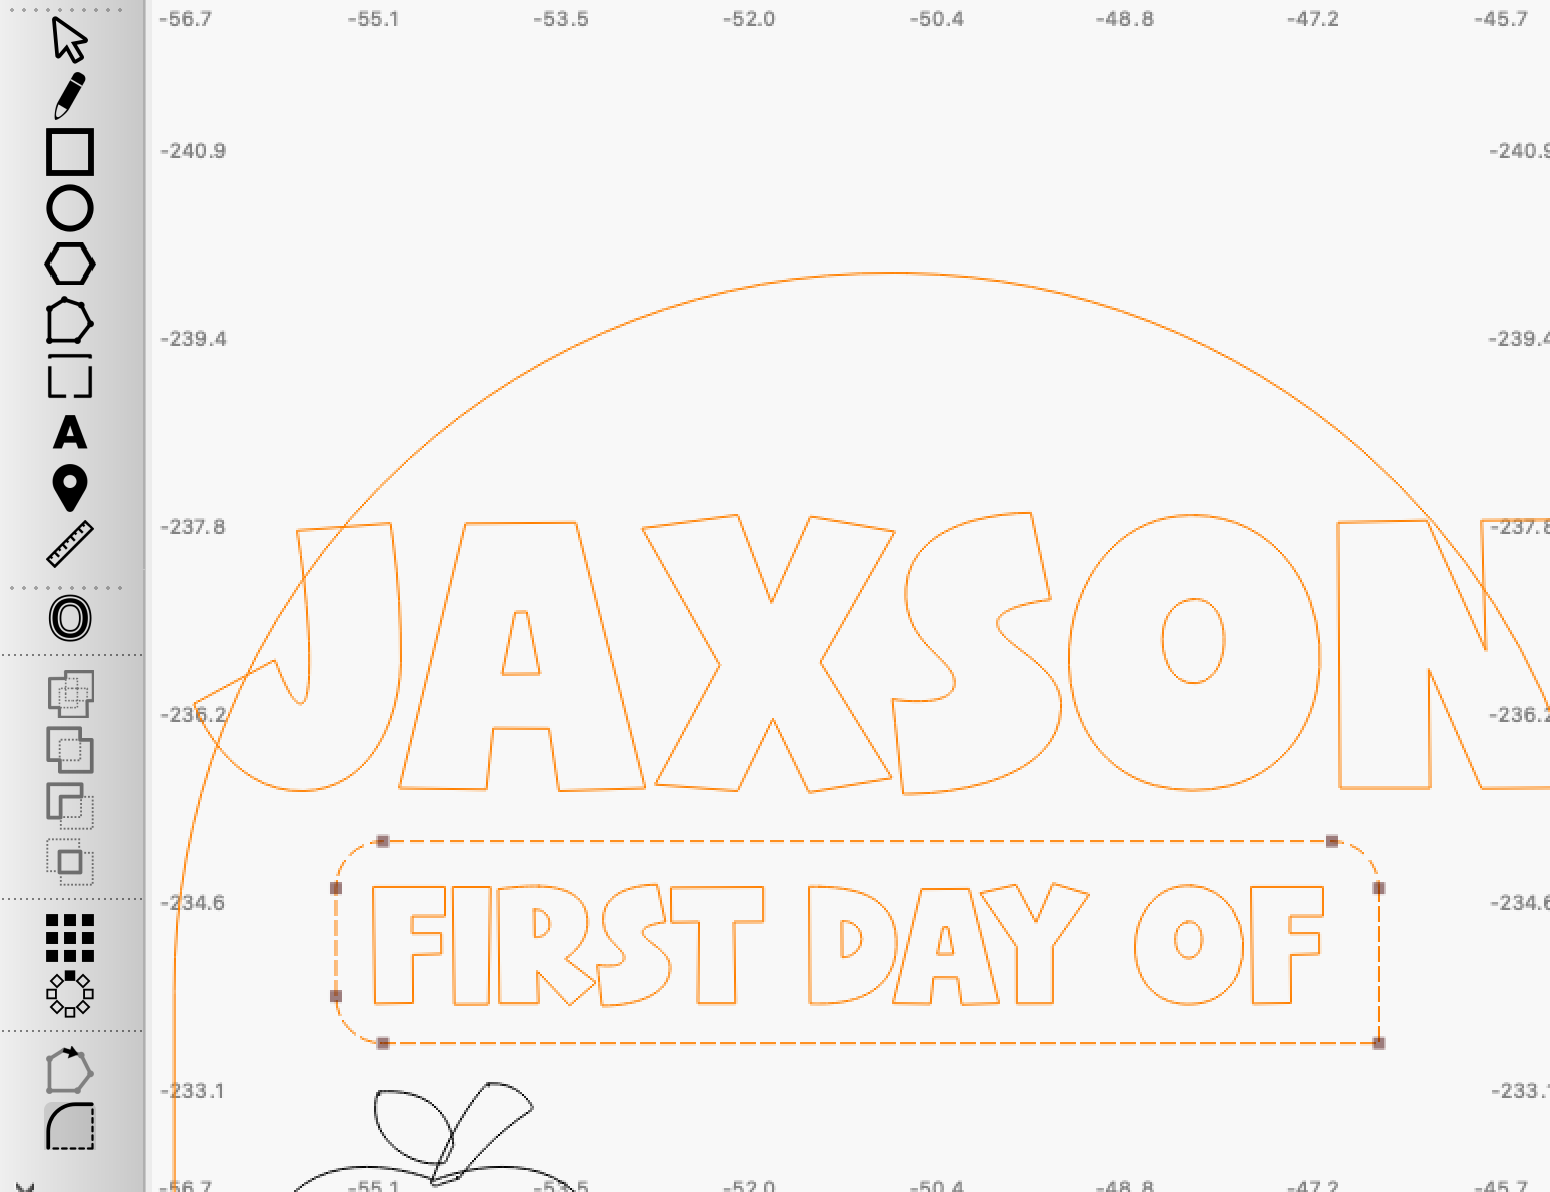
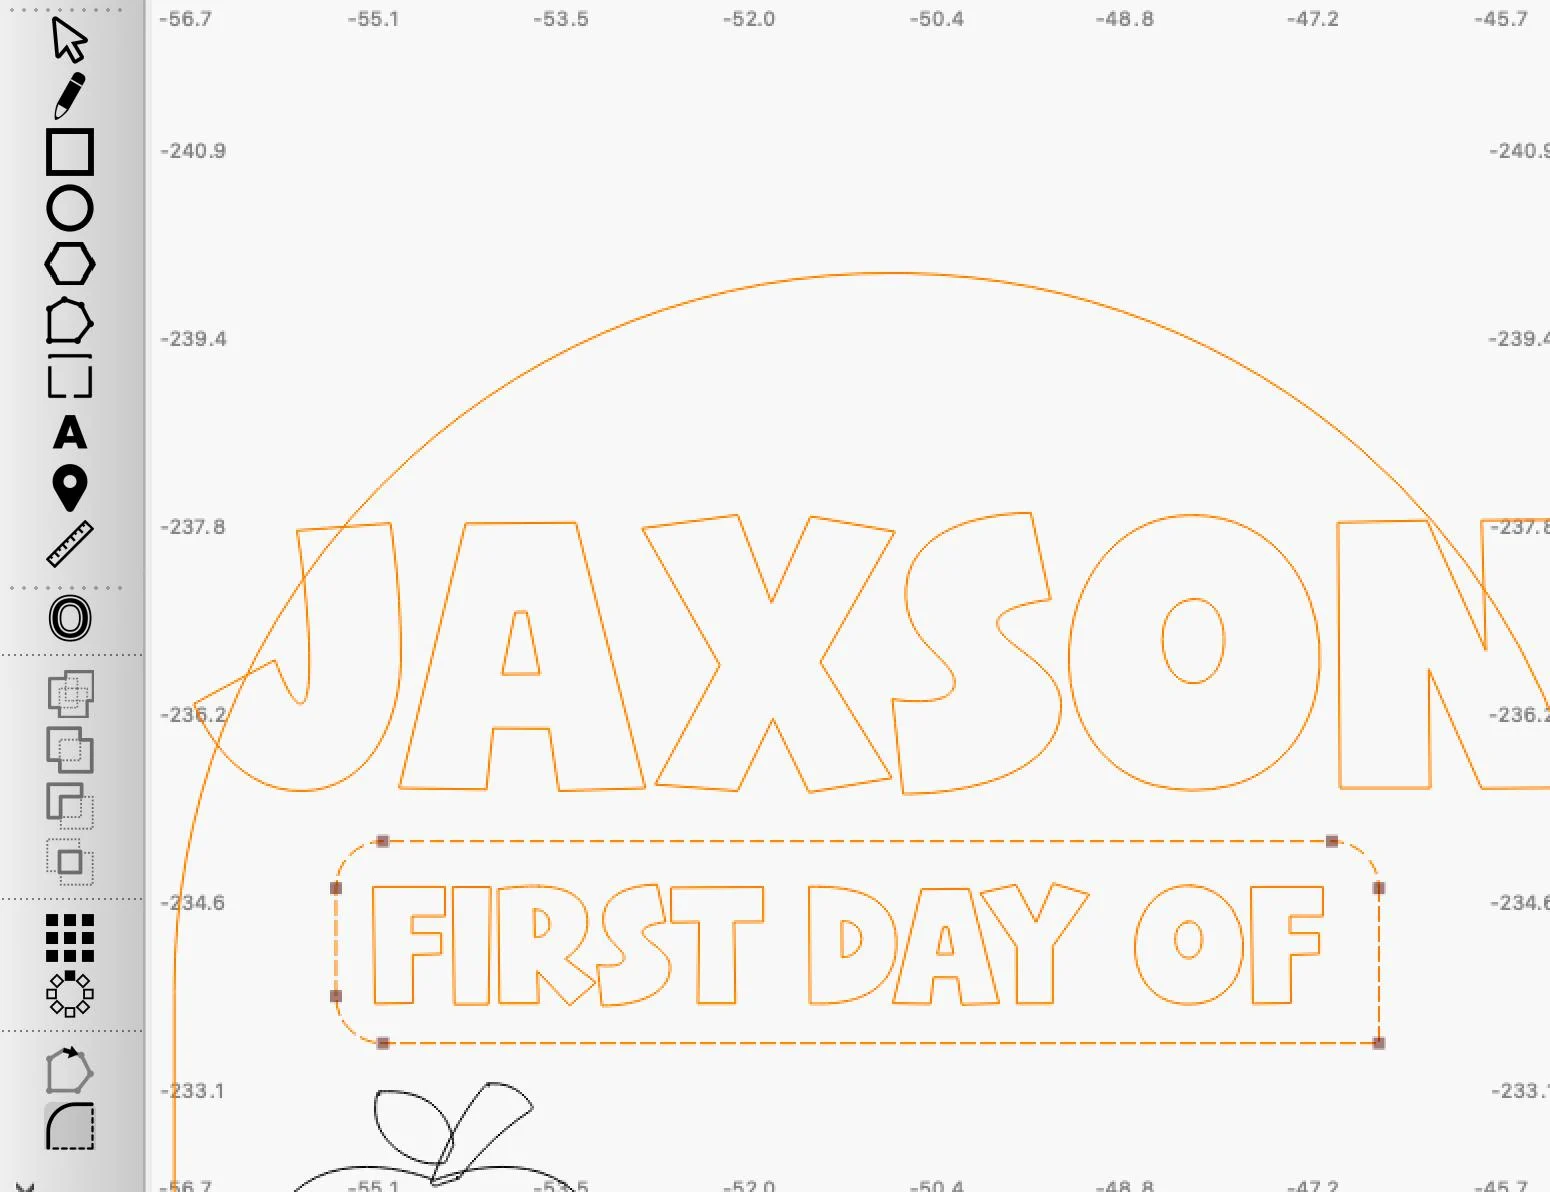
In the screenshot below, I’ve included my offset distance settings for the names.
The text on the sign (Date:, When I Grow Up I Want To Be, etc) is engraved as I found that would be the best time-saving option for this project vs. cutting out and gluing individual letters.
I also scored the outlines of squares where the white gloss acrylic will sit, using an inward offset of .0050 like I did in this project. This scored line creates a way for me to discretely line up shapes to sit where I want them to while still hiding the outlines.
My Thunder Nova Plus 35W cut and engraved 2 of these signs in roughly ~30 minutes.

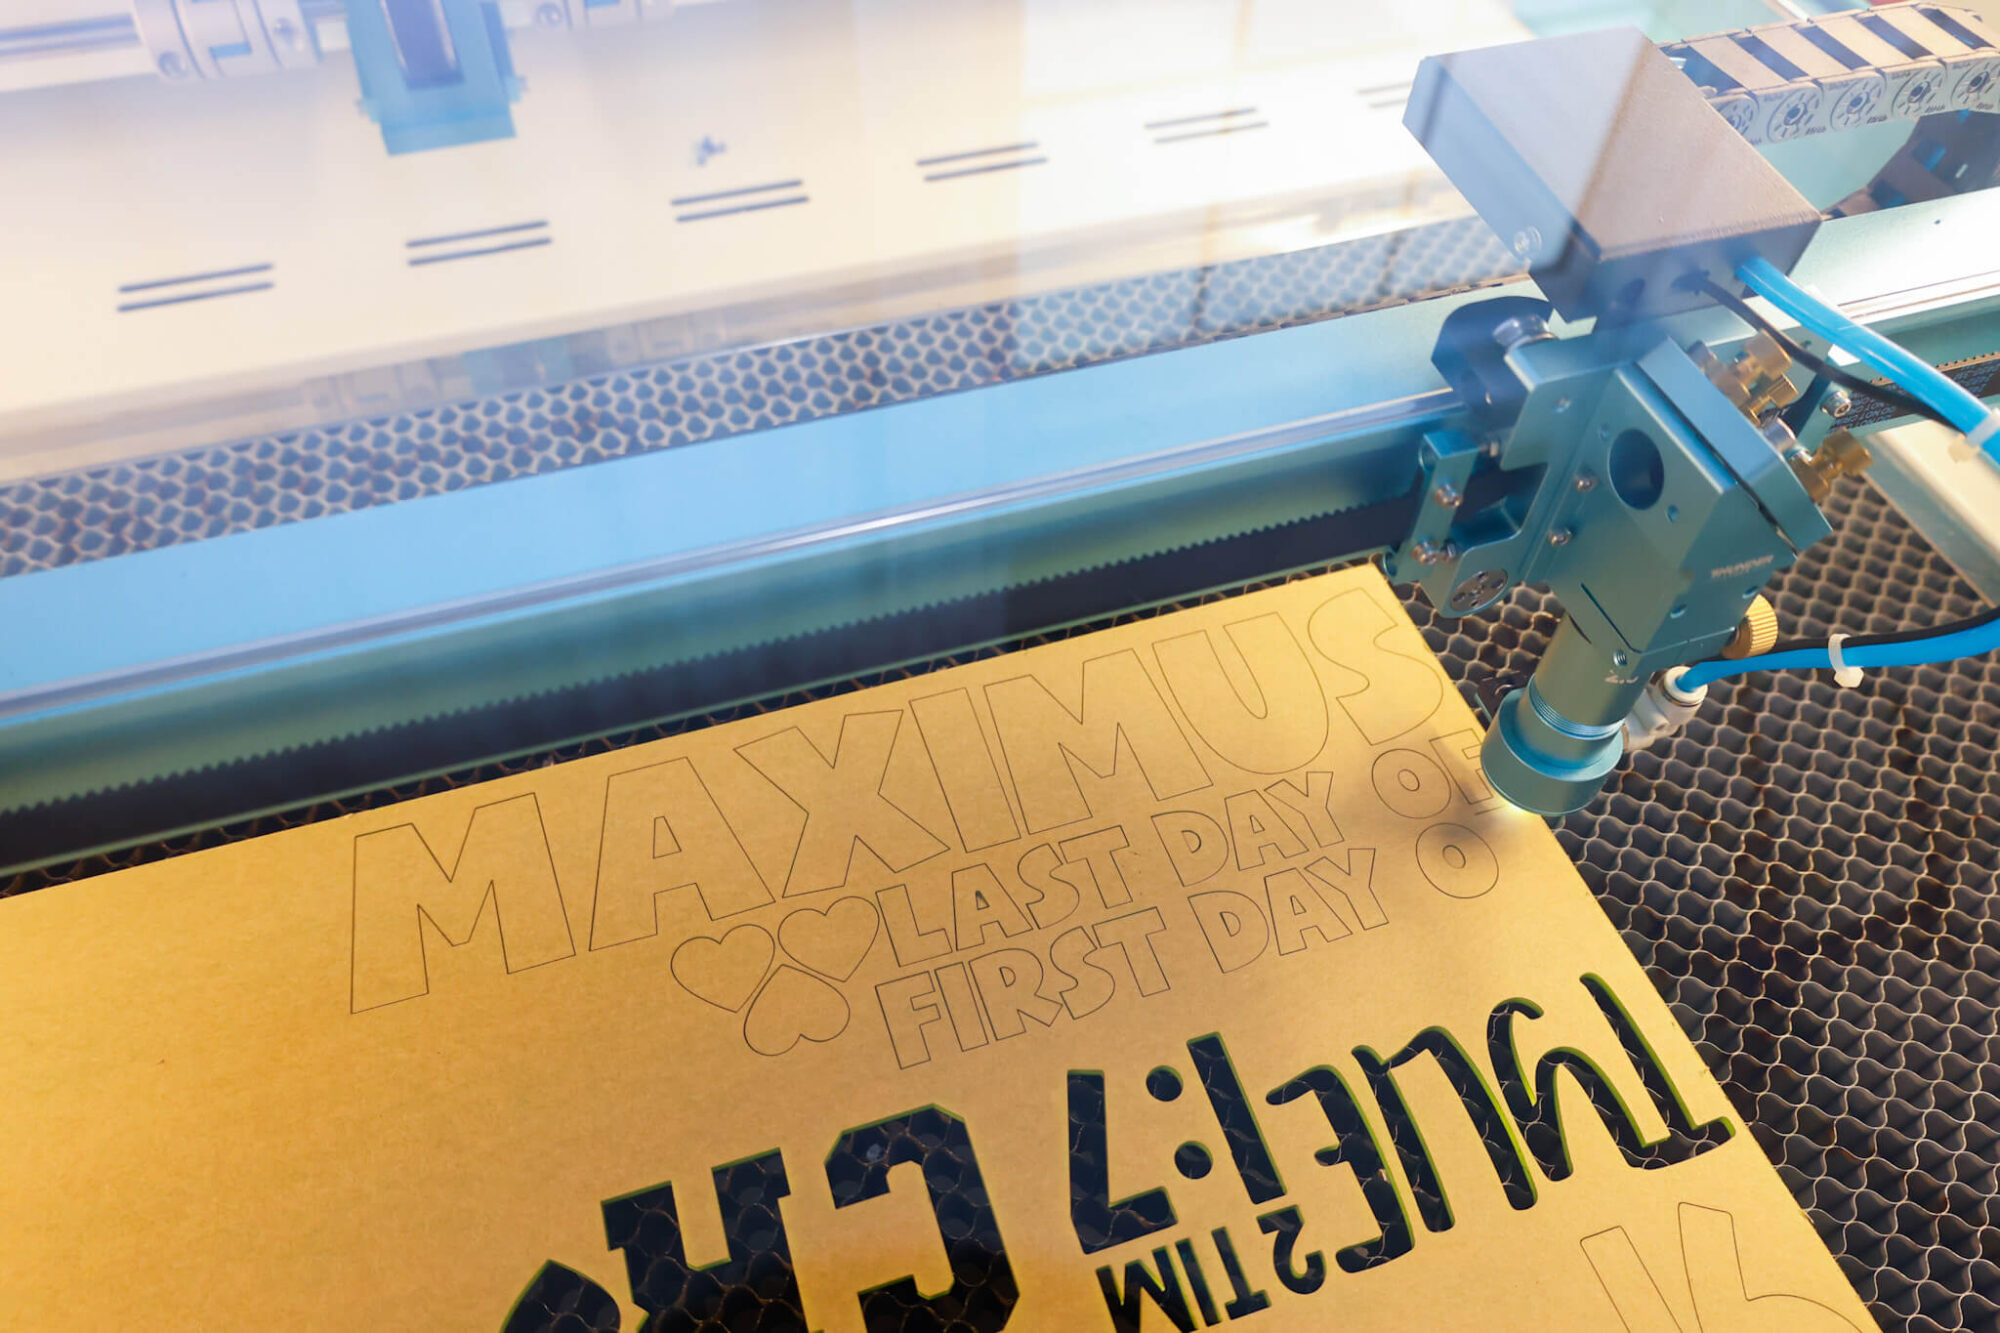

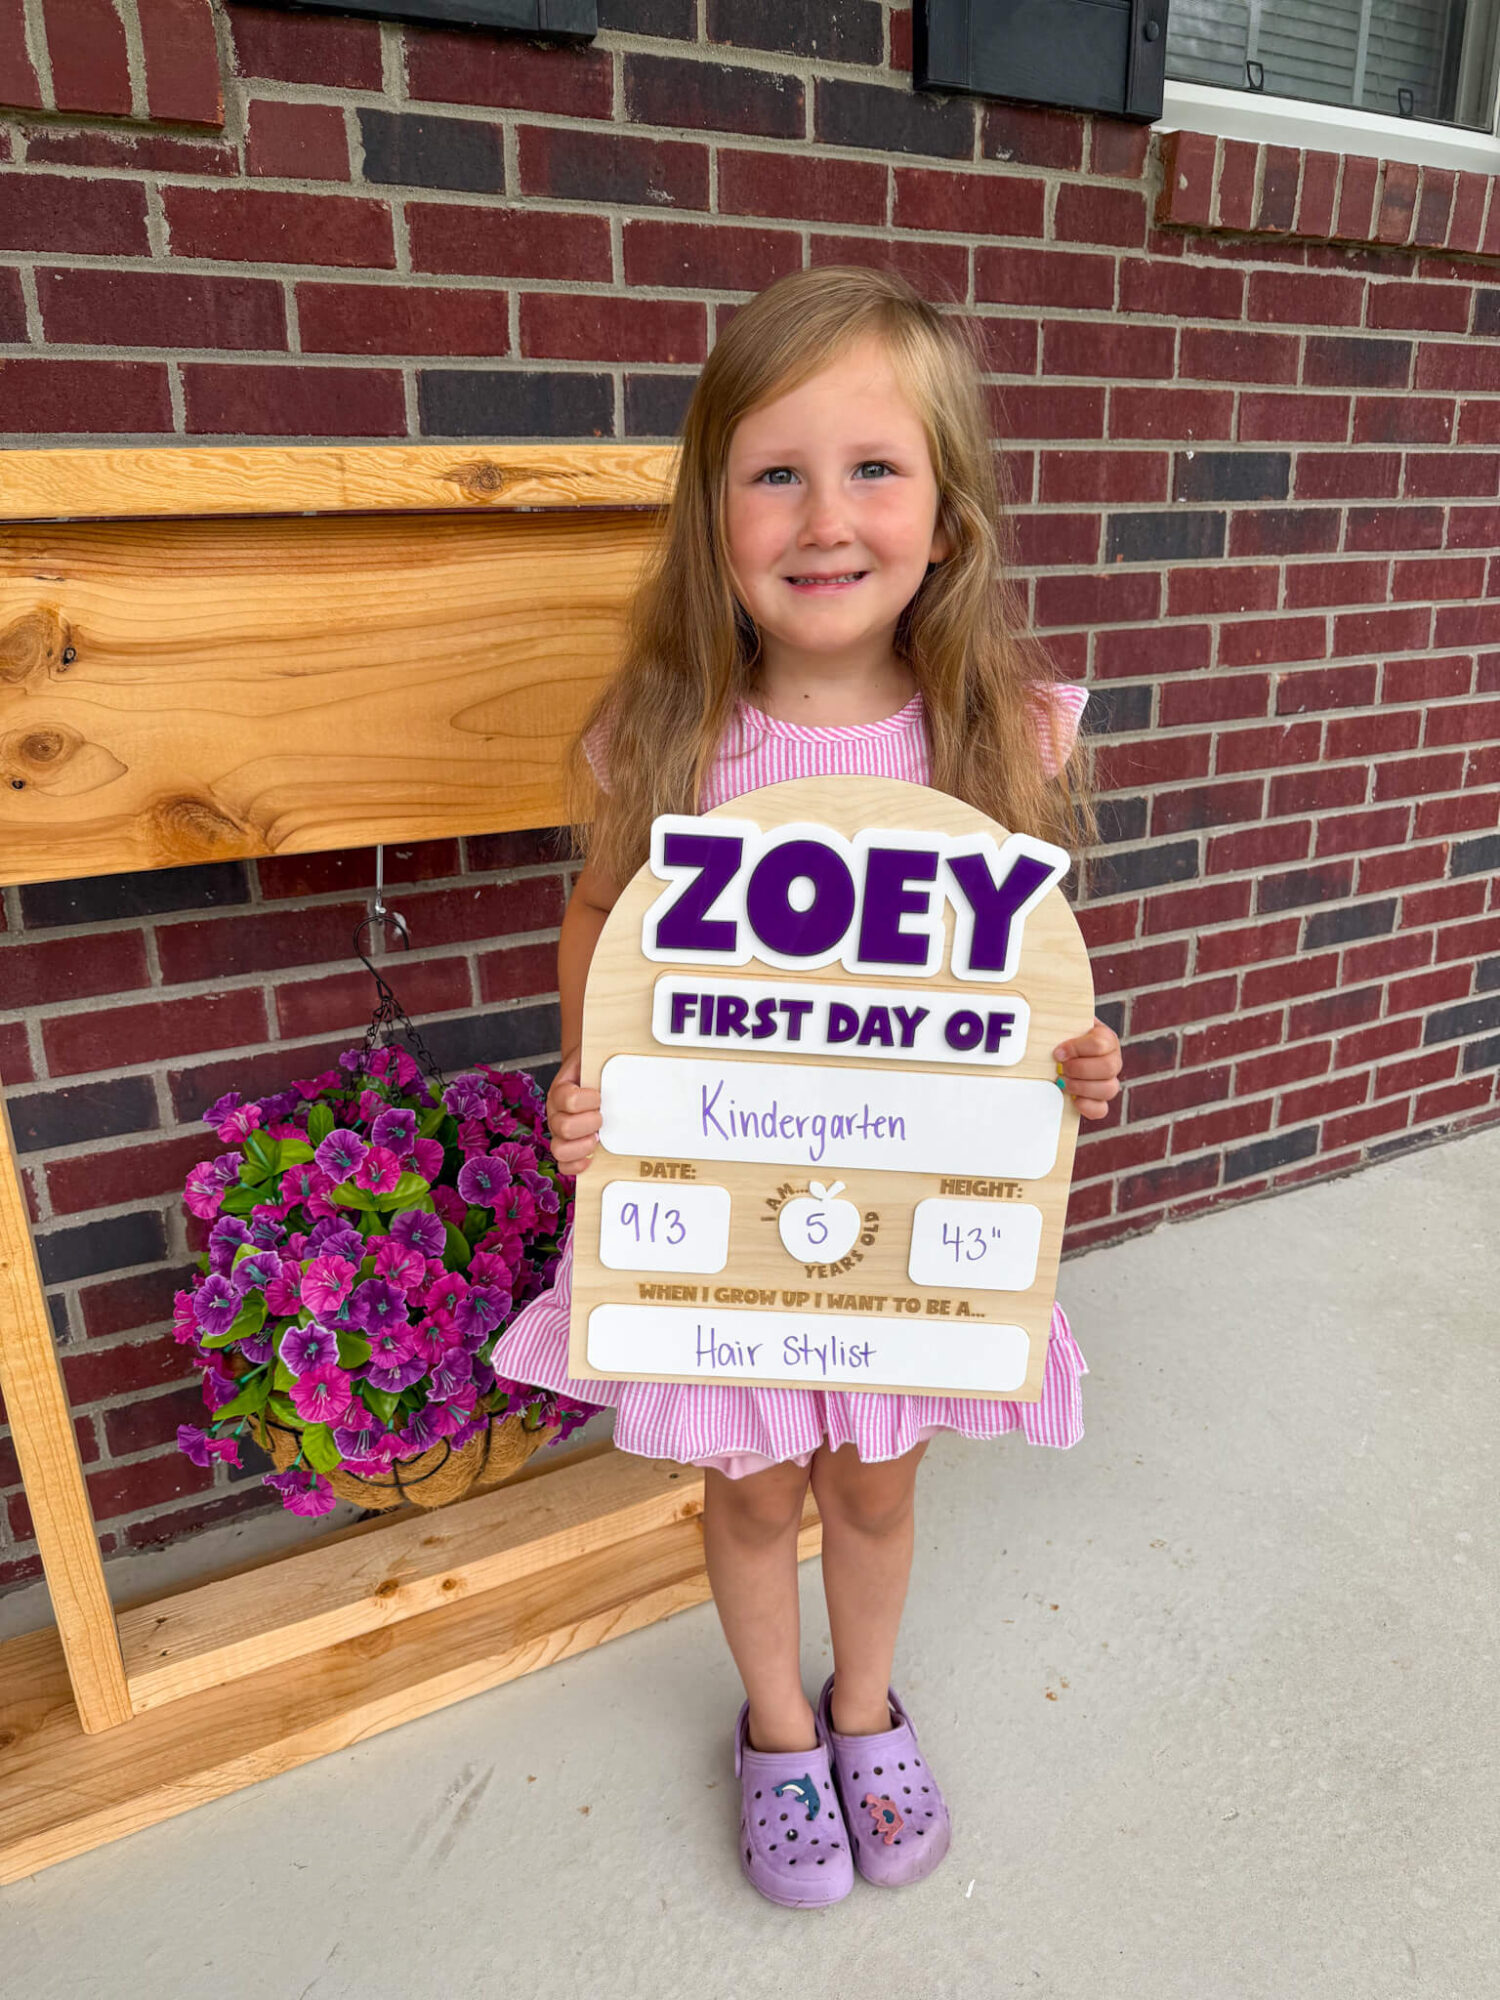
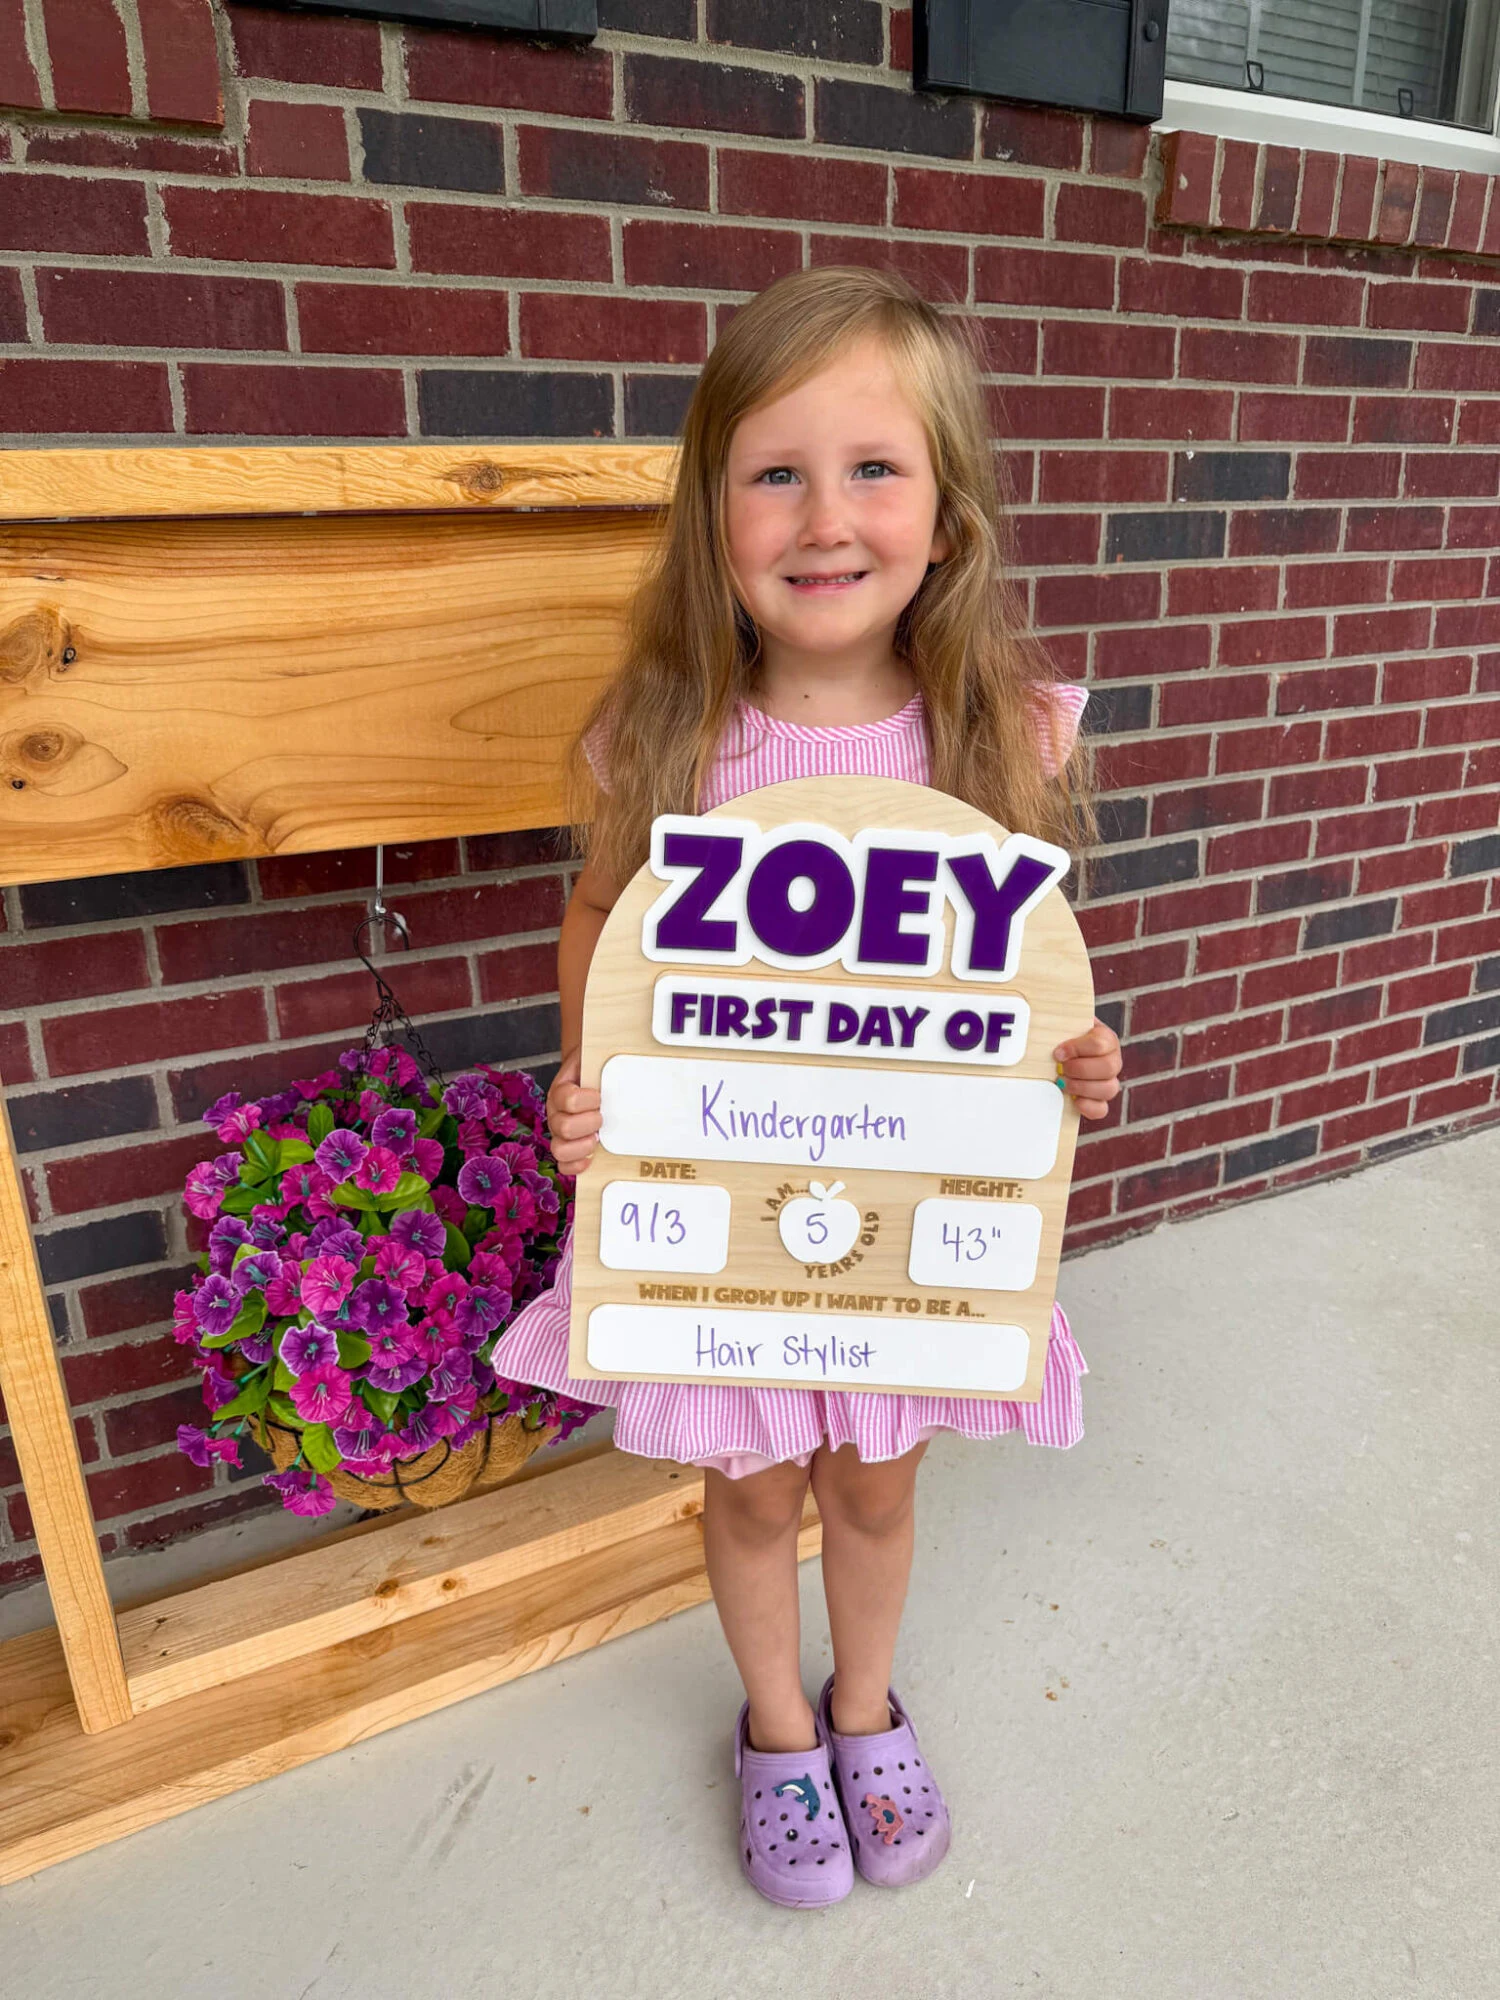
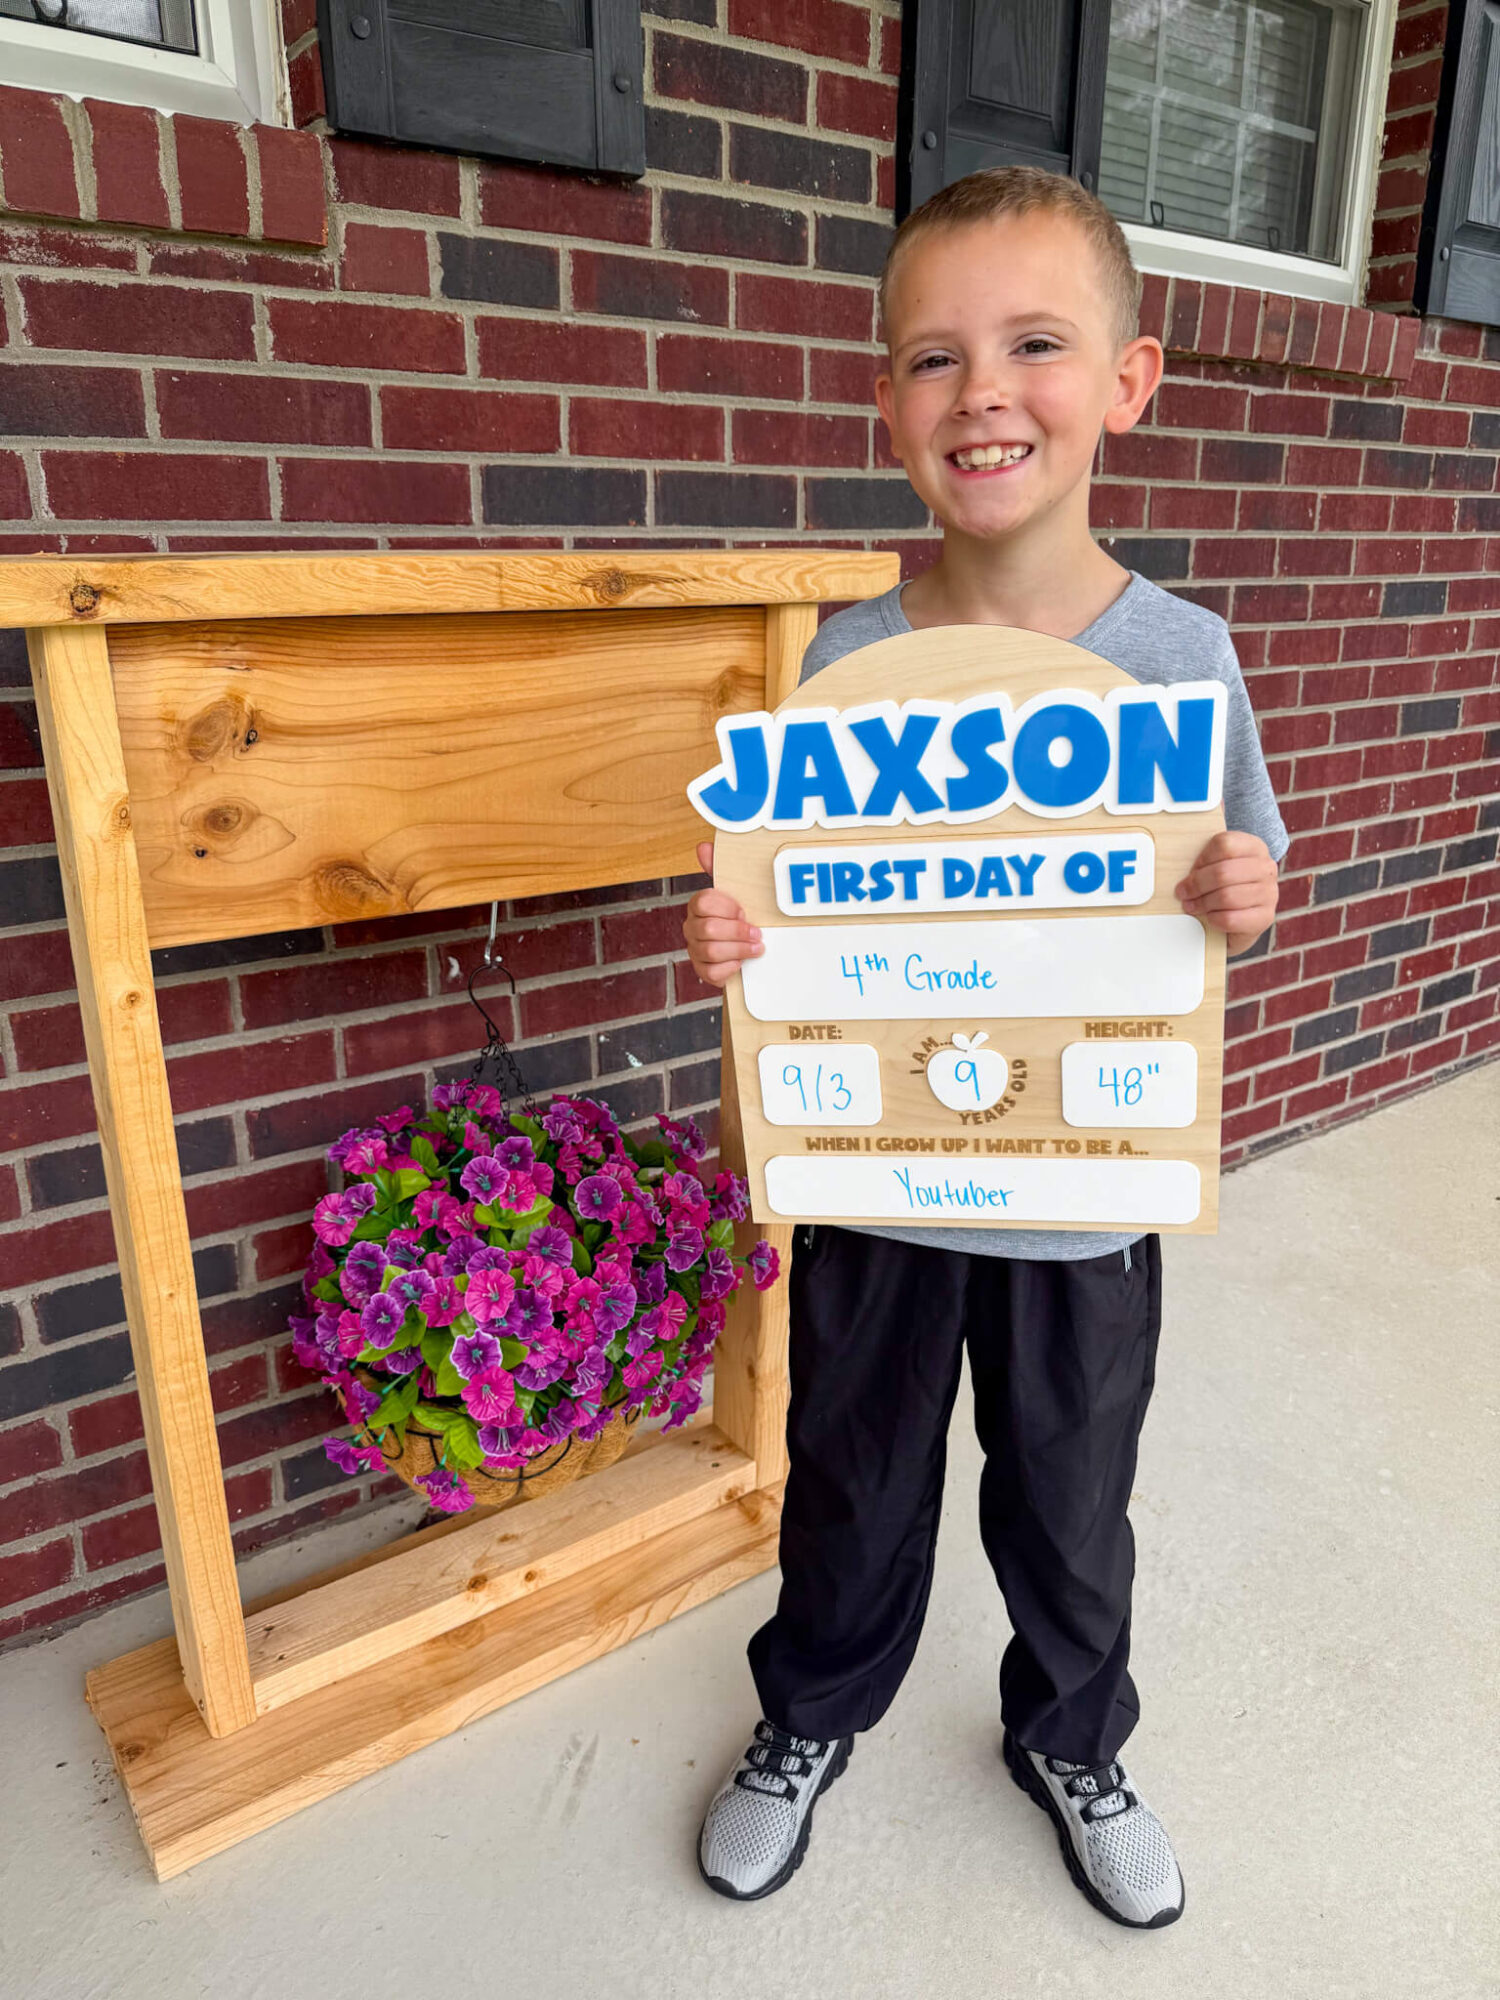
For each of our kids, I worked with their favorite color (Zoey – purple, Jaxson – Blue, Max – green).
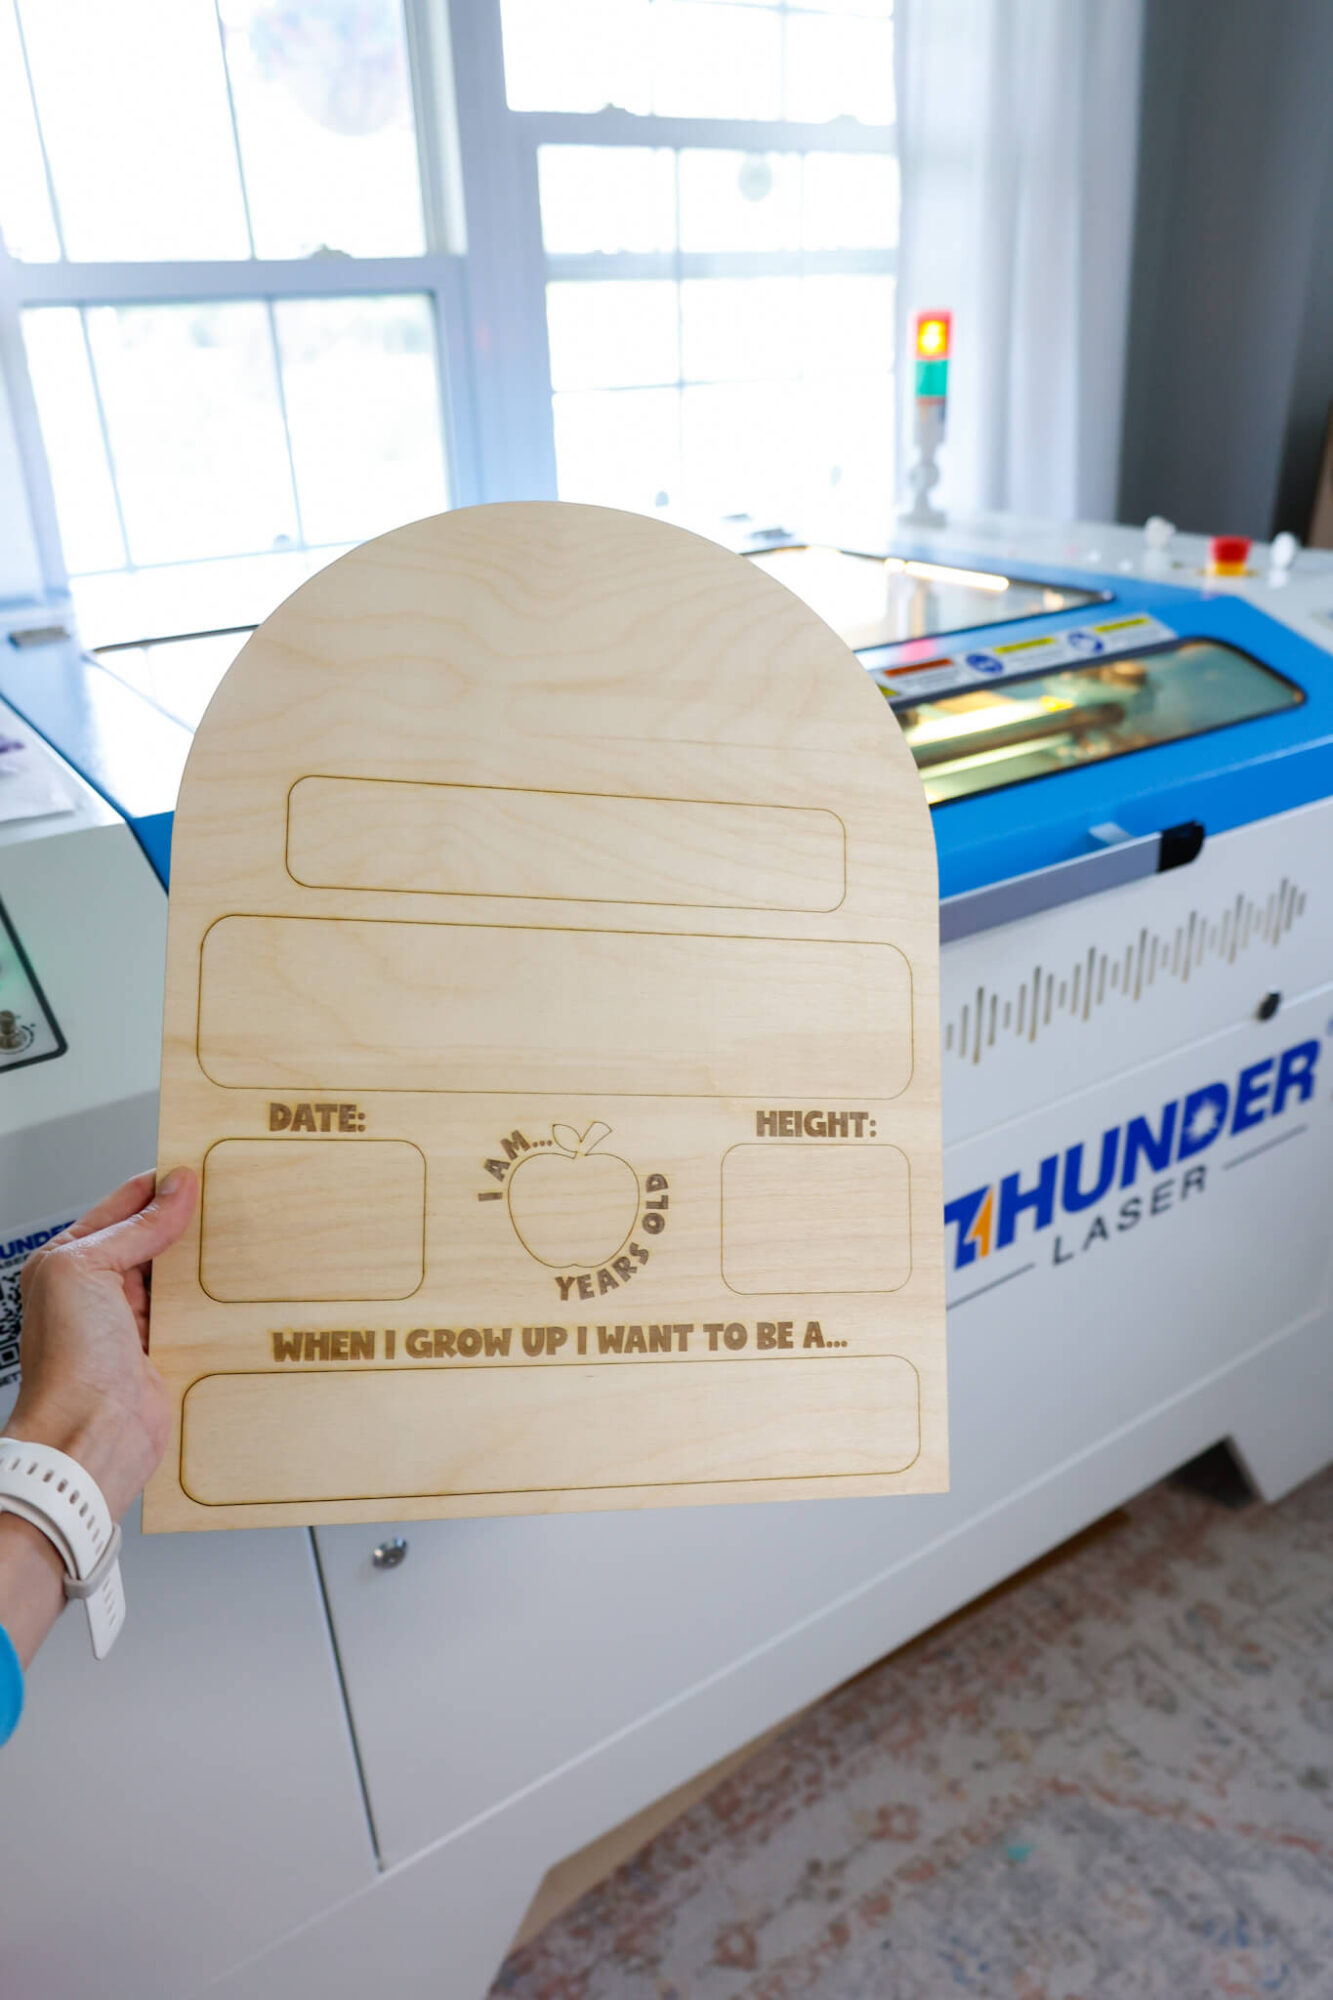

After engraving, I used a sanding block (I think it was about 80 grit?) to polish up the engraving afterwards.
To adhere the acrylic to the wood sign, I use this glue – it great for sticking acrylic to wood with ease, and sets up in about a minute.
For the ‘First Day of’ and ‘Last Day of’ parts of the sign, I decided to try using some little magnets I had on hand so I could just switch out that part of the sign and it turned out great!
I used the same glue for these magnets as well. To line them up perfectly, I worked in stages where I placed the magnets together, placed a tiny amount of glue on one end and stuck it to the acrylic. When that dried, I put glue on the other magnet (with it still attached to a magnet and acrylic) and stuck it down onto the wood and let it dry.
The white gloss acrylic makes it so that we can write with dry erase markers and just wipe off the writing after we use it so it’s ready for the next milestone photo.
Love how these turned out, and how easy it was to make our own on our Thunder laser.


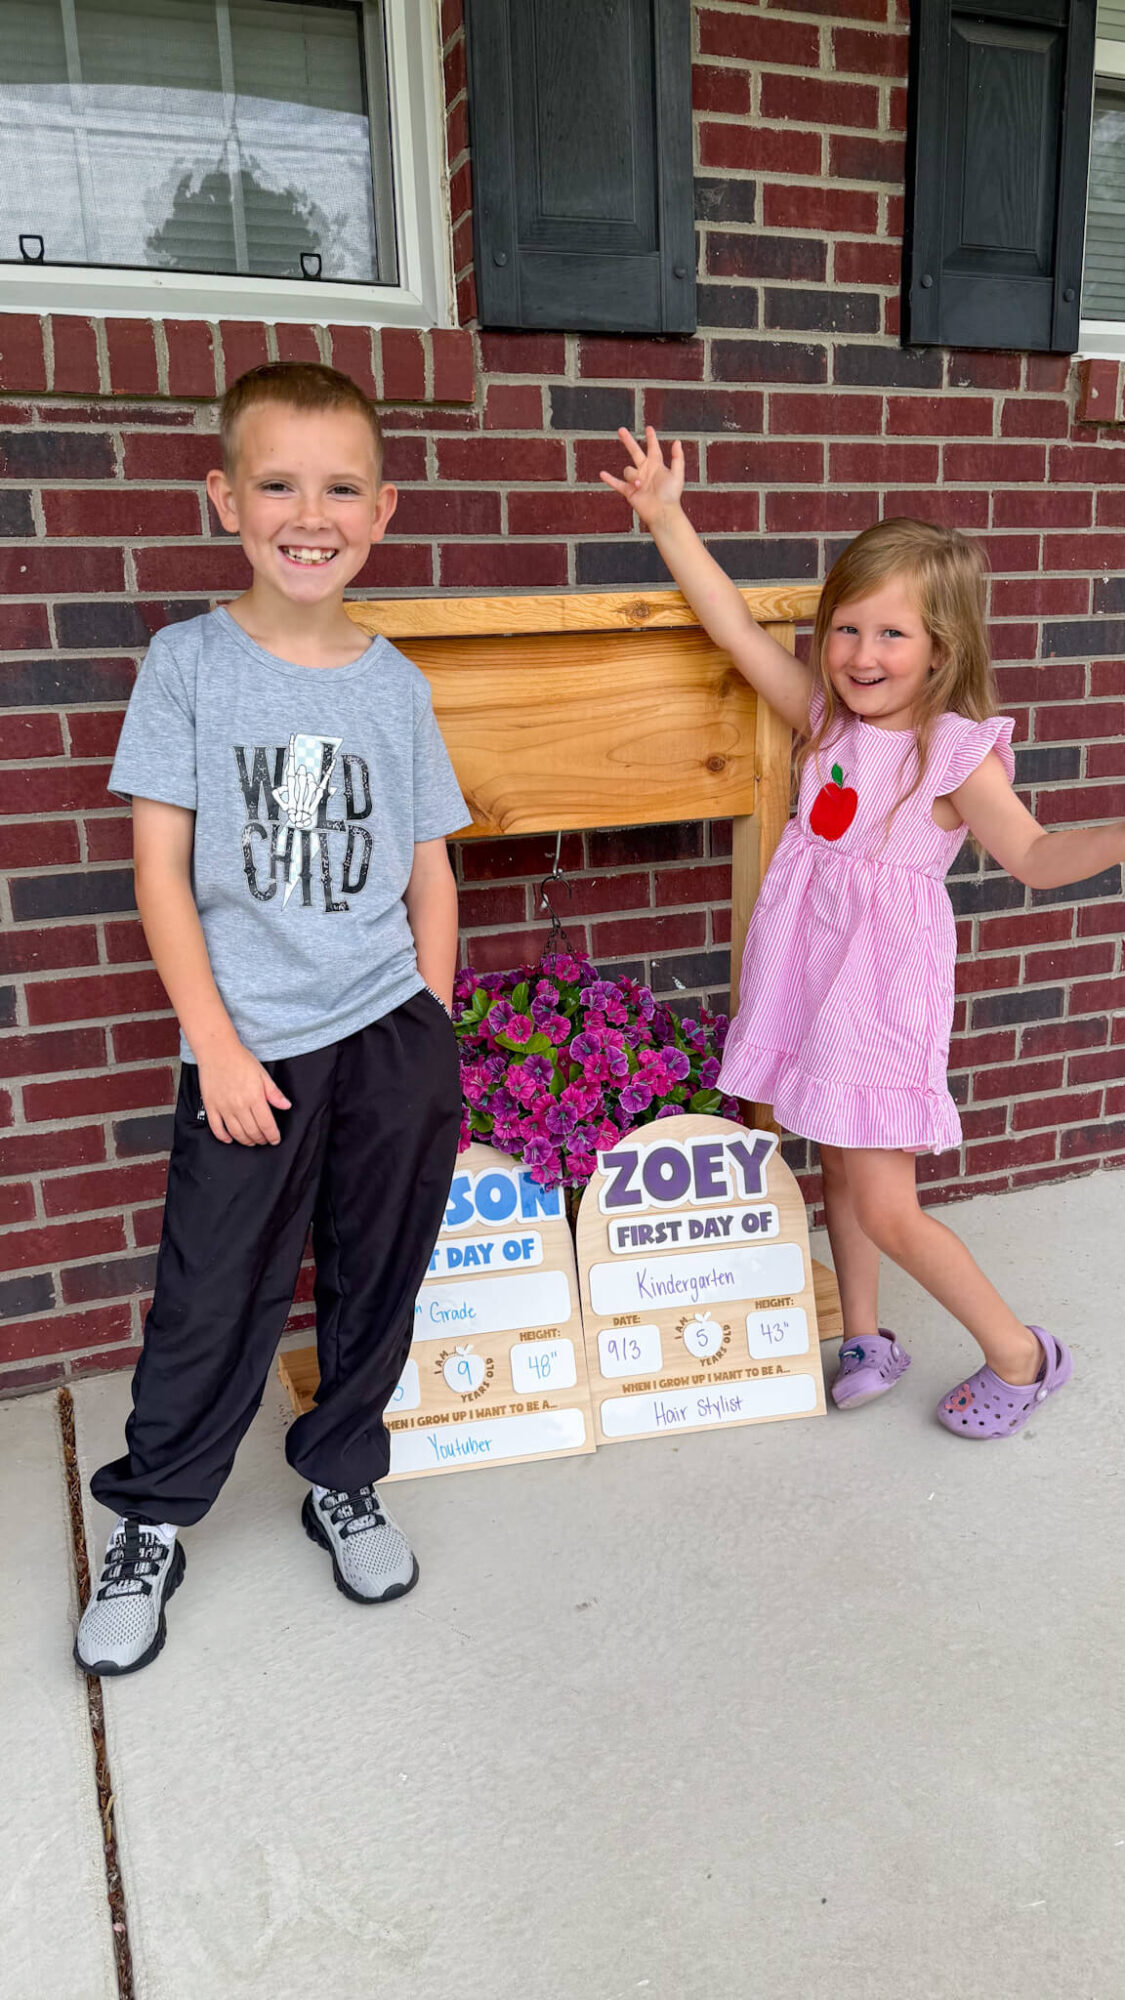
Huge shoutout to my littles for posing for these pictures!
Sign up for my newsletter and gain access to my free laser project SVGs: