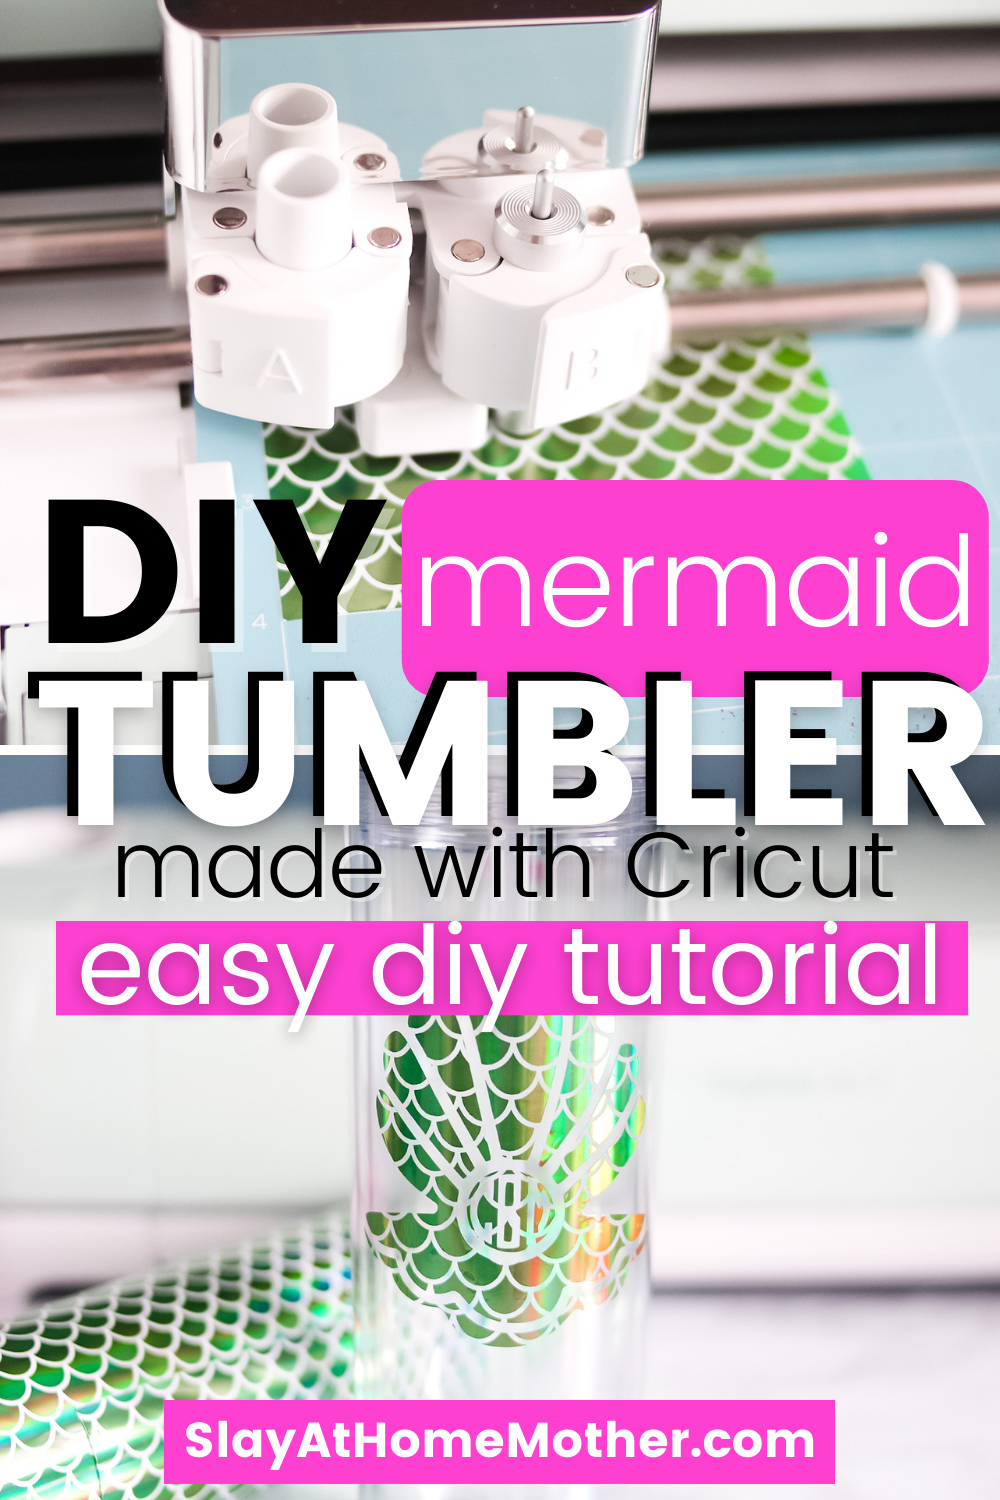
Make your own DIY monogram tumbler with this easy-to-follow tutorial, complete with screenshots and how to create monograms in Design Space…
Hi friends!
I’m still prepping for spring over here with some splashing good Cricut crafts.
I had so much fun last week teaching you guys how to use infusible ink to create gorgeous colorful mermaid coasters, and I figured another mermaid craft would be the perfect follow-up.
I have a thing for mermaids if you haven’t caught on to that just yet.
I grew up around the beach in North Carolina, and have always had a softness in my heart for the sea.
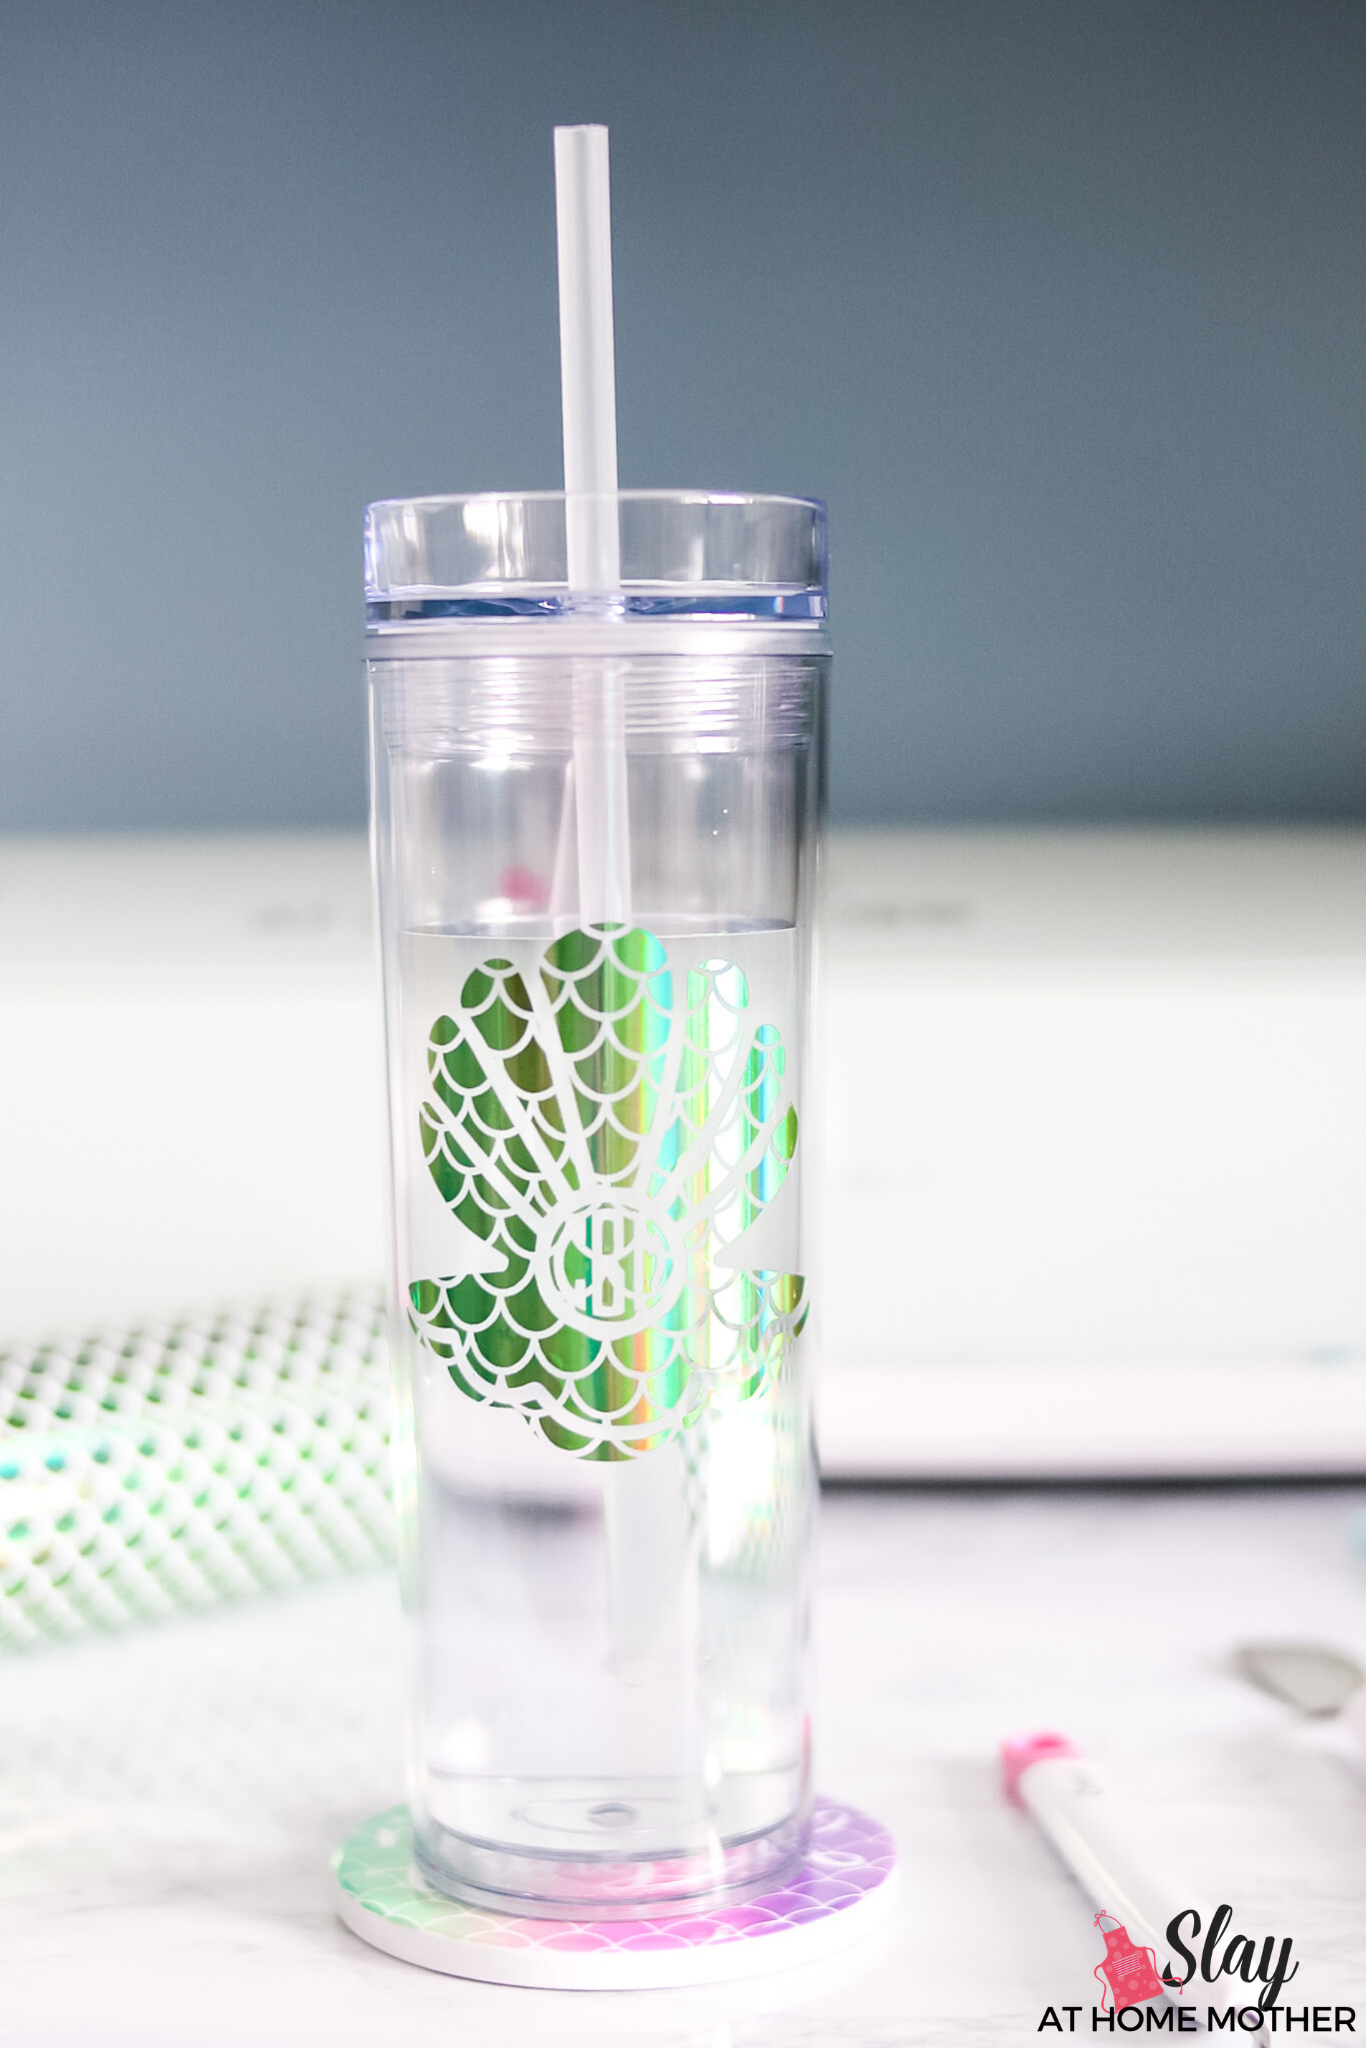
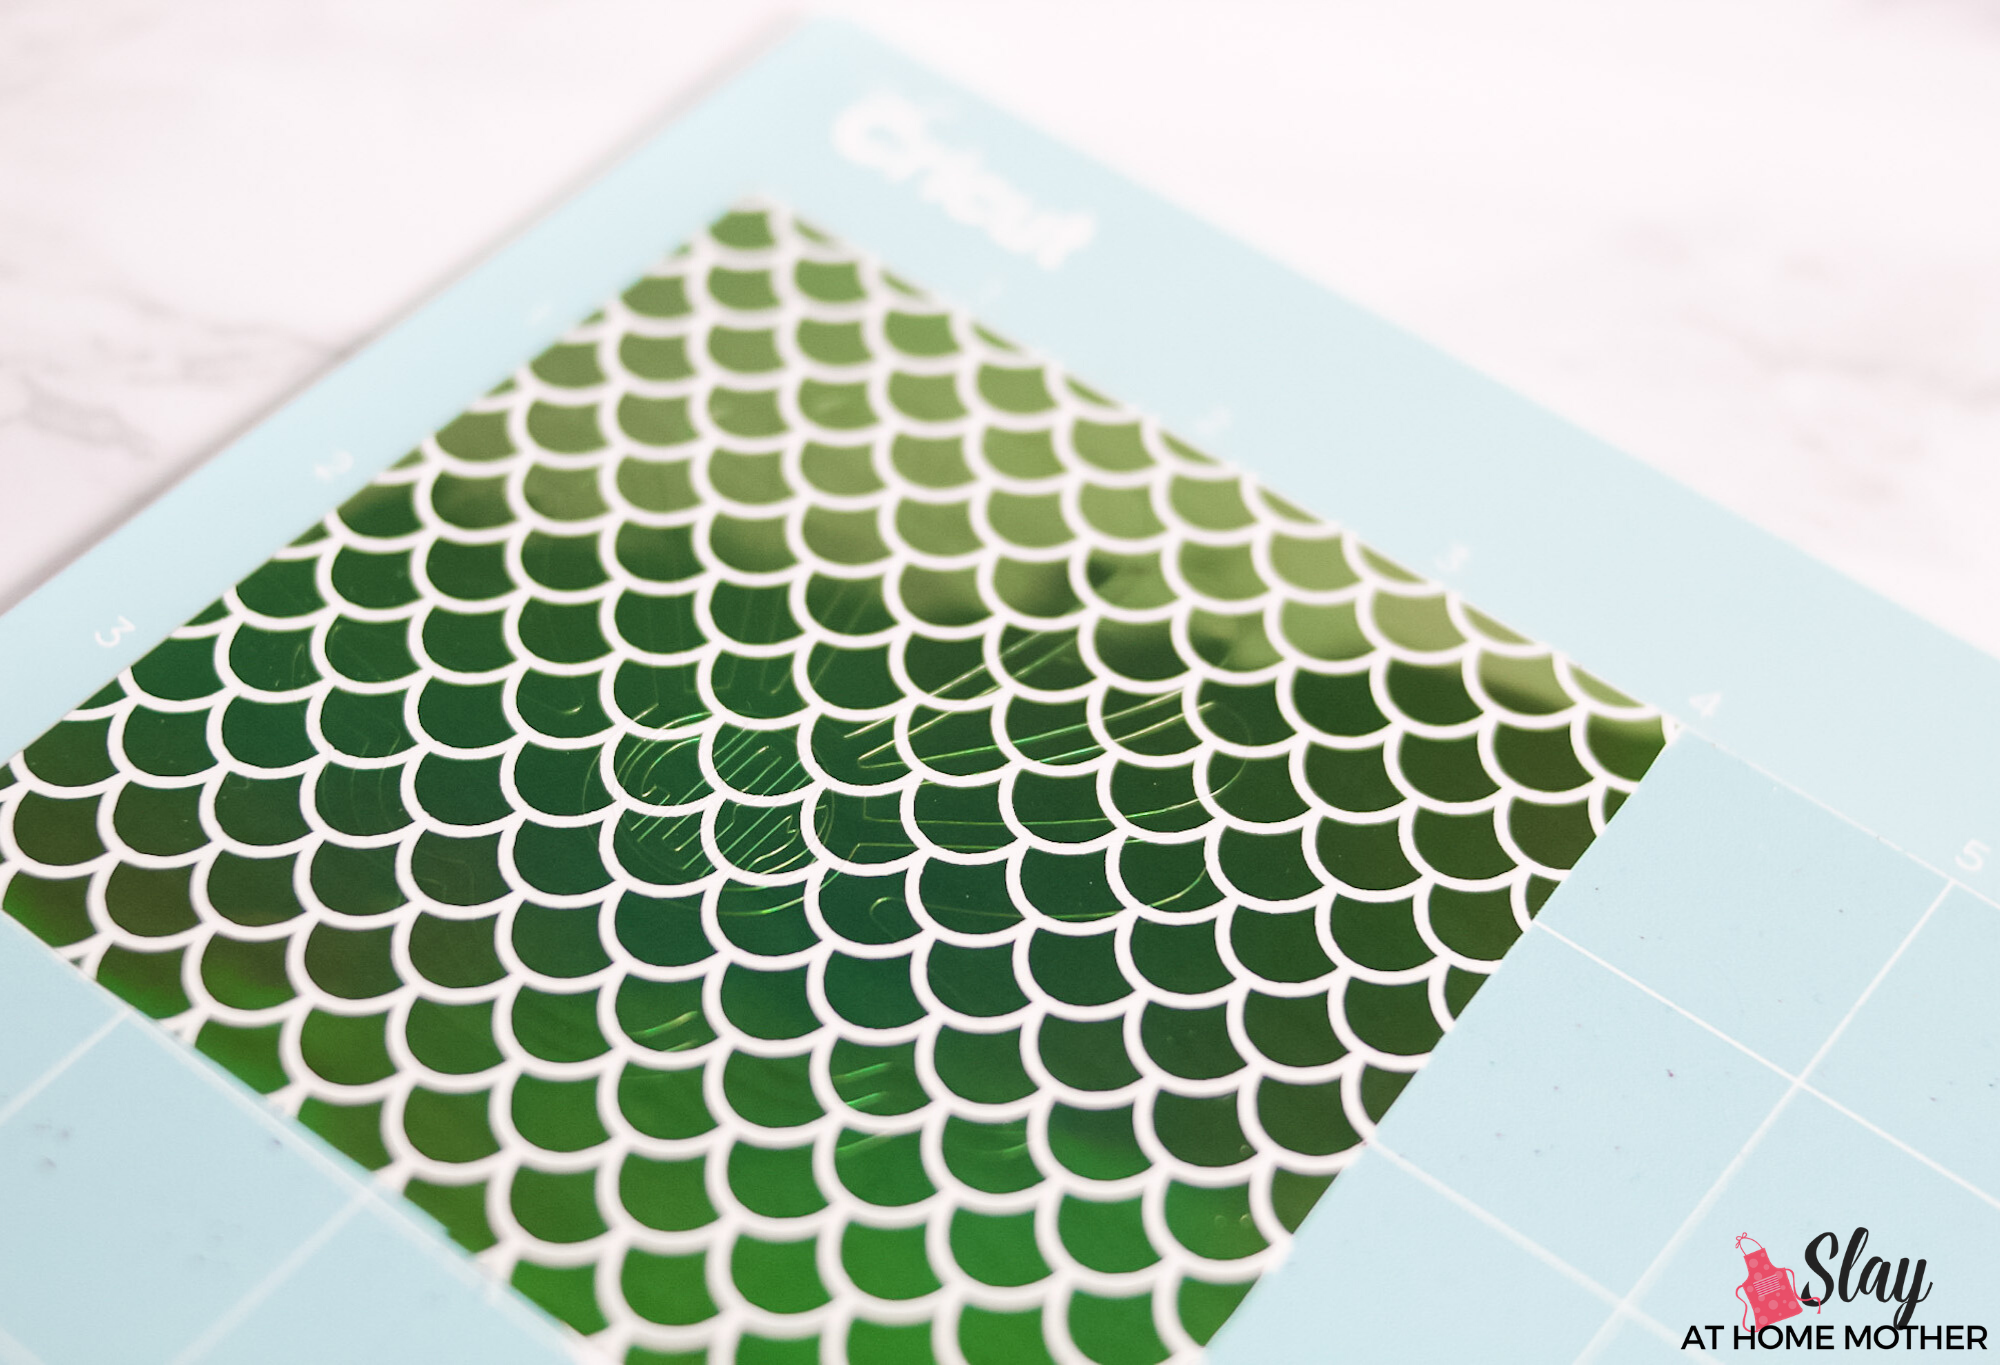
After making my infusible ink coasters, I came across a stunning ‘dragon’ mosaic sampler from Cricut, which included a 12″x12″ sheet of iridescent green print with scales that I found absolutely stunning – and total mermaid-y.
Yessss, you could totally use this print for a dragon-themed decal if you wanted, but as soon as I saw the scales, my mermaid-lovin’ heart leaped from my chest and I knew I had to get my hands on this gorgeous vinyl and create something to go with my coasters!
I put together an easy-to-follow tutorial for creating your own mermaid-themed decal and monogram to fit on some plain skinny tumblers I had on hand, and figured you guys would love to learn how to make these, too!
This tutorial features the basics of creating in Design Space, like slicing, grouping and ungrouping, welding, inserting images, using system fonts, creating monograms using Monogramos font, and applying decals to your tumblers.
I hope you find this tutorial helpful – there’s even a video that goes through the process below for my visual learners (don’t worry, I’m a visual learner, too).
Alright, let’s get to it…
*This post may contain affiliate links, however, all opinions are my own, as always.*
Materials Needed For DIY Mermaid Monogram Tumblers
Here’s what you need to create your own gorgeous mermaid monogram tumblers…
- Dragon mosaic sampler
- blue LightGrip mat
- Cricut machine
- weeding tool
- scraper
- transfer tape
- 16 oz. skinny tumblers (here are the ones I used)
- Monogramos font (can be downloaded for free from Dafont.com)
I’m using my Cricut Explore Air 2 machine for this craft – it’s such a versatile and fun machine to create with!
Creating A Monogram In Design Space Using Monogramos font
Here’s a quick video demonstrating how to use Monogramos font to create a monogram in Design Space…
But here are some step-by-step helpful screenshots to better explain the quick process…
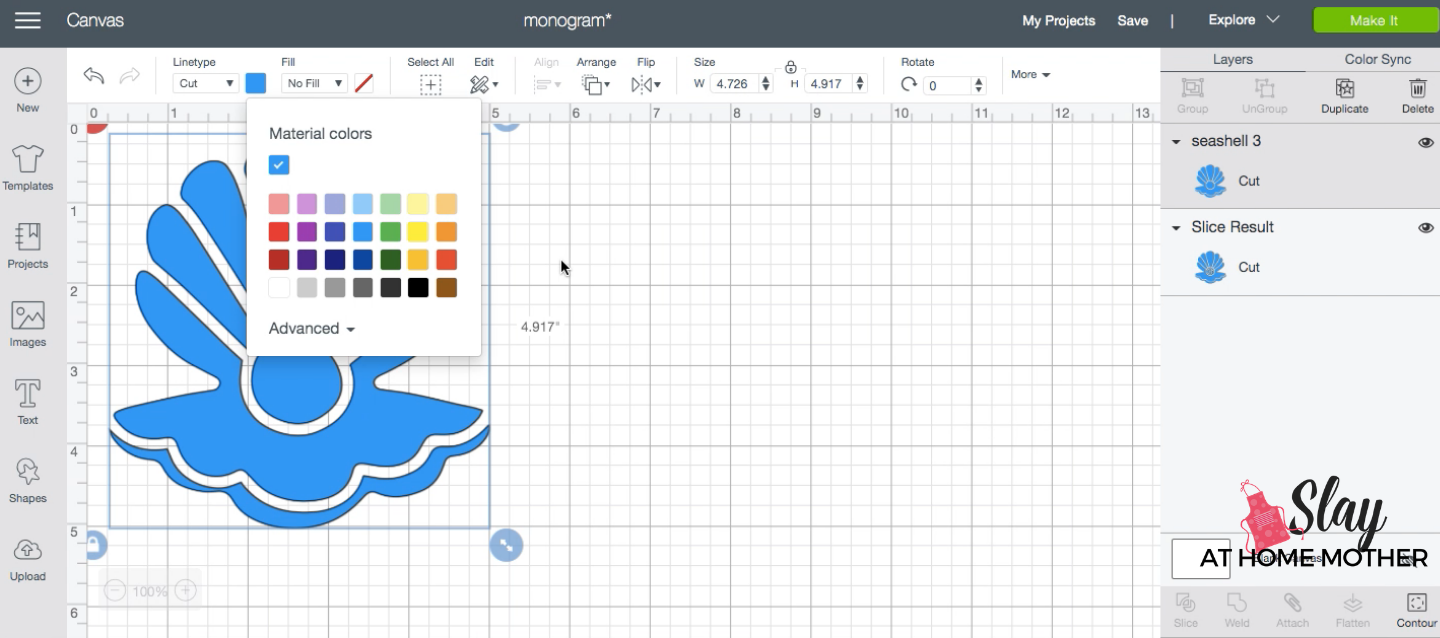
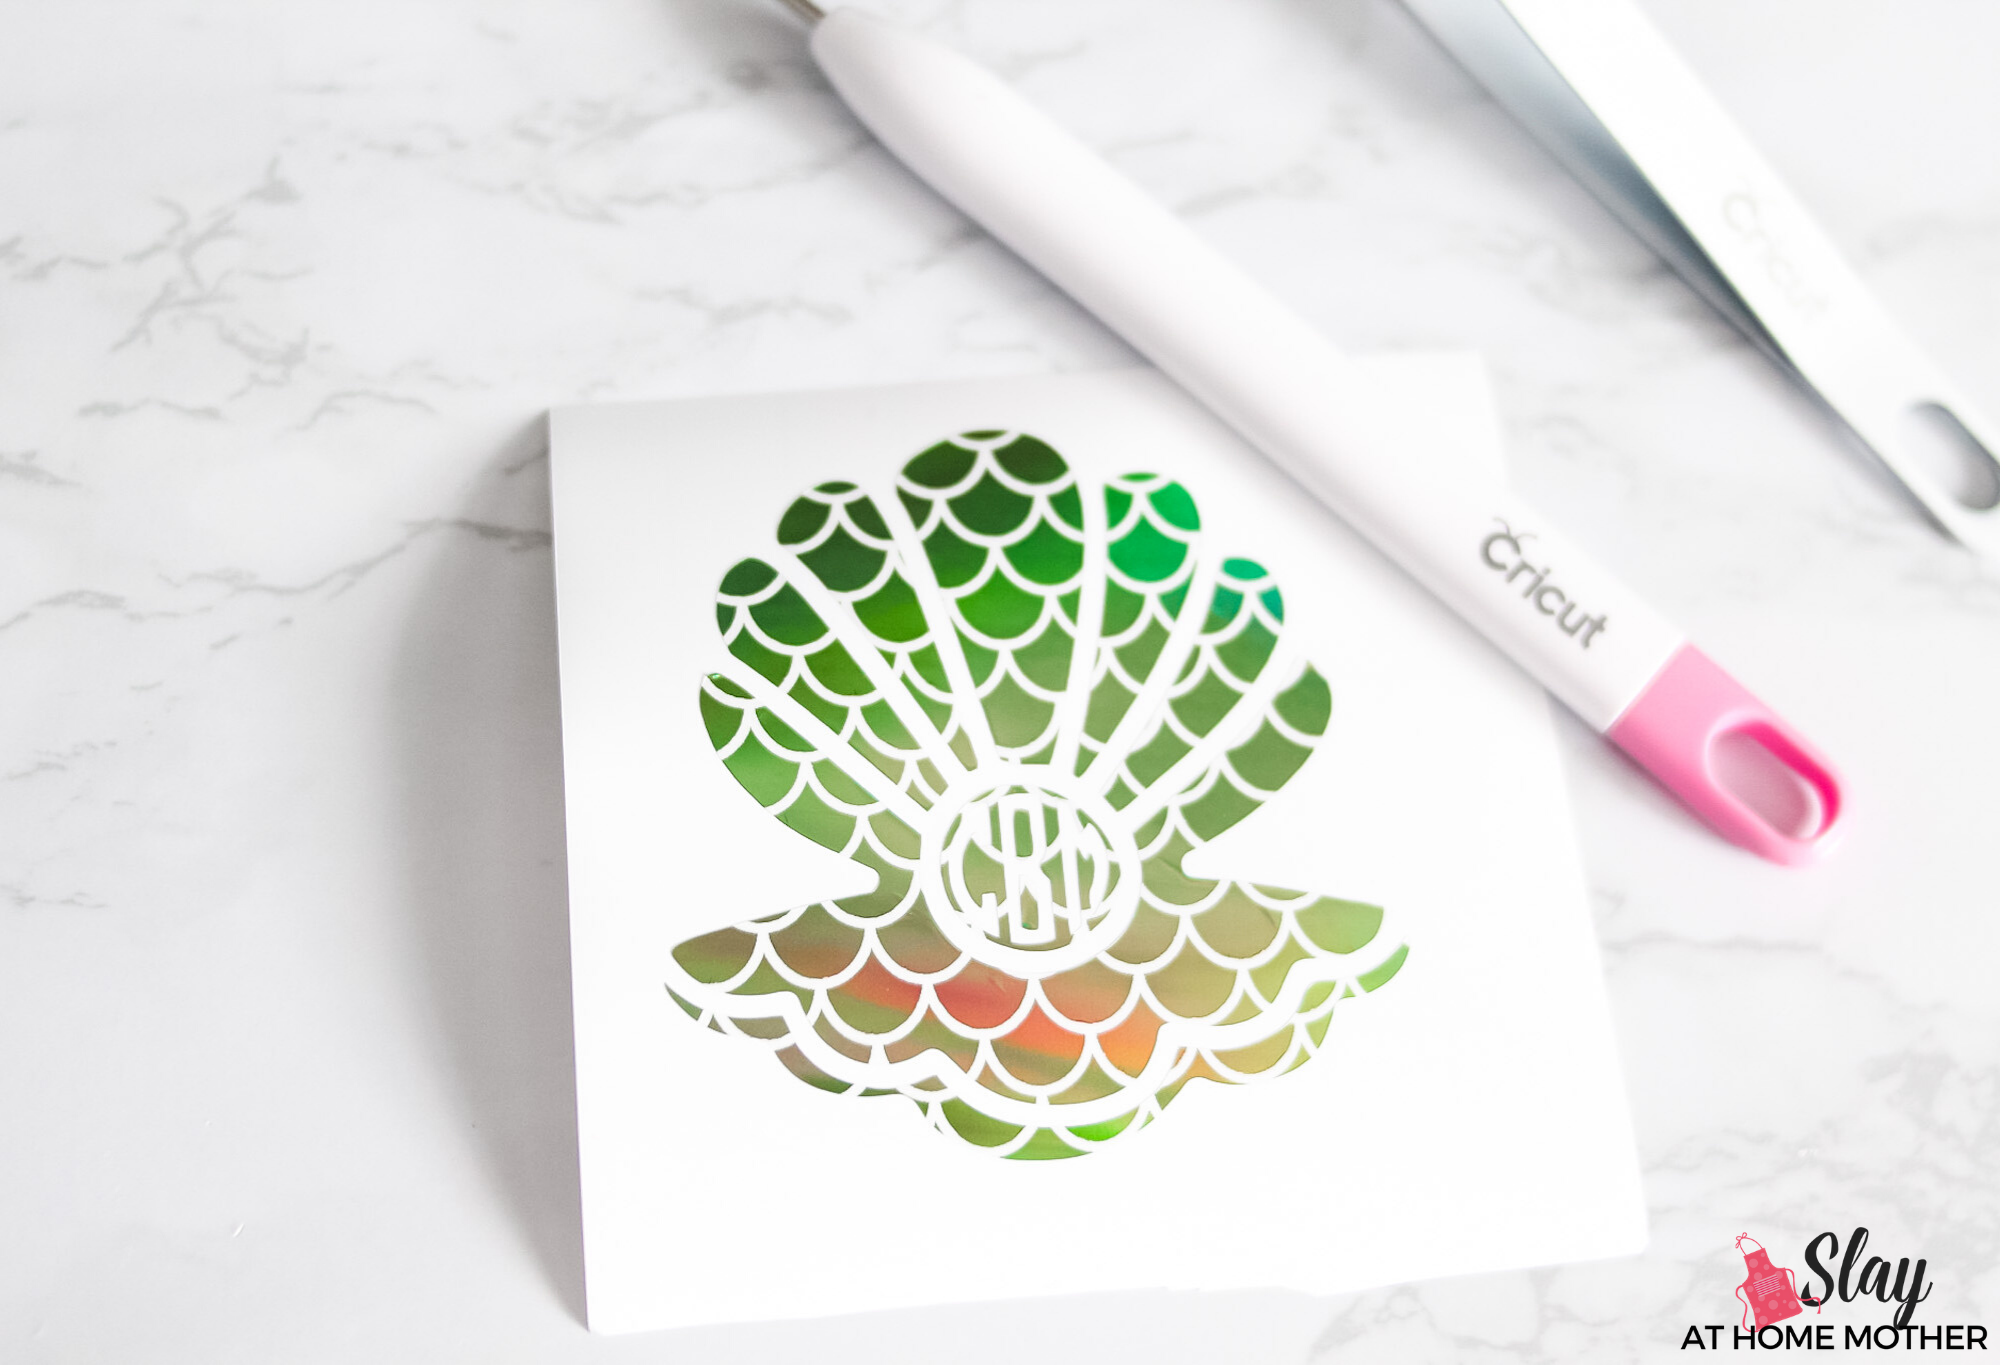
Select an image you like (I’m going for a mermaid theme so I chose a clam) and insert it into your canvas in Design Space.
Images can be found by selecting the Images tab on the left toolbar.
I changed the color of my image so you can see it better, but this isn’t necessary.
If you haven’t already, download the font called Monogramos from Dafont.com or another monogram font you like.
I normally like to use a font called Monogram KK (also from Dafont.com) because it’s so pretty and fancy, but it has such thin, fine cursive lines that wouldn’t work with the pattern or size vinyl decal I’m creating.
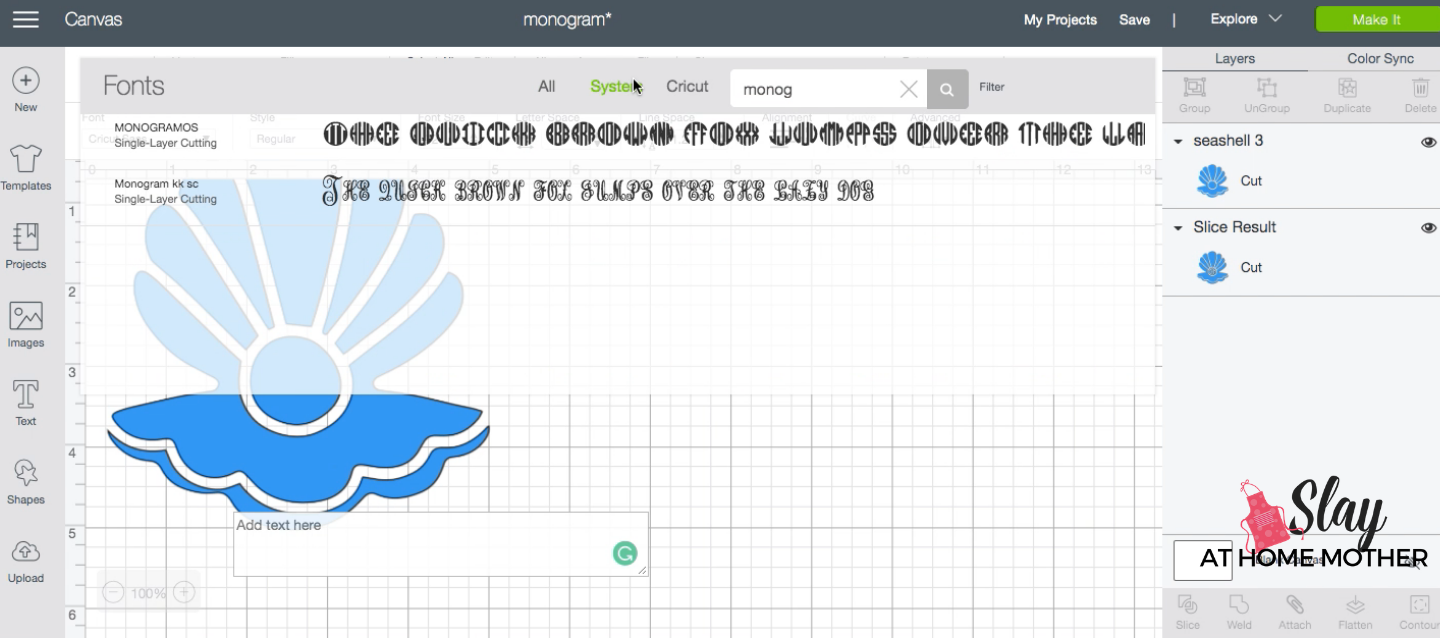
You can easily find fonts you’ve installed onto your computer by clicking on ‘System‘ and typing in the name of the font you are looking for.
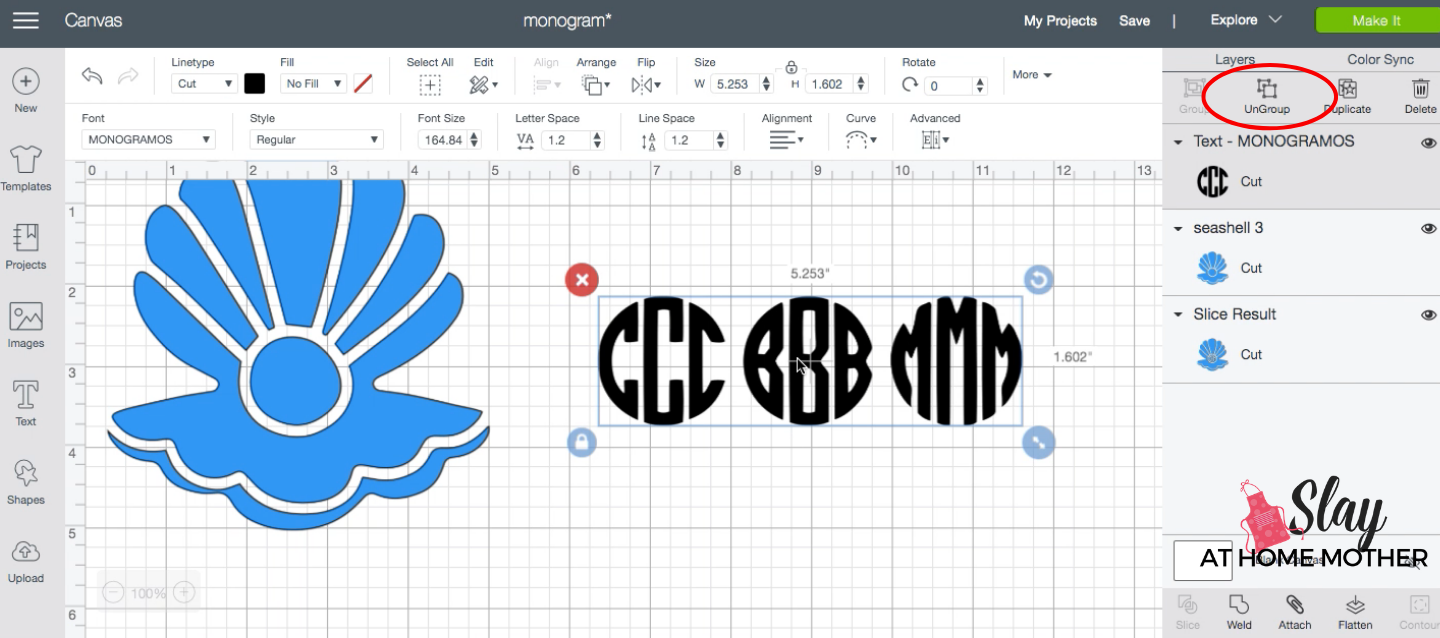
Using lowercase letters, first type your first initial, last initial, and then middle initial in true monogram order.
With the text box selected, click UnGroup.
This will separate the letters.
See screenshot below.
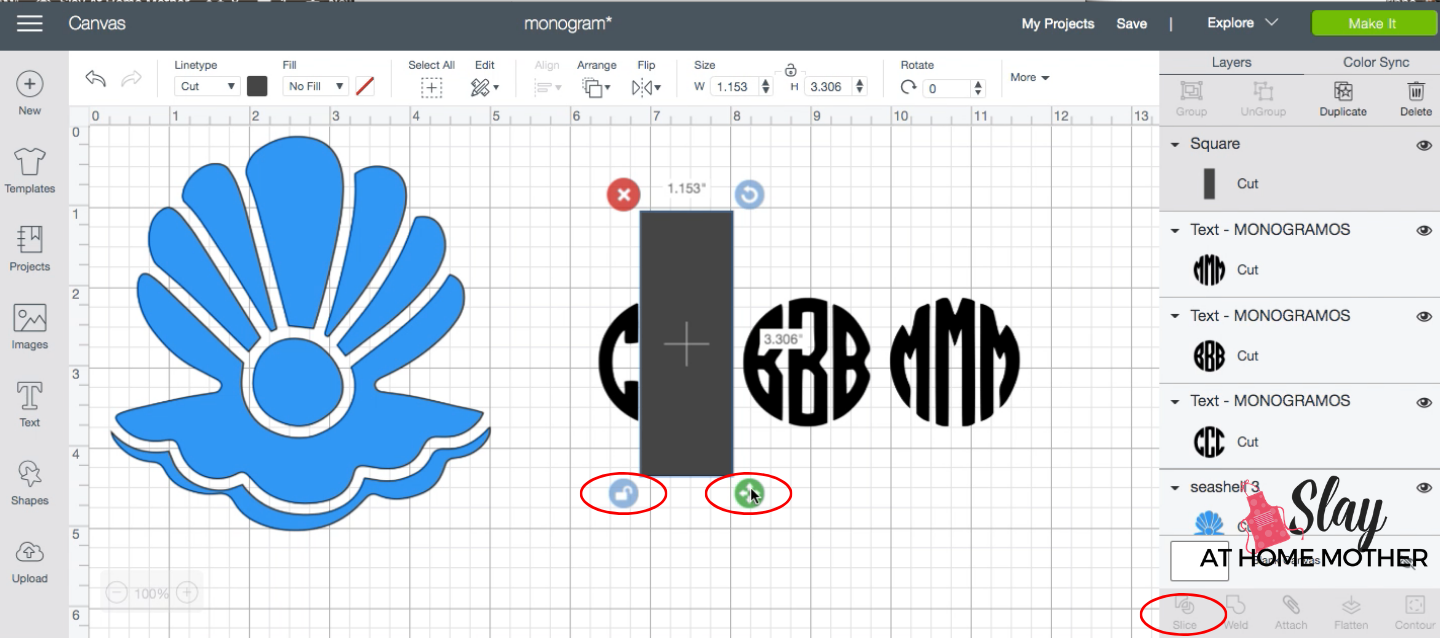
Next, we are going to do some creative slicing to isolate the letters we need.
From the left toolbar, select Shapes and insert a Square.

Click the unlock icon and manipulate the shape of the square so the middle and last letters of the first letter ‘C’ are covered.
Select Slice towards the bottom right.
Delete the sliced objects.
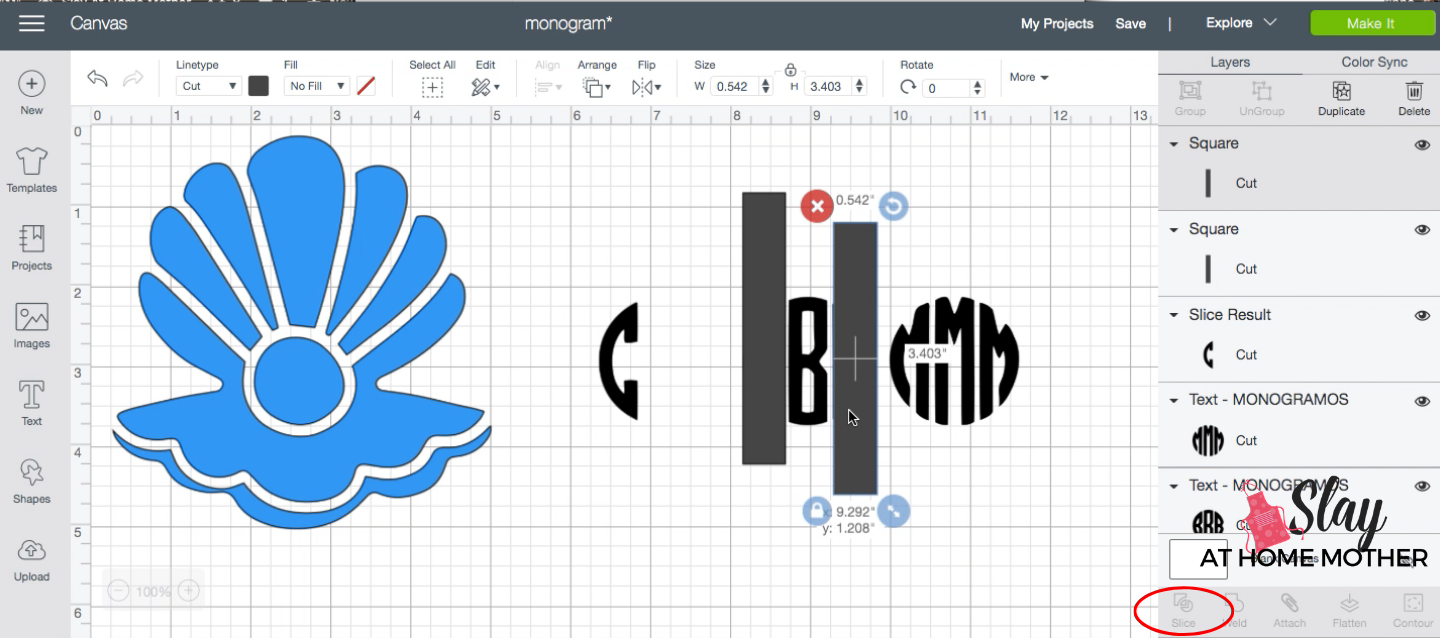
Continue your creative slicing to further isolate the letters you need. In this example, for the middle initial, you’ll need to slice away the ‘B’ to the left and right to isolate and leave the center ‘B’, and slice away the left and middle ‘M’ to isolate the ‘M’ to the right.
The video above shows you how to do this if you need to see that more clearly.
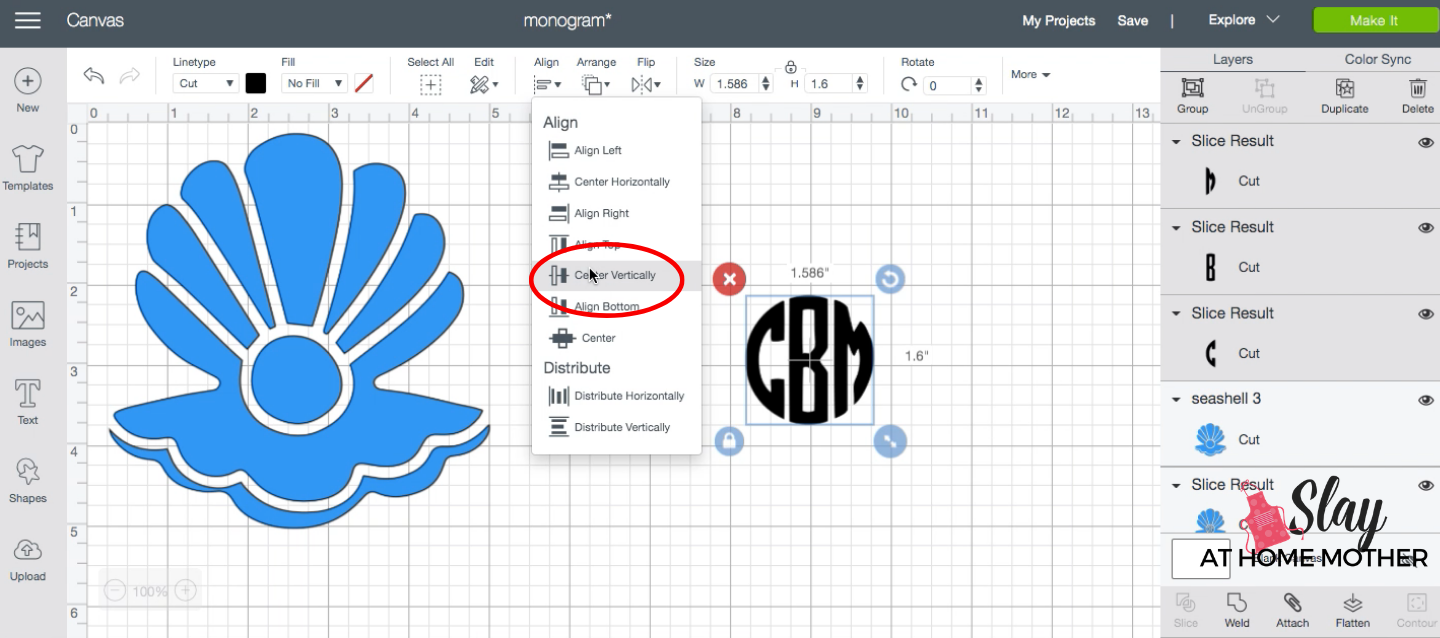
Move the letters together and Center Vertically. Your monogram is ready to go!
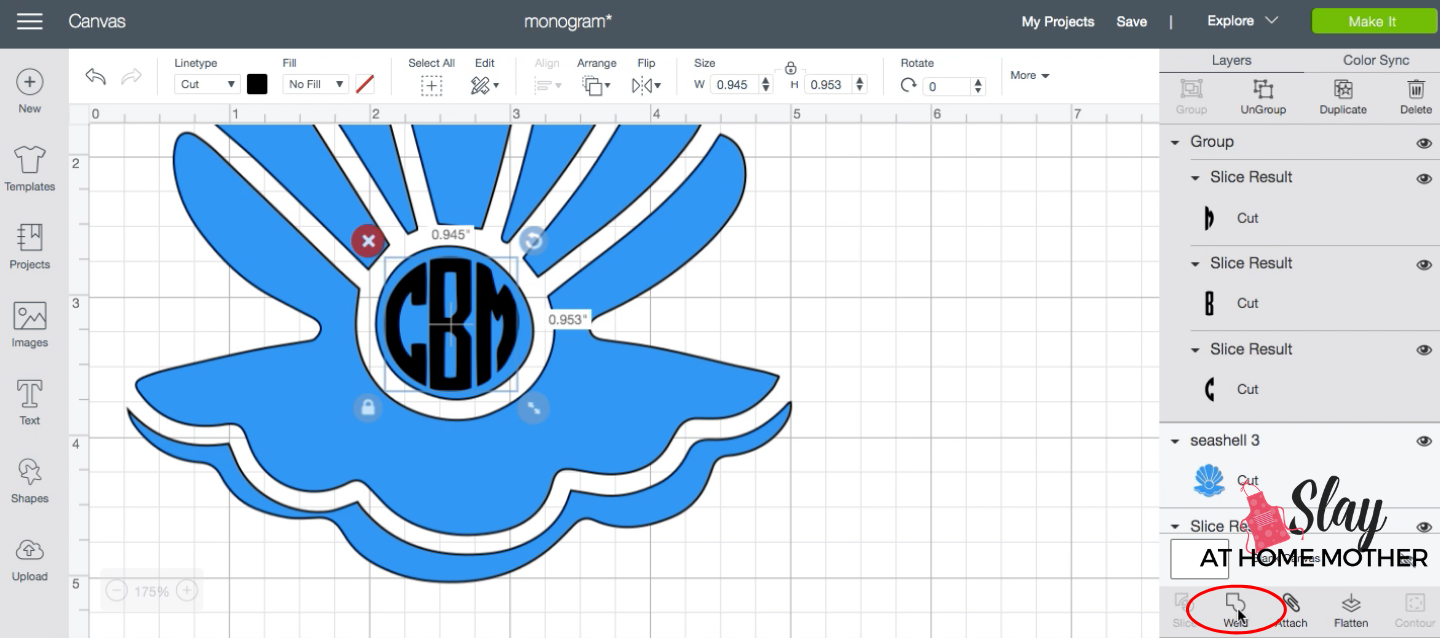
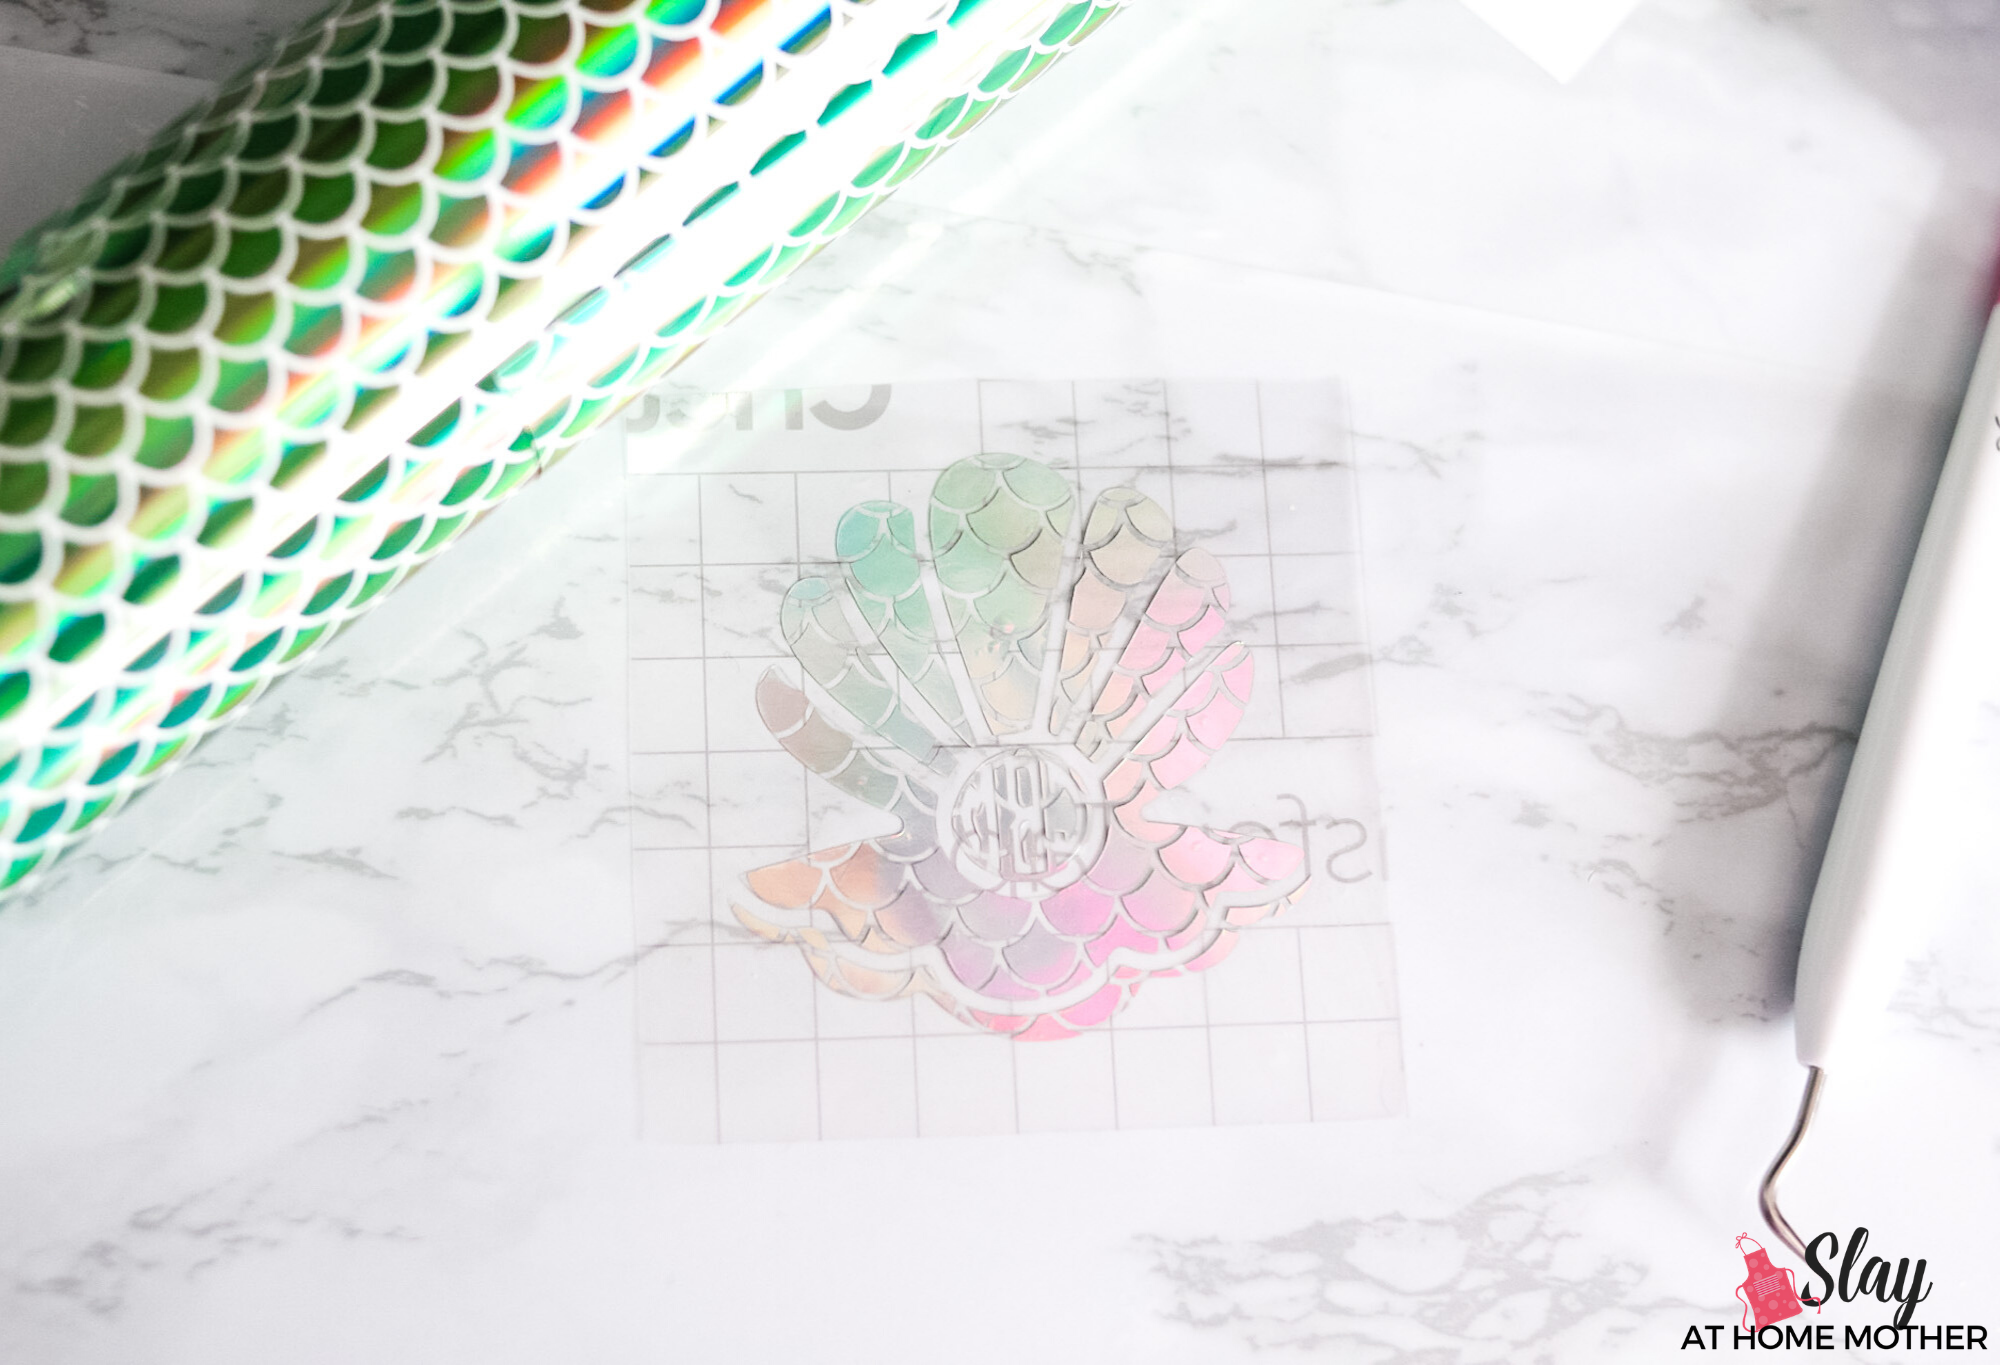
Move your monogram to your image – I will be slicing mine into the pearl part of my image (that round circle in the middle of the clam).
Before slicing your letters into your image, Weld the letters together by clicking on your group of letters and clicking on ‘Weld‘ towards the lower right.
Select both your monogram and your image, and click Slice. Remove sliced bits and delete.
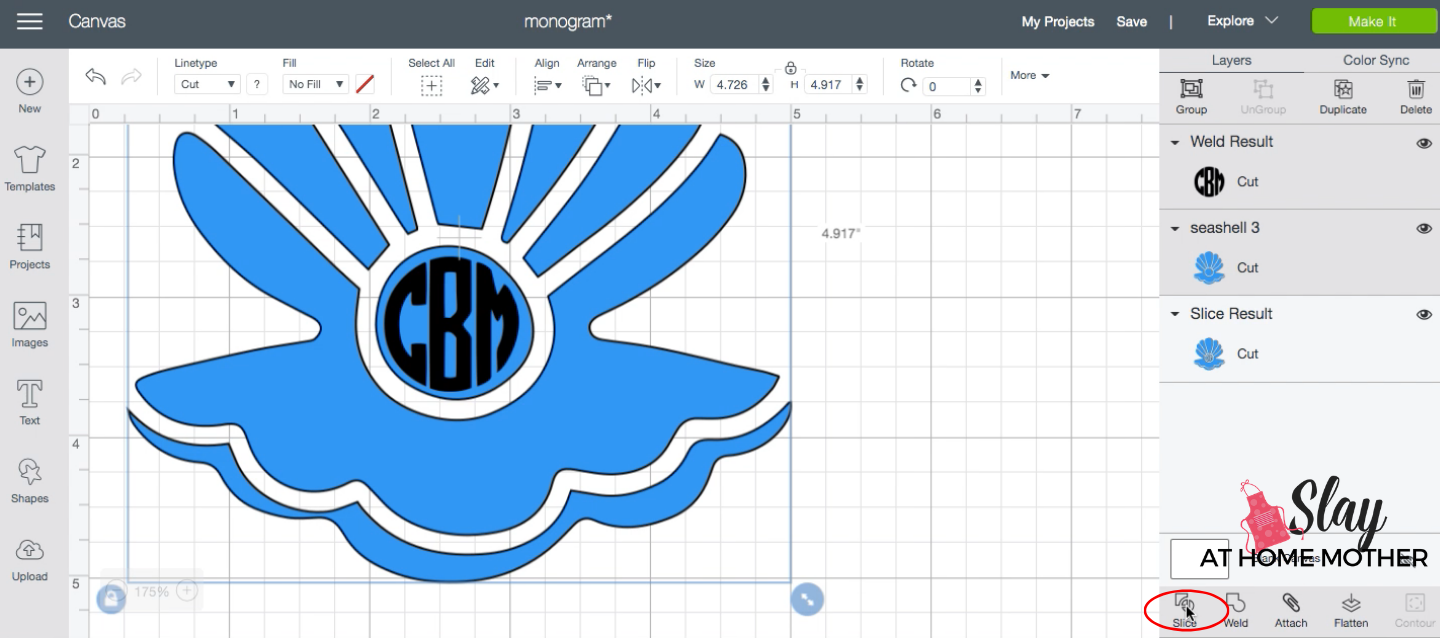
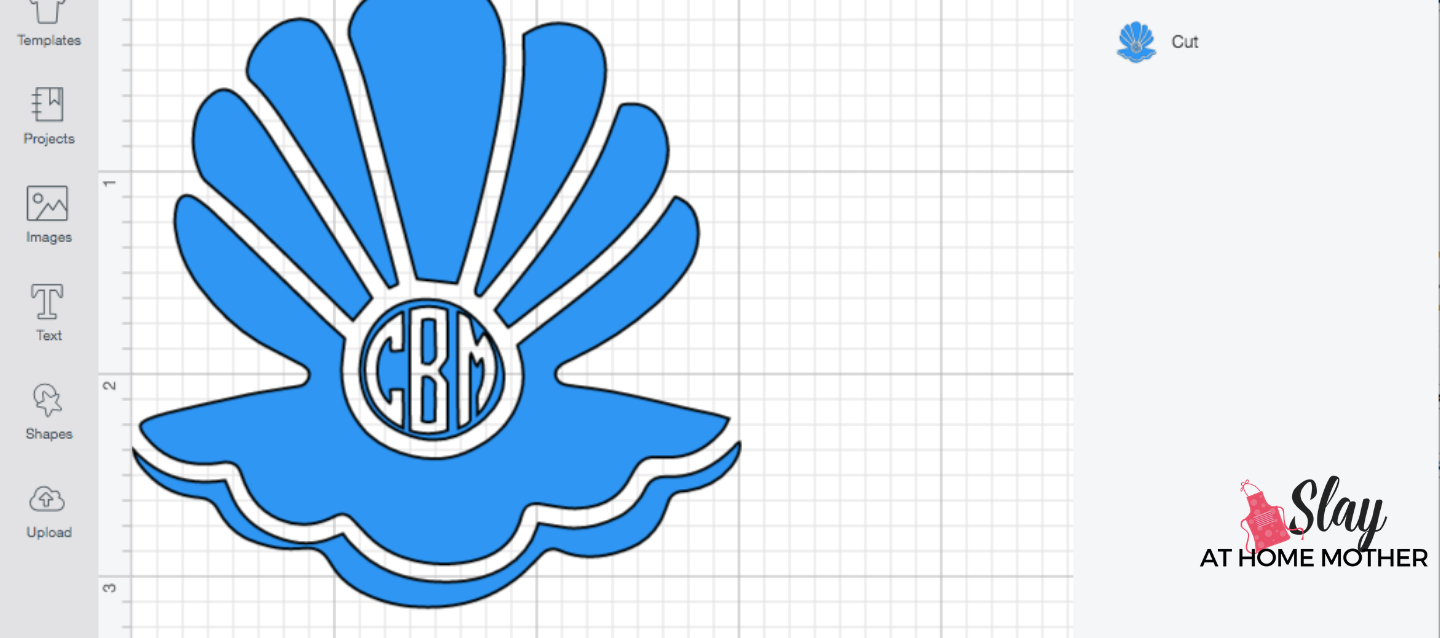
Your monogram is now sliced into and part of your image!
Woohoo!
For my 16 oz. skinny tumblers, I measured and figured a 3″ width would be perfect for my decal, so that’s what I used.
Cutting Vinyl On Cricut Explore Air 2
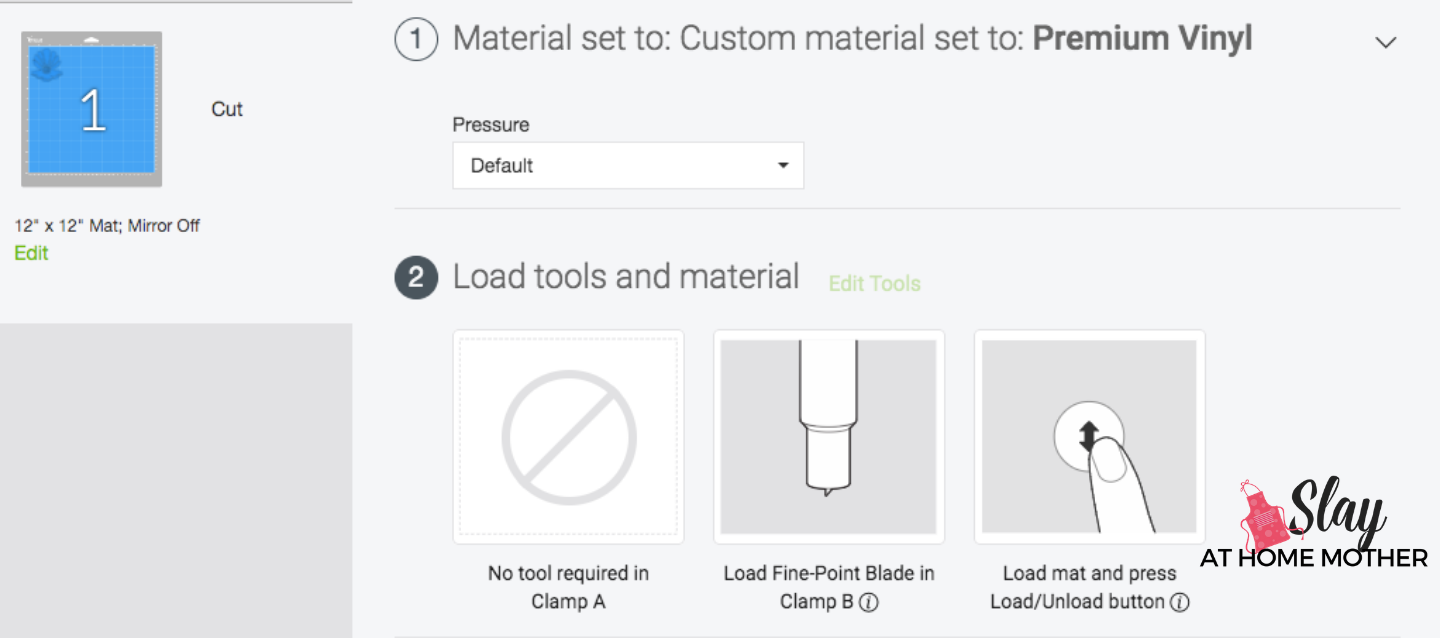
I tend to keep my machine’s dial setting to Custom. This is just a preference and isn’t necessary.
Select your material as Premium Vinyl, and be sure that your fine-point blade and housing is installed in clamp B.
Cut a piece of vinyl to the size you need, and place it on your LightGrip mat.
Load the mat into your machine, and start cutting!

Remove your vinyl from your mat, and peel/weed away the negative vinyl to reveal your design.
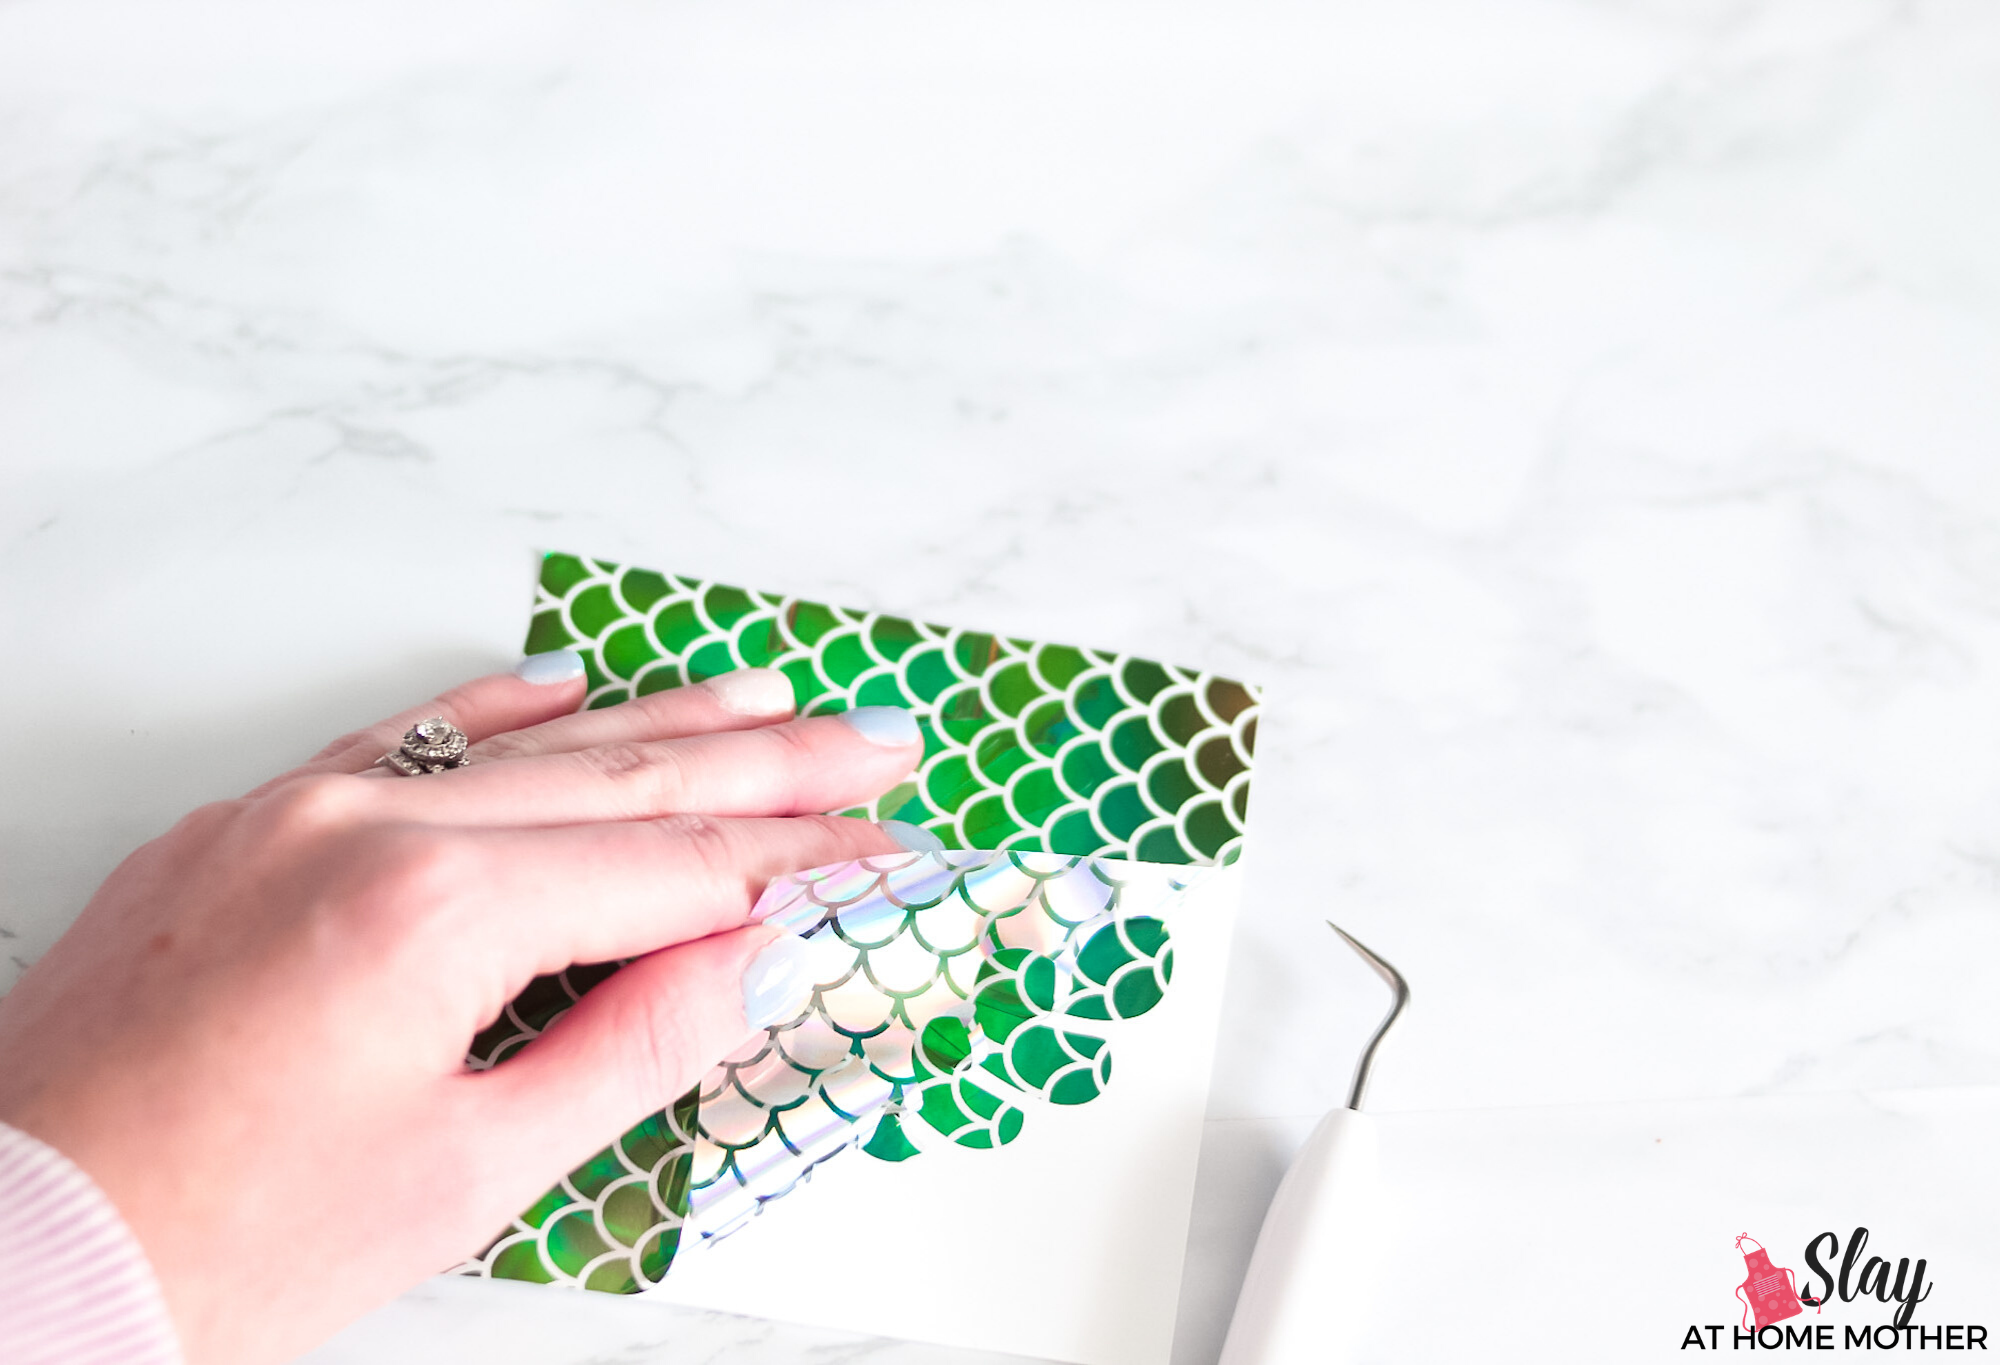
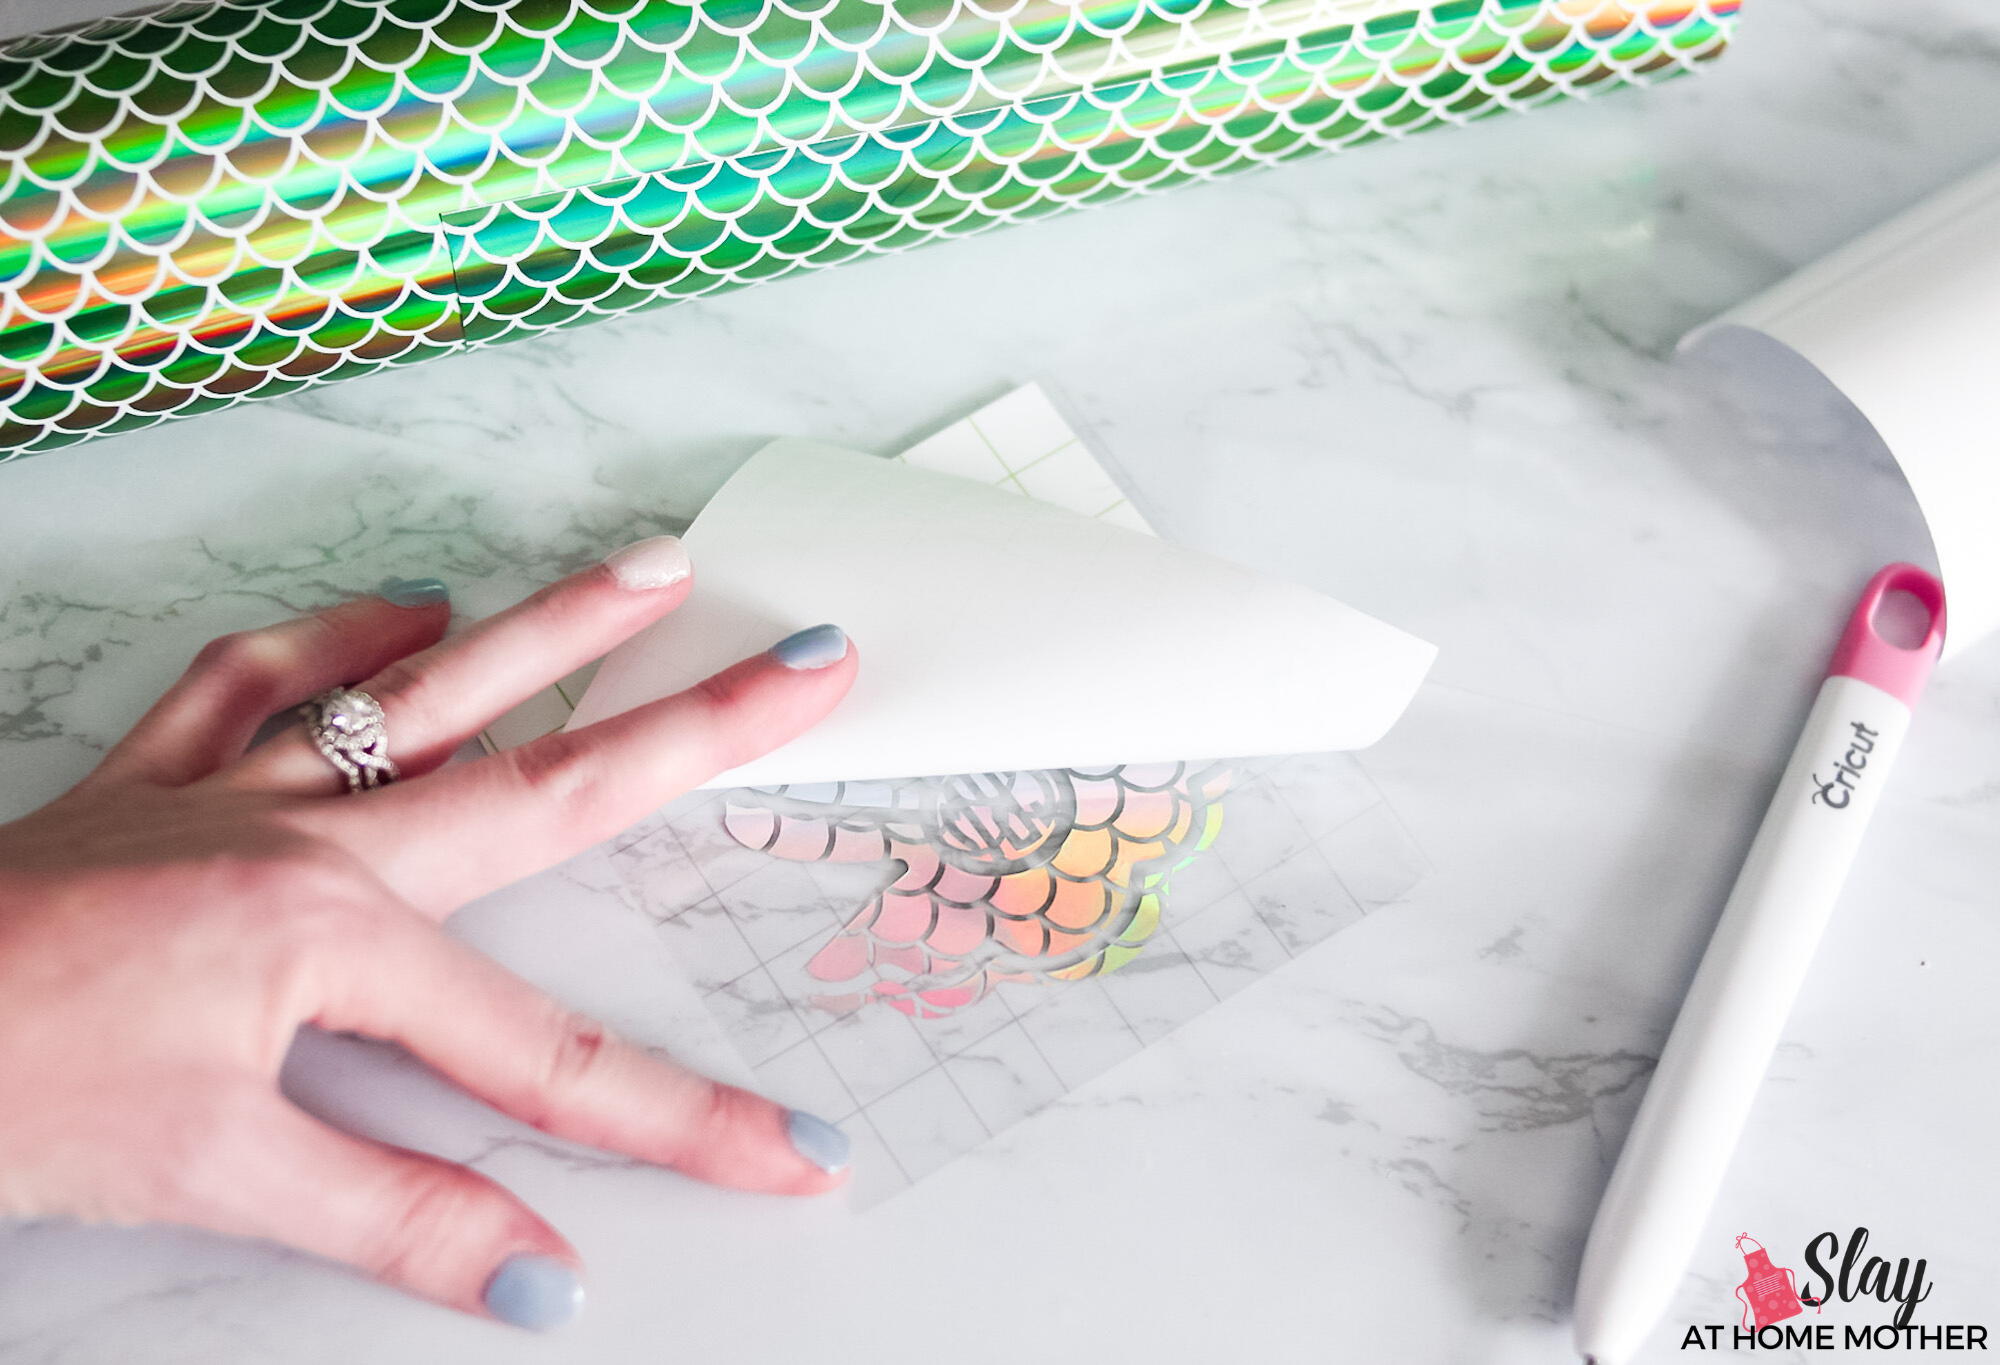
Once your design is weeded, you’ll need to transfer it to a piece of transfer tape.
Remove the backing to your transfer tape, stick your tape to your decal, and use a scraper to gently rub the decal onto the tape.
Remember that transfer tape can be reused, so be sure to keep the backing to your transfer tape!
I would recommend using regular transfer tape only, the StrongGrip transfer tape is too sticky!
Peel away the vinyl backing so the decal is on your transfer tape.
Now that your decal is on a piece of transfer tape, it’s time to transfer it to your tumbler.
Placing Your Decal On Your Tumbler
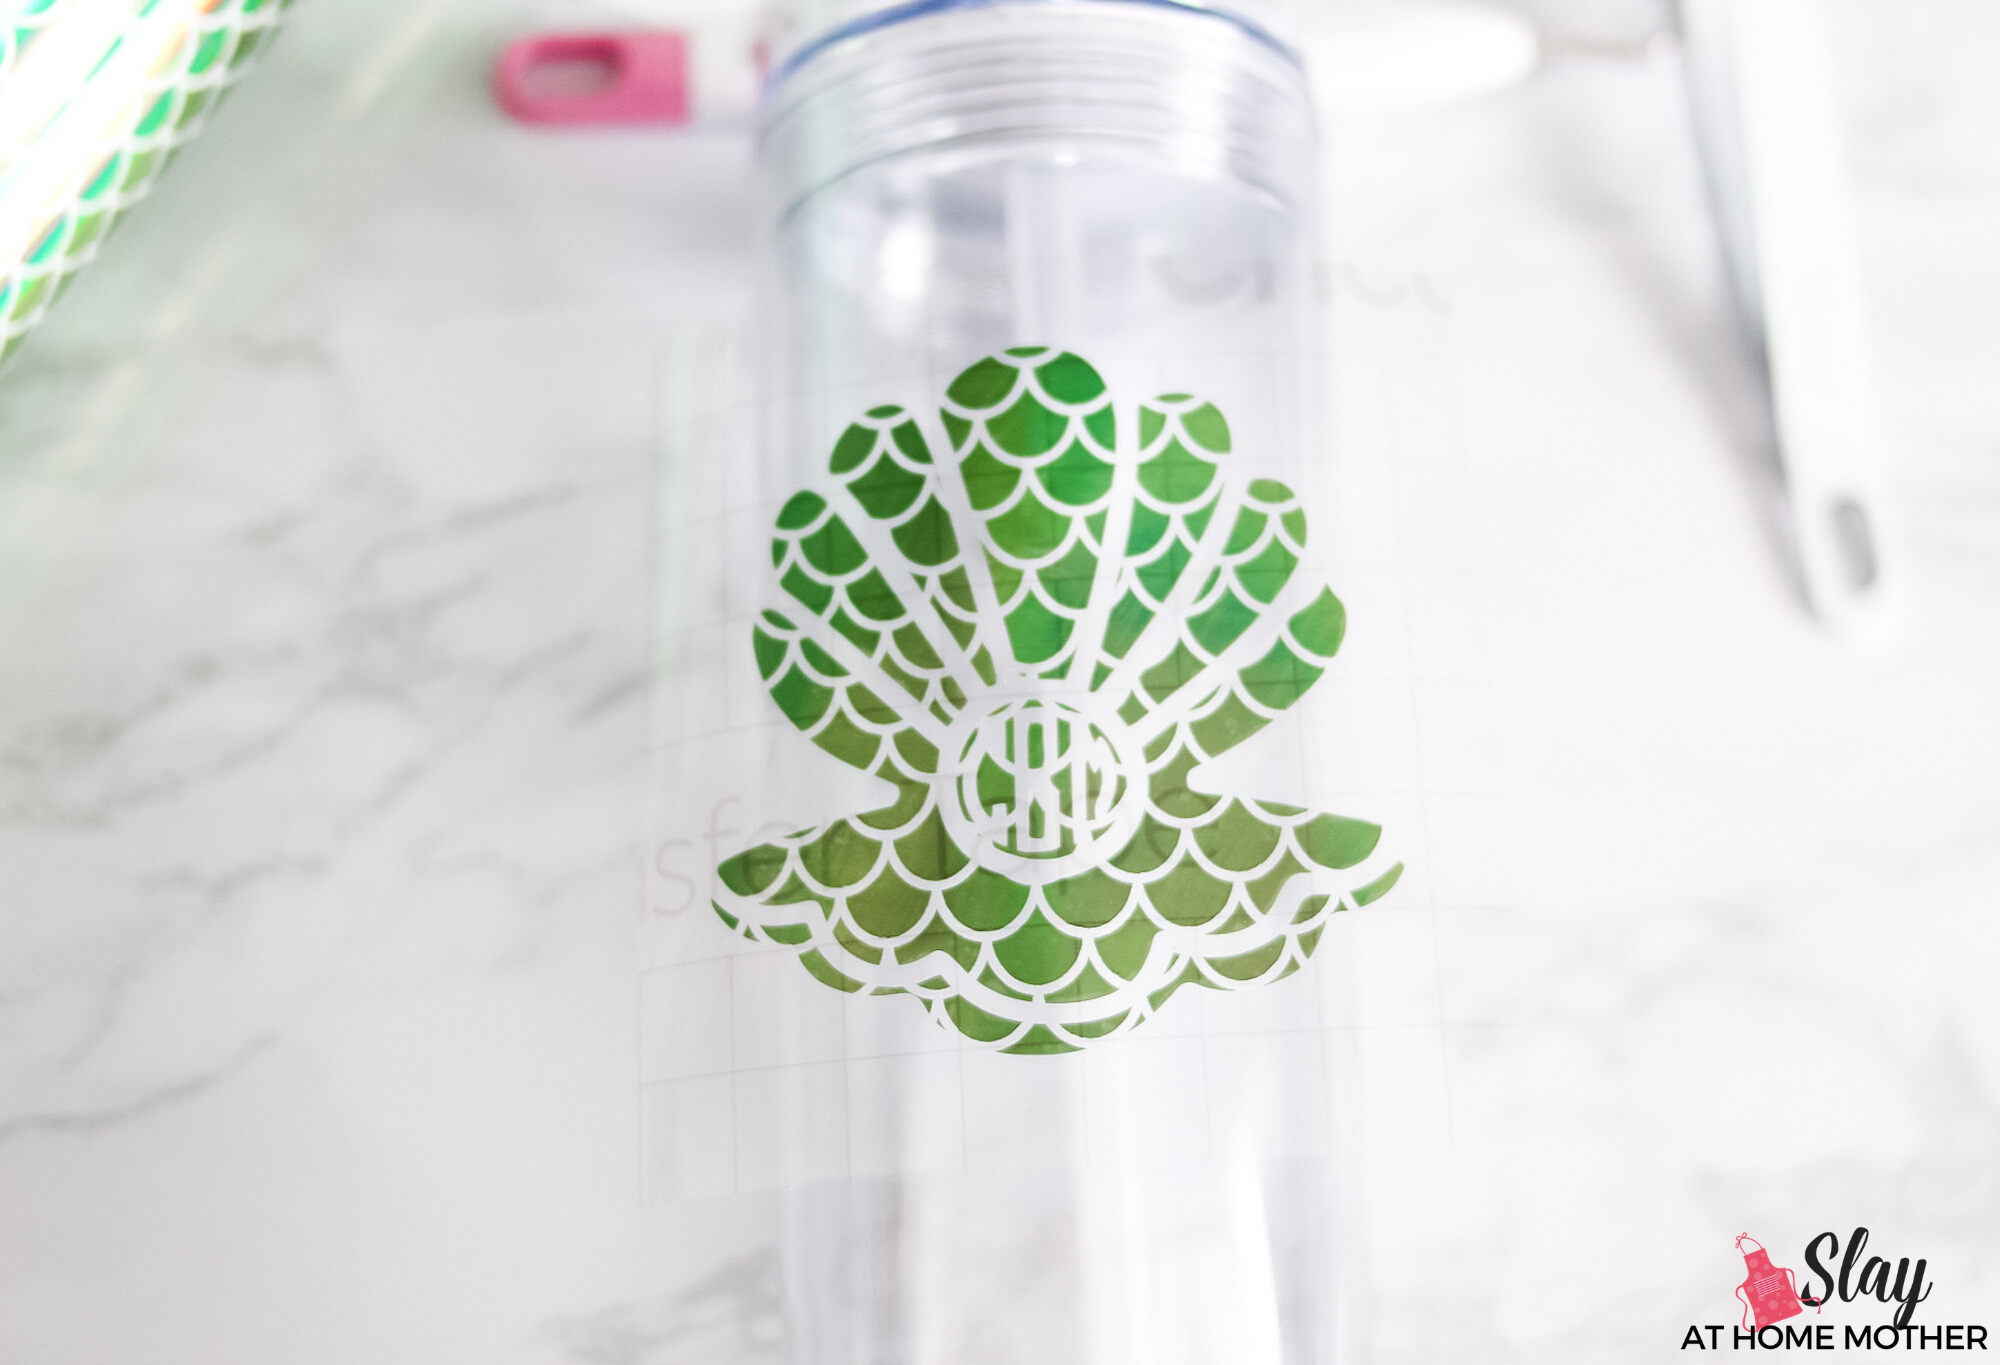
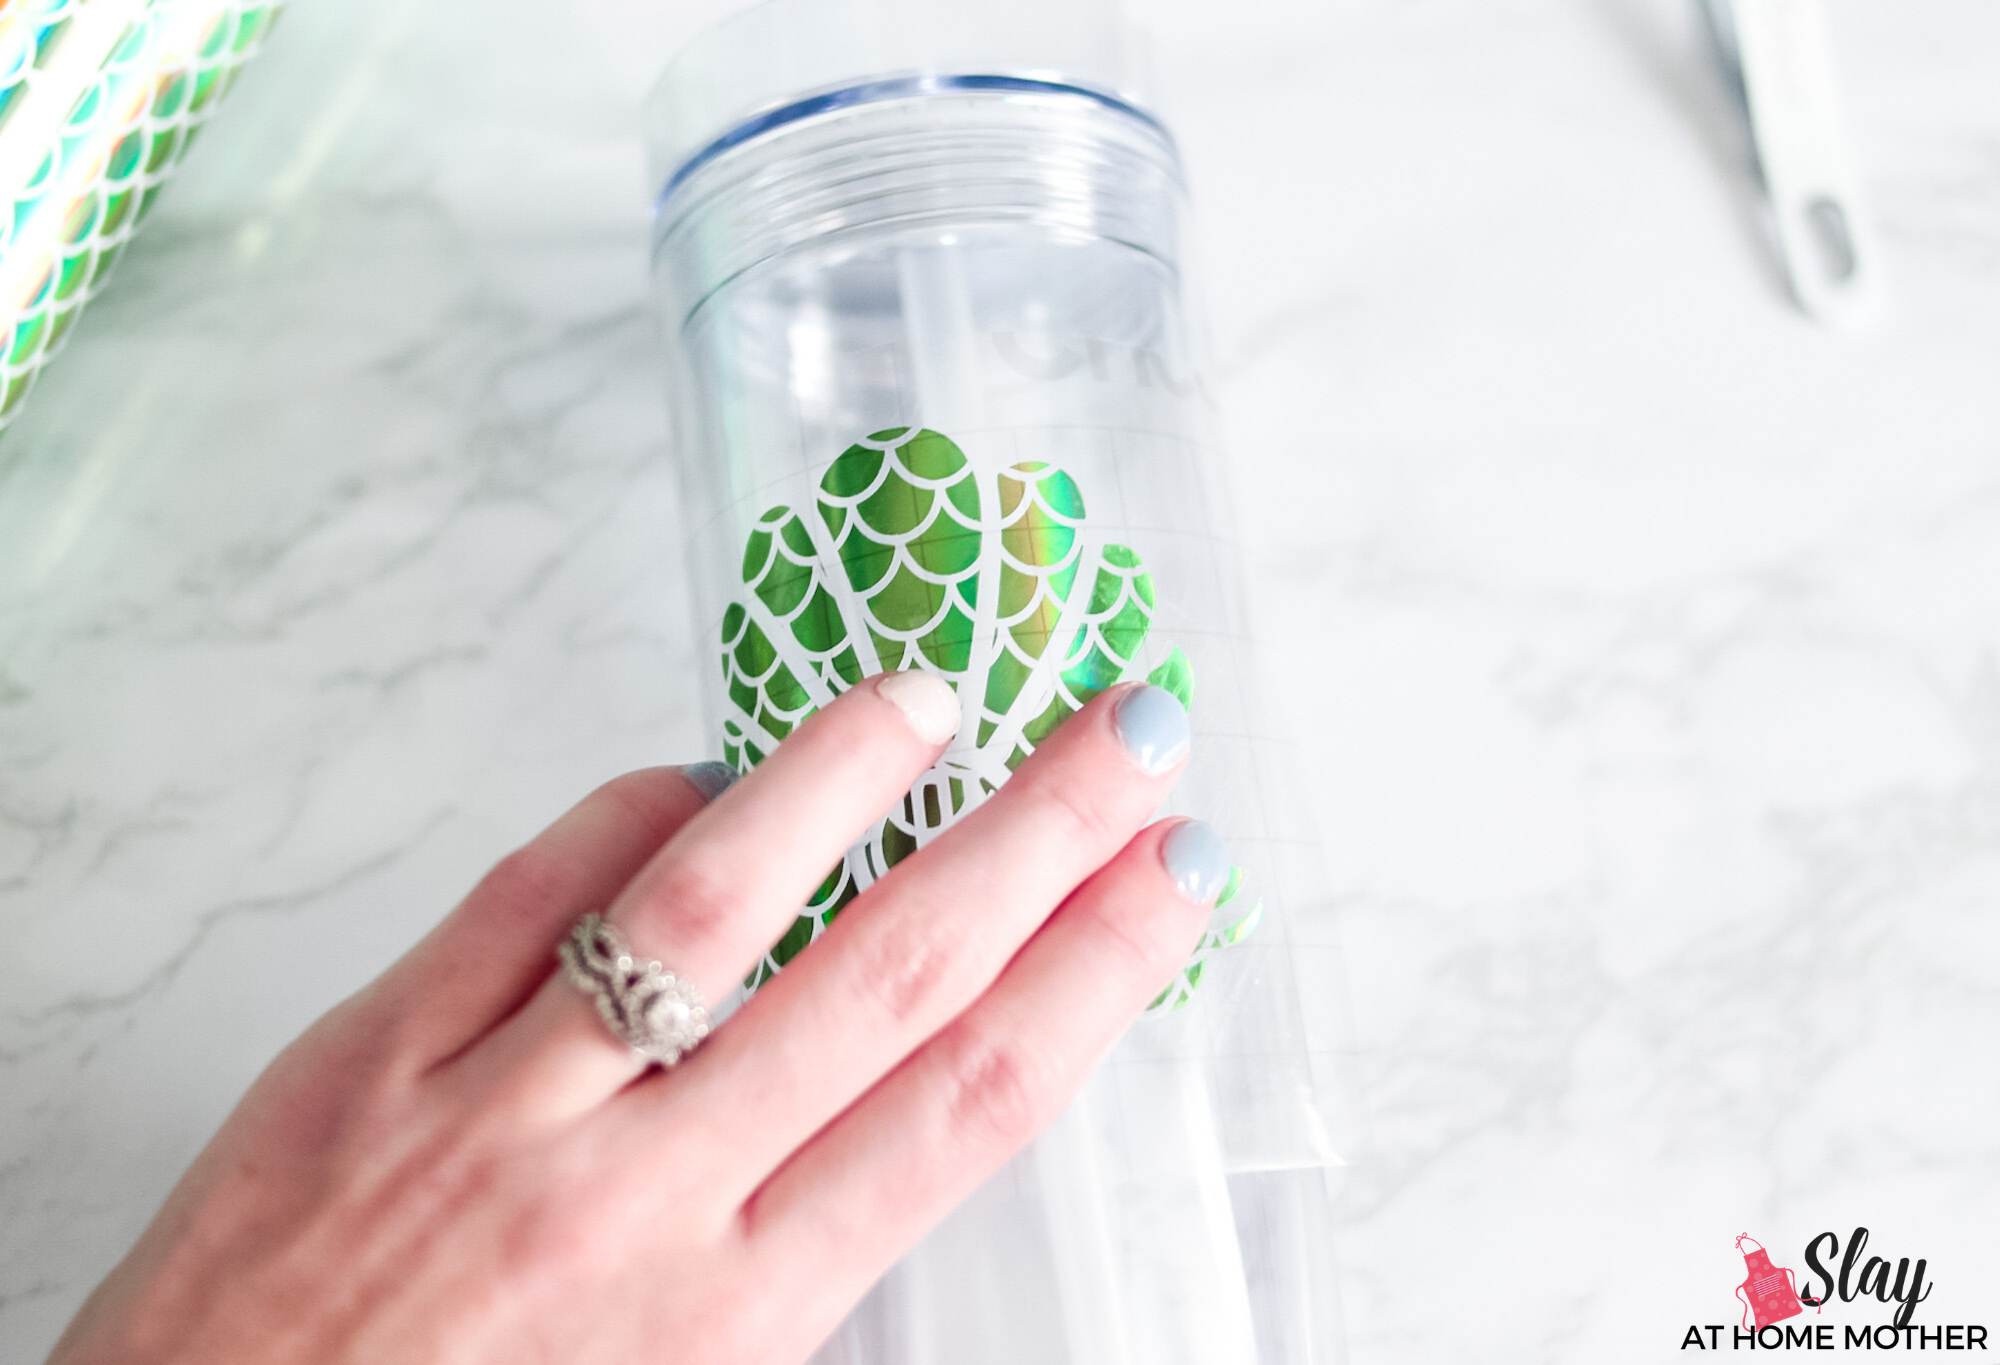
First, line the center of your decal up with your tumbler, and then press outward to each side so the decal sticks to your cup.
Smooth your decal design to each side to fully attach it to your tumbler.
Gently peel away the transfer tape from your tumbler to reveal your finished cup…
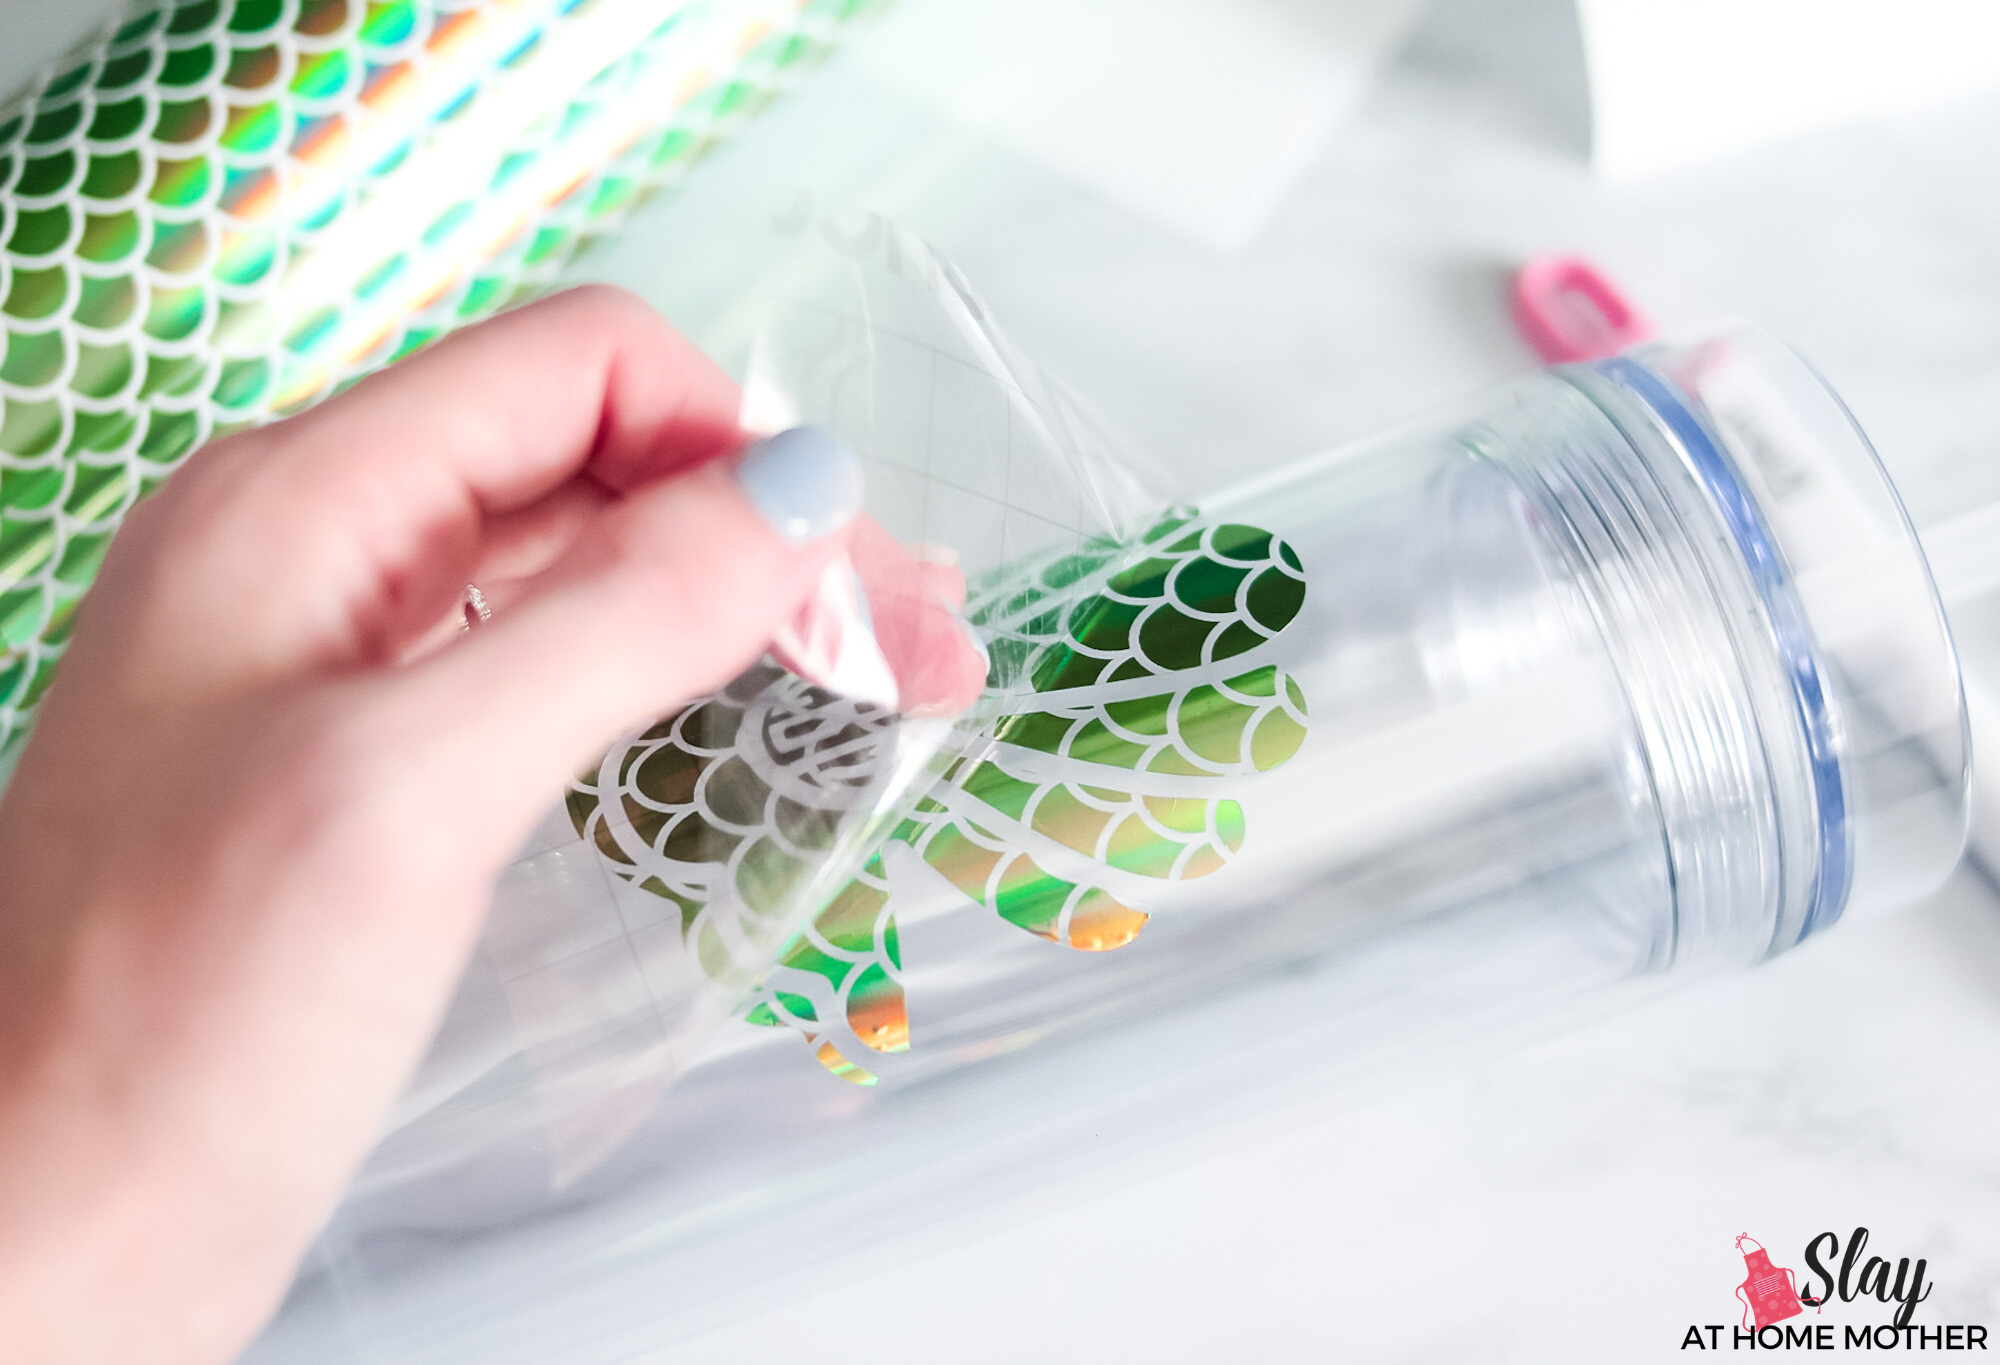
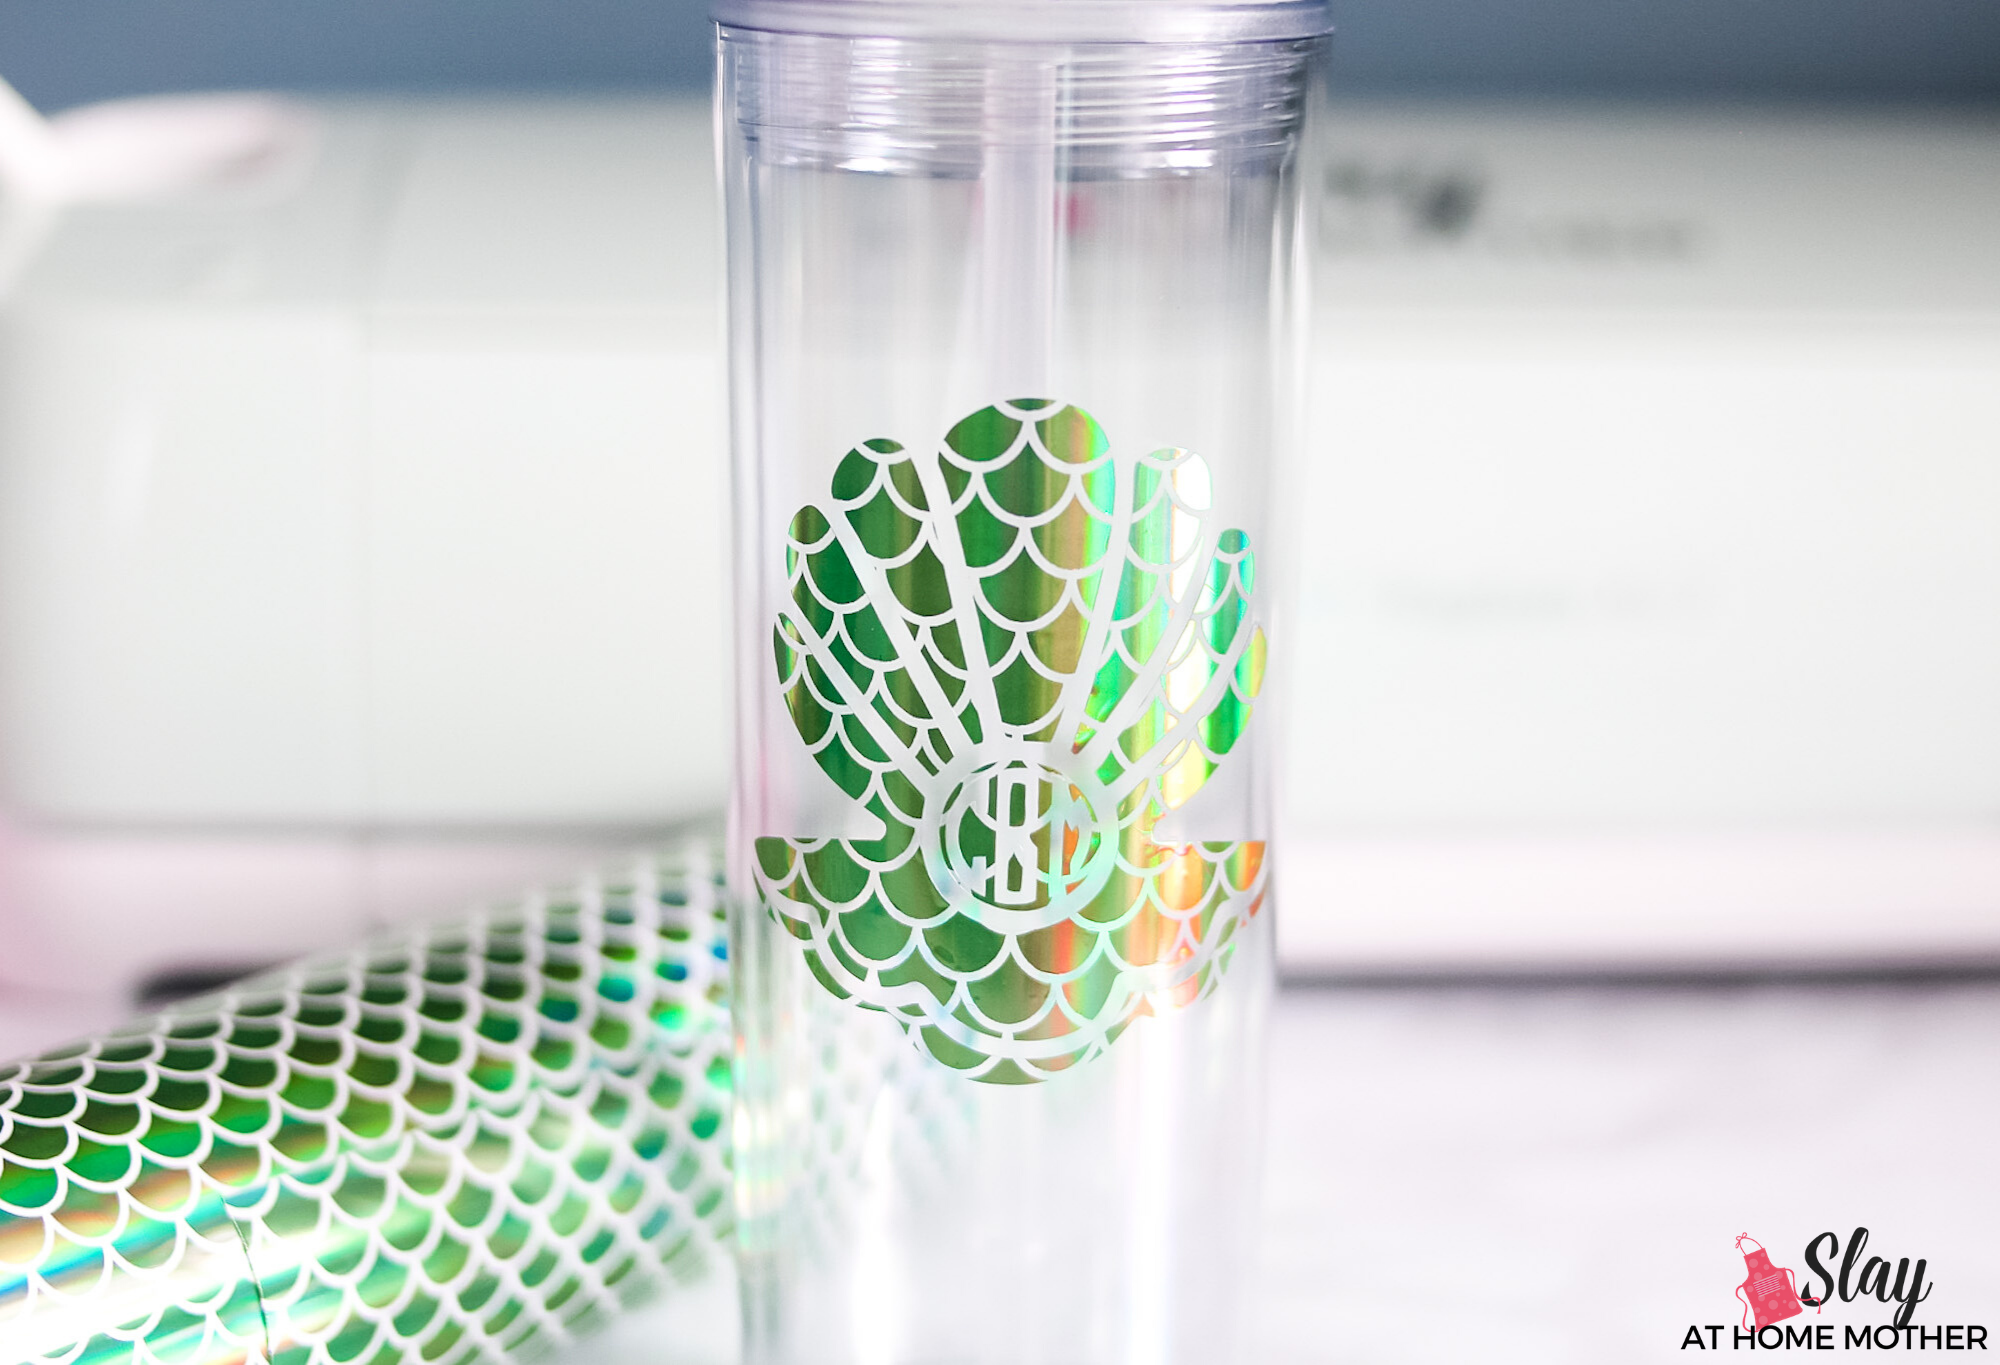
And you’re all done! Isn’t this vinyl gorgeous? I love the way it changes color depending on the light.
How Do I Wash These Monogram Tumblers?
Hand wash your monogram tumbler and straw in warm soapy water with a non-abrasive sponge – DO NOT PUT IN THE DISHWASHER.
Excessive soaking in the sink may cause the decal to separate from the tumbler.
I hope you enjoyed this post – I had so much fun creating it! If you make this design, be sure to tag me on Instagram (@slayathomemother) so I can see your creation.
Post originally published in Feb 2020, updated with video Mar 2023.

Hi! I just came across this project of yours on Pinterest, very cute!! You may already know this, but just in case not I wanted to share it with you: So on dafont, if you search monogram and go to the 20th font down called “Circle Monogramm” this is a much easier way to make the circle monograms. It is 3 different font files (for left, center, right) that way you don’t have to do the slicing and all. Just align the letters and your good to go!
Thank you, that’s so helpful 🙂