
Learn how to start a blog, plus read the 19 things I wish I could go back in time and tell myself in the beginning…

Do you make money blogging?
How much do you make?
How did you get started?
Can you give me any tips on how to start a blog?
I get asked these questions so often on Instagram, I thought I’d go ahead and write a post.
I have tried to be so kind and helpful to everyone that asks for help because I know how much it means to receive help when you really need it.
People have told me I should start a course for this – but I don’t have the time or the resources to do that right now, so I’ll share what I know in a post.
Be warned – this post is pretty long and thorough, but it doesn’t include every single thing I’ve learned in the last 4 years, and it won’t ever.
I just don’t have the time for all of that.
In fact, my husband is wrangling two of our littles in the living room right now so I can dedicate a few hours to writing this FINALLY.
I am finally finding the time to write it all down, and I’m so glad to be able to reference this post now so it doesn’t seem like I’m continually blowing people off with my crazy busy schedule!
That’s never my intention, but my family and business come first (because my blog helps pay the bills).
Alright, let’s get to it…
*This post contains affiliate links, however, all opinions are my own, as always.
How To Start A Blog
So you want to start a blog, but don’t know where to begin?
Oh, and you also want to make money doing it?
Here’s the skinny…
On average, it takes a minimum of six months for a blog to start making money.
And that’s if you start off the right way!
I’m going to do my best in this post to help you start off on the right foot, and give you some knowledge I wish I had almost four years ago when I started out.
You’ll need a self-hosted WordPress site, domain, and hosting…
WordPress.Org vs. WordPress.Com
If you’re starting a blog and want to monetize it, you’ll want a WordPress.Org site, also referred to as self-hosted.
That means you pay for hosting yourself, and you own your domain.
You can tell the difference between someone who has a WordPress.org and a WordPress.com site by their site address.
For instance, someone who does not have a self-hosted website will have an address that looks like this…
www.slayathomemother.wordpress.com
Whereas someone with a self-hosted website has a site address like this…
www.slayathomemother.com
Looking at those two…which one looks more professional to you?
Which one do you think brands will want to work with?
If you answered the www.slayathomemother.com one, you’re correct!
Other benefits to self-hosting include…
- being able to monetize your blog
- incorporating ads
- owning your site and the content
- site design and customization
The most important one, and the one you’re probably most interested in out of the above benefits, is monetization.
You simply can’t monetize a WordPress.com site.
How To Choose A Domain Name


Think of your brand – what do you want to write about?
Is it something other people are interested in?
P.S. The old days of ‘mommy bloggers’ (ugh – that term is like nails on a chalkboard for me…) is GONE.
Mommy blogs are so 2010.
I’m proof-reading this post right now and cringing hard as I read that in a Regina George voice.
No one cares to read honest and real experiences from people through blogs from a mom’s point of view anymore because we are all moms.
The space for real and raw conversations and posts are within Instagram captions now, FYI. 😉
What the internet is craving now is knowledge, tips, hacks, and expertise.
So think on what kind of tips or expertise you have, and capitalize on it!
To buy a domain, you can first look at a website like GoDaddy and type in different domains to see if they are available.
Think of simple, easy, straight-to-the-point names for your brand.
And, coming from someone who rebranded FIVE TIMES in her first year of blogging, take the process seriously.
Because rebranding suuuuucks.
Once you choose a name you love for your blog, be sure to check through social media channels to make sure it isn’t already taken.
Check these sites for handles or names that match your chosen domain:
- Etsy
- YouTube
Plenty of small businesses and brands have names already picked but don’t have a blog yet to go along with their content.
If a handle is already taken, you can always put ‘the‘ in front of it to make it YOURS, but remember that your social media handles will be public and something brands you work with in the future will be paying attention to.
I would also avoid numbers as much as possible.
Hosting Brands And Plans: Who To Avoid And Who To Go With


I started out using GoDaddy in the beginning.
After two years, they wanted me to upgrade my hosting plan an astronomical amount for…no reason?
I barely had enough traffic or disk usage to qualify the need to upgrade.
It left a really sour taste in my mouth, and I strongly discourage anyone and everyone from working with them for that.
Maybe they’ve changed – but I wouldn’t personally know.
What I do know is that none a lot of my big-time blogger friends use them.
The second year with them, my hosting price doubled, but I stayed for the customer service.
I’ve recently switched to host with BigScoots because the plan I had with SiteGround was about to max out thanks to my monthly visitors limit and I would have had to pay a crazy amount to upgrade.
BigScoots is the way to go in the long run, BUT if I could go back in time and tell myself to pick a host for just the first year, I’d go with SiteGround.
Because GoDaddy is slimy. 🙁
I also have a more generous monthly visitors limit on my plan, which I won’t be reaching anytime soon (or maybe I will – my traffic is up over 700% since last year!).
Design A Logo
![]()
![]()
When it comes to your logo, you can either create your own in a design program like Canva or you can purchase one on a website like Etsy.
Alternatively, you can contract a graphic designer to design one for you, but that is a service and can get expensive.
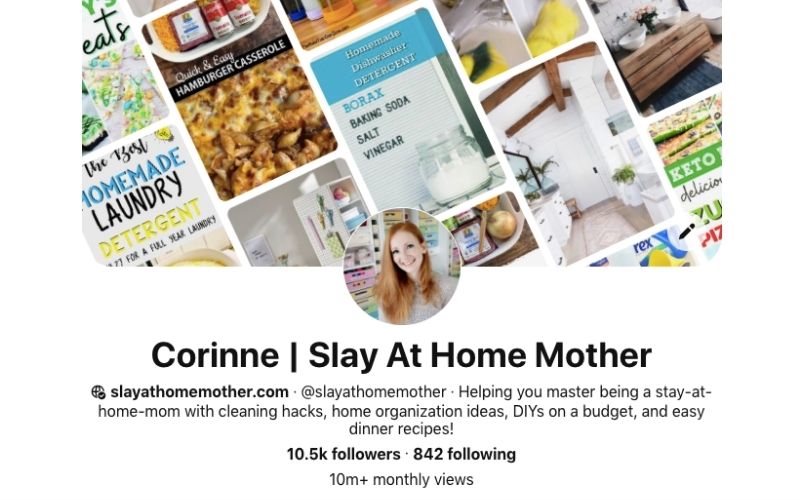
My logo, which you can find at the top of this page (and every page on my blog) clearly states my domain name and includes an image of an apron.
I write about homemaking – cleaning, organizing, and crafting, so it’s fitting.
It’s very direct, and between both my blog name and image, what you can expect from me.
But I will say I’ve seen blogs that just have fancy text at the top of the blog in place of a logo image and it’s been just fine.
You don’t need to spend hours and hours creating a logo for your brand if you don’t want to.
Select A Blog Theme Or Design

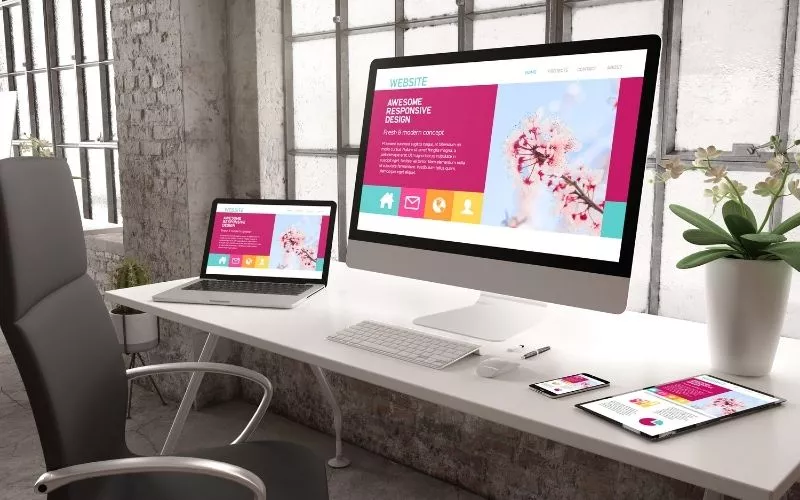
A lot of bloggers, myself included, use the Genesis framework with a child theme.
Child themes for the Genesis framework can be found online or even on Etsy.
If you’re wondering if it’s right for you, you can read up on their FAQs here.
Include a sidebar in your blog theme
An important element you’ll want to see in a blog theme is a sidebar.
Sidebars are where your author photo goes, as well as a search bar, and an ad or two.
The beauty behind a sidebar is that it stays on the screen for the reader, no matter how far down they scroll.
This is great for ad revenue.
Set Up Google Analytics And Google Adsense


Once you have your blog domain, hosting, and WordPress.org account set up, get Google set up!
What Is Google Analytics?
Google Analytics is going to be your new best friend.
It will tell you how well your blog is doing, how many users are visiting your site, your audience demographics, and so much more!
Set up your account, and download the app.
I check my GA app about 50x a day to keep track of my site.
You don’t have to be as obsessive, but my blog is my baby and is a huge source of income for my family.
I take its success very seriously.
Here’s a screenshot of my Google Analytics for the last 30 days compared to the same dates last year…
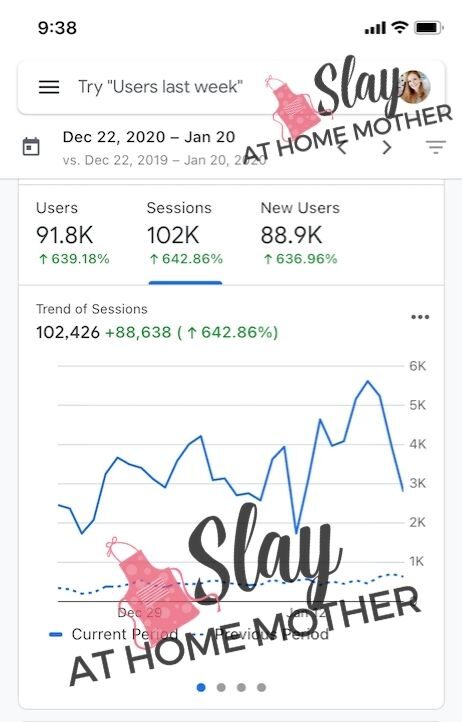
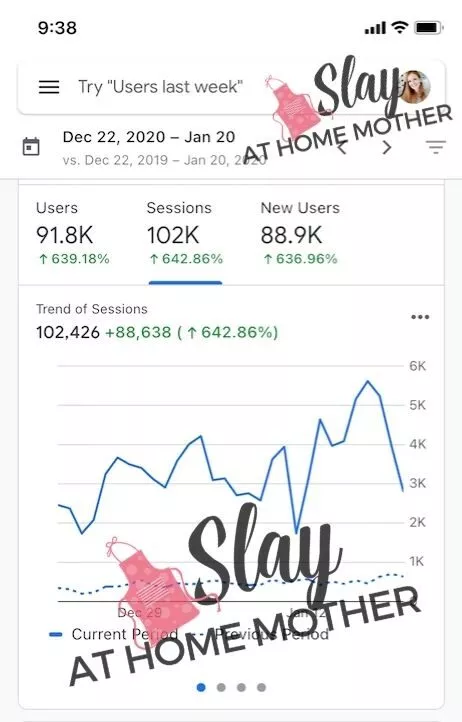
I’m putting my logo on this screenshot because, unfortunately, some people suck and try to steal stuff and claim it as their own.
Holy smokes, I’m up 642.86% from last year!!!
I also have over 1 million sessions a year right now – woohoo!
Metrics To Pay Attention To In Google Analytics
In the beginning, you’ll want to pay attention to your Sessions in GA.
Why is this important?
Because this number will be what qualifies you to sign on with bigger ad agencies like Mediavine in the future.
The old minimum for Mediavine was 25,000 monthly sessions.
Recently, they have increased it to 50,000.
The Impact Of Holidays And Events On Your Analytics
Don’t get discouraged on holidays or big events if your traffic is taking a dive.
This is common on days like Thanksgiving, Christmas, Inauguration Day, or during public events with tons of media coverage because people are paying attention to the news or their family.
Set Up And Install Google Adsense
In the beginning, you’ll want to set up an account on Google Adsense.
With an Adsense account, you will be able to implement ads from Google onto your site.
This will result in a little trickle of money for you until you can get in with a bigger ad agency.
Adsense does not pay as well as other ad companies, but you will be able to explore other options within this post once you get to at least 10,000 sessions per month.
I have a more detailed section further below in this post that goes into some of the more popular ad networks bloggers use.
Building Your E-mail list And Why That’s Important


As a blogger, one of our most valuable assets is our e-mail list.
If social media networks when down tomorrow and we didn’t have Instagram, Facebook, or Twitter – we’d still have our e-mail list.
It’s the one thing we own that no one can take from us.
It’s valuable because these are people who have signed up to receive content from us directly into their inbox and have trusted us with that personal information (like their name and e-mail).
If you’ve ever worked retail and have had to ask for someone’s email, you know that a good portion of people are reluctant to give it out, even with the promise of amazing coupons that will come their way!
How To Build An Email List
The easiest way to start building your email list is by offering your audience something for free.
A freebie, if you will.
People are more likely to give up their email in return for something they want.
Here are some ideas for free email incentives:
- checklists (cleaning, moving, workout, etc.)
- planners (menu, diet, daily, etc.)
- spreadsheets (budget, tracking, etc.)
- worksheets
The incentive should be related to your content – stay true to the kinds of information you’ll be delivering to your audience.
You want to attract the right people with your freebie.
For example, you don’t want to make a budget tracker printable if you’re writing about food.
Well, I guess unless it’s a grocery spending tracker…because that could technically work!
Design Your Freebie Online
Make your newsletter freebie online using a free program like Canva.
Utilize Google image search to find some similar checklists or printables to get some ideas – BUT DON’T COPY OTHER PEOPLE.
Make your printable/freebie unique and useful.
What are some elements that these other freebies are missing?
Implement a different layout, factors, and designs that other printables don’t have.
Really make it your own!
Building Your E-mail List Before Your Site Goes Live
It is very possible to start generating your e-mail list prior to launching your site for the World Wide Web to see.
In this case, you’d set up your website homepage to be a landing page where people could enter their name and e-mail address to sign up for your newsletter.
Tempt them by letting them know that you will let them know via e-mail as soon as your website is live!
This isn’t necessary, and it may not be a popular option for those without established social media profiles, but it’s definitely an option!
This would be a great option for people who have brands on Instagram or Facebook that are thinking of launching a website.
These new bloggers already have an audience established that might be interested in reading a blog dedicated to what they’re already sharing on social media.
Otherwise, it might be just your mom and grandma signing up for your newsletter ;).
How To Write A Blog Post

When you begin writing blog posts, your goal is to appear on the first page of Google’s search results.
When you’re searching for almost anything – how often do you actually make it to page 2 of Google’s search results?
Hardly ever.
And you aren’t alone.
Most people select one of the search results from the first page of their search results.
But how do you get your blog post on the first page?
The answer is SEO…
What Is SEO?
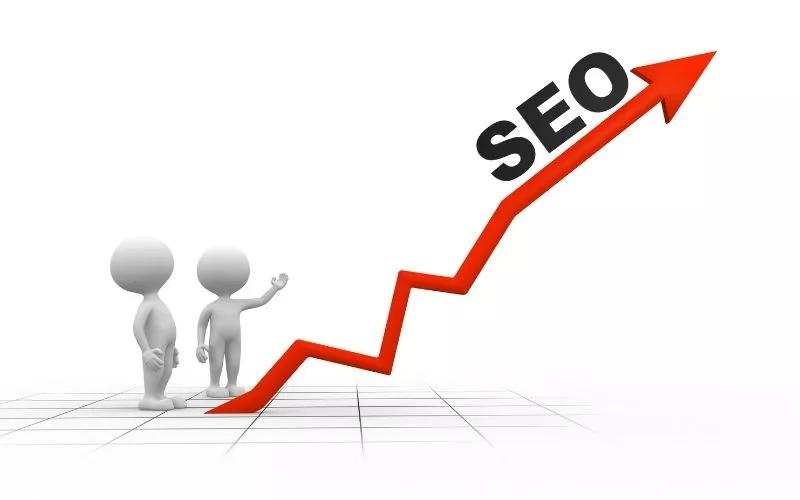
SEO= Search Engine Optimization.
According to Neil Patel’s site, “SEO stands for search engine optimization. Which is the art of ranking high on a search engine in the unpaid section, also known as the organic listings.”
Any blogger that’s been around for a bit and is doing well will tell you just how important it is to optimize your posts.
Using keyword research tools can give you an idea of which terms to focus on by giving you intel on who many monthly searches a certain key phrase or keyword gets in searches, the CPC (cost per click), and how easy or difficult it is to rank for that keyword/phrase.
A good rule of thumb is to stick with keywords that have a minimum of 1,000 monthly searches.
You don’t want to focus on a keyword that received 30or 100 monthly searches because that post will never be enough to generate enough in ads or revenue.
I mean, you could write a thousand of these types of posts, but it’s a lot more work on your end versus writing about something people actually want to read and research.
Best Keyword Research Tool
To research keywords, I use a paid site called SEMRUSH.
Oftentimes, the free keyword sites just don’t give you accurate information.
Free Keyword Research Tools
The only decent free keyword research tool I would recommend at this time would be Neil Patel’s Ubersuggest.
How I Write My Blog Posts For SEO
First, I come up with an idea for a blog post I want to write, and research good keywords to center my blog post around.
Blurp At The Top
In each blog post, I start off with a little blurp at the top and include my main keyword.
I put the keyword in BOLD.
I want to reassure readers who have clicked on my link that they’re here for the right reasons.
Insert Pin Image
I create a pin for Pinterest but also include it in my post at the top.
Intro
This is the part of the post that most readers skip.
I’ve seen so many posts on social media making fun of the fact that bloggers will sit there and write 500 words in their intro about something that seems so random.
“Just tell me how to make the recipe, dang it!”
But the intro is important and is a great way to increase your post word count, which is important for SEO.
Try to keep it relevant to the post, however, because Google will read it, and some of your readers may actually sit through it and read.
Affiliate Disclosure
After your intro, and before any affiliate links are put into a post, I write a quick affiliate disclosure, like this:
This post contains affiliate links, however, all opinions are my own, as always.
If your post does not include affiliate links, you can skip this step.
Include Ingredients Or Supplies They’ll Need
Before starting a project, and because I know many of my readers are skimming through a post during their lunch hour or with kids on their lap, I include a picture and write up of the items they’ll need to replicate the project or recipe.
Step-By-Step Instructions
Even if it’s a recipe, I take my readers through each step in case they have questions.
This is a great way to increase your post’s word count.
Sprinkle in some keywords organically as they fit.
Do not keyword stuff.
Finished Project Or Recipe
I always take a few pictures of the finished project, both on a working surface, and in use.
For example, when I made a front door sign with my Cricut last year, I took pictures of it finished on my desk, as well as hung on the door.
Things I Include Throughout The Post
- affiliate links (I’ve got a section below dedicated to affiliates!)
- links to other relevant posts on my blog
- you may also like:
- Related:
- Be sure to grab my free printable fridge labels at the bottom of this post, and learn how to clean your fridge the right way in this post!
- affiliate disclosure (this is required by the FTC – Federal Trade Commission).
How Long Should Blog Posts Be?
Aim for at least 1,000 words, but try not to go over 5,000.
I think I have one or two posts that go over 3,600, but that’s it.
Taking Images For a Blog Post


Portrait images do better for ad revenue in a blog post vs. landscape.
Why?
Because users spend more time on posts that have portrait images – they have to scroll to see the entire image, and more scrolling means more exposure to in-content ads and sidebar ads.
When you are taking pictures of your recipe or project for a post, be sure to take plenty of pictures in both portrait and landscape mode.
Ideas For Photos To Include In Blog Posts
You’ll want plenty of images in posts!
Here are some ideas, if you’re stuck, of what you can photograph to include in your blog post…
- flat lay of ingredients or supplies needed
- step-by-step pictures
- special ingredients
- close-ups of particular items
- project in stages
- side-by-side before and afters
- closeup of particular steps (thread through a needle, or smoothing frosting on a cake, etc.)
Write 5 Blog Posts Before You Launch
Have content ready to go and scheduled.
This is definitely something I wish I did, it helps you stay ahead of the game and be consistent, which Google likes.
What Are Affiliate Links And Why Are They Important
As an affiliate, I am able to post a link to a product or service and earn a commission from that sale.
Commission rates are up to the advertiser and can vary with time.
Why are affiliate links important for bloggers?
A lot of different products and services that bloggers use offer affiliate programs – which is amazing!
Companies know that bloggers network with each other and that we trust each other’s recommendations.
I’m not happy with my site host – who do you use?
Oh, I use BigScoots, they’re amazing! My site speed and traffic even increased after migrating my site!
Are you serious? That’s crazy! Are they expensive? Which plan did you get?
^ Serious actual conversation I had with a blogging bestie last week!
Besides the fact that you can earn a commission from sales through affiliate links, they’re also important because they help you diversify your income.
When it comes to earning a full-time income from your blog, you don’t want to put all your eggs in one basket.
If you depend solely on ad income, but then have a really crappy week with traffic and your ad income tanks – you’ll be scrambling!
Most bloggers, myself included, earn a full-time income through…
- products (click here to check out My Shop!)
- affiliate earnings
- ad income
While ad income will probably be the majority of your earnings once your traffic takes off, developing a healthy income from affiliate links or creating digital products to sell is a great practice and can help you diversify your income.
Affiliate Networks To Sign Up For
- Shareasale
- RewardStyle (if you already have the LikeToKnowIt app, you are a little familiar with RewardStyle!)
- Amazon
These are the big three.
You can easily apply to become an affiliate with Shareasale or Amazon, but I believe RewardStyle requires another blogger or influencer to refer you.
Personally, my other affiliates come straight from the advertisers, like BigScoots, Create Room, Force Of Nature, etc.
Adding An Affiliate Disclosure To Your Post
Unless you want to receive a fine from the Federal Trade Commission, you’ll need t include an affiliate disclosure in your posts (for any posts that actually include affiliate links).
This helps protect the consumer and lets them know that, yes, you are recommending a product or service, but you’re getting some cash from the sale as well.
And not all bloggers are ethical in recommending things to their readers – some of them are just after the money they’ll make.
I know, I said it.
P.S. Don’t be one of those bloggers.
Earn the trust and respect from your readers – they’re trusting your recommendation and reviews with their hard-earned money!
Ad Networks For Blogs


If you want to earn an income from your blog, ads are very important.
Popular ad networks and their minimum required blog stats:
- Adsense
- Enzoic – 10,000 monthly sessions
- Mediavine – 50,000 monthly sessions
- AdThrive – 100,000 monthly pageviews
It’s important to note that sessions are different from page views – you can see this information in your Google Analytics.
Adsense does not require any minimum monthly views or sessions, just that your content is original and engaging.
Enzoic requires a monthly minimum of 10,000 sessions.
From what I’ve heard, bloggers running Enzoic ads on their sites have experienced site speed decreases and mentioned it isn’t very user-friendly. The developers don’t seem to be as helpful or responsive to these concerns, either.
Mediavine recently increased their monthly minimum of 25k sessions to 50k.
I can speak to Mediavine since I am part of their network – in my opinion, they are incredible to work with, are constantly evaluating sites within their network for improvement and ad increases, and seem to be on top of algorithm changes.
Their dashboard and settings are easy to navigate, as well.
AdThrive requires a monthly minimum of 100,000 page views.
I currently do not know anyone in the AdThrive ad network but haven’t heard anything negative so far.
Create Pinterest Images For Each Blog Post

Pinterest is a huge traffic source for many bloggers.
Think about how often you look things up on Pinterest.
Recipes, outfits, home decor, organization, cleaning hacks, etc.
Each pin on Pinterest was created by a blogger, or a company, as a way to garner clicks to their post!
Clicks = traffic!!!
I use Canva to create my pins.
Using pictures from the blog post, I craft each pin to help draw in my target audience to want to click and read my post.
Here’s a funny visual for you that I want you to consider when you’re making your pins with text overlay, though…
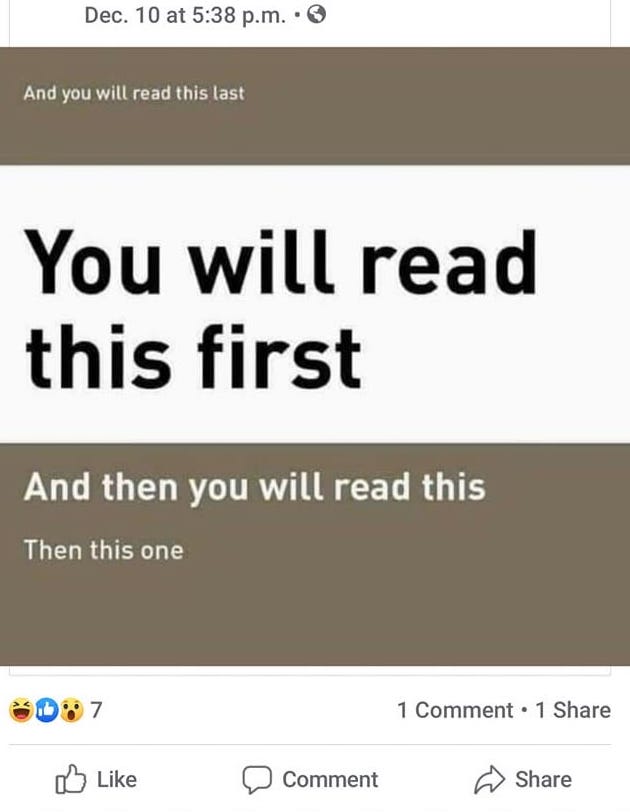

Always remember this picture when you’re putting text on your pin, and choosing which font and keywords to put at the forefront of your pin – BECAUSE IT REALLY DOES MATTER. 🙂
19 Things I Wish I Knew When I Started Blogging
- Look at your blog like a business, and treat it as such from the *very beginning.*
- Implement SEO – don’t skip this for any post
- Take landscape photos for blog post
- Thoroughly research blog name before dedicating to it
- Write about what you’re passionate about
- Be consistent with posting – 2x a week, x a week, 1x a month
- Invest in a good camera, and then really take the time to learn how to use it properly
- Network with a bunch of bloggers, particularly the ones that are starting out at the same time you are
- You’ll get better with time so give yourself grace even if others don’t
- You should always be willing to learn and pivot when you can (algorithm changes, etc)
- Focus on quality, not the quantity of blog content (more posts isn’t always a good thing)
- Utilize internal links (link to other relevant posts within your content)
- Each month, choose 1-2 older blog posts to update
- Volunteer to be a guest writer on other blogs to gain some traffic
- Use social media to promote your blog posts
- Start thinking of a digital product (here are mine, for reference) that can help your audience – what question do you get asked often?
- Include your most valuable content towards the end of your post
- Don’t utilize media kits – they box you into rates so there is no wiggle room, and brands often take advantage of this. Get all information from the brand about the project/collaboration, and THEN give them a rate. Factor in exclusivity (if you work with one vacuum brand this year and they want you to refrain from mentioning or linking to other vacuums for the next 6 months, that is a lot of opportunities you may have to give up.)
- Take it easy on the number of plugins you install on our site – too many is actually a bad thing, and can really slow your site down.
Now that I’m at almost 4,500 words for this post, I think I’m going to end it here.
I hope this information was enough to learn how to start a blog this year!
There is, of course, much more to blogging than just this post, but I wanted to write down the basics in something that it, hopefully, easily digestible and very direct.
Got questions? Comment them down below and I’ll try to answer them, but remember that this post is not supposed to encompass EVERYTHING, and is really just a roadmap to getting started right…
*Post originally published January 2021, last updated October 2022.