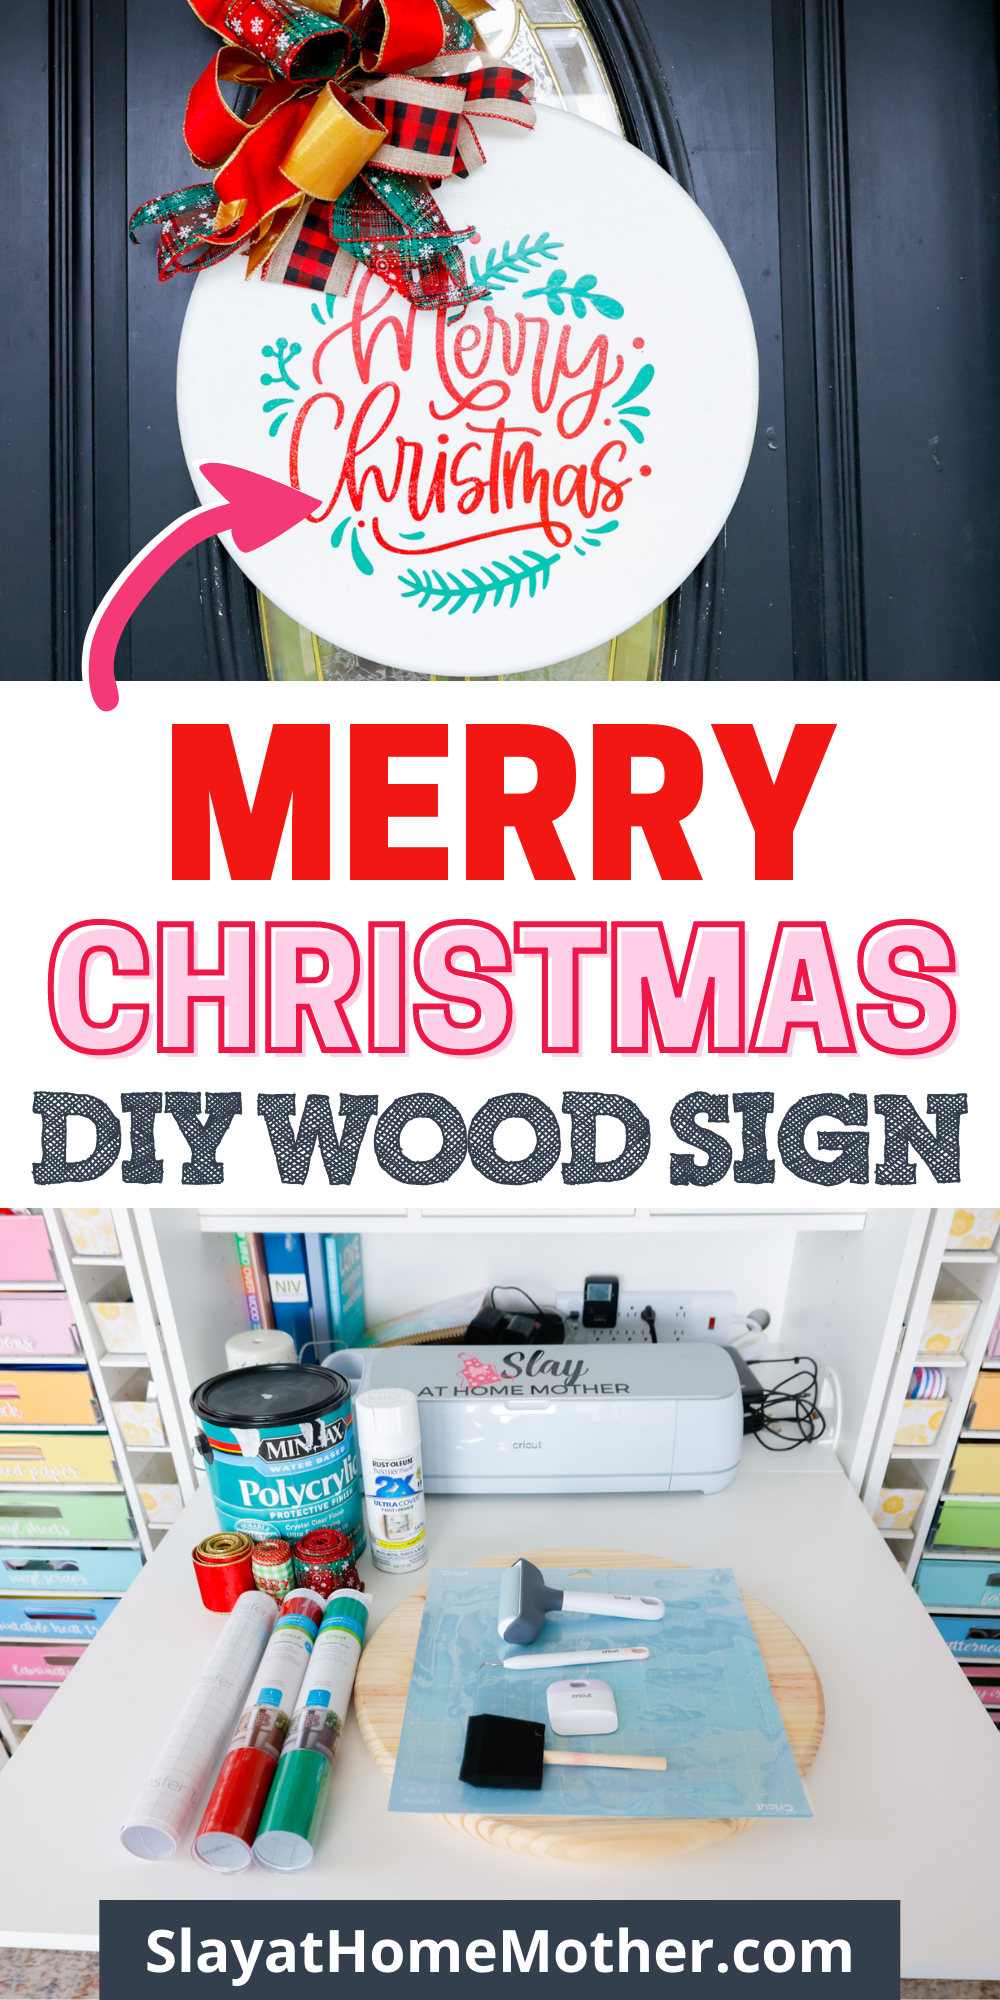
Make this gorgeous Merry Christmas Wood Sign with your Cricut machine – free design link!
Hi there, fellow crafters!
Anyone else super late making their holiday decor?
As a content creator, I try to have my Christmas content out by Halloween.
So dropping a new post this close to Christmas feels SUPER LATE to me.
But I’m just thankful that I’m able to do this and consider it work, and be able to share it with all of you!
Here’s my latest Christmas craft, with a free Design Space link for you to create your own…
*This post contains affiliate links, however, all opinions are my own, as always.
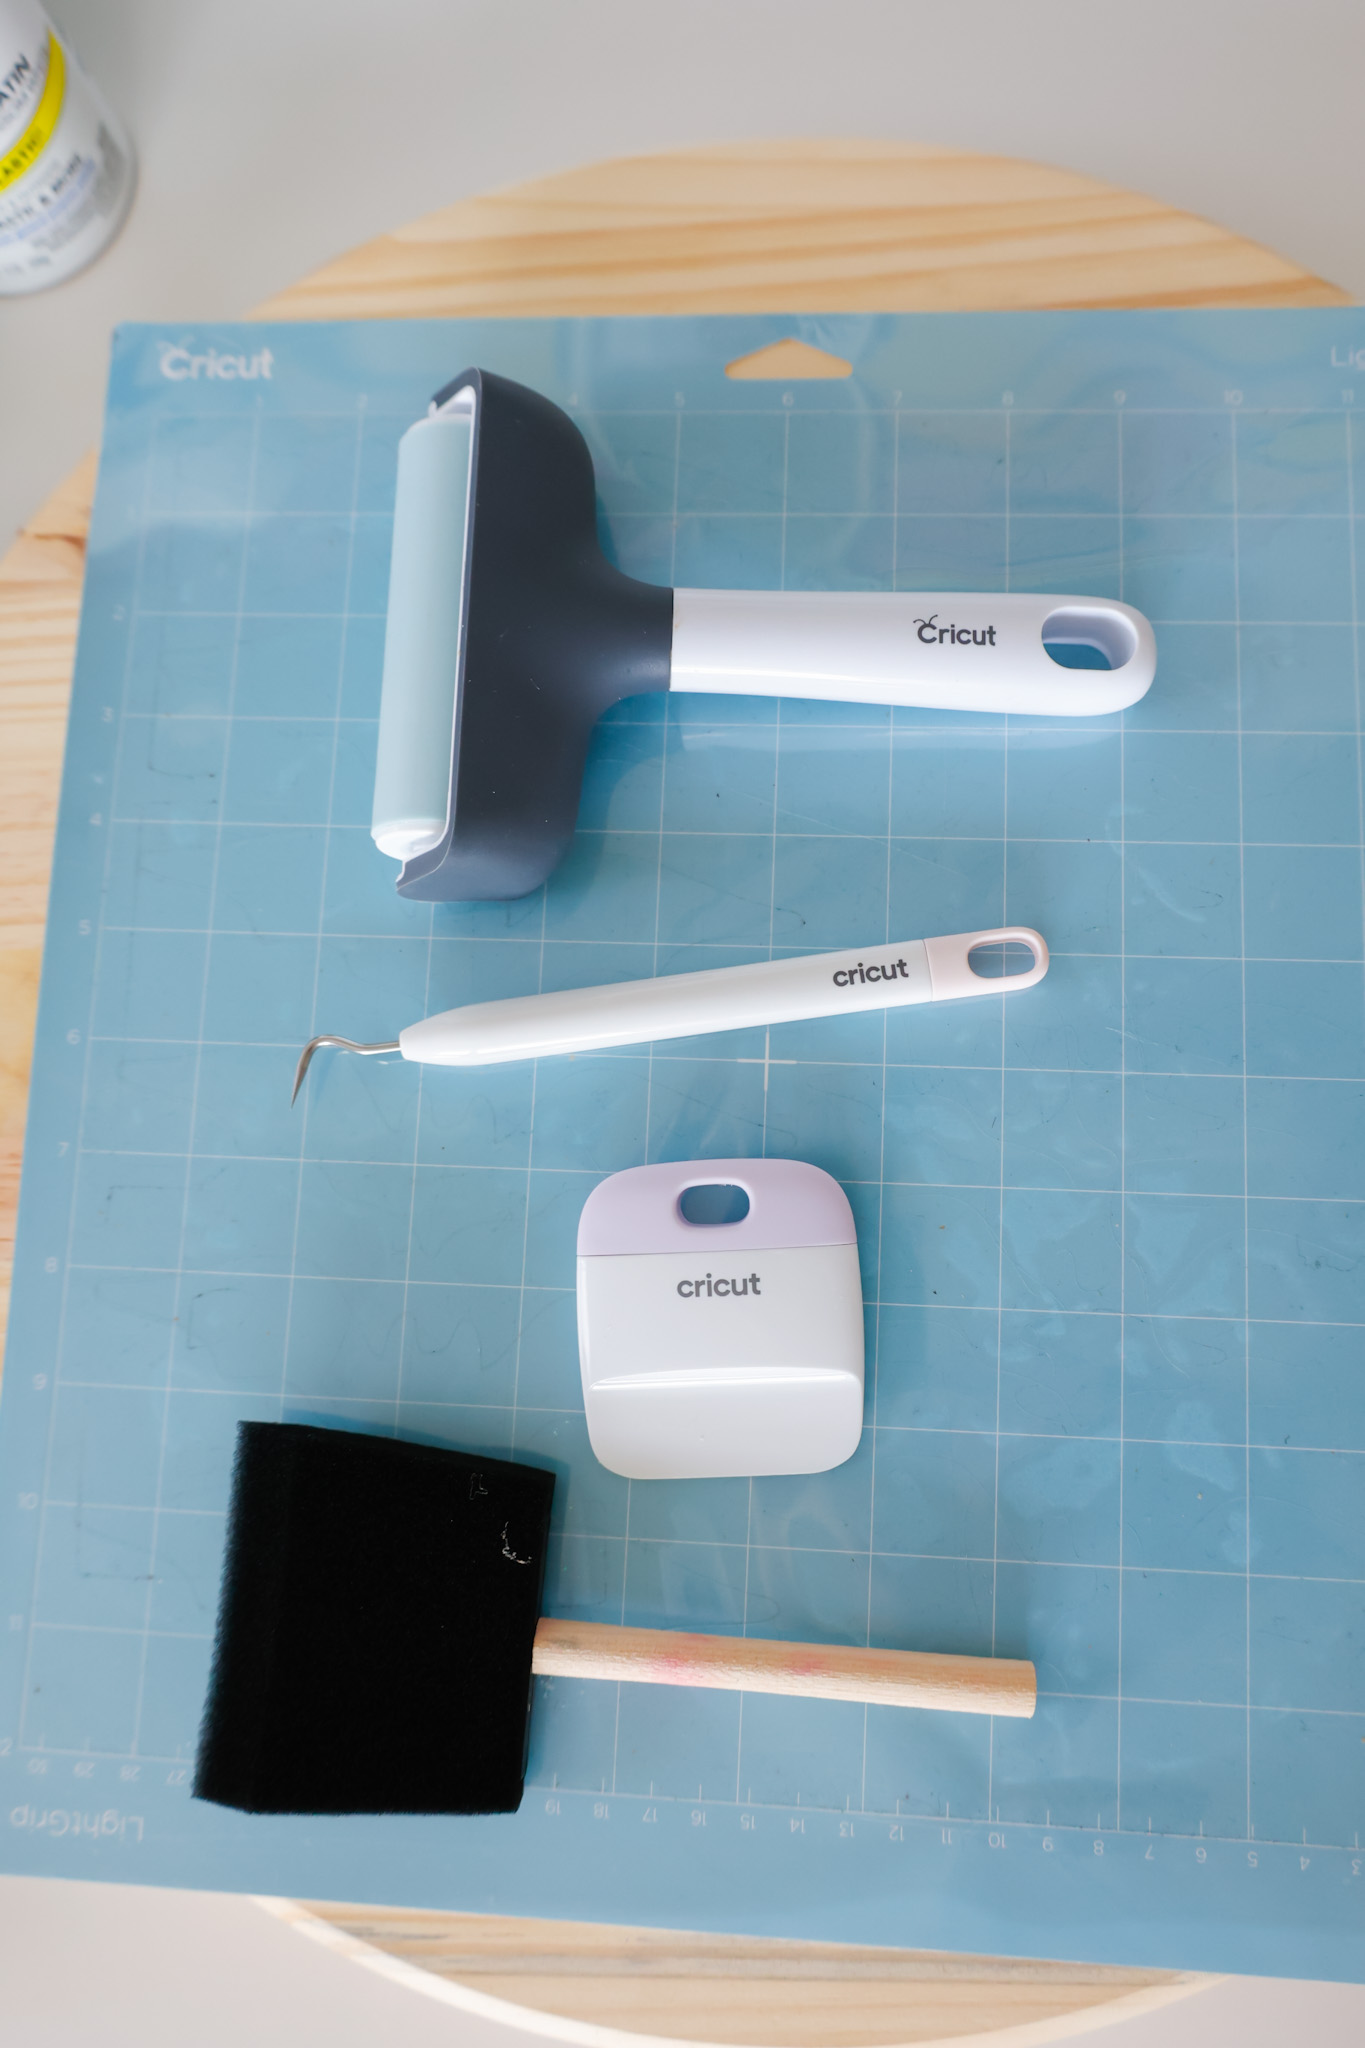
What You Need To Make This DIY Wood Sign
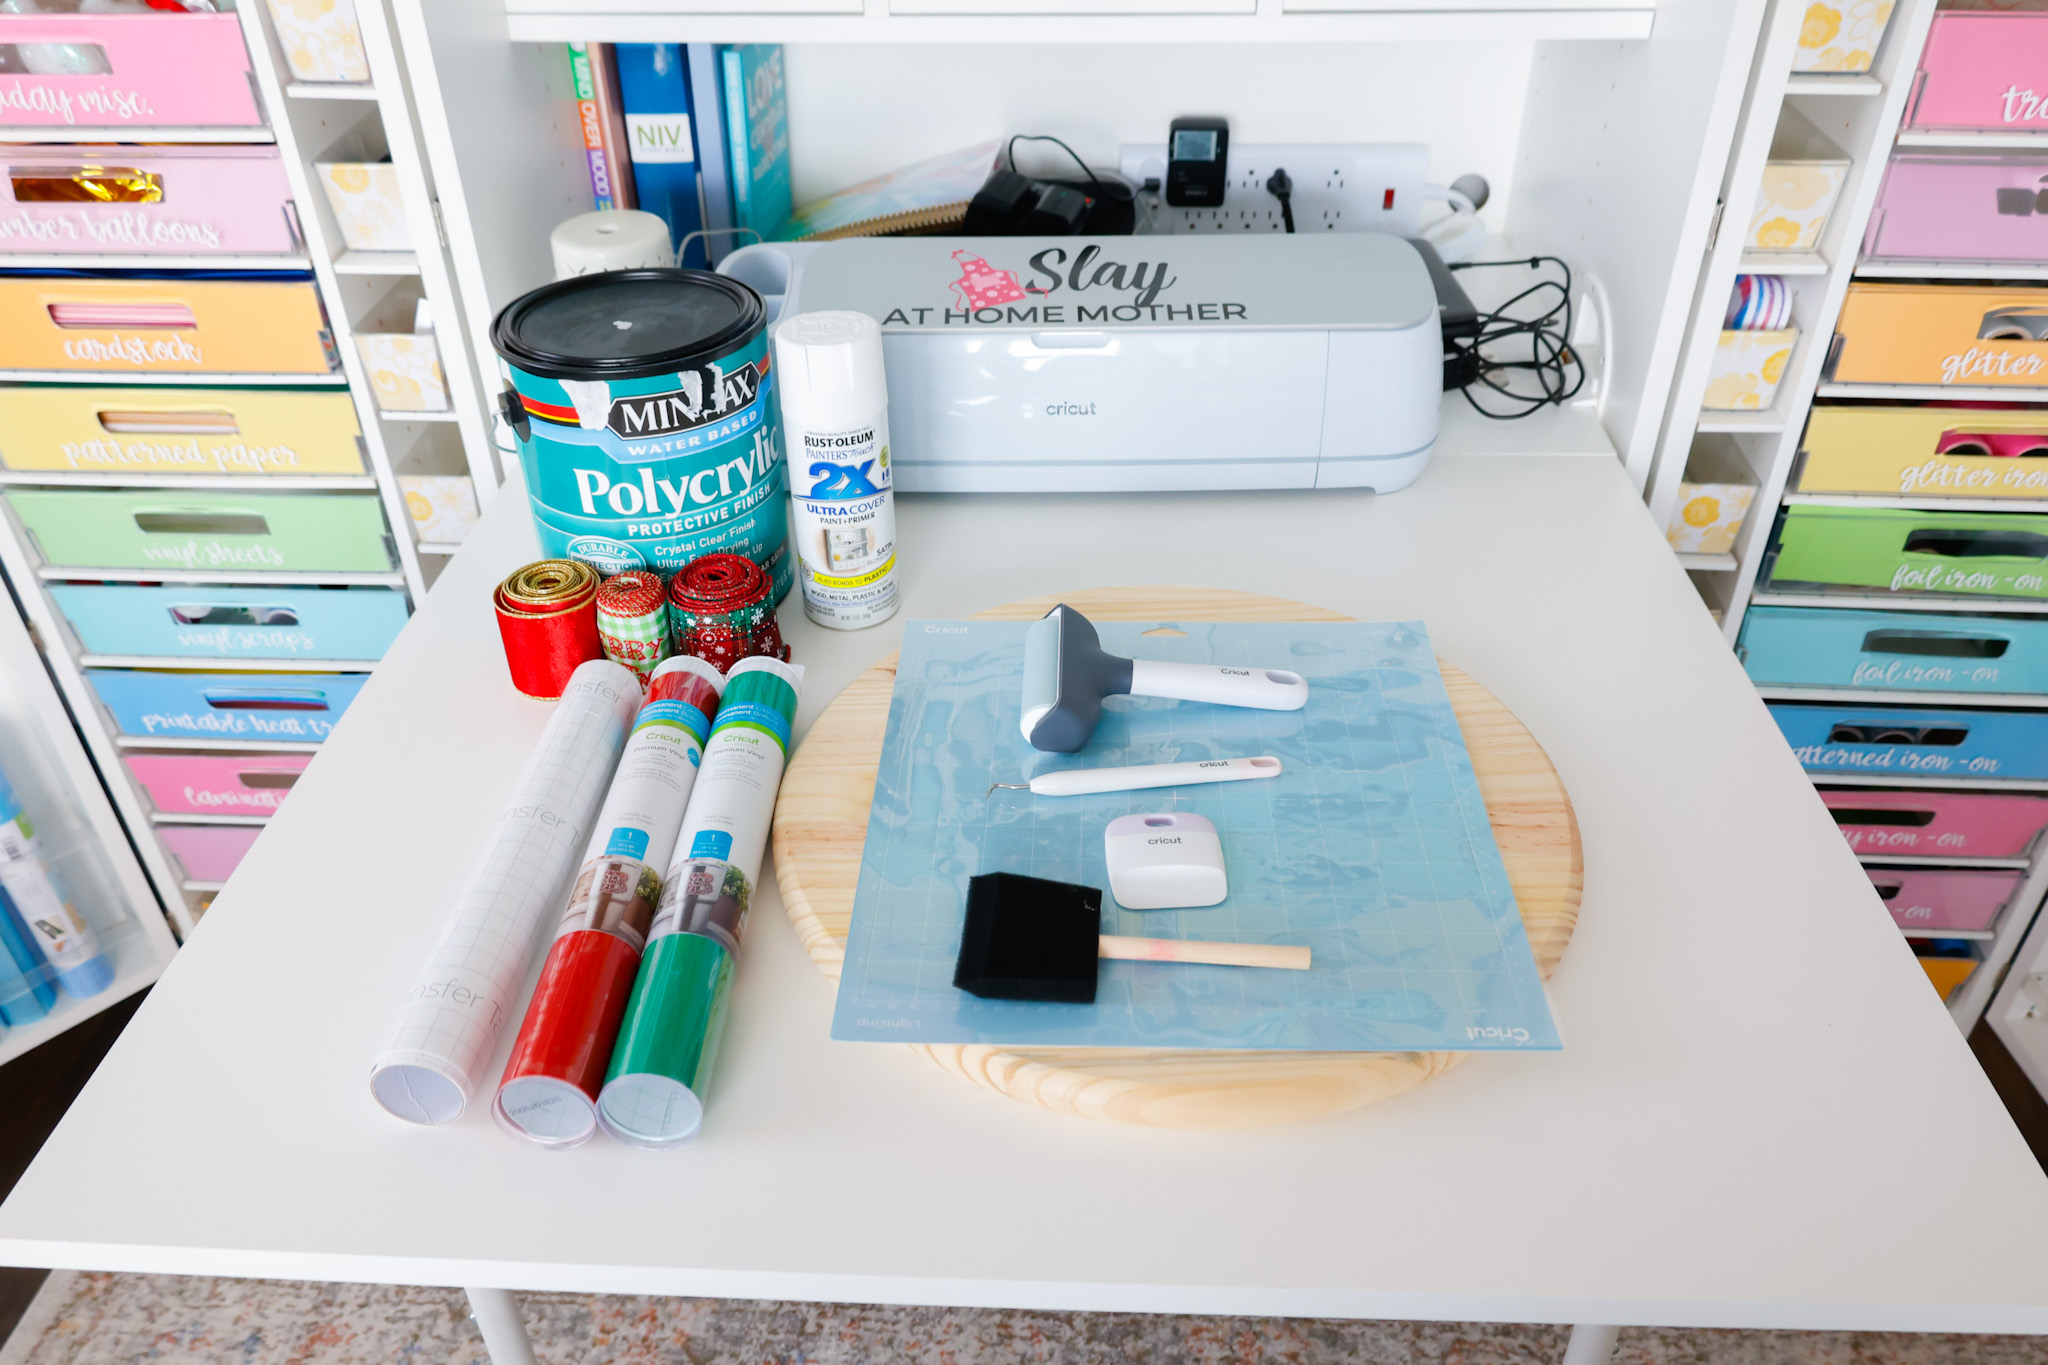
- 14″+ wood round (I’m using an 18″ round that I got for about $10 at our local hardware store)
- Cricut machine
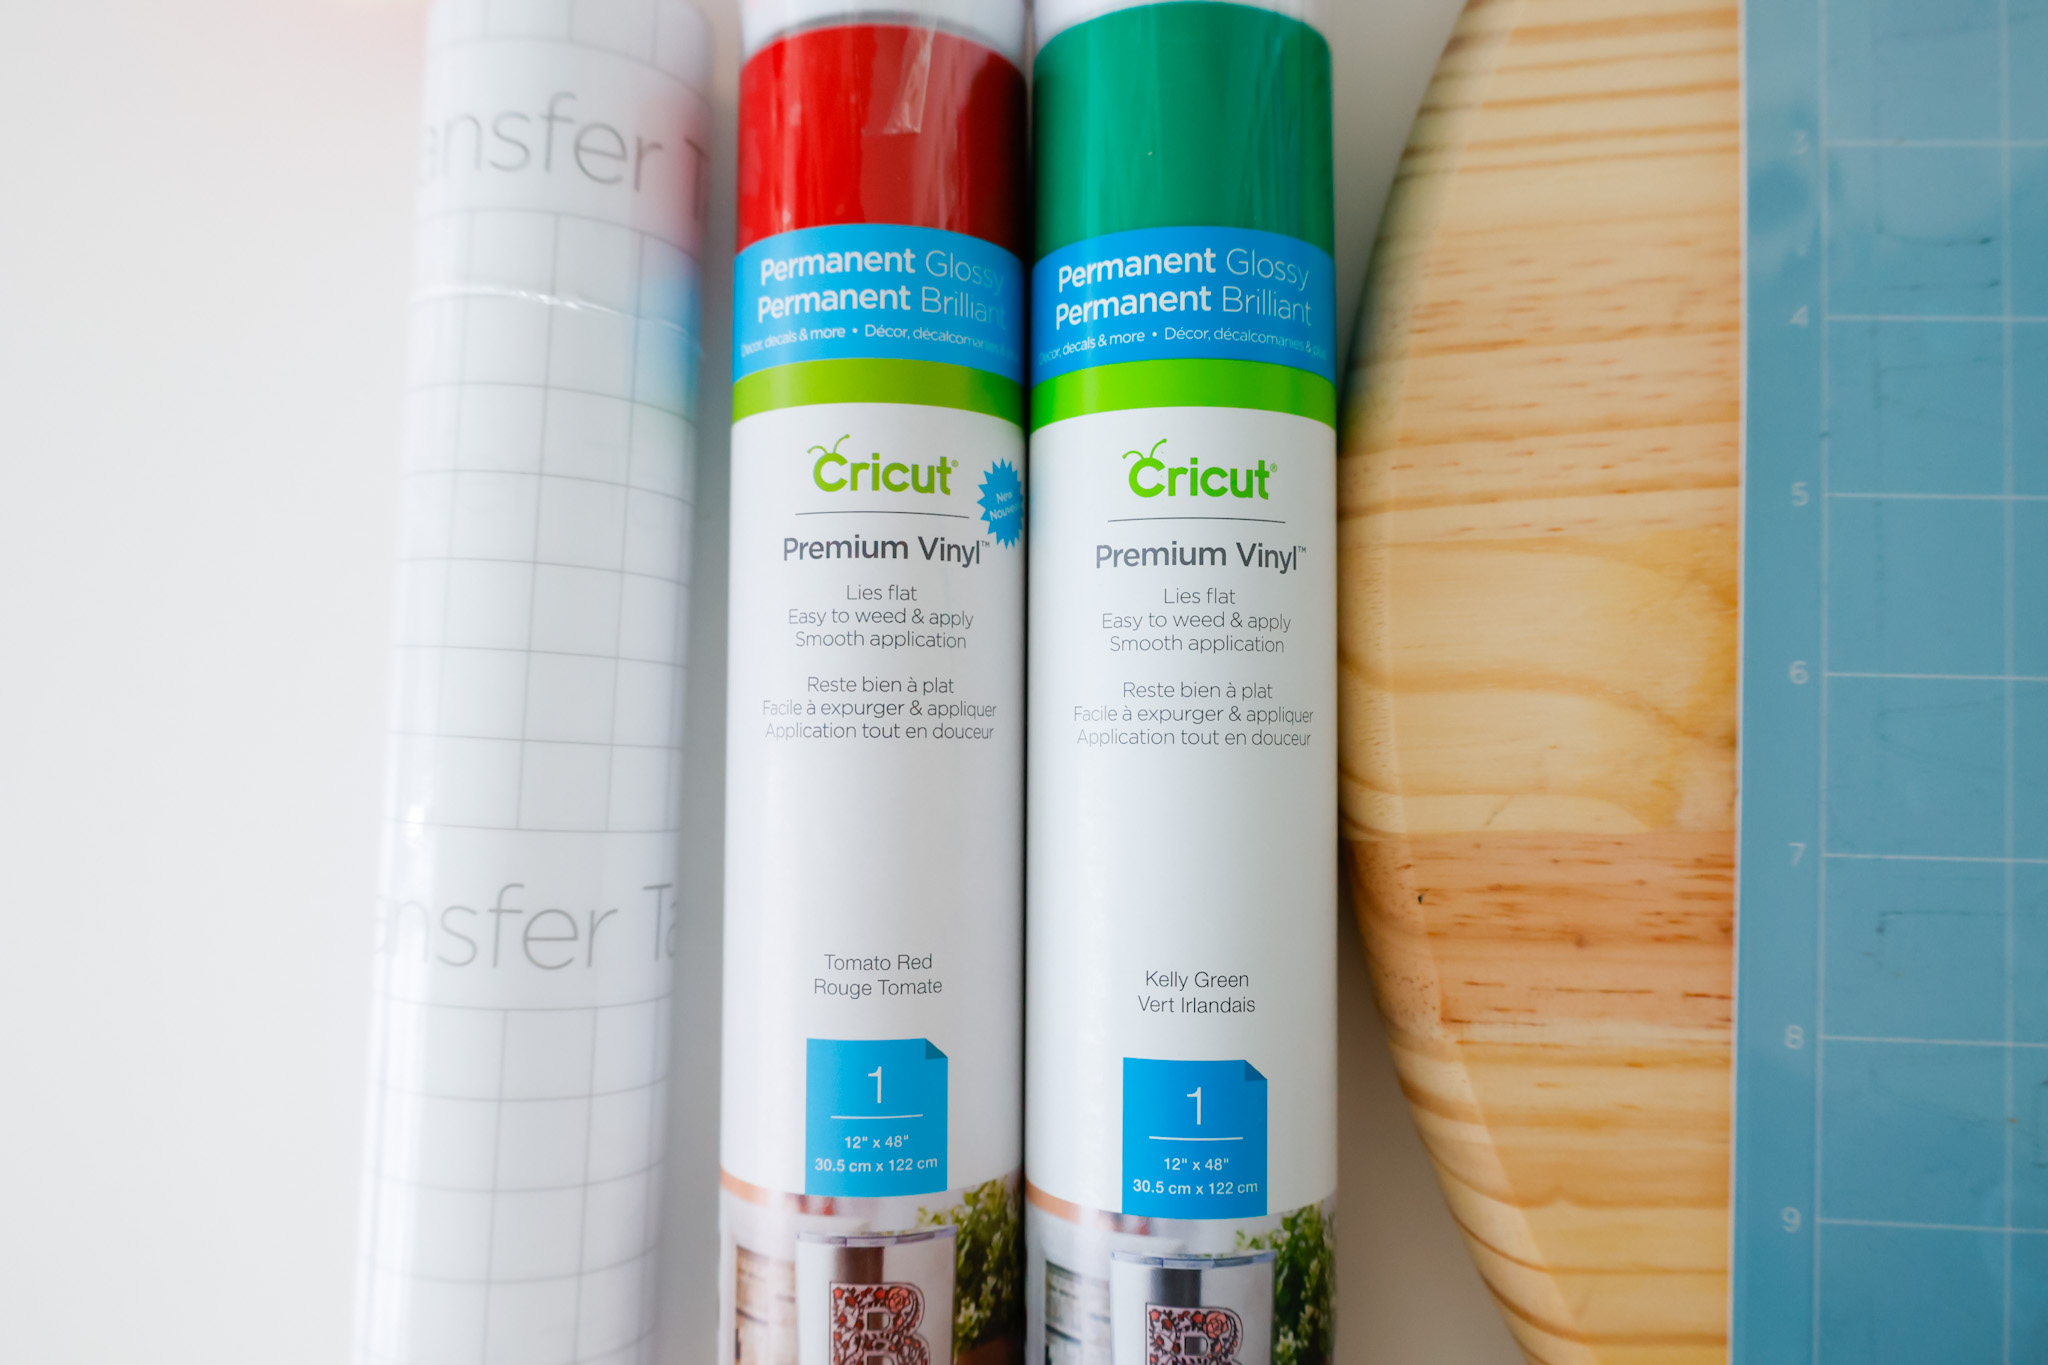
- permanent vinyl
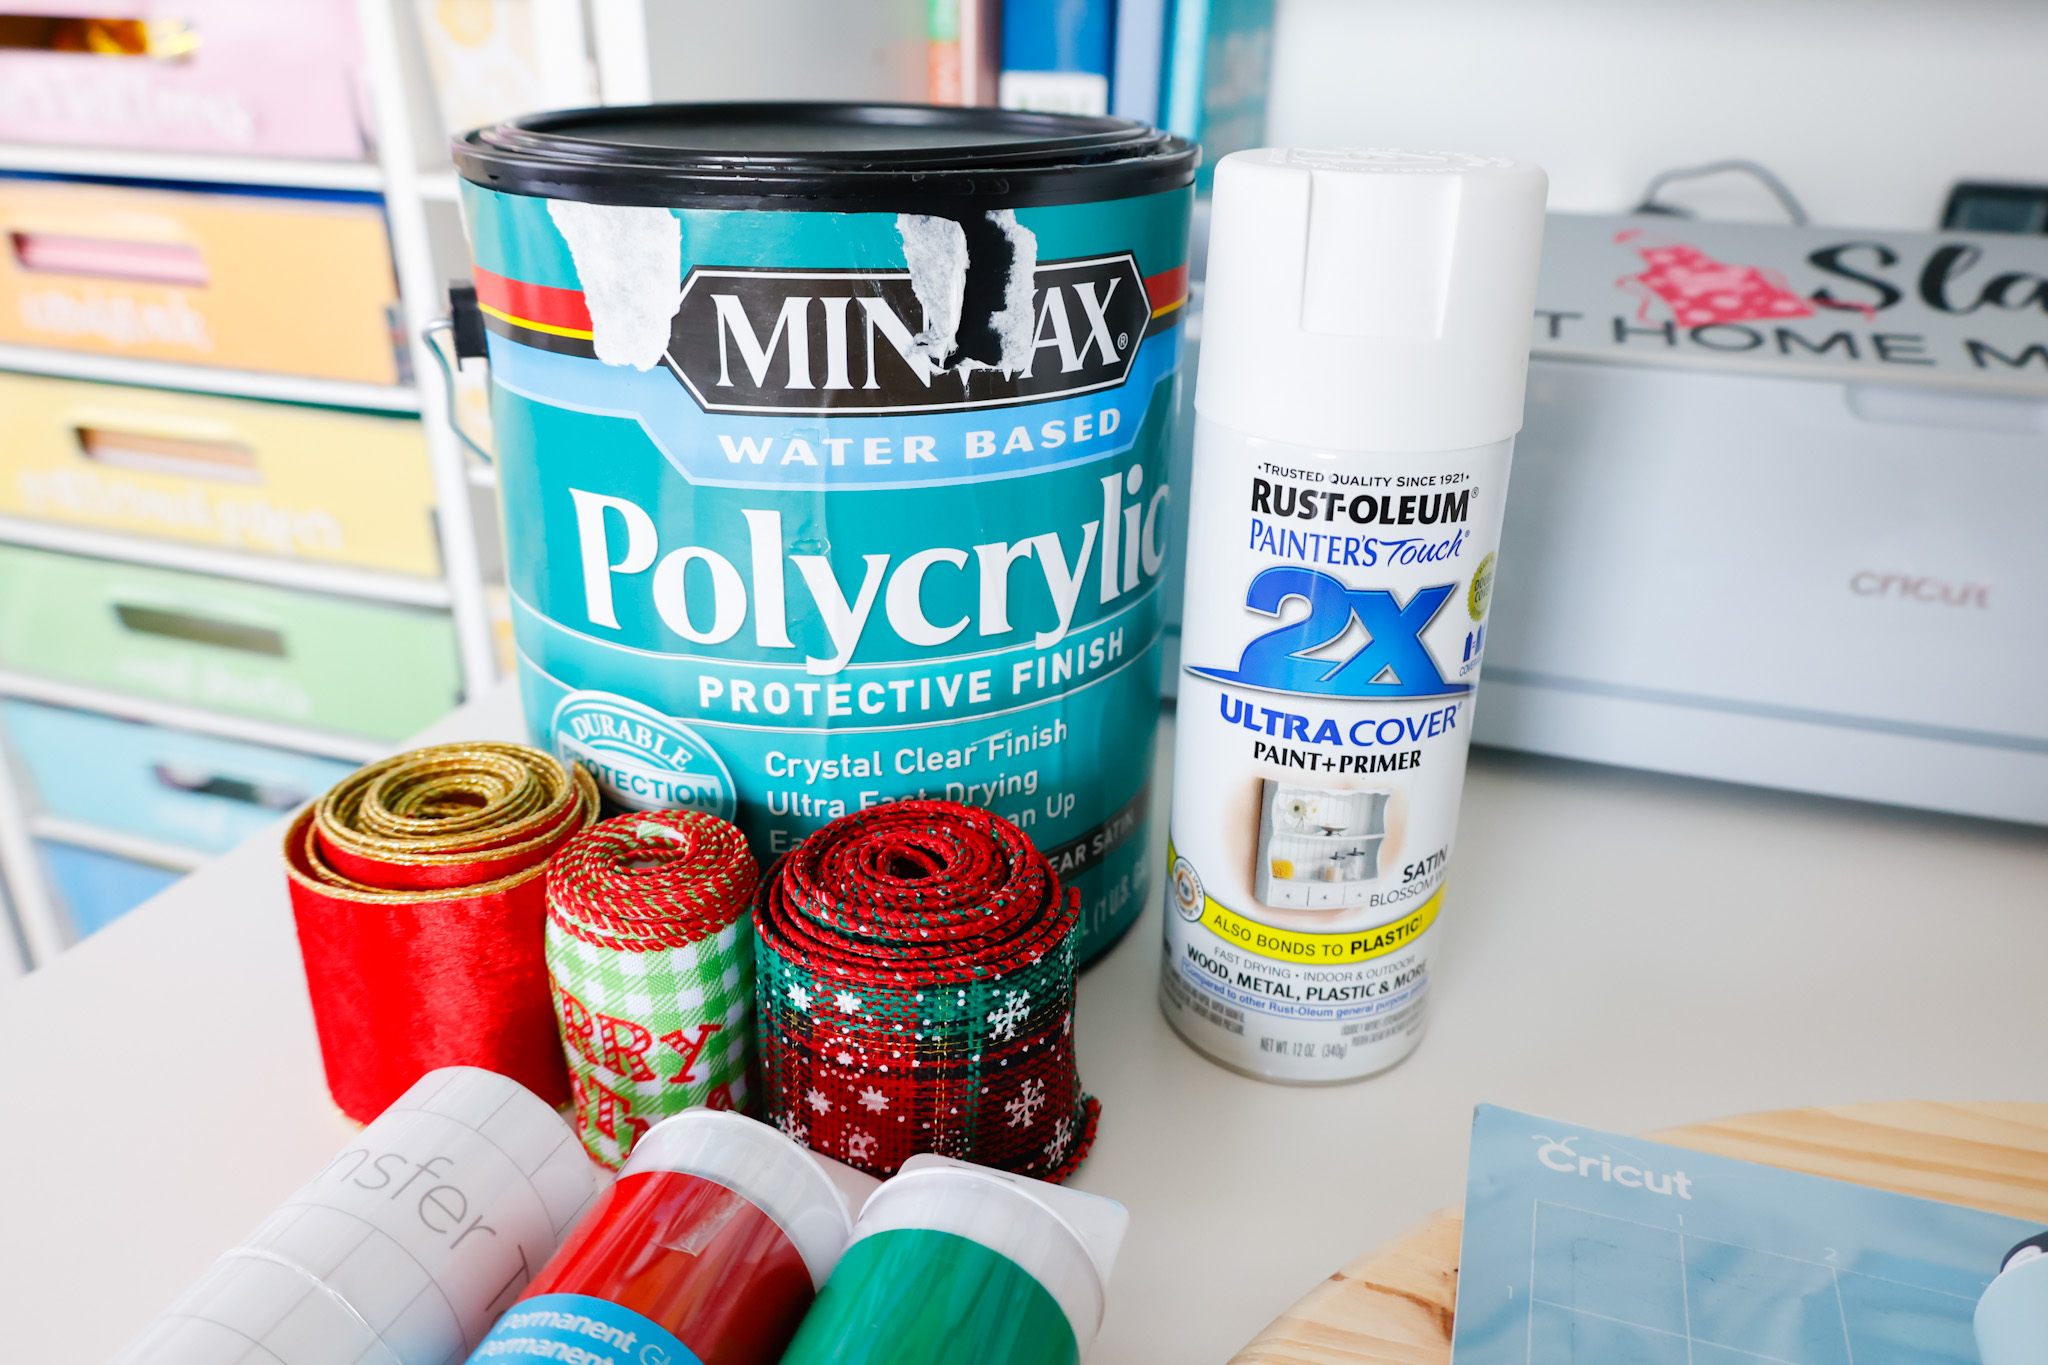
- spray paint
- polycrylic
- ribbon (aim for 3+ prints)
- staple gun (optional)
- zip tie or floral wire
- glitter (optional)
- LightGrip mat – 24″
- foam paintbrush
If you’re looking for the exact ribbon set I used for my sign, here is the first set, and second set I ordered.
For my red and green vinyl, I chose the Cricut permanent vinyl colors Tomato Red and Kelly Green.
Designing Your Wood Sign Decal
I made my full design width no larger than 11.75″ so my Cricut machine could cut the design.
I used a design readily available in Design Space with Cricut Access…
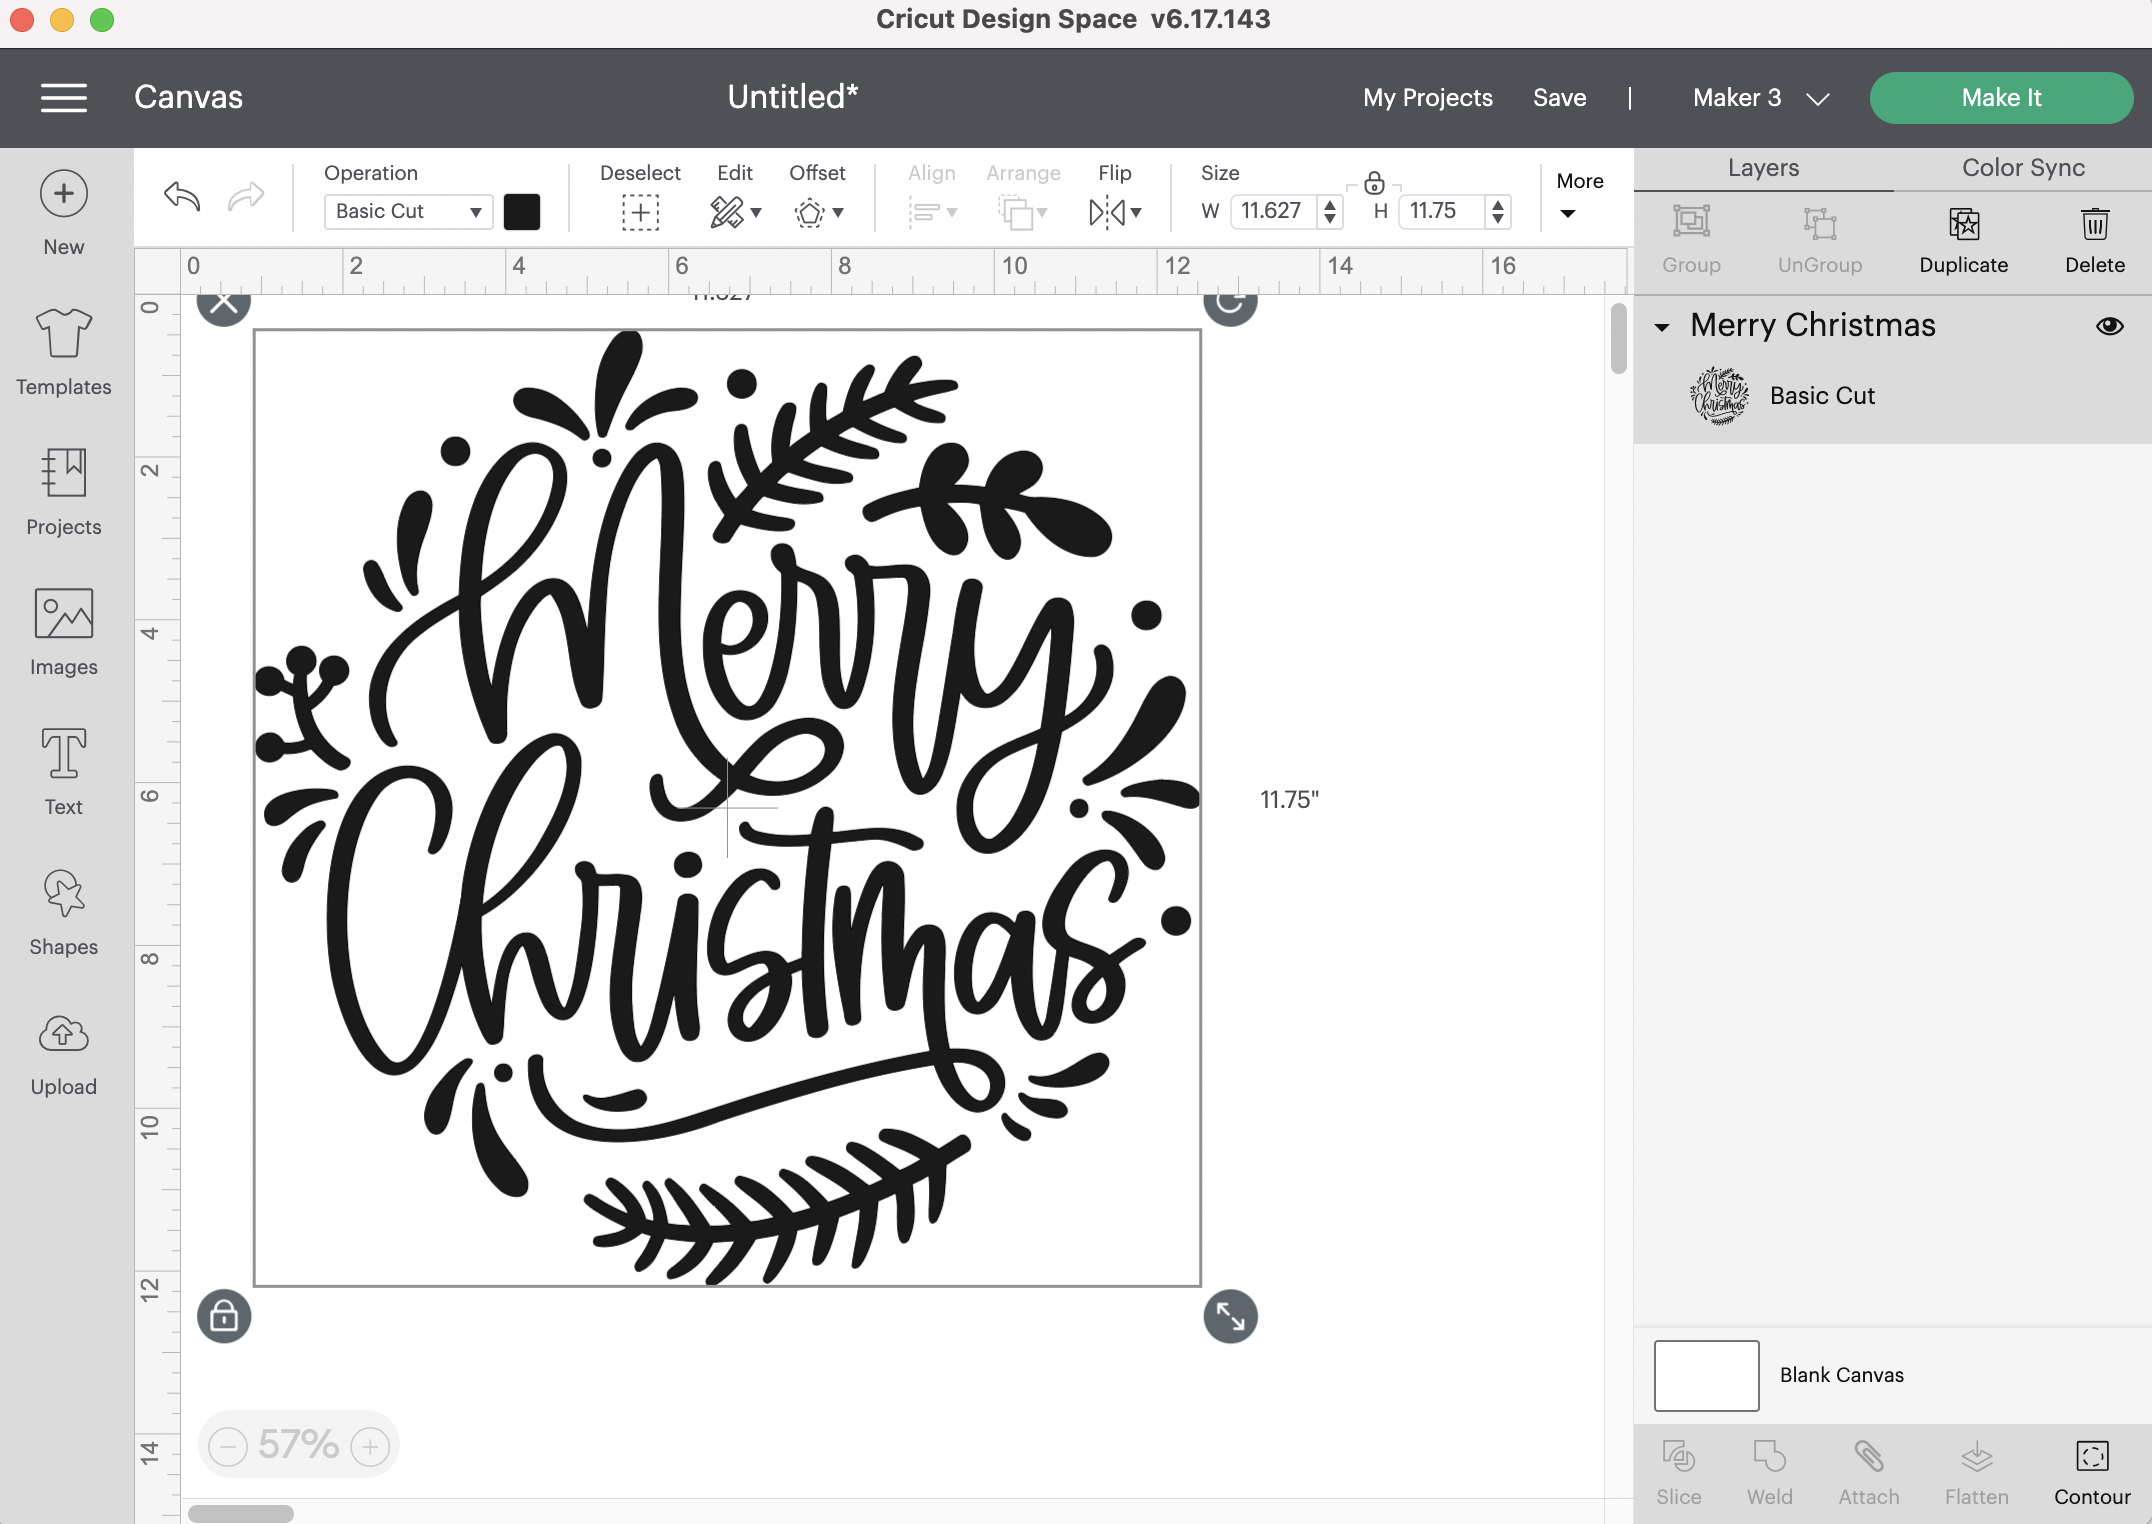
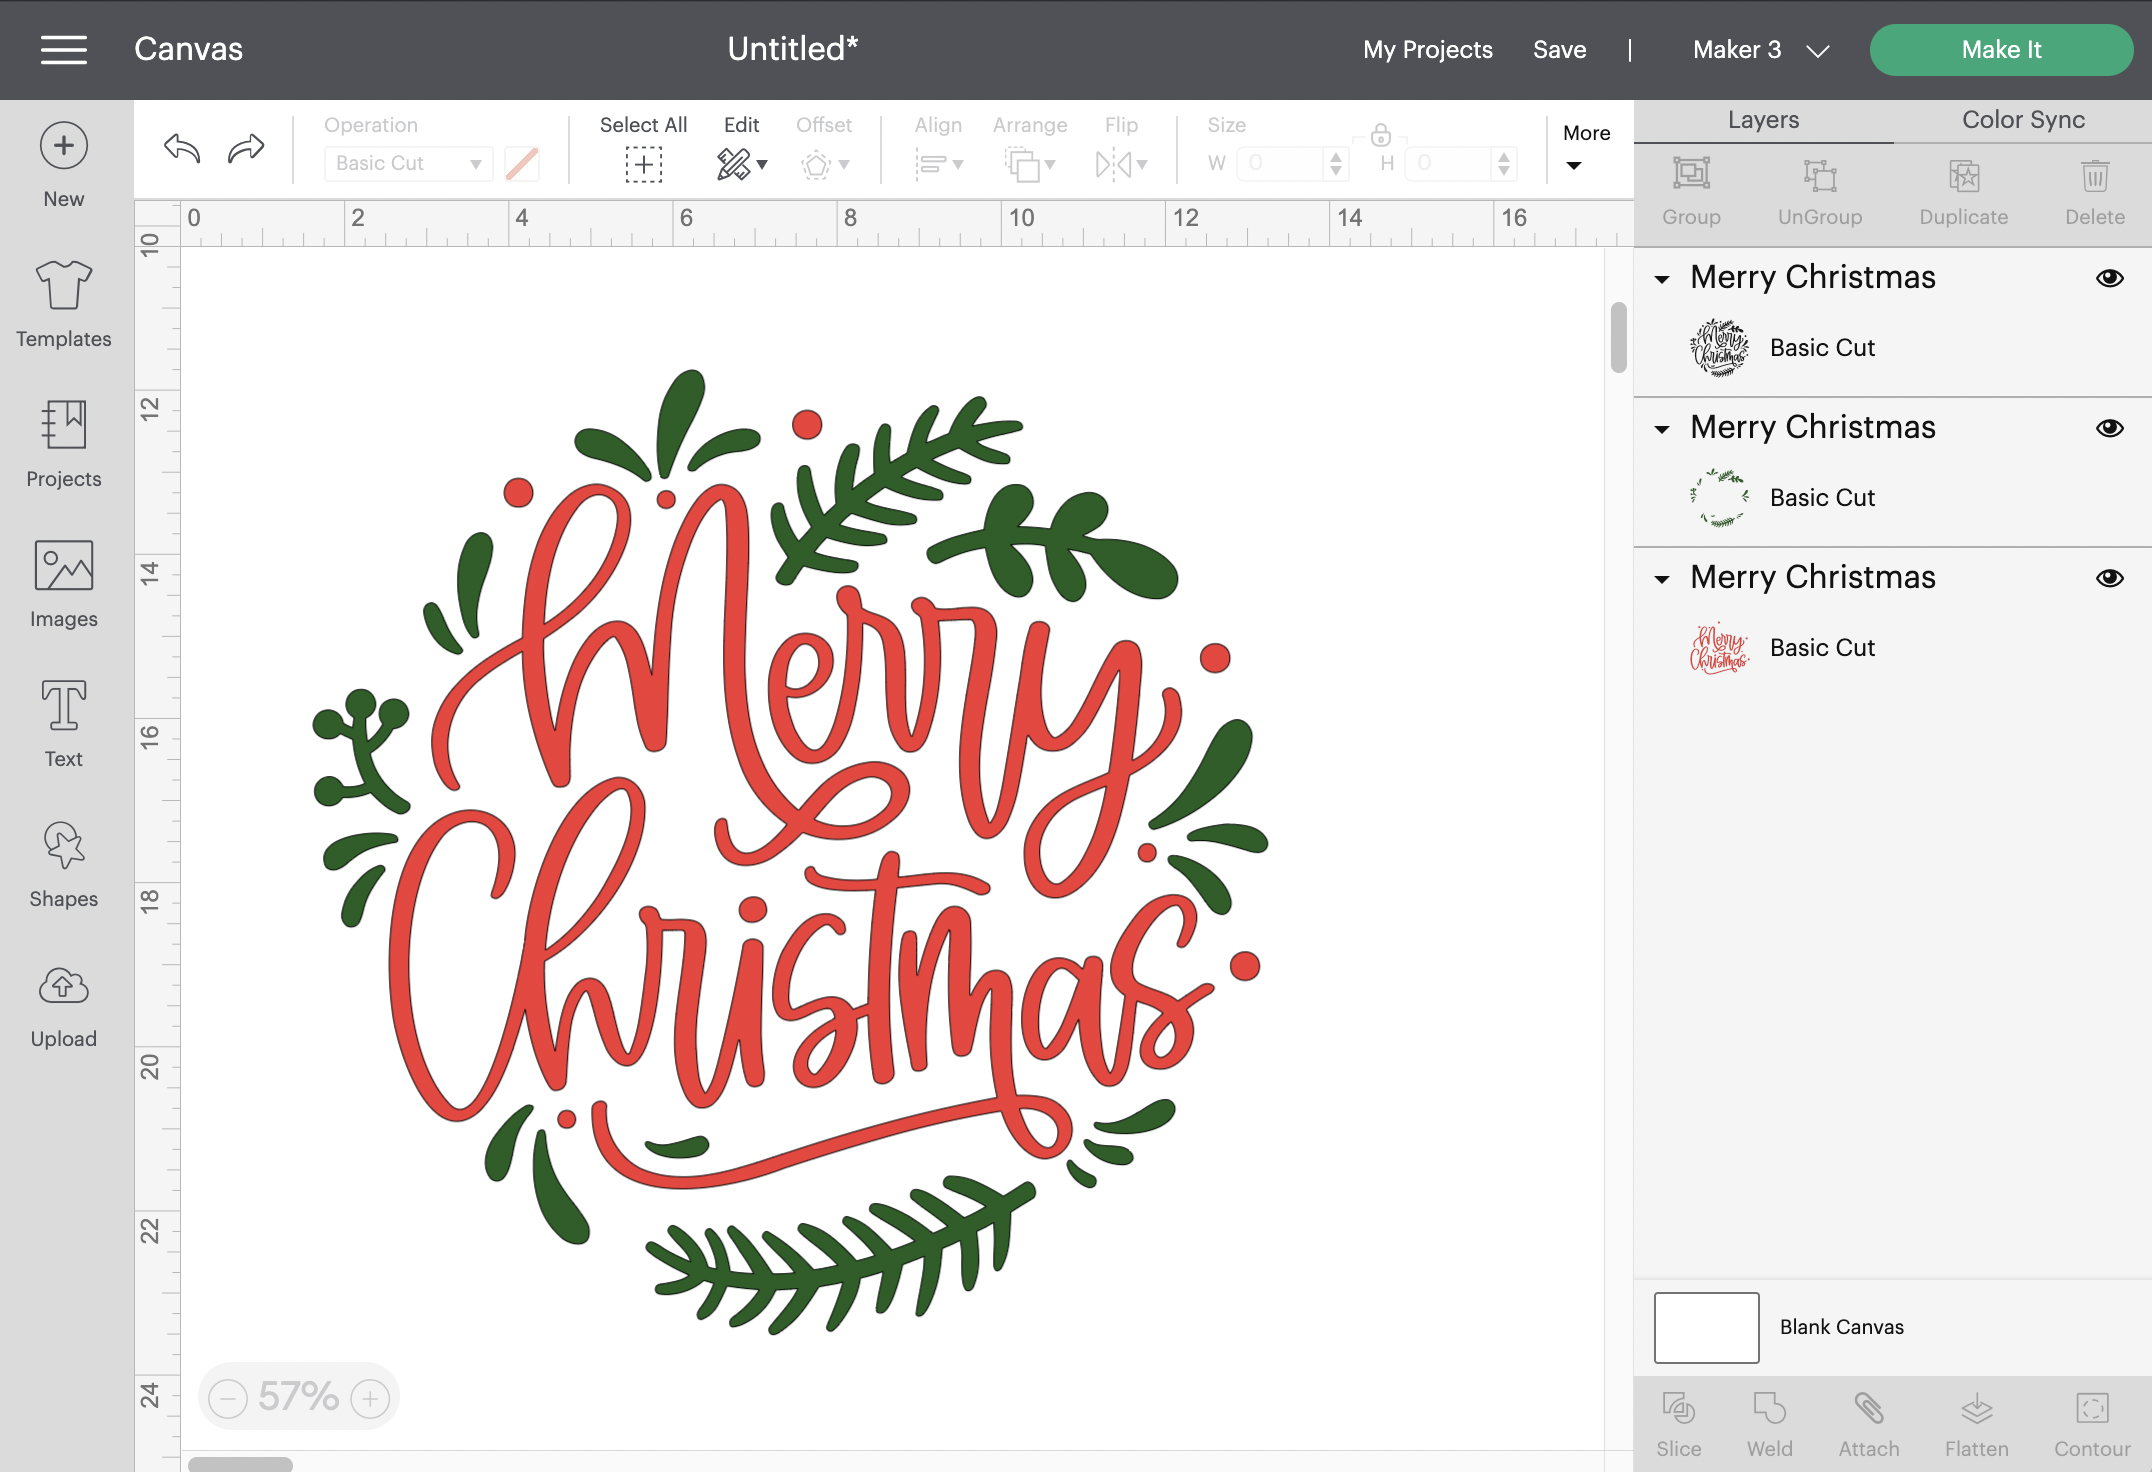
I duplicated my design once it was sized, and used the Contour option at the bottom right of the screen to change the colors of certain parts.
First, I hid the parts that I wanted to make green by clicking on each design element in the preview window.
On the duplicate of the original design, I opened the Contour window and hid all of the parts that I wanted to make red by clicking on the other elements.
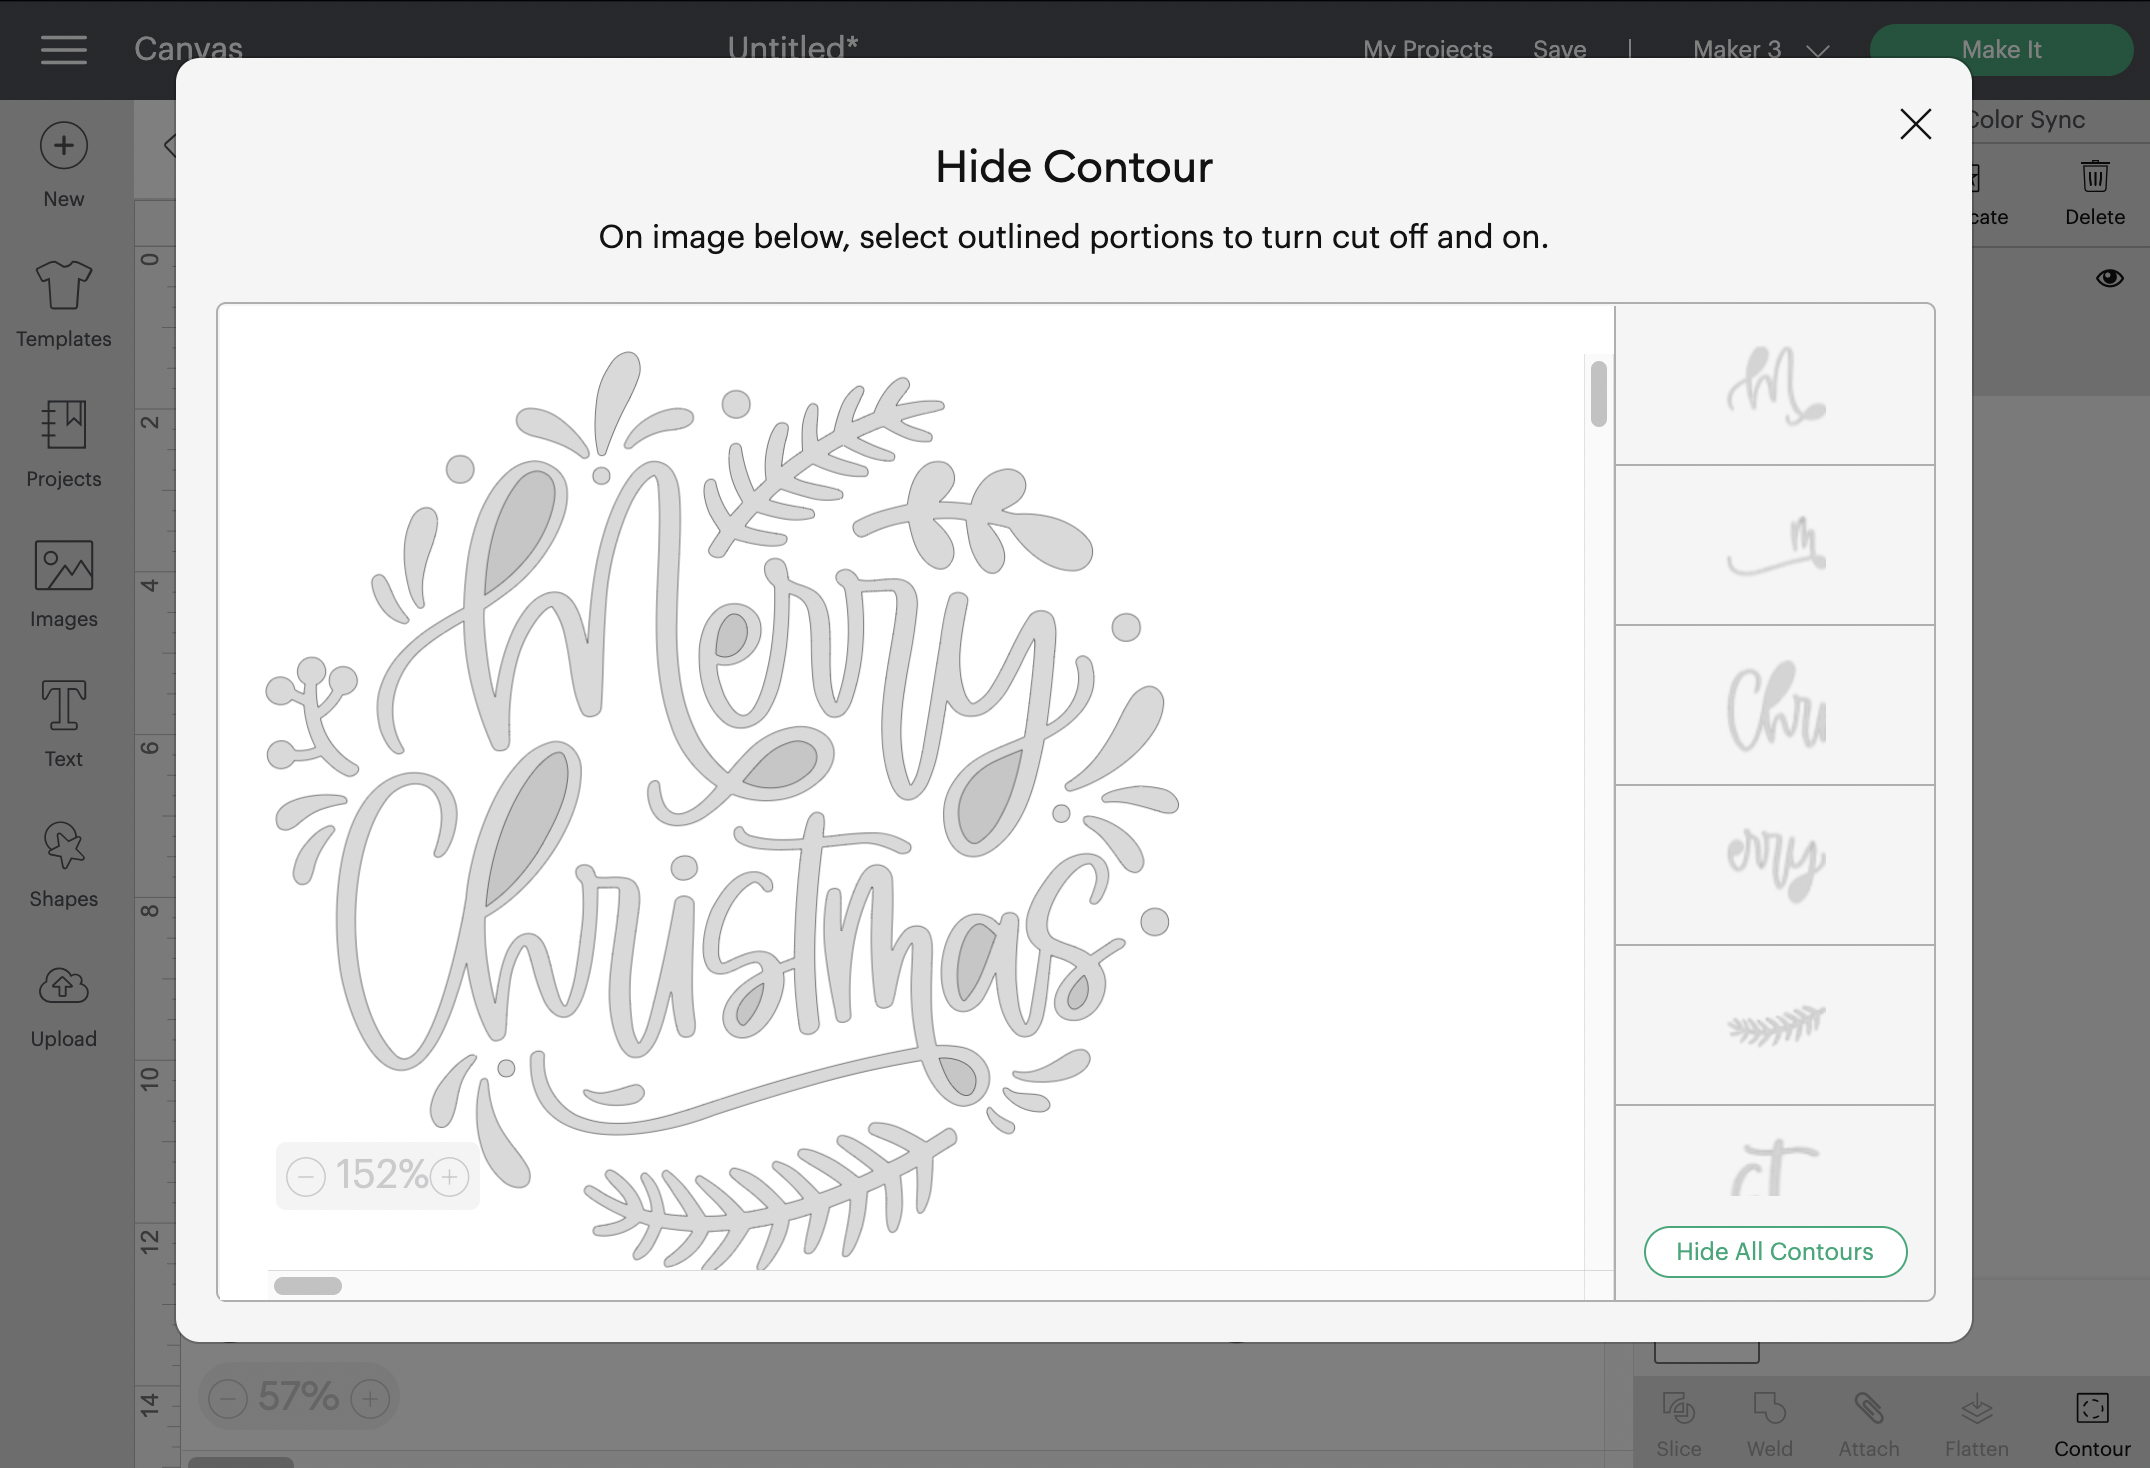
I clicked on each one, one at a time, and choose the color I wanted them to be (red and green)…
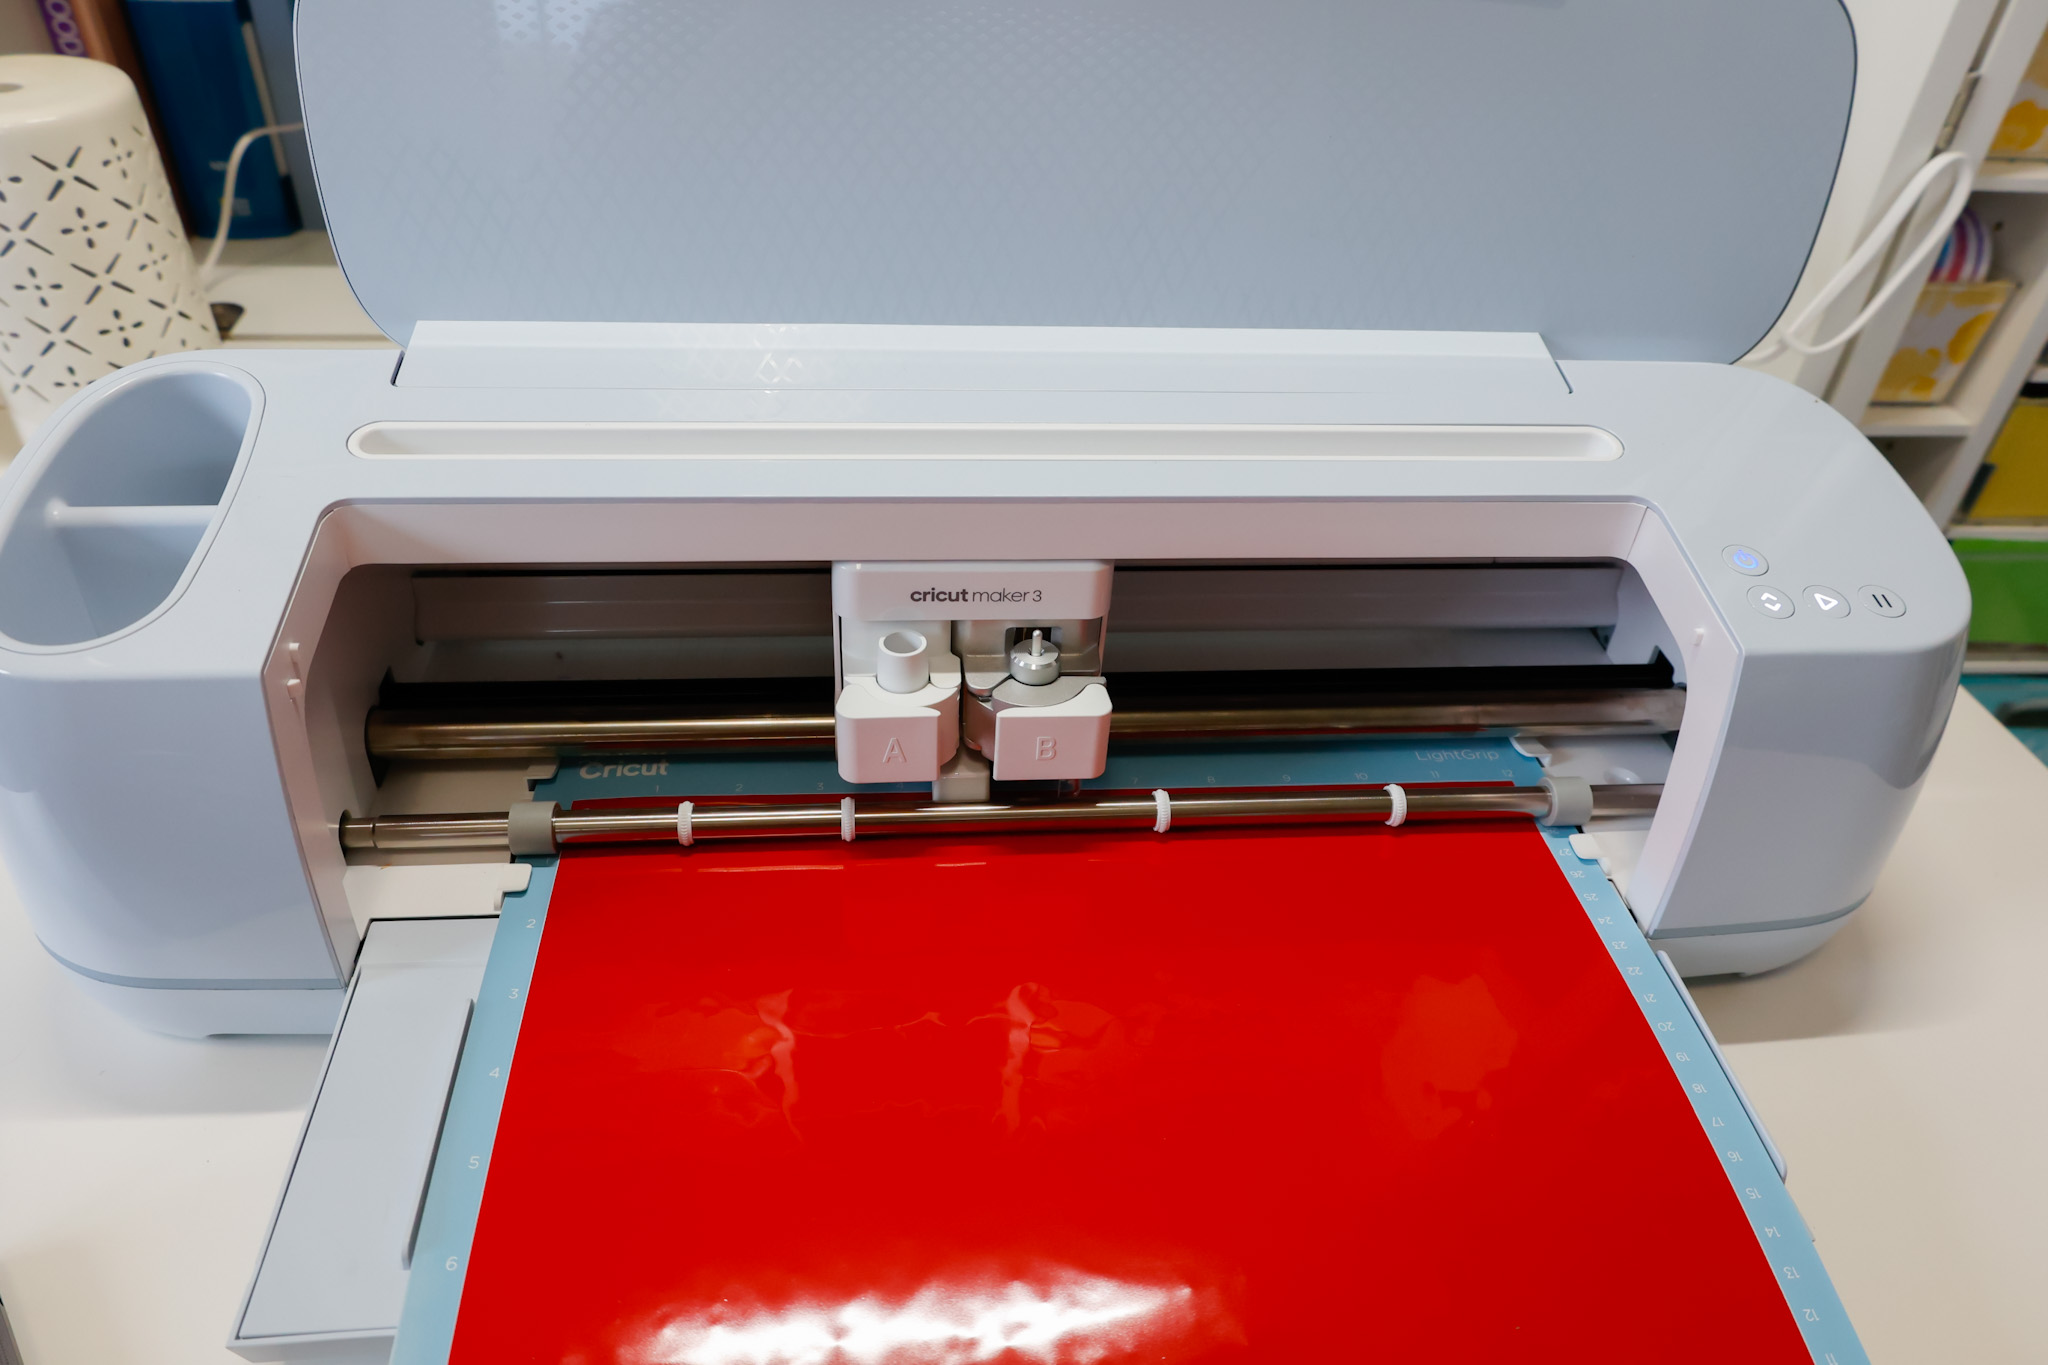
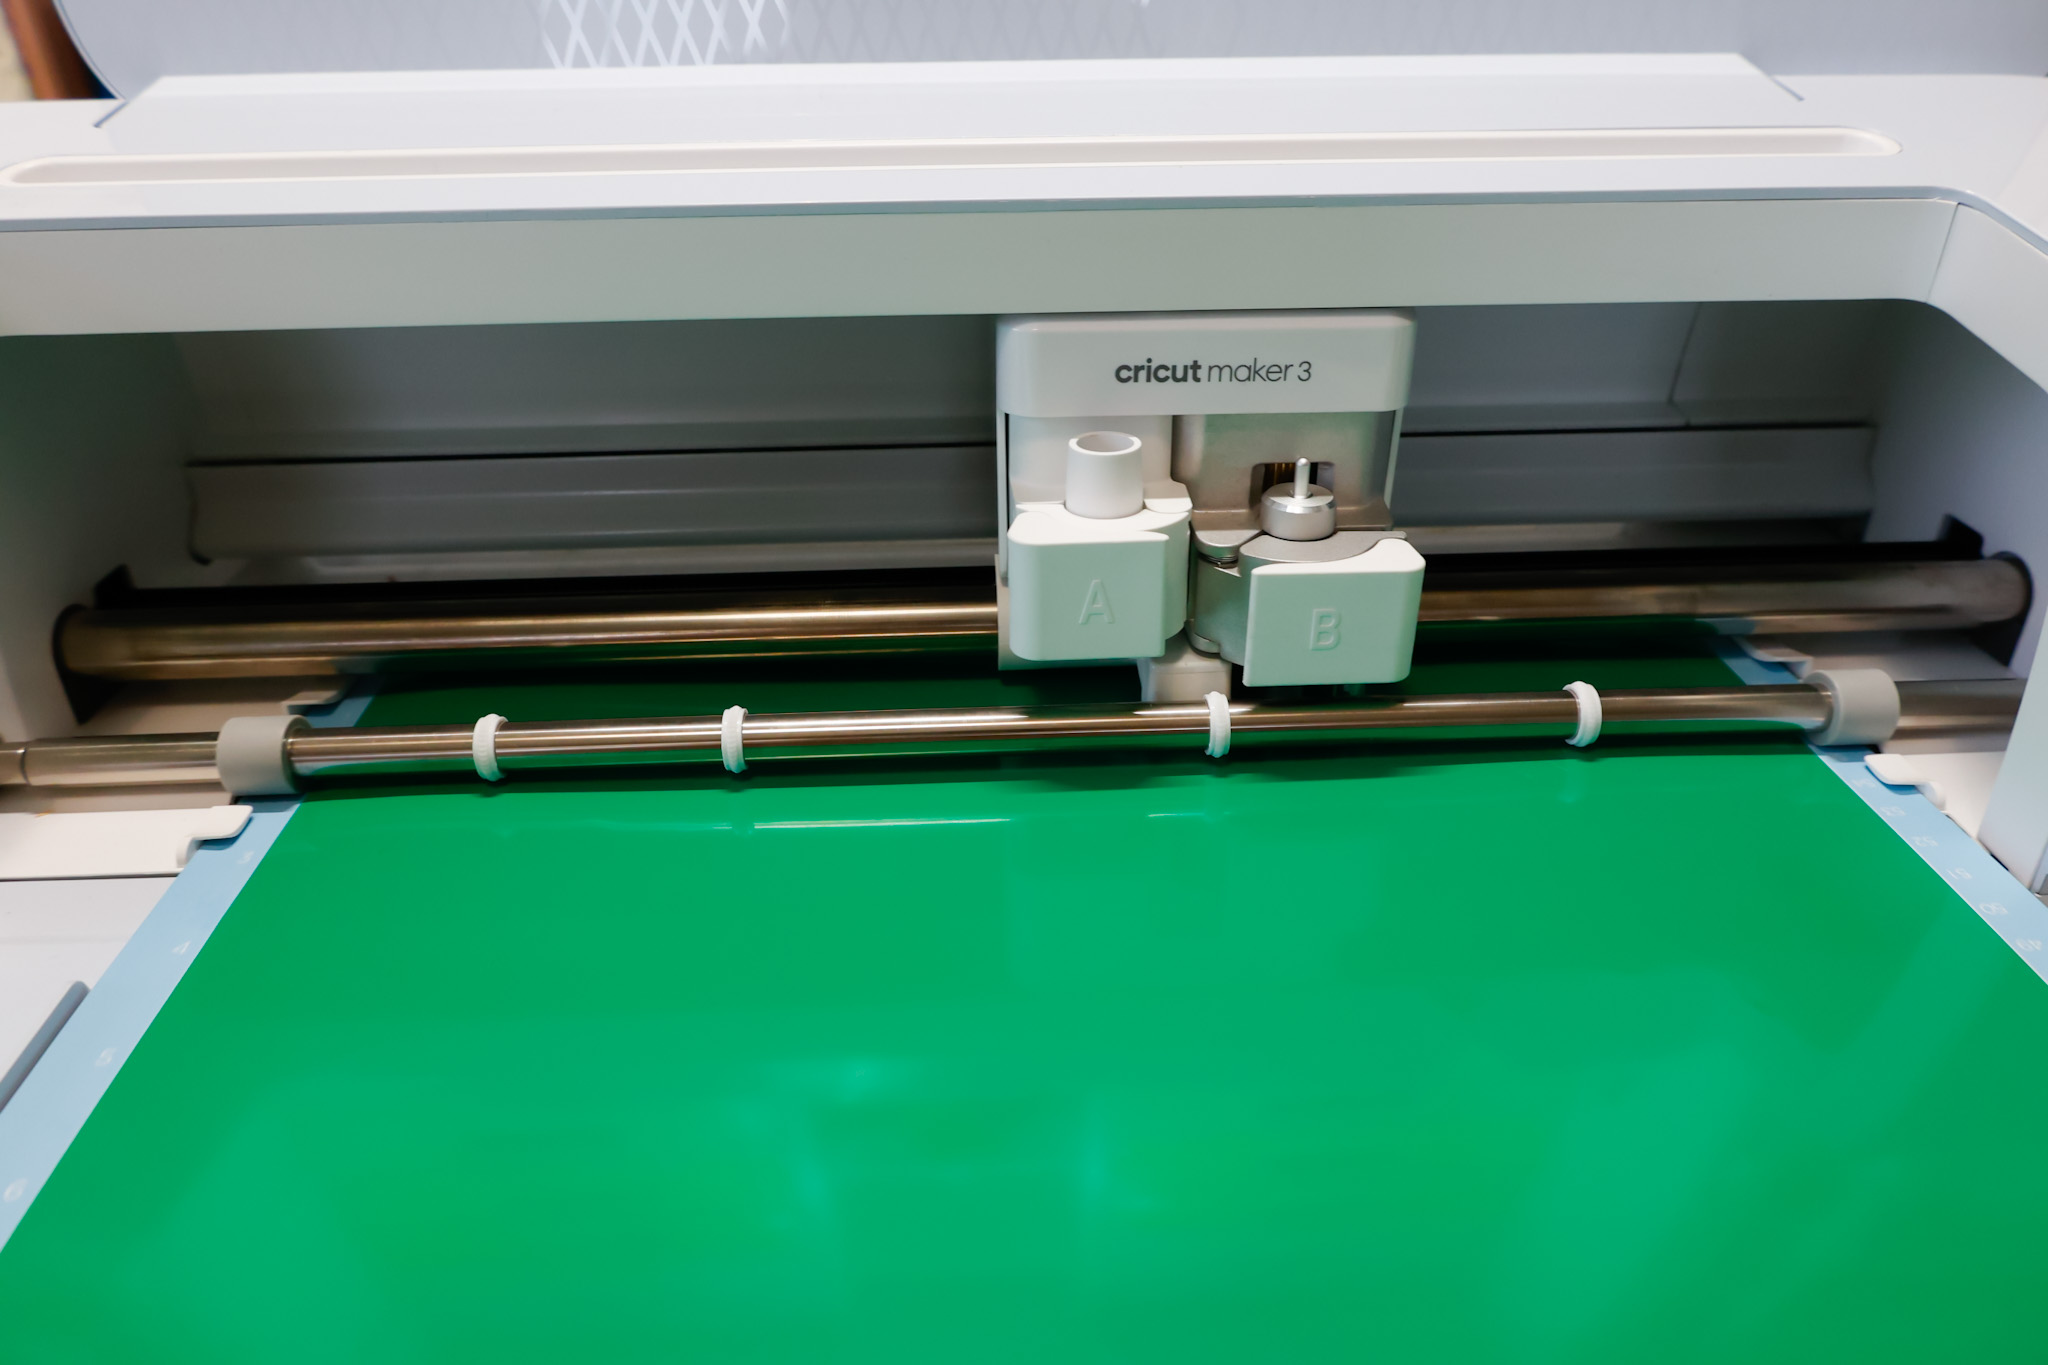
Cutting Your Design With Your Cricut Machine
On the Make It screen, Design Space will want to cut your design by color on a 24″ LightGrip mat.
To conserve green vinyl, you can flip one of the designs around like I’ve done below…
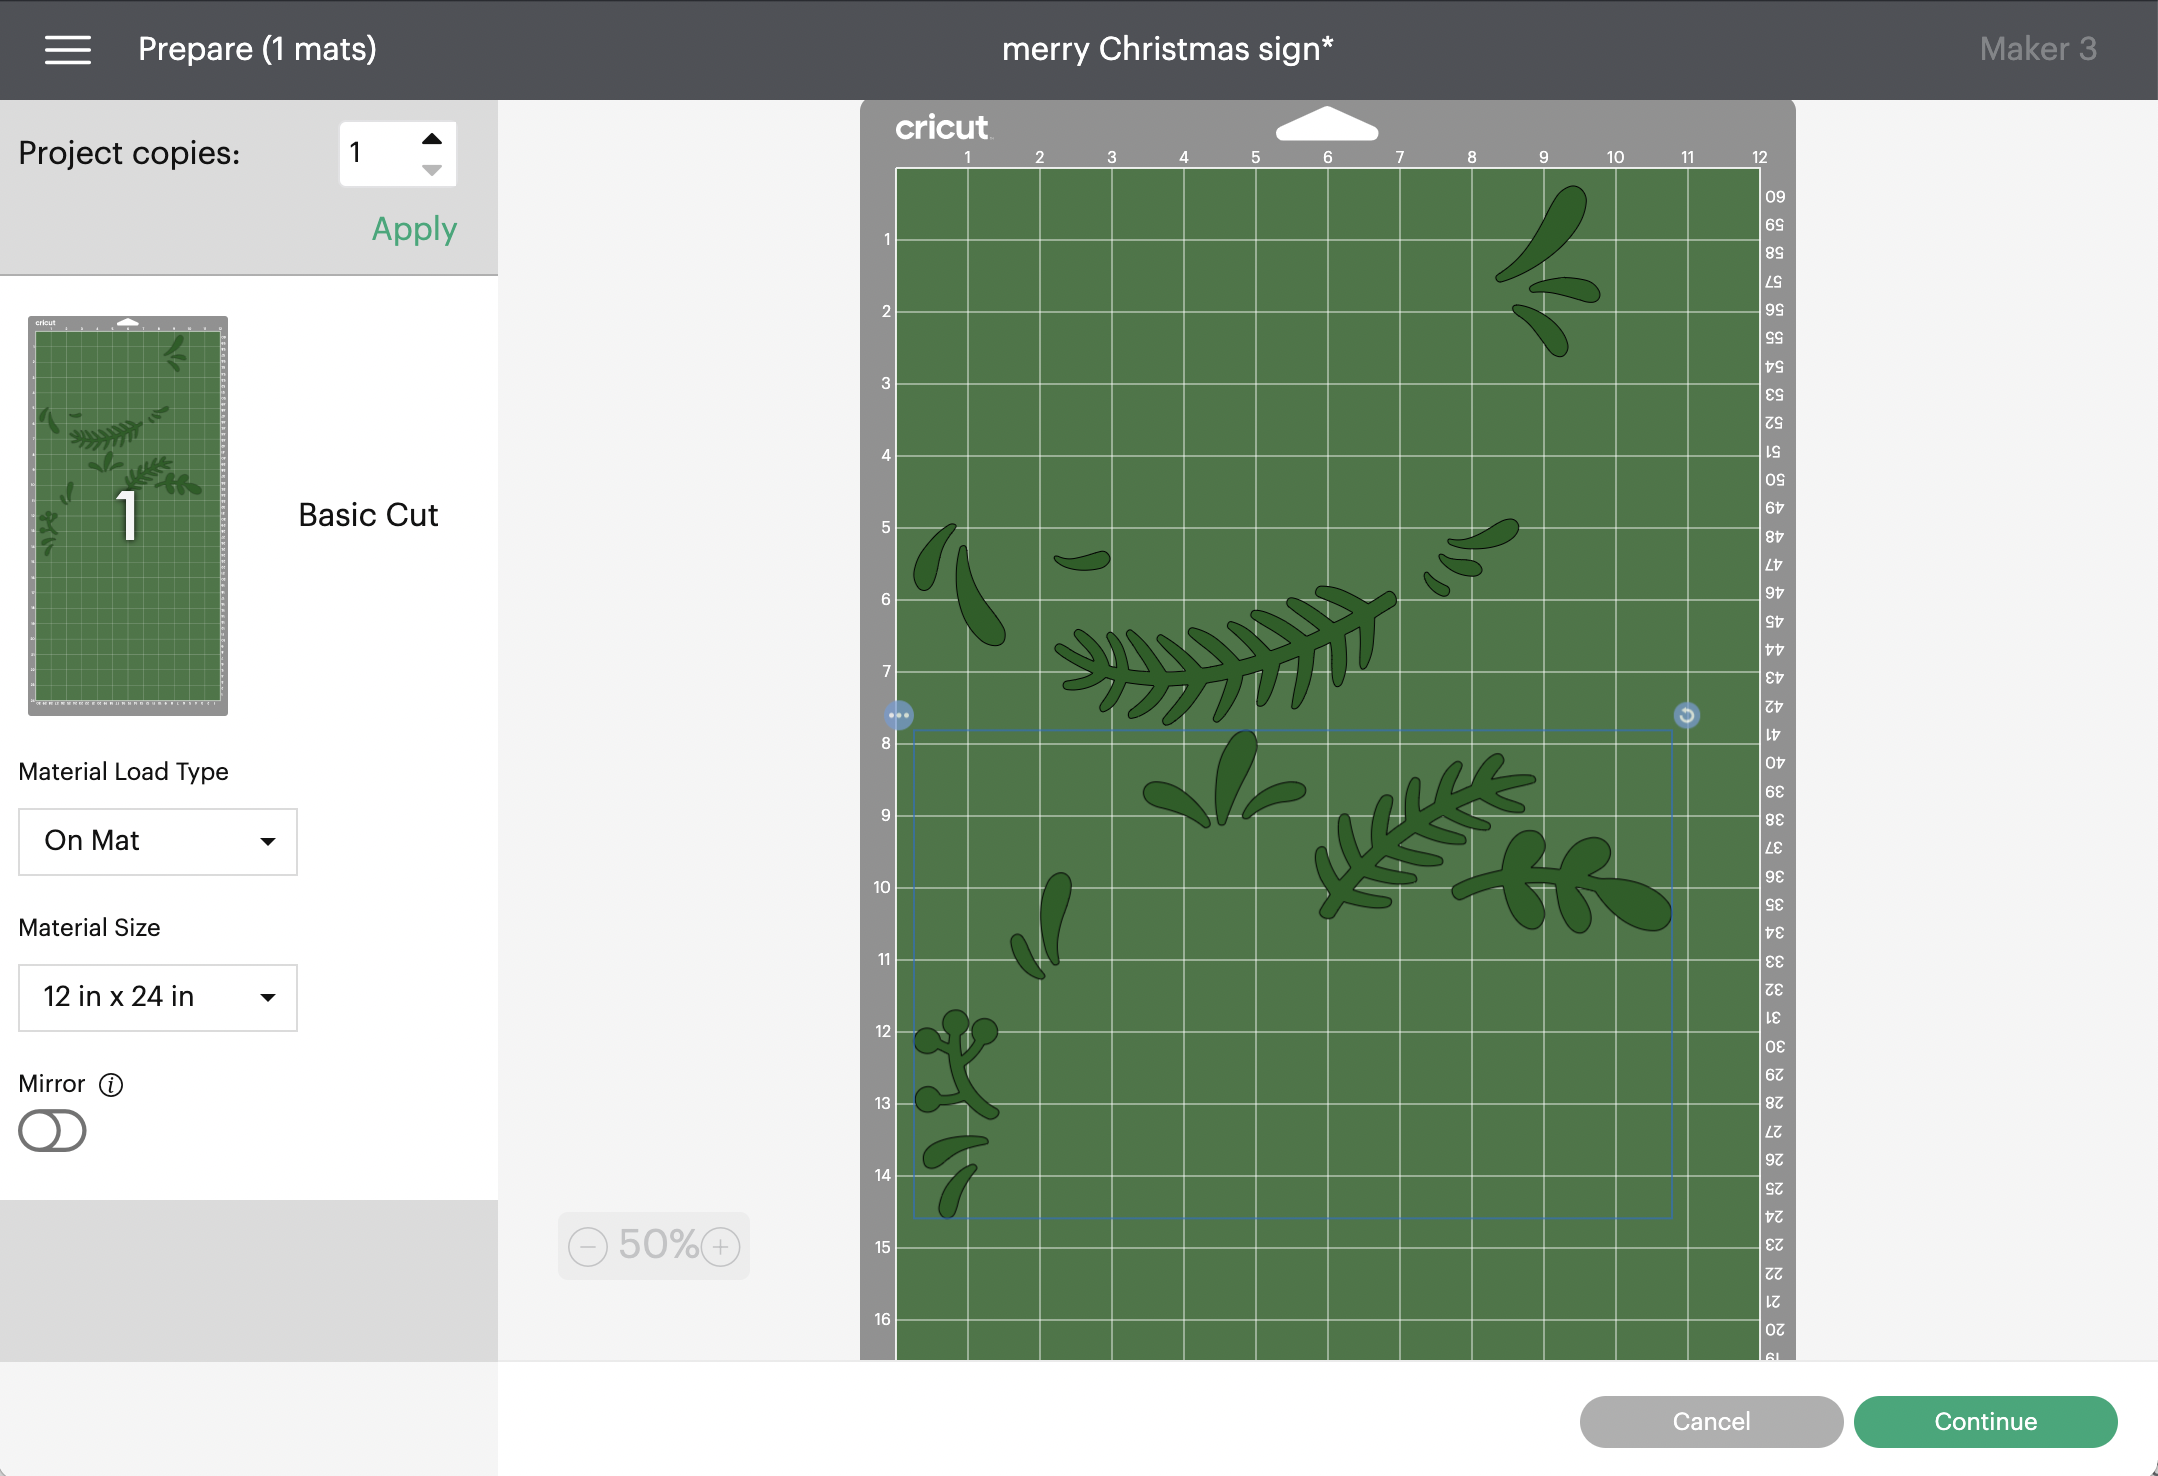
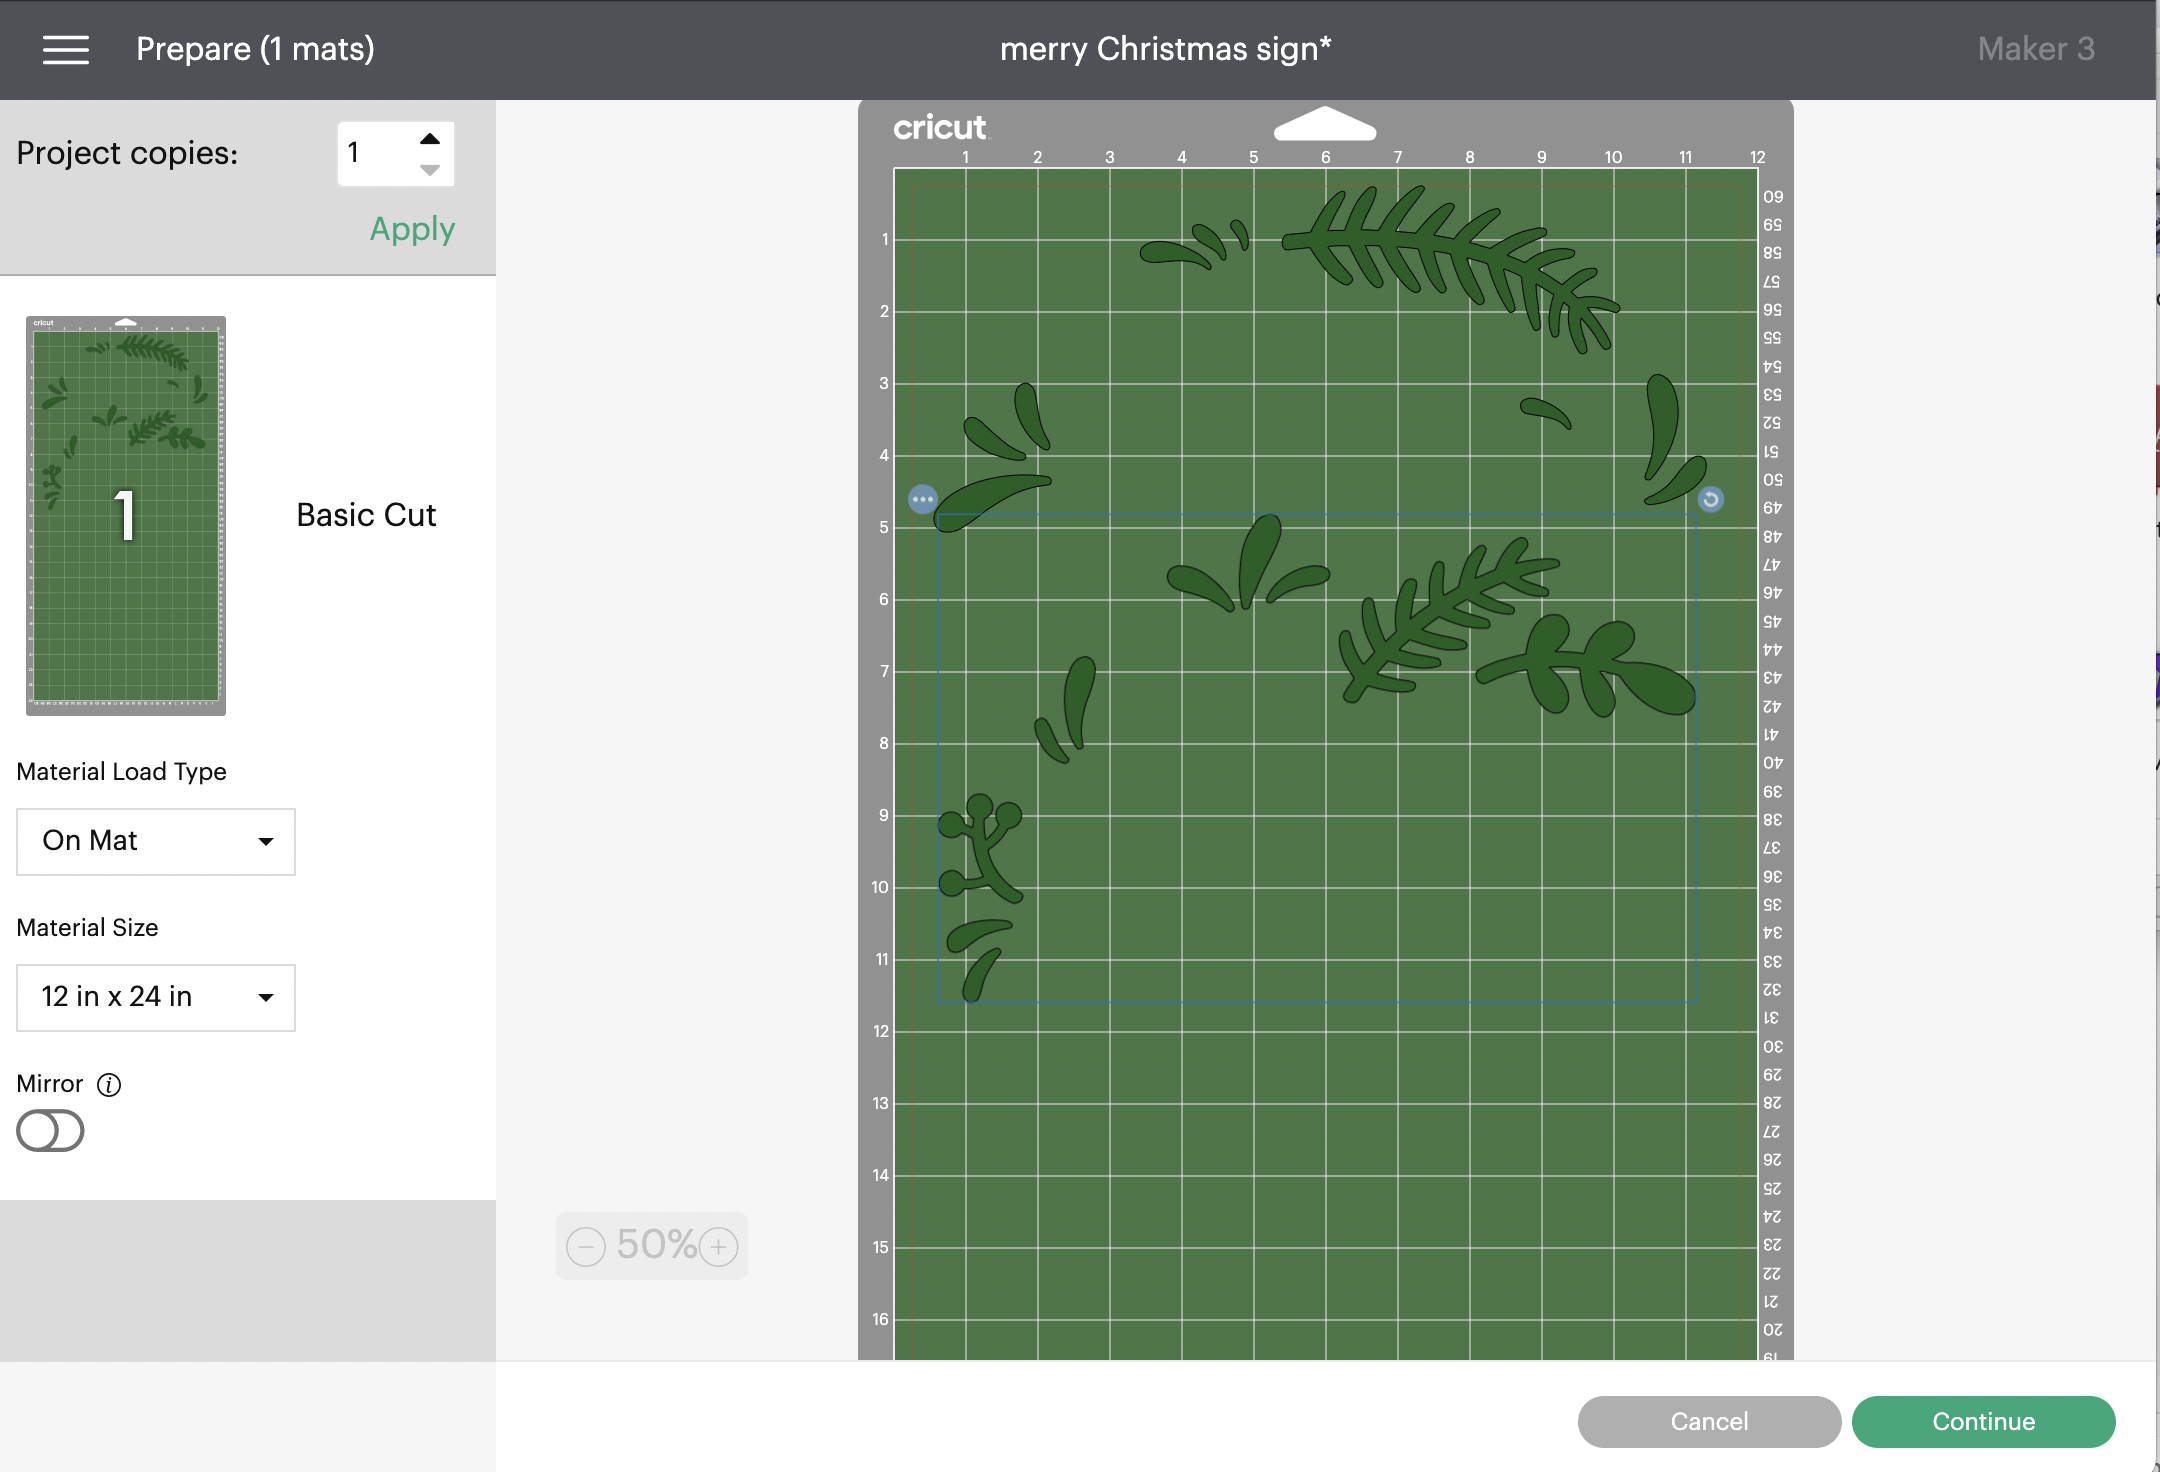
Cut out your vinyl.
You do not need to mirror your designs.
How To Make A DIY Merry Christmas Wood Sign
Paint Your Wood Round
To paint your DIY wood sign, use liquid paint or spray paint.
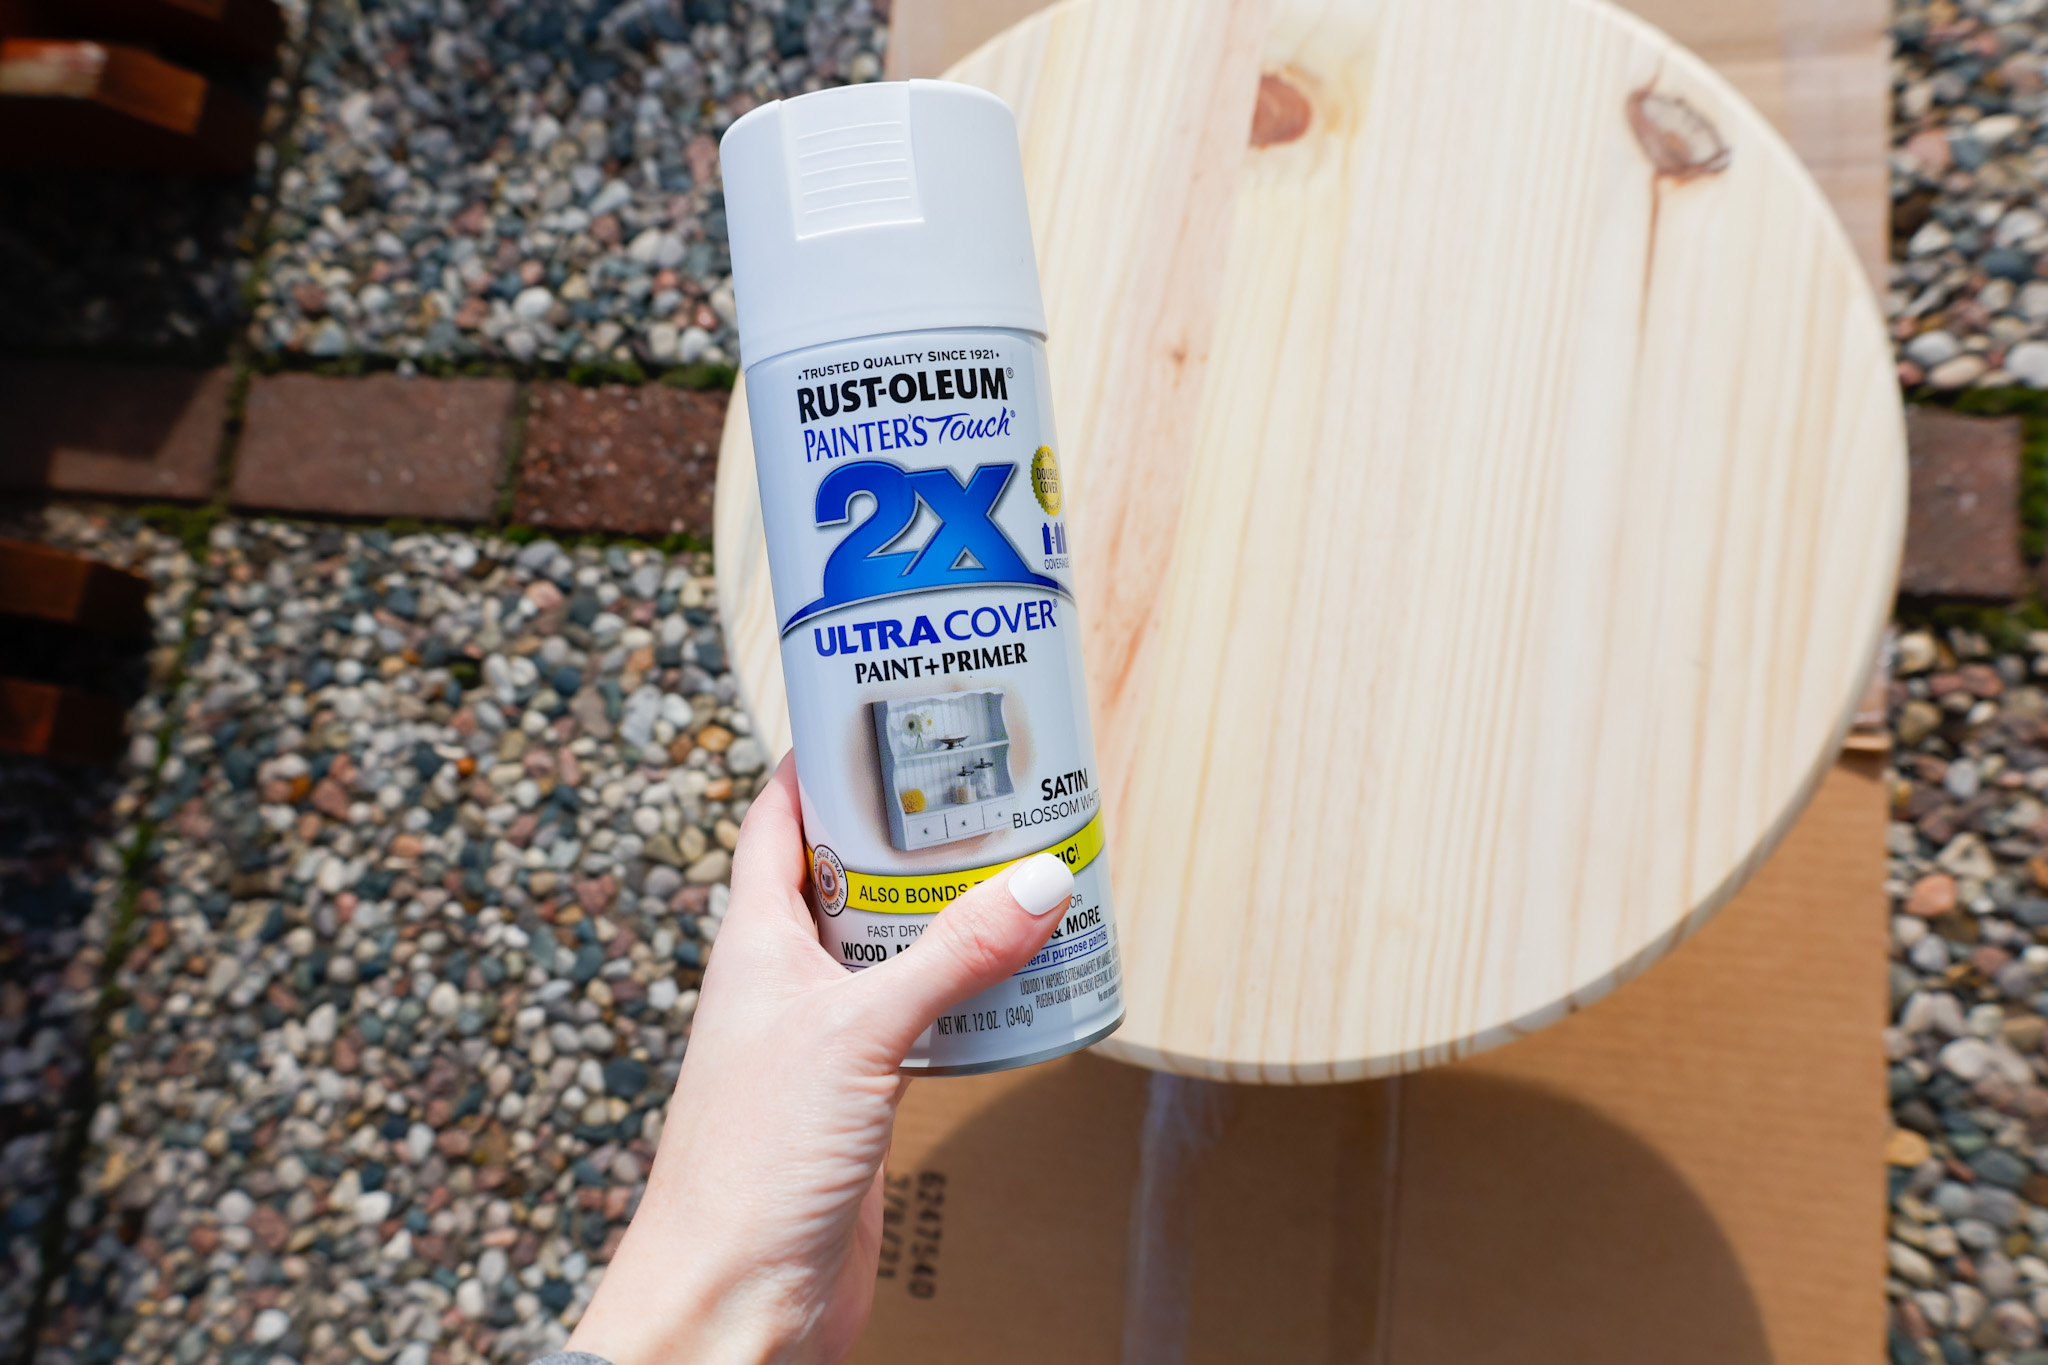
I like to flatten a cardboard box, place an old paint can on top, and then place my wood sign on top.
This way, I’m able to evenly spray the edges without having the wood round stick to the box as it dries.
I learned this the hard way in my last wood sign DIY for Halloween!
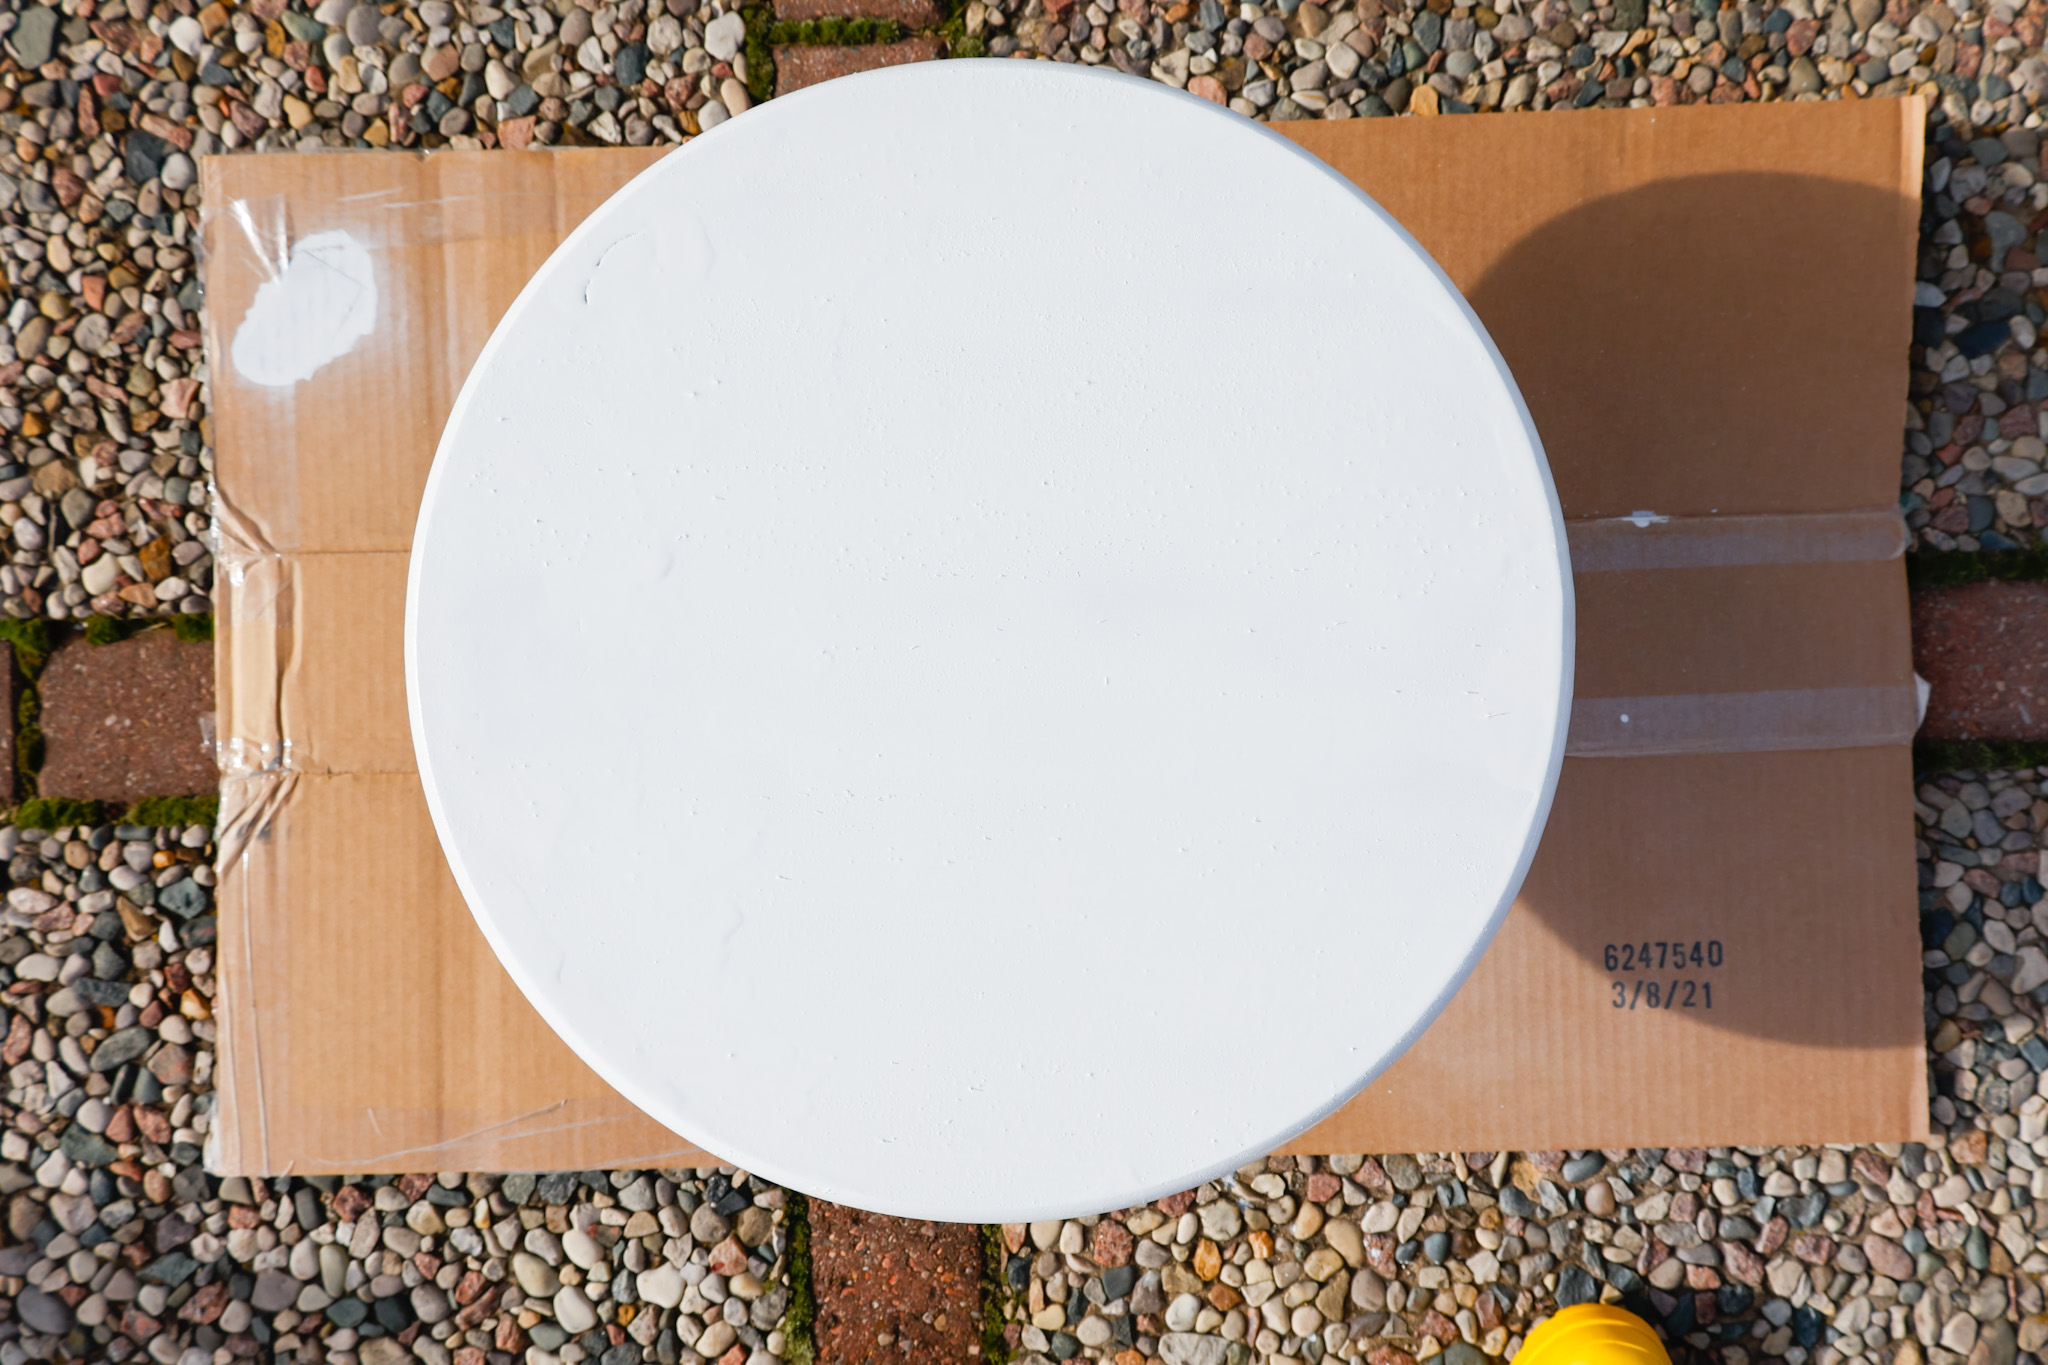
You want a medium coat (not too thick, but not thin enough to catch the color of wood underneath) for your sign.
Allow your painted sign to dry for at least 2 hours.
Apply a very thin coat of polycrylic to your sign – this light coat will allow the vinyl design to stick to something.
I like to use an old condiment bottle to apply the polycrylic, and then use a foam paintbrush to wipe it across the top layer, allowing the excess to drip off the edges.
Vinyl doesn’t like to stick to painted wood.
Allow that to dry for about 30 minutes.
During these drying times, you can design your Christmas decal, or cut out the one I’ve designed in this post with the Design Space link here.
Cut Your Design With Permanent Vinyl
You can now cut your vinyl – no need to mirror your design beforehand.
You only need to mirror a design if you are working with a heat-applied product, like iron-on vinyl or infusible ink.
Applying Your Vinyl Decal To Your Wood Sign
Start with the lettering (red permanent vinyl).
Transfer onto your transfer tape sheet.
Be sure to give yourself enough room around the red design for your green design…
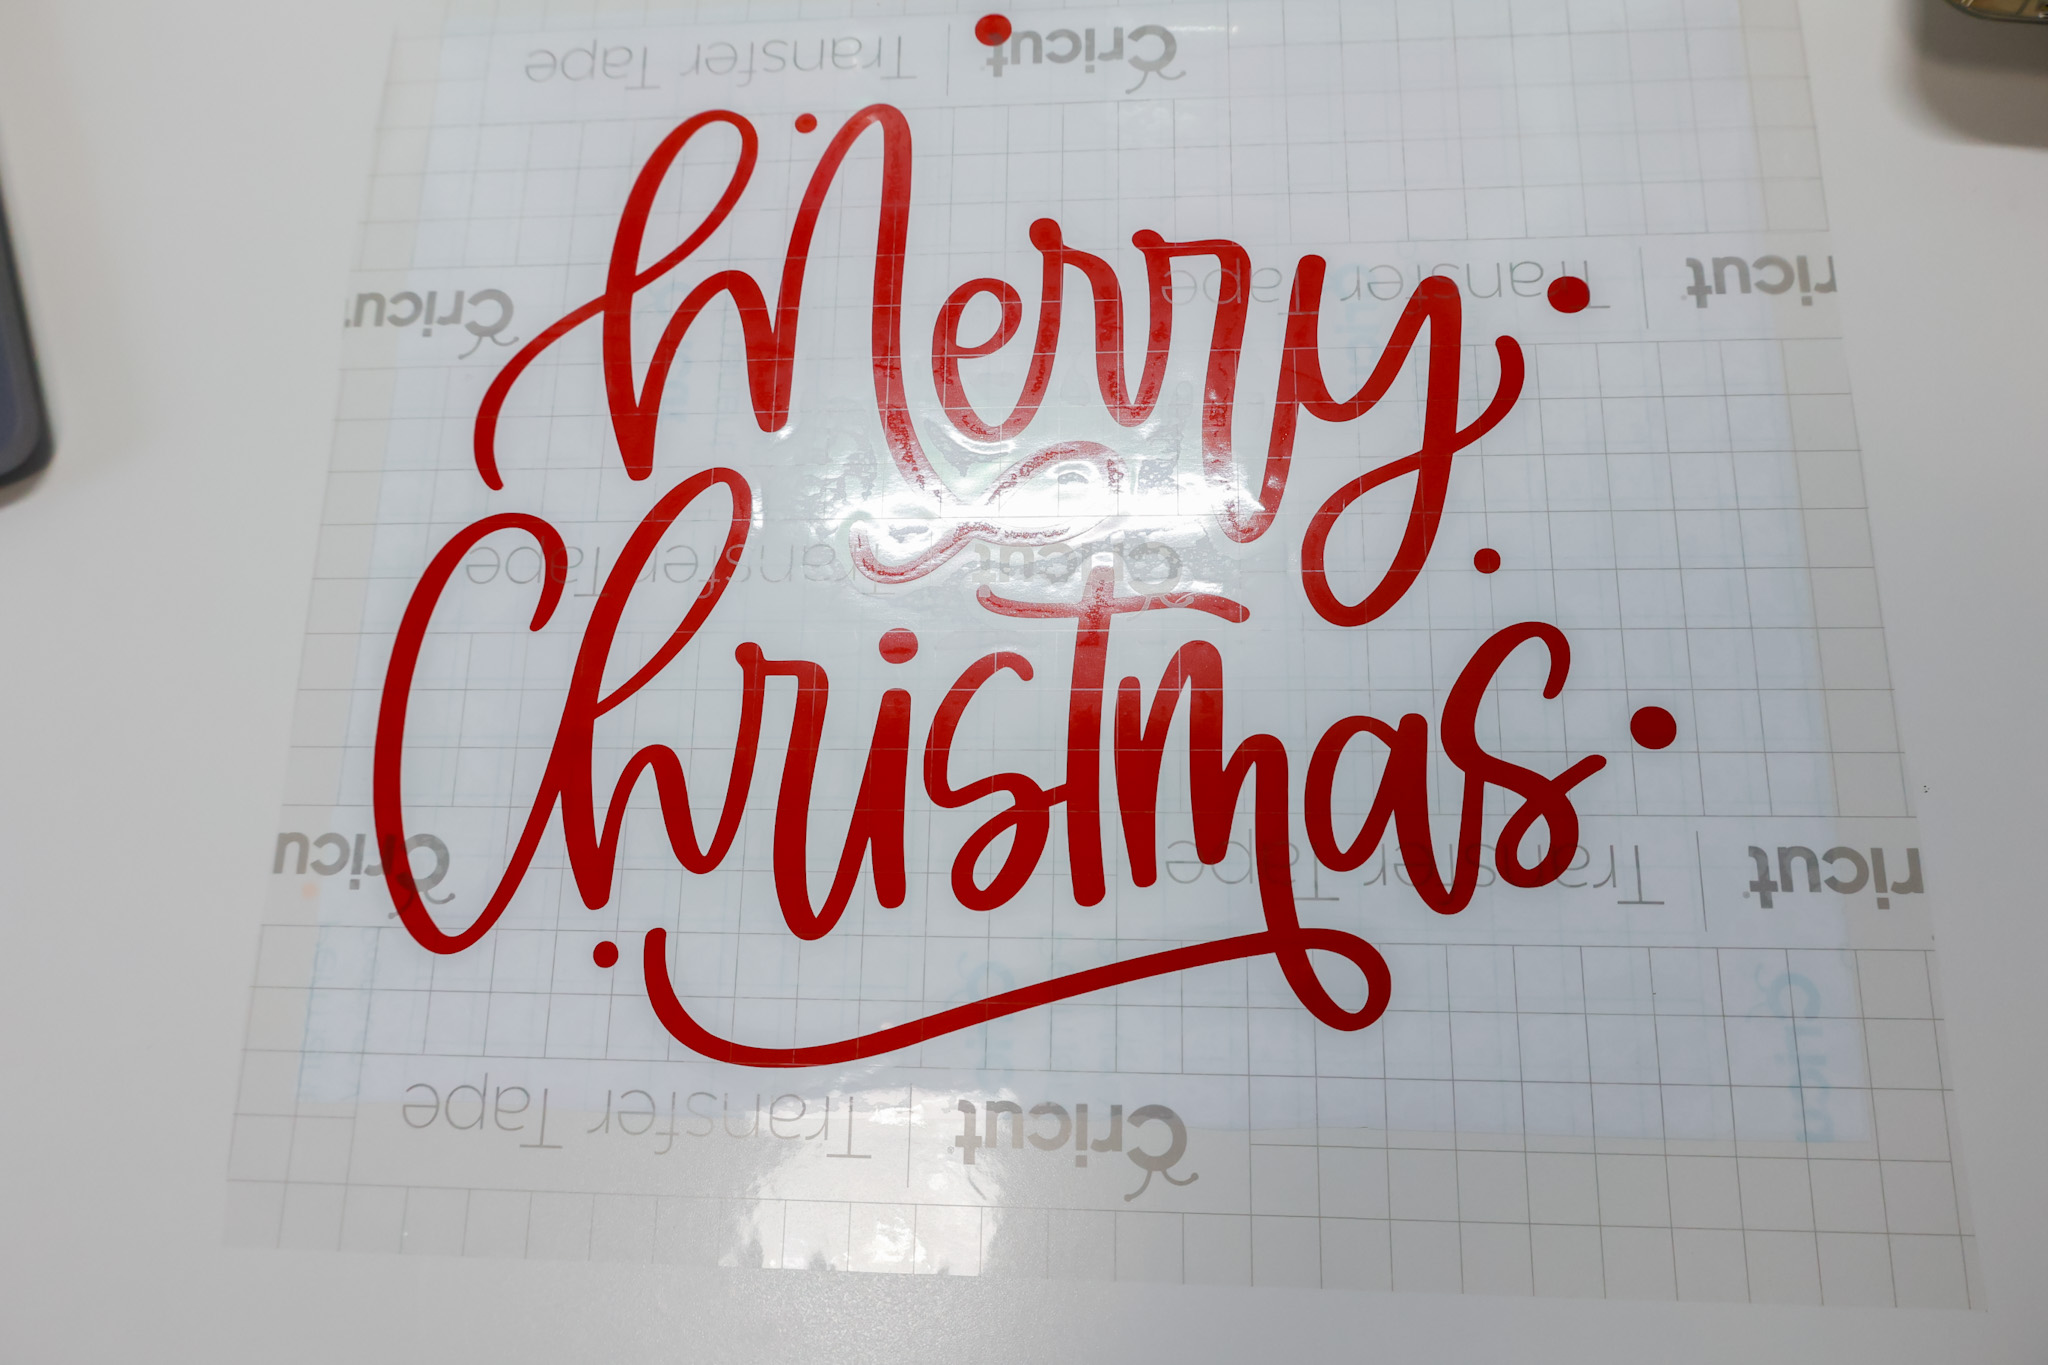
In my design on Design Space, I’ve split the greenery decals in half so a) they can fit on a cutting mat, and b) they would be easier to apply to transfer tape.
Once all 3 cuts are on the transfer tape, apply your decal design to your wood sign…
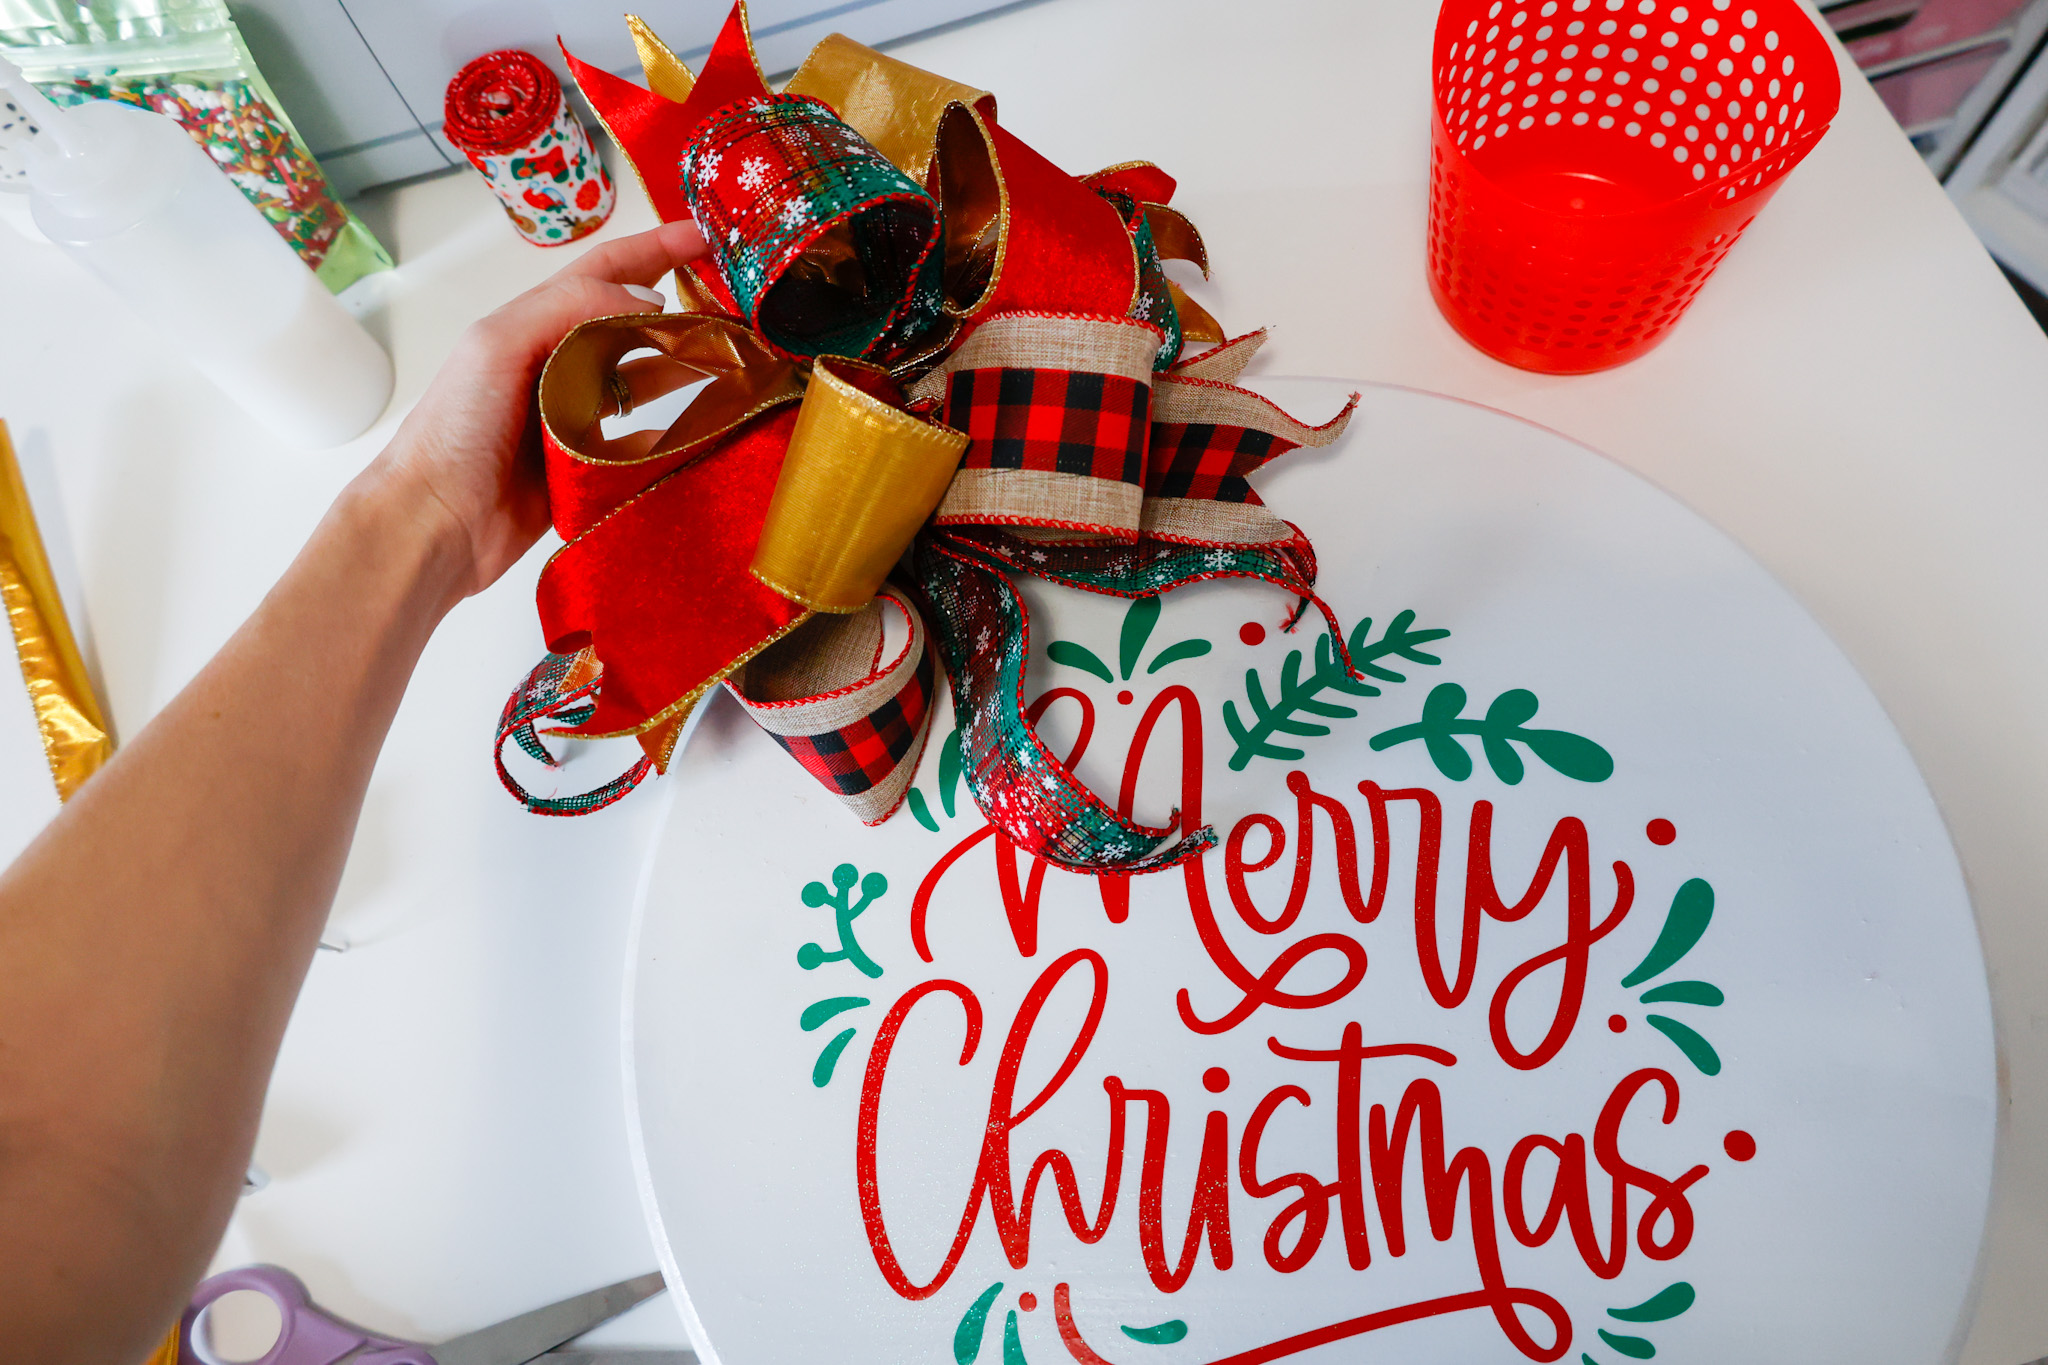
If you plan on attaching a bow or greenery to the top of your sign, give yourself extra space and place your decal a bit further down from the center.

There may be some areas of vinyl that are still being stubborn as you’re trying to stick them to the sign – work slowly on those areas.
Apply A Seal Coat
After applying your vinyl decal successfully, I would advise adding a final seal coat to your wood sign.
This helps your sign endure any weather conditions outdoors, making it last longer.
If you are planning on selling your own wood signs, this step cannot be skipped!
For my sign, I mixed about 2 tbsp. of fine white glitter and 1/2 of a condiment bottle of polycrylic for the final seal coat.
I love introducing glitter whenever I can, and I have a ton of white glitter to use.
I squirt some glittered-polycrylic onto my sign and spread a medium coat across my sign with a foam paintbrush.
I also take the foam paintbrush with some polycrylic and go over the rounded edges a few times.
Allow your sign to dry for several hours.
Overnight is best.
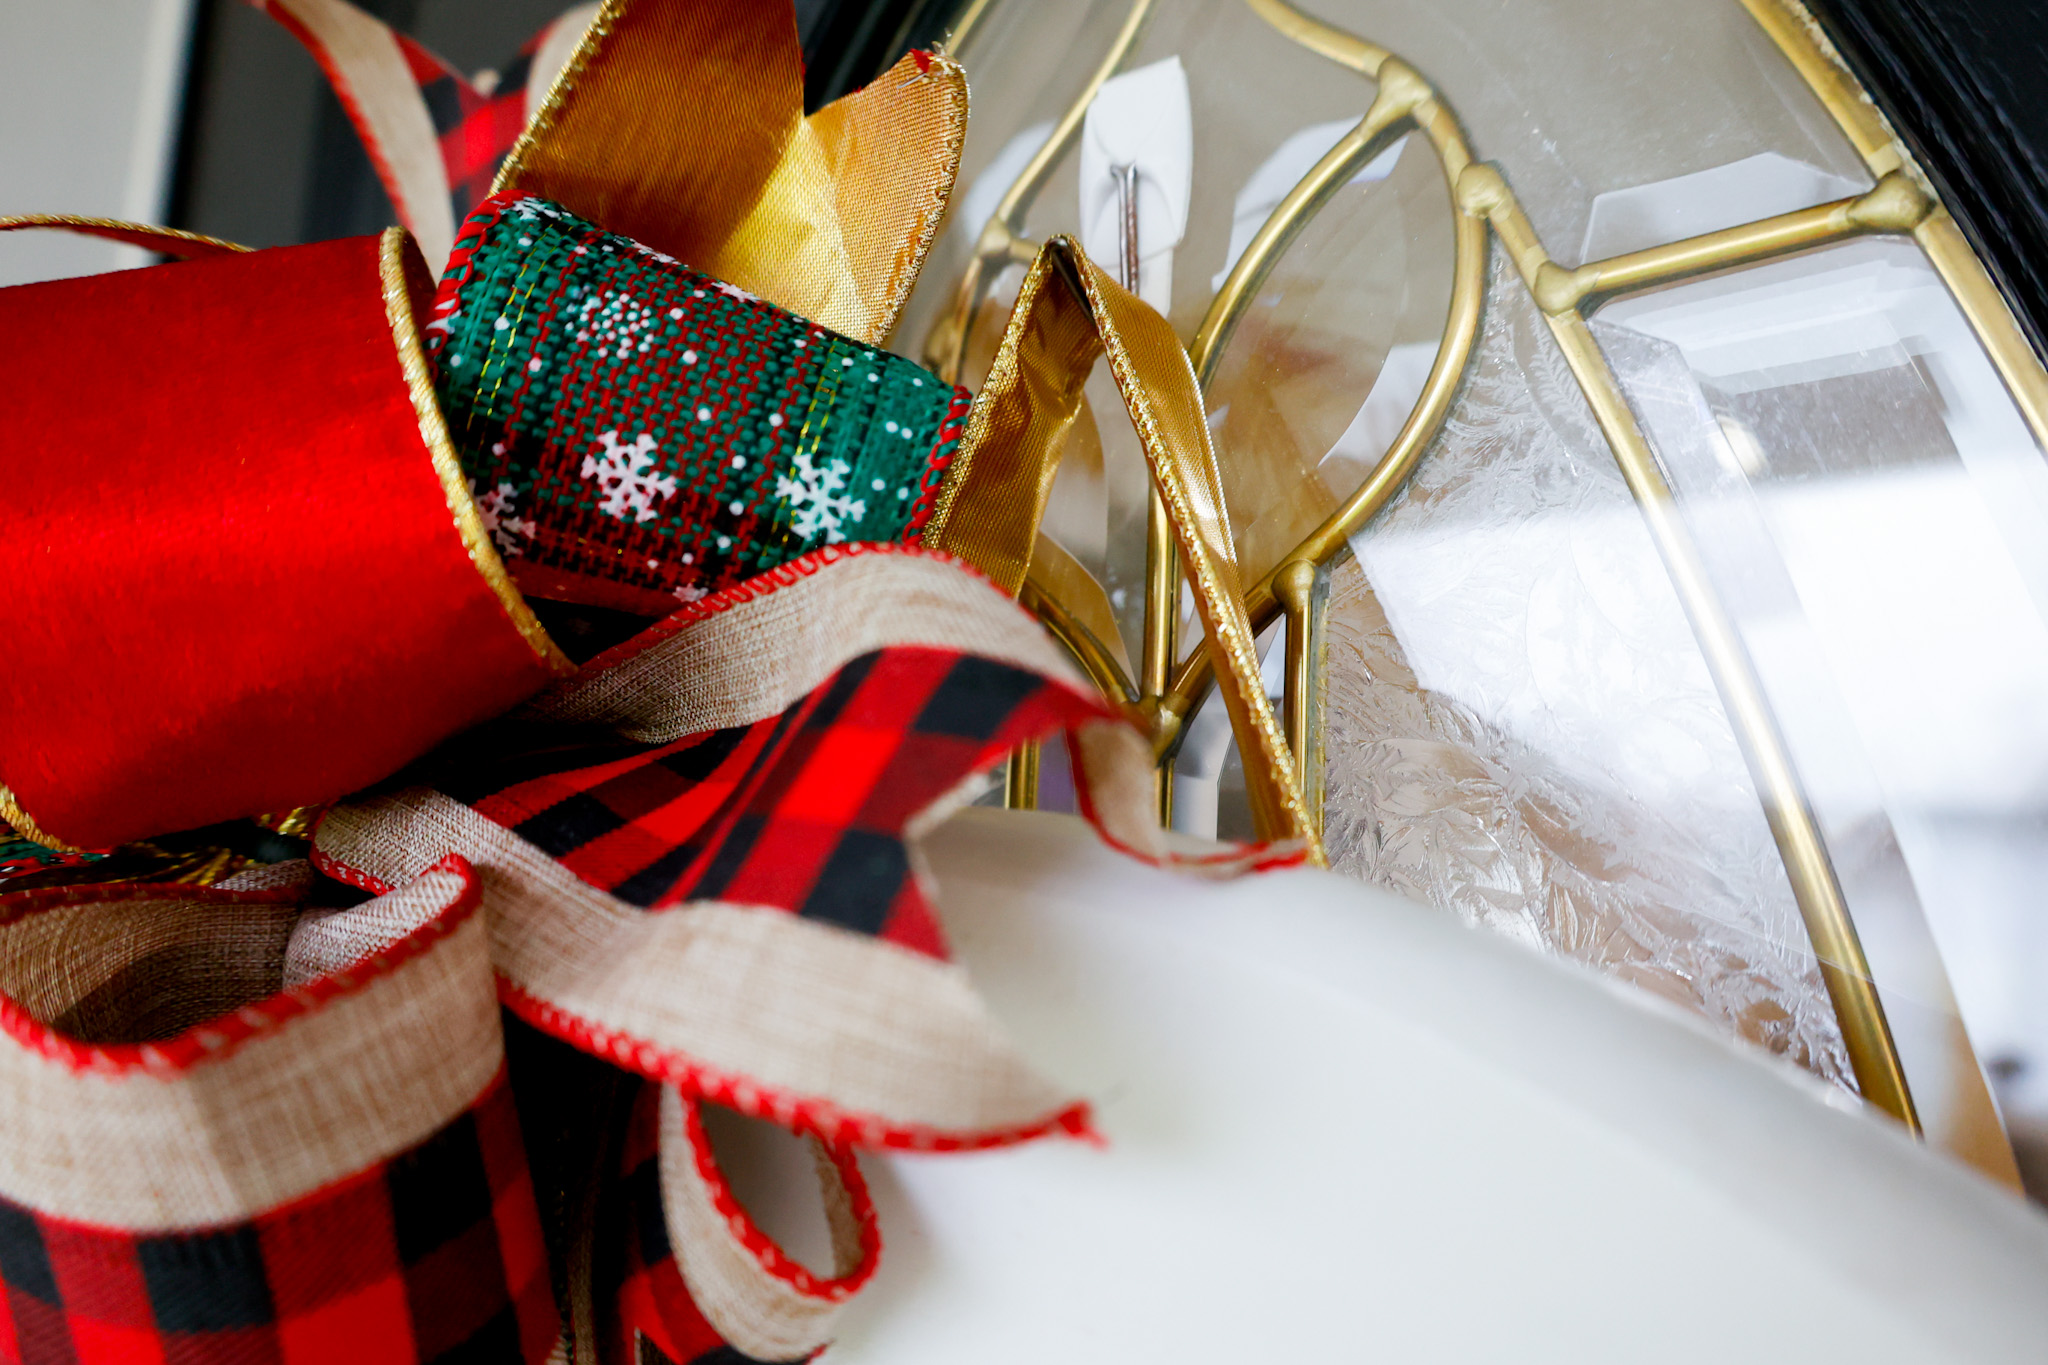
Fasten Your Bow To Your Sign
I find this is best done by using a zip-tie to make my ribbon bow, and using a staple gun to secure the zip tie to the sign.
The bow is held in suspension between the door and the wood sign.
You can also secure twine or ribbon to the back of your sign for hanging as well.
I like to take a 2″ wide piece of wired ribbon (about 8 inches long or so), fold it into thirds, and secure it to the back top middle of my sign with a staple gun as well.
Once your sign is done, hang it up on your front door for the neighborhood to see!
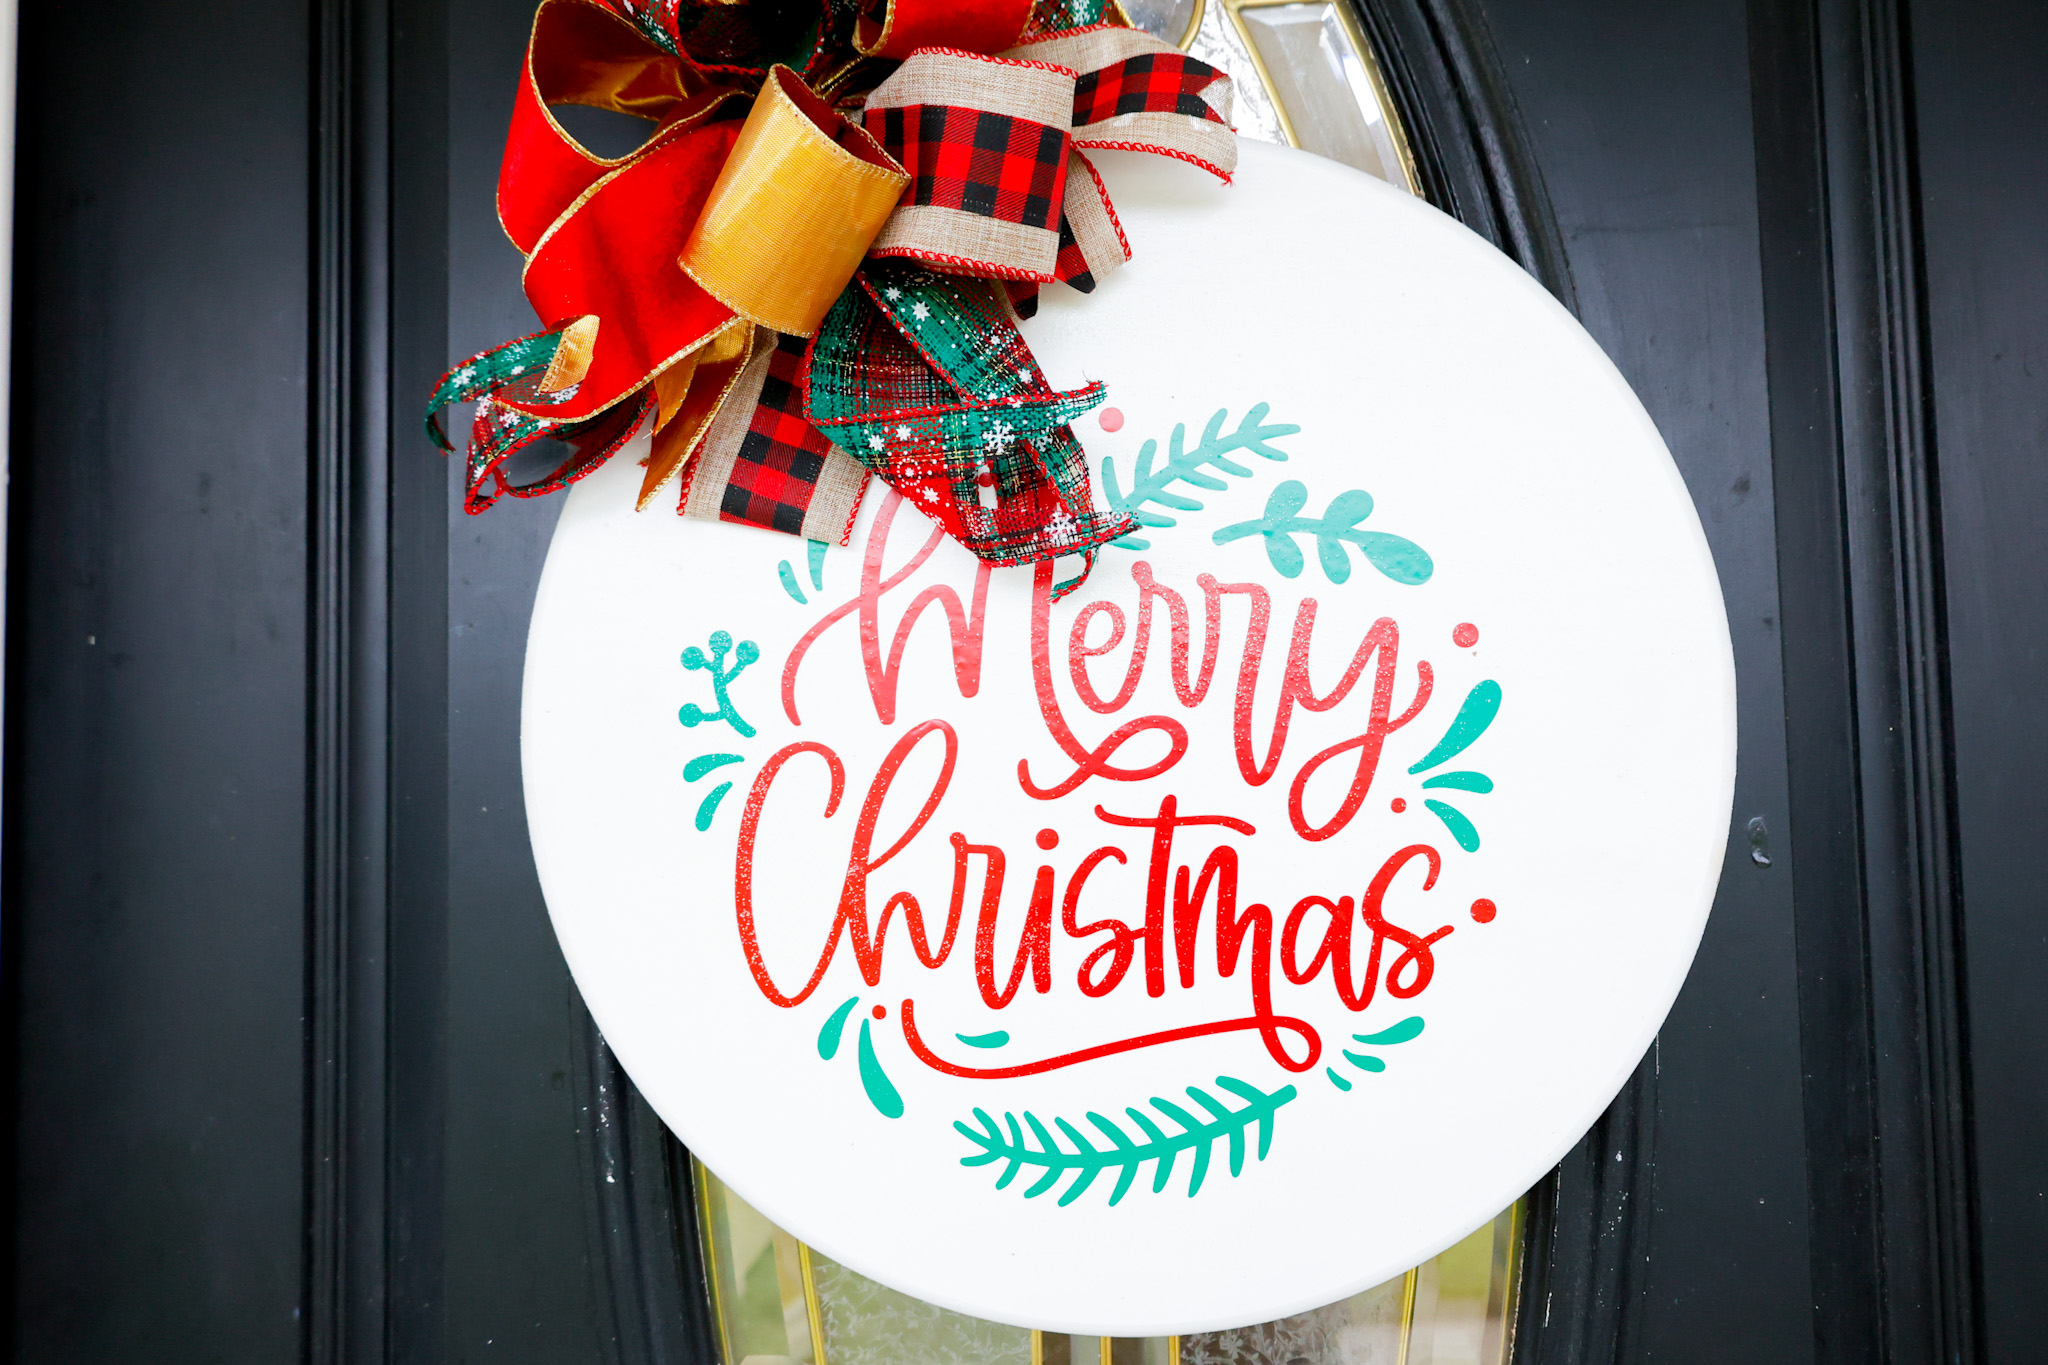
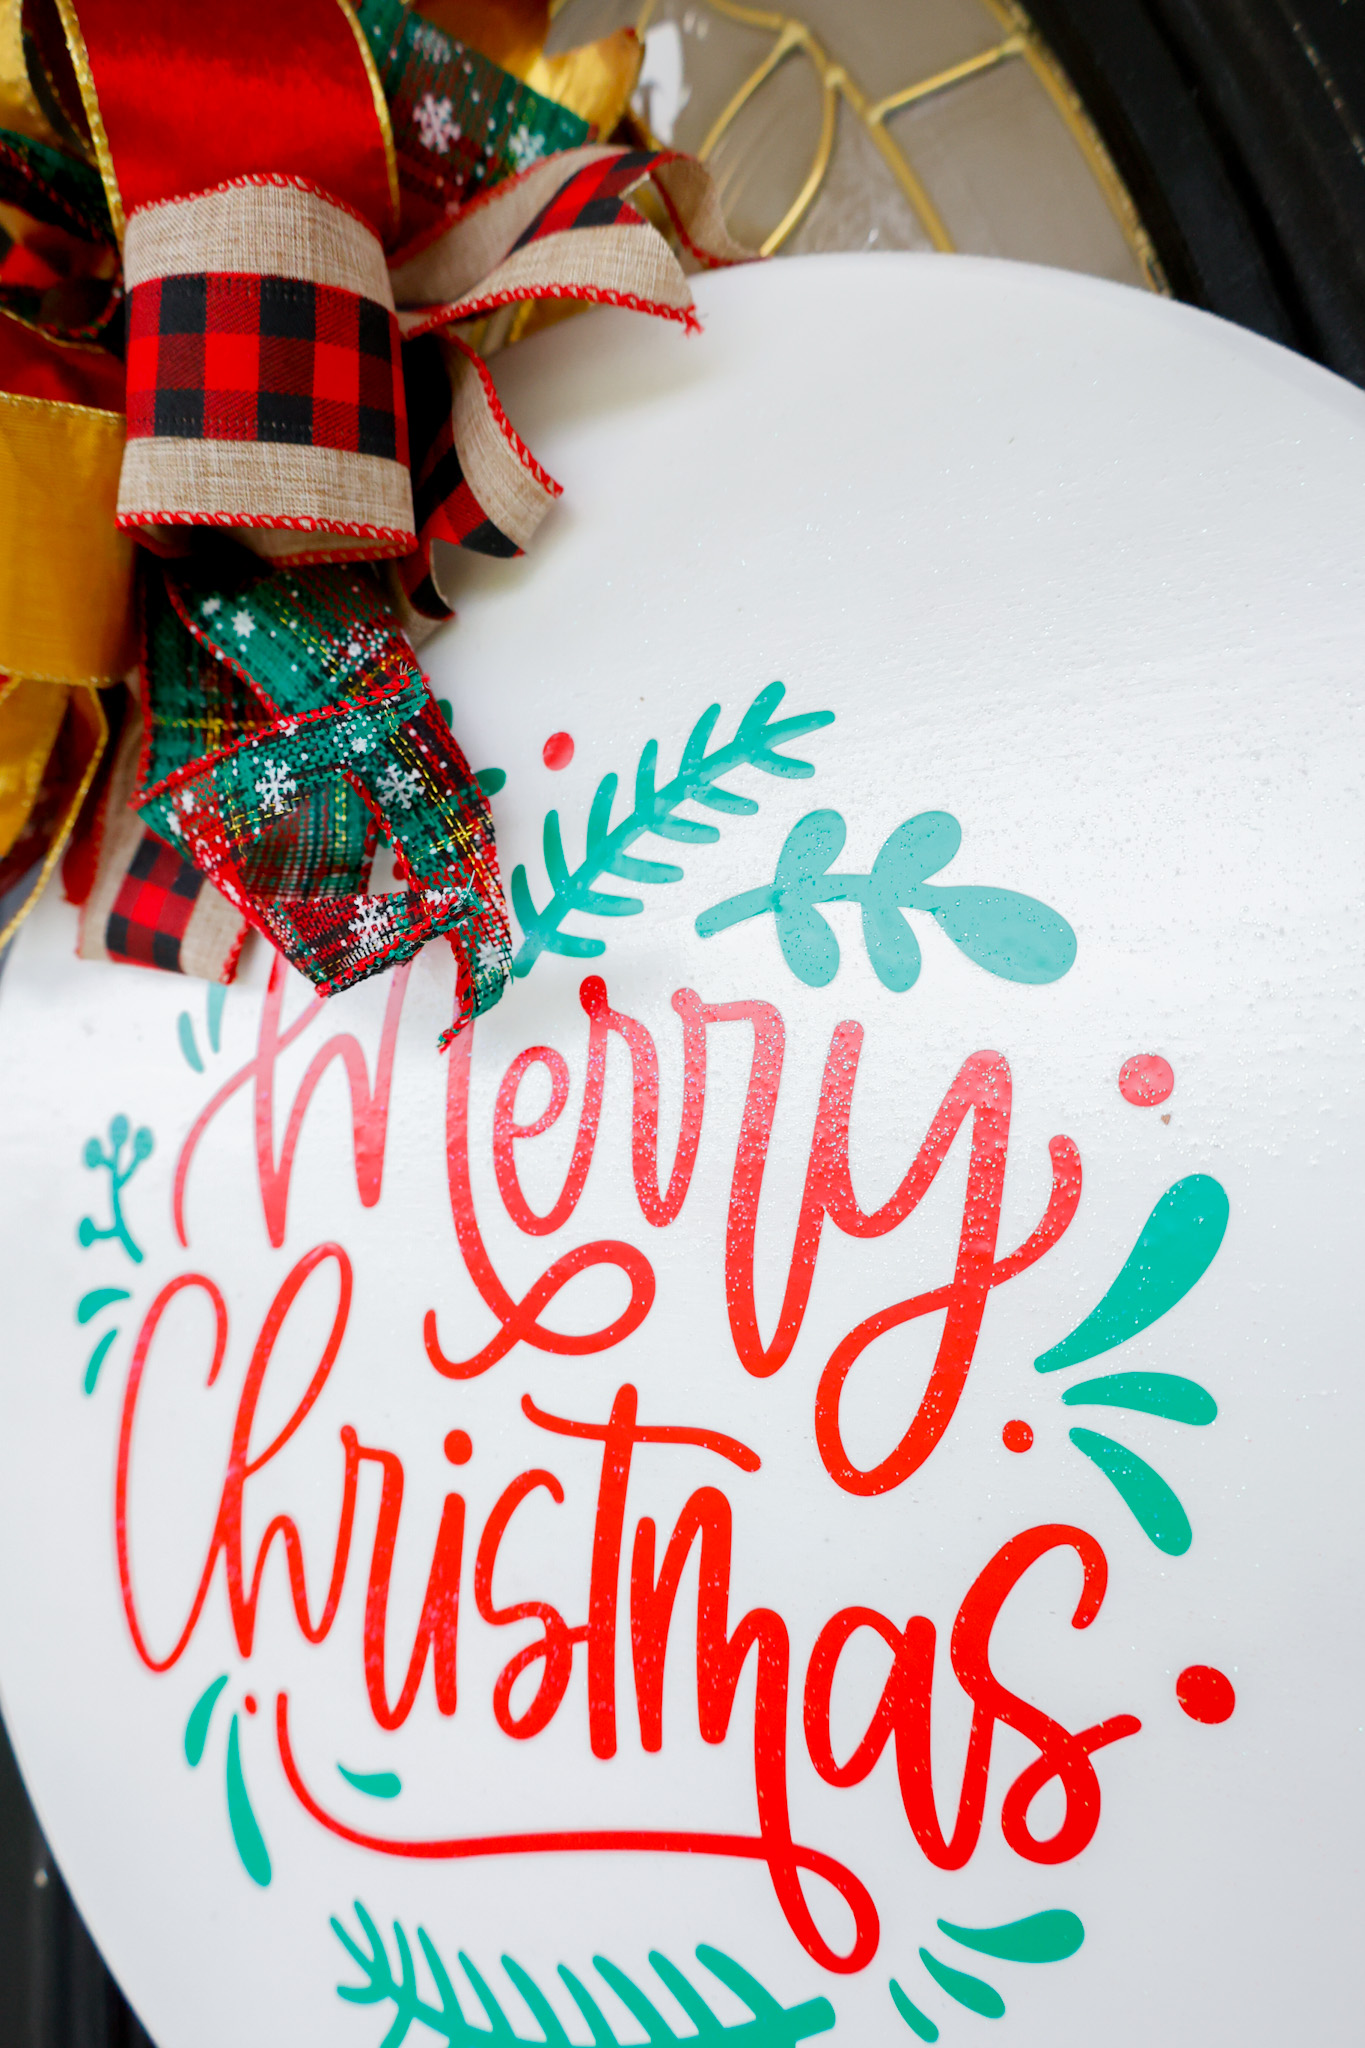
Finished Merry Christmas Sign
Here’s my finished Merry Christmas wood sign hung on our front door…
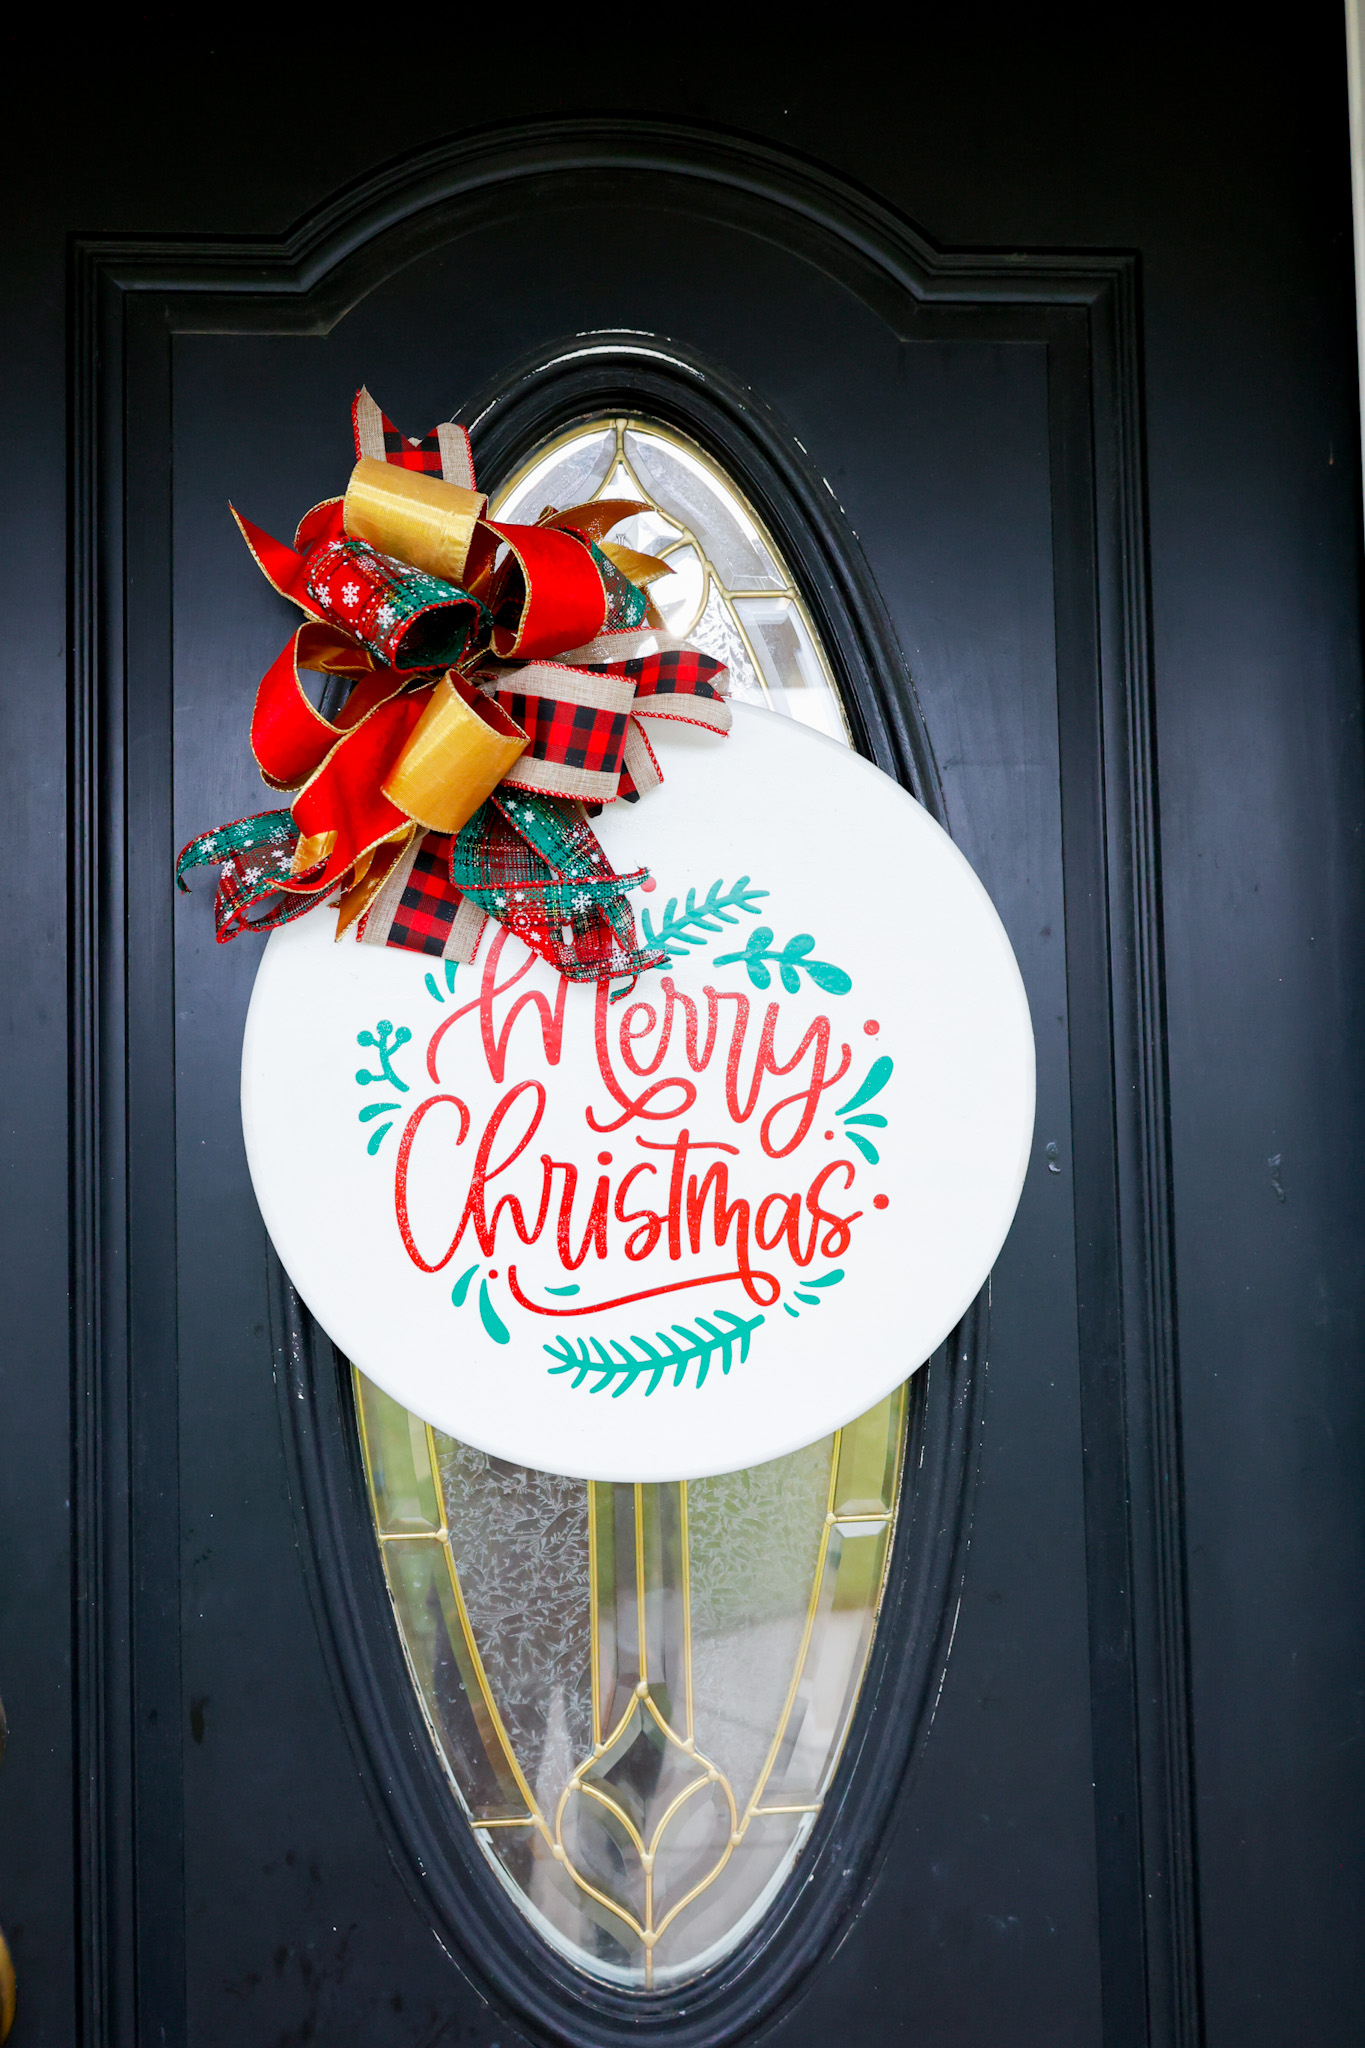
I love how beautiful it came out!
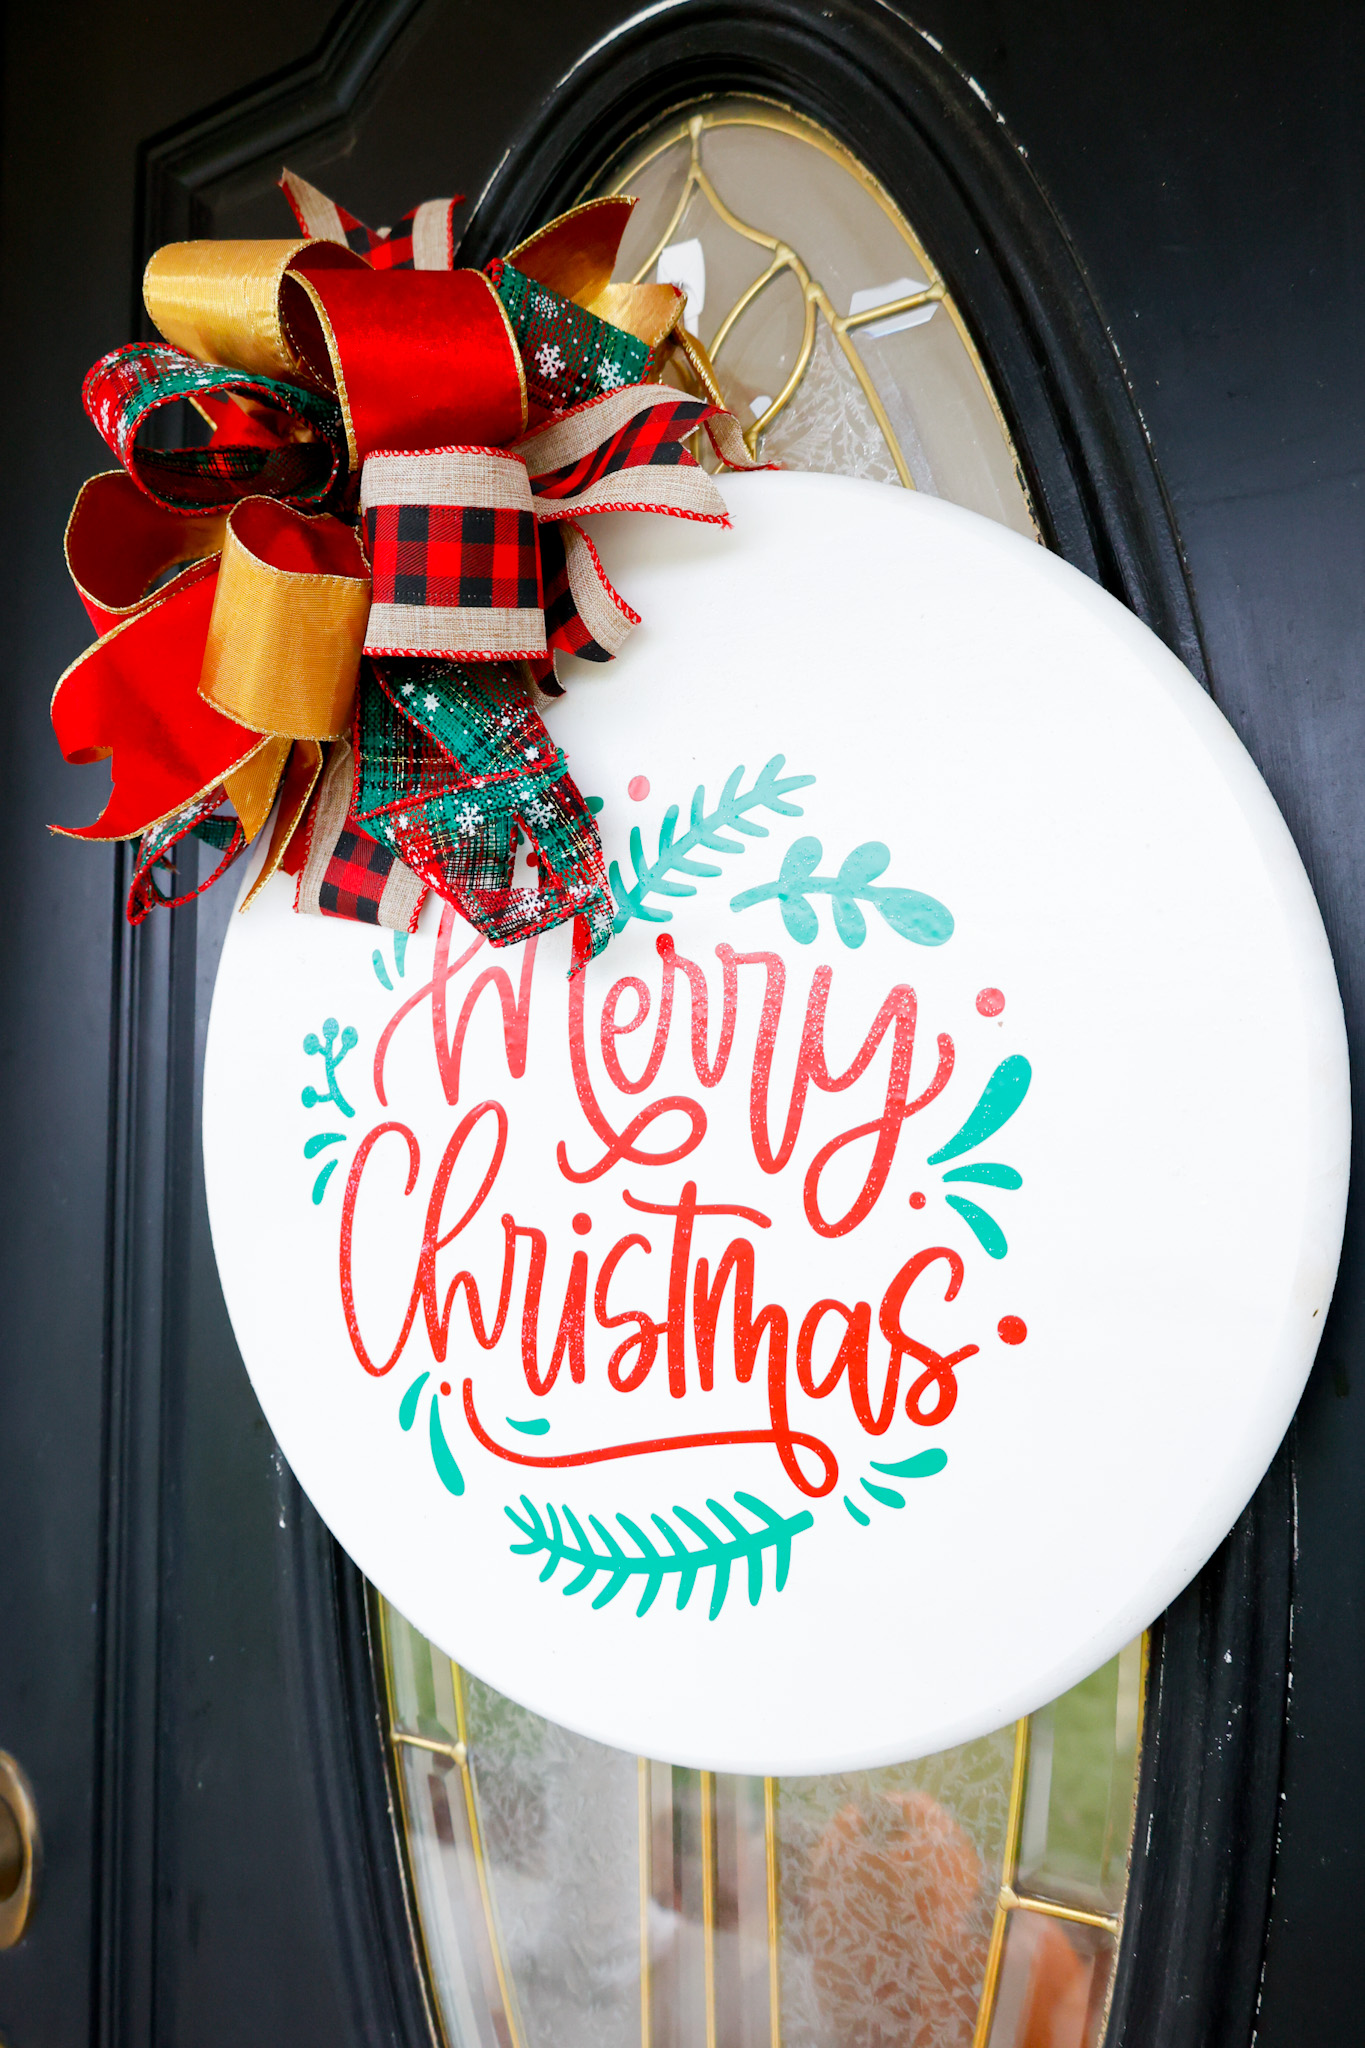
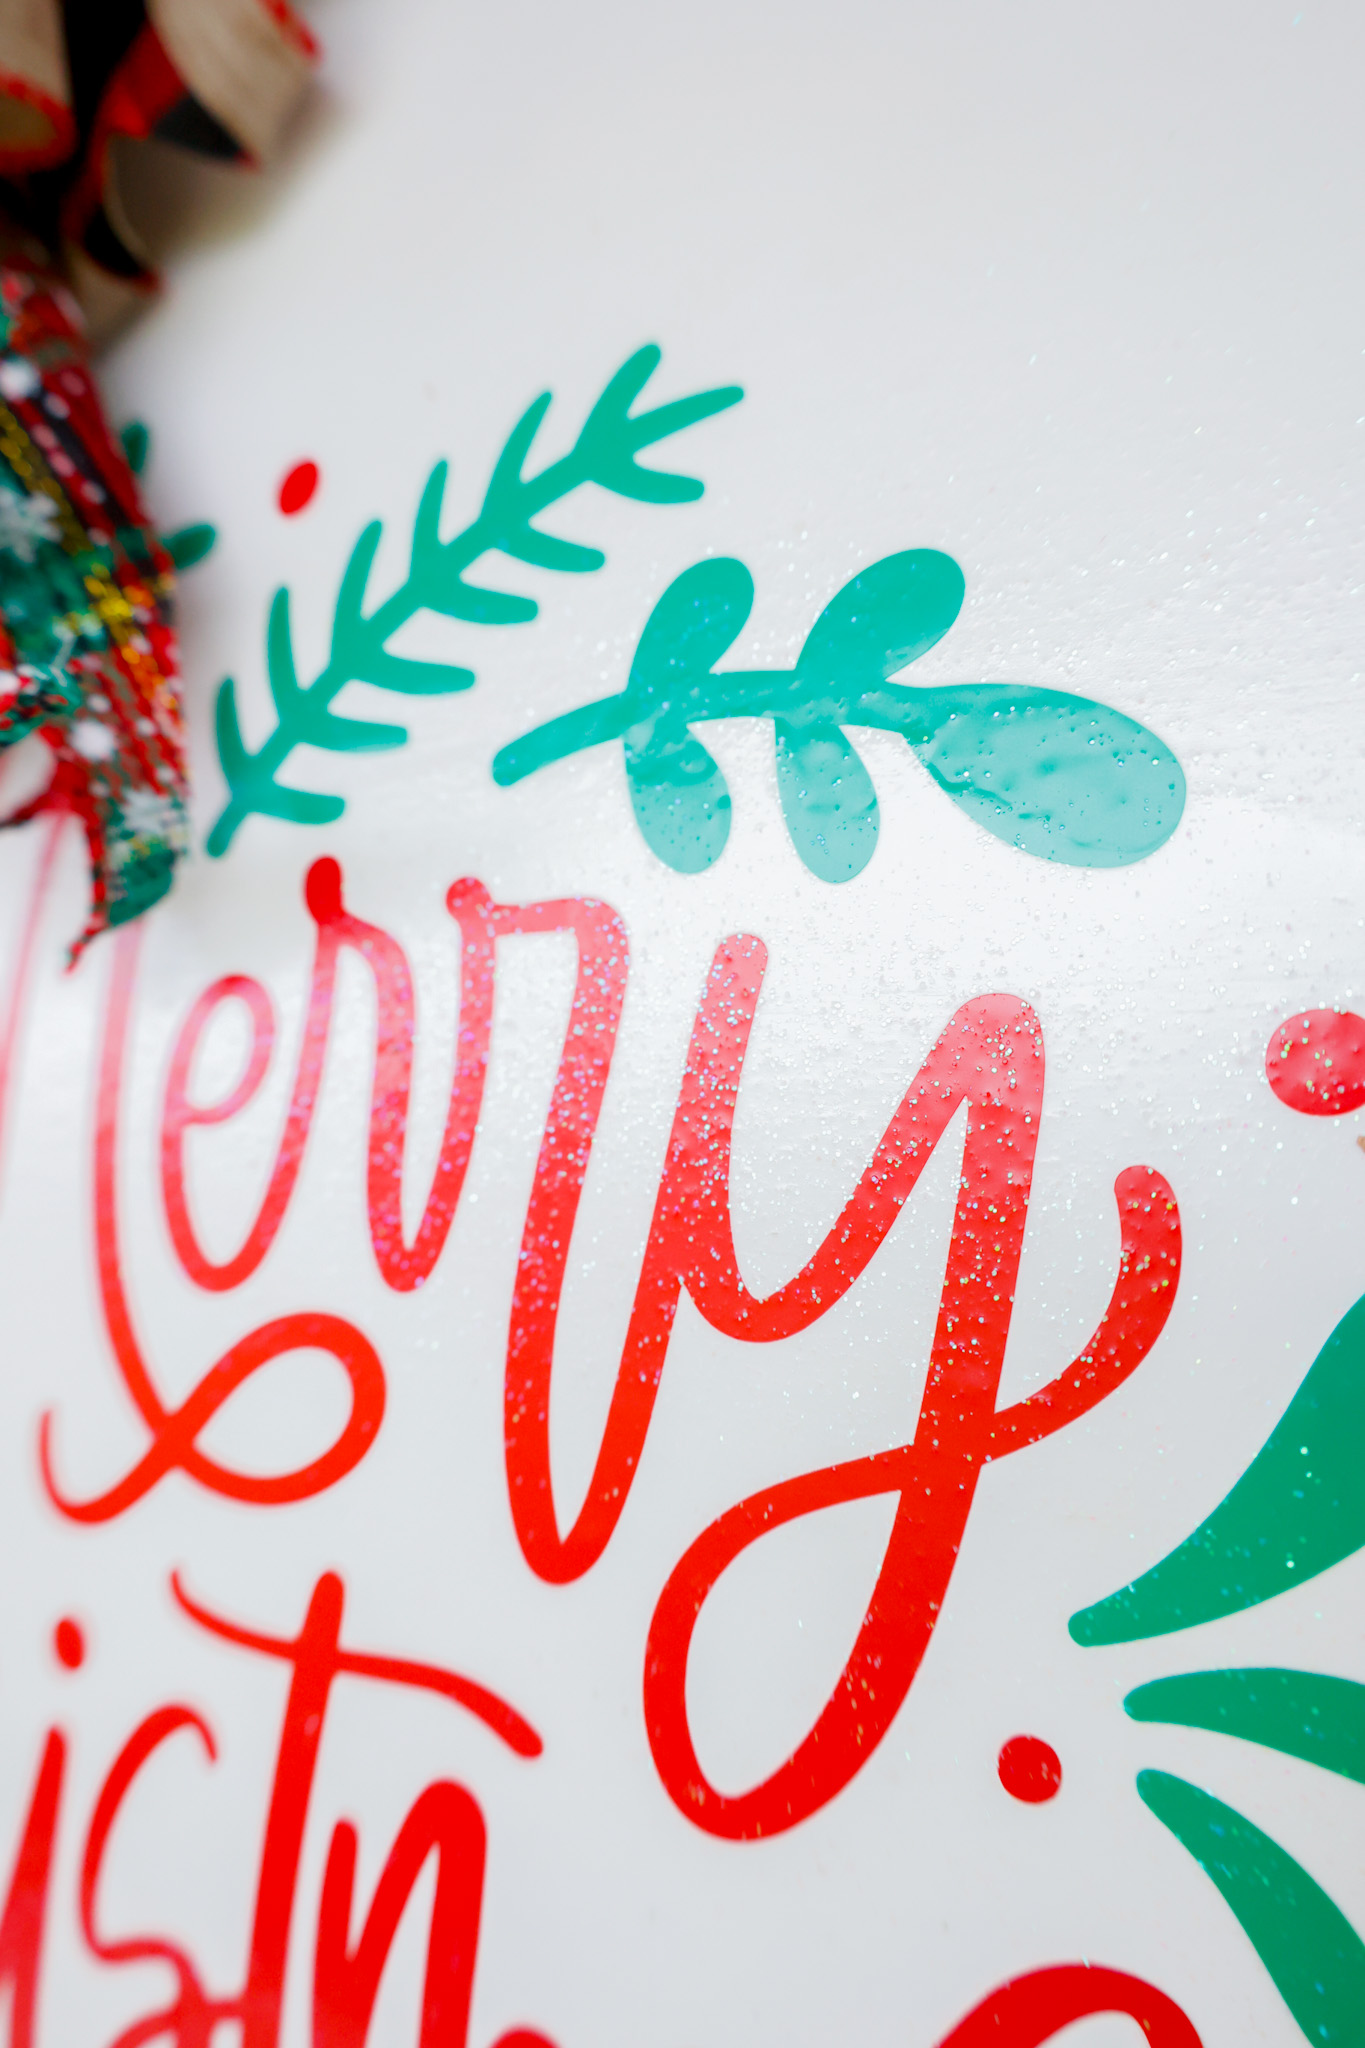
Here’s a closeup of what the glitter looks like…
I love how beautiful the glitter looks on our wood sign.
This was something new I decided to try, and am so happy with the turnout!
Thanks so much for reading!
If you enjoyed this post, be sure to check out these other posts as well…
Create Room DreamBox A Year Later – Is It Worth It??

Leave a Reply