Get ready for Santa’s arrival by making this DIY Santa Stop Here sign, and download the free SVG in the post at the bottom.
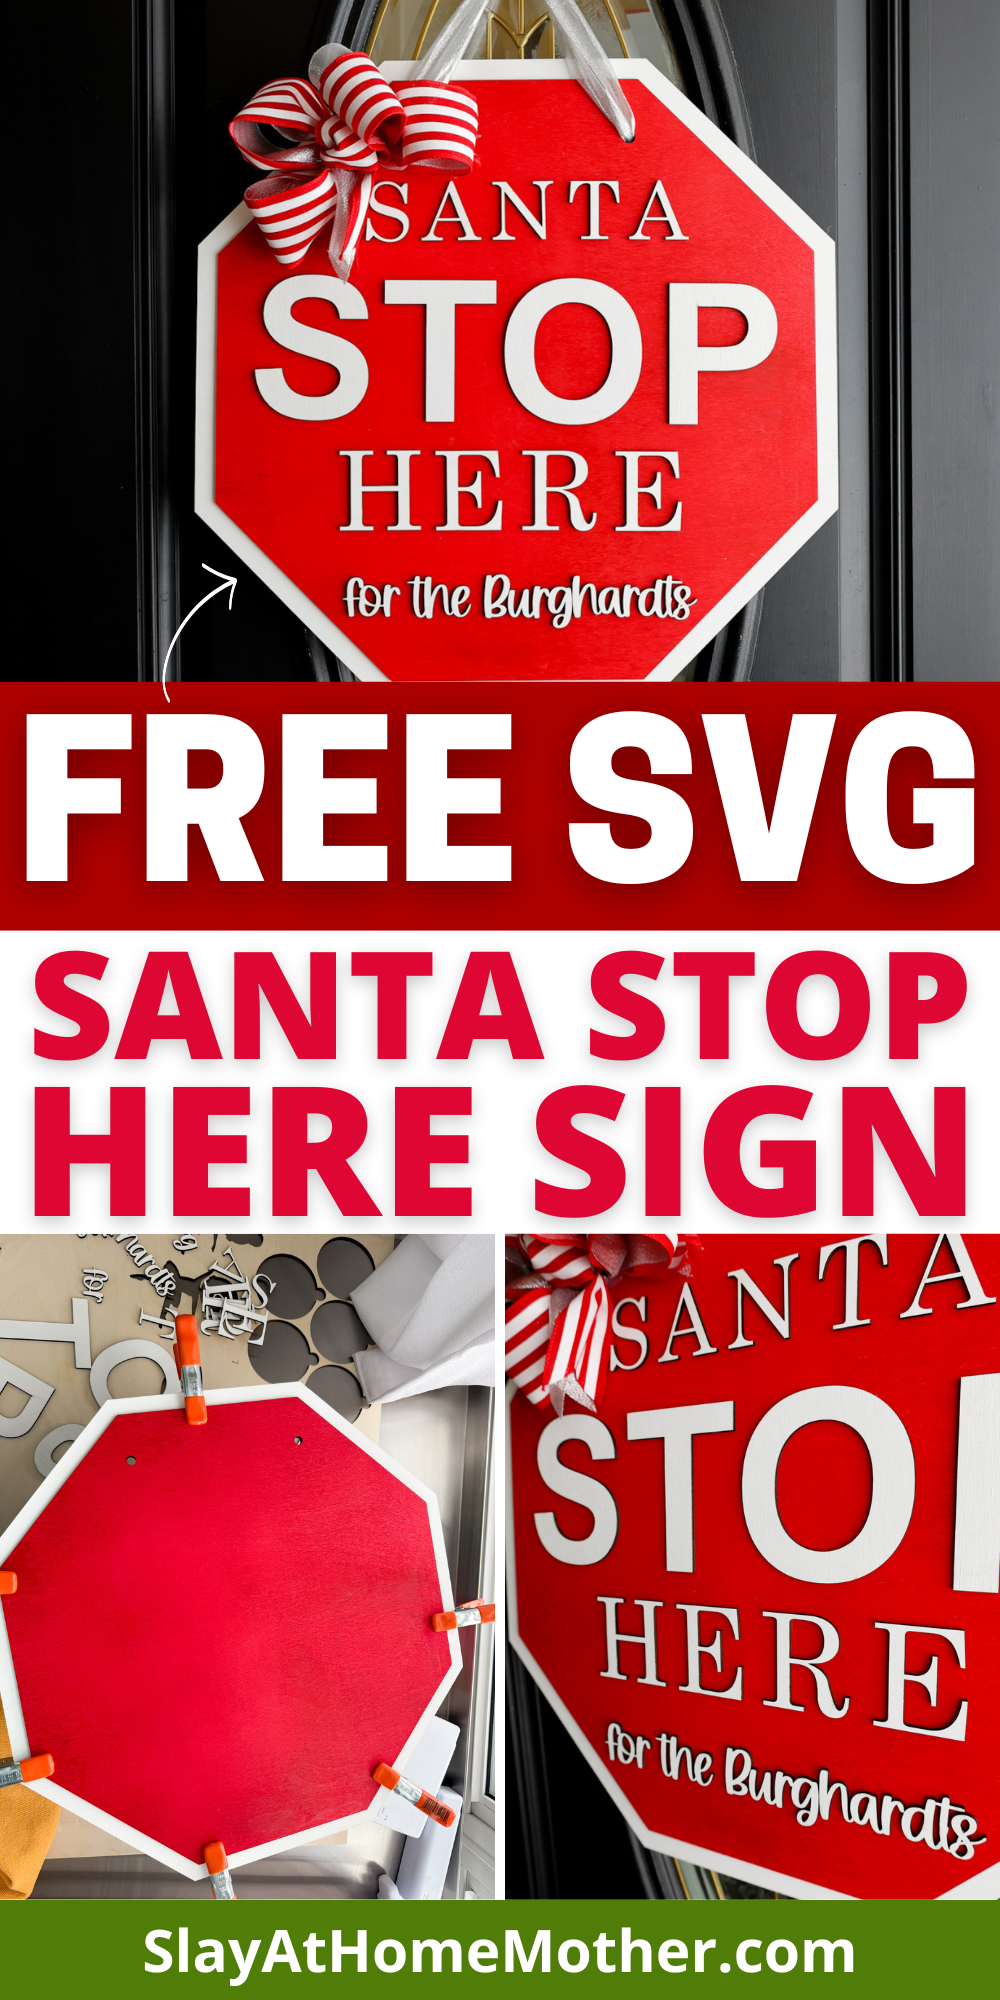
Kids are rotten and you’re nervous the guy in the big red suit won’t even stop by your house this year to deliver coal??
No need to fret, this sign will catch Ol’ Saint Nick’s attention!
I wouldn’t call out kids ‘rotten’, but they’ve made some poor choices in dealing with each other lately (probably a combination of cabin fever and tension) that have made them question if Santa would even come visit us this year.
So I got the idea, particularly for the little children, to make a big, bright sign to help Santa remember us ;).
The kids LOVED the sign and are excited about Christmas again, even to the point of trying to work together on small goals and projects this season.
If you’ve never made a sign like this before, be sure to read my tips in the post or leave a comment on this blog post so I can help answer any questions you have.
I’m sharing a free SVG at the bottom of this post on how to make this easy DIY Santa Stop Here Sign that you can download and create your own personal sign as well.
This post may contain affiliate links, however, all opinions are my own, as always.
What You’ll Need for this DIY Santa Stop Here Sign
Here is what I used to create this sign:
- 2 pieces of 3mm Baltic Birch wood (I pre-painted my wood, but you can always paint afterwards)
- laser machine
- SVG file (grab my free SVG download at the bottom of this post!)
- Starbond glue – this one is my favorite for gluing wood to wood or acrylic to wood
- acrylic in colors Red, Blue, Green, Yellow, Silver Glitter
- spray or acrylic paint in Red and White
- 2″ wired ribbon in your color choices (I went with Red/White Stripes and Silver)
- hot glue gun
- zip tie
I recommend at least 1/4″ for door signs, particularly in the case of owning a home with heavy winds (*raises hand*). You’ll need some weight to your door hanger to prevent it from being easily lifted up and crashing down because of heavy winds.
Ask me how I know.
Or just take my word for it, and stick with 1/4″.
For this door sign, because we’re adhering two layers of 1/8″ (or 3mm) wood together, we already make up that 1.4″ weight for our sign, especially considering the small border of white that shows past the outline of the red octagon.
Fonts Used in this Design
Here are the fonts I used for this sign:
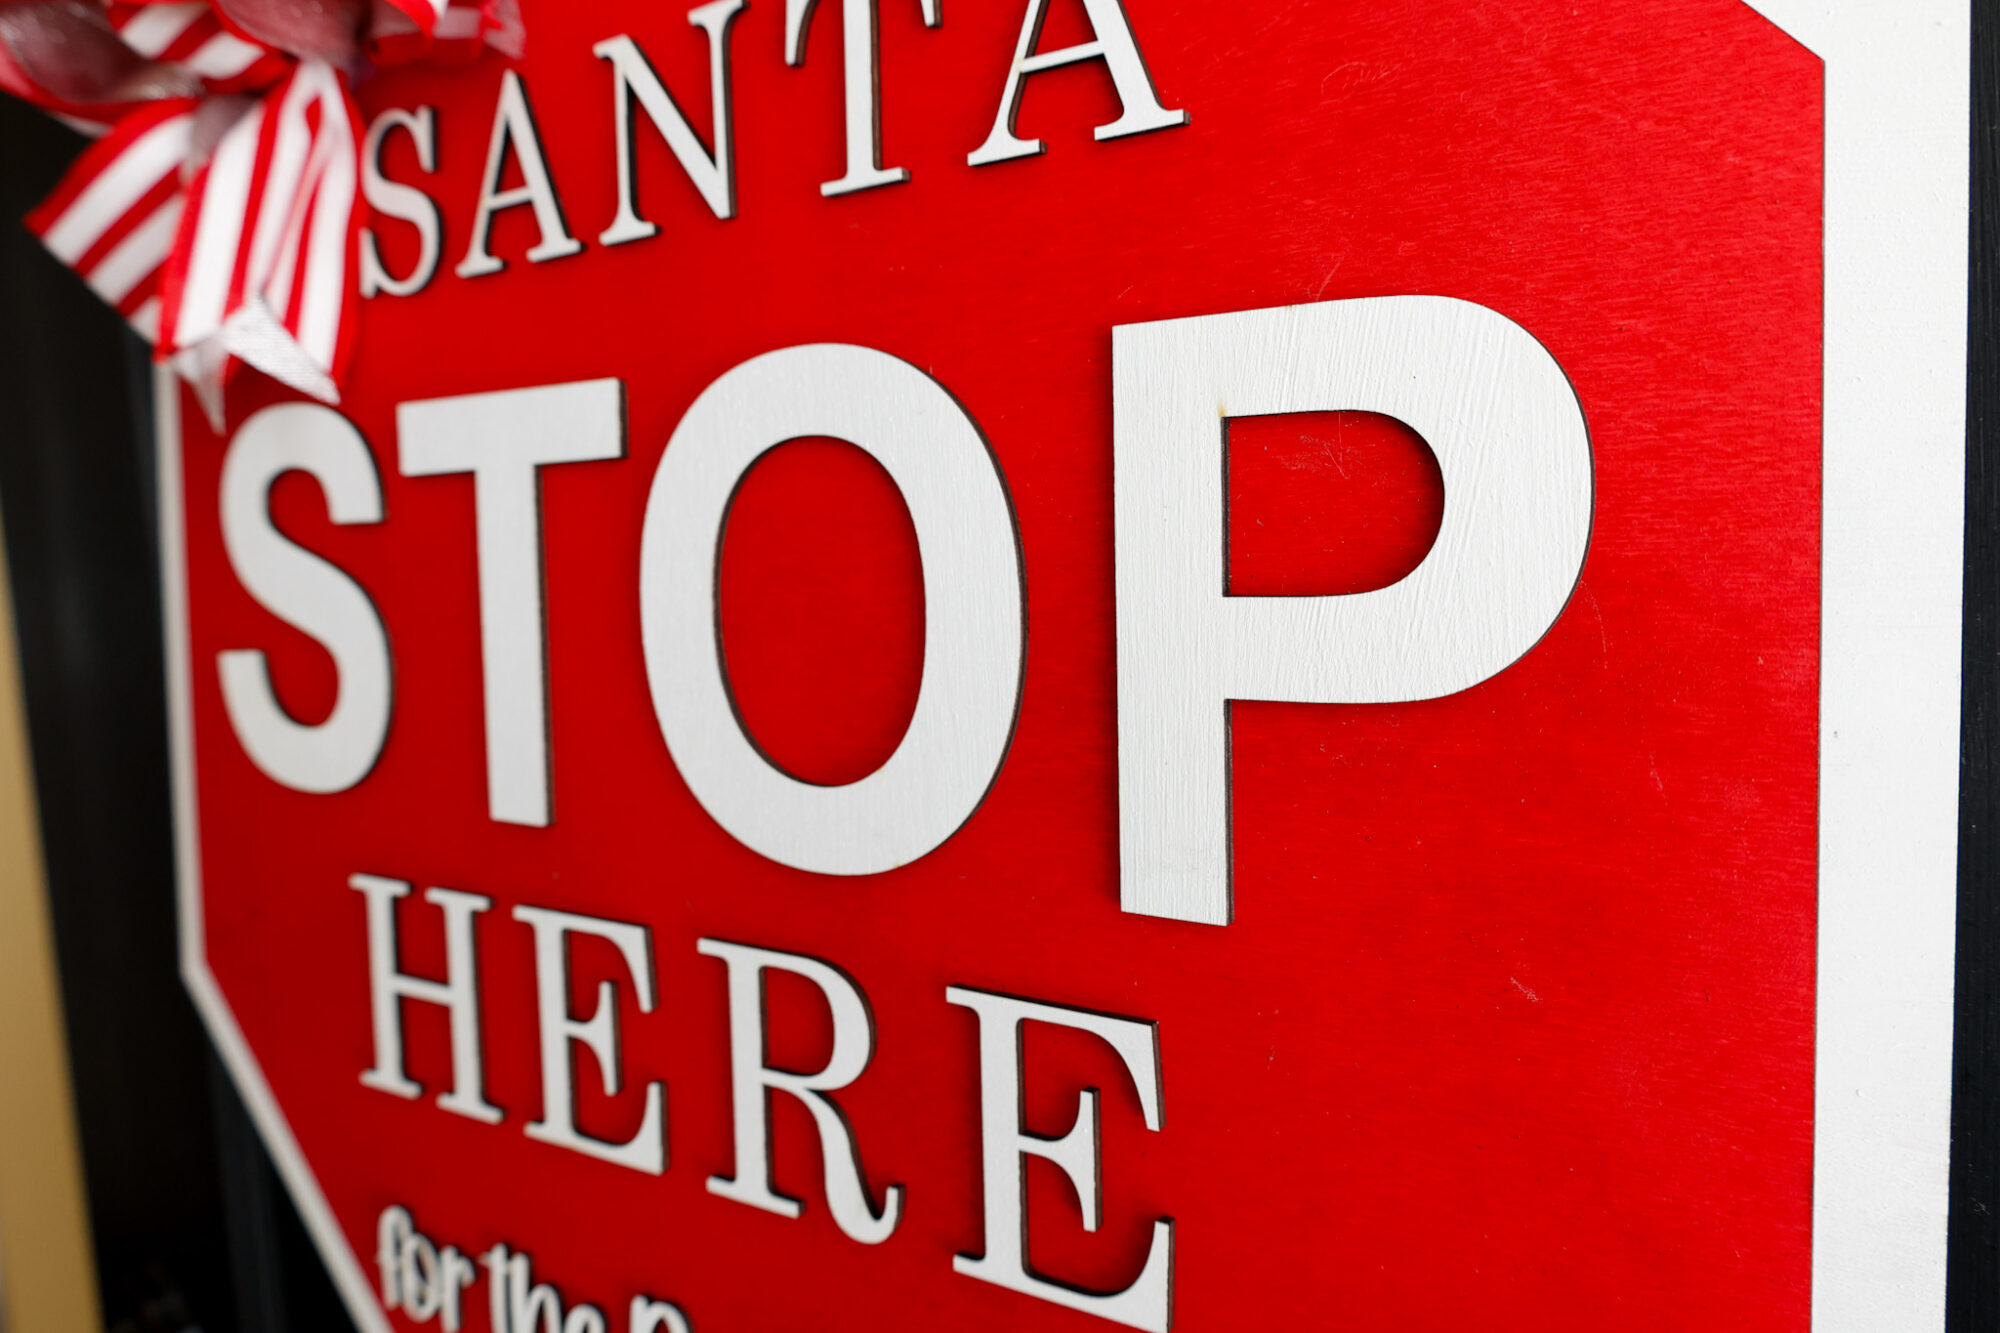
- AppleMyungjo (for ‘Santa’ and ‘Here’)
- Arial Bold (for ‘STOP’)
- Barn House (for the bottom line of lettering with our last name)
I have included in the SVG file for you the lettering pictured in this post except for the line of lettering that has our name in it, as obviously that wouldn’t be needed for your sign).
My Laser Machine
In this project, I’m utilizing the Nova Plus 35 60W, which is a workhorse laser machine – read the specs here.
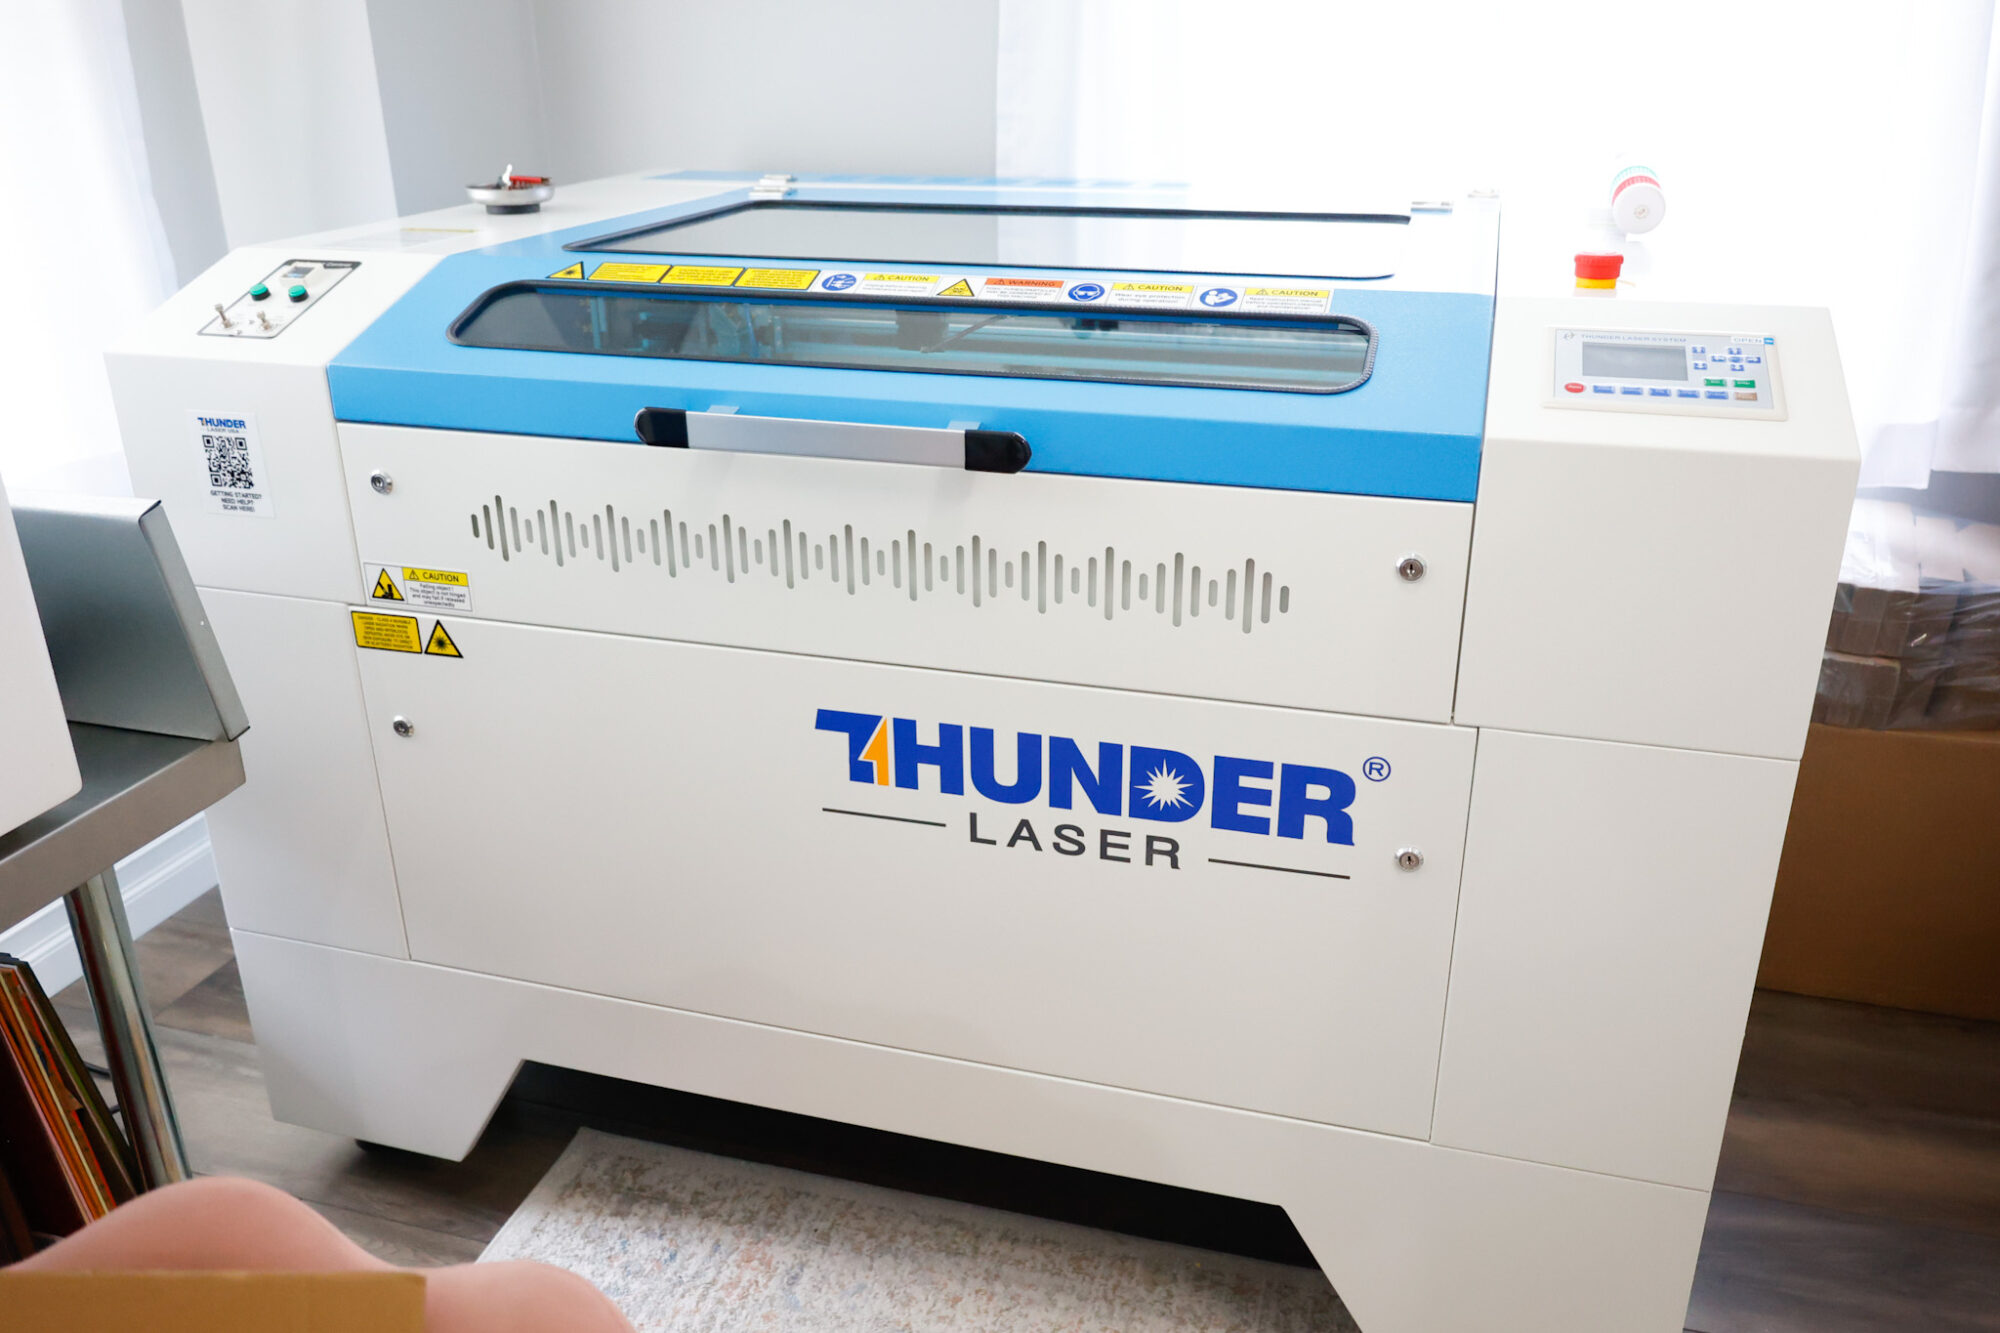
This machine has been incredible for crafting nursery signs, ornaments, door signs, tiered tray decor, and so much more!
The honeycomb on this laser bed is perfect for making larger items like nursery signs, door signs, etc.
Laser Cut Settings for Baltic Birch Wood
To cut these shapes out cleanly, I used these settings with my laser machine:
Cut wood: 8 mm/s at 50% Max power, 25% min power
Score wood: 200 mms/ at 15% Max power, 5% min power
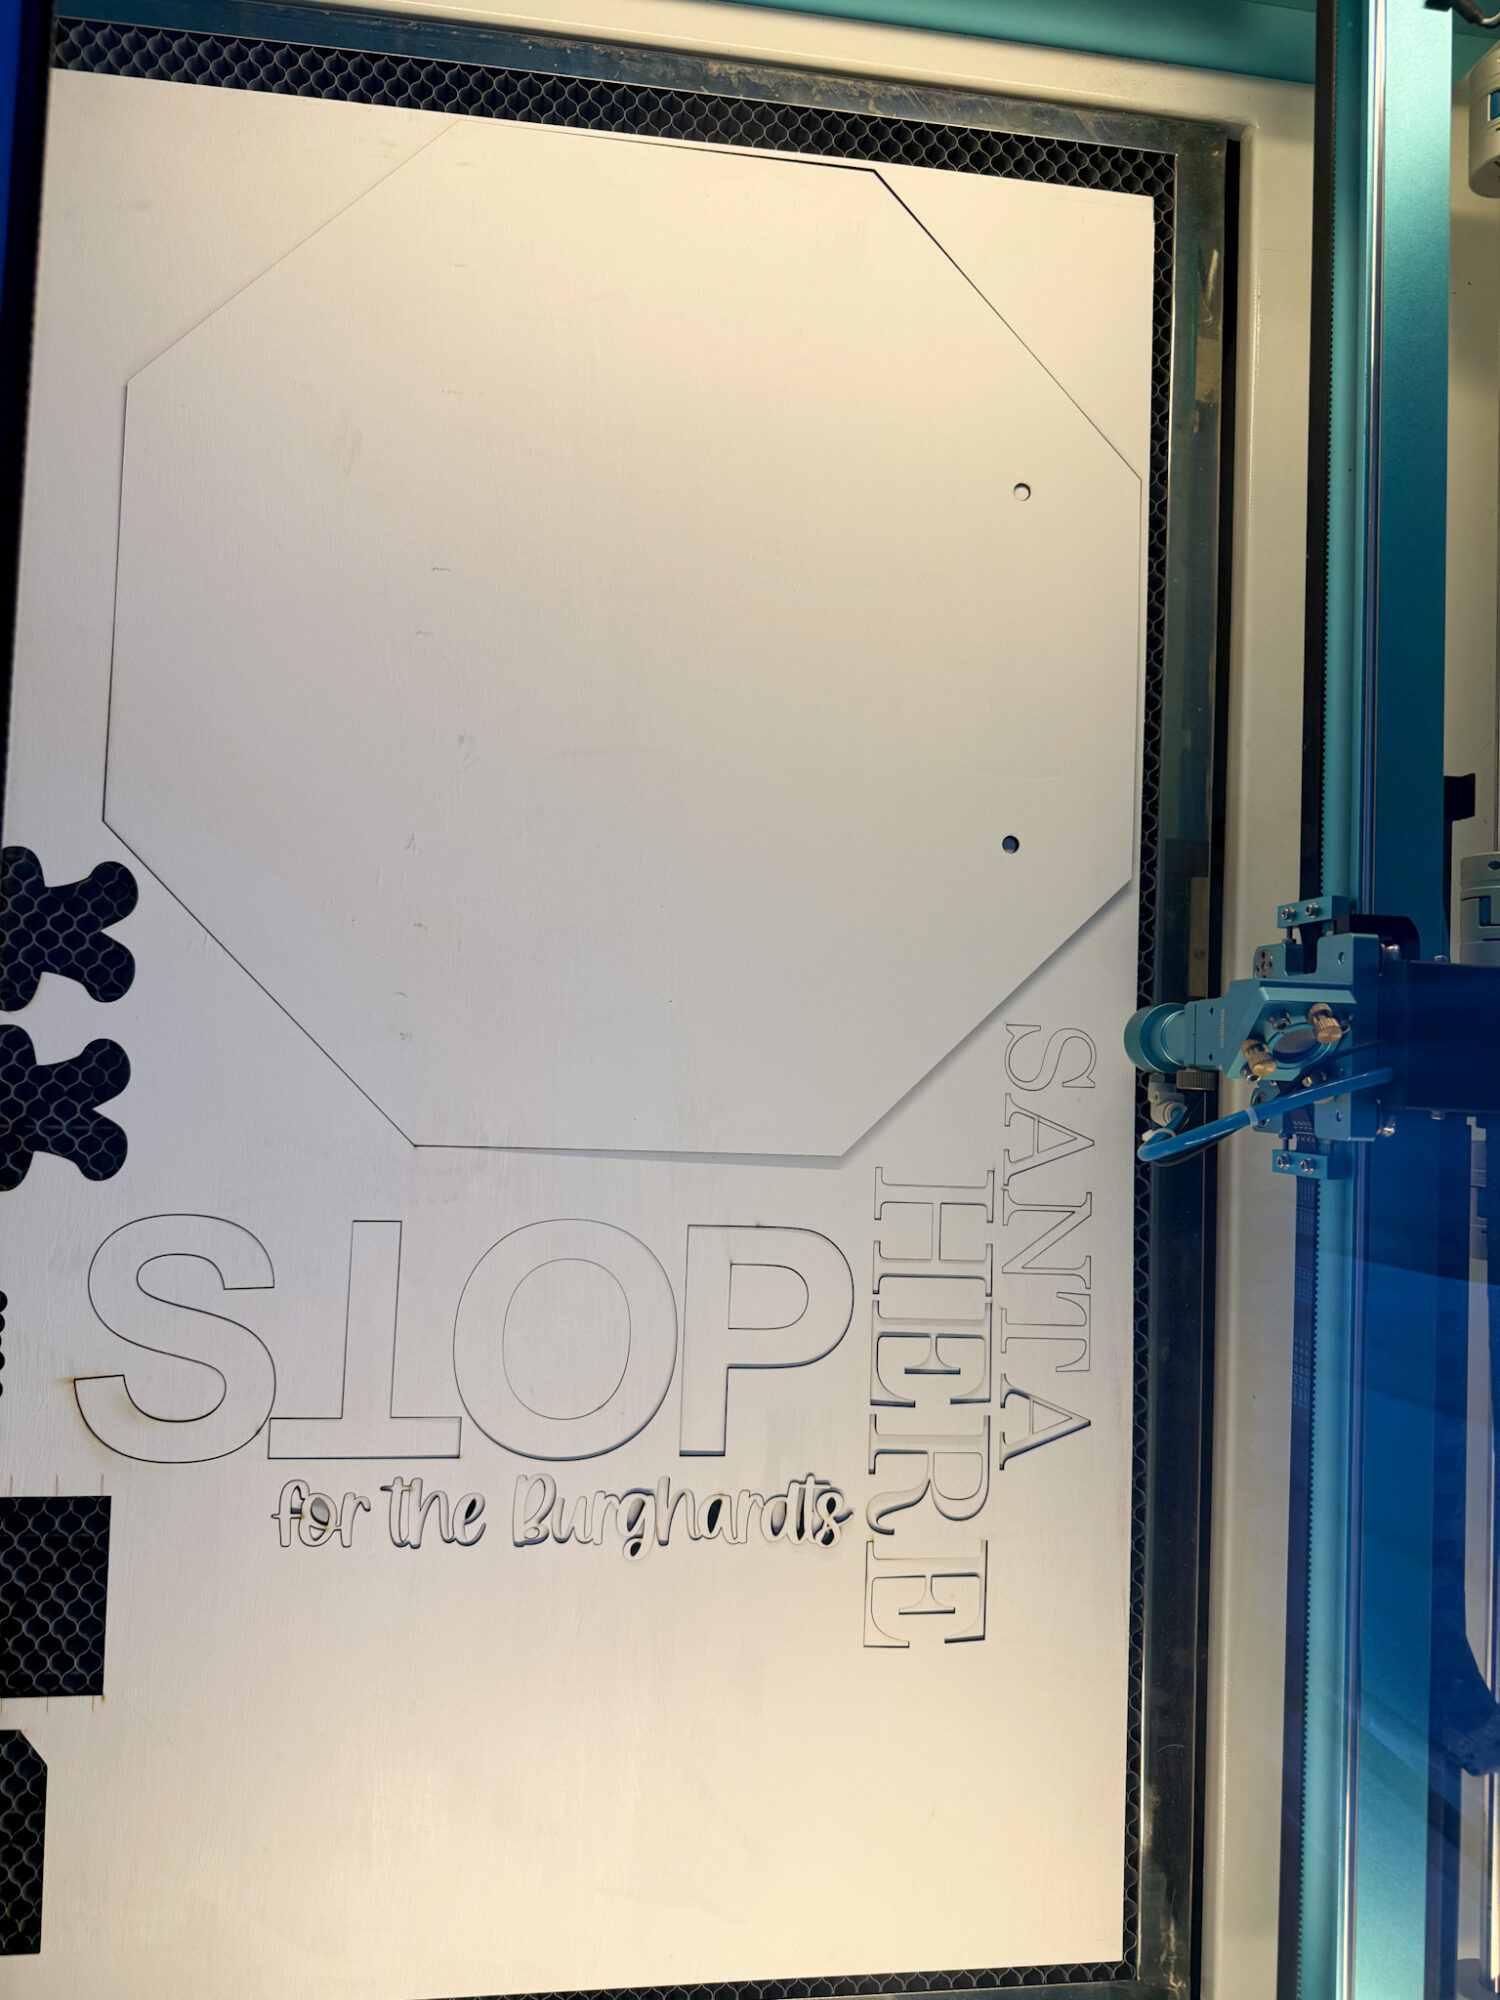
(Scoring in Lightburn if a LINE setting, not a FILL setting (engraving). I use this option to lightly trace an inward offset to mark where the letters go so I’m not eyeballing everything. Consequently, I forgot to do this when cutting out my red octagon, so I HAD to eyeball everything.)
If you want to score the outline of the letters, I recommend do an inward offset (this helps hide your score lines so you can use them as a reference but they aren’t seen as part of the finished project, which makes your sign look CLEAN), as shown in the screenshot from Lightburn below…
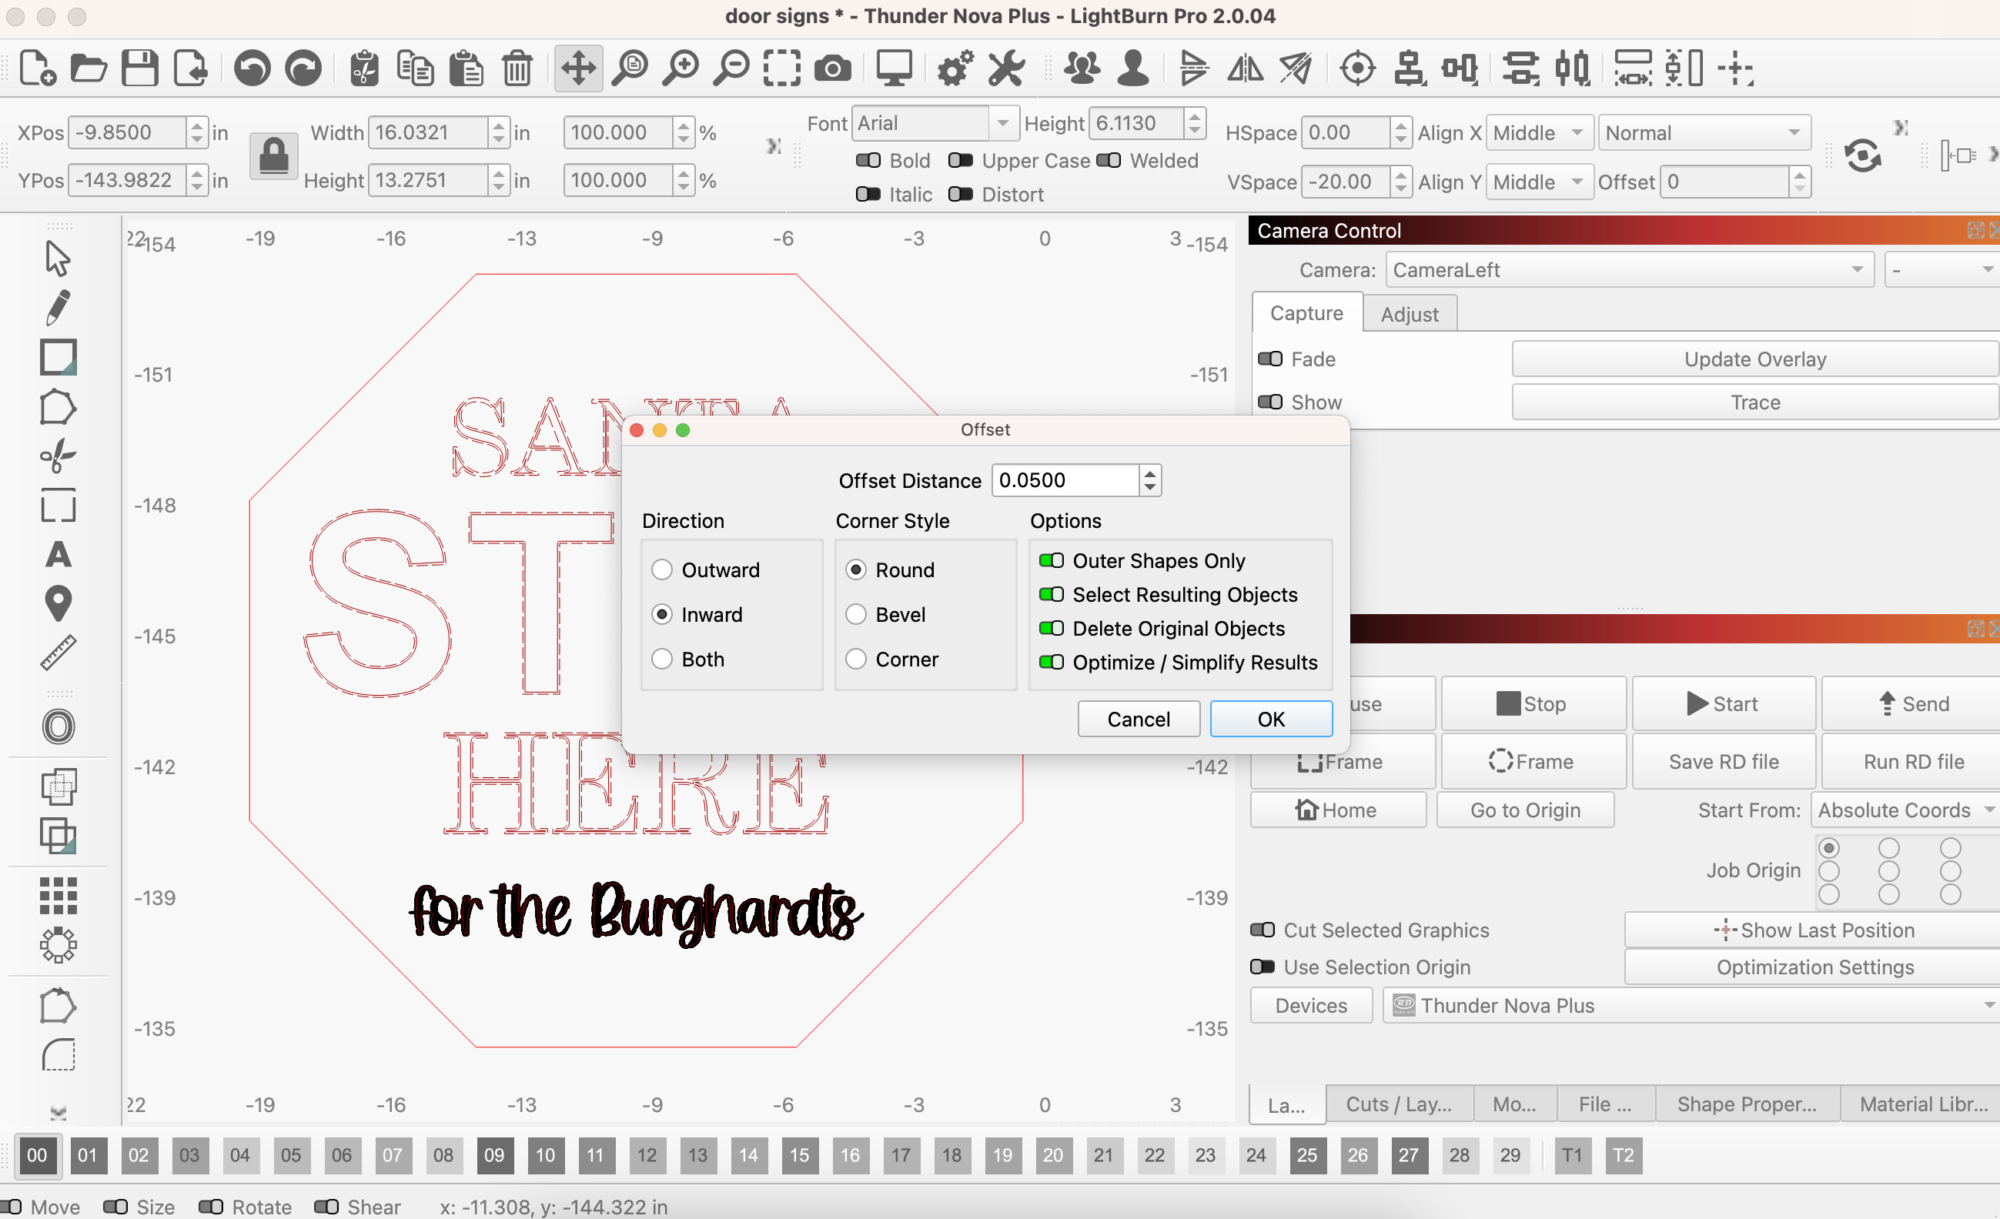
And here is what that would have looked like, if I went through with it…
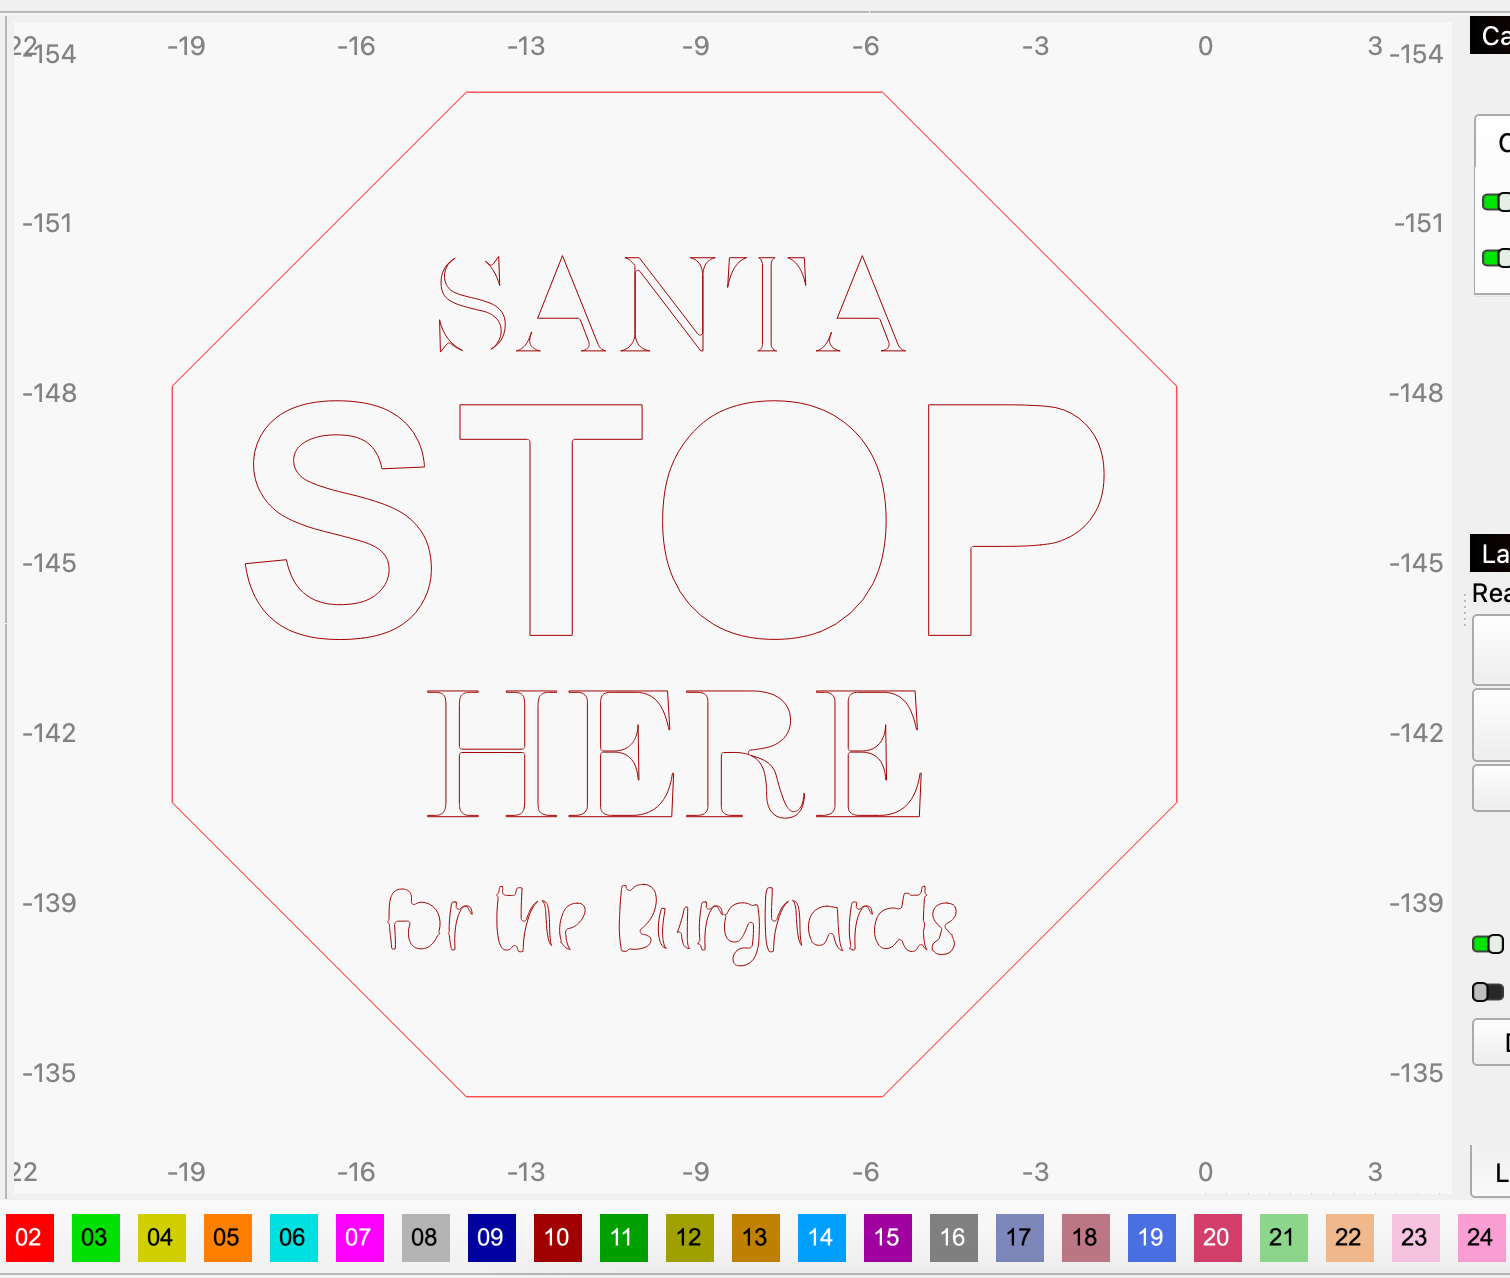
As mentioned before, this scoring just provides a inward reference point for you to place your letters so they are even.
FYI: If you have a CO2 laser, the settings will differ for you as well as my settings shown in this post are for my RF laser. It’s recommended that you run a test sheet for scoring/engraving/cutting for your laser so you have some go-to settings for the different materials.
You may also like: DIY Tiered Tray Decor + Free SVG
I chose this specific piece of white (pre-painted by myself) wood as it had gotten scuffed up a bit being in the garage at the same time as my kids while it was drying.
If you know, you know.
But it was perfect for this application as I would be covering it up with another piece of wood anyways.
Here’s what it looks like underneath…
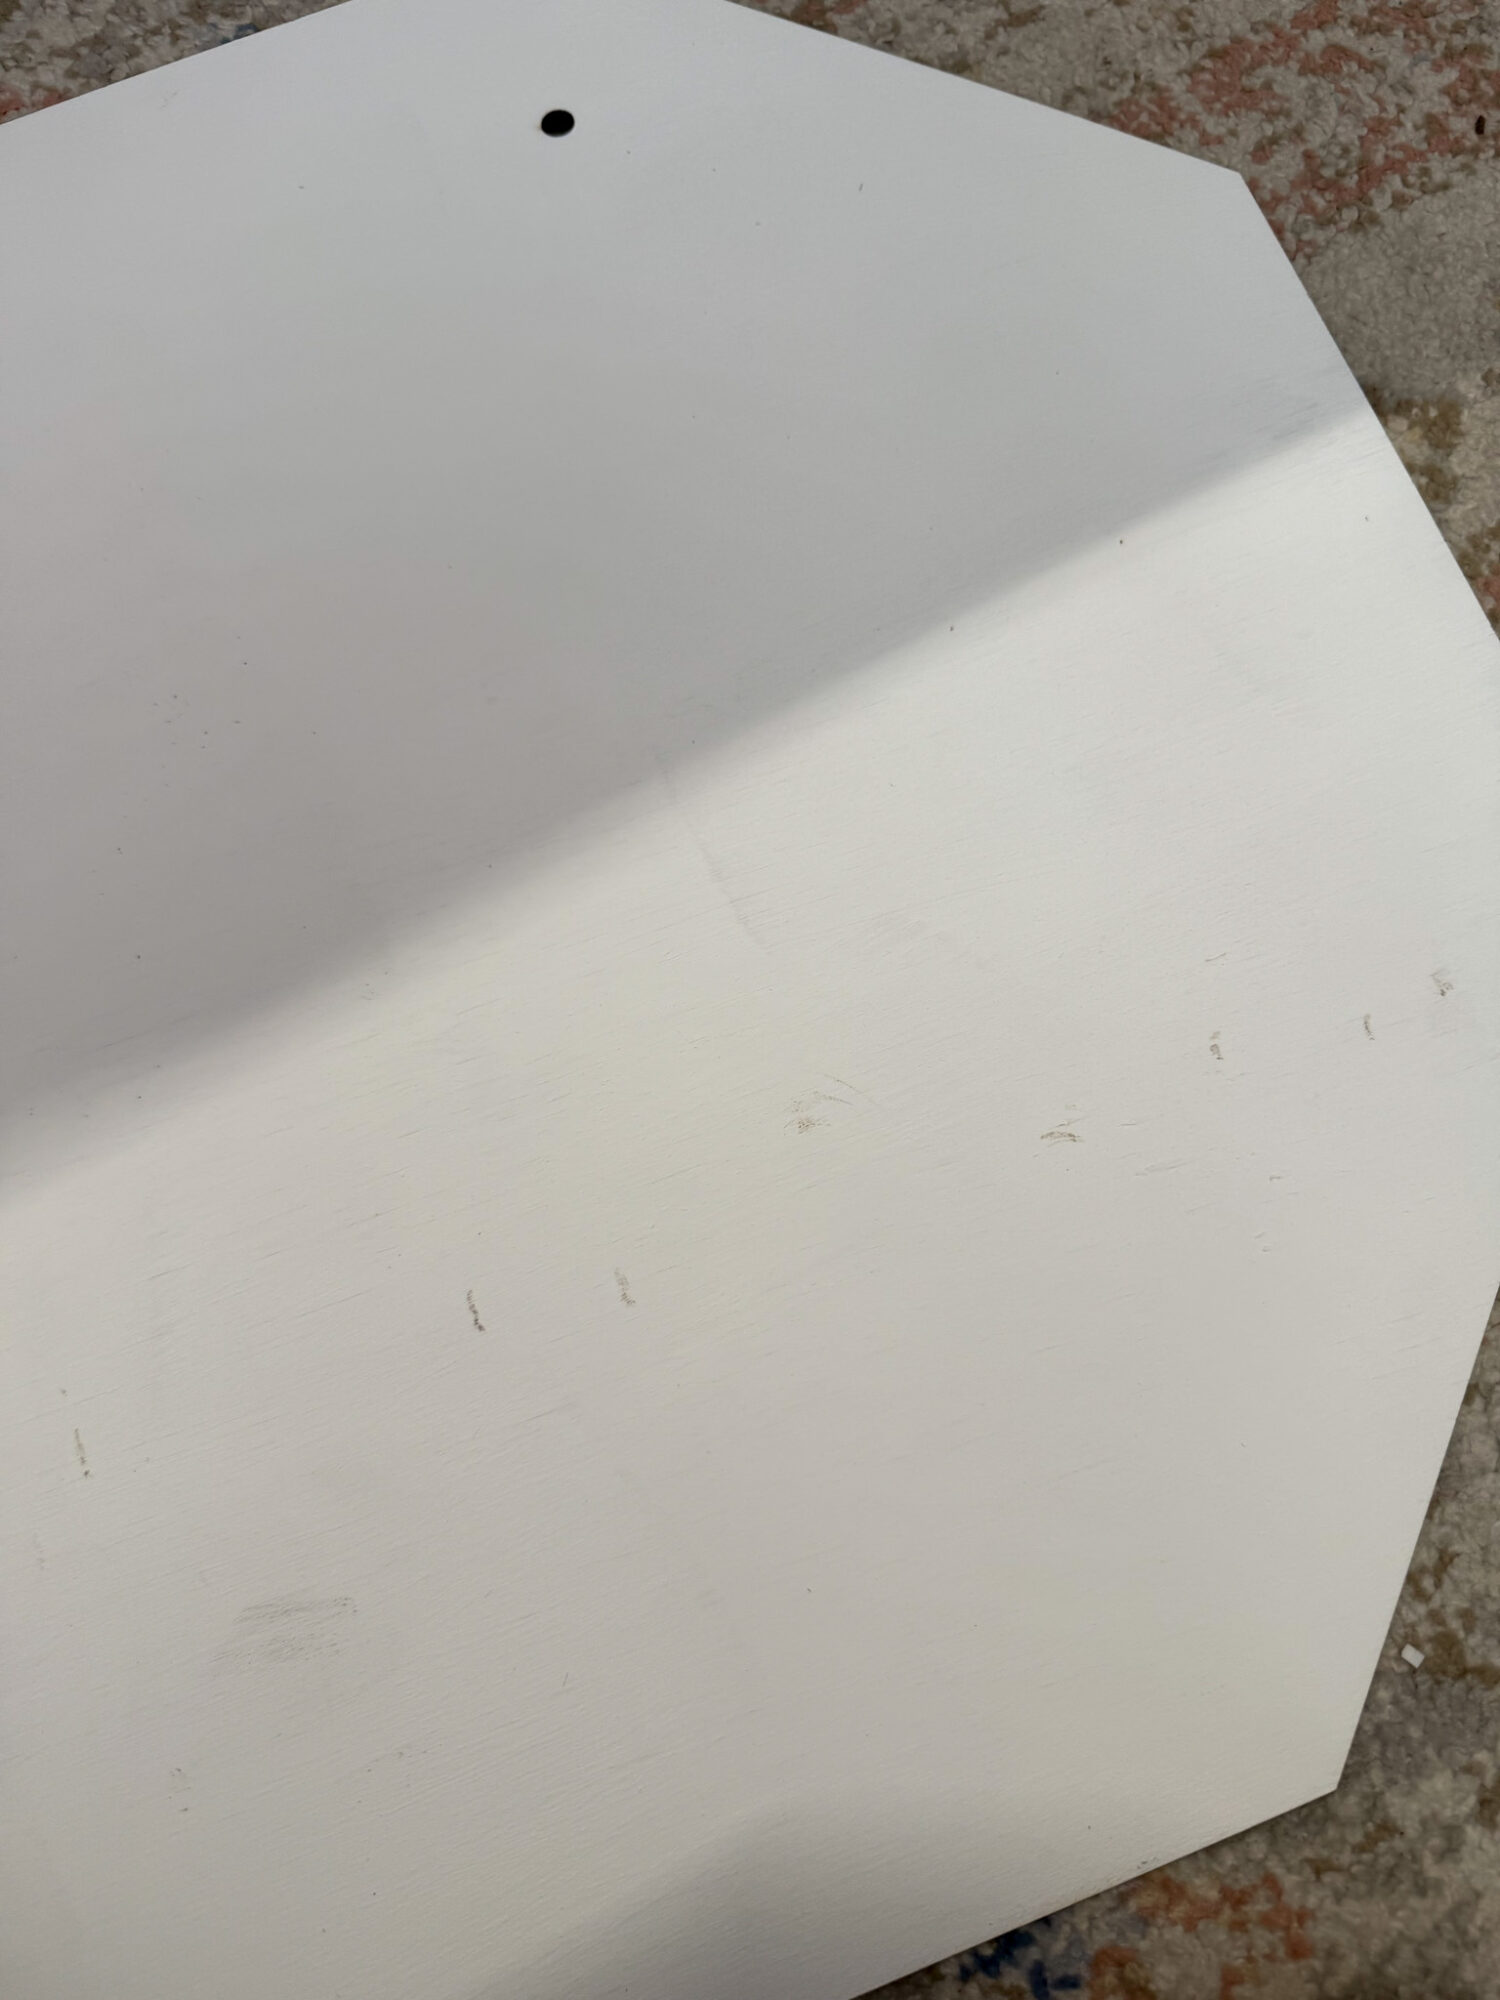
This isn’t terrible, and it won’t be seen underneath the red octagon so it’s perfectly fine in this application.
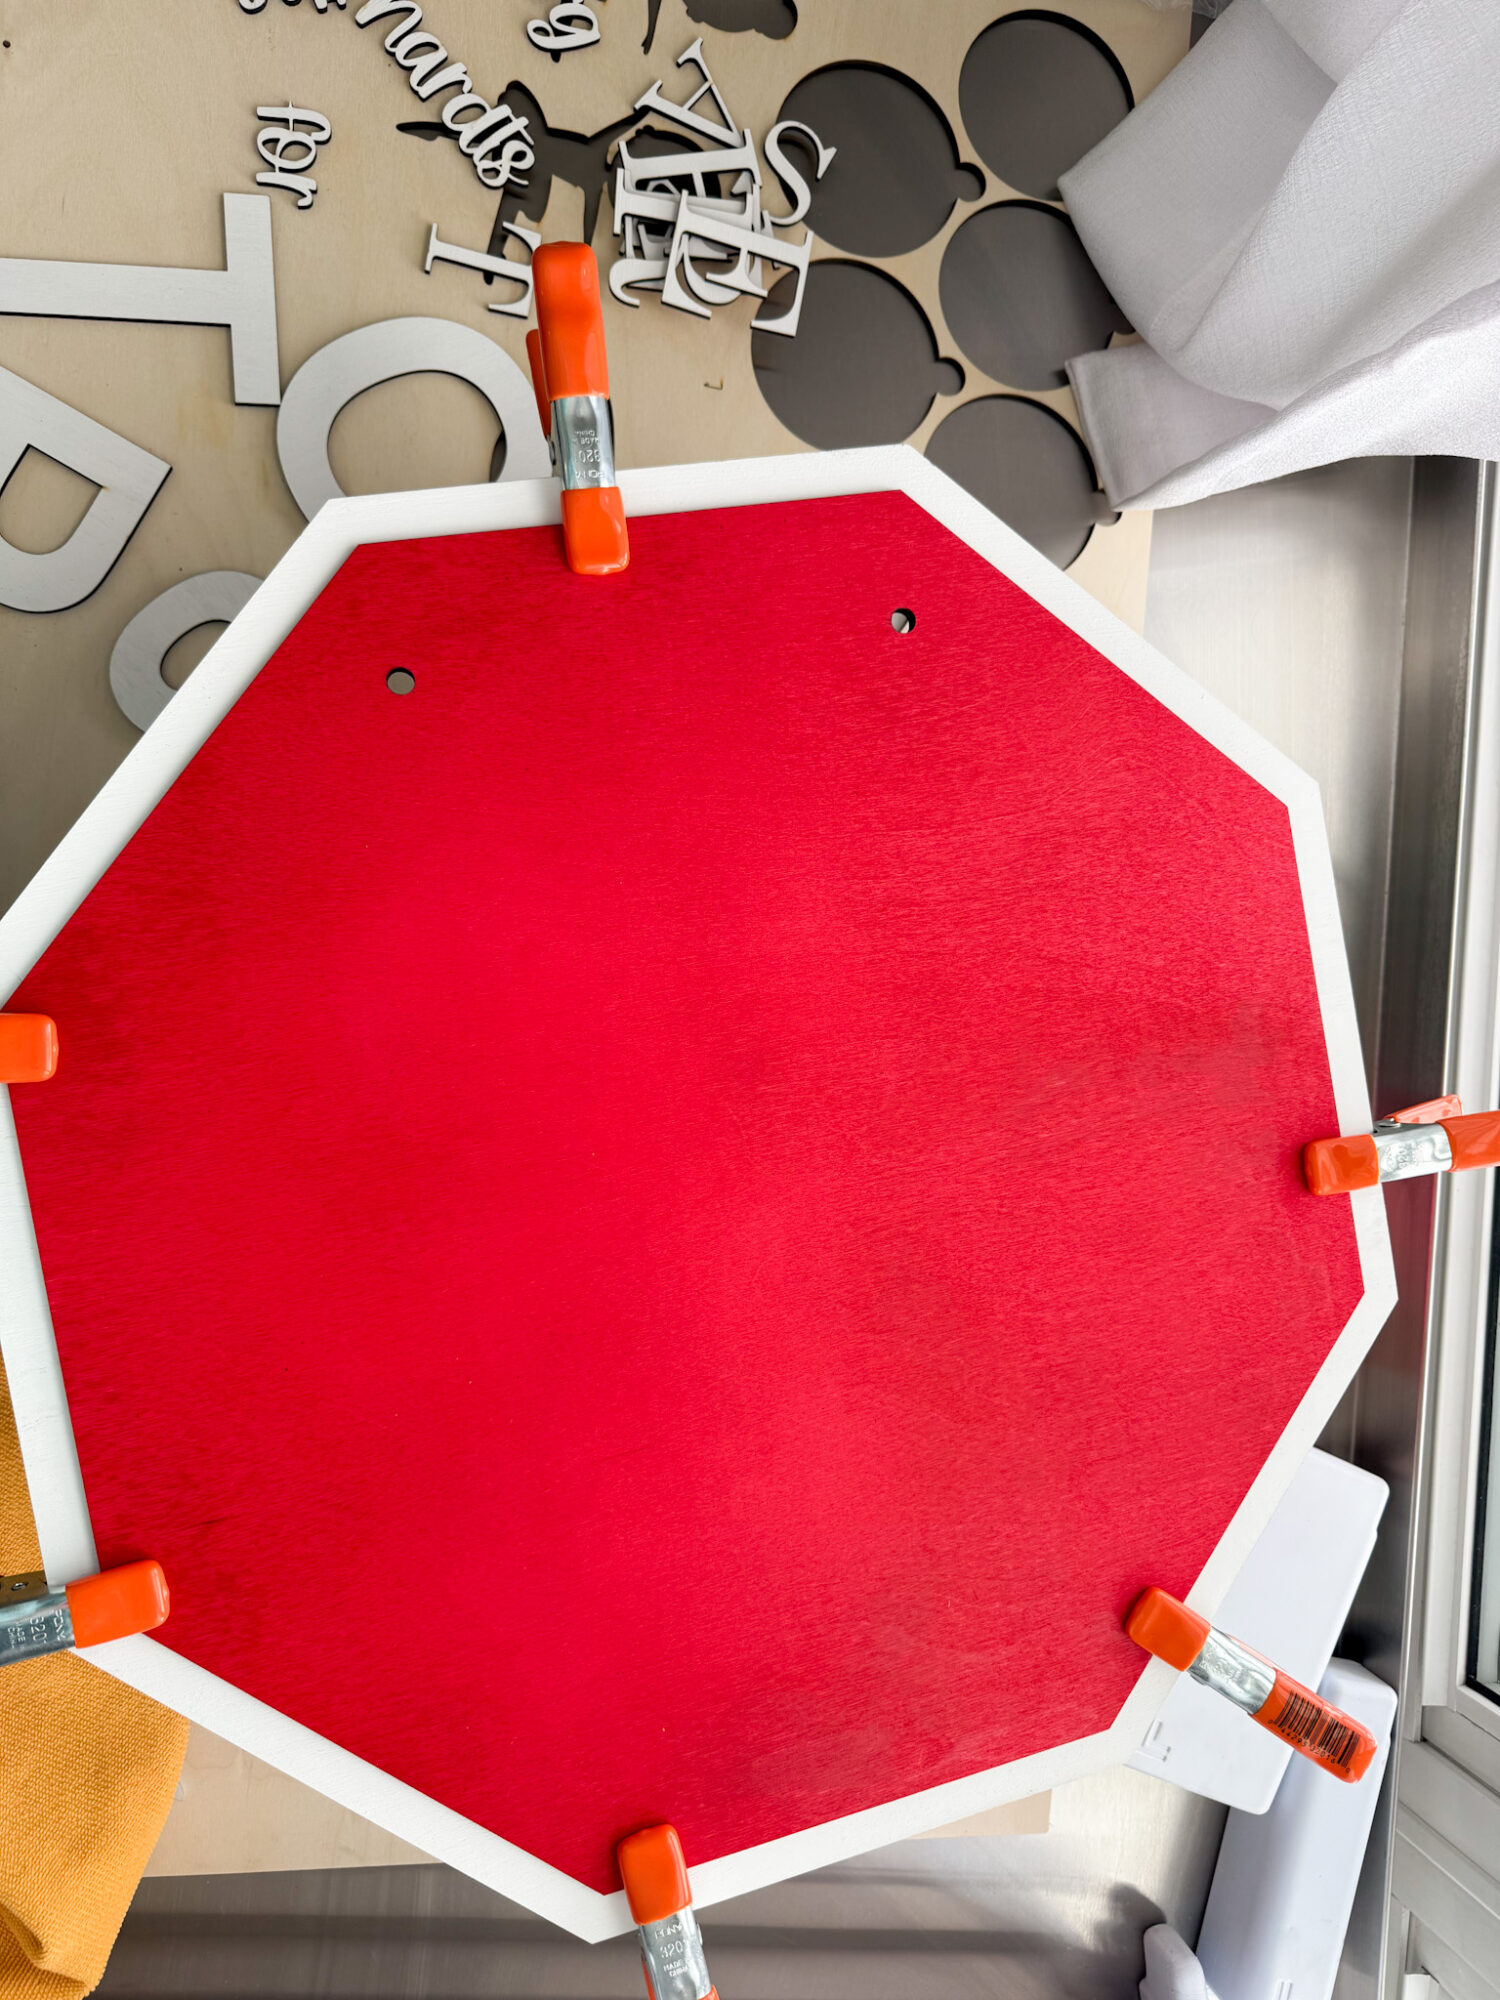
Adhering the Layers of this Santa Stop Here Sign
Before we glue, notice my lack of score lines on the red octagon – oops!
Definitely a rookie move, but salveagable with endless tweaking of the letters. 😉
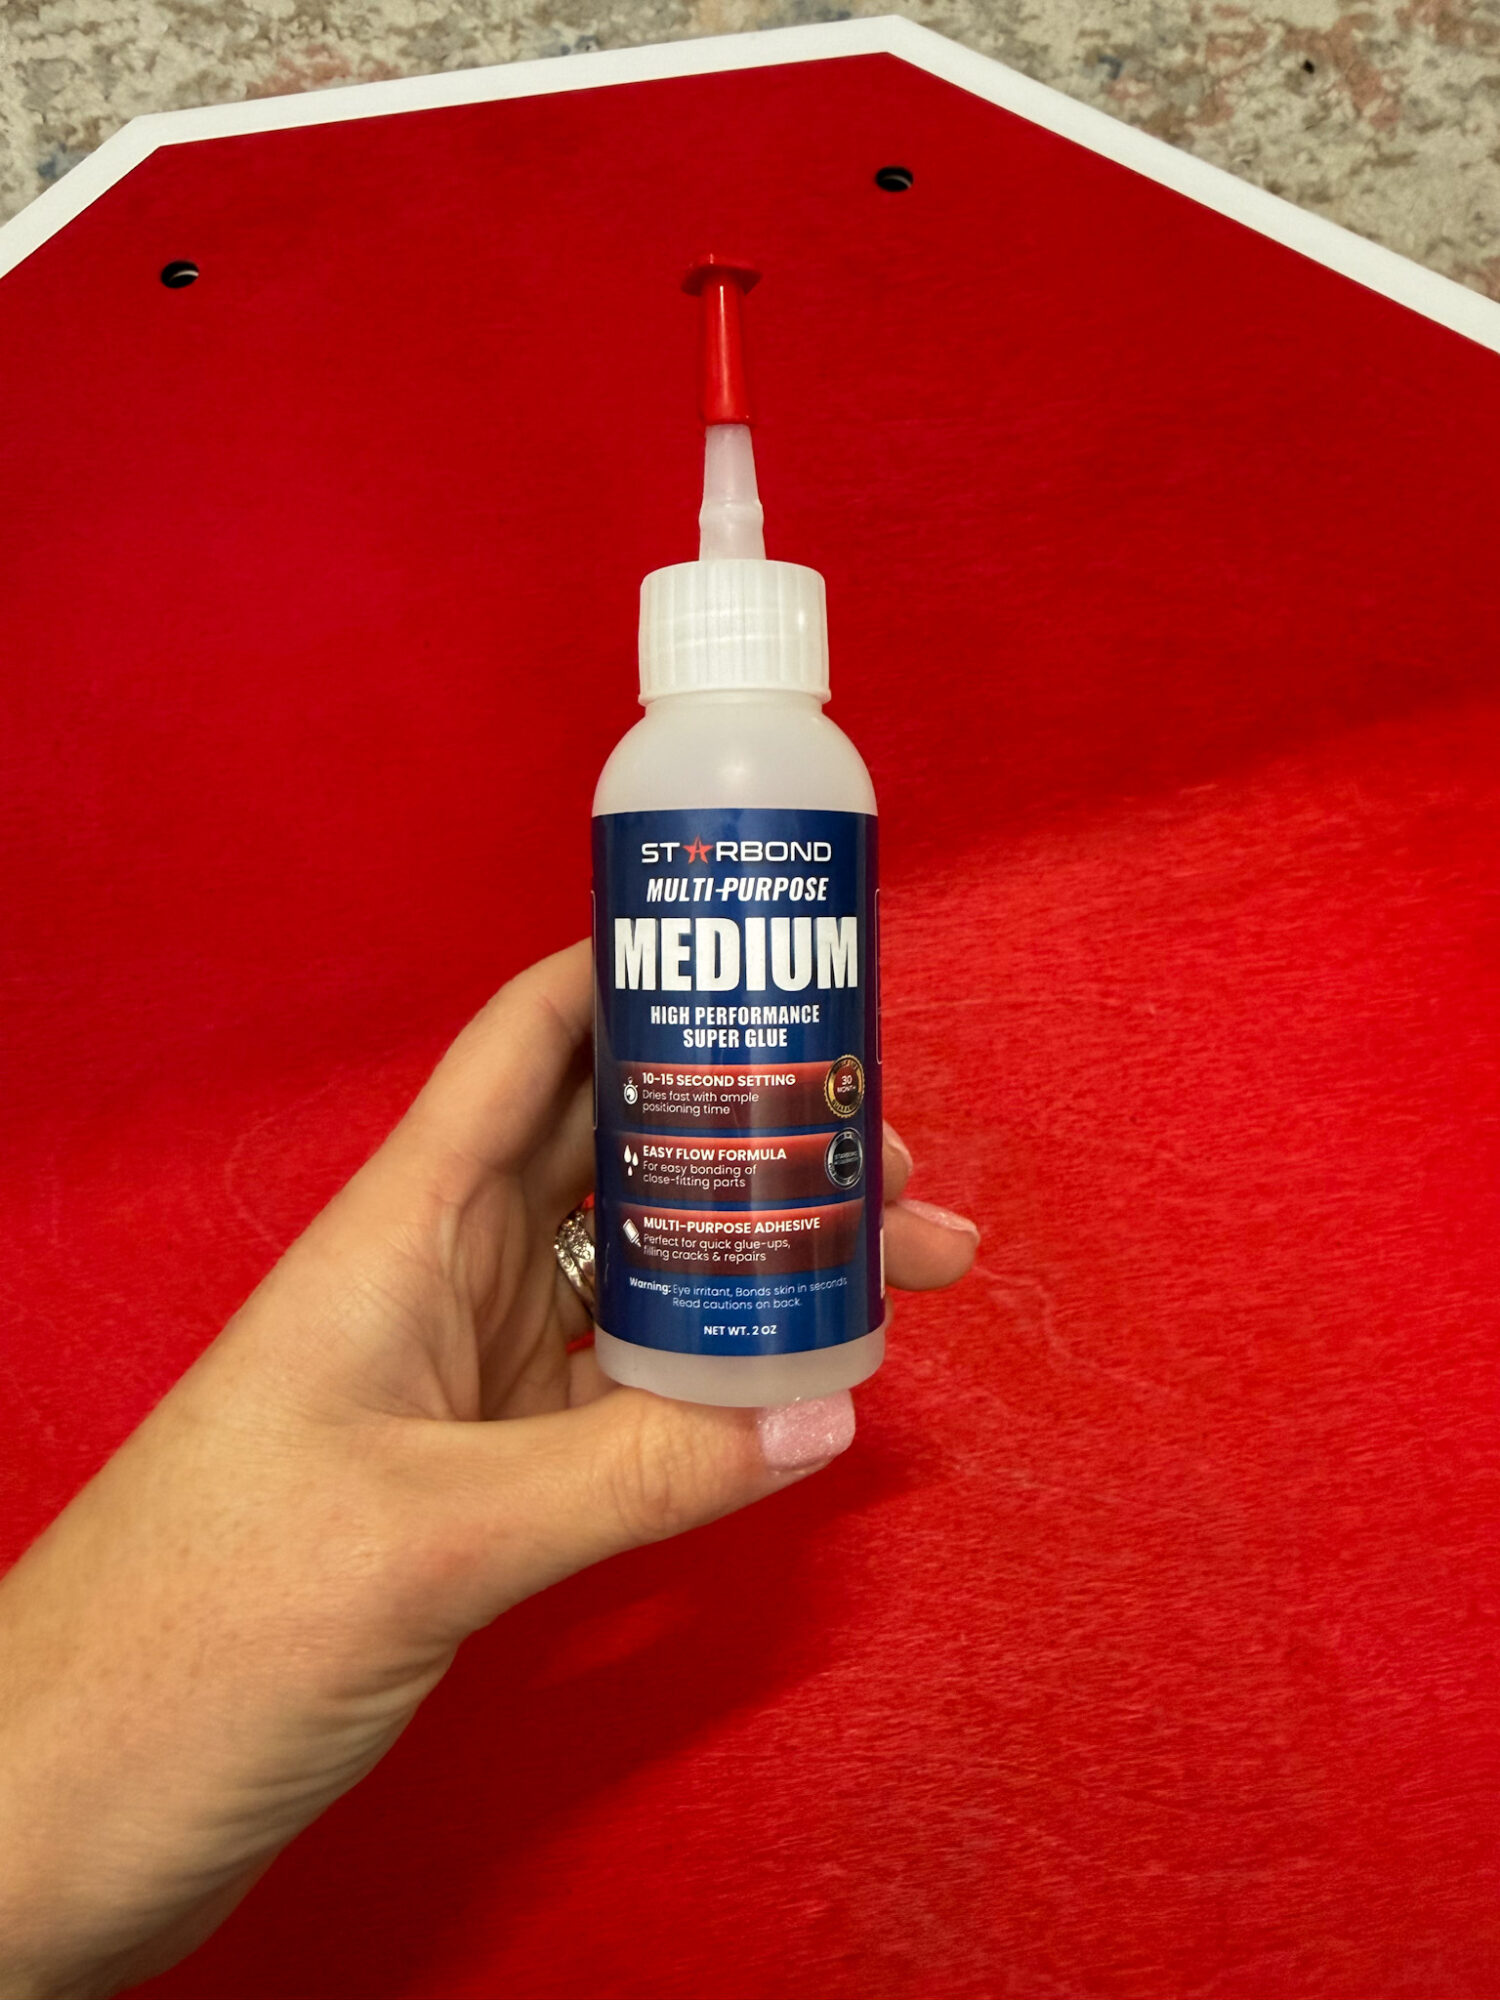
My favorite glue to use to adhere wood to wood or acrylic to wood is this glue by Starbond.
It does take a bit to set so be sure to plan for drying time.
Aside from sitting on top of the red octagon for a while to ensure it glued in place, you can also use heavy duty clamps like I use.
To adhere the letters to the red octagon, I used the same glue but used magnets on top of the letters and on the bottom of the sign to hold the letters in place while the glue works its magic.
Finished DIY Santa Sign
Here’s what my finished sign looks like on our front door…
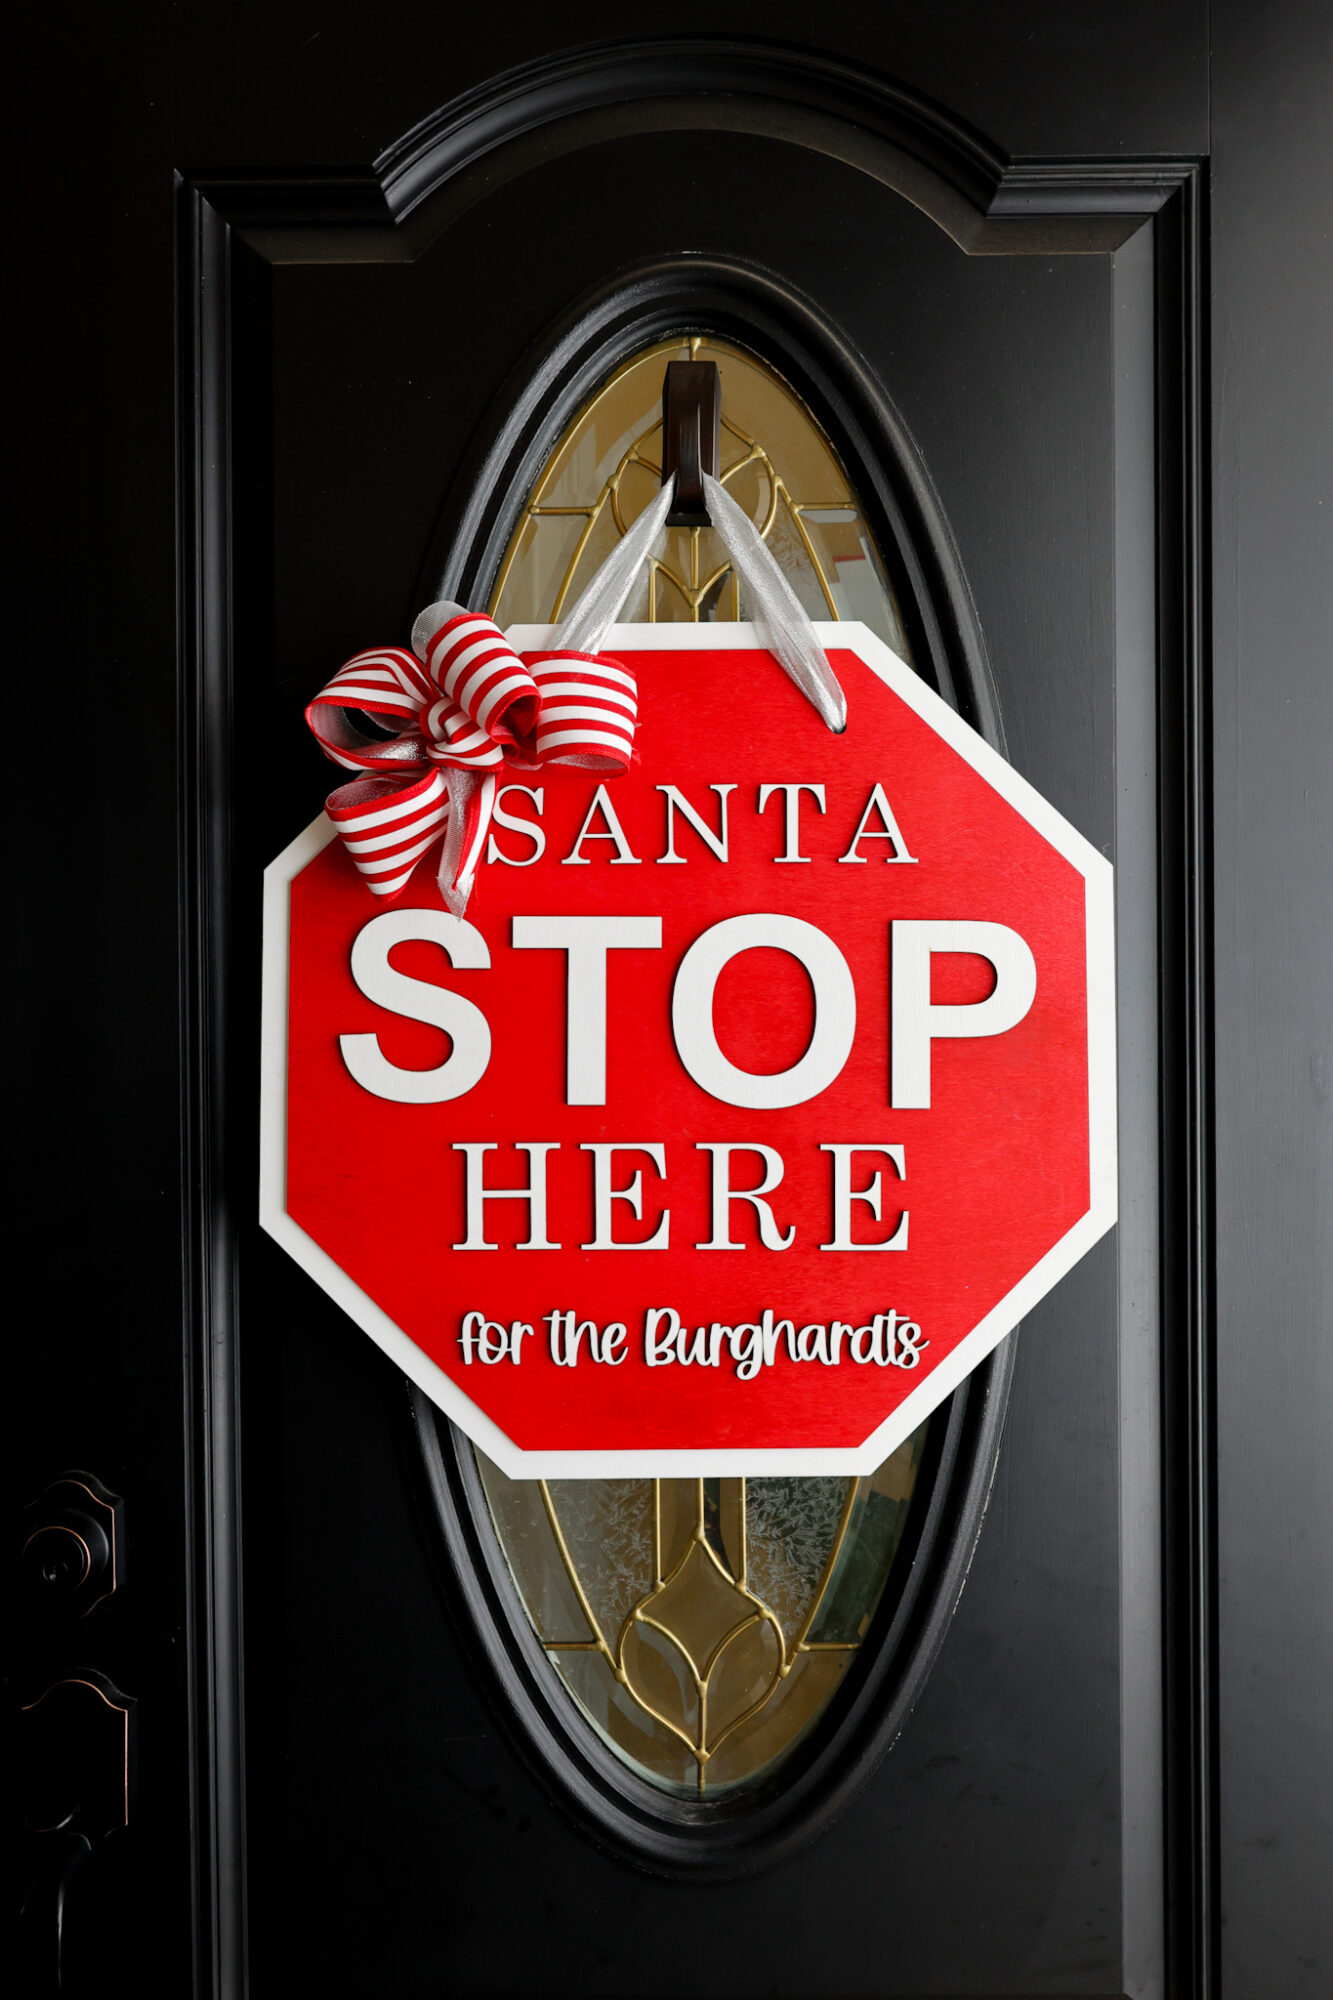
I love how it turned out, especially against out black door but I could see it being a total curb side showstopper on a white door as well!
I used a double layer of my silver ribbon to tie as the door hanging loop to match my bow. I felt the striped ribbon might have been a bit much.
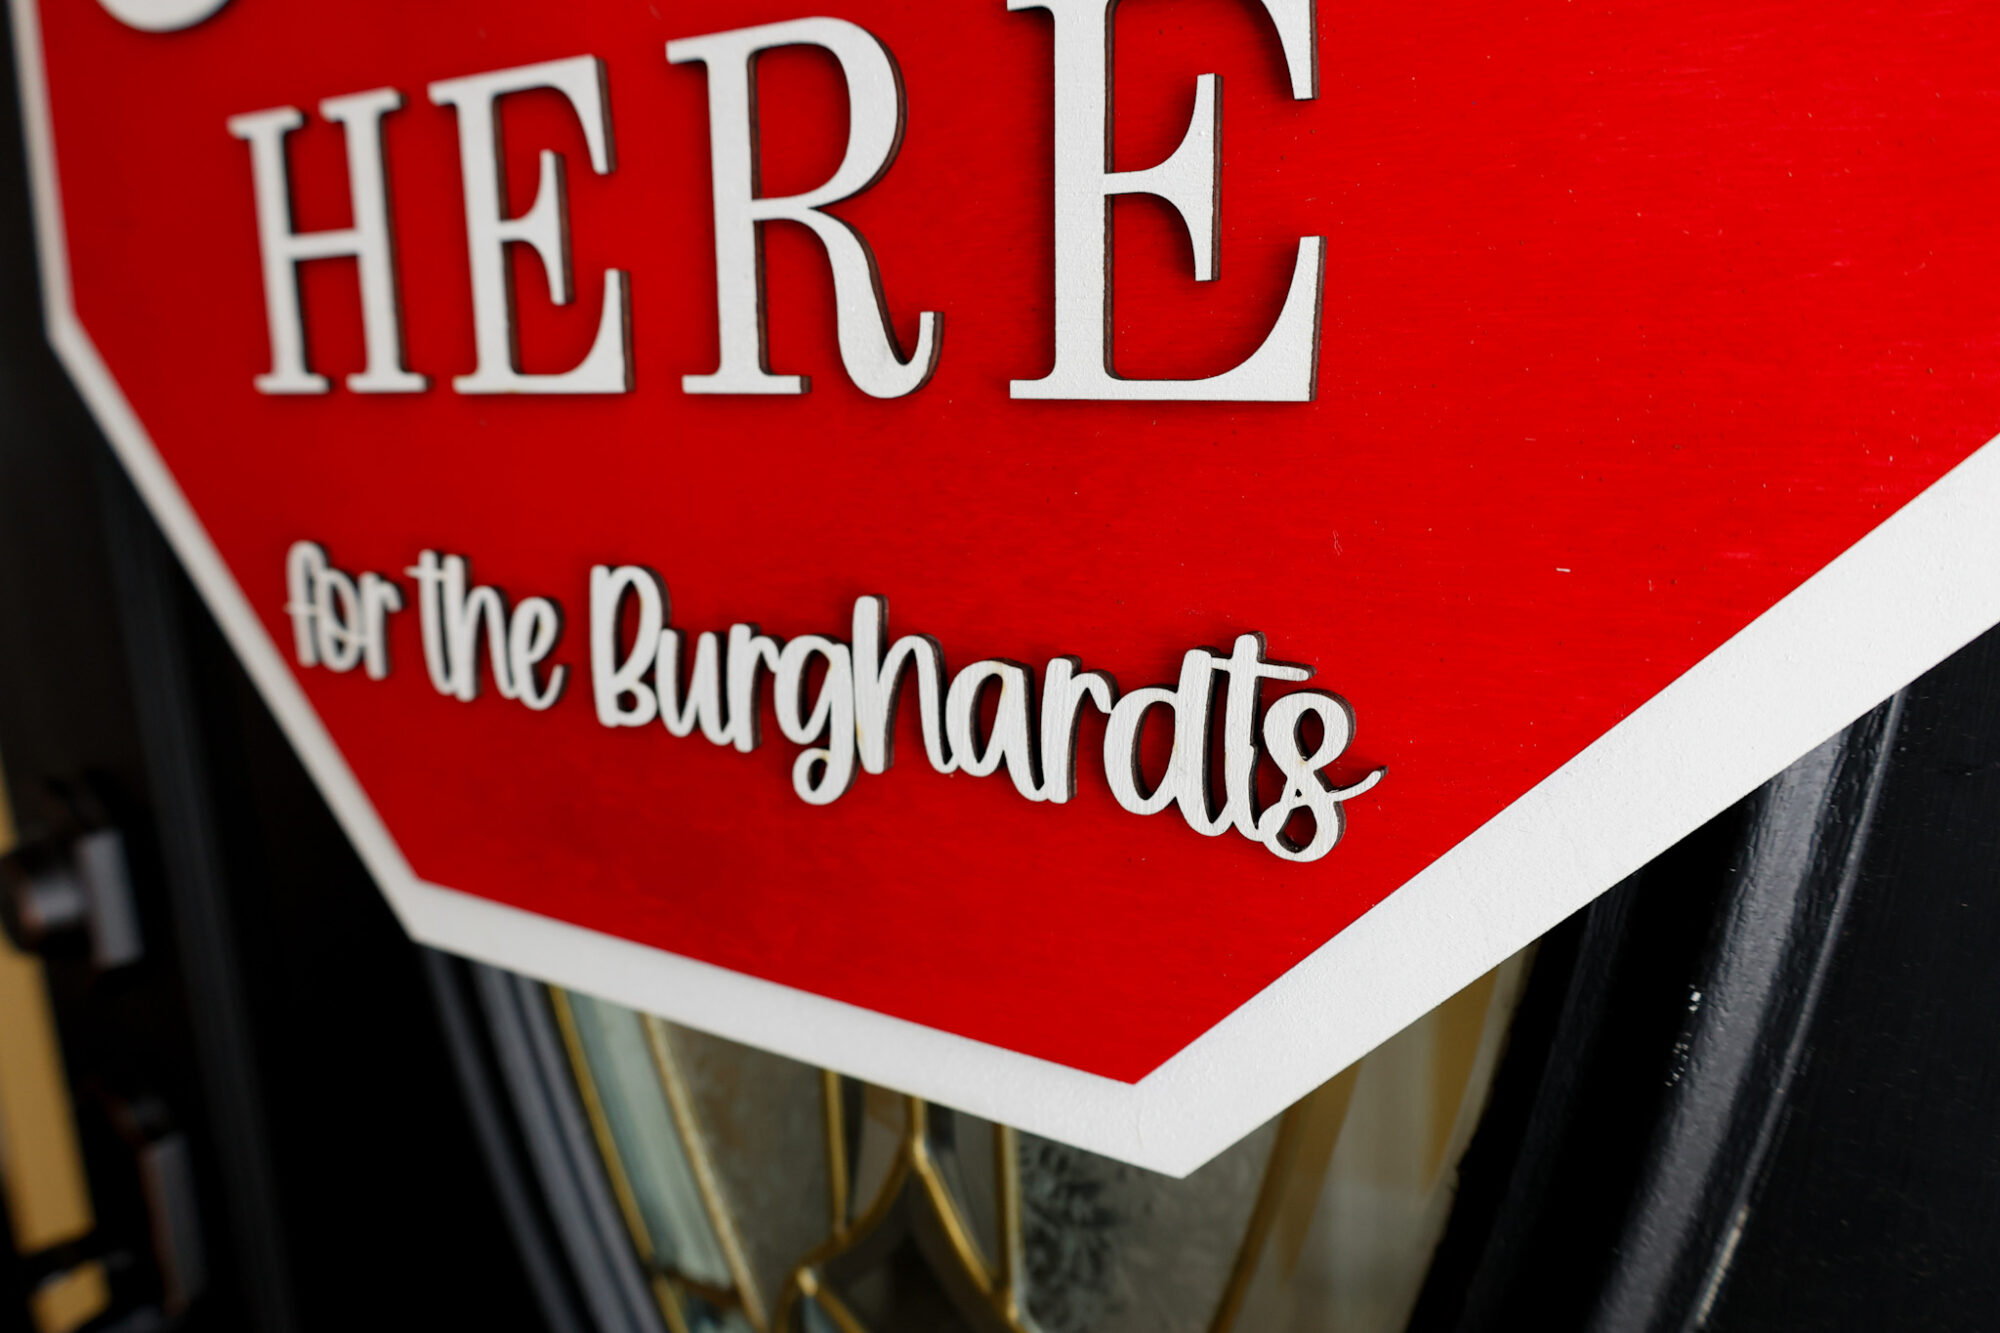
You can see, from the side, why I love to pre-paint my wood before cutting.
When spray or hand painting wood after cutting, the paint can run onto the side of the shapes/letters are be very noticeable.
I like a clean look like this…
For the bow, I used two layers of wired ribbon, zip tied the finished bundle, and used my hot glue gun to adhere it to the top left of the sign.

What a fun sign to make this holiday season!
Free SVG Download: Santa Stop Here Sign SVG
Sign up below to gain instant access to my free SVG file for this project:
Please remember that all free files are for personal use only, and cannot be sold, copied, or distributed. Thank you!

Leave a Reply