Valentine’s Day has never been so sweet! Make this Valentine’s Day Door Sign, with my free SVG download for my email subscribers!
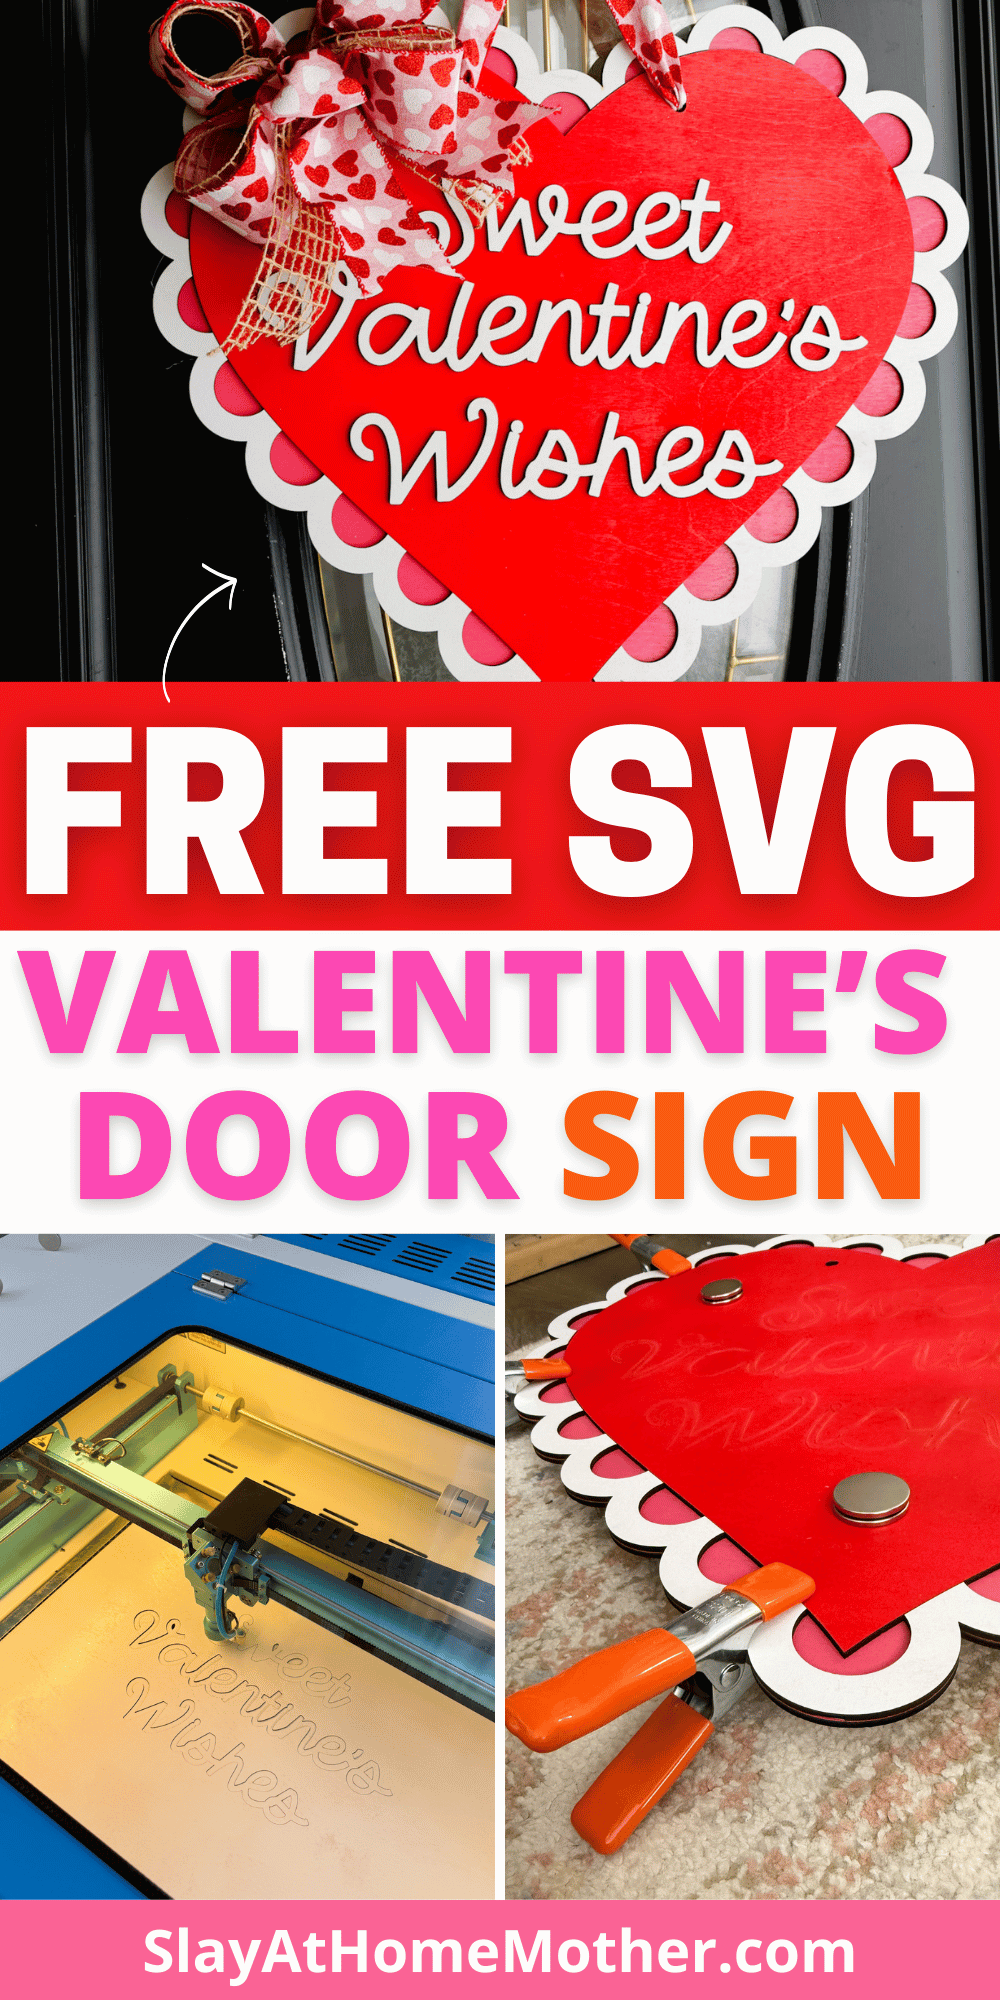
Make this gorgeous (and very girly!) Valentine’s Day Door Sign with me!
I’ve included a free SVG file for you to download within this post, as well as all my helpful tips and materials I used to help you pump out another beautiful laser project.
I have really loved drumming up new ideas for each holiday to help decorate our home, give gifts to friends, and explore the possibilities for my laser machine.
If I could go back in time and tell my super-crafty 10-year-old self that she would be doing this for a living, offering free SVG files and showing other people how to craft and create…
I know that little girl would be on cloud nine.
I’ve always loved to create, especially very girly things like this project.
You could say this is very on brand for me, and always has been. 😉
It’s something I hope to pass on to my children – the crafty bug is one you never want to get rid of…
I hope you love and enjoy creating this project as much as I did. Be sure to download your file below, and share it with me when you make it (@slayathomemother)!
This post may contain affiliate links, however, all opinions are my own, as always.
What You’ll Need for this Valentine’s Day Door Sign
Here is what I used to create this sign:
- 3 pieces of 3mm Baltic Birch wood (I pre-painted my wood, but you can always paint afterwards) – one piece for each color
- laser machine
- SVG file (grab my free SVG download at the bottom of this post!)
- Starbond glue – this one is my favorite for gluing wood to wood or acrylic to wood
- spray or acrylic paint in Red, Pink, and White (here are the exact colors I used for this sign)
- 2″ – 2.5″ wired ribbon in your color choices
- hot glue gun
- zip tie
- clamps or magnets to help secure wood to each other
I recommend at least 1/4″ for door signs, particularly in the case of owning a home with heavy winds (*raises hand*). You’ll need some weight to your door hanger to prevent it from being easily lifted up and crashing down because of heavy winds.
Ask me how I know.
Or just take my word for it, and stick with 1/4″.
For this door sign, because we’re adhering two layers of 1/8″ (or 3mm) wood together, we already make up that 1.4″ weight for our sign.
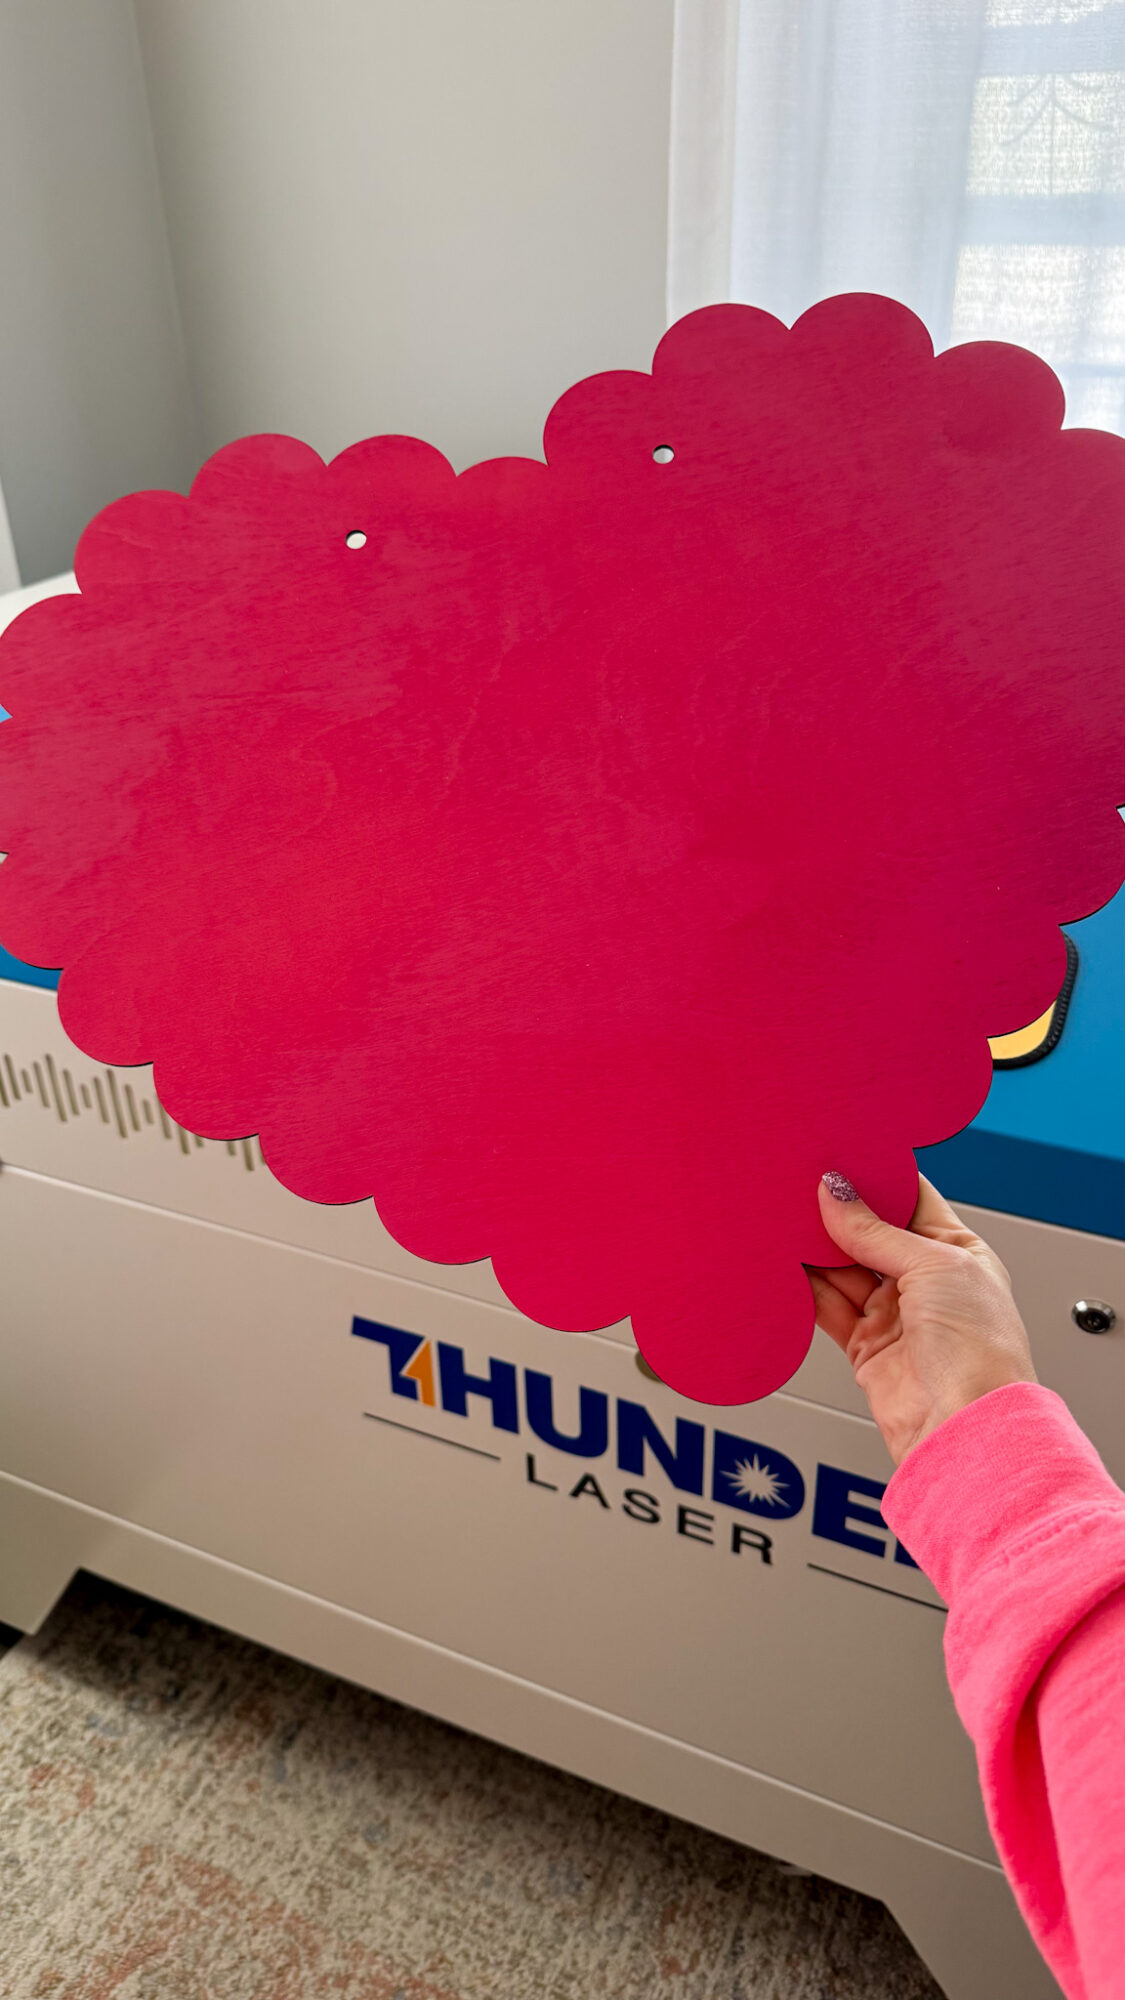
The white and red layers will serve as the top layer for the sign, while the pink layer will serve as the bottom layer.
Font Used in this Design
Here are the font I used for this sign:
- Riverside
I have included in the SVG file for you the lettering pictured in this post so you will not need to download any fonts unless you choose to do lettering that differs from this design.
My Laser Machine
In this project, I’m utilizing the Nova Plus 35 60W, which is a workhorse laser machine.
I graduated from the Thunder Bolt, which was an incredible starter desktop laser, to this one so I could begin designing and crafting bigger projects like door signs!
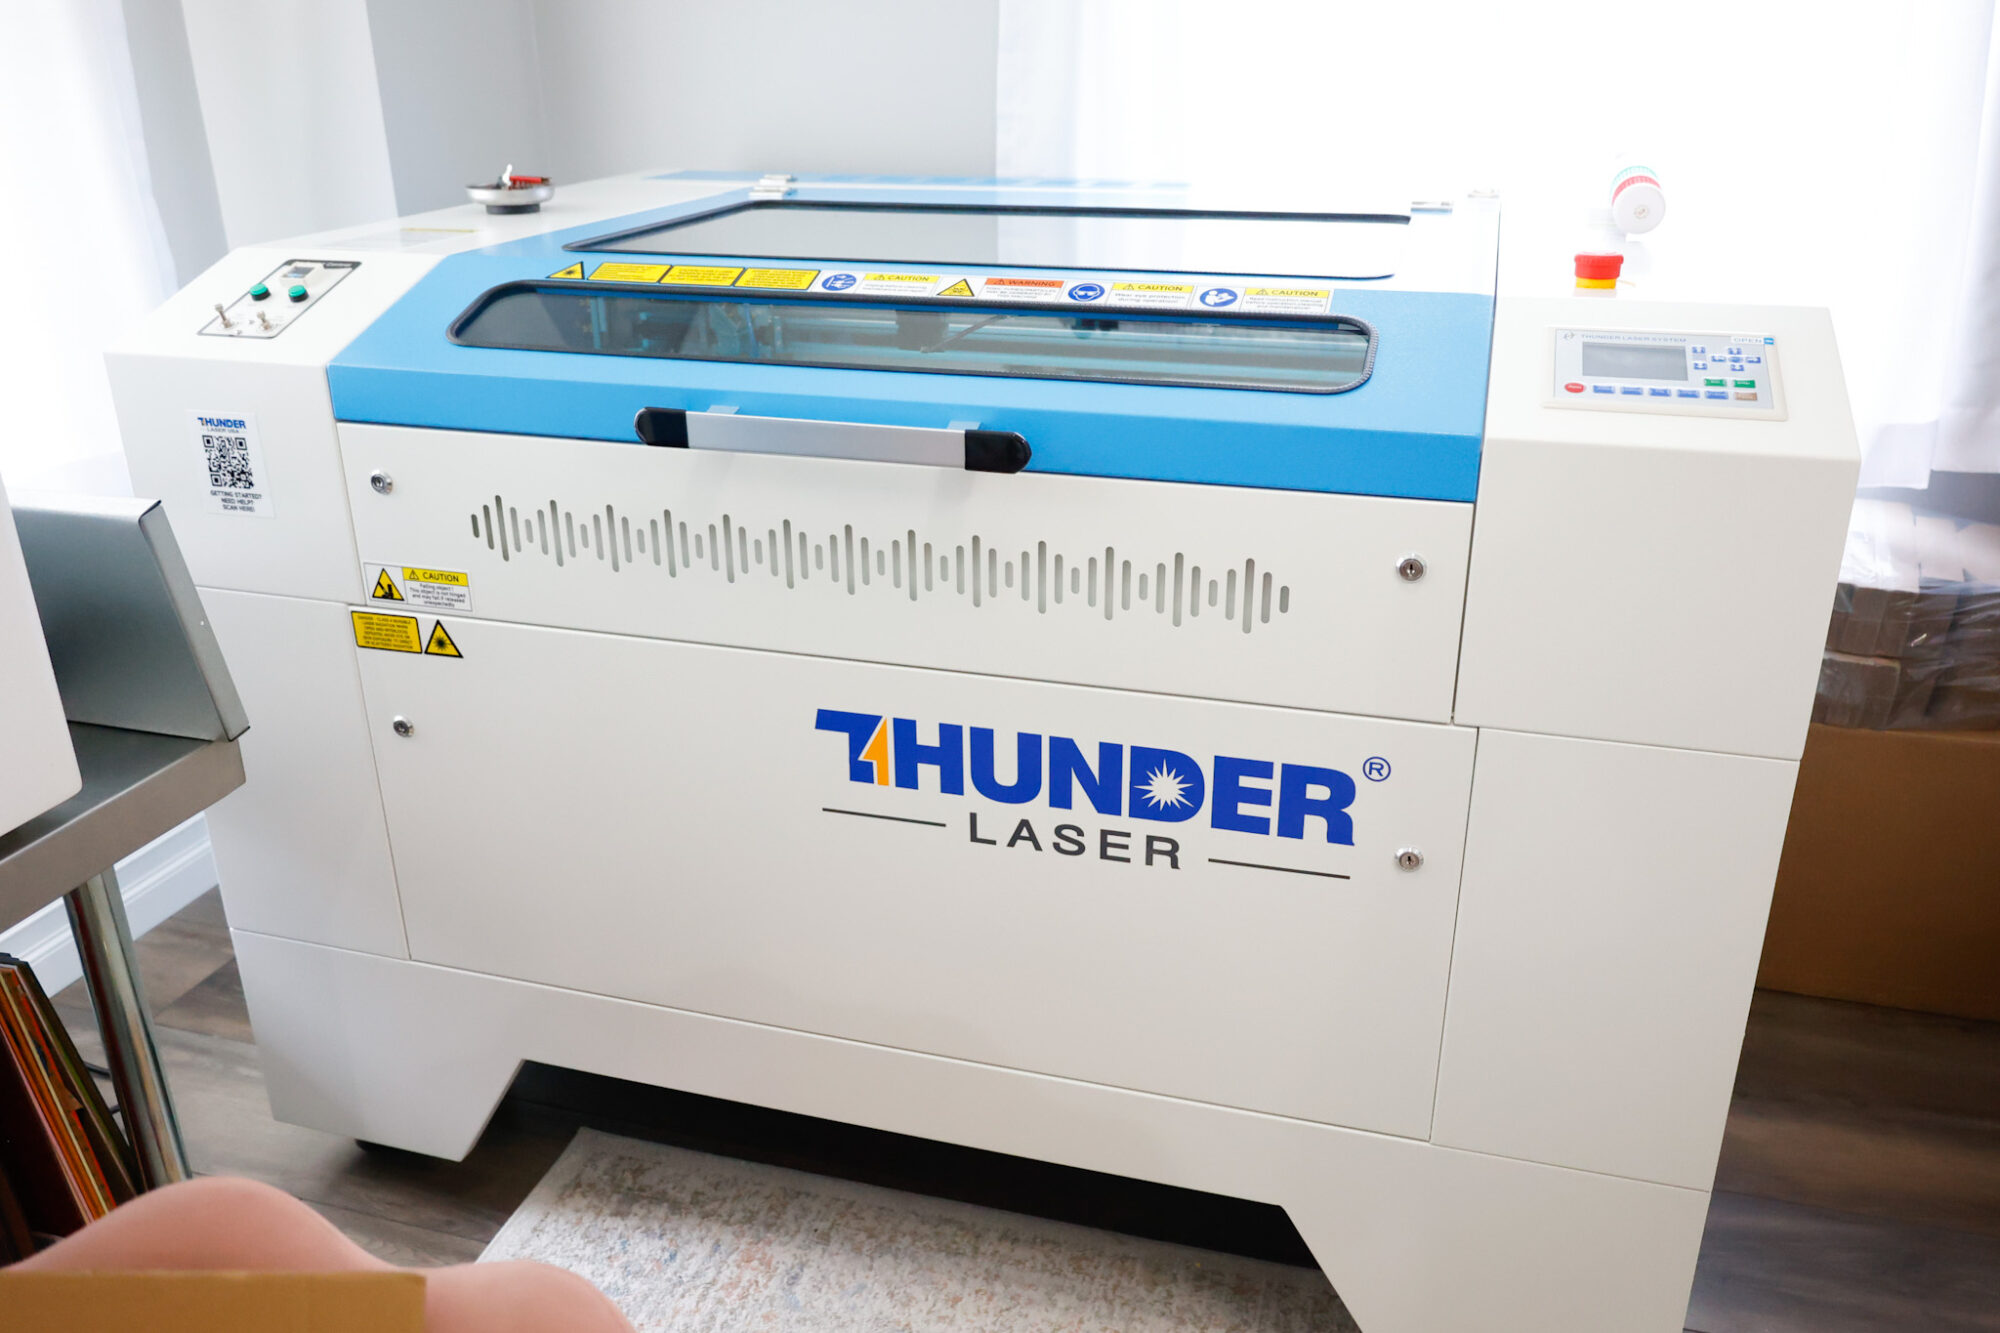
This machine has been incredible for crafting nursery signs, ornaments, door signs, tiered tray decor, and so much more!
The honeycomb on this laser bed is perfect for making larger items like nursery signs, door signs, etc.
The laser bed measures approximately 24″ x 36″, so it has plenty of room to do a beautiful door sign like the one you see in this post.
You May Also Like: DIY Stop Here Santa Door Sign – Free SVG Laser Craft
Laser Cut Settings for Baltic Birch Wood
My laser machine from Thunder is great at cutting through 1/8″ and 1/4″ wood. Here it is cutting through 1/8″ wood…

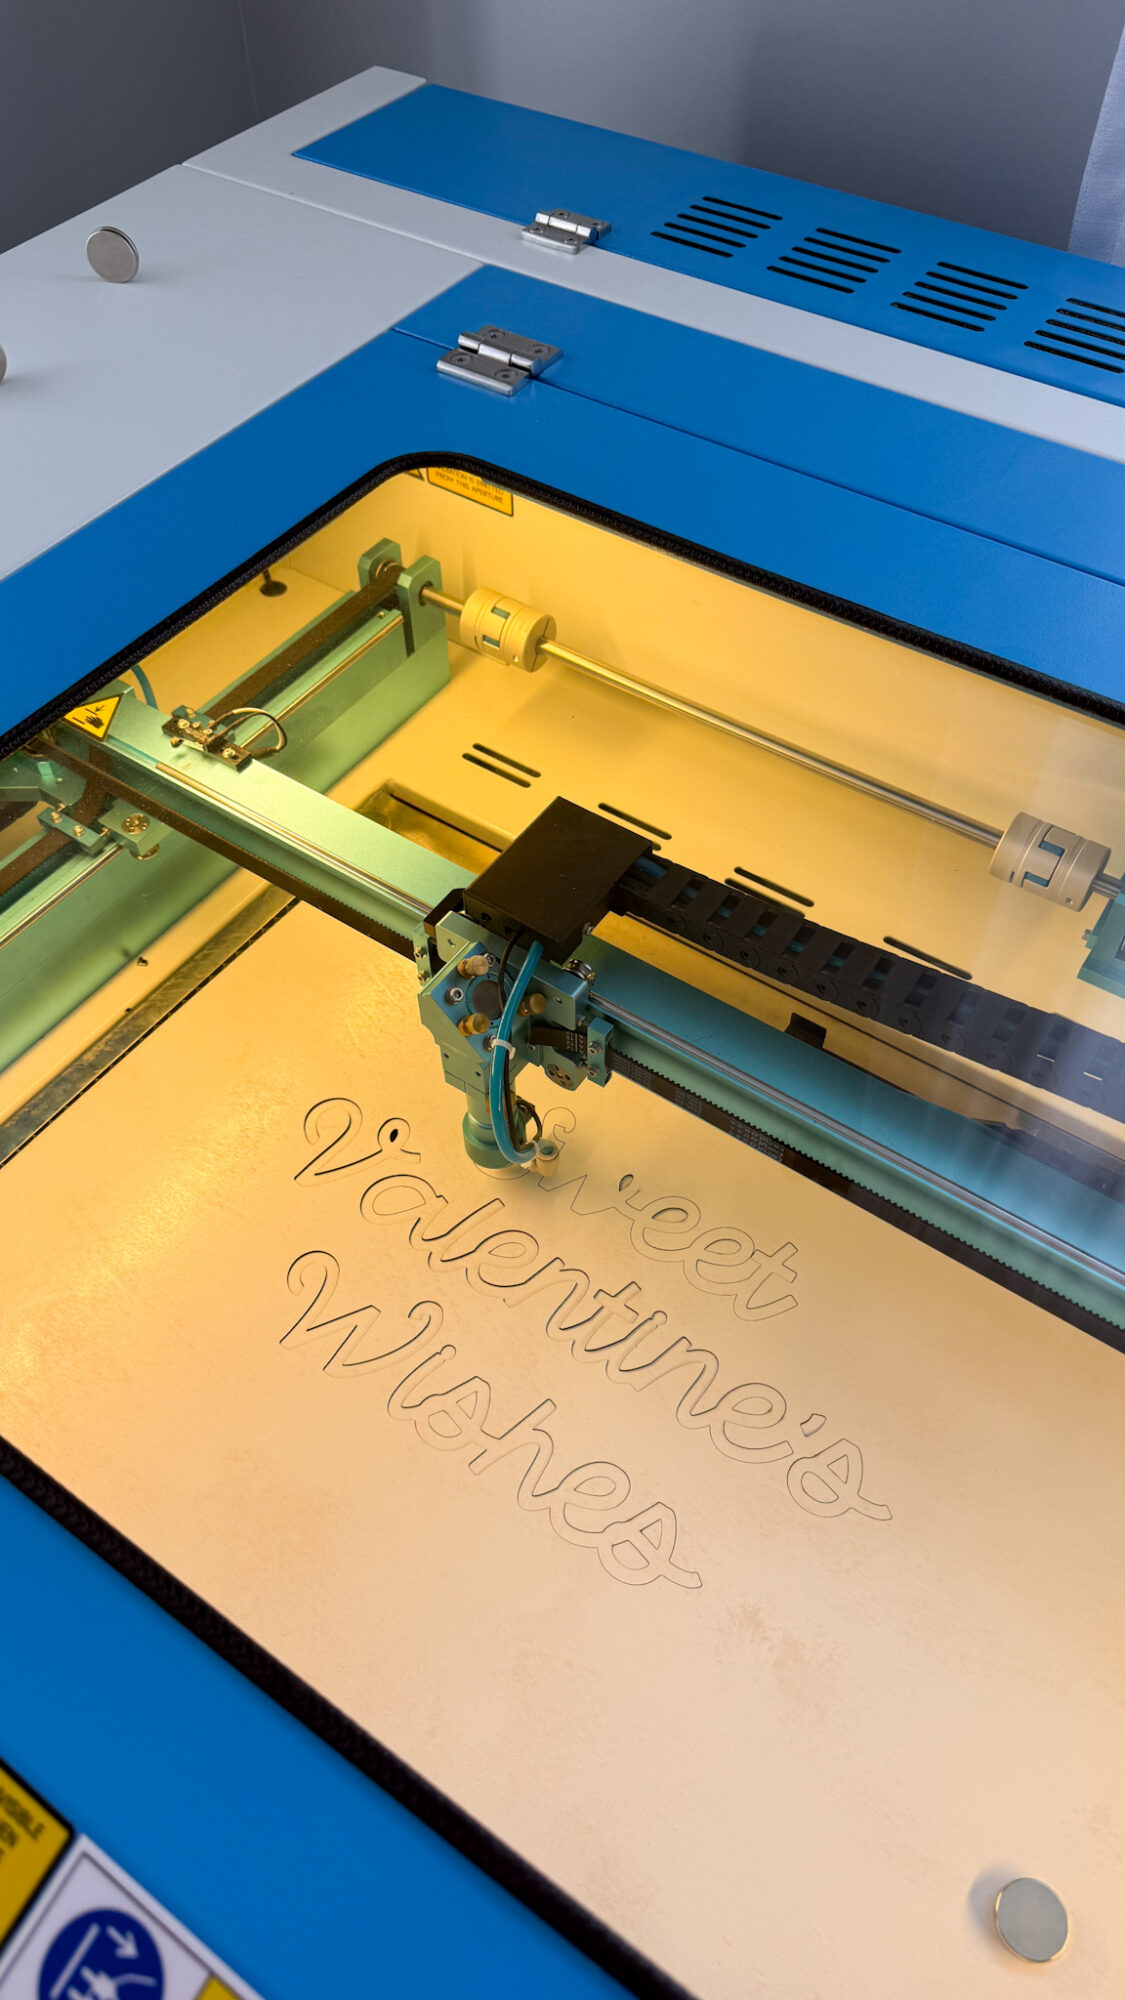
I like to pre-paint my wood before cutting as I have tried painting afterwards and found that the paint runs down the edges of my cuts and doesn’t look very clean or professional.
To cut these shapes out cleanly, I used these settings with my laser machine:
Cut wood: 8 mm/s at 50% Max power, 25% min power
Score wood: 200 mms/ at 15% Max power, 5% min power
Scoring in Lightburn is a LINE setting, not a FILL setting (engraving). I use this option to lightly trace an inward offset to mark where the letters go so I’m not eyeballing everything.
You can see in this picture below a faint outline on the red painted wood – this is my inward offset (could we call that the ‘inset’ from now on?) that will help me accurately place my letters, which I need especially for cursive lettering…
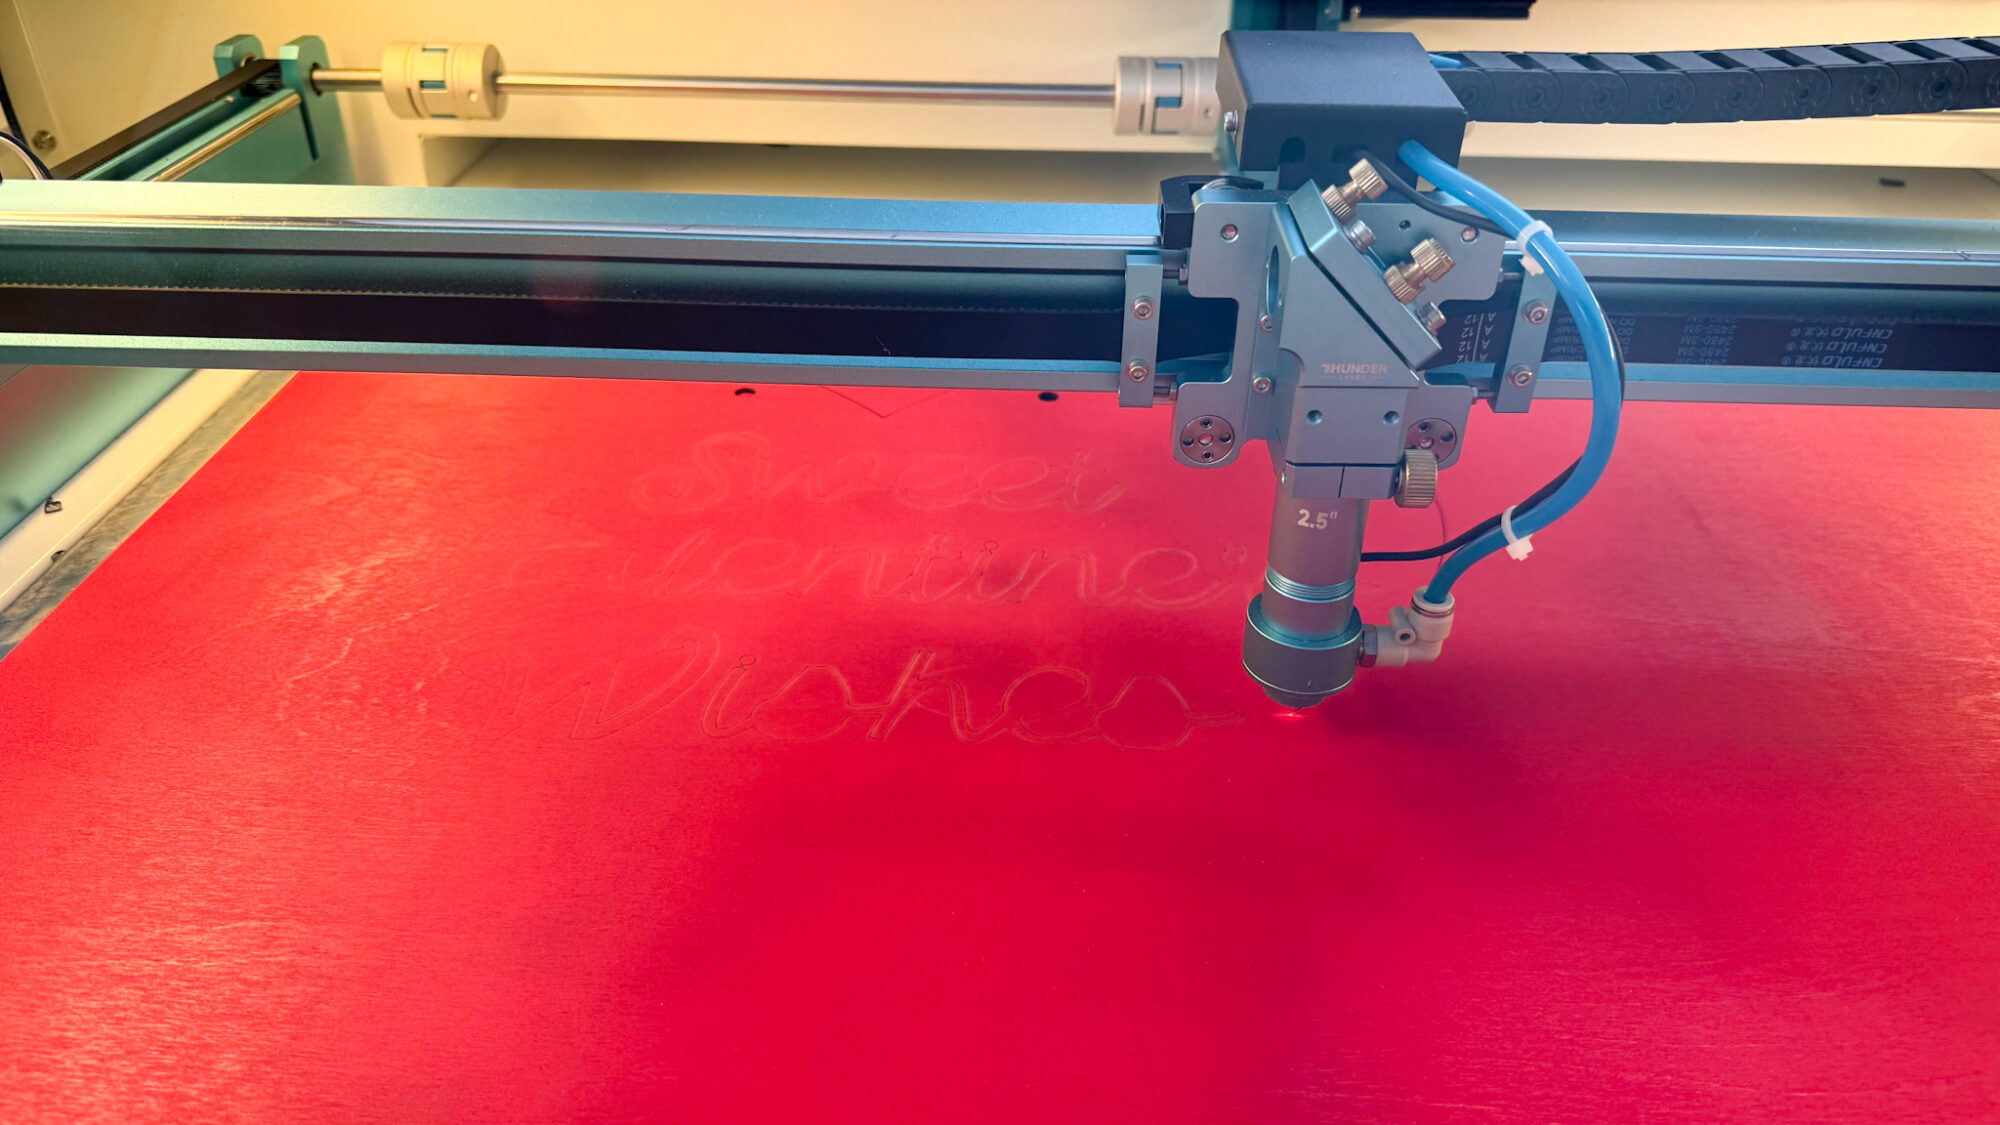
If you want to score the outline of the letters, I recommend do an inward offset aka ‘inset’ (this helps hide your score lines so you can use them as a reference but they aren’t seen as part of the finished project, which makes your sign look CLEAN), as shown in the screenshot from Lightburn below…

I’m not sure what other laser crafters use for this, but I use these settings and they never fail me.
It took some trial and error to establish this setting, and now it is my go-to.
This is what it looks like after you click ‘OK’…

Does it look a little silly right now? YES.
But these lines are just a reference point for positioning your letters – this step helps a lot!
Notice that there are no inside lines for the letters, like the ‘a’ or ‘e’ or cursive ‘s’. This is perfect for what we need.
FYI: If you have a CO2 laser, the settings will differ for you as well as my settings shown in this post are for my RF laser. It’s recommended that you run a test sheet for scoring/engraving/cutting for your laser so you have some go-to settings for the different materials.
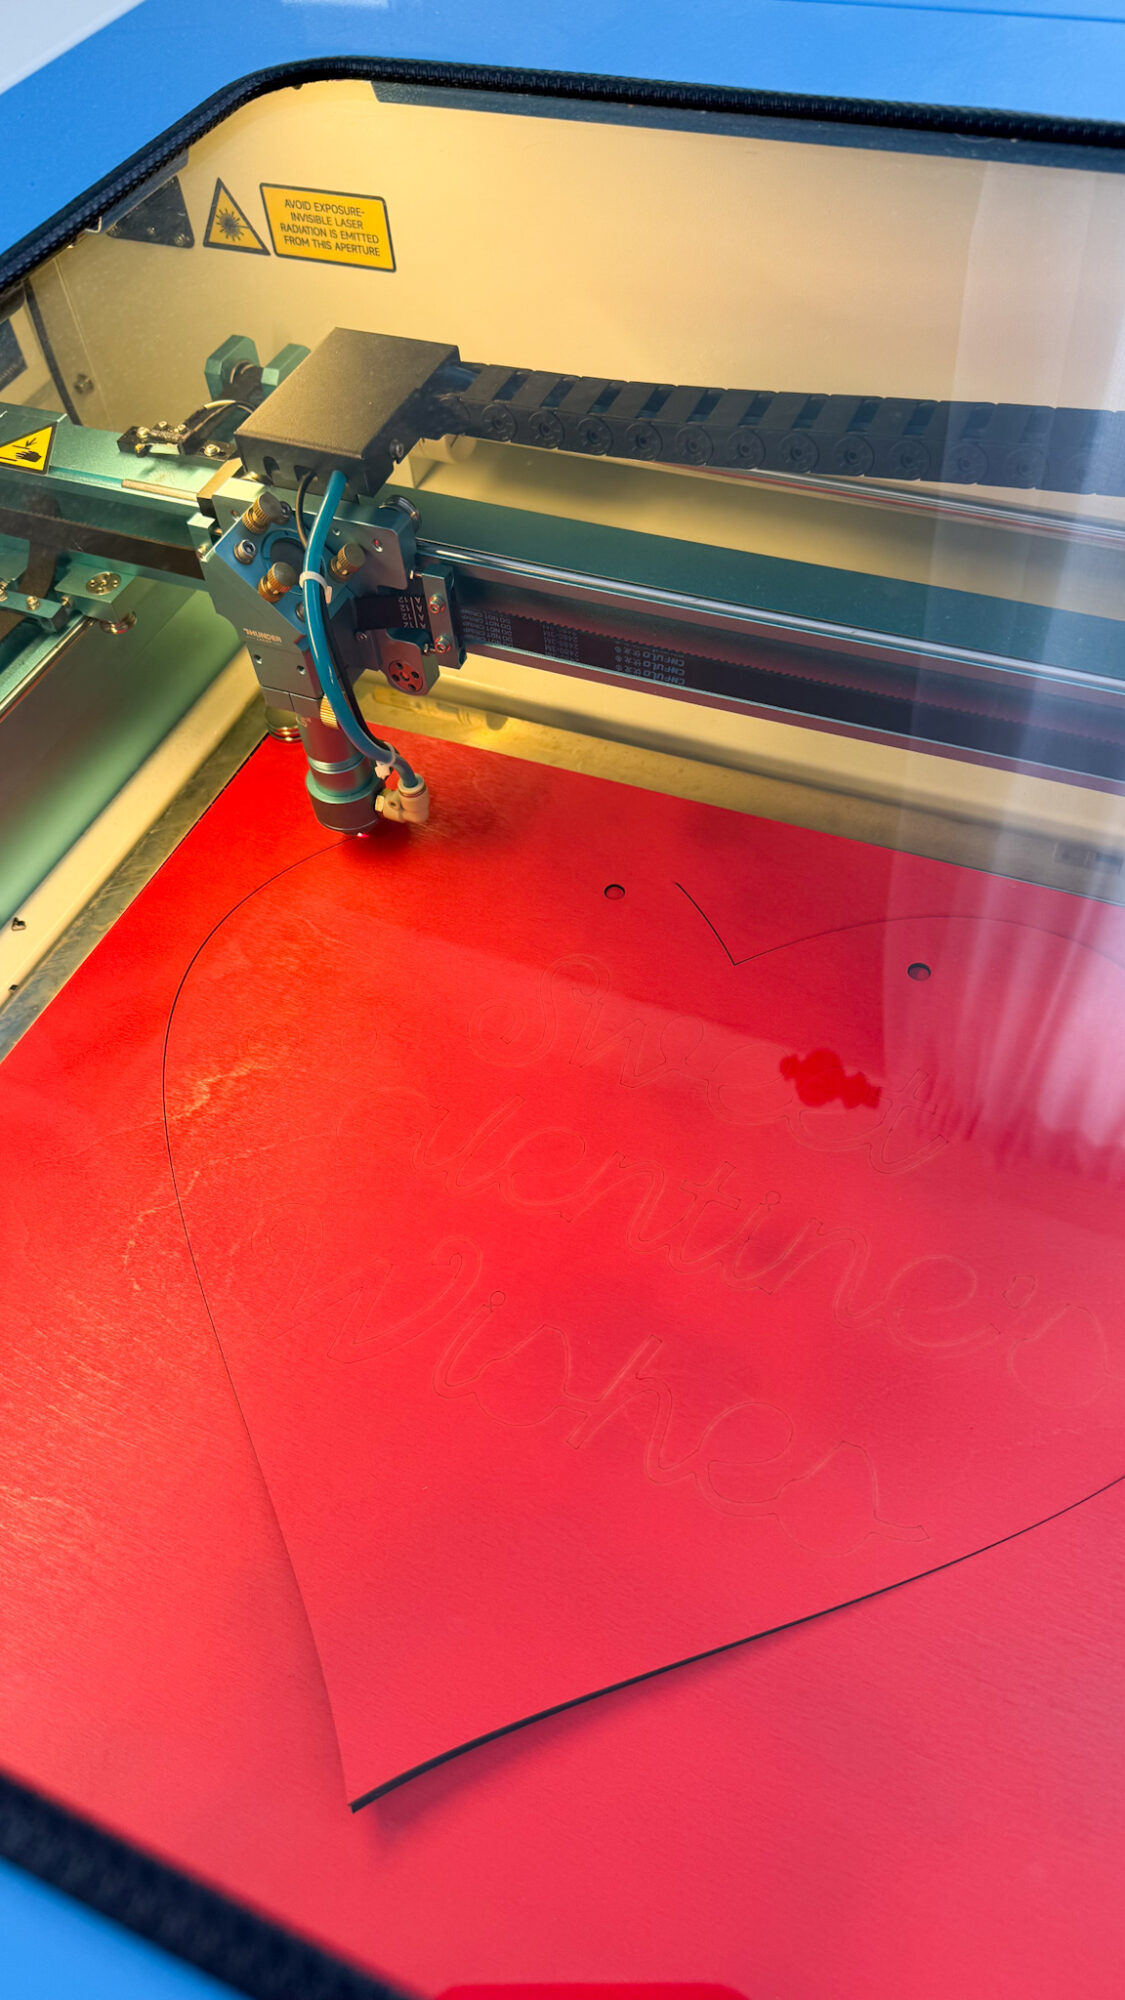
Adhering the Layers of this Valentine’s Day Door Sign
I have one glue that I use and love for gluing wood projects (or gluing acrylic to wood projects). It’s never failed me and works great.
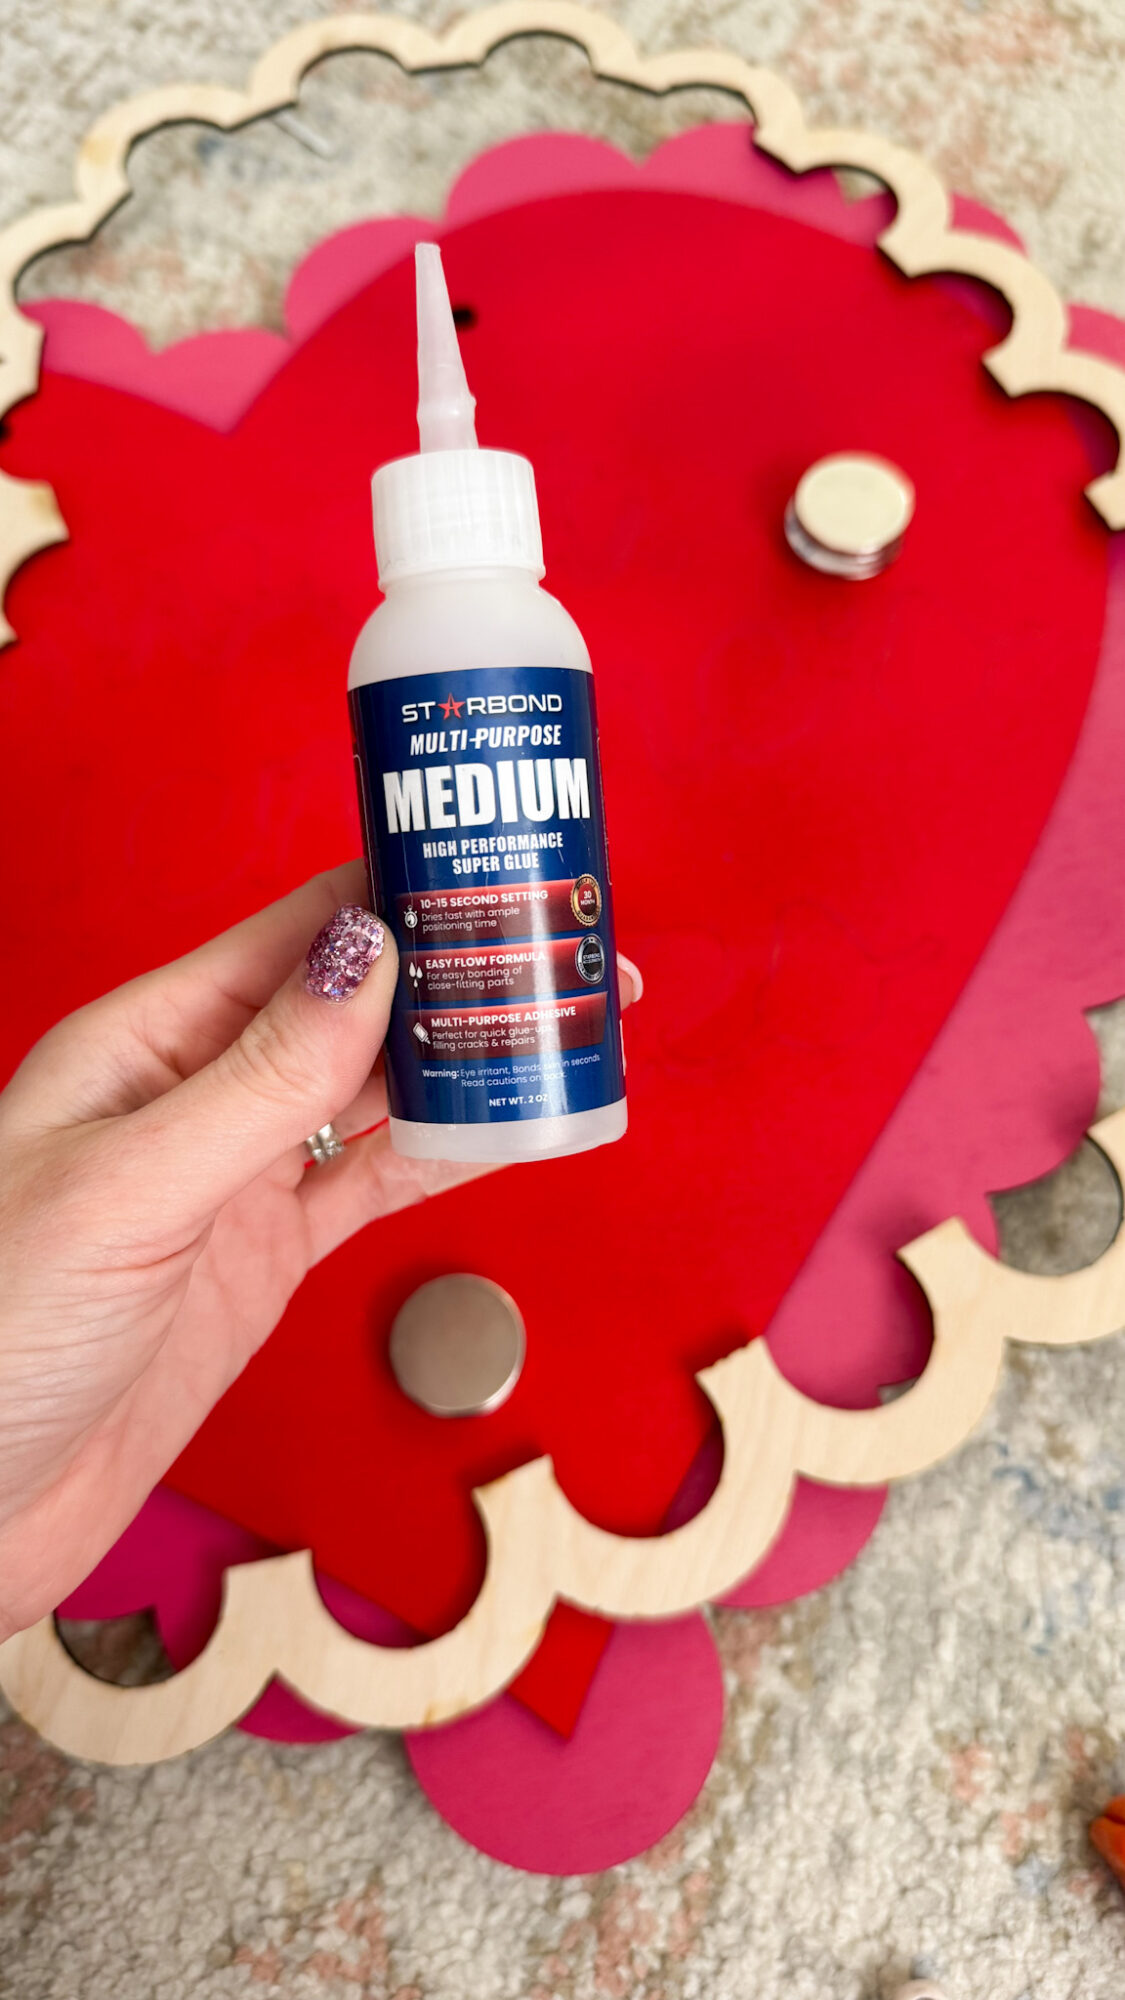
It does take a bit to set so be sure to plan for drying time.
I try to let it sit for several hours or overnight, especially if I’m gifting to a friend.
If it fails on me because I was impatient and didn’t let it set for long enough, I could always re-glue it. But if giving to a friend, I want to avoid that and just be patient ;).
Once glued, I use two different methods to glue the wood together and ensure the wood pieces are touching each other fully for secure adhesion:
They both serve a purpose and help a project like this with a large area to adhere, to actually be successful. There are times I use one or the other, but for a project like this, I employed both.
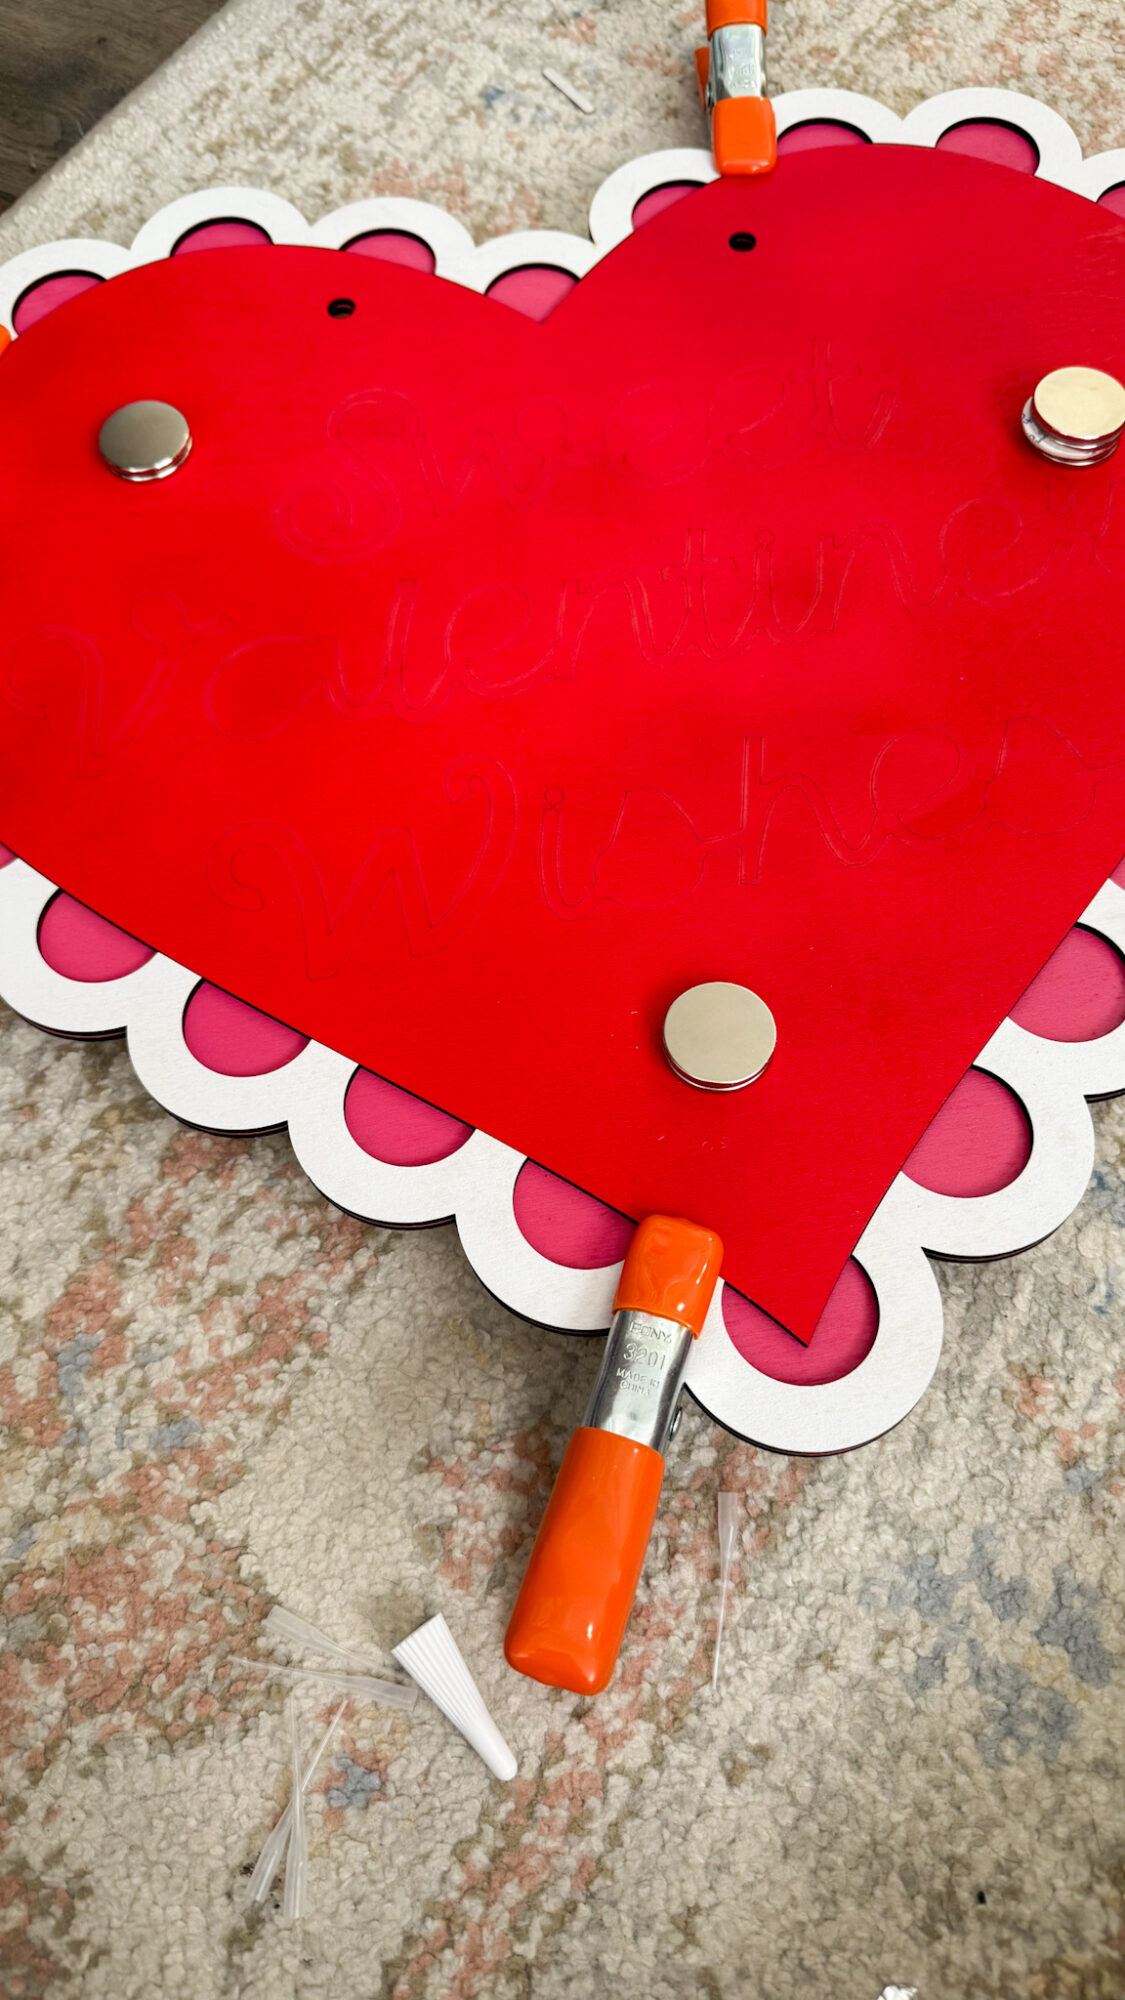
For gluing this sign, I first glued the white scalloped faux lace border to the pink background sign first.
Then, I glued the red heart in the middle.
After gluing the white faux lace, I moved my orange clamps from that scalloped border to the red heart.
The magnets help with the center of the heart adhering. For my magnets, I place doubled-up magnets on the bottom as well as the top to really pull those wood layers together while the glue sets.
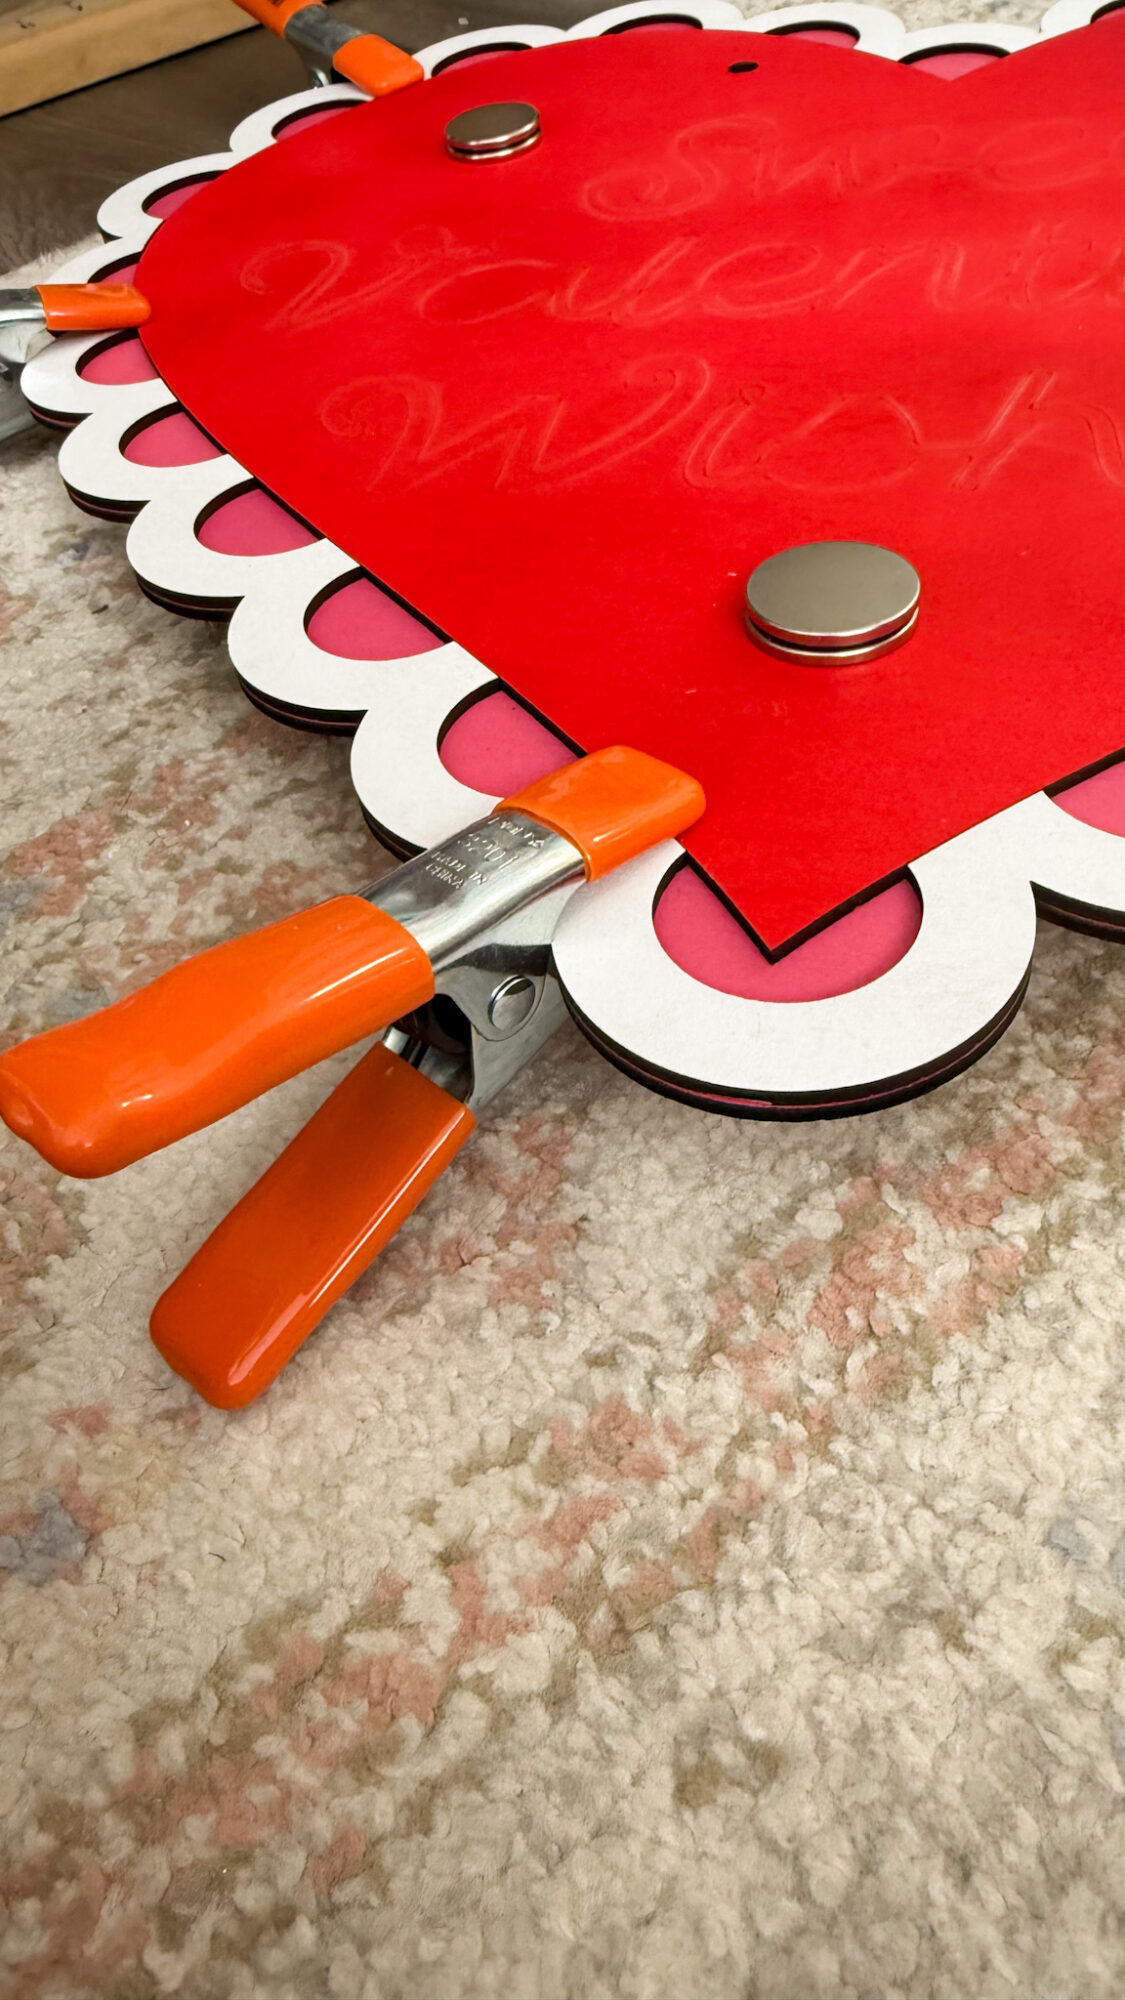
After about 6 hours (I shut my office doors and moved onto homeschooling and running errands), I was ready to glue on the lettering.
I glued the lettering on using the same glue and magnet system on both sides of the sign.
It is very important not to get glue on the top layer of the lettering before placing the magnet on top.
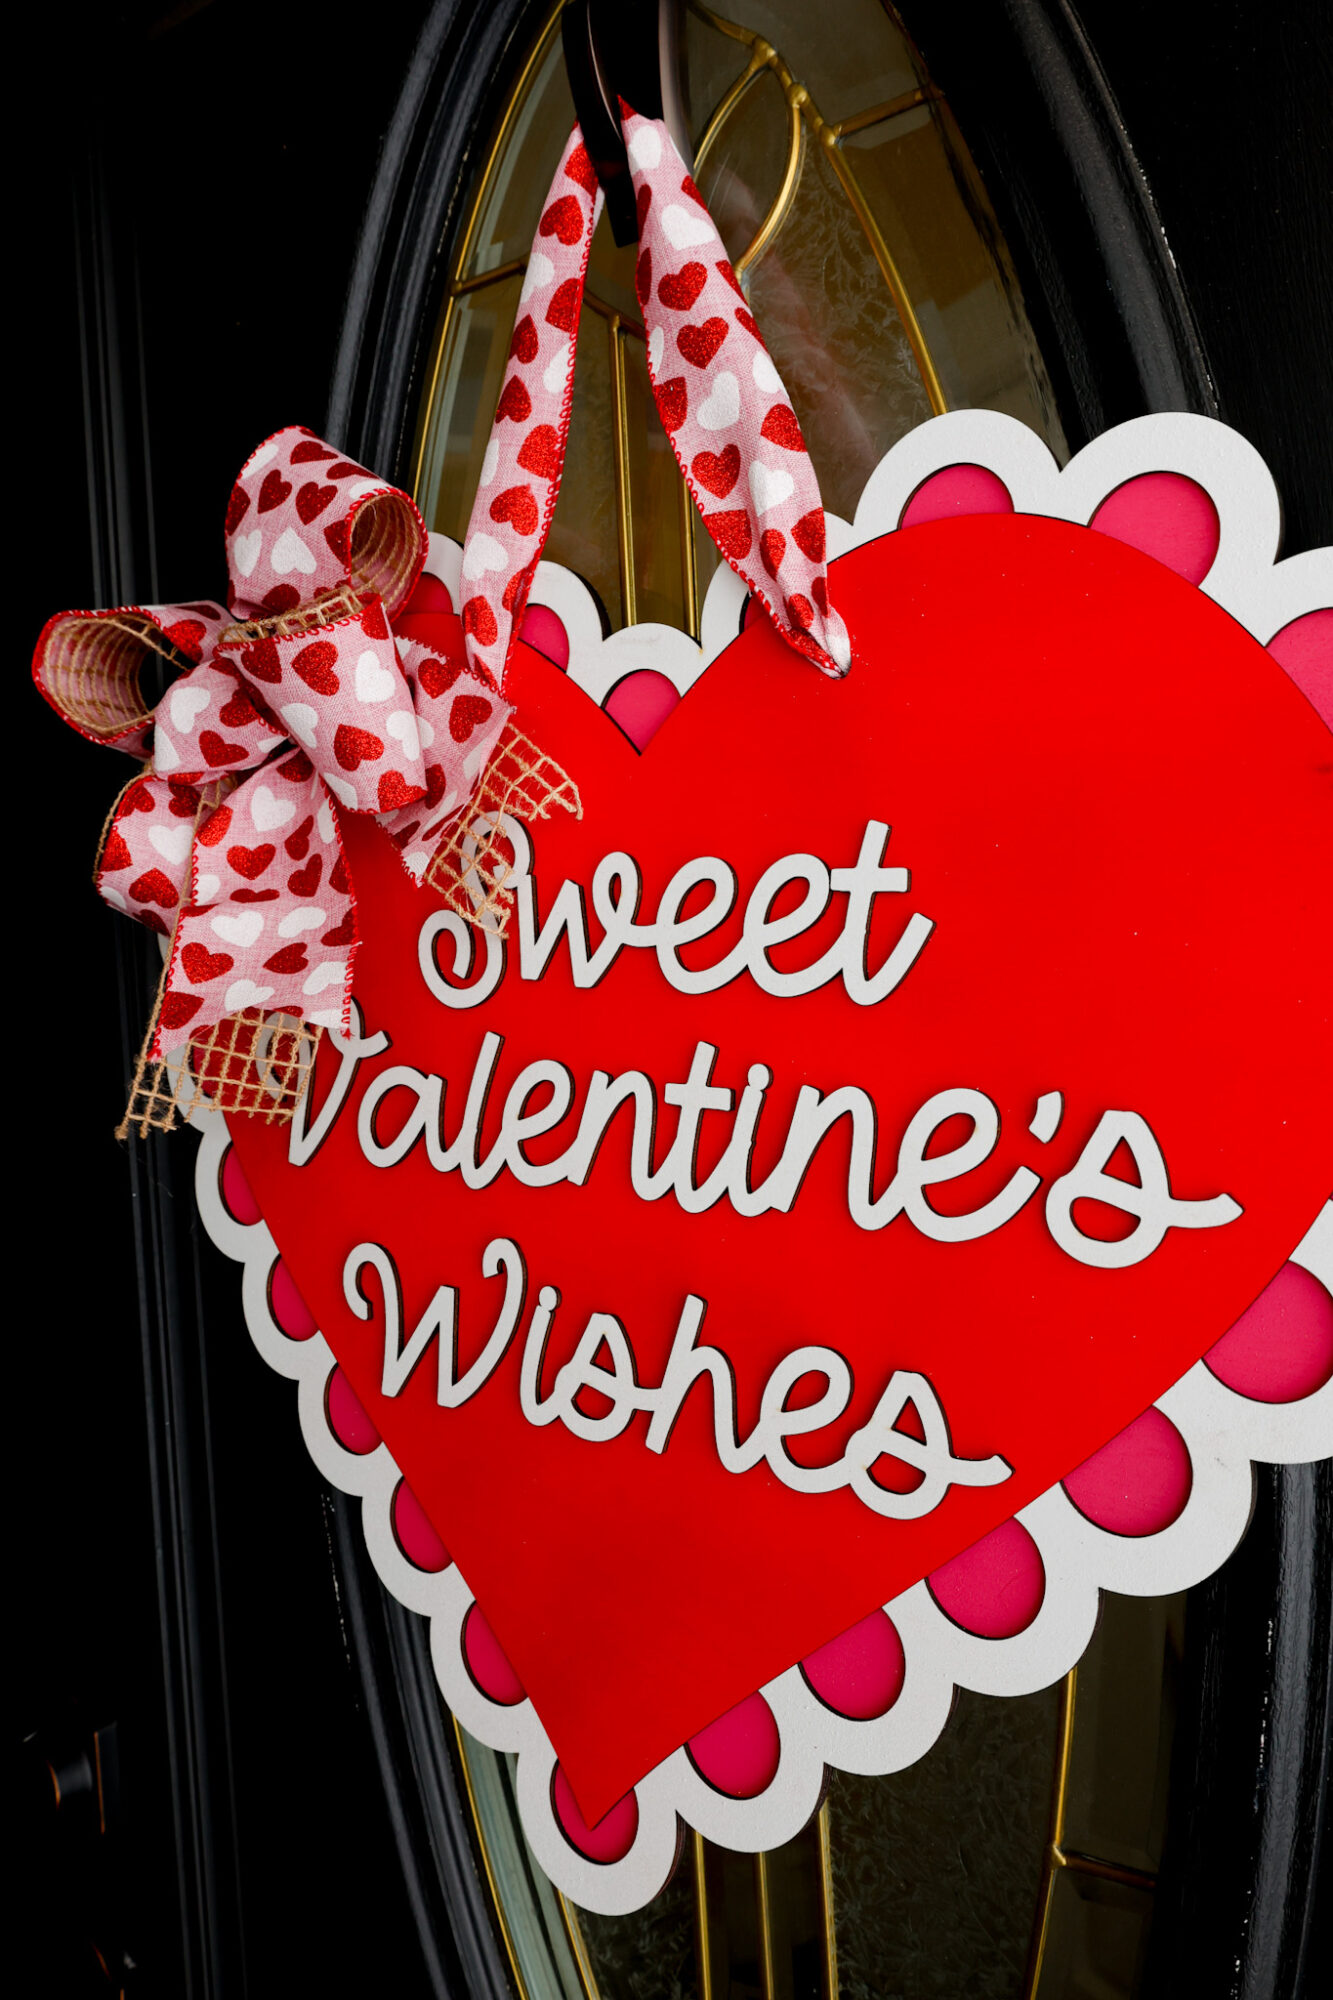
Finished DIY Valentine’s Day Door Sign
Here’s what my finished sign looks like on our front door…
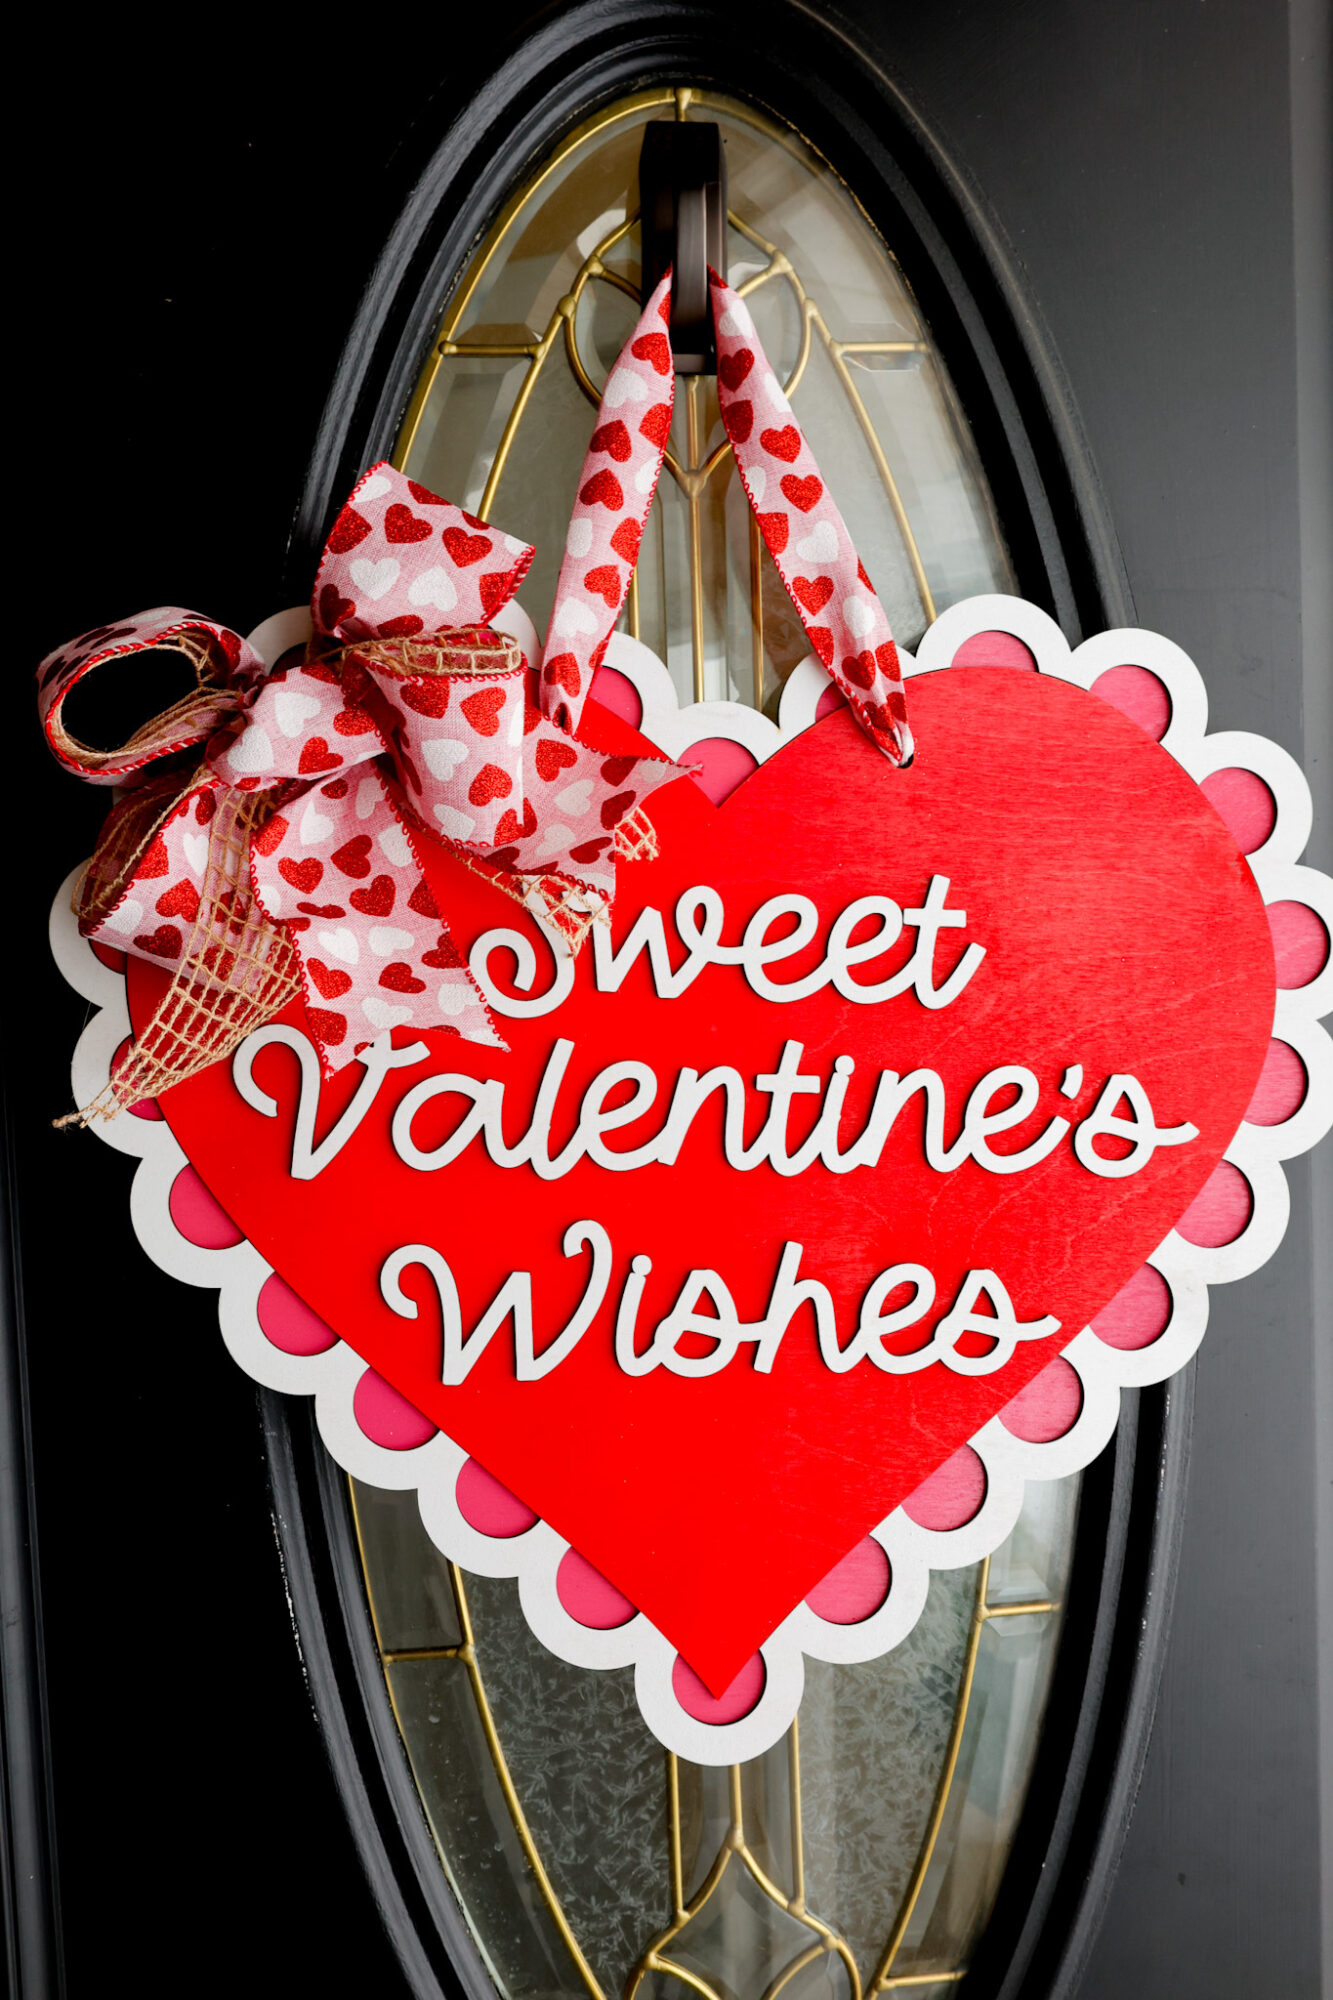
I love how it turned out, especially against out black door but I could see it being a total curb side showstopper on a white door as well!
You can see, from the side, why I love to pre-paint my wood before cutting.
When spray or hand painting wood after cutting, the paint can run onto the side of the shapes/letters are be very noticeable.
I like a clean look like this…
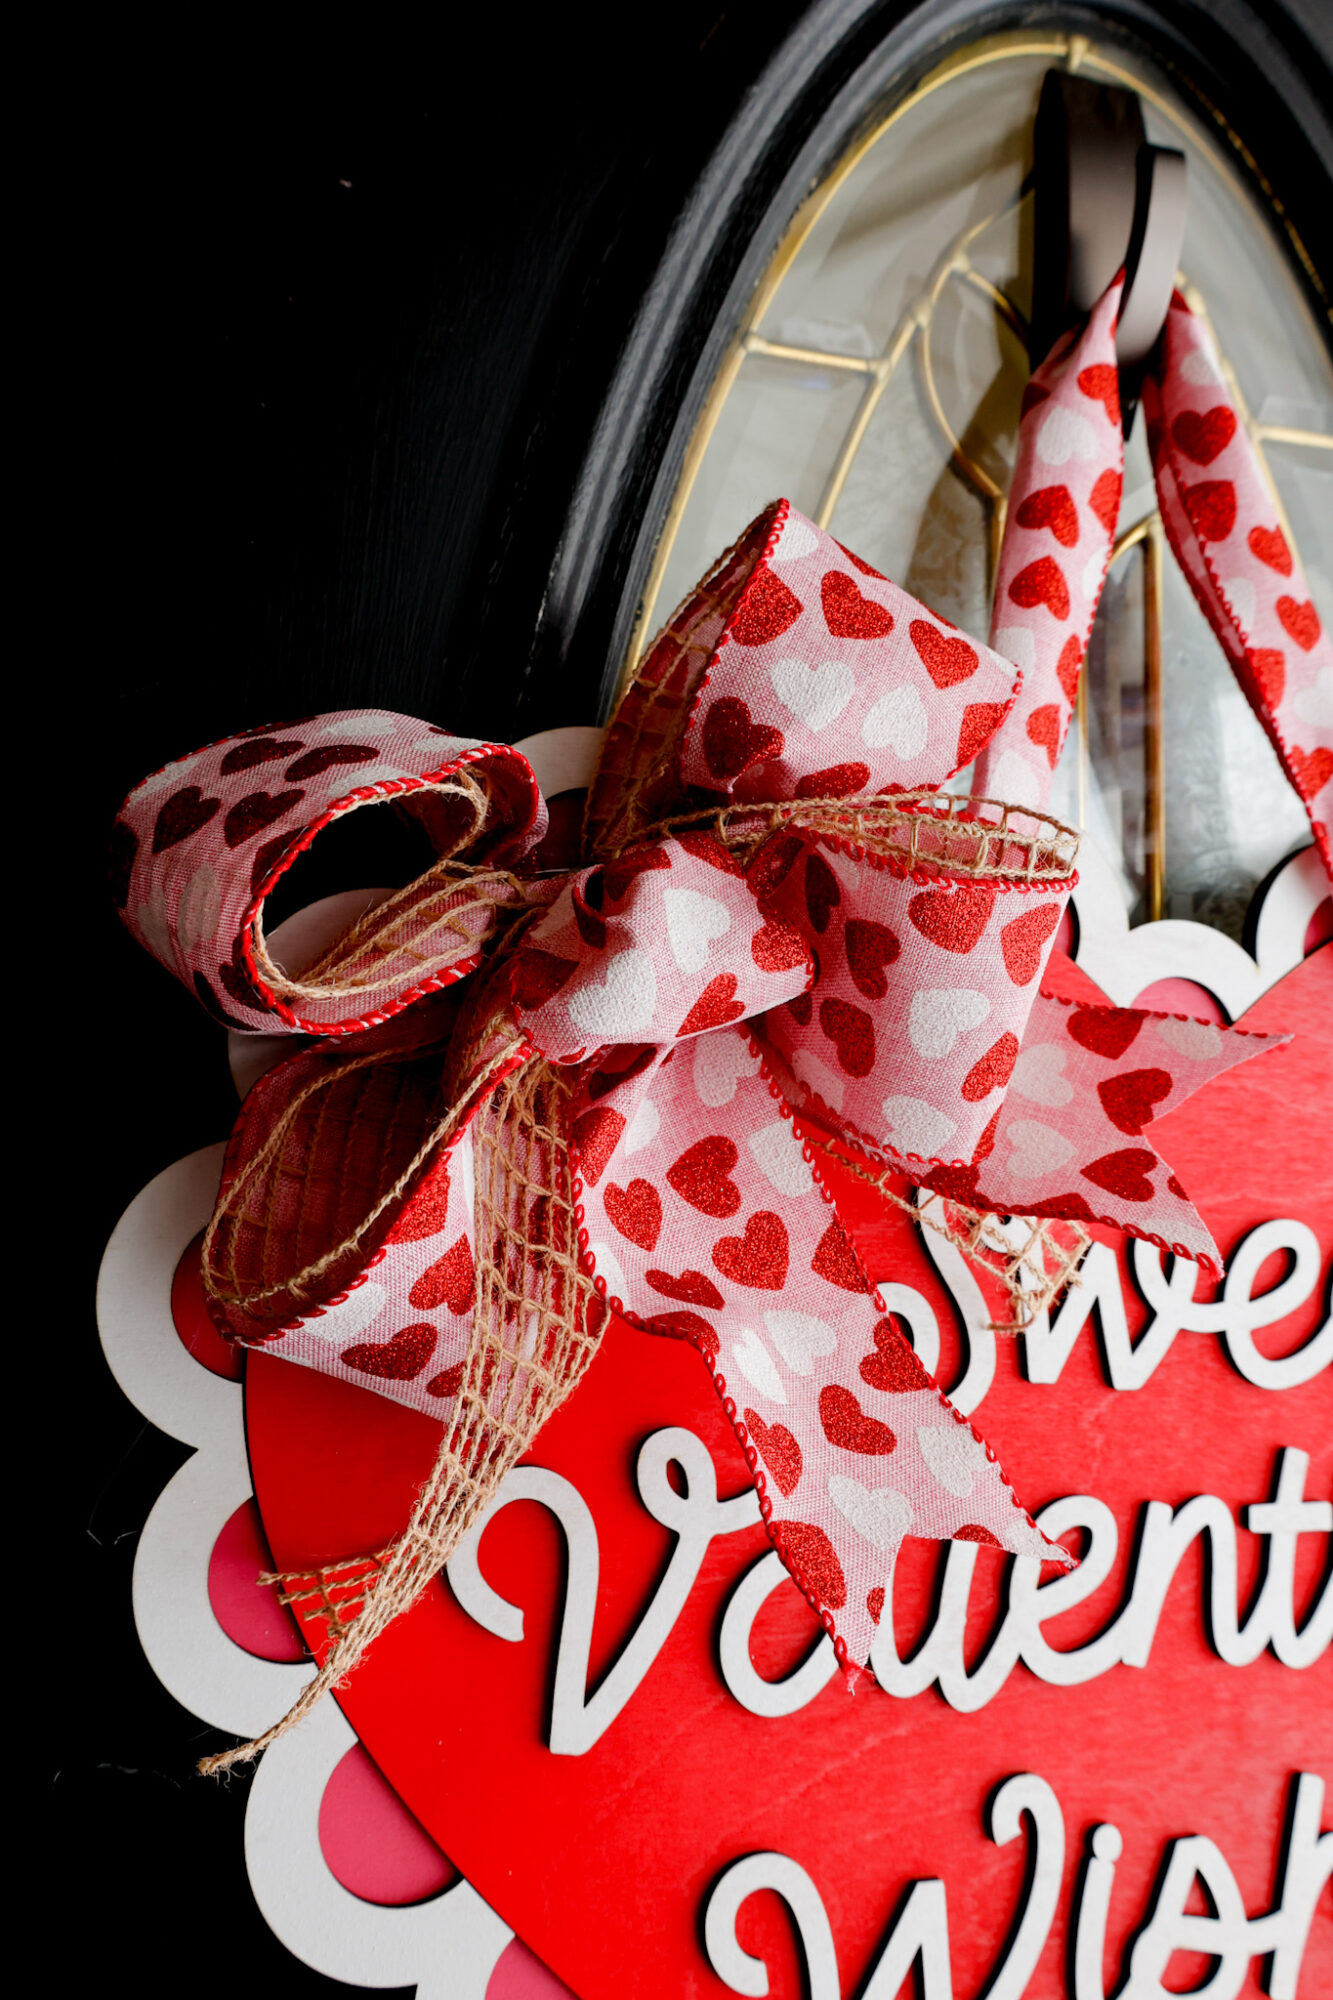
For the bow, I used two layers of wired ribbon, zip tied the finished bundle, and used my hot glue gun to adhere it to the top left of the sign.
To help me make my bows, I use this tool! It’s like having a sturdy second set of hands to hold things in place. I mentioned this earlier in the post, but wired ribbon is KEY to making beautiful bow for door signs that will last years and years.
Free SVG Download: Valentine’s Day Door Sign
Sign up below to gain instant access to my free SVG file for this project:
Please remember that all free files are for personal use only, and cannot be sold, copied, or distributed.
Thank you!

Leave a Reply