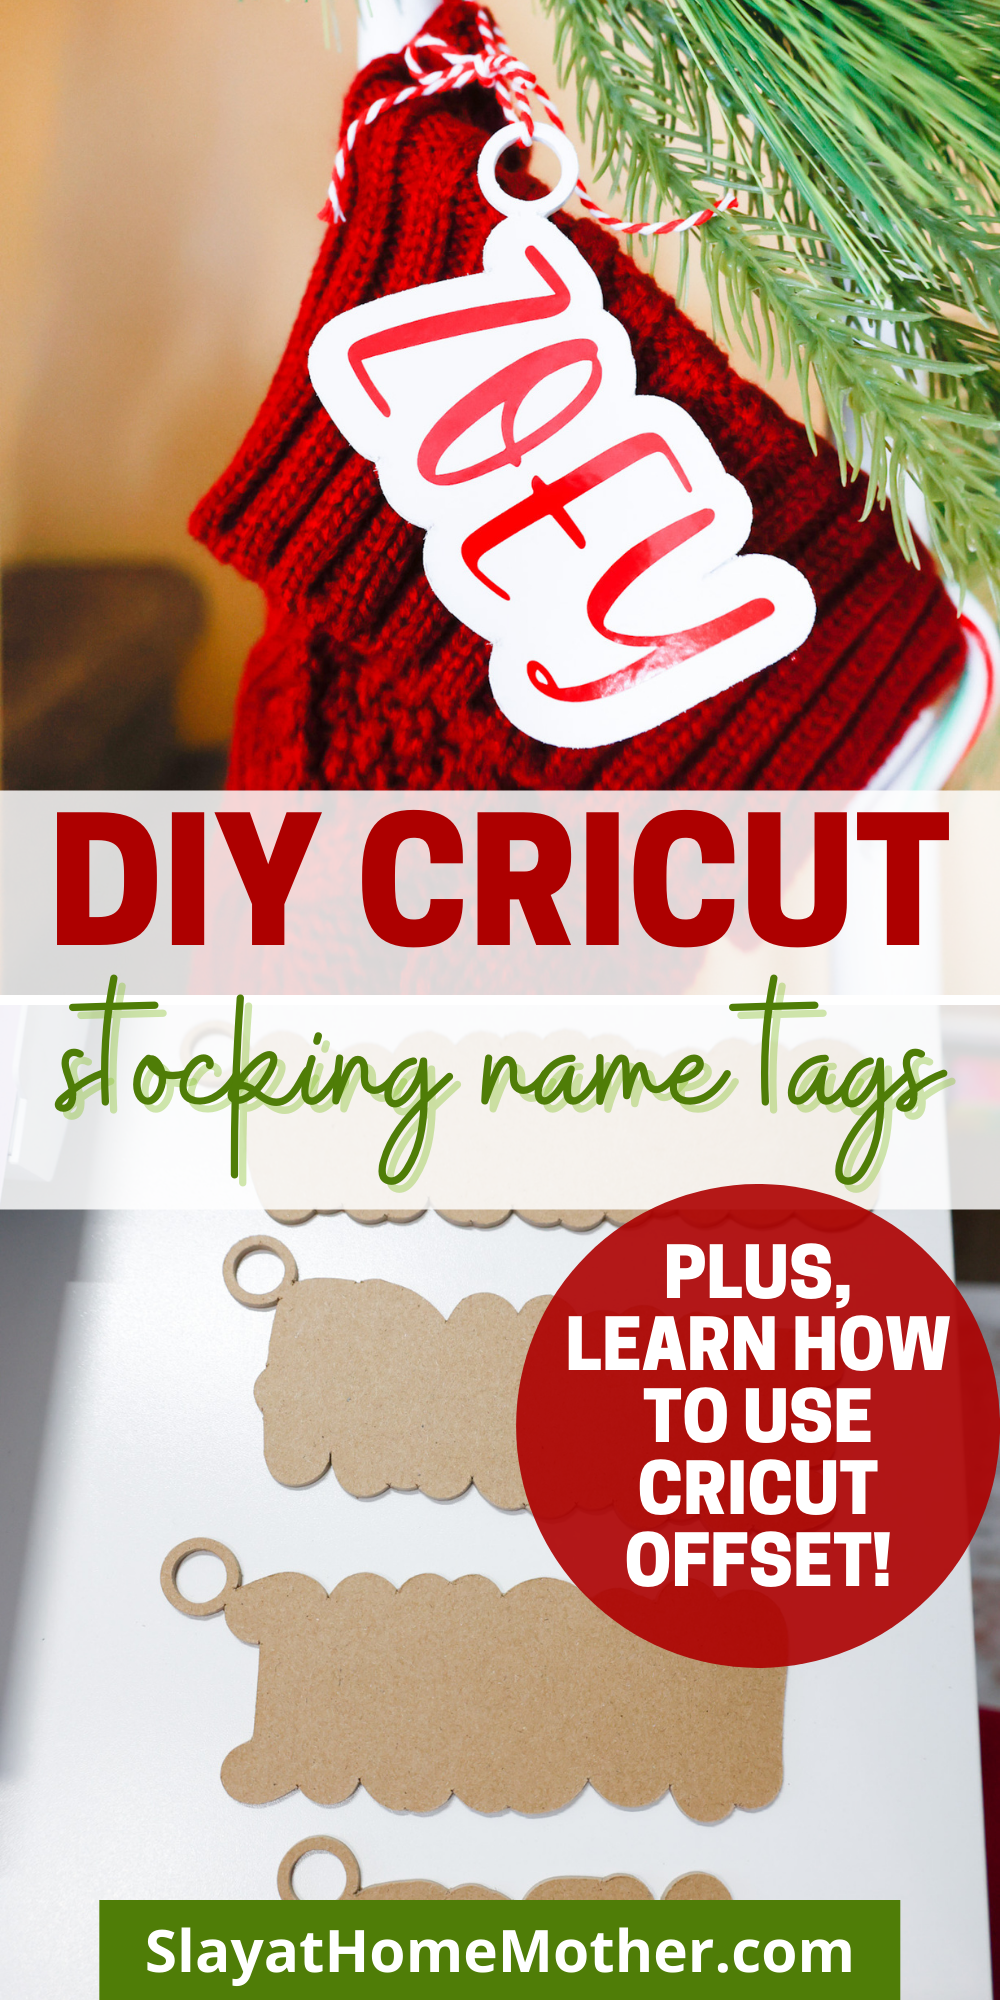
Looking for an easy DIY stocking name tags tutorial? This Cricut how-to is for you!
Christmas is NEXT WEEKEND, and I’m just now sharing this tutorial with you all…
But better late than never. 😉
There’s still plenty of time this month to create, craft, and celebrate together!
In this post, I’ll be sharing how I crafted our children’s (and new puppy’s) Christmas stocking name tags, as well as focusing on the offset feature within Cricut Design Space.
Of course, if you have additional questions about the project or offset, please leave a comment below!
*This post contains affiliate links, however, all opinions are my own, as always.
What You Need To Make These Stocking Name Tags
You’ll need…
- heavy chipboard
- permanent vinyl (I used Cricut’s tomato red)
- spray paint
- brayer
- painter’s tape
- transfer tape
- weeder and scraper
- festive twine, string, or ribbon
- LightGrip cutting mat
- StrongGrip cutting mat
- Cricut Maker
- knife blade
- fine-point blade
How To Make Stocking Tags With Your Cricut
Cricut Offset Feature
To design your stocking tags, open Cricut Design Space.
Using the font of your choosing (I chose to use DTC Autumn Sunshine), type out the names for your stockings.
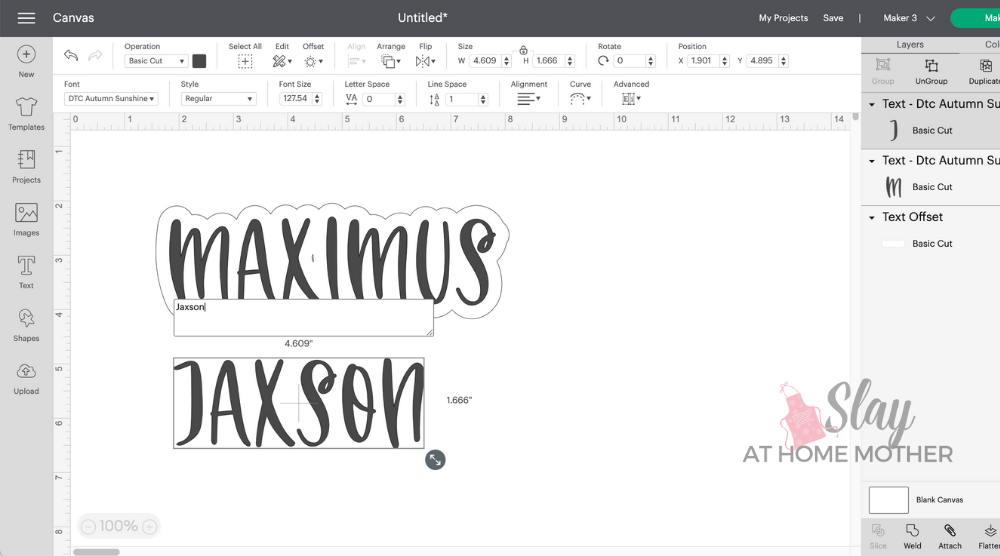
Cricut offset creates an outline around your image or text and is perfect for this project.
To use the Cricut offset feature, select the text you wish to outline, and click on the Offset button on the top toolbar of Design Space.
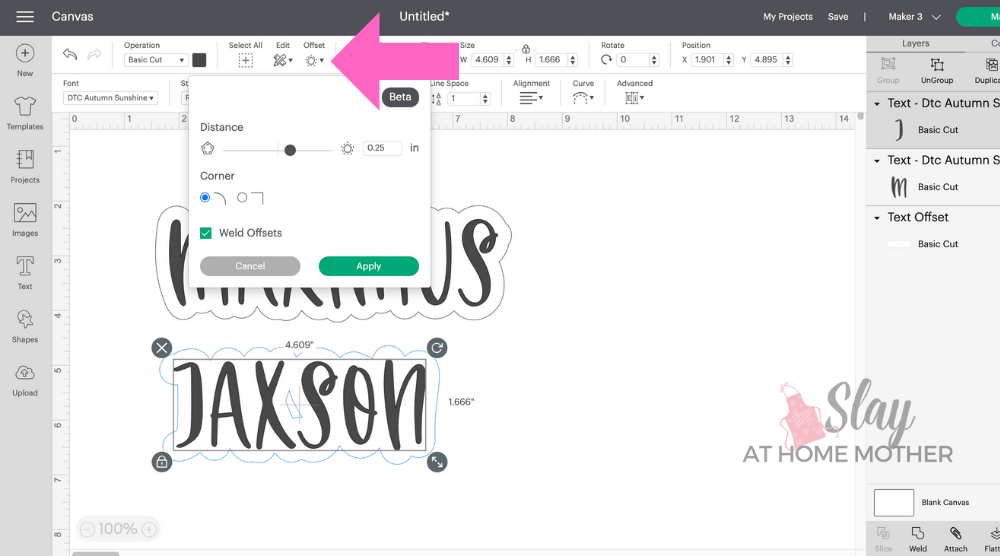
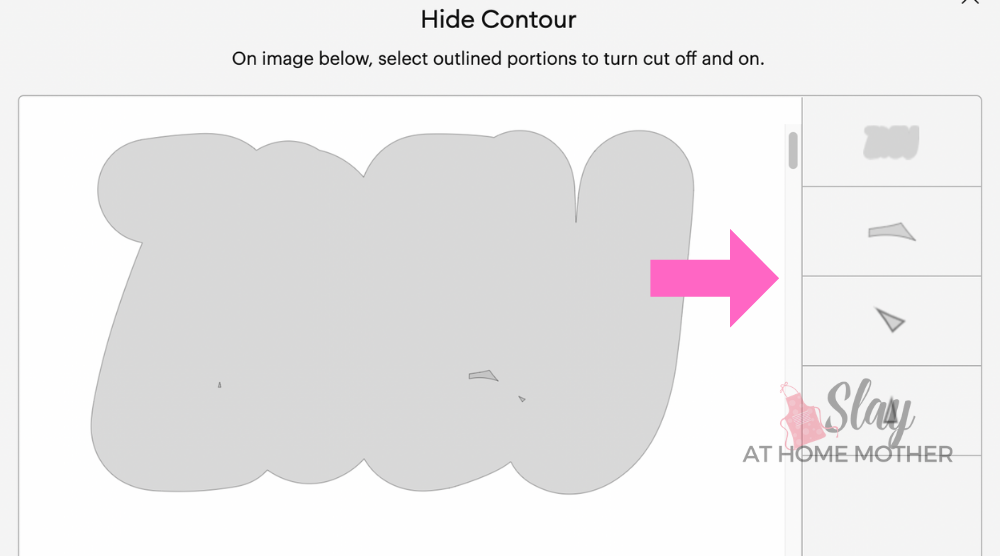
If there are certain cuts you’d rather your Cricut machine not cut, you can click on the Contour button at the bottom right of the the Design Space Canvas screen, and click on those to hide them.
Next, I’ll show you how I created the circle to tie our stocking name tags…
Click on Shapes on the left-hand toolbar, and then click on the circle shape.
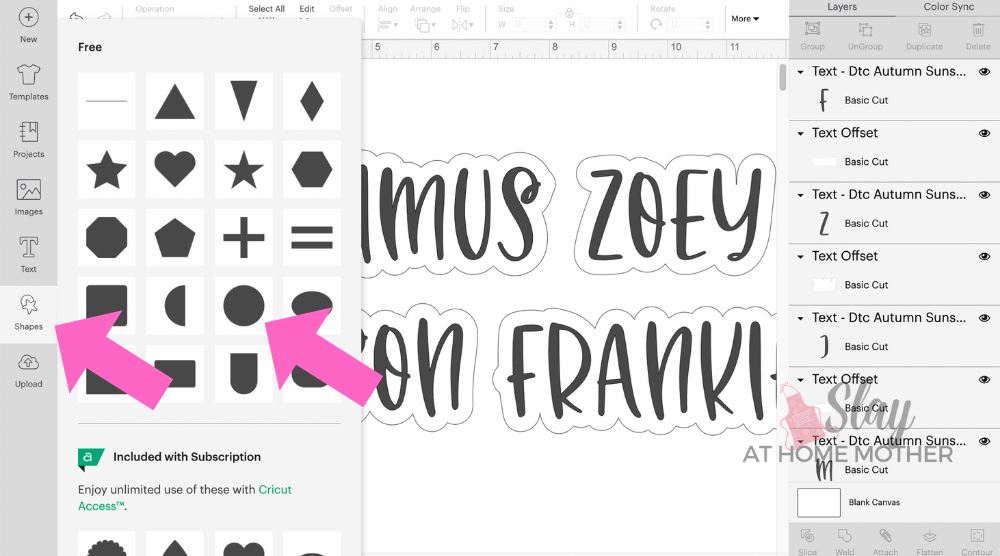
Next, add another circle, decrease the size, and layer them on top of one another (see screenshot below).
Click Align on the top toolbar and then click on Center.
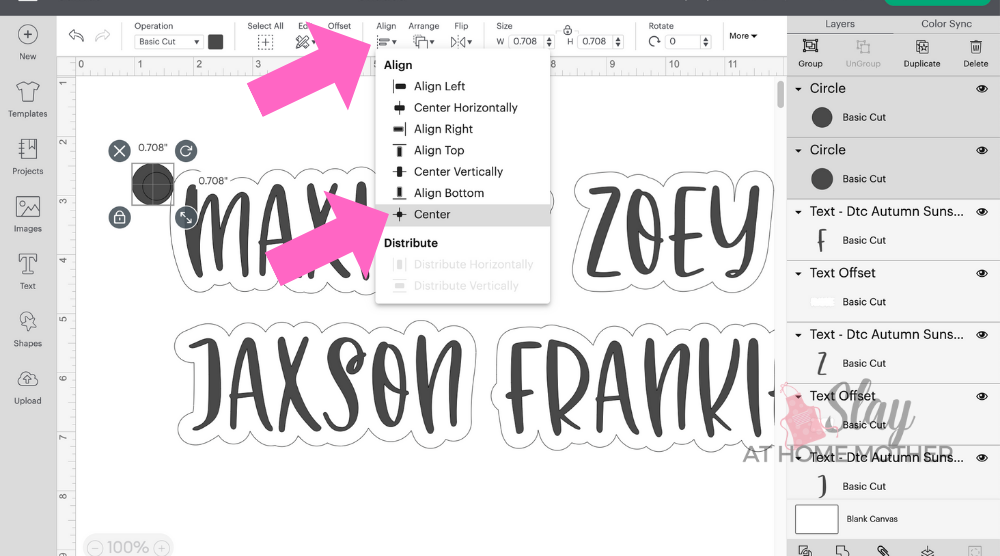
Once the circles are aligned and centered on each other, Slice them together, and remove the center cut.

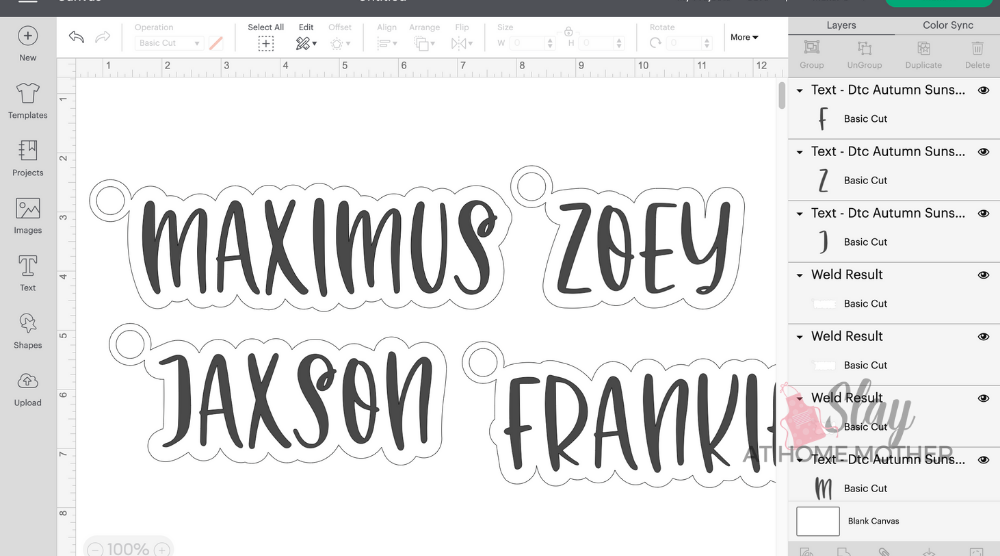
Duplicate this sliced circle for each stocking name tag you’ll be creating so they will all be the same size.
Select both the slice result circle and the offset outline and Weld them.
Now you’re ready to cut your stocking name tags!
How To Cut Your Stocking Name Tags
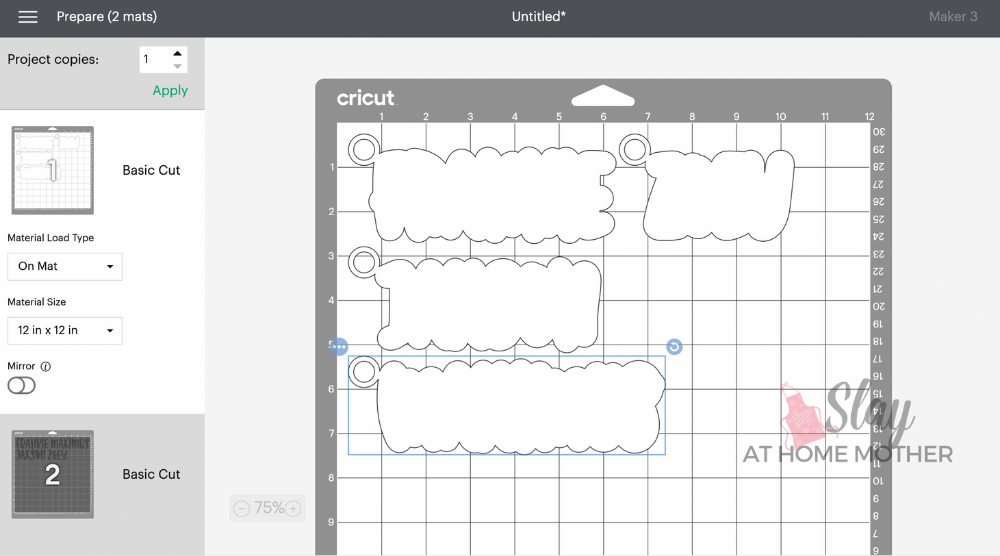
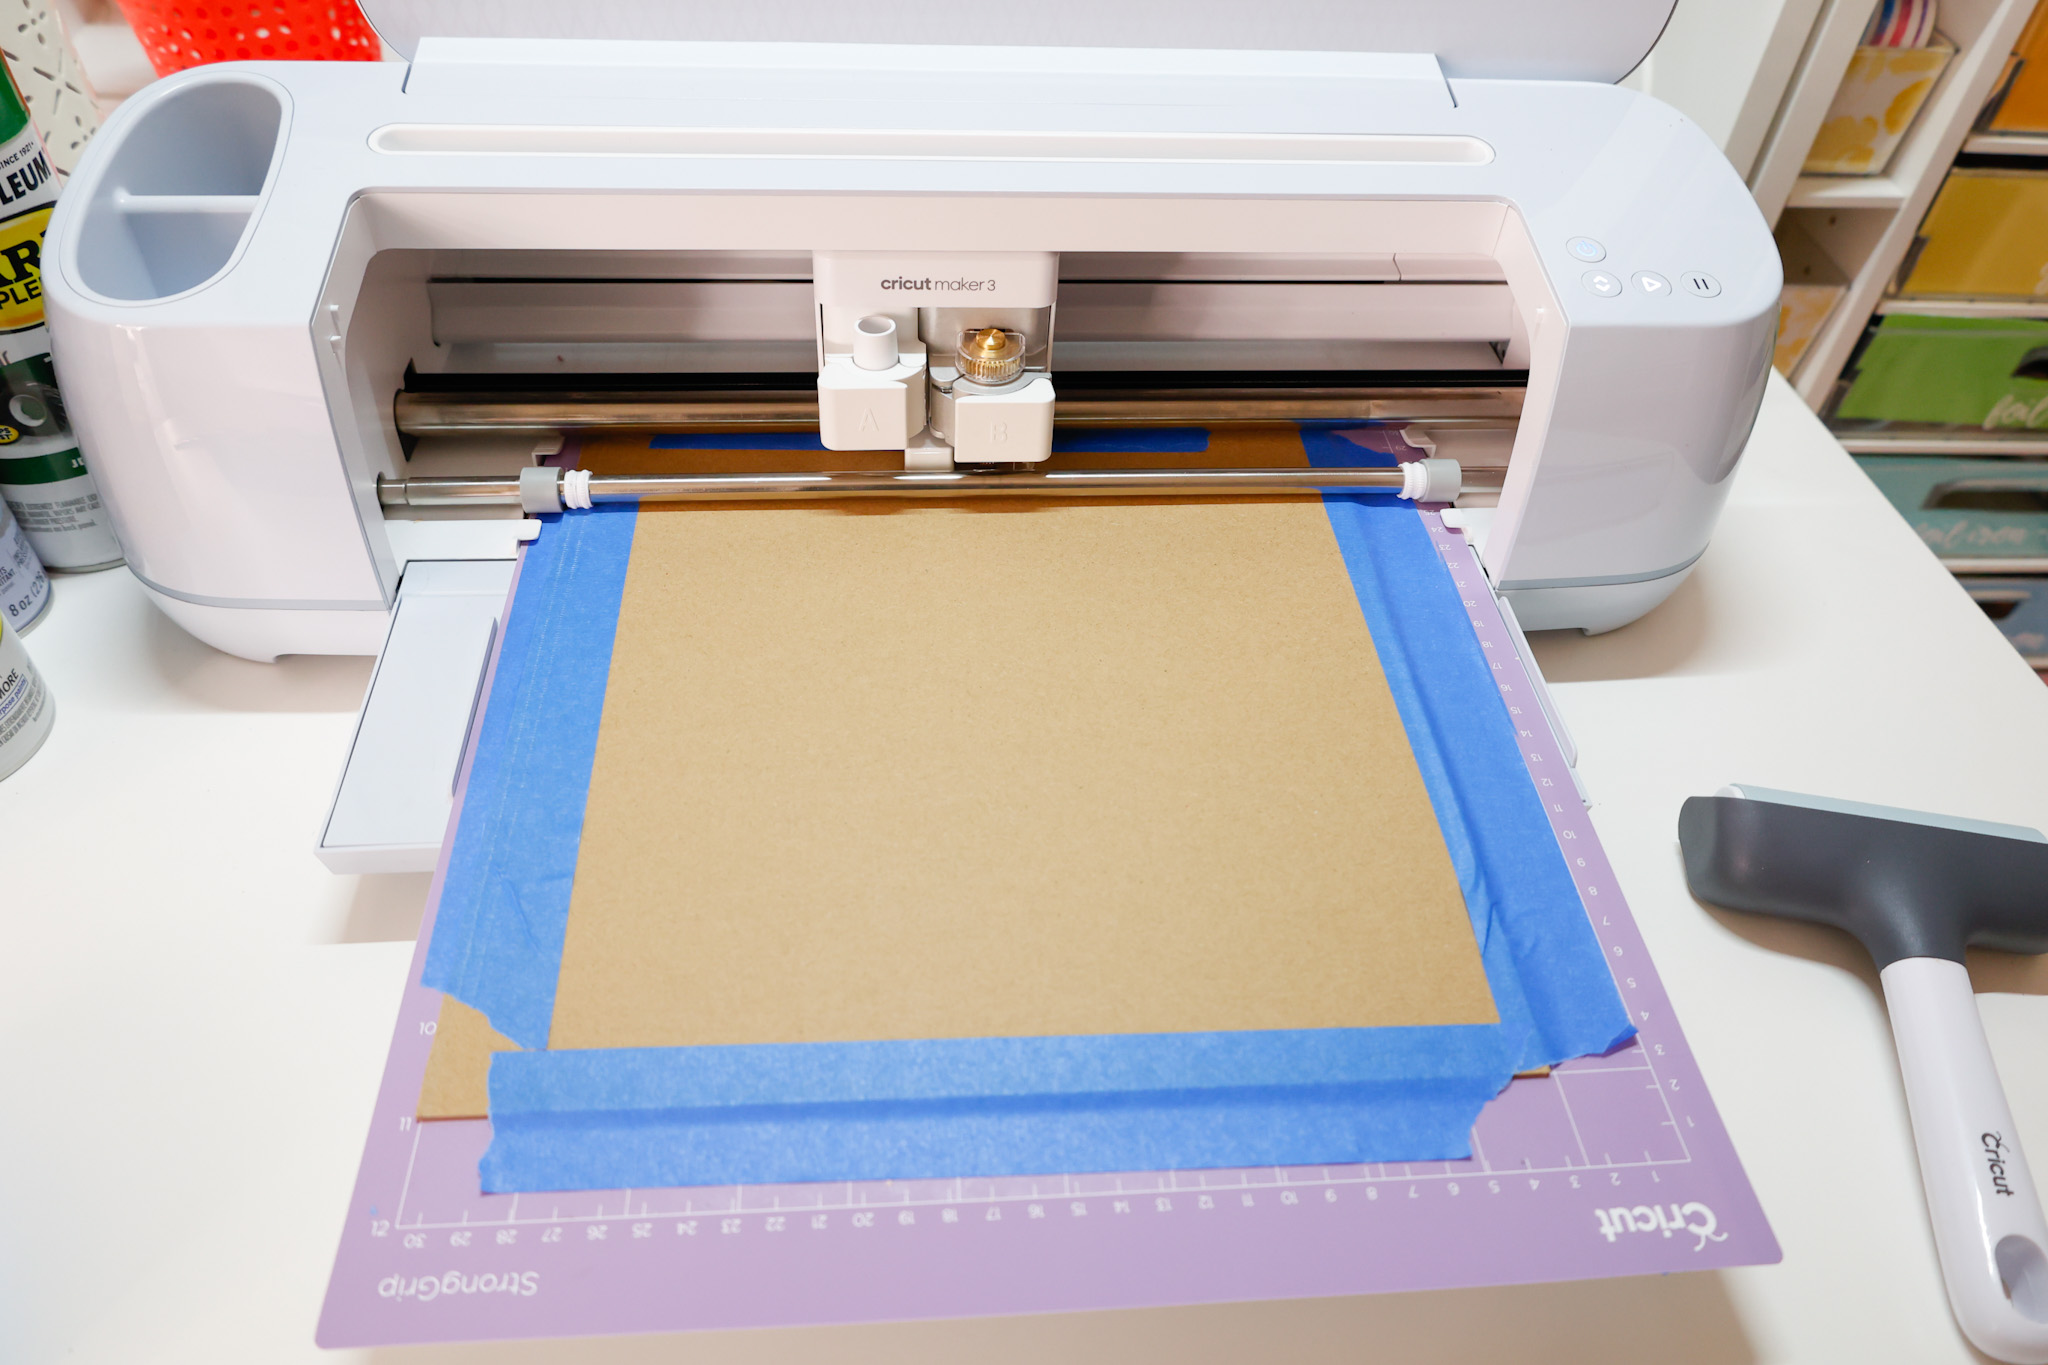
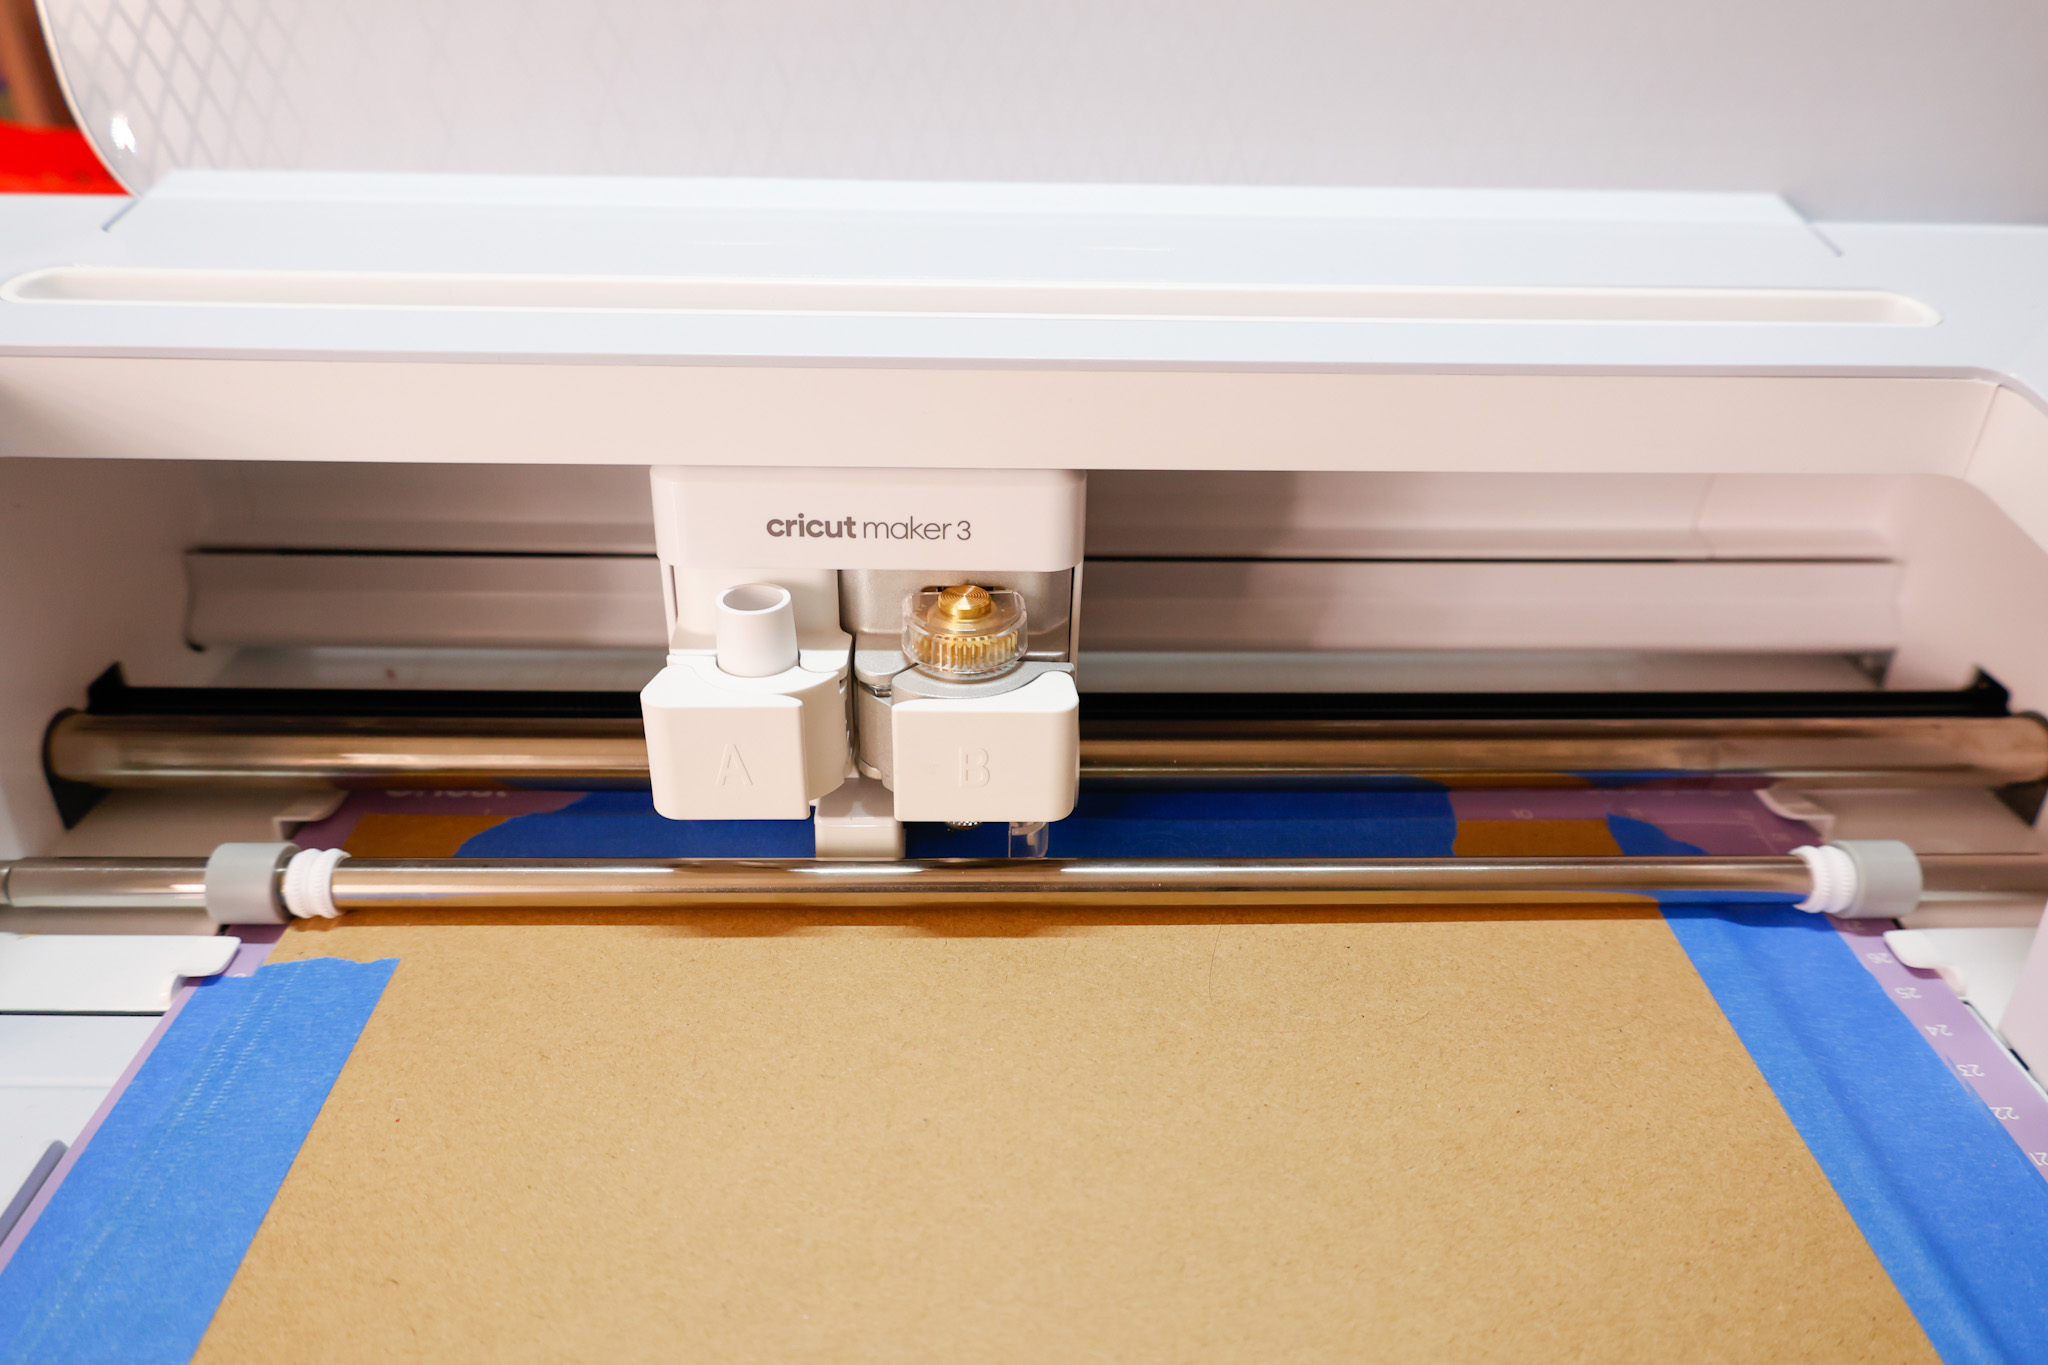
To cut your stocking name tags, you’ll want to cut your outlines on chipboard.
No mirroring is necessary for these cuts.
To cut the chipboard, use a Cricut brayer (or a rolling pin, firm hand pressure, etc.) to press the chipboard piece flat onto the StrongGrip mat.
Use painter’s tape to secure all four sides of your chipboard to the mat.
Cut the offset outline design with a Cricut knife blade in your Maker.
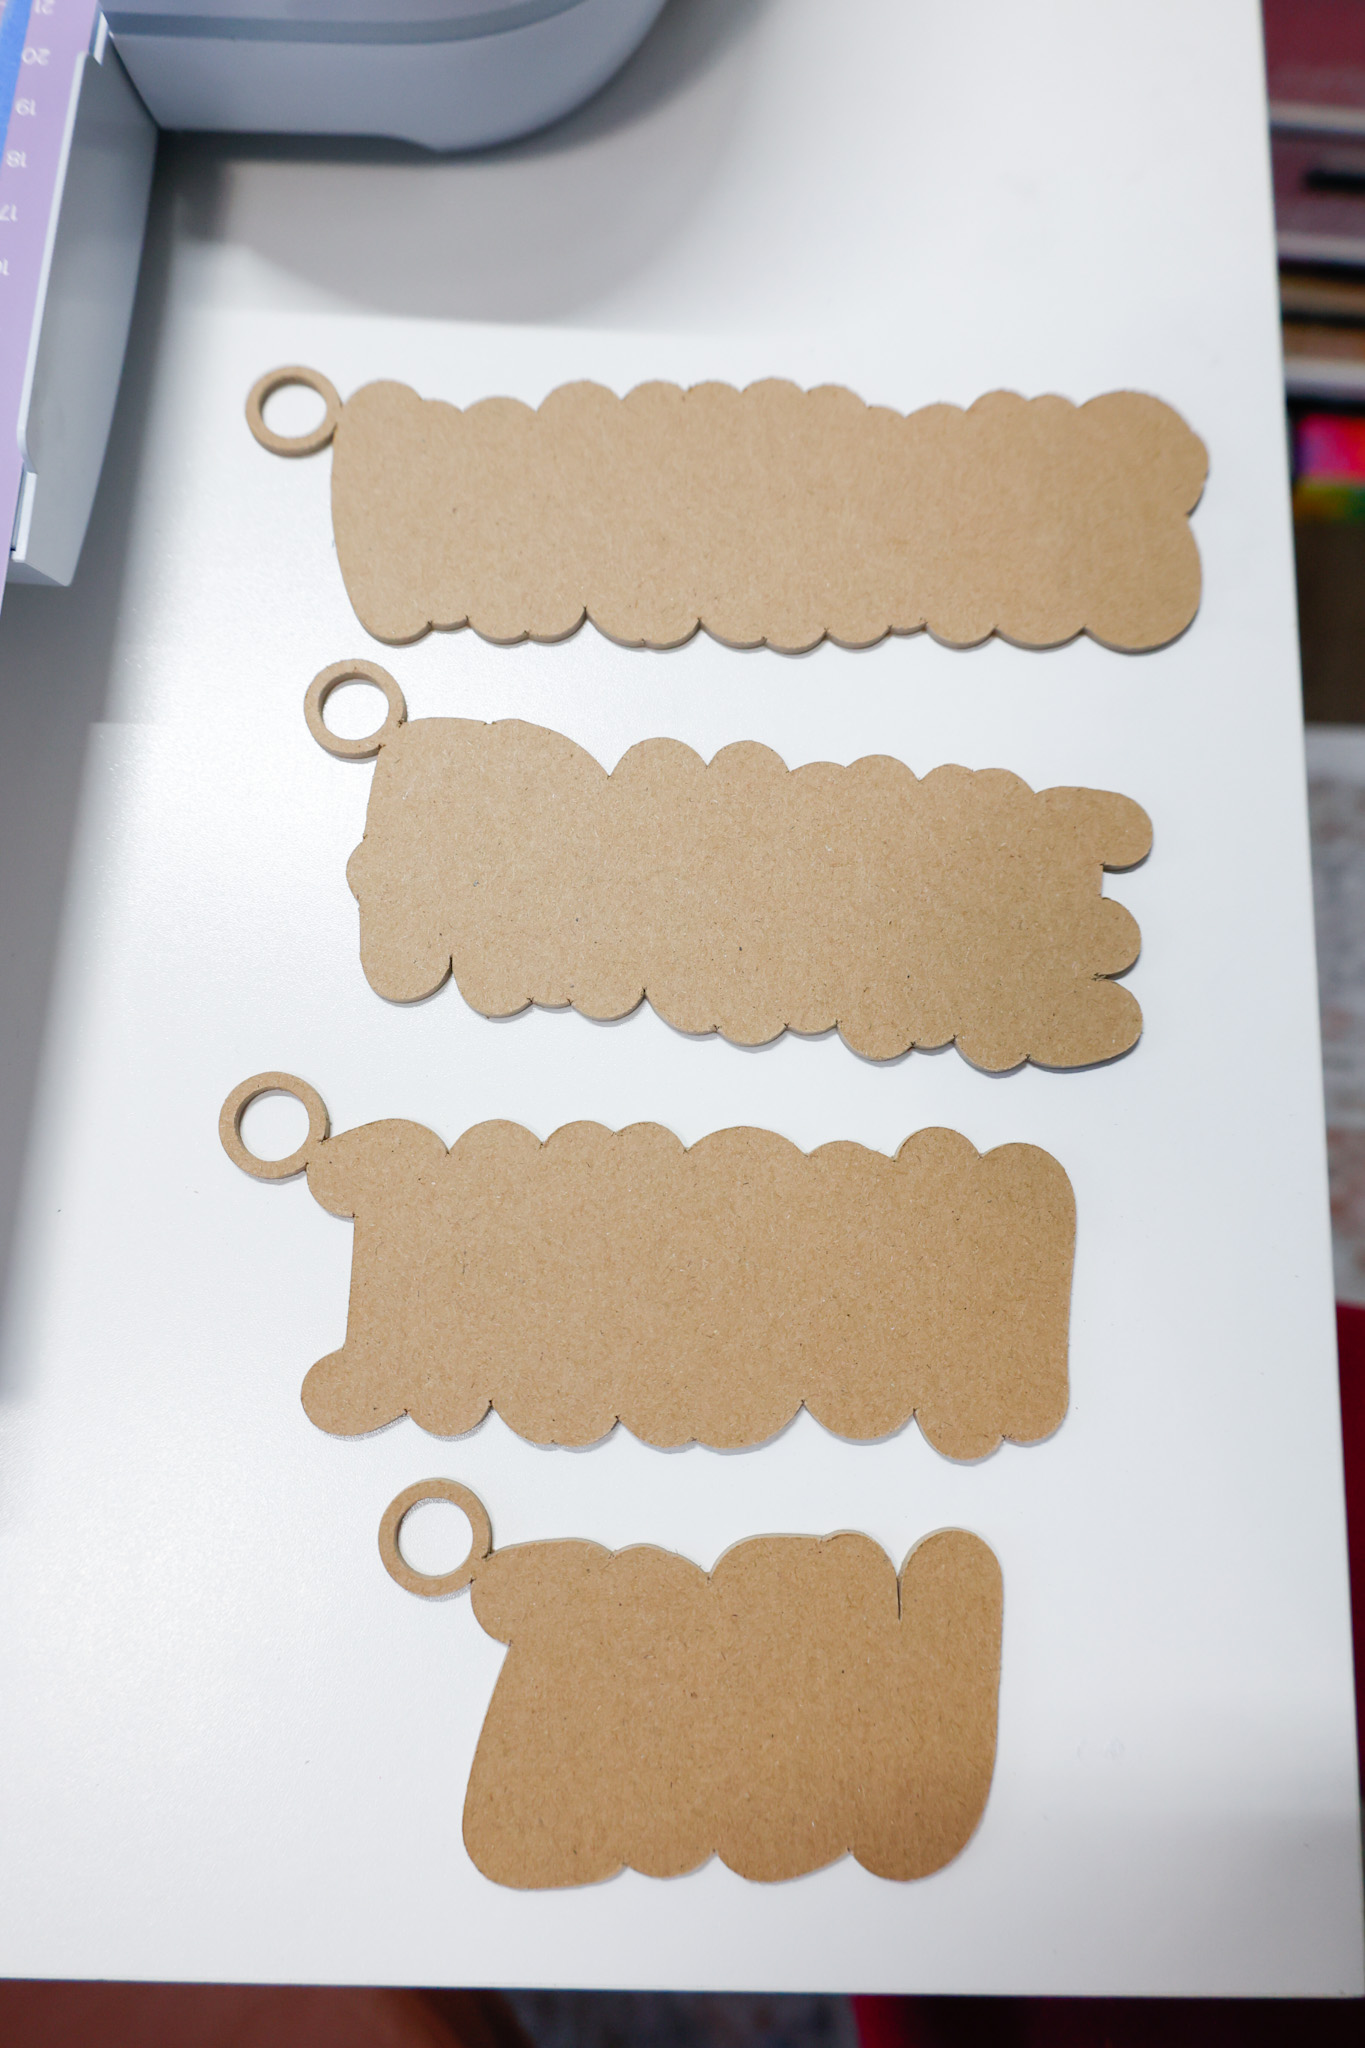
After the cut has been completed, gently pop out each stocking tag from the chipboard.
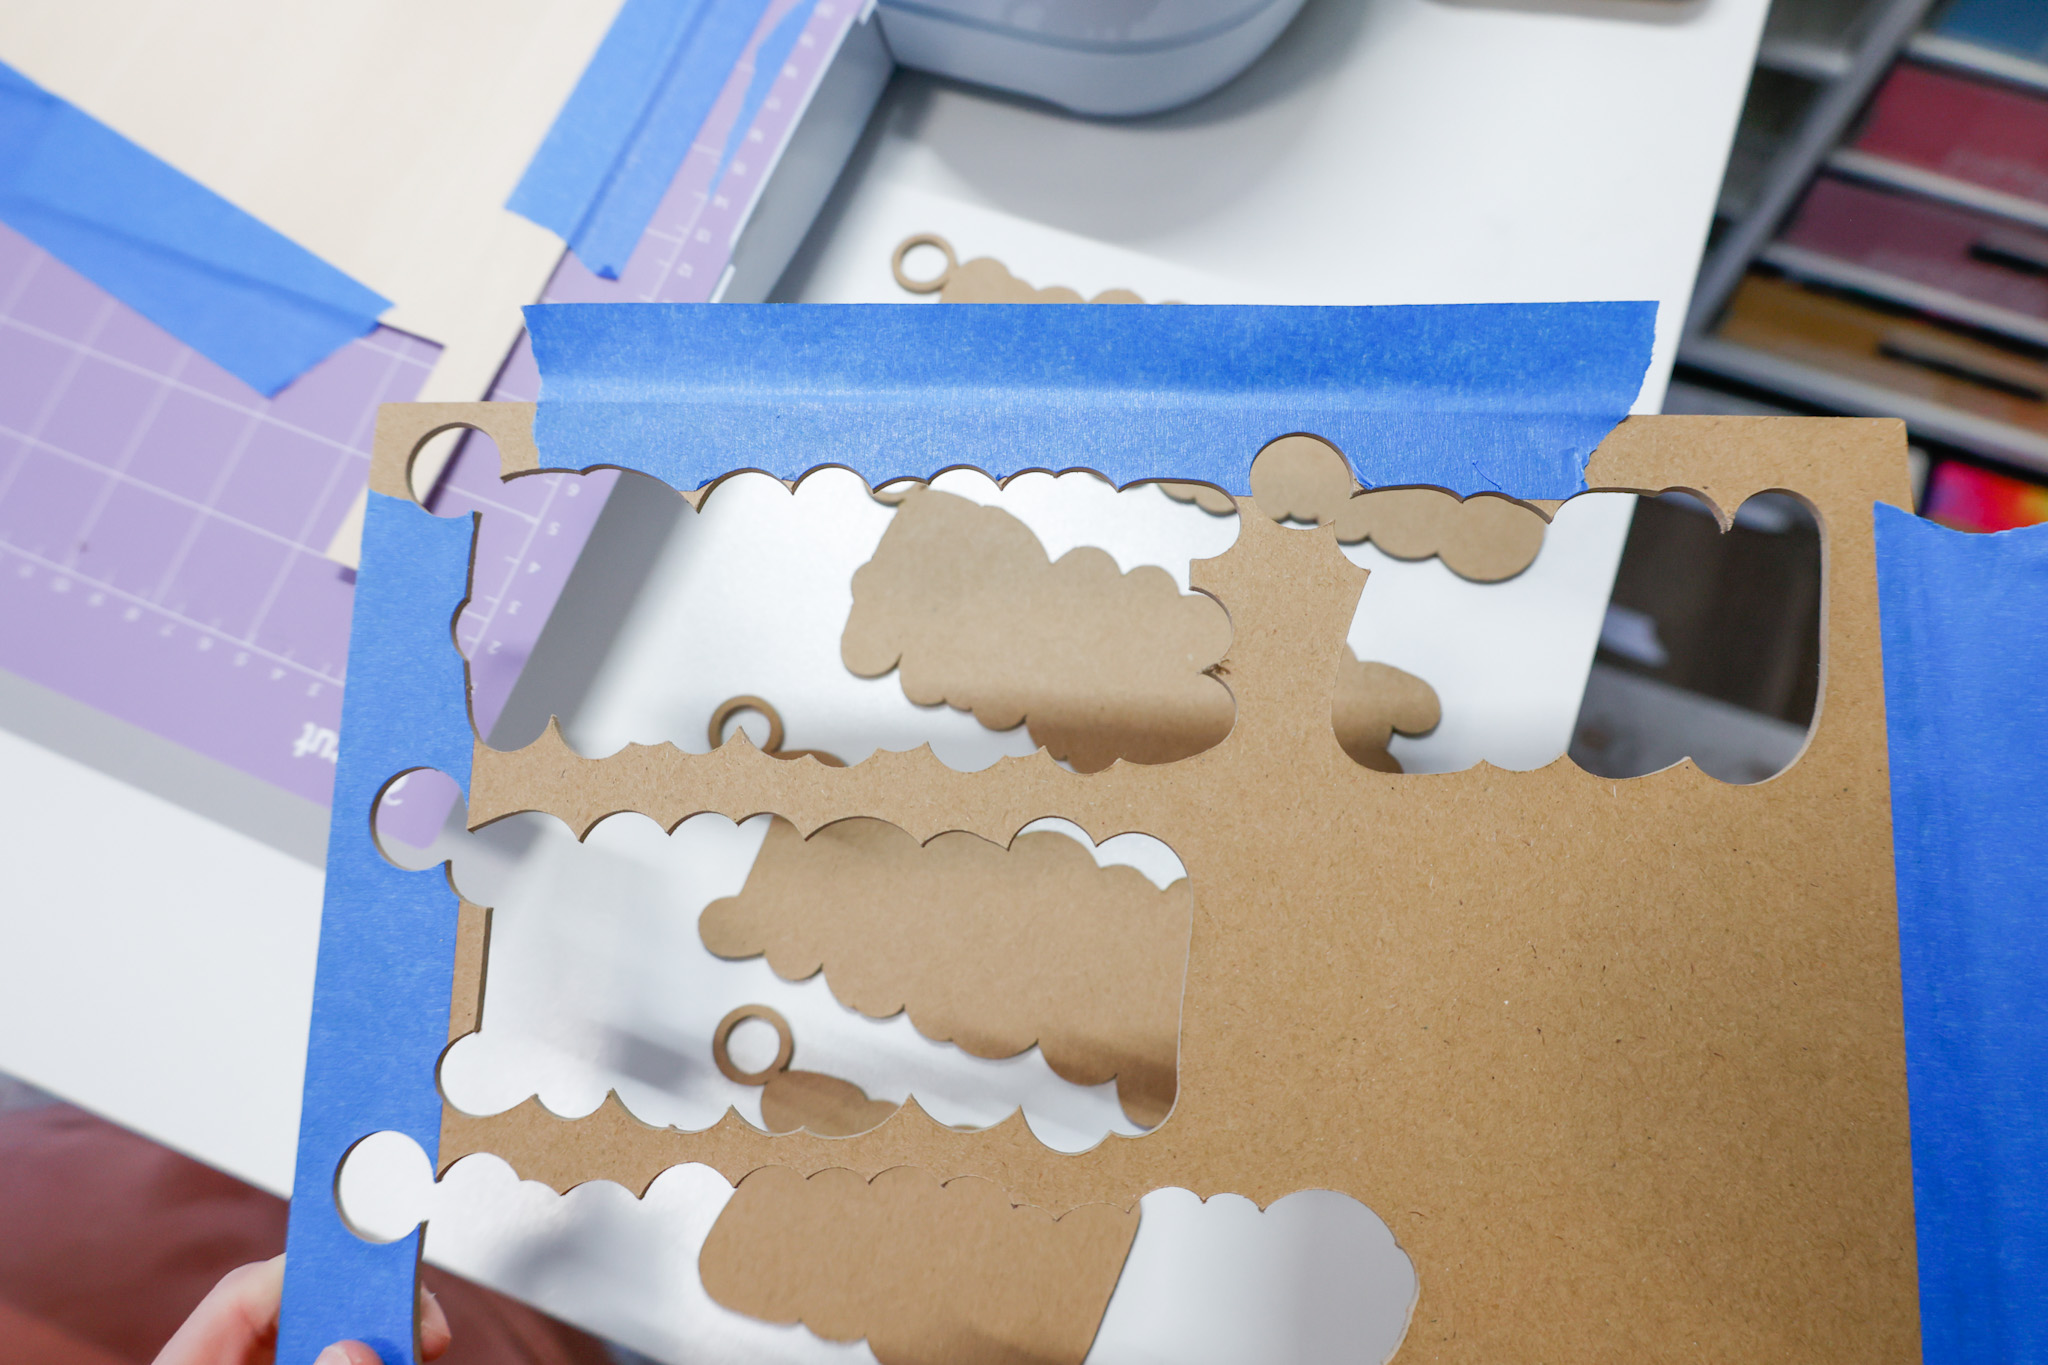
Here’s what they’ll look like when they’re cut…
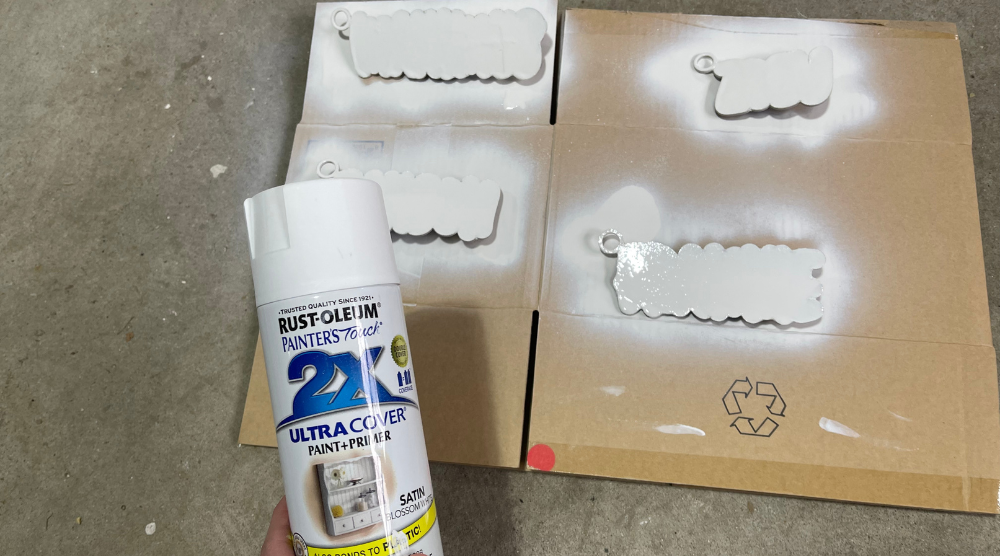
Painting Your Stocking Tags
To paint my DIY stocking tags, I balled up some tape on the backside (this helped lift them up), and stuck the tape to a piece of old cardboard.
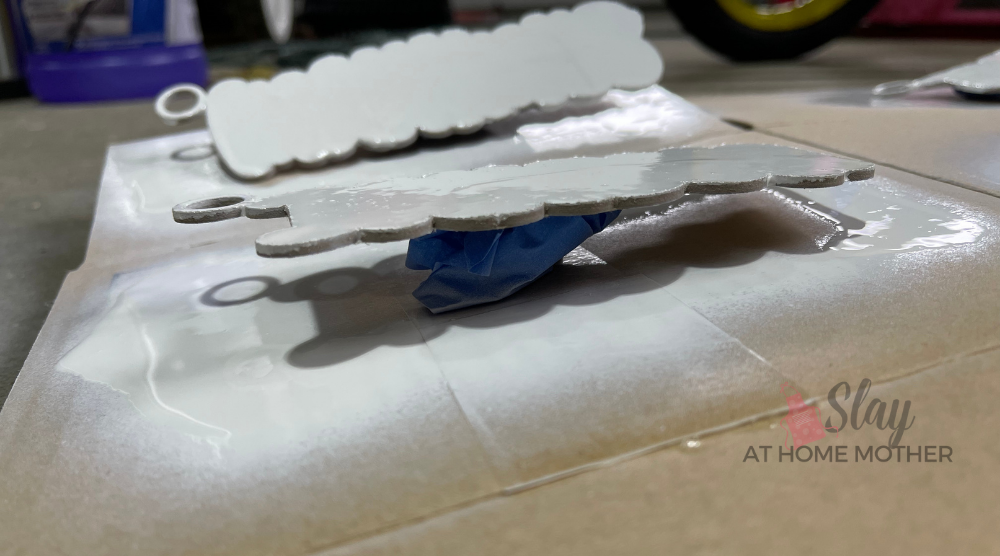
I sprayed them with two coats of spray paint, allowing them to dry between coats.
I also used this spray paint for a Merry Christmas front door sign!
While the chipboard pieces were drying, I cut the permanent vinyl.
I weeded the negative space from the letters and used transfer tape to transfer the vinyl letters to each chipboard stocking tag.
Finished Stocking Name Tags
Here is what our finished stocking name tags look like…

I used some festive striped twine I had on hand to tie these stocking tags to each stocking.


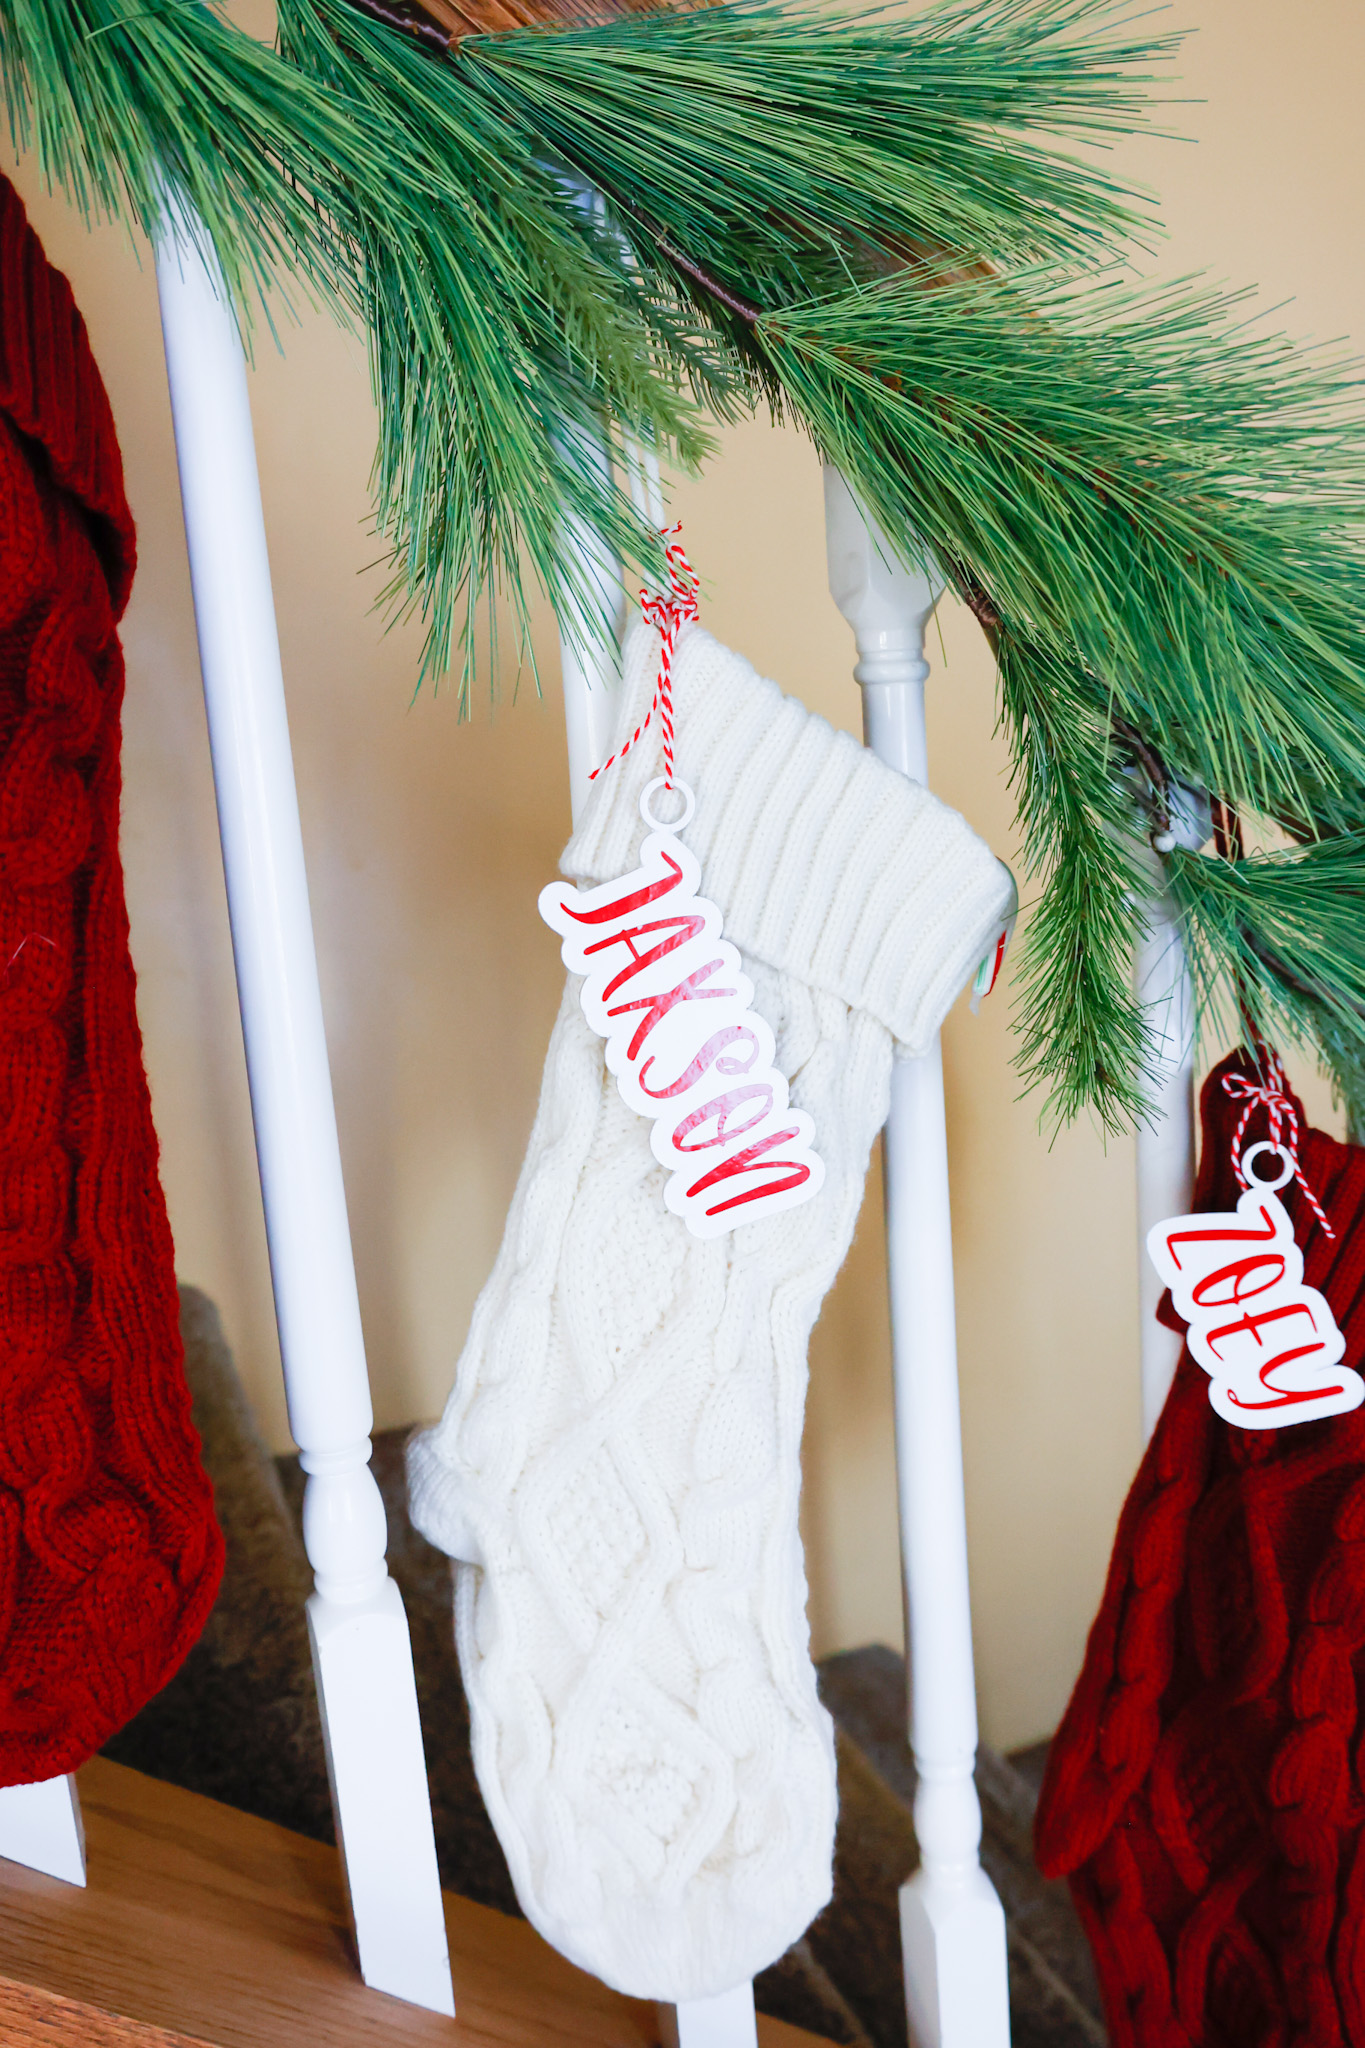
I love how they turned out!

Have you tried making your own DIY stocking tags with your Cricut machine before?
*Post originally published December 2021, last updated August 2025.

Leave a Reply