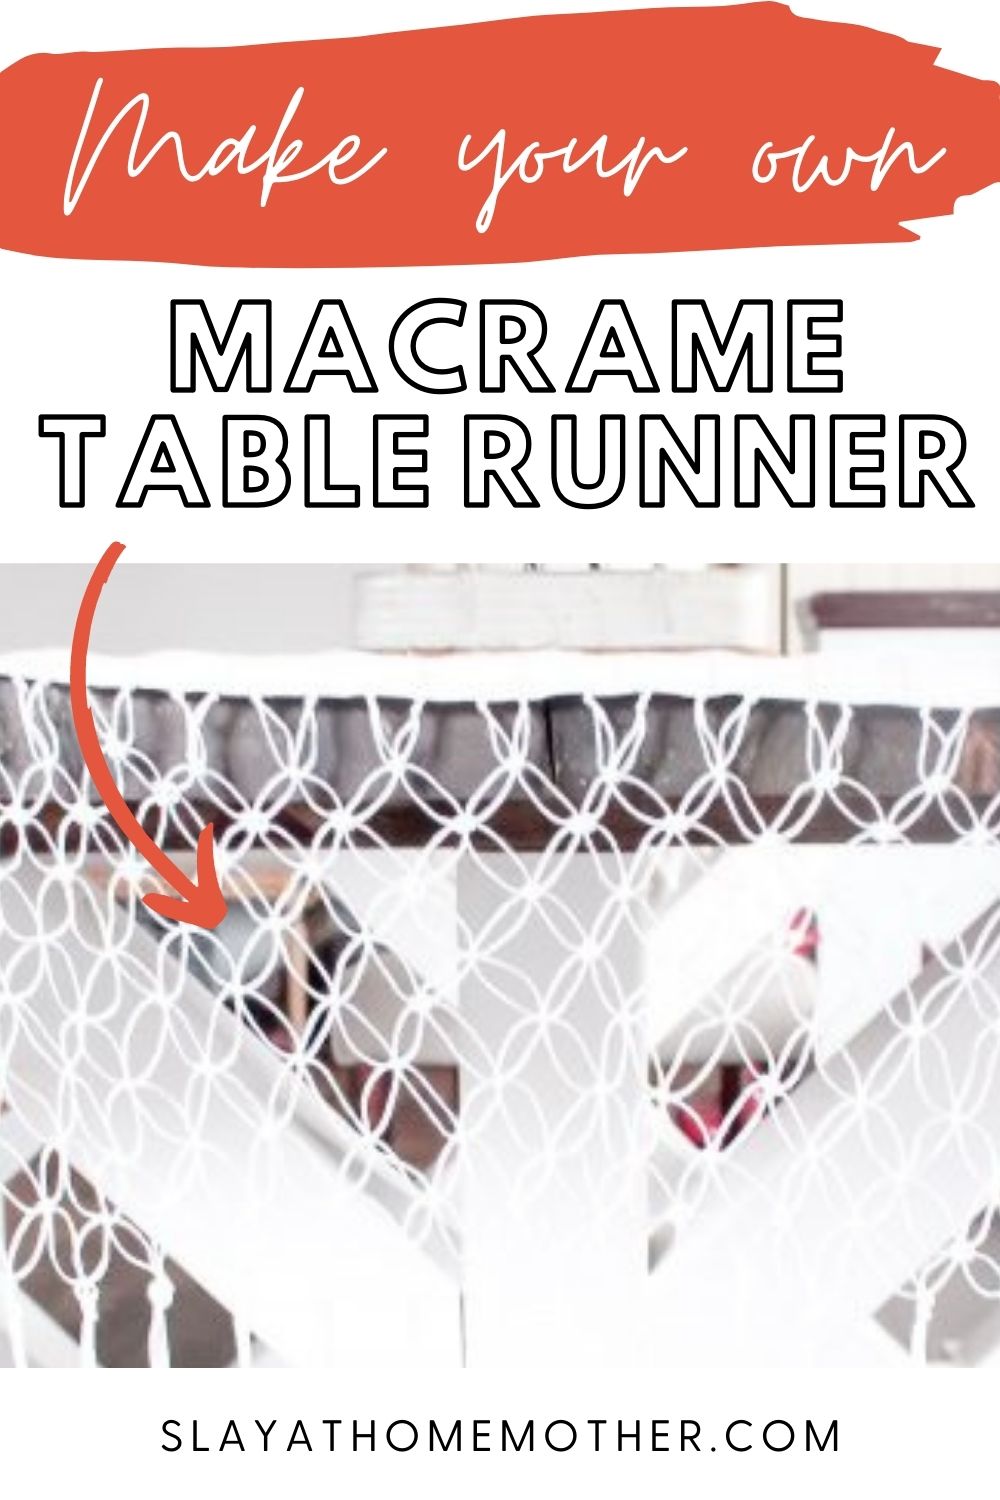
Learn to make your own DIY Macramé Table Runner with this easy tutorial. Whether you’re new to macramé or a seasoned crafting pro you’ll love this bohemian table runner project. It’s both casual and dresses up your space at the same time. Learn how to macramé your own table runner easily!
Hi friends! I’m got another exciting DIY for you guys – and this one includes some easy macramé! I’m going to teach you how to make a table runner that is unique and complements any home décor.
What is Macramé?
Macramé is a form of textile-making using knotting rather than weaving or knitting. The knots are usually made with cotton cord, but you can use other materials like wool or jute.
It gained popularity in the 1970s as part of the bohemian and hippie aesthetic, but has been around for centuries.
Macramé is the art of knotting cord or string in patterns to make decorative articles (thank you Dictionary.com).
You’ve probably seen a ton of different macrame projects online already, and want to try making your own!
As an avid crocheter and knitter, I am a fan of knots and creating things with my hands.
So I thought I’d dip my toes into the macrame pool and see just how ‘easy’ it is. There seem to be enough helpful YouTube videos, tutorials, and inspirational Pinterest pins to motivate anyone to try this craft.
And by teaching yourself some of the basic macrame knots (which are way easier than they look), you can get to creating something truly spectacular for your home without having to pay hundreds of dollars online!
I have to say that I am so thankful that I tried it. It’s easily one of my favorite things to do now – and isn’t so hard on my wrists like crochet can be.
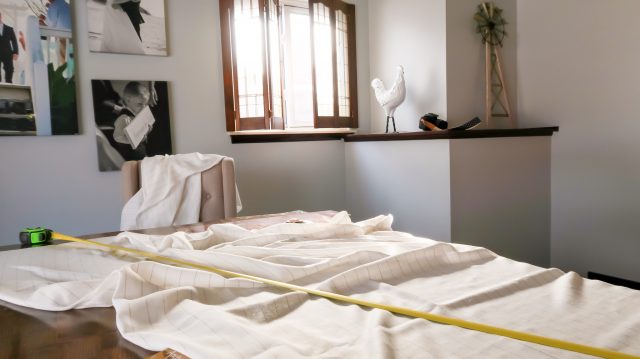
To fill you in on my DIY for today’s post, I have to backtrack a little and tell you that I’ve been itching to make myself a table runner for quite some time.
We’ve had our custom-made farmhouse table for a good 6 months now, and it is exactly 6 feet long.
Most of the cute table runners I’ve found on Etsy or in the store aren’t long enough to hang over the sides like I’d like or come in a print I like – so I’m forced to make my own.
Which isn’t so bad…
I also love to sew – and this was the perfect excuse to break out my sewing machine again.
Now that I’ve turned the nursery back into an office for a bit while we wait for a BFP this year, I finally have the counter space that I need to fit my sewing machine and get some crafting done.
I couldn’t have timed this project more perfectly, either, because we ended up experiencing quite a whiteout here in Michigan with flurries, snow, and canceled school/preschool this past week, giving me plenty of time to craft!
I’m not even kidding you about the weather, today was a high of -2 degrees – brrrrrrrr!
So, long story short, I decided to combine my latest DIY with a little fringe work with macrame! Here’s the final result…
This table runner was SO EASY to make. The process of tying the knots is actually pretty therapeutic (at least for me it was).
Trust me when I say that you can do this – even if you’ve never done macramé before!
If you can tie a basic knot, then you can make this runner.
And if you’re more drawn to other macramé knots for your own table runner, there are hundreds of free macramé patterns online.
*This post contains affiliate links for your convenience at no cost to you, and all opinions here are my own.
Supplies Needed For This DIY Macrame Table Runner
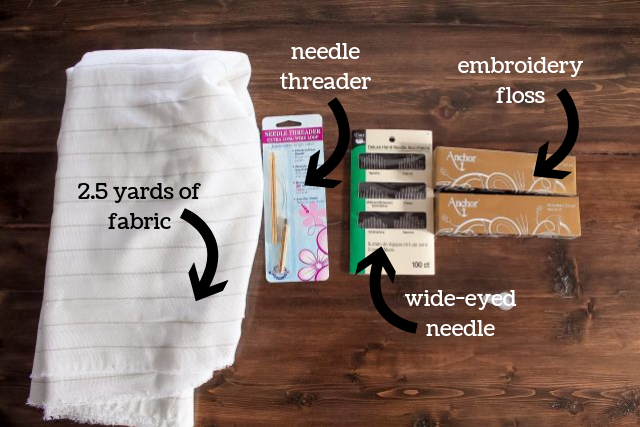
For this table runner, I used:
- linen fabric (or fabric of your choice)
- wide-eyed needle
- needle threader
- embroidery floss in white
- iron
- white thread
- rotary cutter (you can also use fabric scissors)
- cutting mat
- tape measure
When choosing thread, don’t shy away from complementary colors like brown, gray, black, blue, etc.
Your thread color doesn’t have to blend in with the color of your fabric, it can stand out!
Also, you don’t necessarily need a cutting mat unless you are using a rotary cutter (which is much like a pizza cutter, only for fabric ;)), but I didn’t want to leave that off the supply list in case one of my impatient readers skims the list doesn’t read the rest of my post ;).
For this table runner, I bought 3 yards of fabric, but I could have easily gotten away with just 2.5 yards.
Determining Your Table Runner’s Size
The size of your table runner will depend on the size of your table.
Typically, the width of your table runner will be 1/3 of the total width of your table or about 13-14 inches wide, while the length will be 12-24 inches more than the length of your table (for overhang).
For this particular table runner design, I will be using the macrame design as the overhang.
See below for more information on measuring guidelines you need to know before making your first cut…
Measuring Guidelines To Know Before Cutting The Fabric
Now for just a tiny bit of math!
If you aren’t a wiz at math like Yours Truly, don’t fret – all of these measurements can be done with the calculator app on your phone in 3 seconds.
To figure out the right measurements for your table runner, you’ll first need to measure your table.
You need to get a good idea of how wide and long your table is before creating something you’ll be staring at every single day for the next couple of years ;).
Once you’ve measured your table, you can determine how wide you’d like your runner and how much overhang (if any) you’d like.
Again, for this Macrame Table Runner, the macrame design is the overhang, not the fabric.
Although, if you want, a little fabric overhang wouldn’t hurt anybody!
Once you’ve determined your table runner size, add 4 inches to the width and length measurements. If you’d like overhang, add however many inches you’d like to hang over, accounting for both sides.
Ex. Table length: 72 inches + 4 inches for edges + 24 inches (for a 12 inch overhang on both sides of runner) = 100 inches length.
Desired width: 16 inches + 4 inches = 20 inches width.
The 4 inches will allow for pressing and sewing the folded edges you’ll need to complete on each side.
**For my table runner, I only added 4 inches to my 72-inch table measurement because I wanted the macrame to be the overhang, not the fabric.
Cutting Your Fabric For Your Table Runner
Now that you’ve determined what table runner size you’d like to craft, you can mark the measurement with a pen, pencil, or one of those crafty fabric pens that have disappearing ink.
For this design, I cut my table runner at 20″ wide, and 76″ long.
Again, I only accounted for the recommended 4 inches extra material in my measurements (2 inches for each side) because the embroidery floss macrame design will serve as the overhang on either side of my table runner instead of fabric.
Sewing Your Table Runner
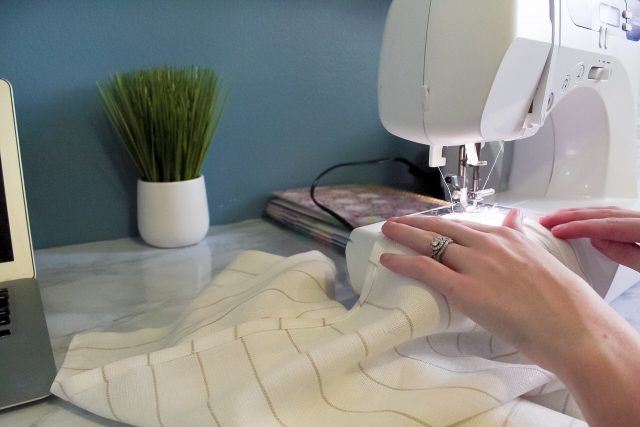
Once your fabric is cut to your preferred measurements, heat up your iron on the correct setting and start with one side of your fabric rectangle.
Fold the edges over in sections 1/2 inch and press with an iron.
Continue pressing each side until all four sides are pressed.
Fold the edges over another 1/2 inch, pressing with an iron.
**I CAN NOT STRESS ENOUGH THE IMPORTANCE OF PRESSING BEFORE SEWING.
I can count on two hands every single project I have attempted to just pin, sew, and pray that failed miserably. Almost every single one looked terrible once I pulled it away from the sewing machine.
I finally learned my lesson – it just isn’t the step to skip, even for the lazy crafters.
Pressing the folded edges ensures your fabric stays put, looks clean, and takes a whole 2 minutes to do.
So please don’t skip this step!
If you do not have a sewing machine and wish to complete this table runner in a no-sew method, use hem tape at this stage under the folded edge – press firmly to make it stick.
If you are using a sewing machine, sew the double-folded edges using a zigzag stitch. Cut all loose threads away.
Easy Macrame Square Knots For Your Table Runner
Most macrame you’ll find is created using macrame rope, hemp cord, or even clothesline.
But for this particular project, those mediums wouldn’t work – so I decided to implement embroidery floss!
It’s thicker than thread, but way thinner than macrame rope, and adds the perfect delicate touch to this table runner!
For my easy macrame design, I cut and used 72 pieces of embroidery floss (each cut to 6′ in length – although I could’ve gotten away with cutting each piece at 4′), 36 pieces of floss for each edge, measuring the floss to be about 1/4″-1/2″ apart.
I mostly eyeballed this measurement, but that’s a great approximation.
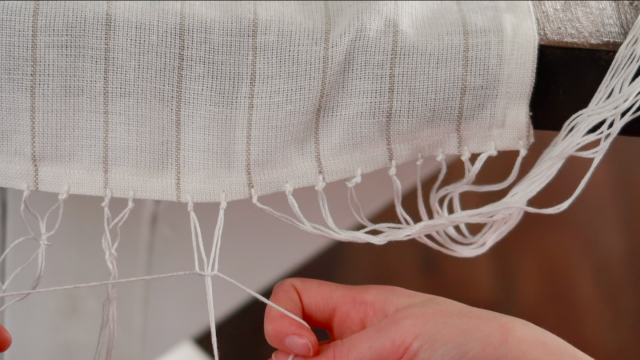
Using a wide-eyed needle and needle threader, thread one piece of white embroidery floss into the edge of the table runner.
Repeat this step for each planned piece of embroidery floss, spacing them out 1/4 inch – 1/2 inch apart.
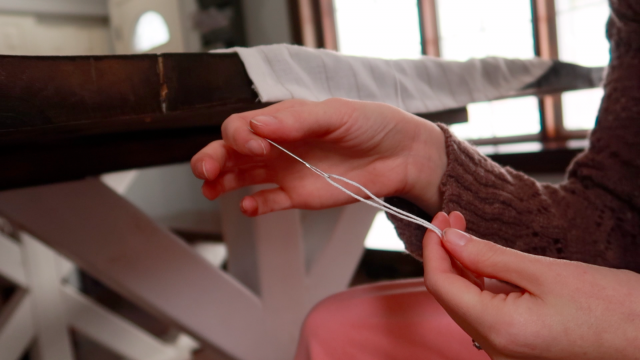
Tie a knot at the base of each piece of embroidery floss.
For this design, I used one of the most basic of macrame knots: the square macrame knot.
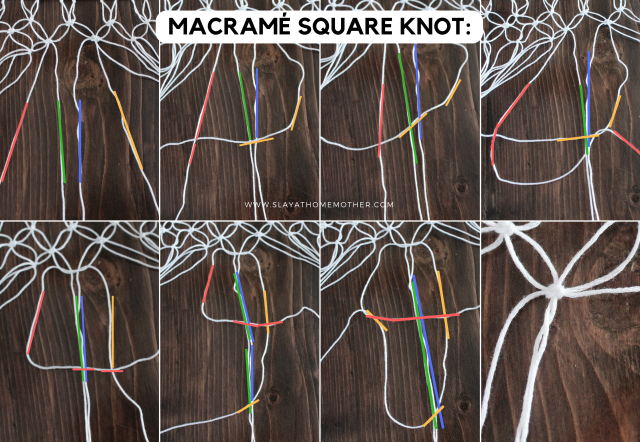
I’ve included some easy-to-follow instructions for you to use for your own boho table runner if you’re new to macrame below:
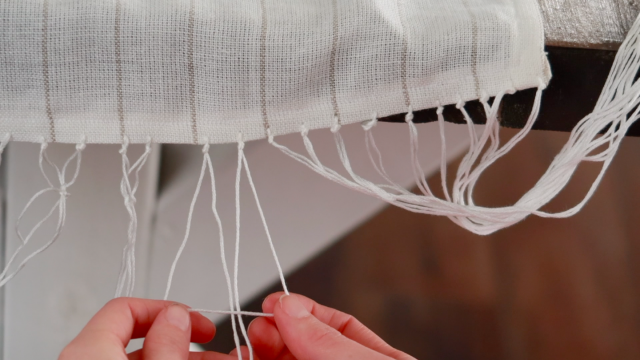
Using four strands (made up of two pieces of embroidery floss, separate thread furthest to the left and the right from the middle two strands.
The threads make an ‘M’ shape.

With the strand furthest to the right, create a loop with the thread and pinch your thumb against the middle two strands.
The strand on the right should sit on top of the two middle strands.
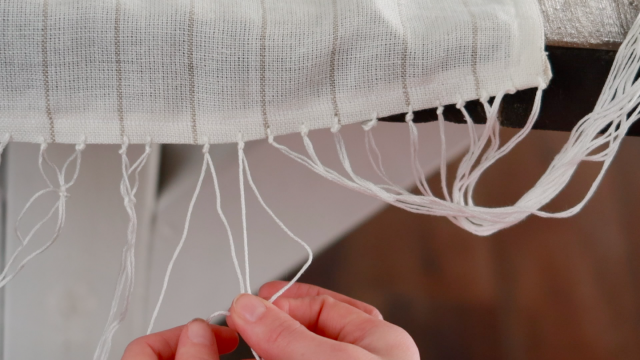
Take the left strand, go in front of the right strand, go underneath the two middle strands, and pull the thread through the loop in the right thread’s loop space.
Pull on all four strands to move up the thread and tighten.
For this design, don’t pull up all the way, leave some space between the first knot and the edge of the fabric! I left about 1 inch between the square knot and the edge of my fabric table runner.
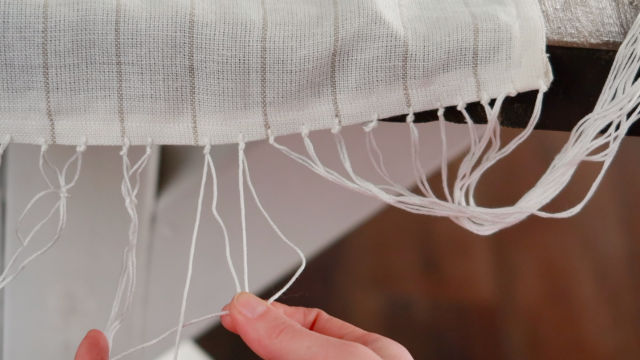
Repeat same steps but in reverse (using left thread to create a loop in front of the two middle strands, taking the right strand in front of the left strand’s tail, going underneath the two middle strands, and pulling the right thread through left strands loop).
Once the second knot is made, pull all four strands again. The square knot is now complete.
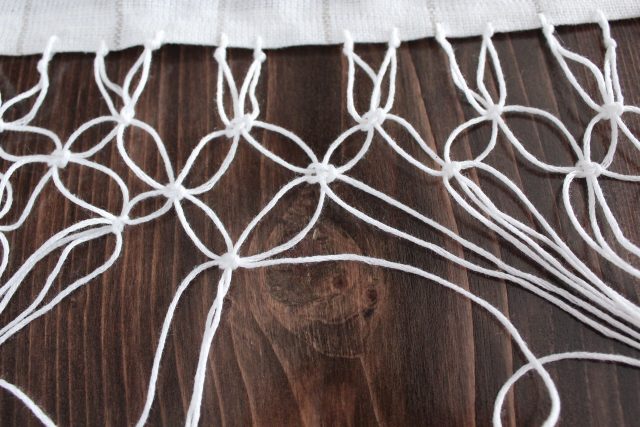
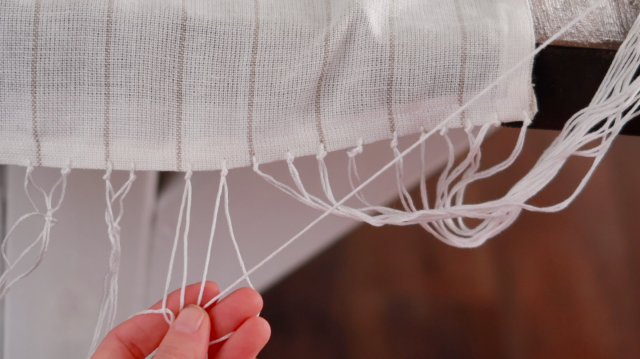
For the second row, use right two strands and left two strands of two knots. Repeat steps above across.
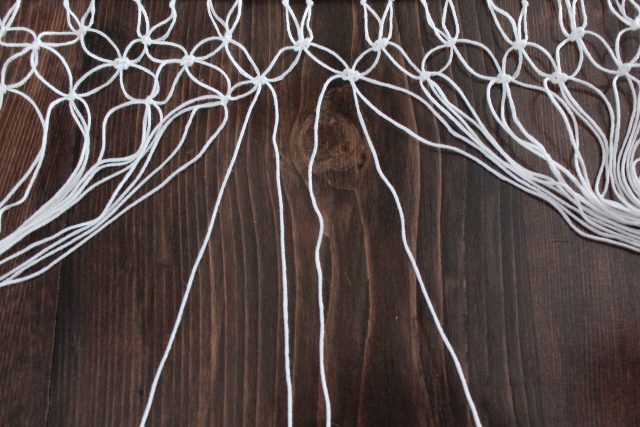
Once you are done with your desired rows, finish off each square knot with a knot to secure design.
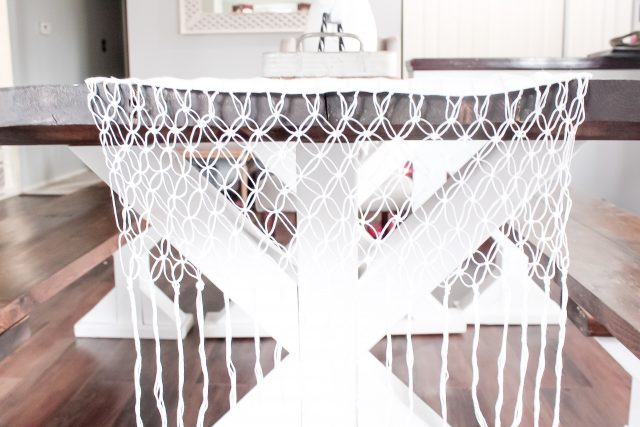
Cut fringe to the desired length – admire.
For my table runner, I completed 9 total rows, and cut my fringe to be about 8″ long.
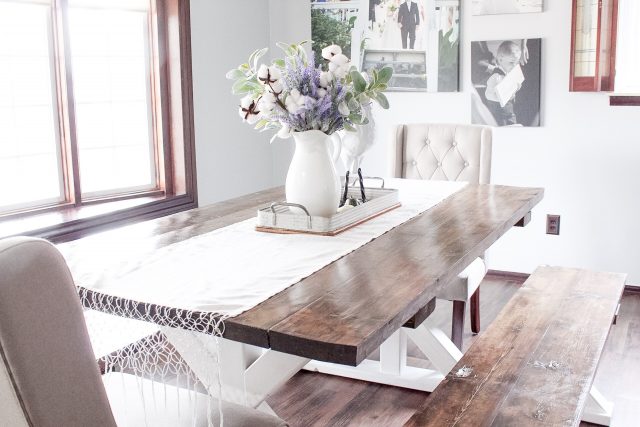
My Final Table Runner Measurements And Tablescape
My finished table runner ended up being 18.5 inches wide,72 inches long, with a macrame hanging edge of 13 inches (6 inches of that being fringe).
Macrame Table Runner Care Instructions
For this table runner, should you be using embroidery floss as I did in this tutorial, I would highly recommend hand washing only and laying the table runner flat to dry.
If you wash it in the washer the delicate threads could tangle and fray, so it’s best to avoid that if you can.
I laid my table runner flat on a dry towel, rolled it up like a sleeping bag, and squeezed out as much water as possible.
Then I unrolled it, smoothed it out, and hung it over the back of a chair to dry completely.
More Popular Macramé Projects
If you’re interested in more DIY macramé projects, I don’t blame you! It’s a soothing, easy, and FUN craft to make.
Here are some of most popular macramé ideas to try:
- Macramé plant hanger
- DIY jute macrame wall hanging
- Boho chic DIY tassel macrame garland
- A macramé dreamcatcher
- Macramé coasters
- Macramé bracelets
I hope you enjoyed my tutorial! I tried to be thorough and include plenty of photos to help you master this easy DIY macramé table runner. I hope you found it helpful in some way, and perhaps you feel ready to tackle an easy DIY for spring!
Let me know in the comments below if you’d like to see a FULL macramé table runner made with macramé rope…

I’m not sure if I’m talented enough for that but it looks really cool!
This is so pretty and looks simple to make. I think it is even better because it is so versatile and fitted for so many occasions.
This is so timely! I feel like I have the longest table known to man, so even the longest tablerunners don’t cover it like they should. Now I can do this, instead!
I have been loving macramé lately and this table runner is so cute! I might have to try this for my first macramé project!
Wow I have to say this is really beautiful, but unfortunately this is something I won’t ever able to do 🙂
I love how delicate and feminine this looks! I would love to make this for our dining table!