A step-by-step tutorial of how to make a customized mug with the new Cricut Mug Press…
It’s here, Cricut’s newest machine!!!
When Cricut reached out to let me know about their newest machine, the Cricut Mug Press, I was thrilled!
Their cutting machines are superb, so I was excited to be able to test out this machine as well.
Basically, the Mug Press from Cricut is for customizing mugs.
I don’t know about you, but I have tried to make mugs before with permanent vinyl.
You design, cut, weed, and apply a beautiful design to a coffee mug.
Once the vinyl is on the mug, it looks nice, but it isn’t waterproof.
This means it’s only a matter of time before that design starts curling up and away from the mug’s surface.
Bummer, right?
Well, not anymore!
In this post, I’ll be sharing the new Cricut Mug Press with you and what it can do.
This post has a step-by-step video, screenshots, and detailed instructions to help you make your own dishwasher-safe and microwave-proof mugs at home with the Cricut Mug Press.
Oh, and tons of pictures.
*This post contains affiliate links and is in partnership with Cricut, however, all opinions are my own, as always.
Be sure to watch the video pop-up in this post to see the easy set-up of the Cricut Mug Press!
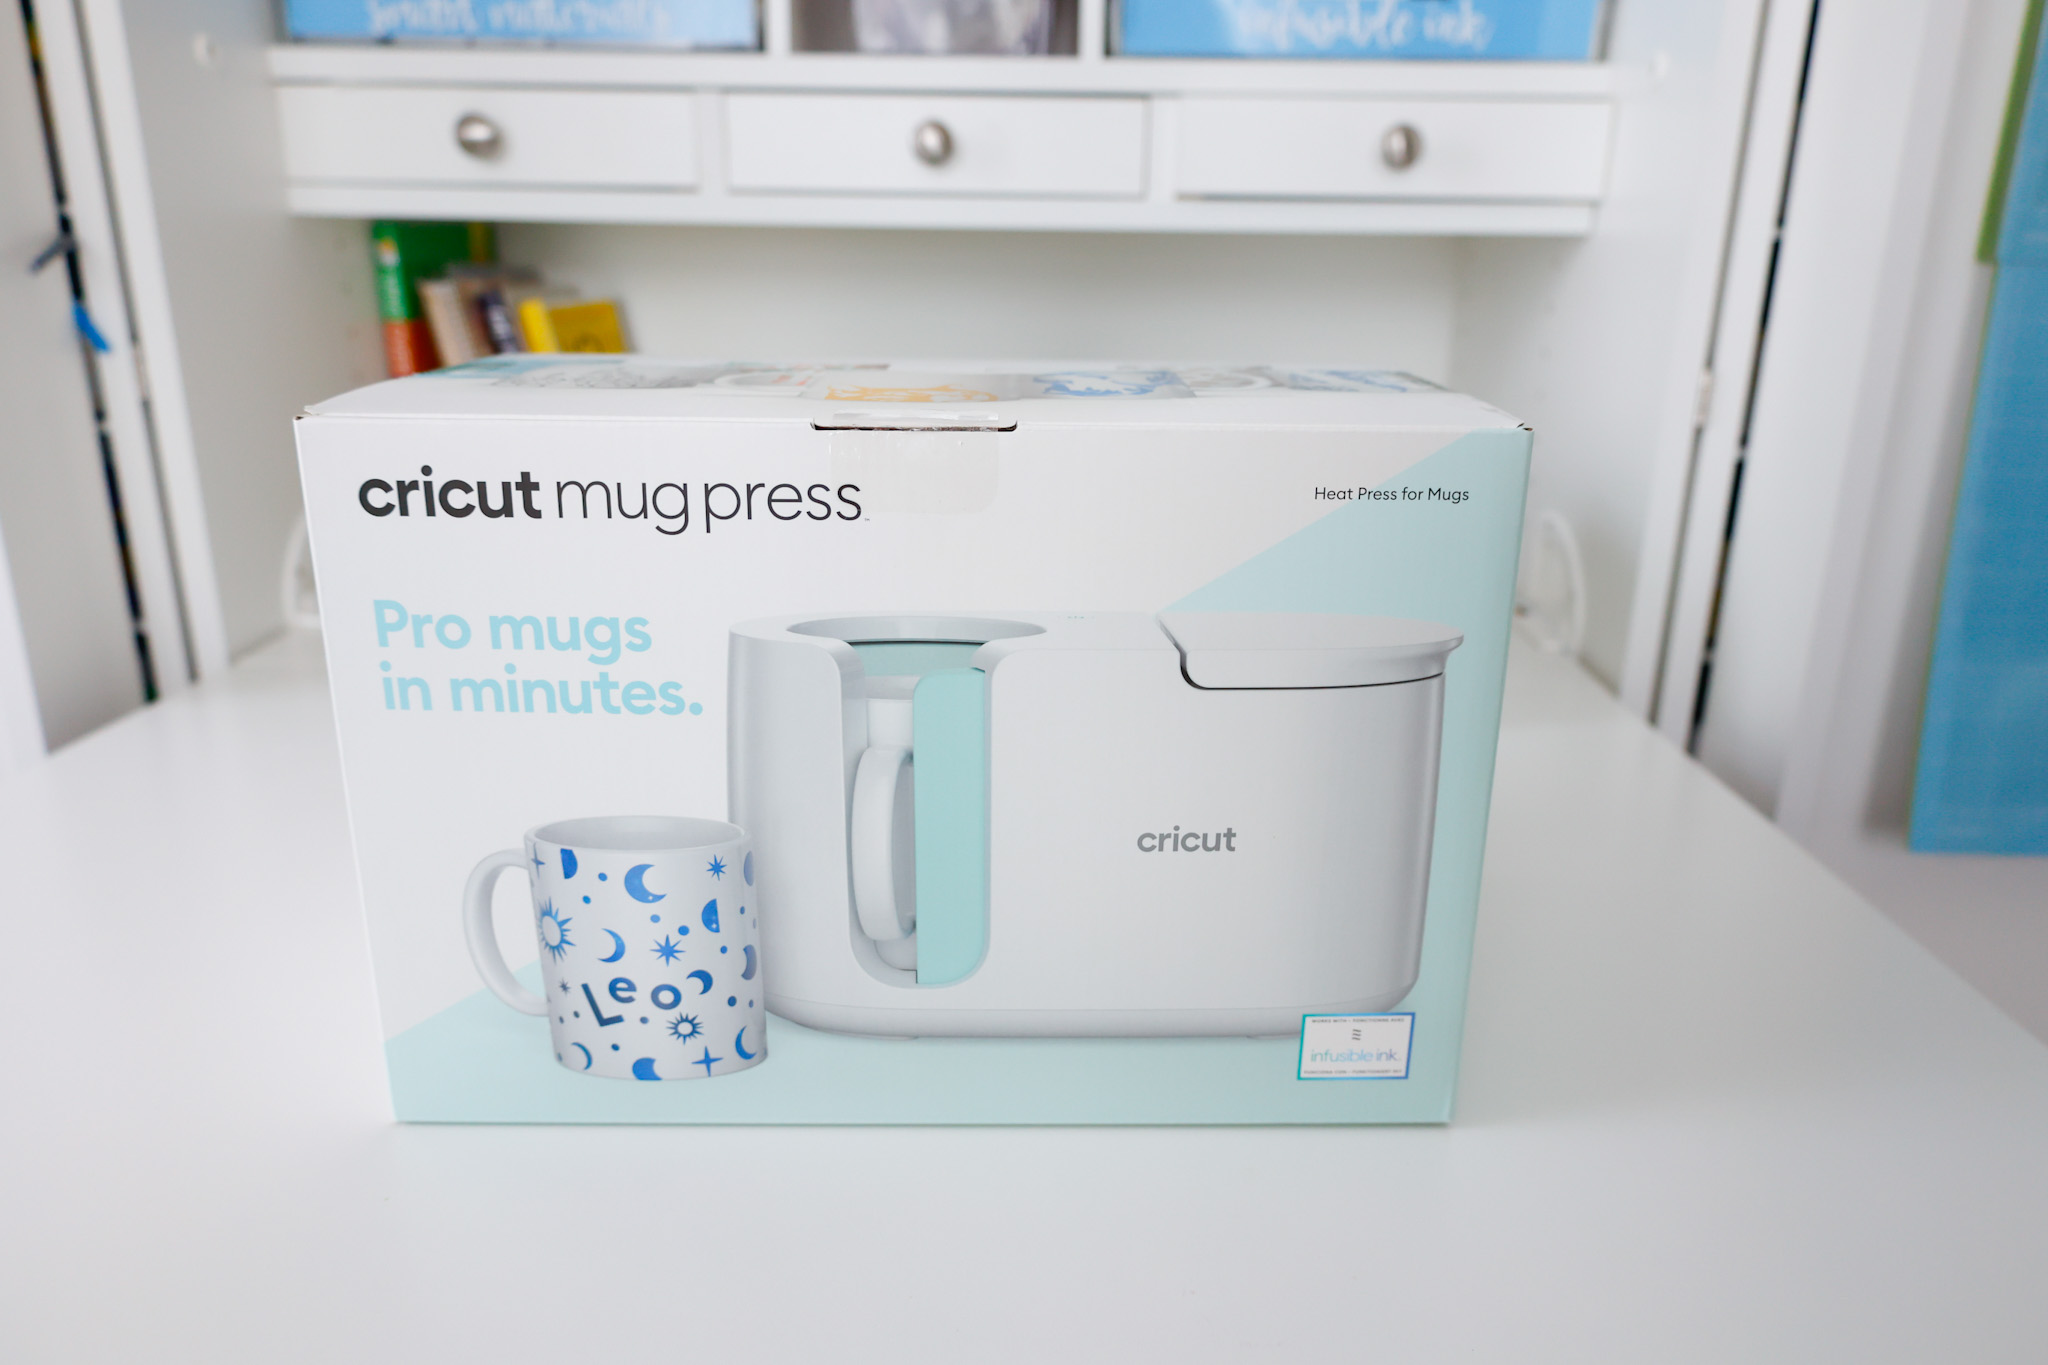
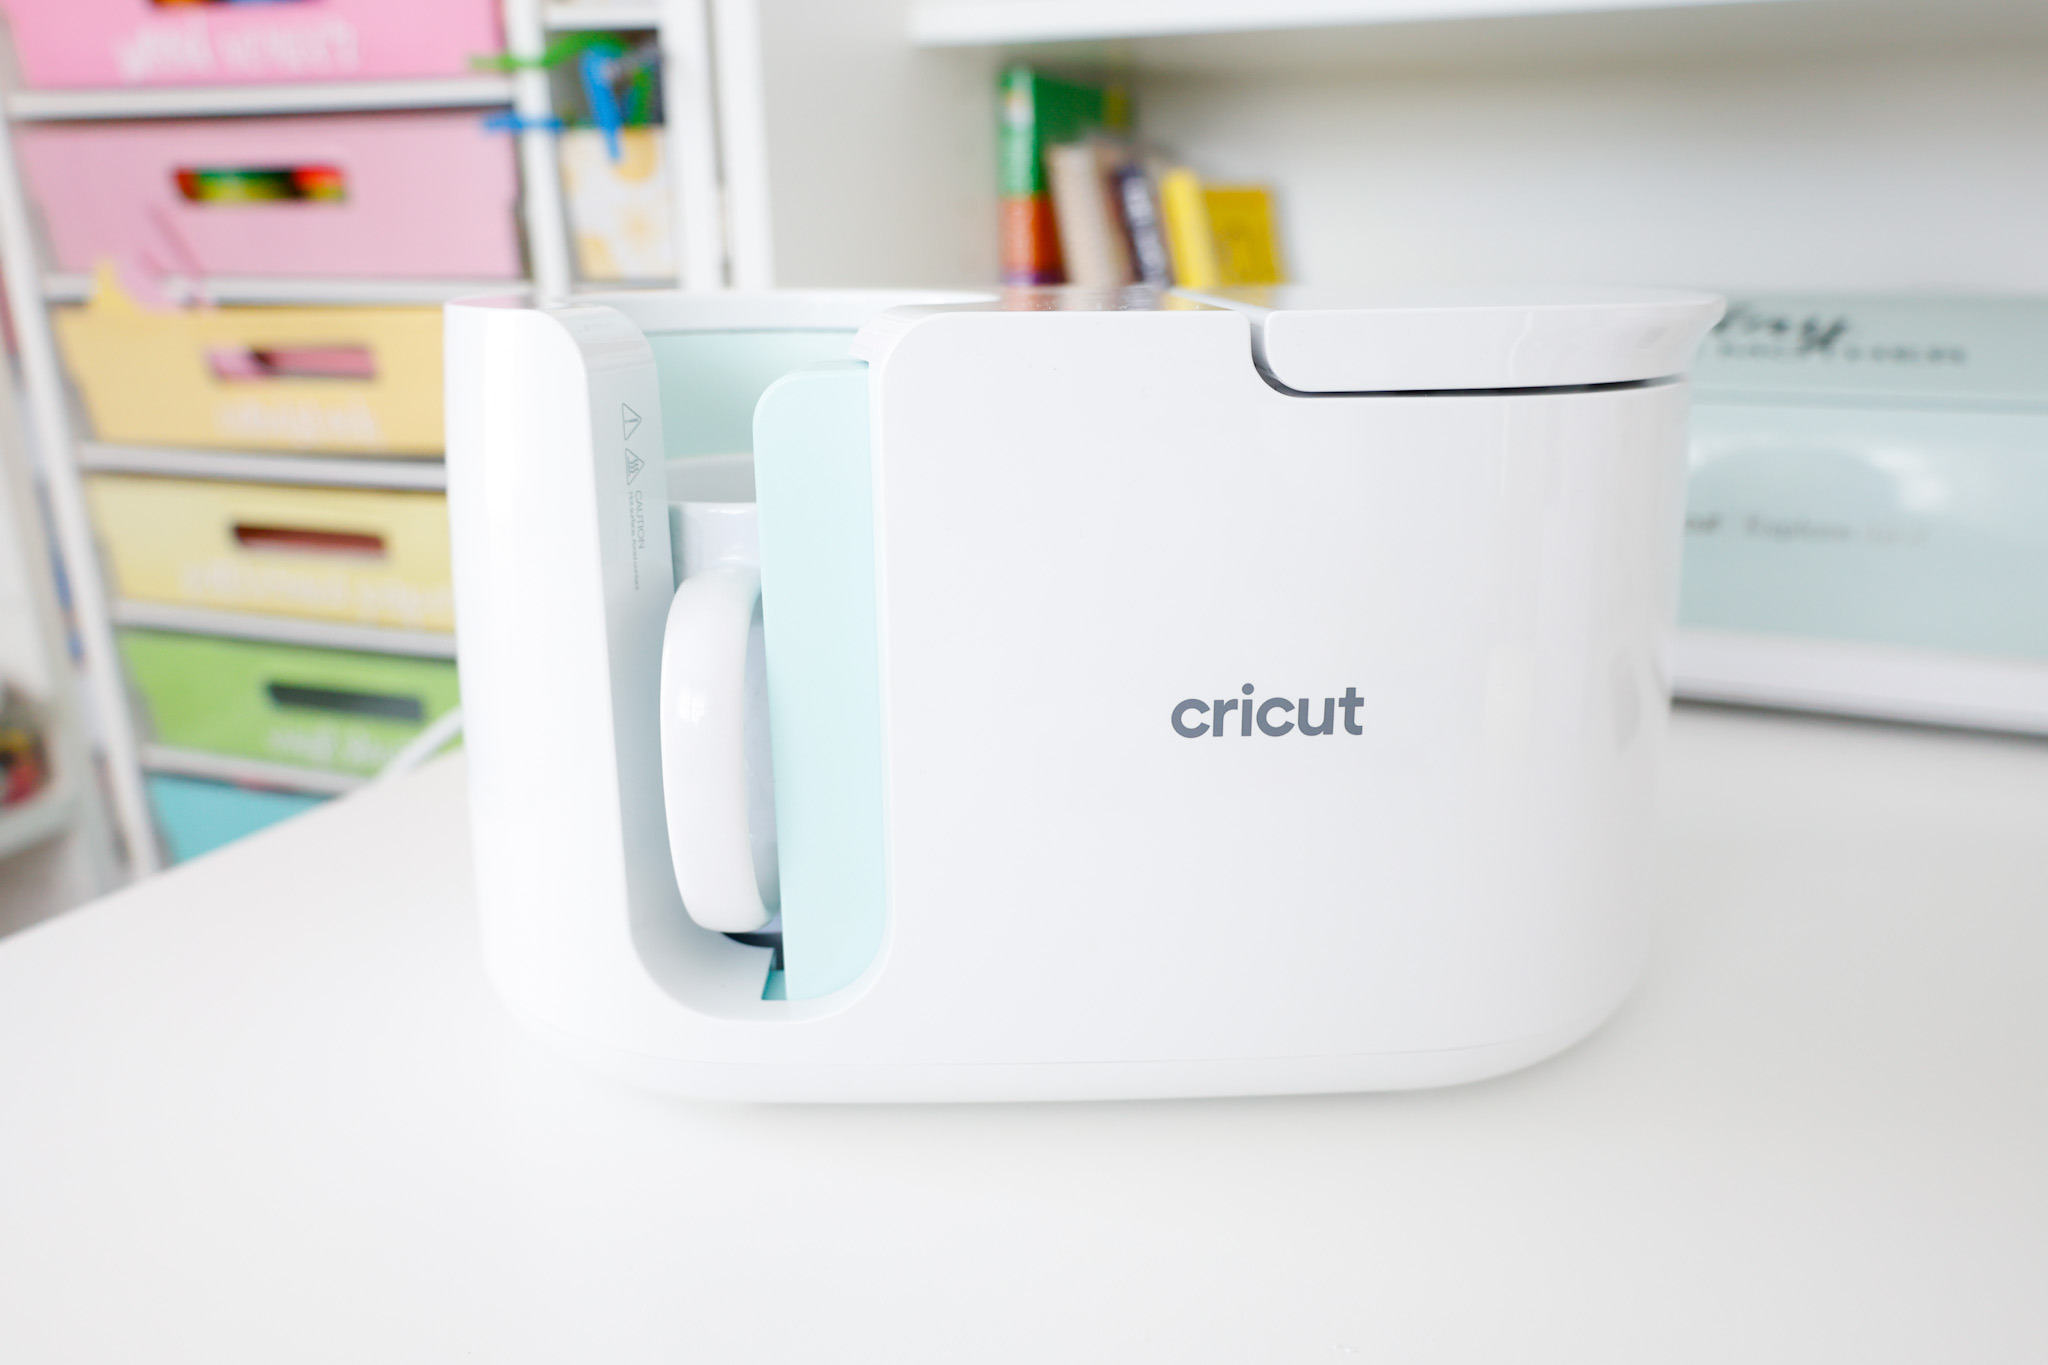
Cricut Mug Press Features – What Makes It So Awesome
Ready for mugs you can put in the dishwasher and microwave without worrying about ruining your beautiful design?
The Cricut Mug Press does just that!
Using heat and infusible ink transfer sheets, the Cricut Mug Press permanently transfers your design to your mug (just like other infusible ink blanks) so that it is completely waterproof.
Your design permanently lives on your mugs, and will never come off!
Gone are the days of vinyl peeling up from coffee mugs after accidentally being placed in the dishwasher, or handwashing all of your favorite mugs because the vinyl isn’t waterproof.
Finished mugs are…
- vibrant
- heatproof
- waterproof
- permanently marked with your design
The Cricut Mug Press has some incredible built-in features as well, like…
- auto-off feature (if it hasn’t been used in a bit, it will power off as a safety measure)
- just-right temperature control (you don’t have to set the temperature for your project, which is different than the EasyPress line)
- no pressure settings needed
- wide size range (use Infusible Ink compatible mugs ranging from sizes 11 oz. – 16 oz.)
- boasts a safety-conscious design
Also, to make your mug projects easier, Cricut has designed some Infusible Ink transfer sheets that have been perfectly sized for mug projects.
These transfer sheets are 12″ wide x 4.5″ high.
You can also cut infusible ink sheets you have on hand to use for mug projects.
What Cutting Machines Are Compatible With The Mug Press?
Mug Press projects (designing and cutting) are compatible with all current Cricut machines, including the Cricut Joy, the Explore Air 2, and Maker.
Do I Need To Use The Heat Guide To Use The Mug Press?
Because there are no temperature or pressure controls you need to make, you don’t need to worry about those aspects.
However, you may find Cricut’s Heat Guide useful for your Mug Press project if you are using Infusible Ink Pens and copy paper to know how to secure and cover the design for a streamlined transfer.
How To Activate The Cricut Mug Press
Make sure you use and operate this machine in a well-ventilated area.
In the product box, underneath the Mug Press machine, will be a power cord and a cable.
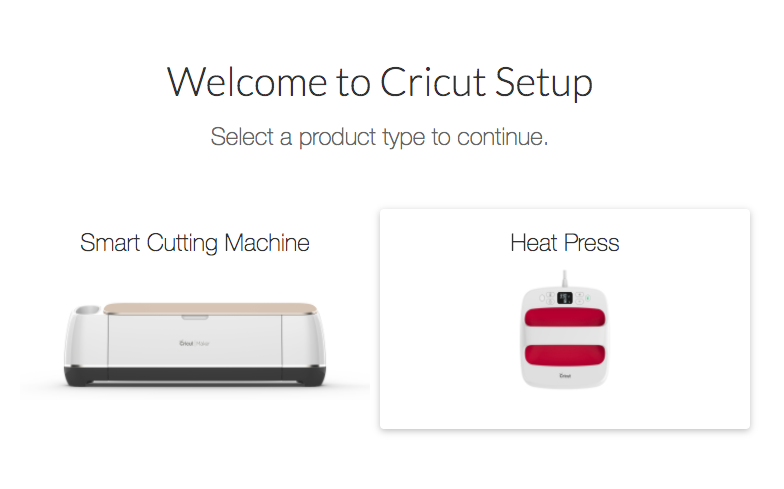
On your laptop or desktop computer, open Design Space and open the menu at the top left of the screen (represented by 3 horizontal lines).
Scroll down to New Machine Setup.
See screenshot below with text highlighted in green…
On the next screen, you’ll see two options to choose between Smart Cutting Machine or Heat Press.
Select Heat Press.
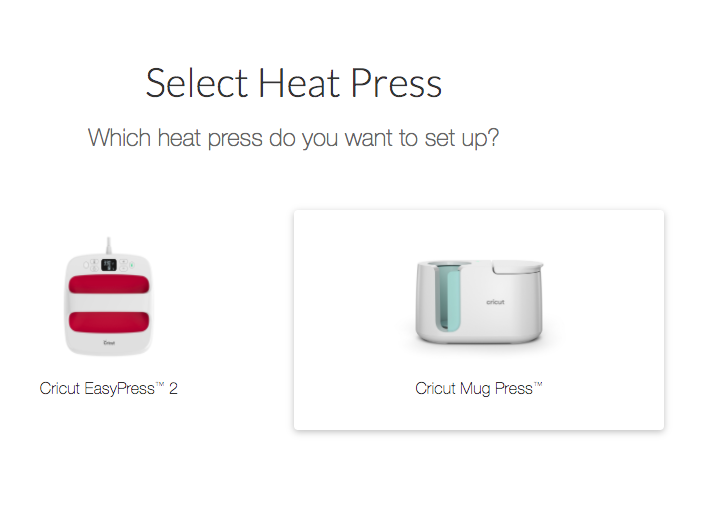
On the next screen, you’ll see the image for the Cricut Mug Press. Click on that.
From there, the screen will give you step-by-step directions to activate your machine.
You’ll be asked to connect the cable (included in the box) to both your new Cricut Mug Press and your computer.
Once your machine has been activated, you are free to use it!
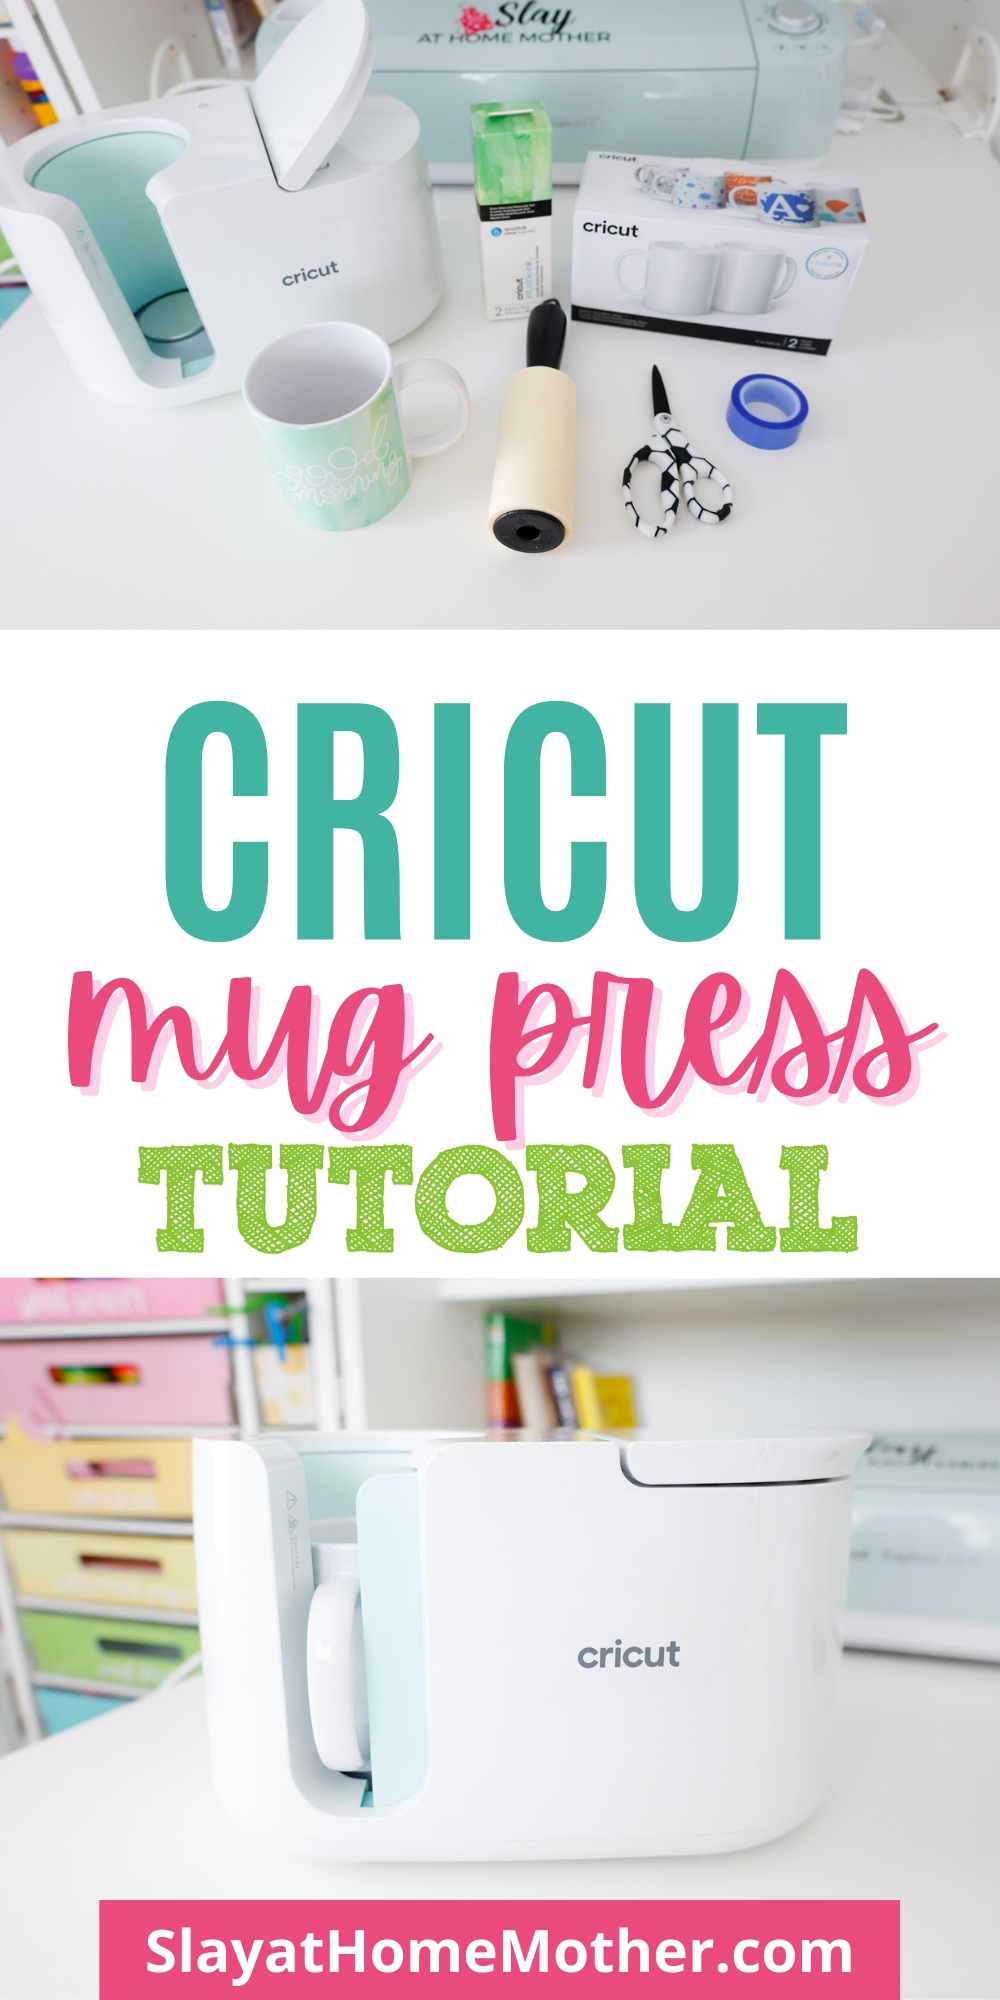
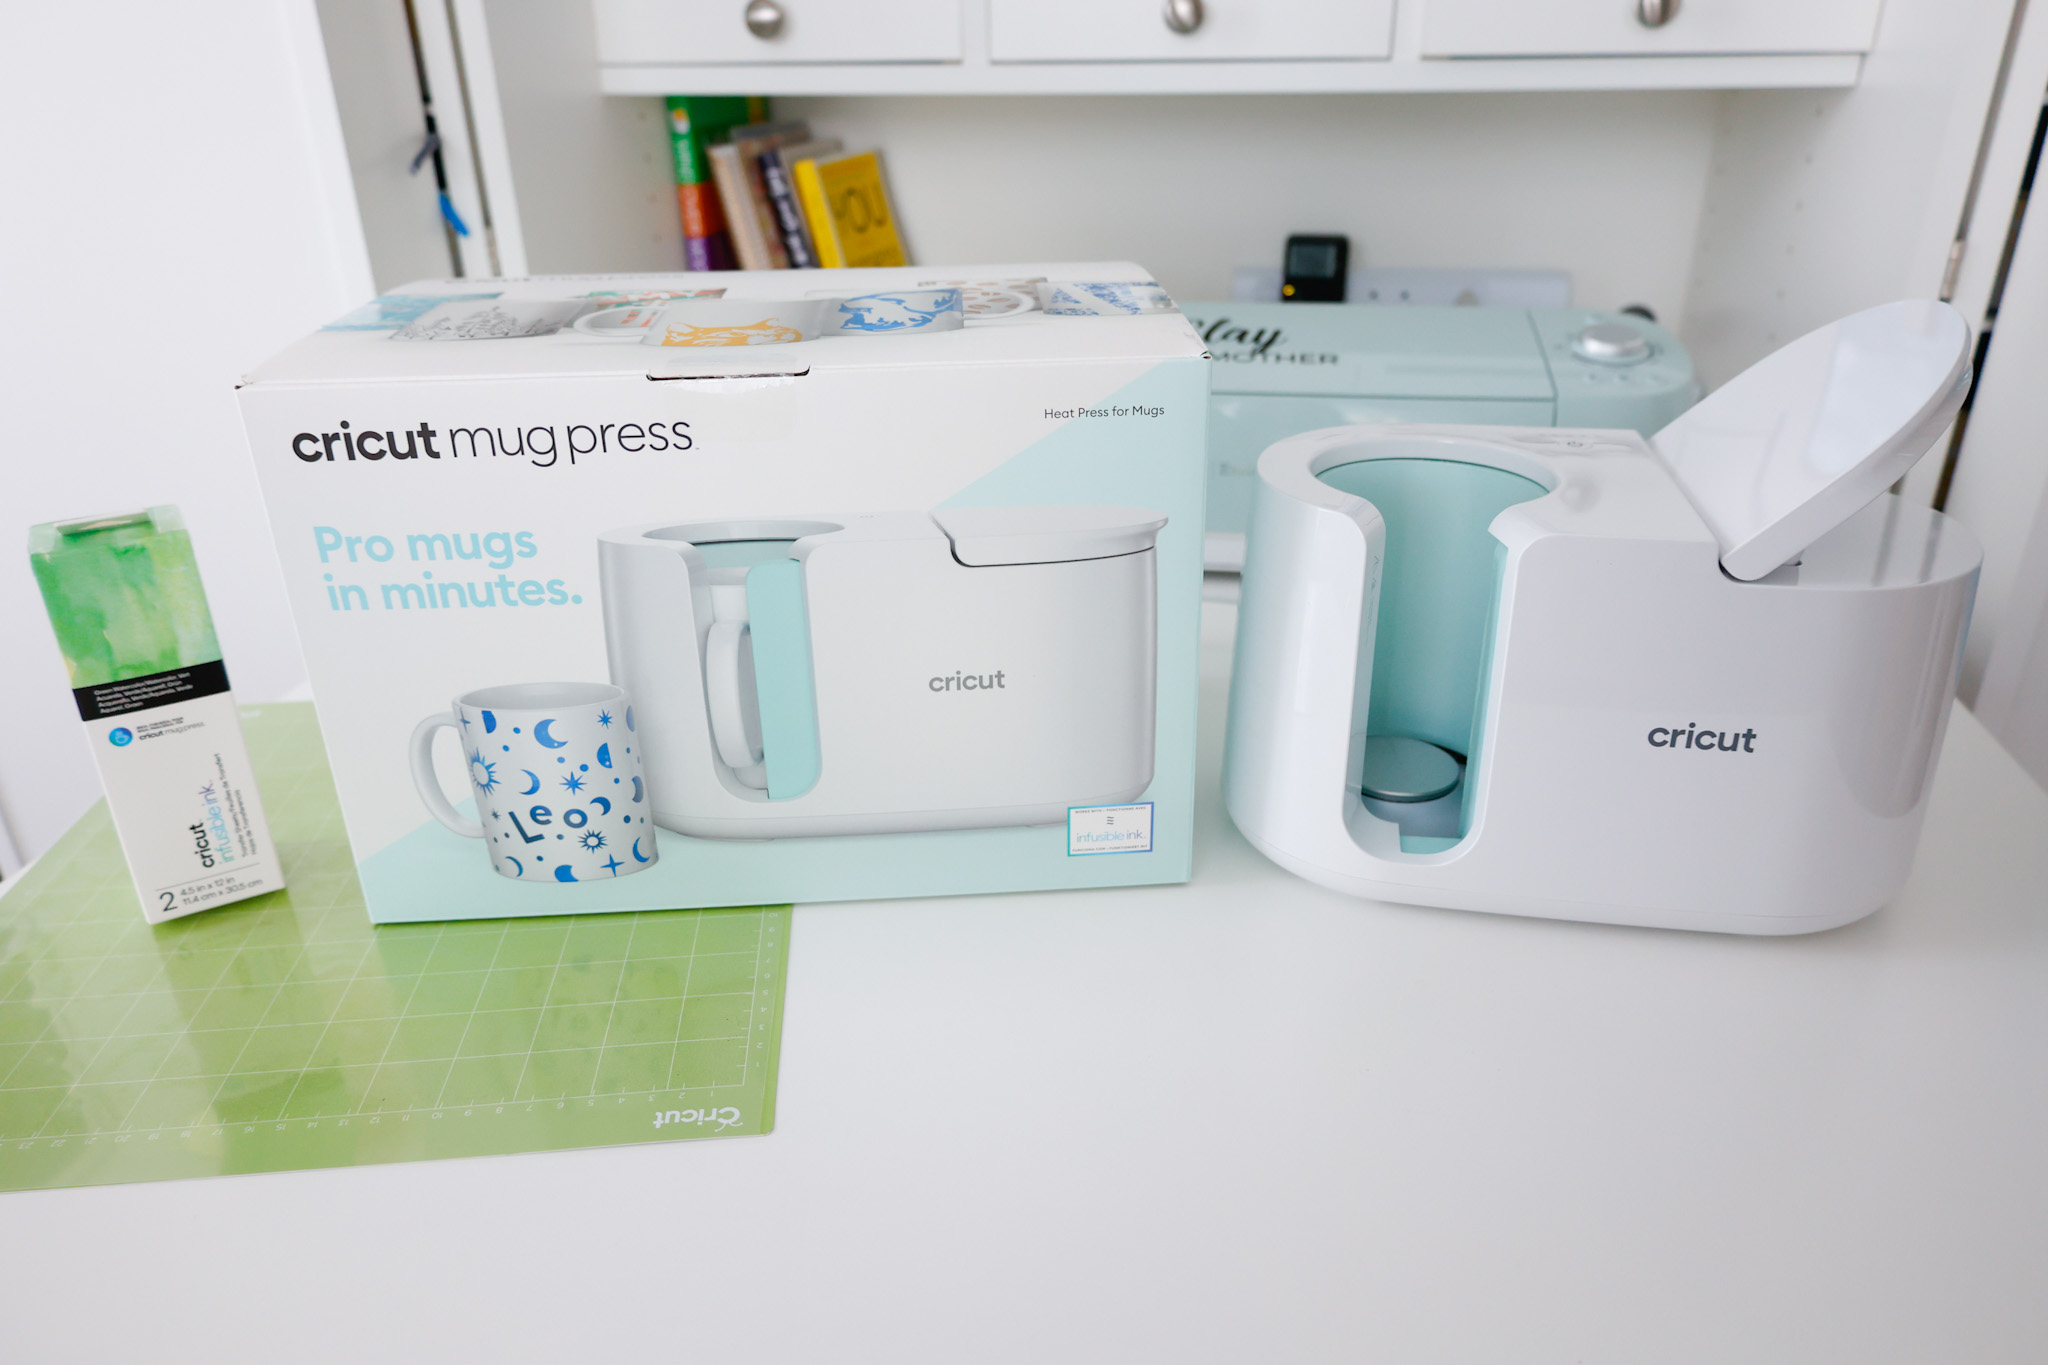
What You Need To Make Mugs With The Cricut Mug Press
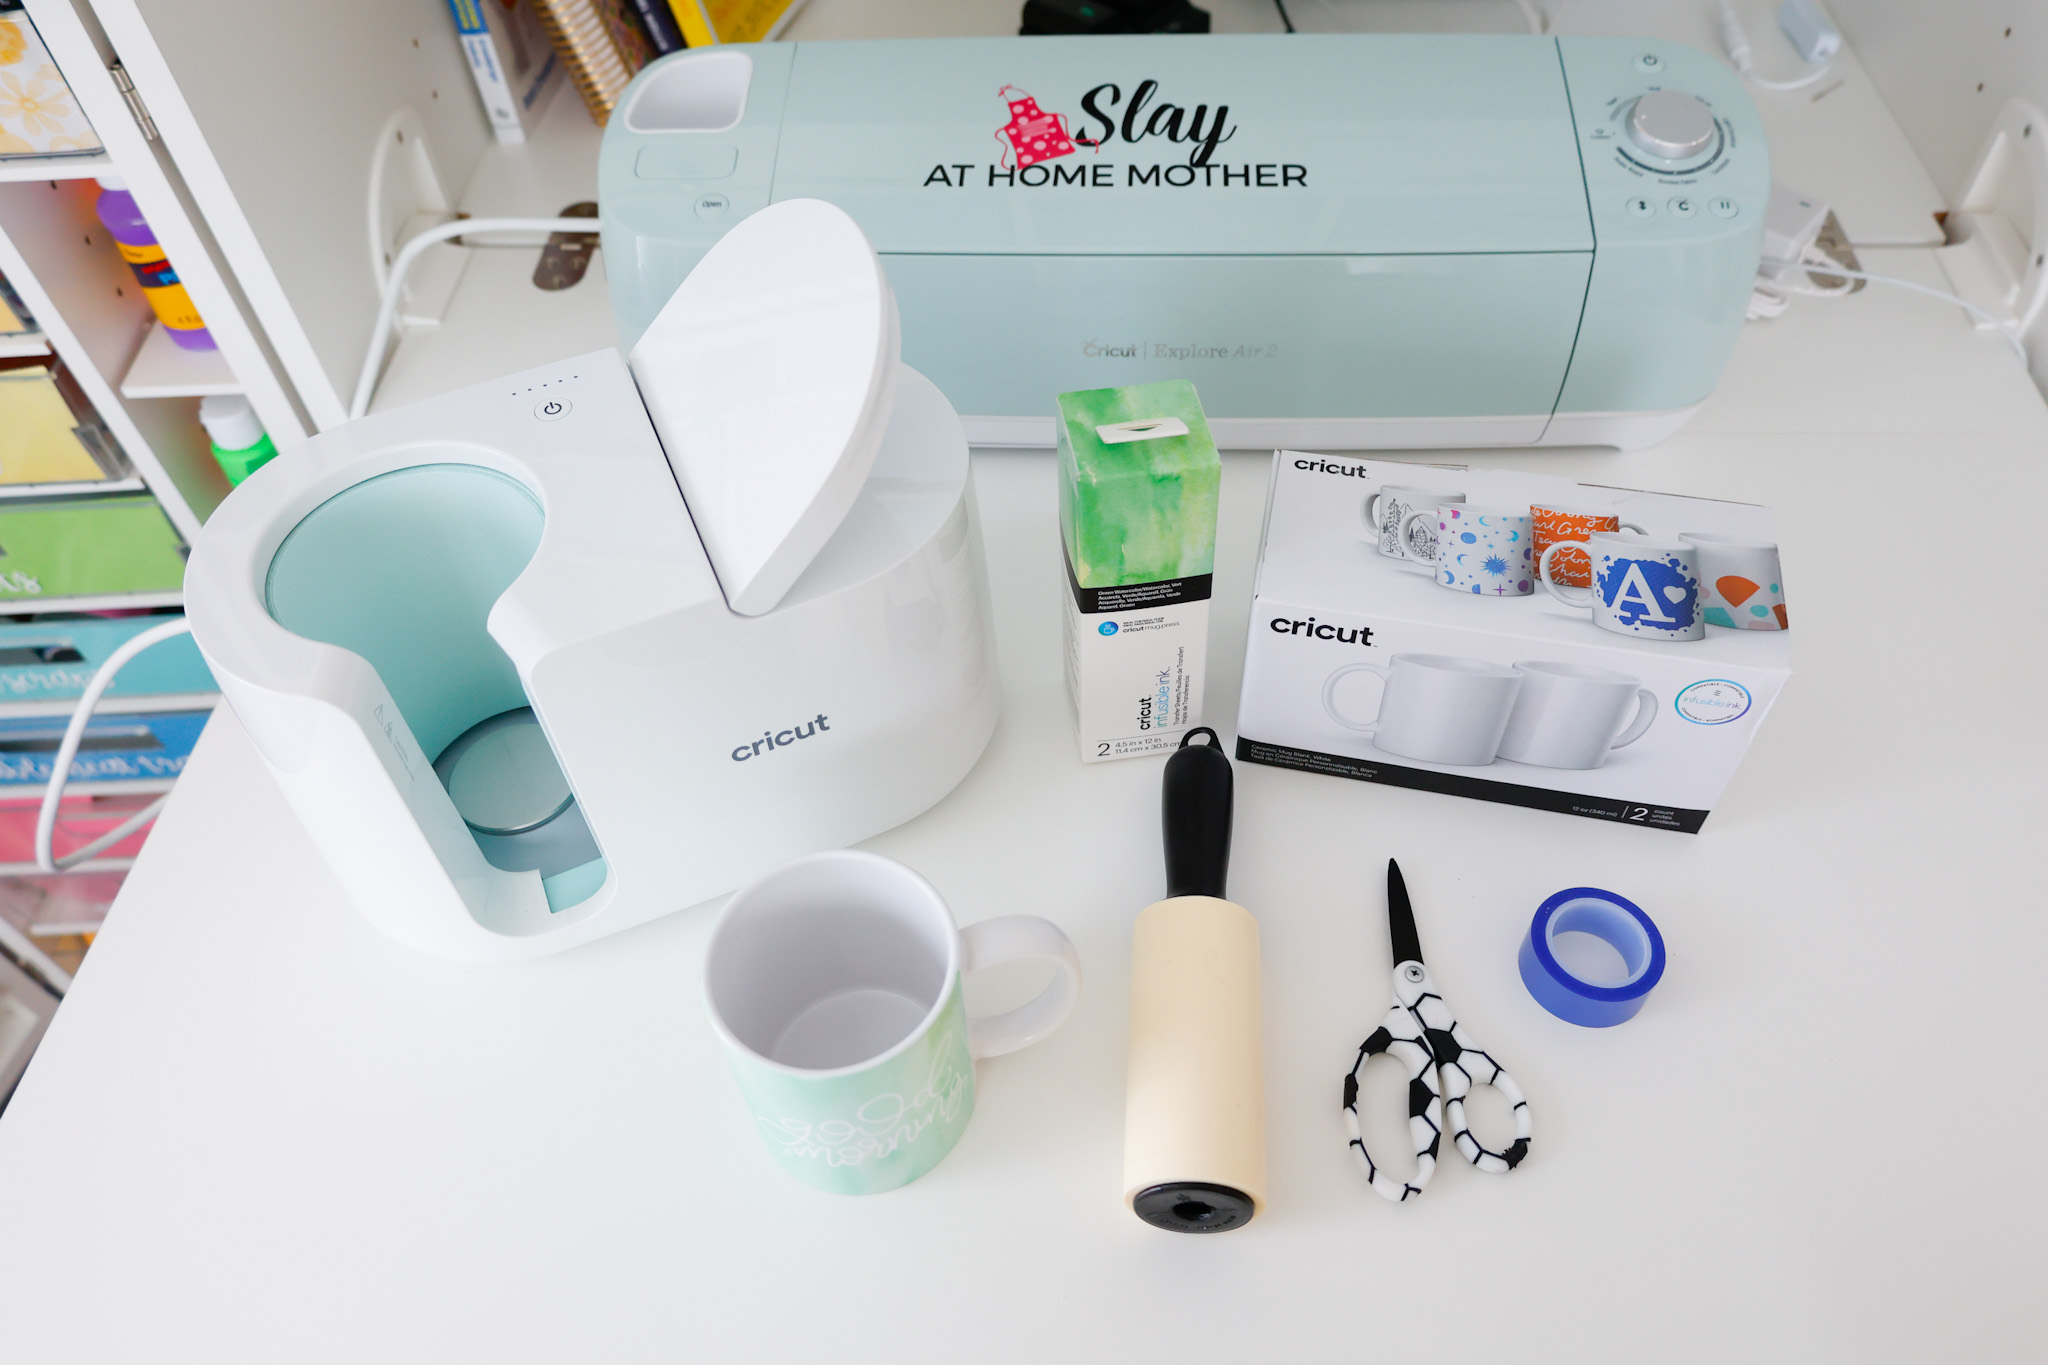
To get started, you’ll need…
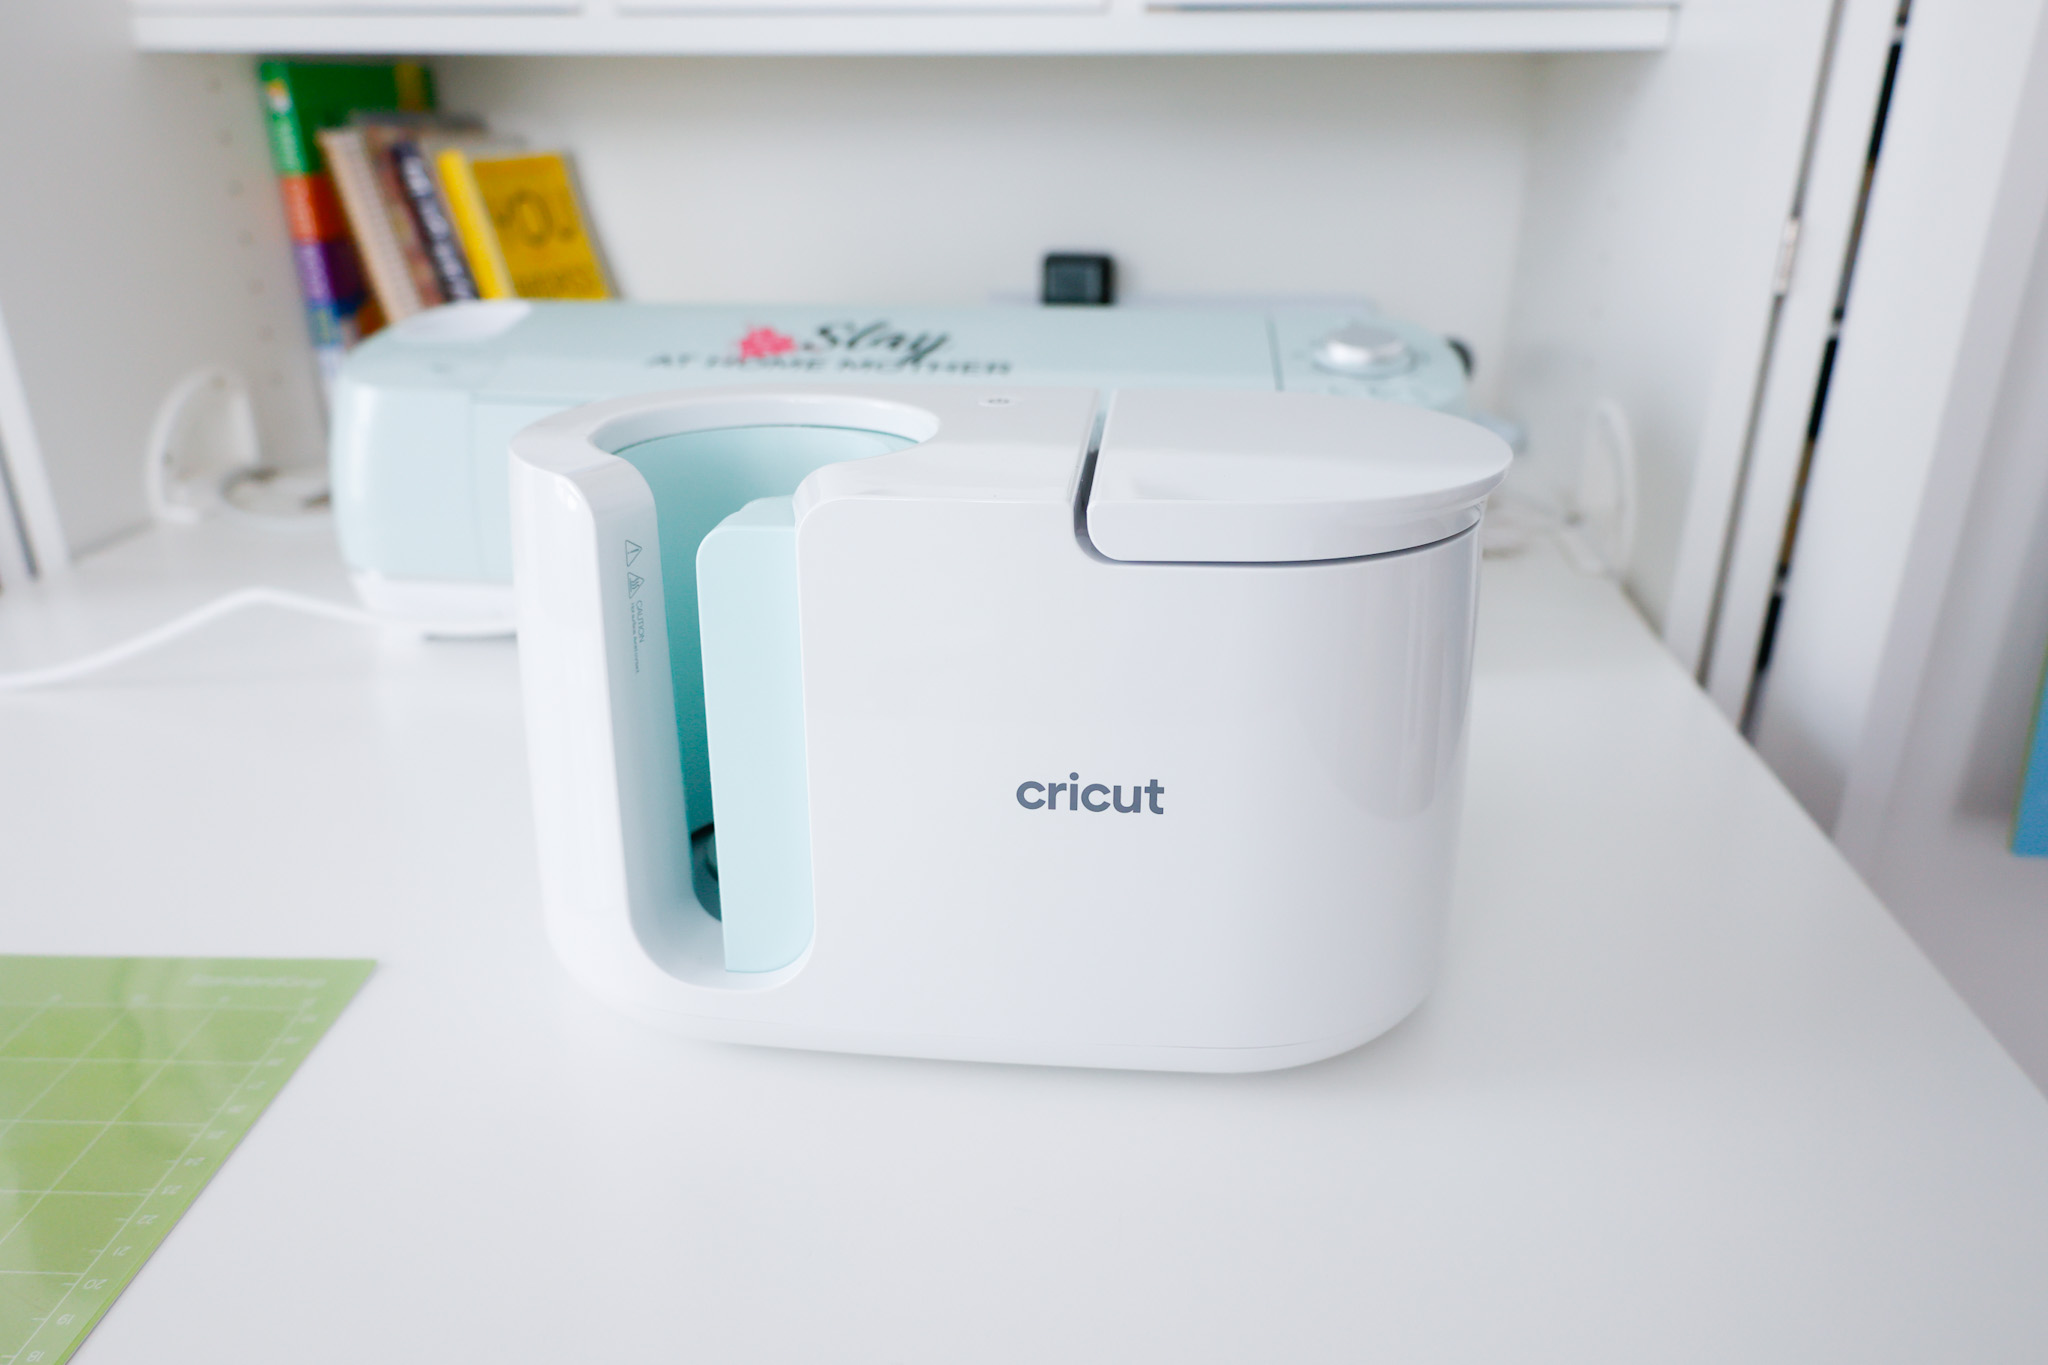
- Cricut Mug Press
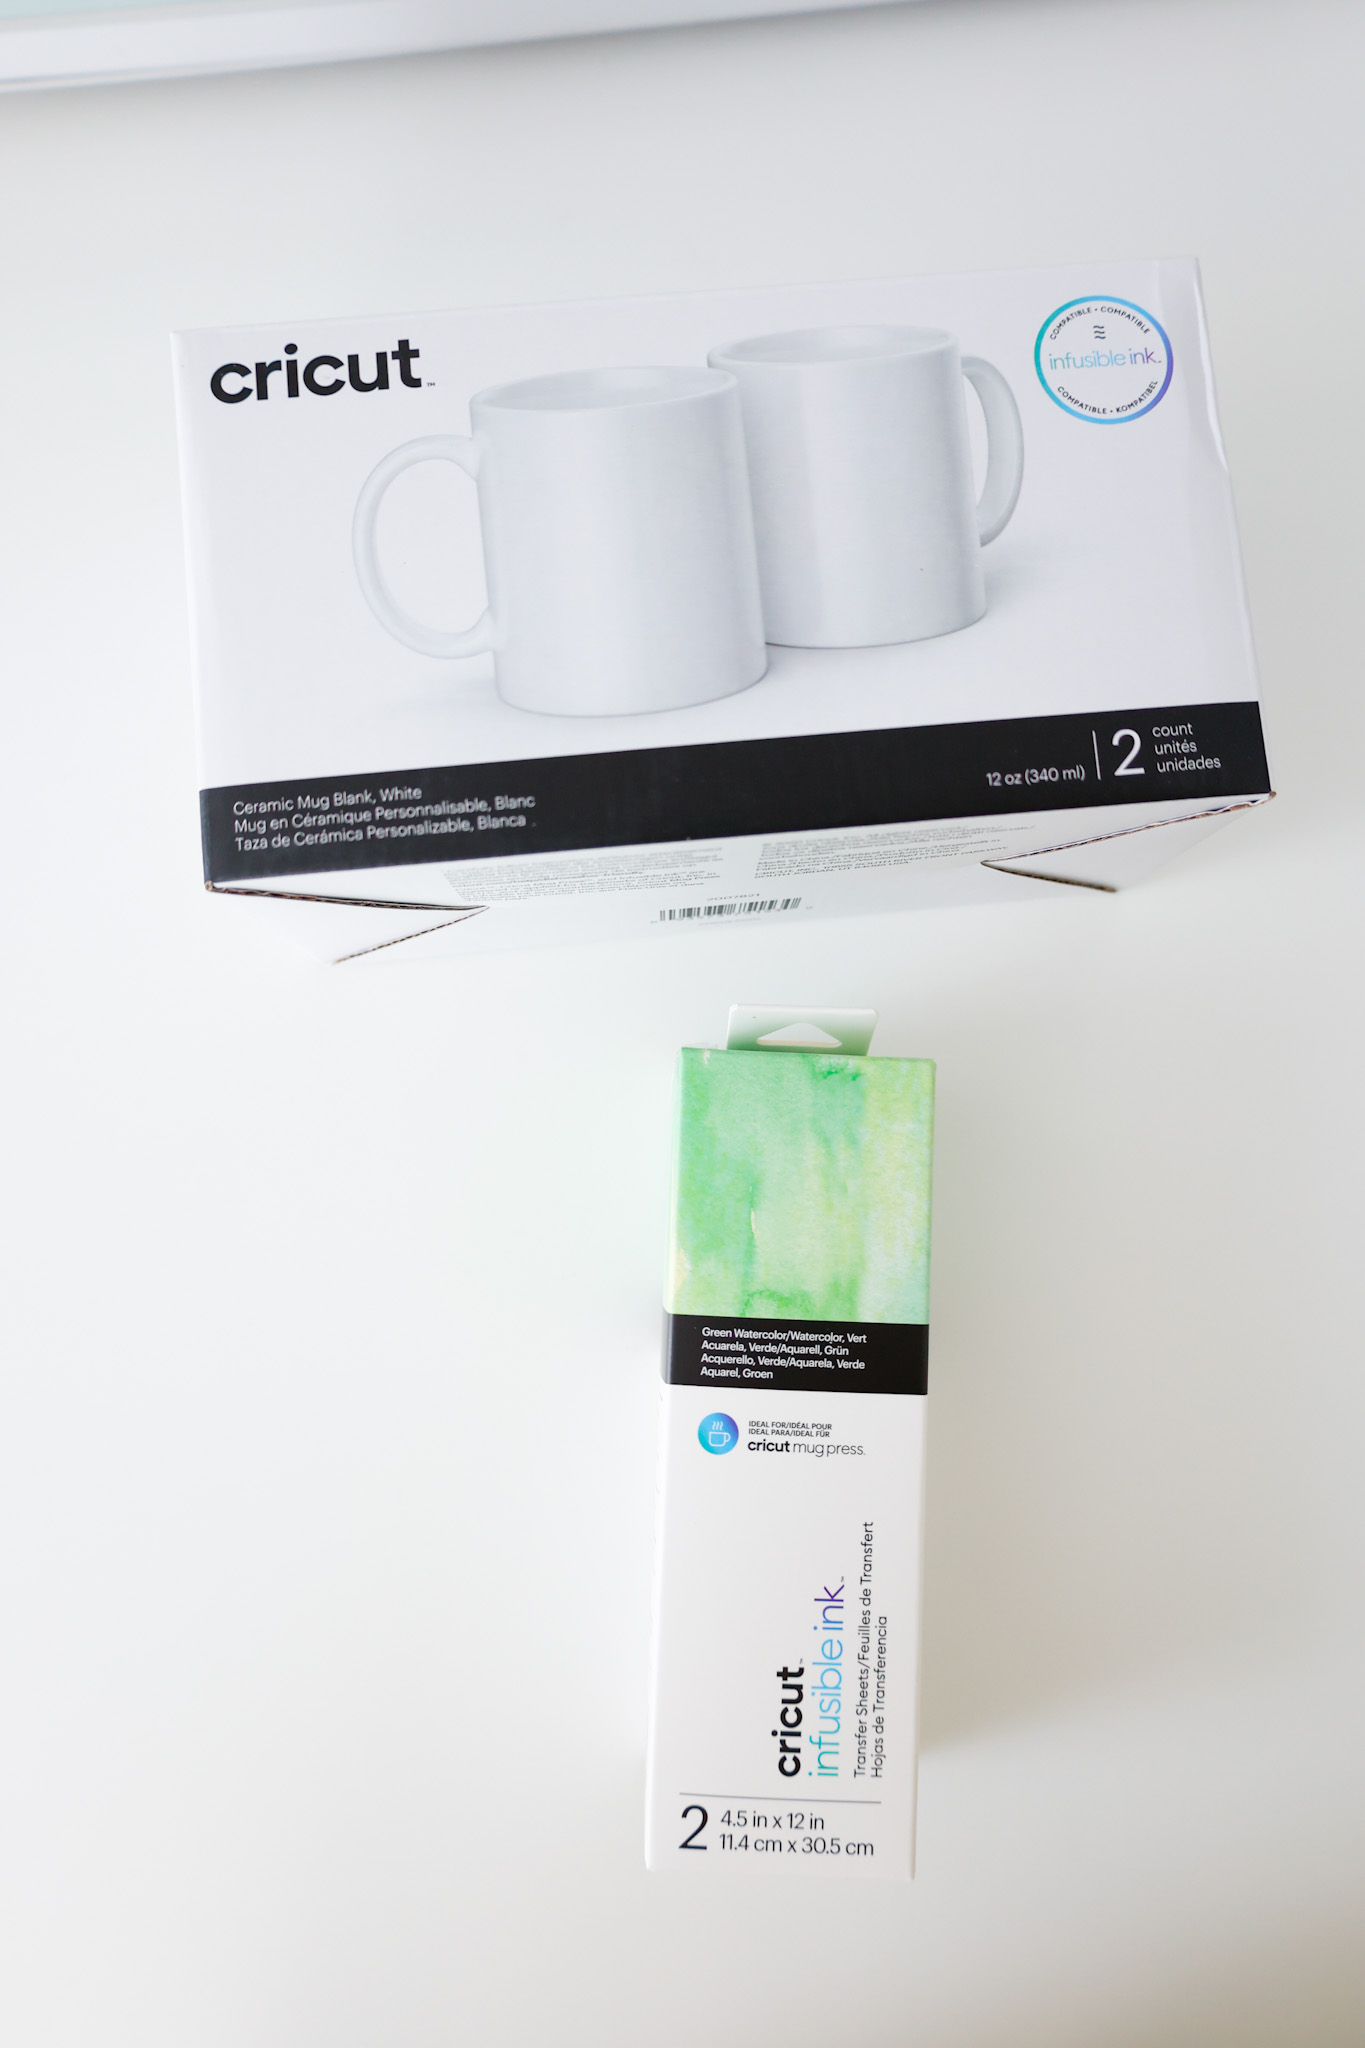
- Cricut mug blanks
- there are two different sizes (11 oz. and 15 oz.)
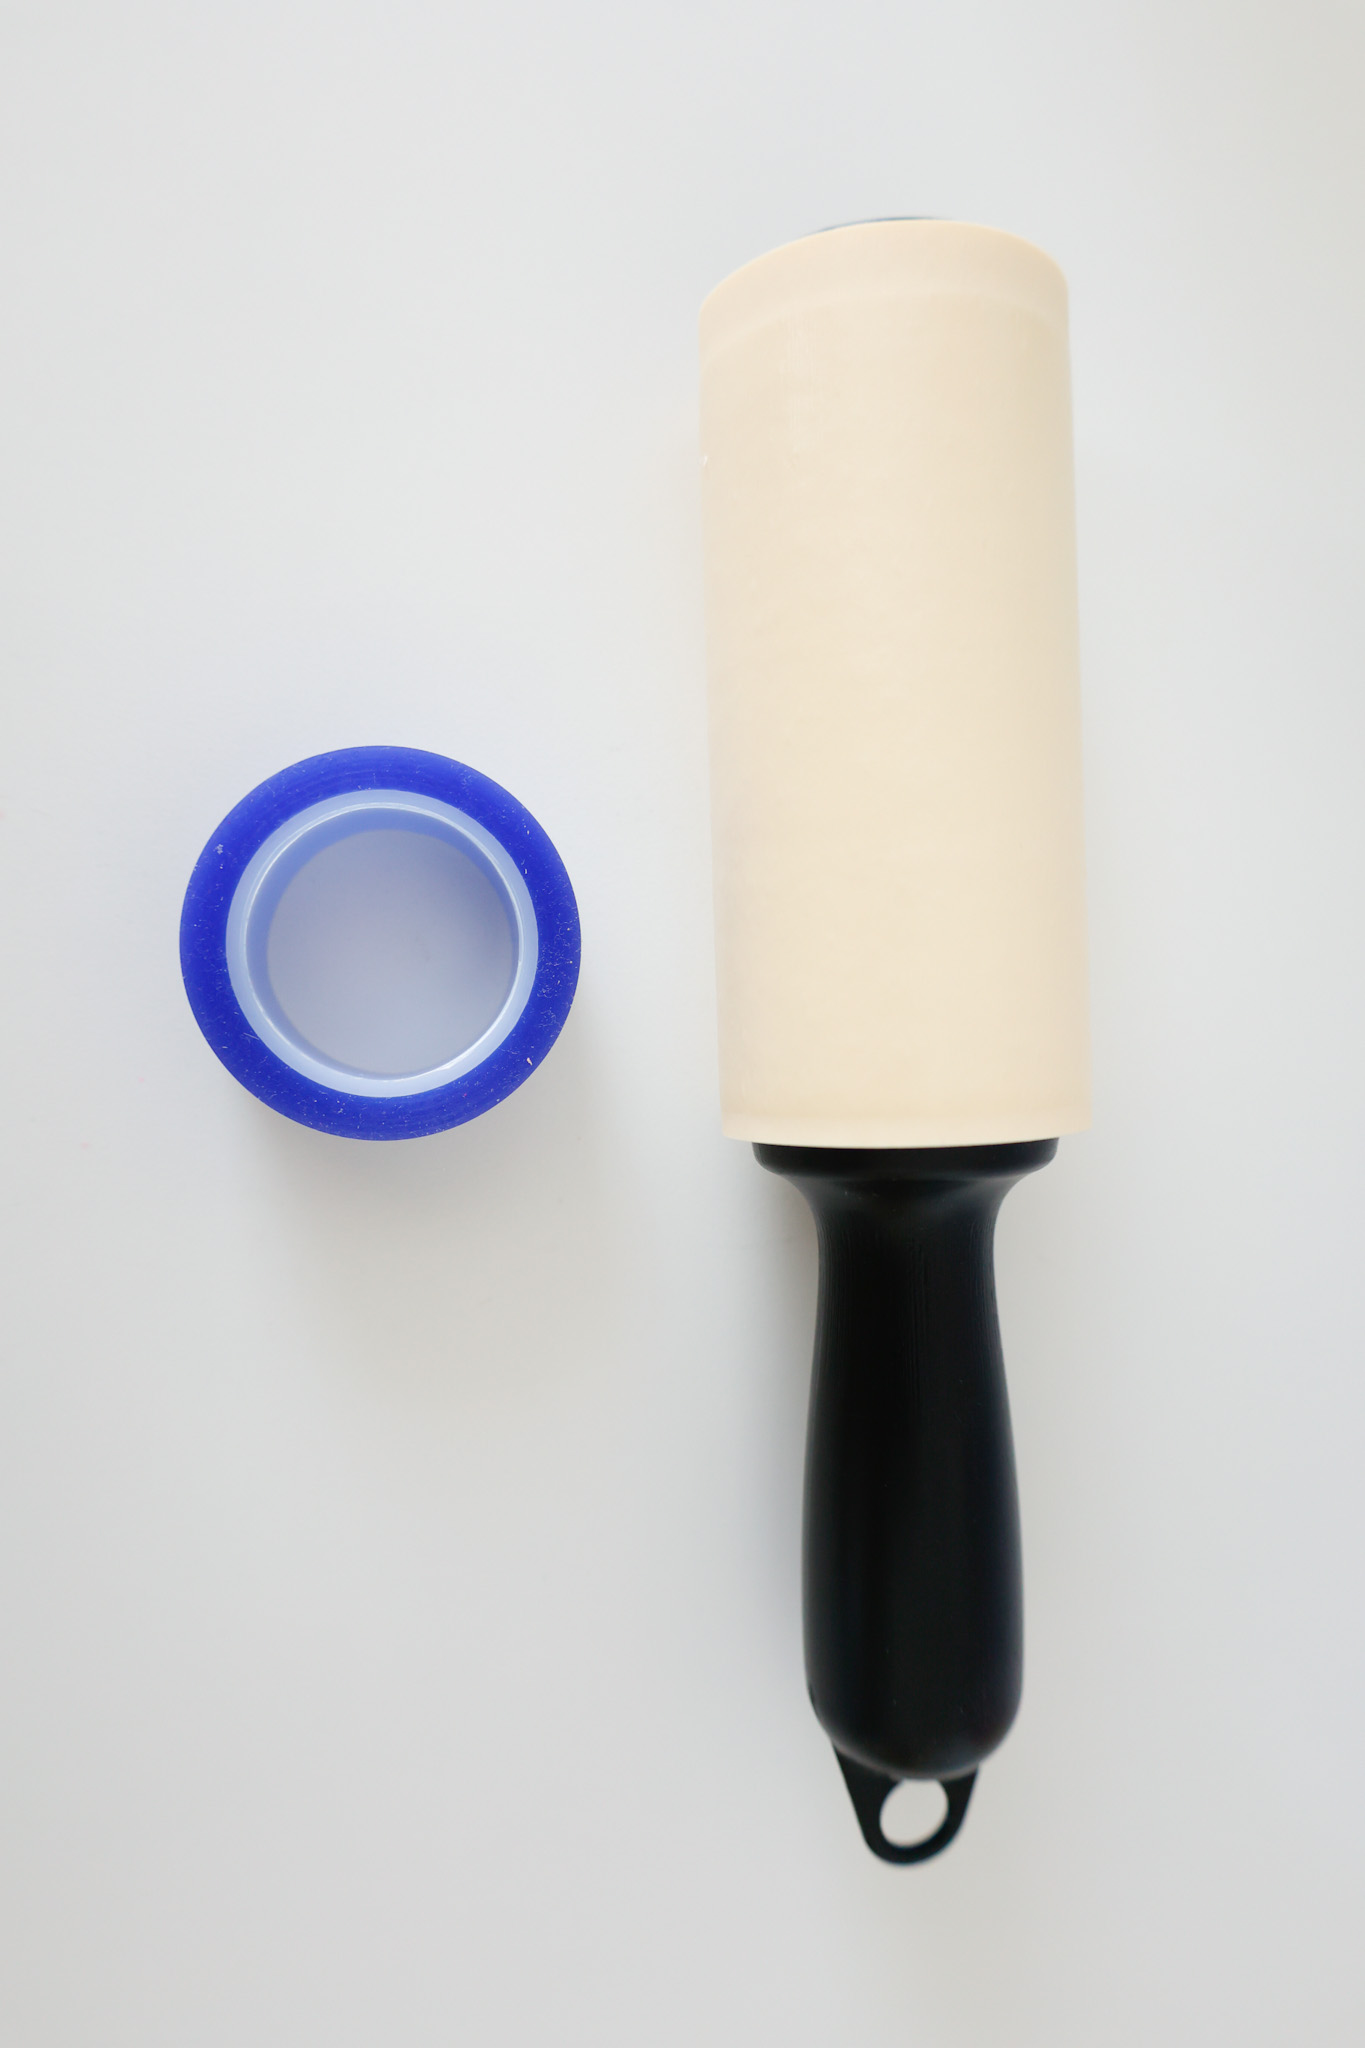
- StandardGrip mat (green)
- infusible ink transfer sheets
- lint roller
- Cricut machine (Maker or Explore Air 2)
- heat-resistant tape
- infusible ink pens*
- butcher paper*
*If you choose to draw a design with infusible ink pens, you will need those as well as butcher paper.
If only using the Infusible Ink transfer sheets, no butcher paper is needed.
Cricut recommends having 3 layers of butcher paper for your design utilizing infusible ink pens.
Don’t forget the lint roller!
Designing Your Mug in Design Space
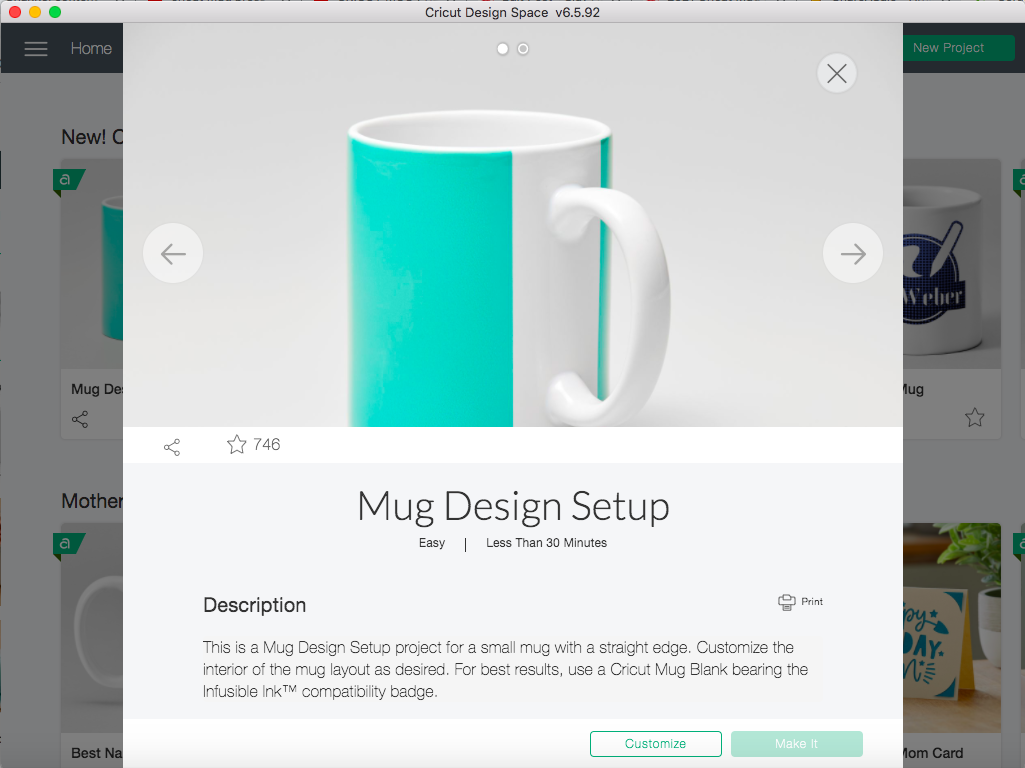
To create your mug design, visit this link in Design Space.
Scroll down just a tad on the screen and select an option from the drop-down menu.
You can make a selection based on the size of Cricut mug you’ll be making as well as what style of edge you want your mug to have.
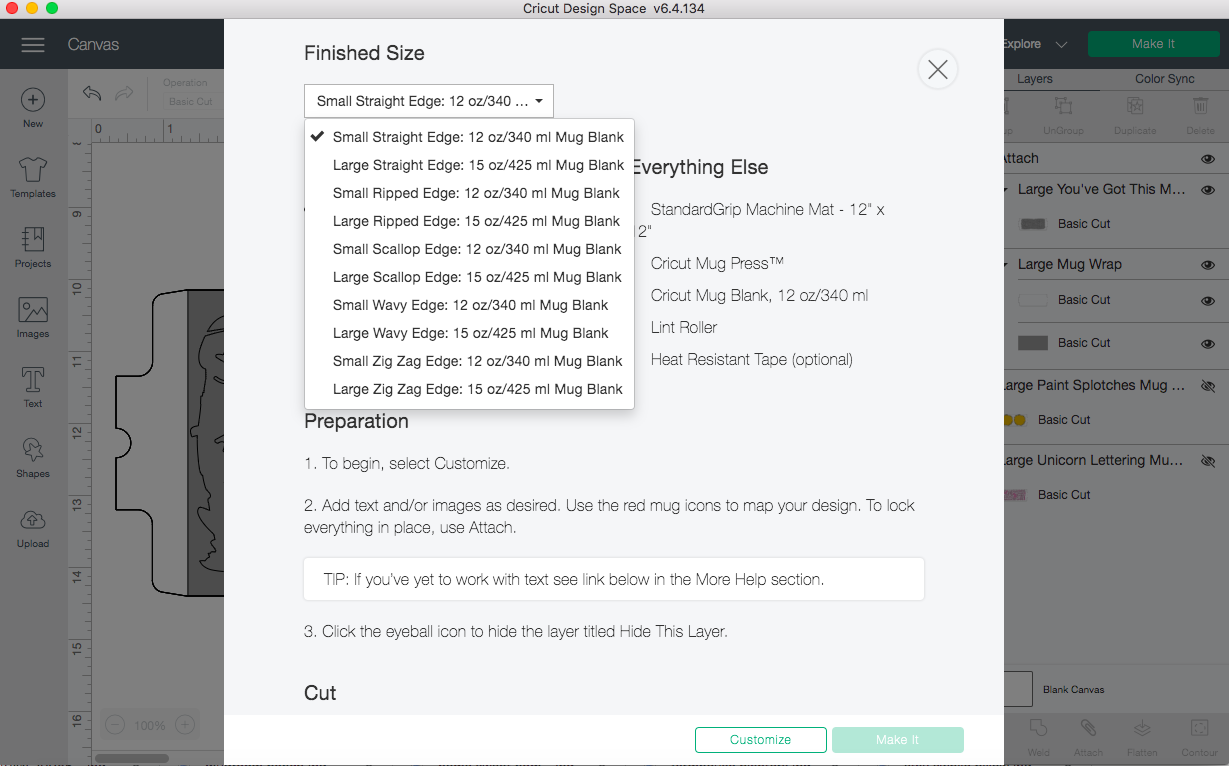
Once you make a selection, a preview of the edge can be seen on the featured image (the white mug with blue on it) so you can confirm that that is the style of edge and size you want.
Once you make your selection, click on the Customize button to have it inserted into the Design Space Canvas.
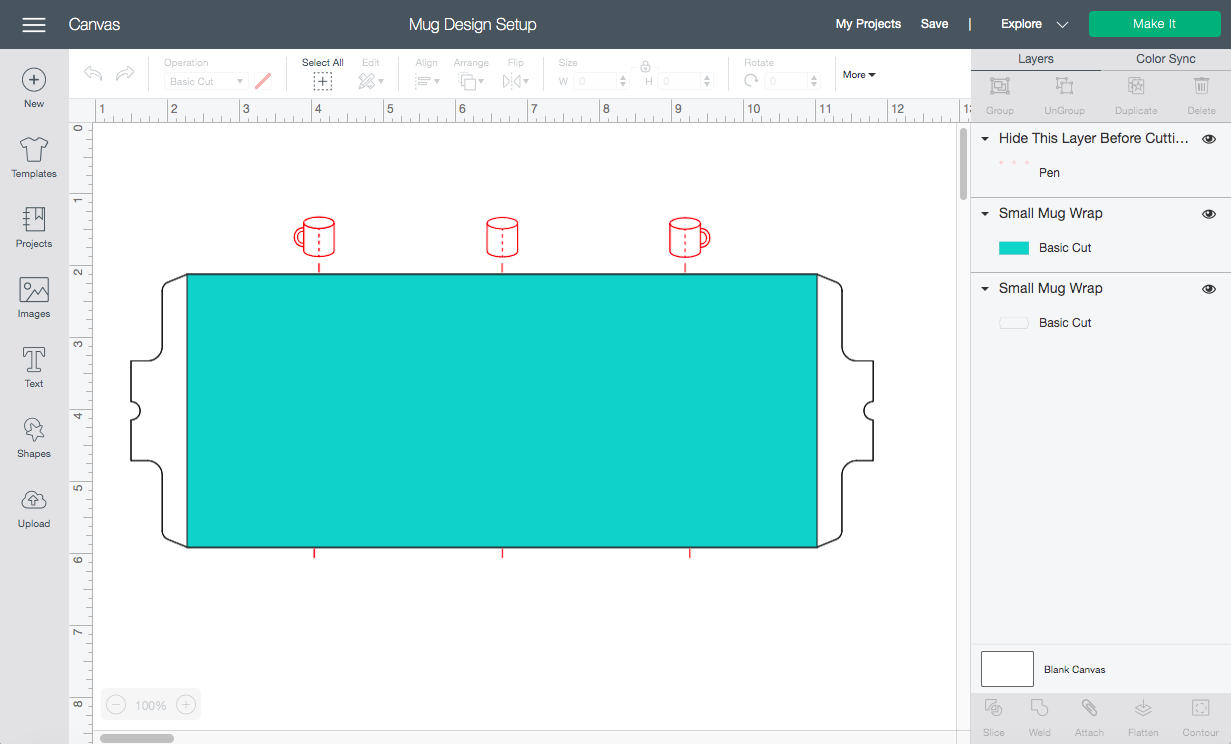
Looking at the photo above, you can see some red marks and illustrations in the design. These indicators are there to help you place your design where you’d like so they are visible.
Depending on where you’d like your design to be on your mug, you can use these indicators for reference.
Step-By-Step How To Design And Make A Mug
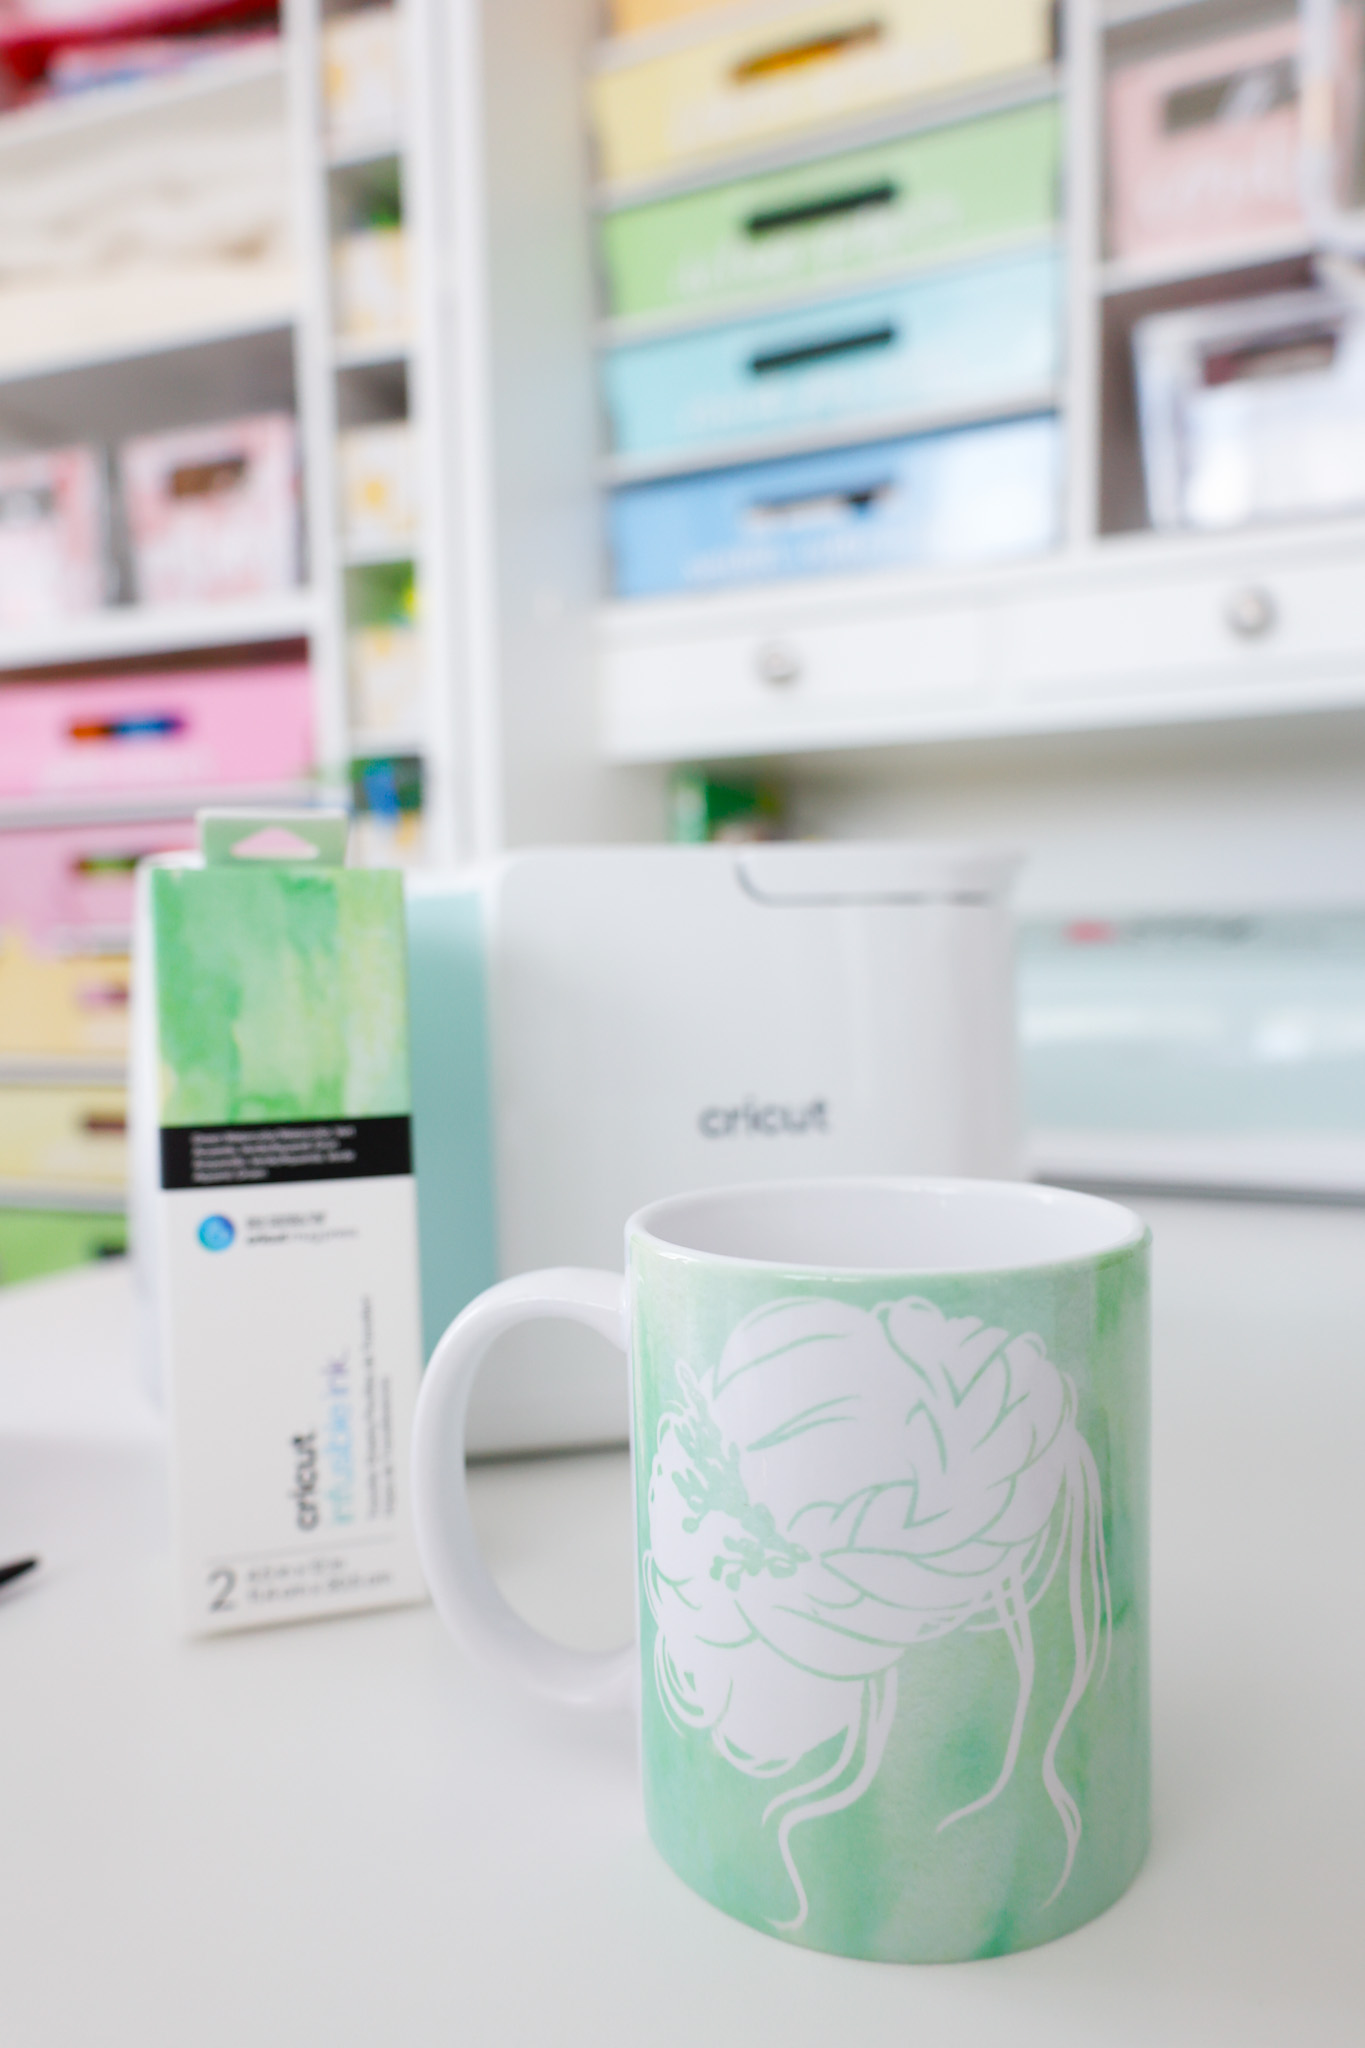
For my green mug, I’ll be taking you through the process of how I set up, designed, and made my mug with the Cricut Mug Press…
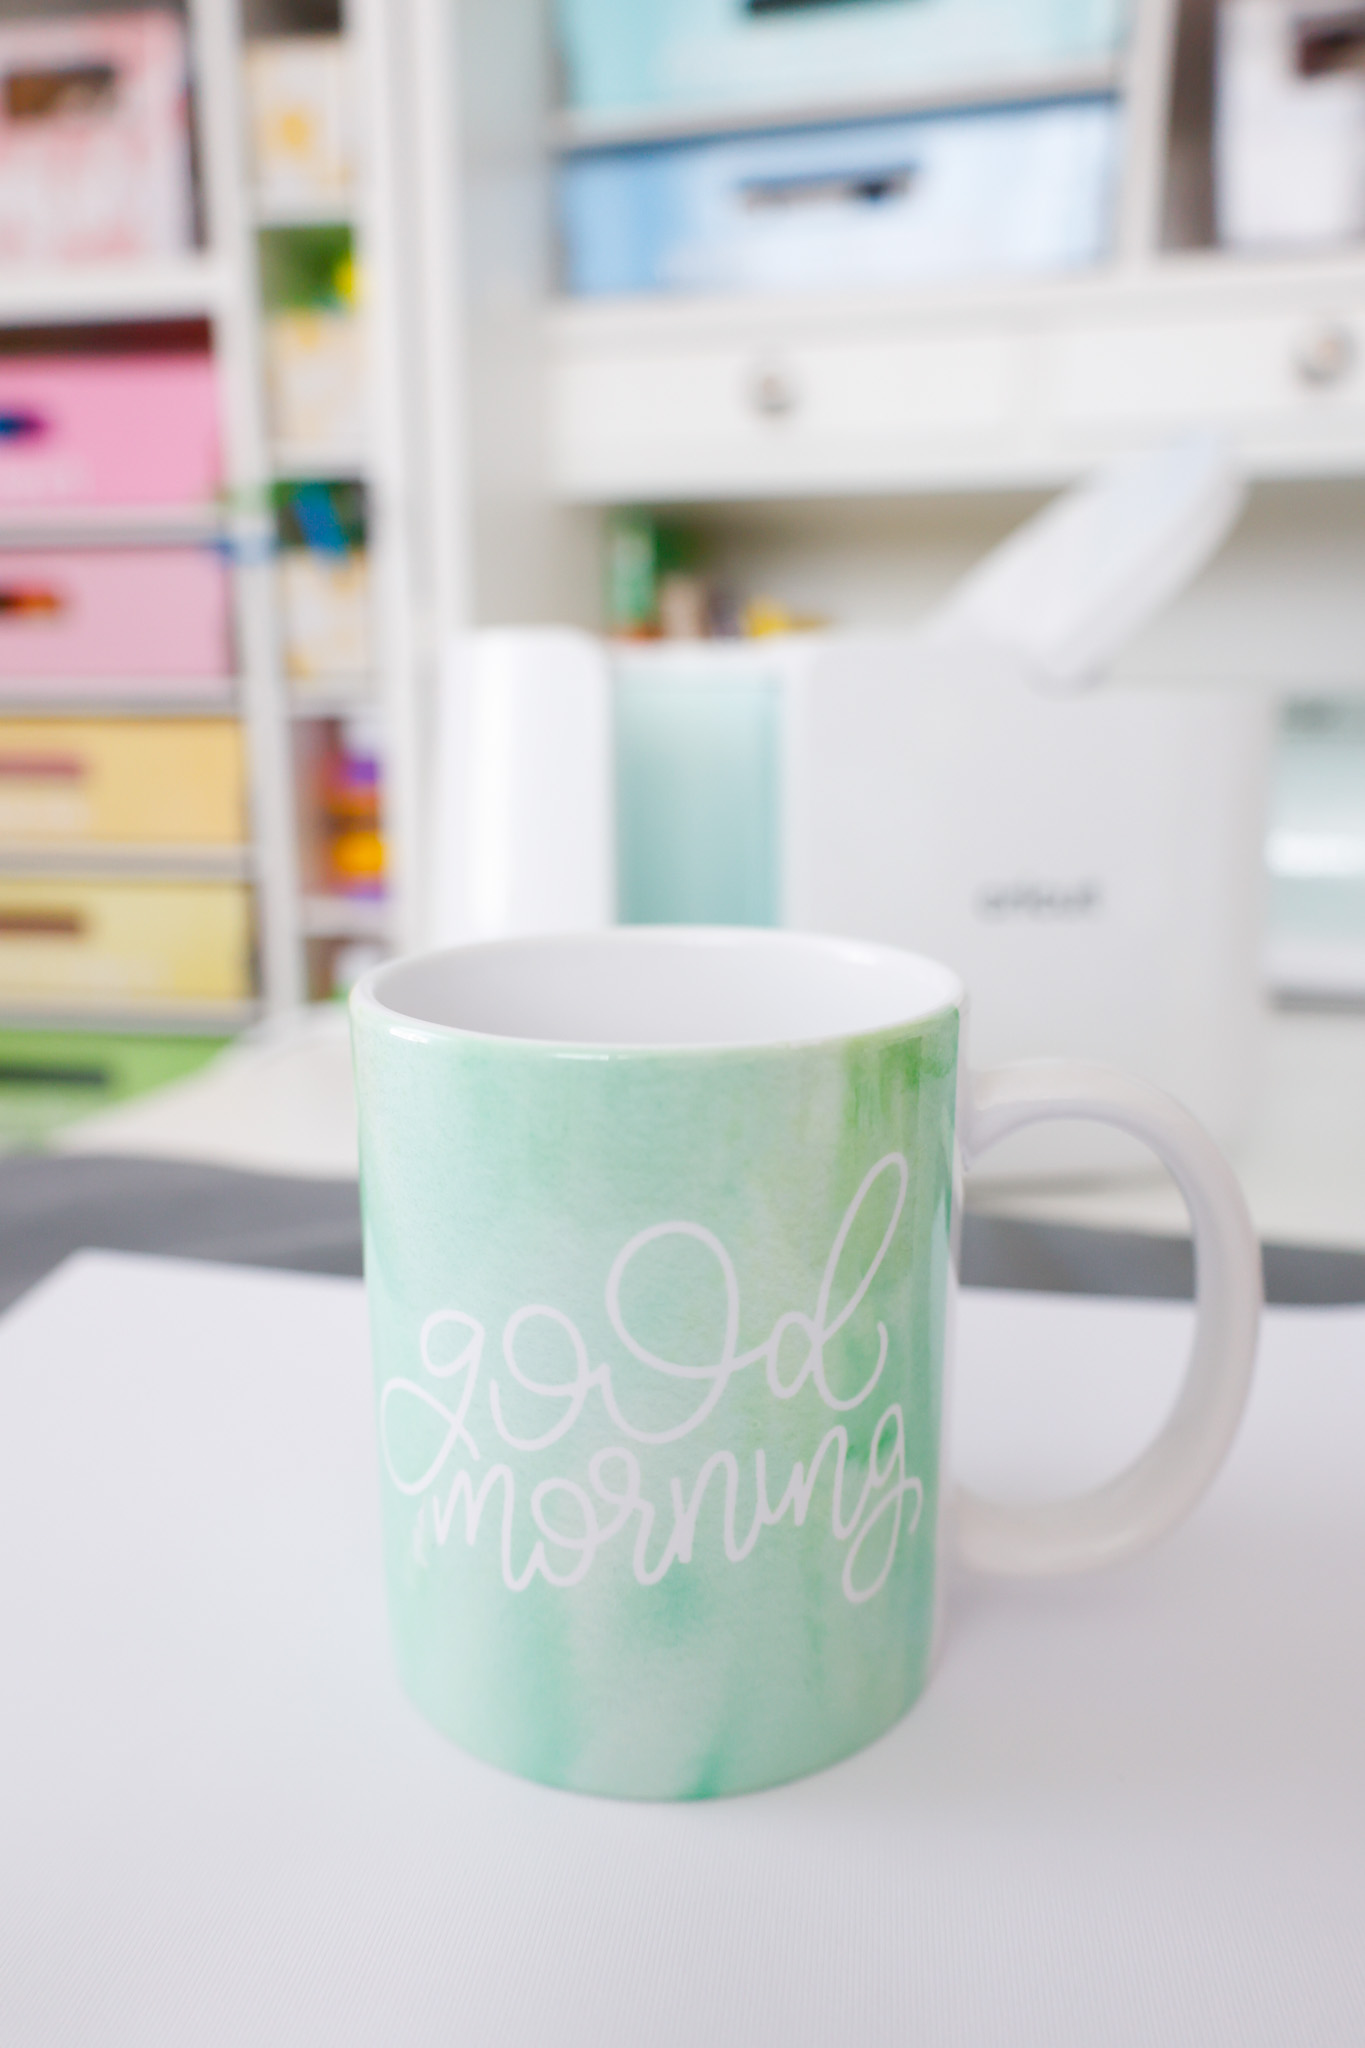
To skip these steps and create this exact mug design, here is the Design Space project link.
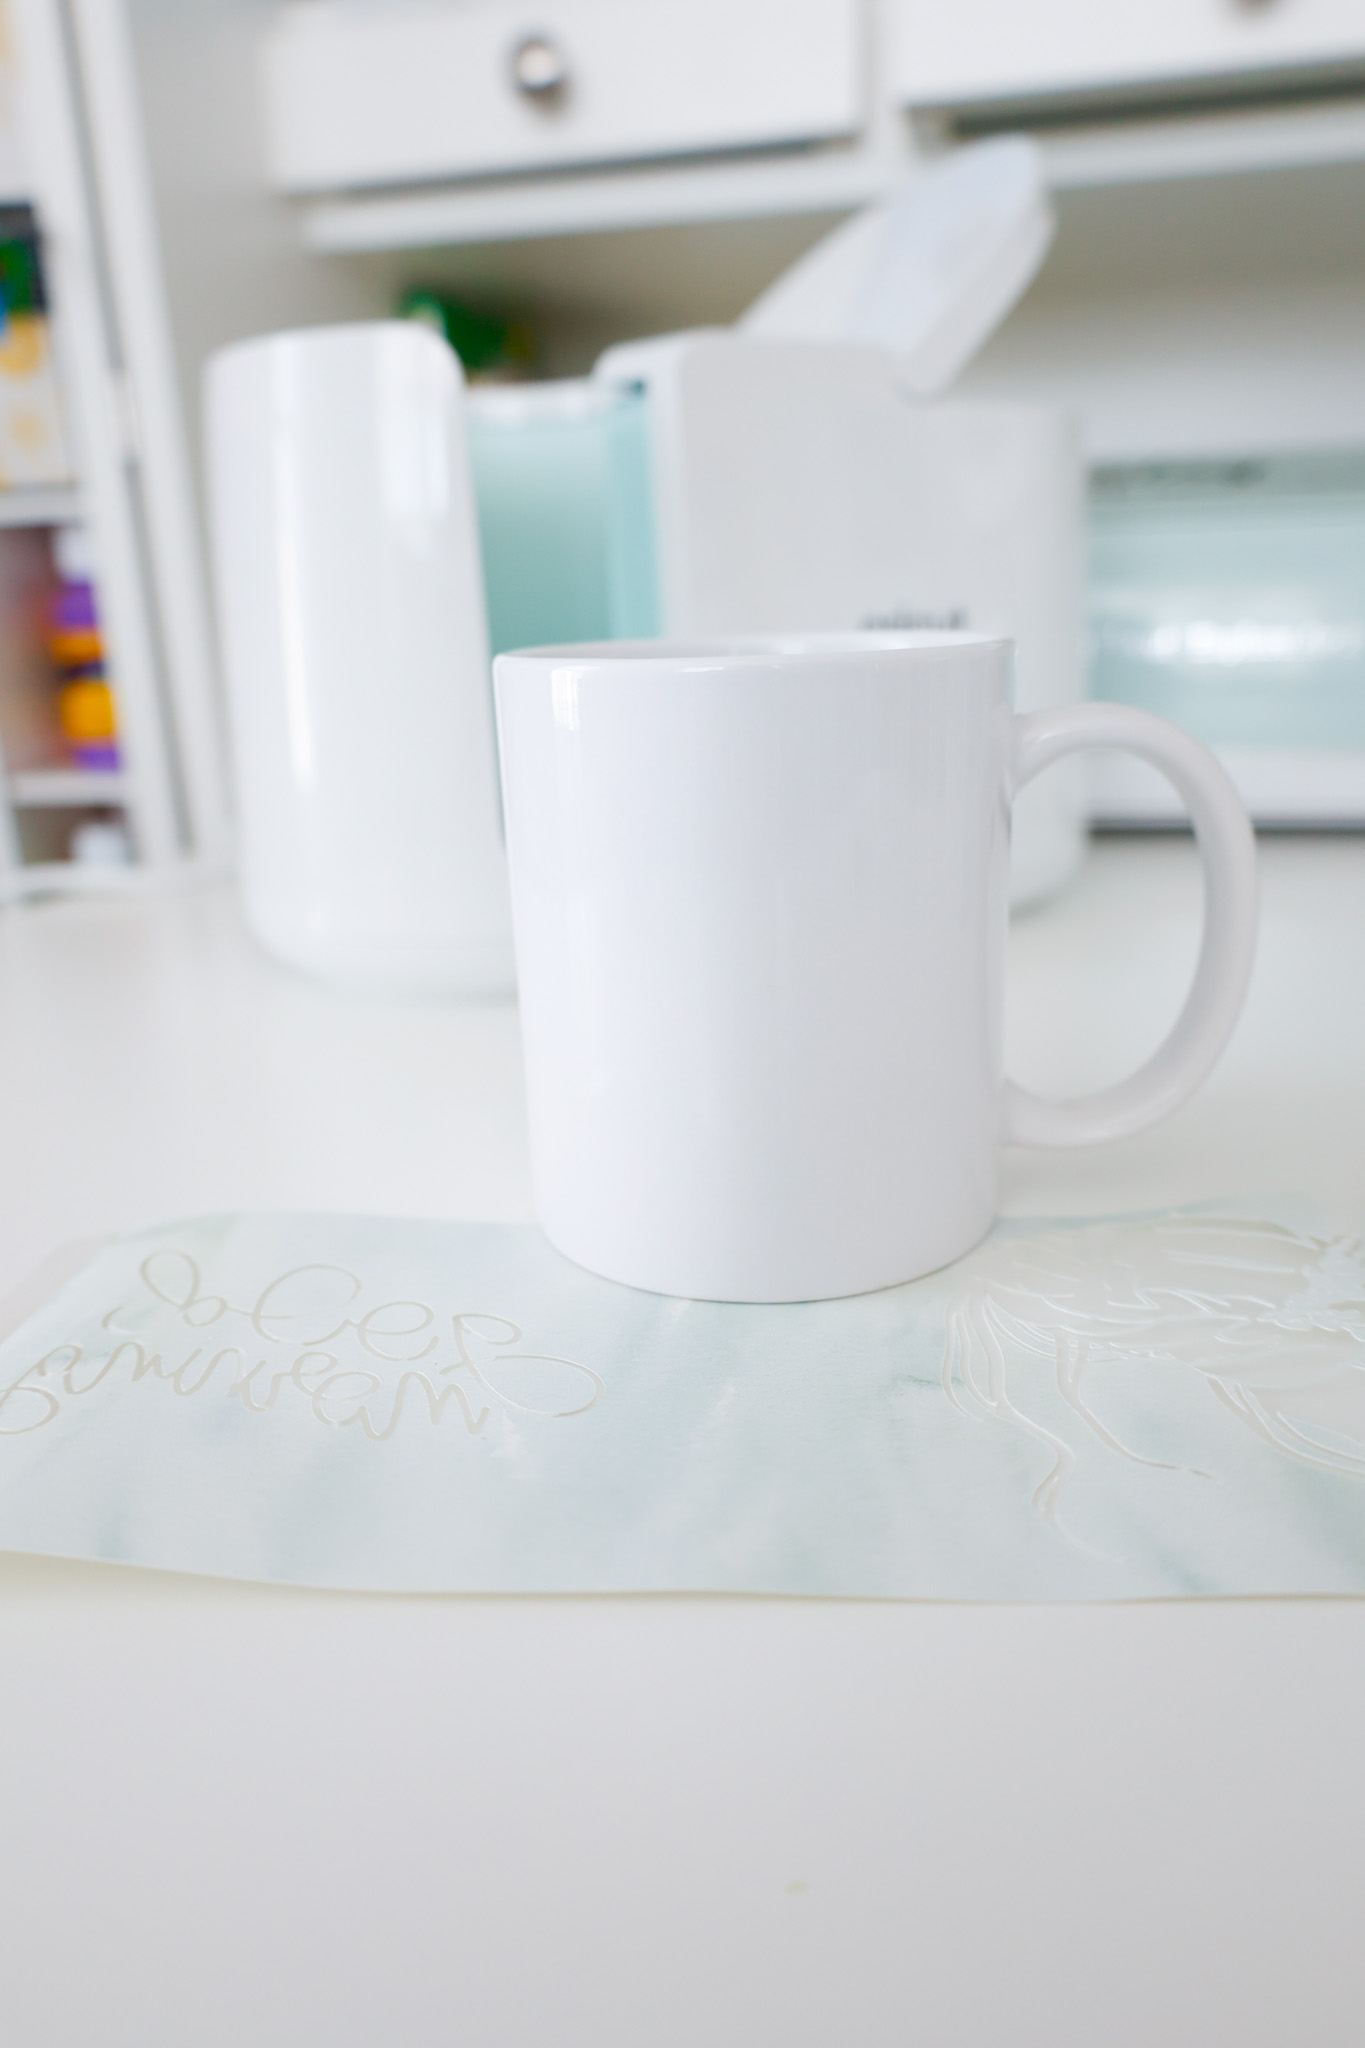
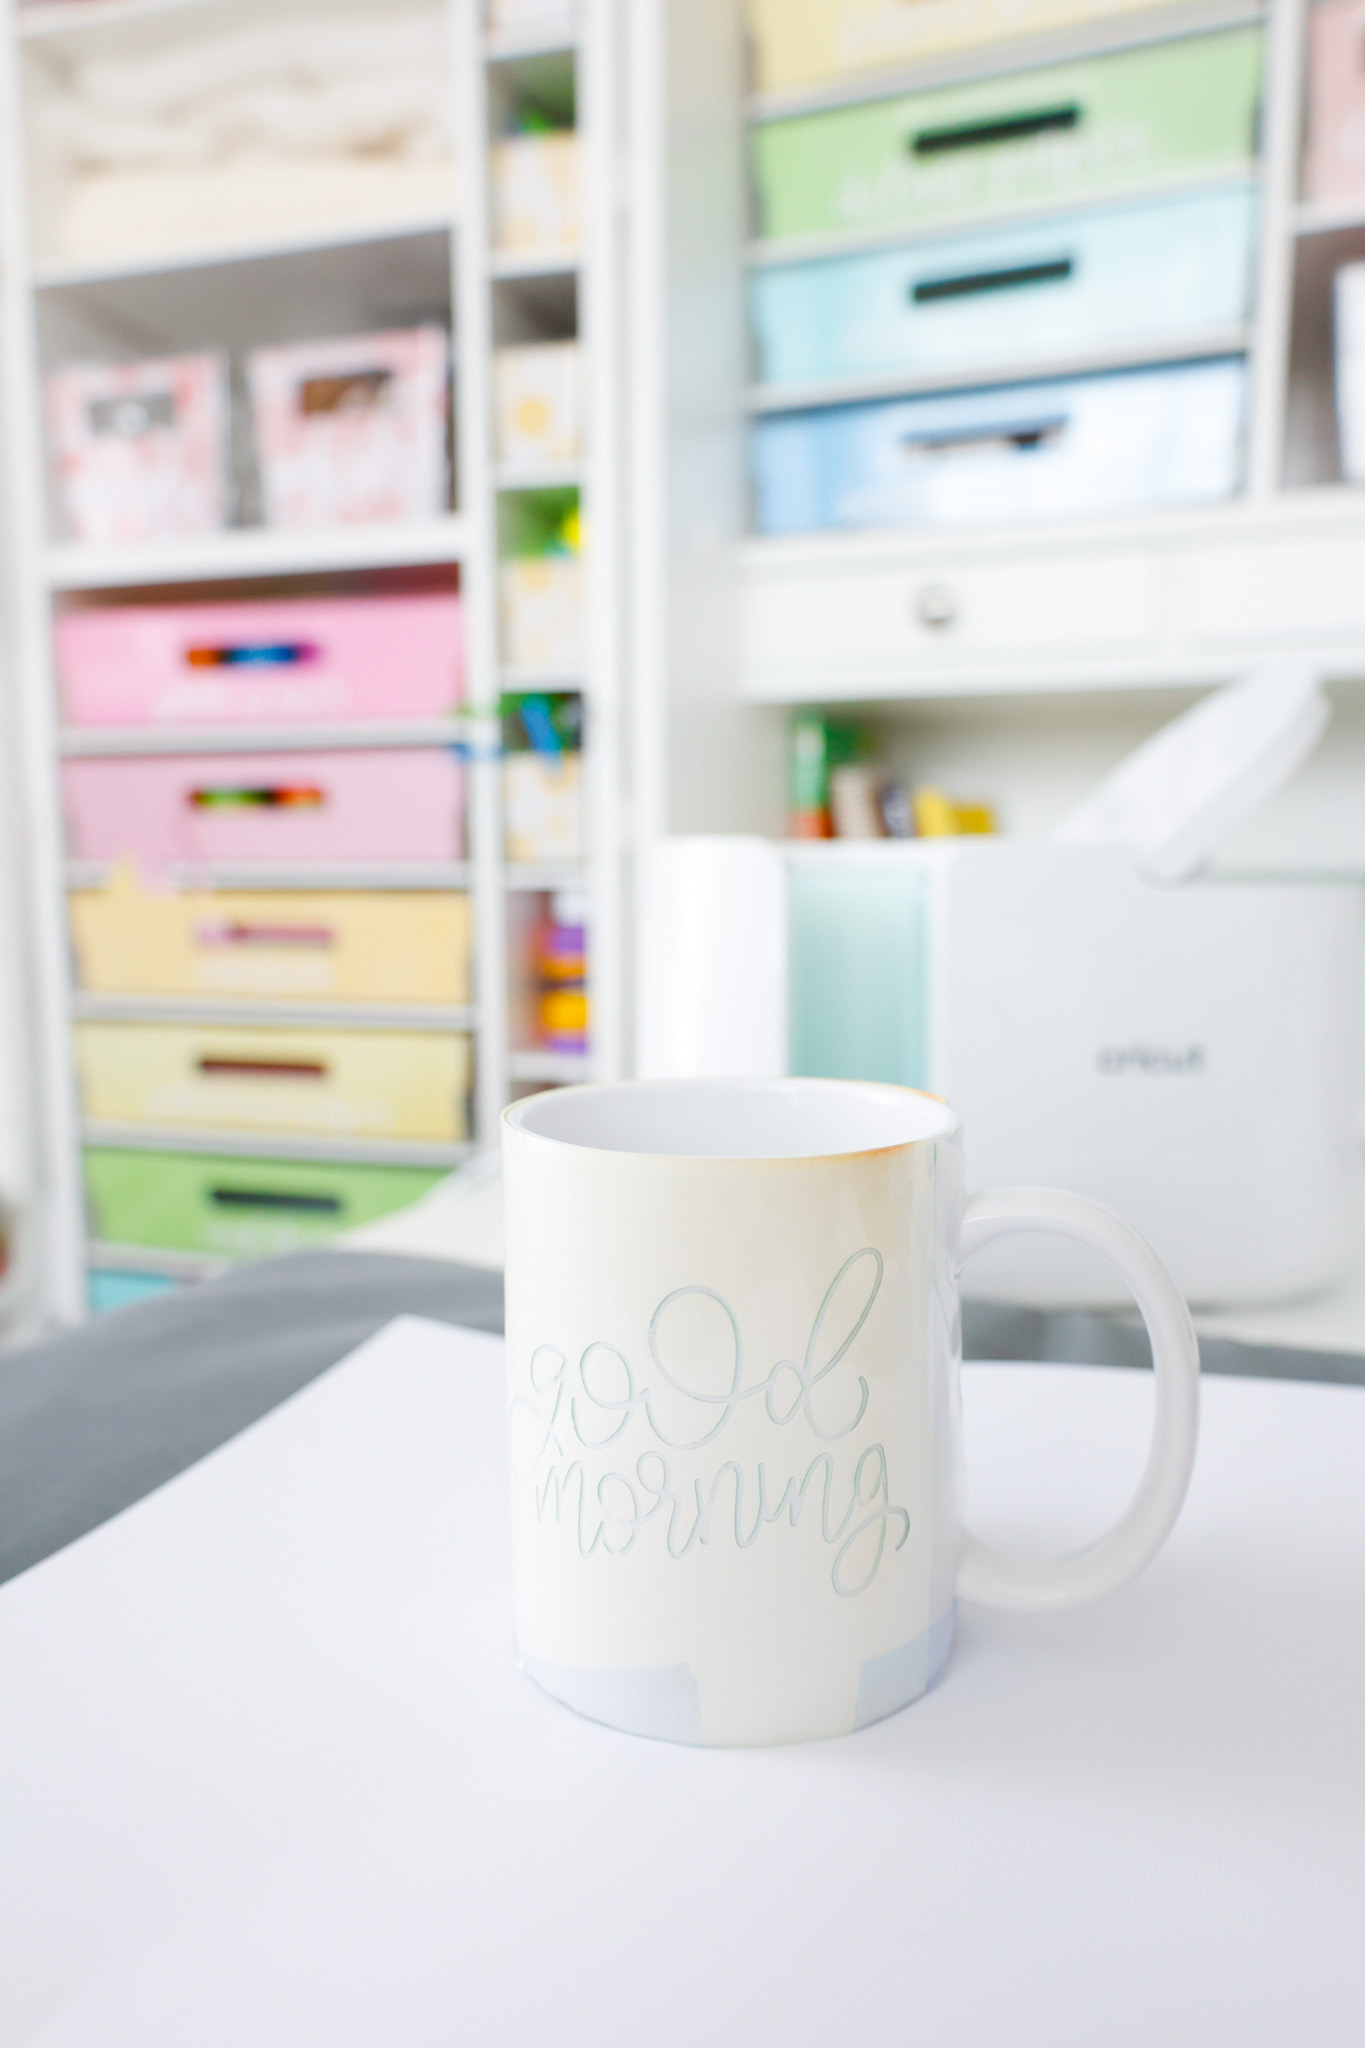
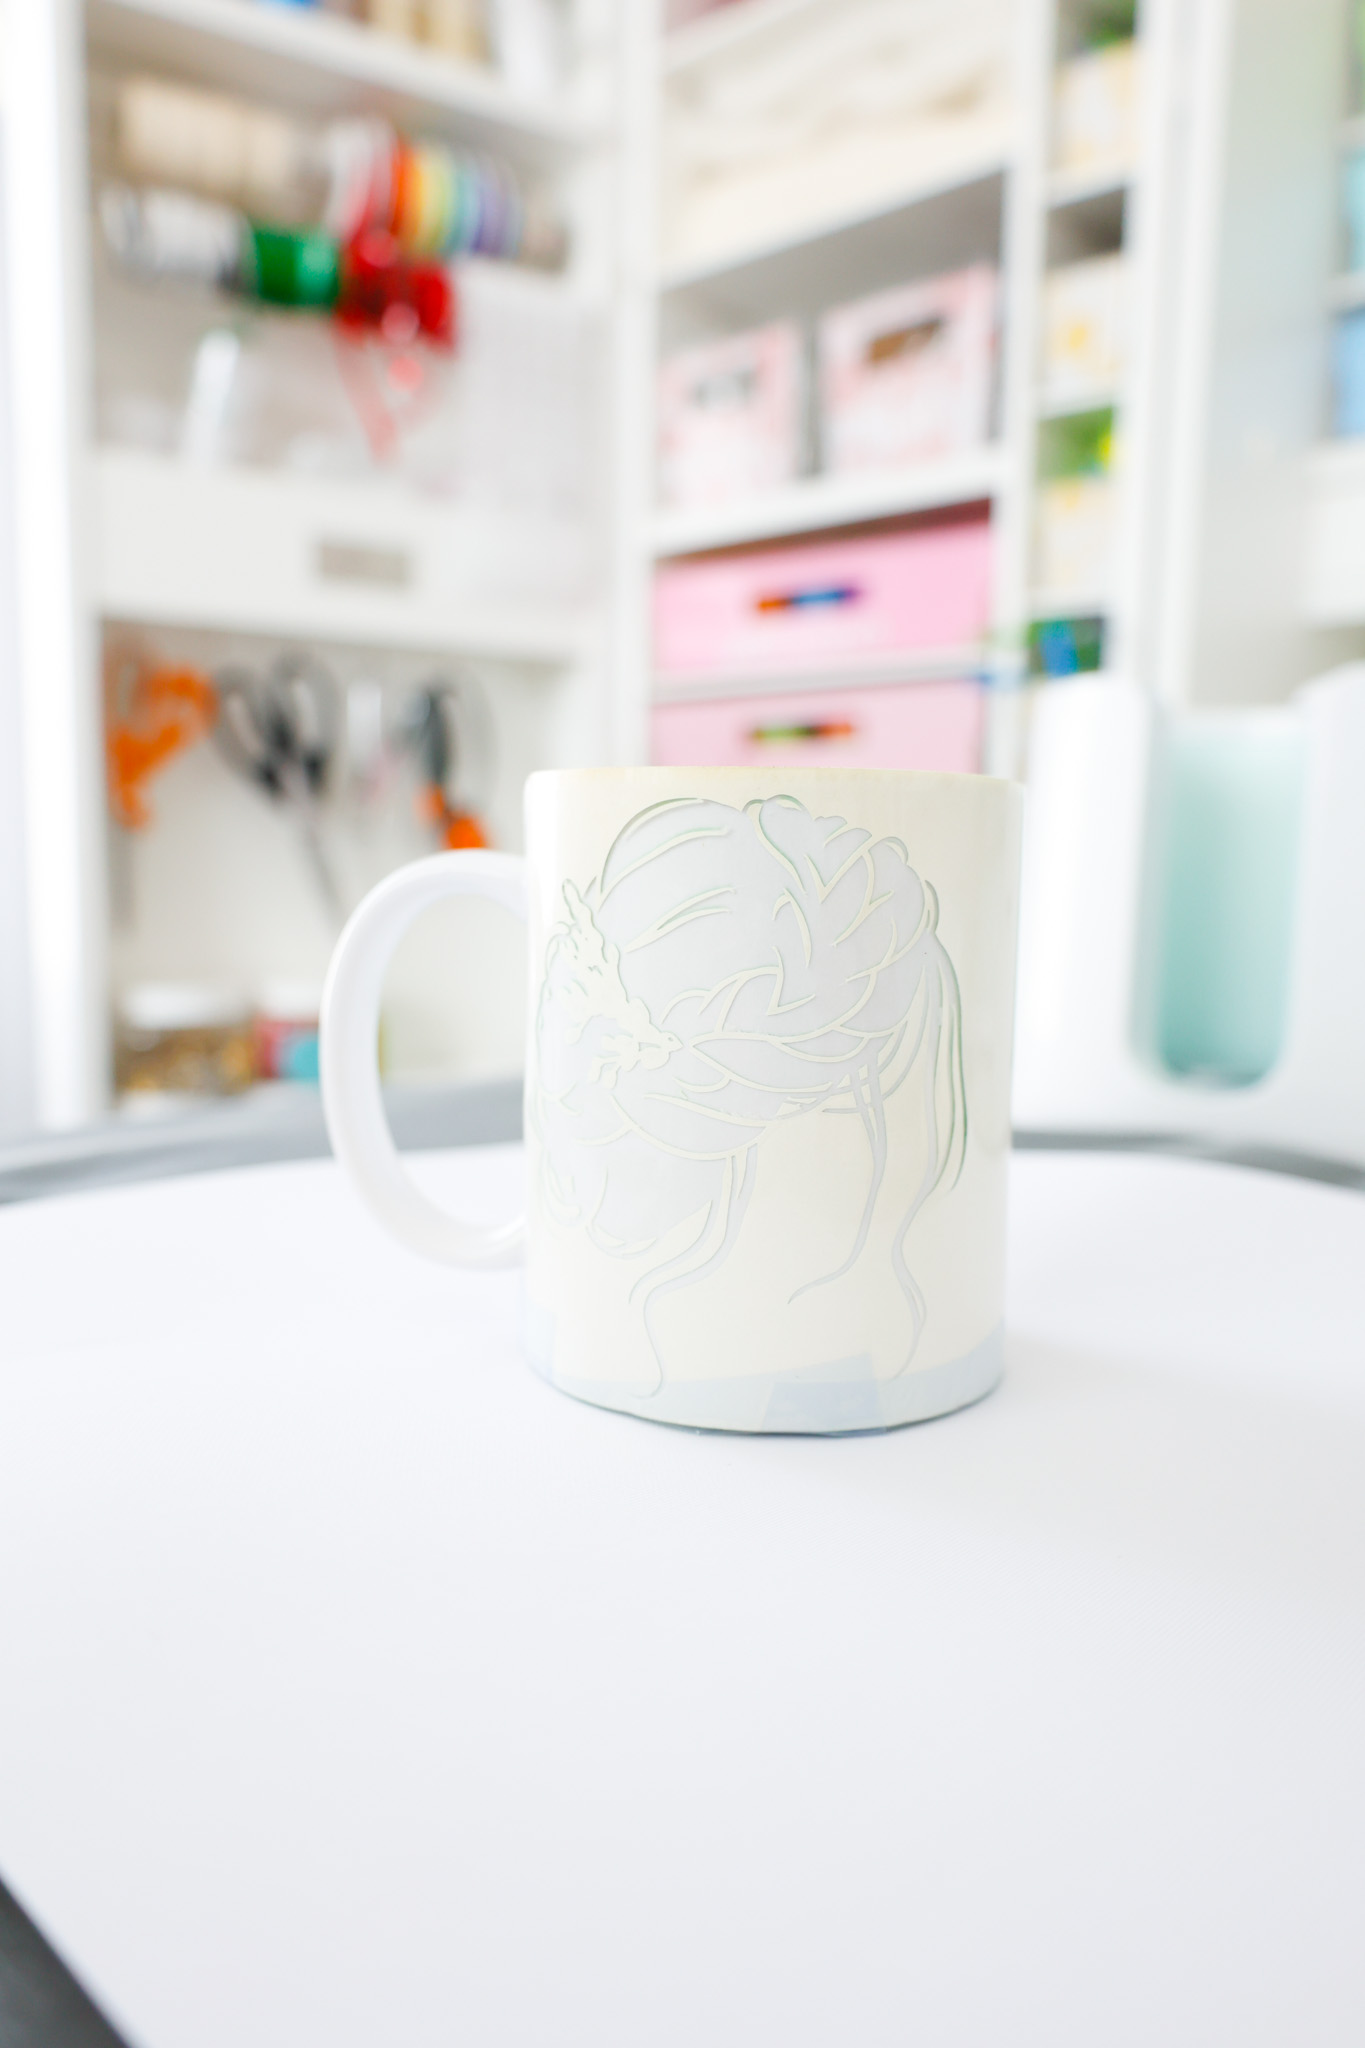
First, I searched through the images in Design Space to find one I liked.
The blue hair image is #M208F8FFB.
The Good Morning image is #M156AD09.
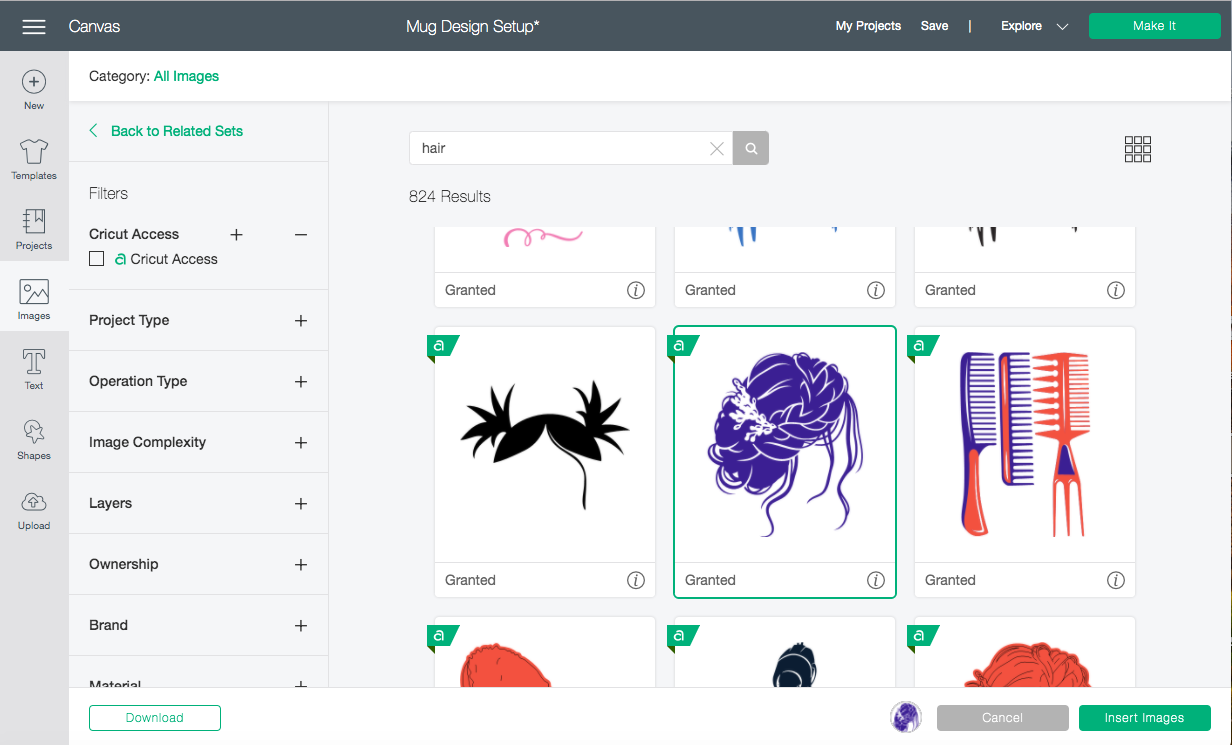
By the way, those green ‘A”s in the upper left corner of the images signify images that are available to Cricut Access subscribers like me! With Cricut Access, you get access to over 100,000 images, over 500+ fonts, discounts on licensed content (like Disney, Marvel, Star Wars, Harry Potter & more), and you can enjoy 10% off Cricut.com purchases.
Once I selected my images for my design and placed them where I’d like them to be, I clicked the eye icon on the right-hand toolbar to hide that part of the image.
Now it’s time to Attach – NOT SLICE – the image to the design.
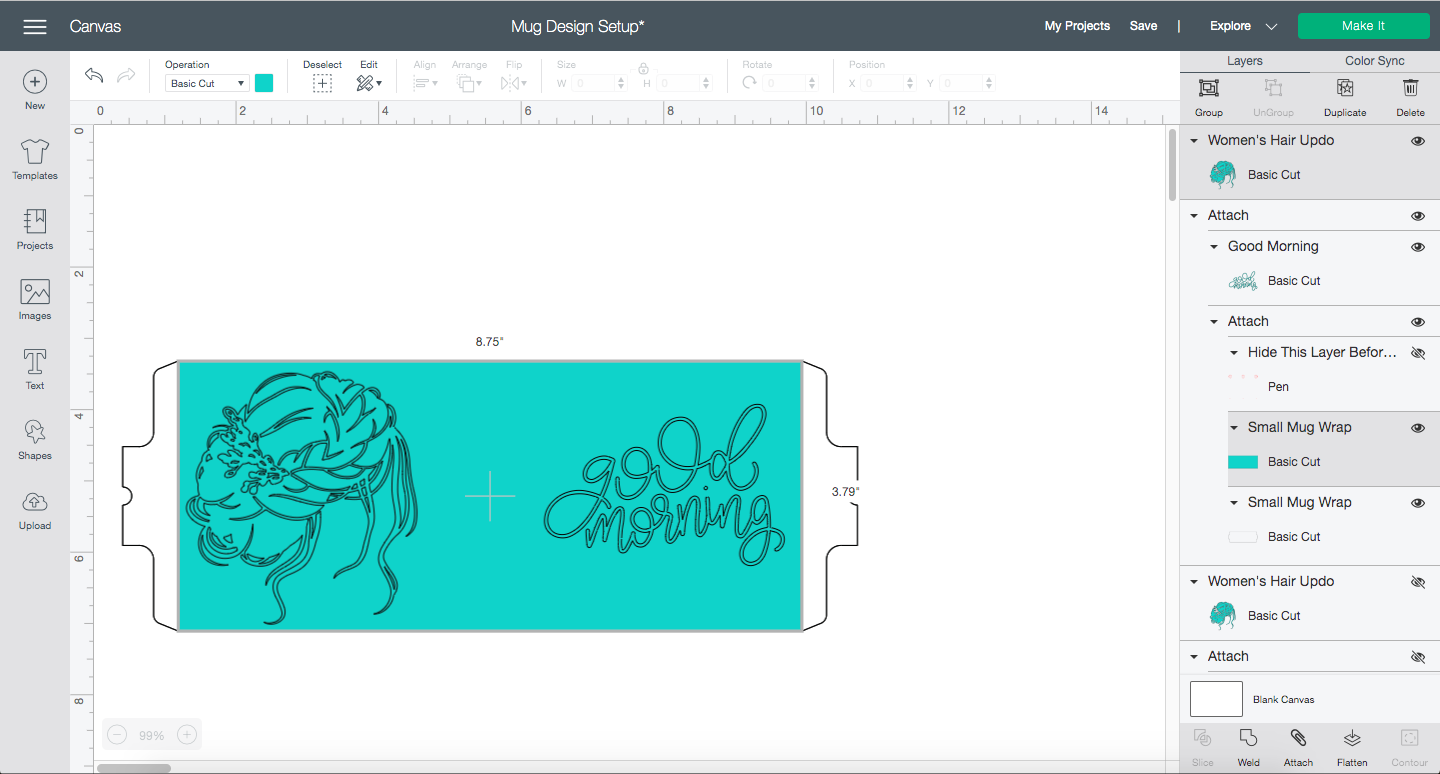
After attaching the images, I made the images the same color as the mug wrap.
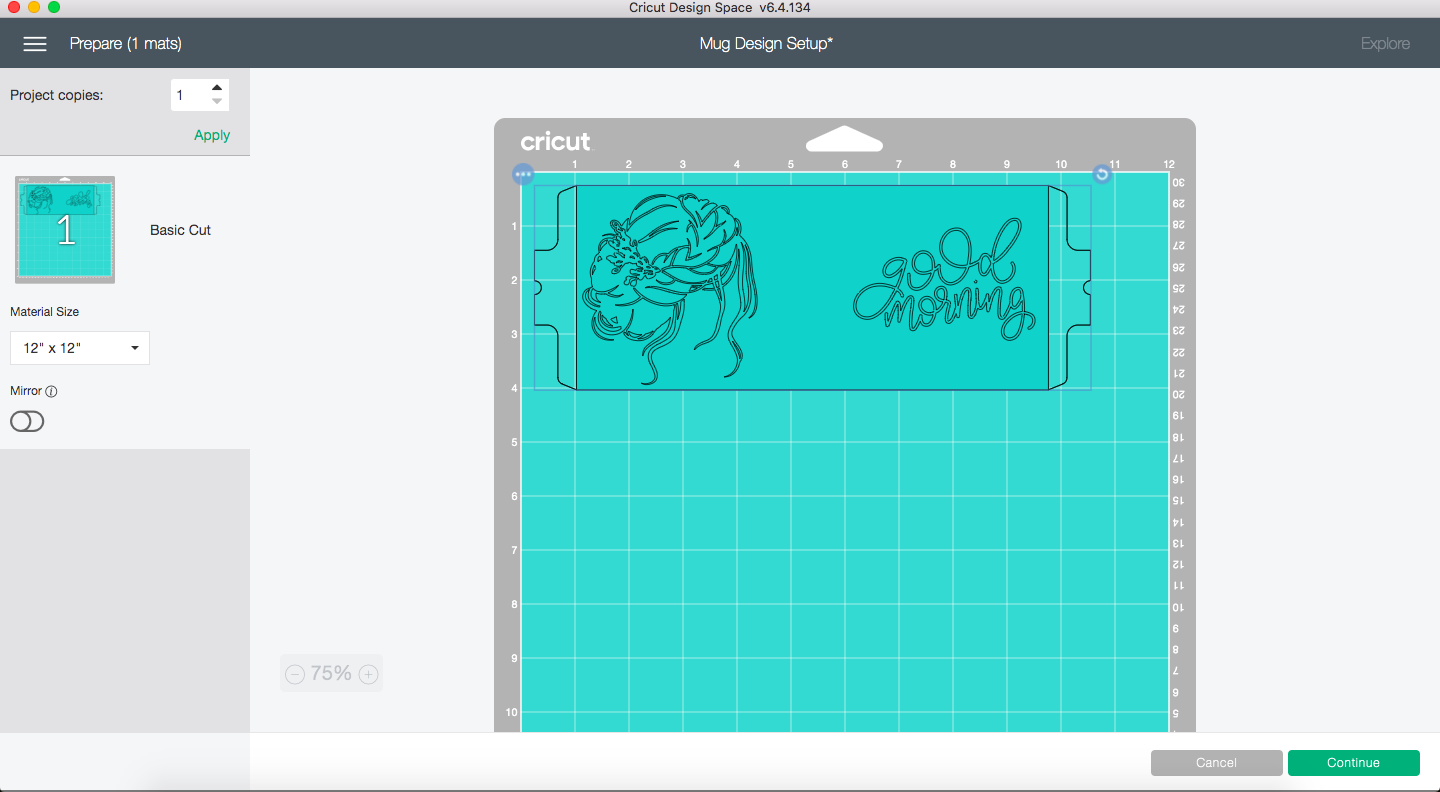
Now it’s time to cut!
Click Make It at the top right corner of your screen.
Plug your Cricut cutting machine in and turn it on.
On your Prepare screen, click on Mirror.
For all projects that require heat (EasyPress, iron-on, and Mug Press), your design will need to be mirrored.
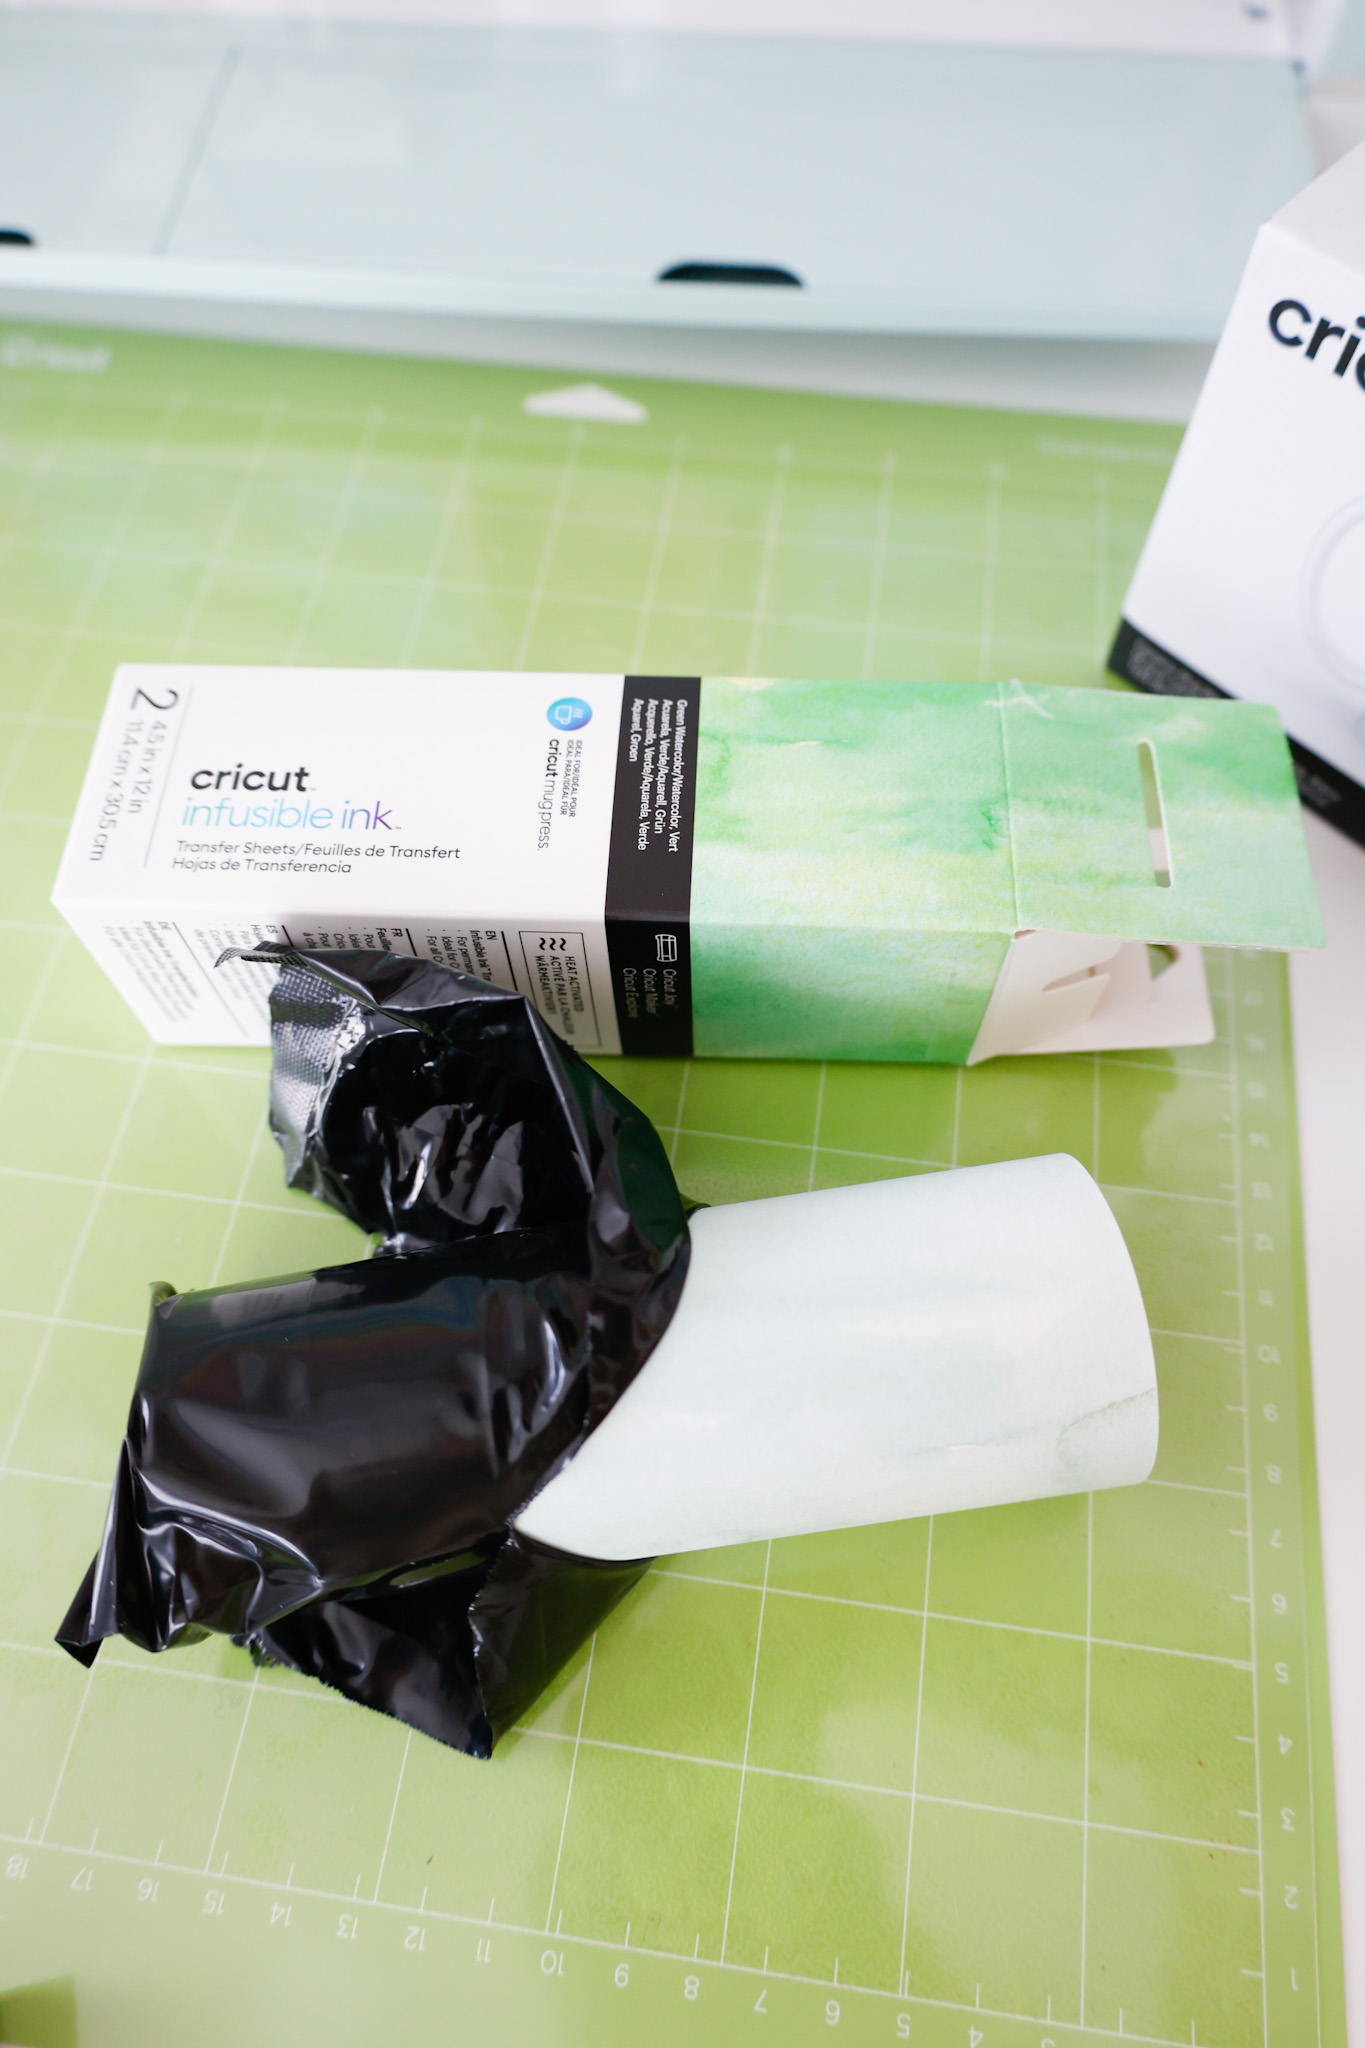
Open your Cricut Infusible Ink Transfer Sheets – I’m using one that is sized perfectly for Mug Press projects.
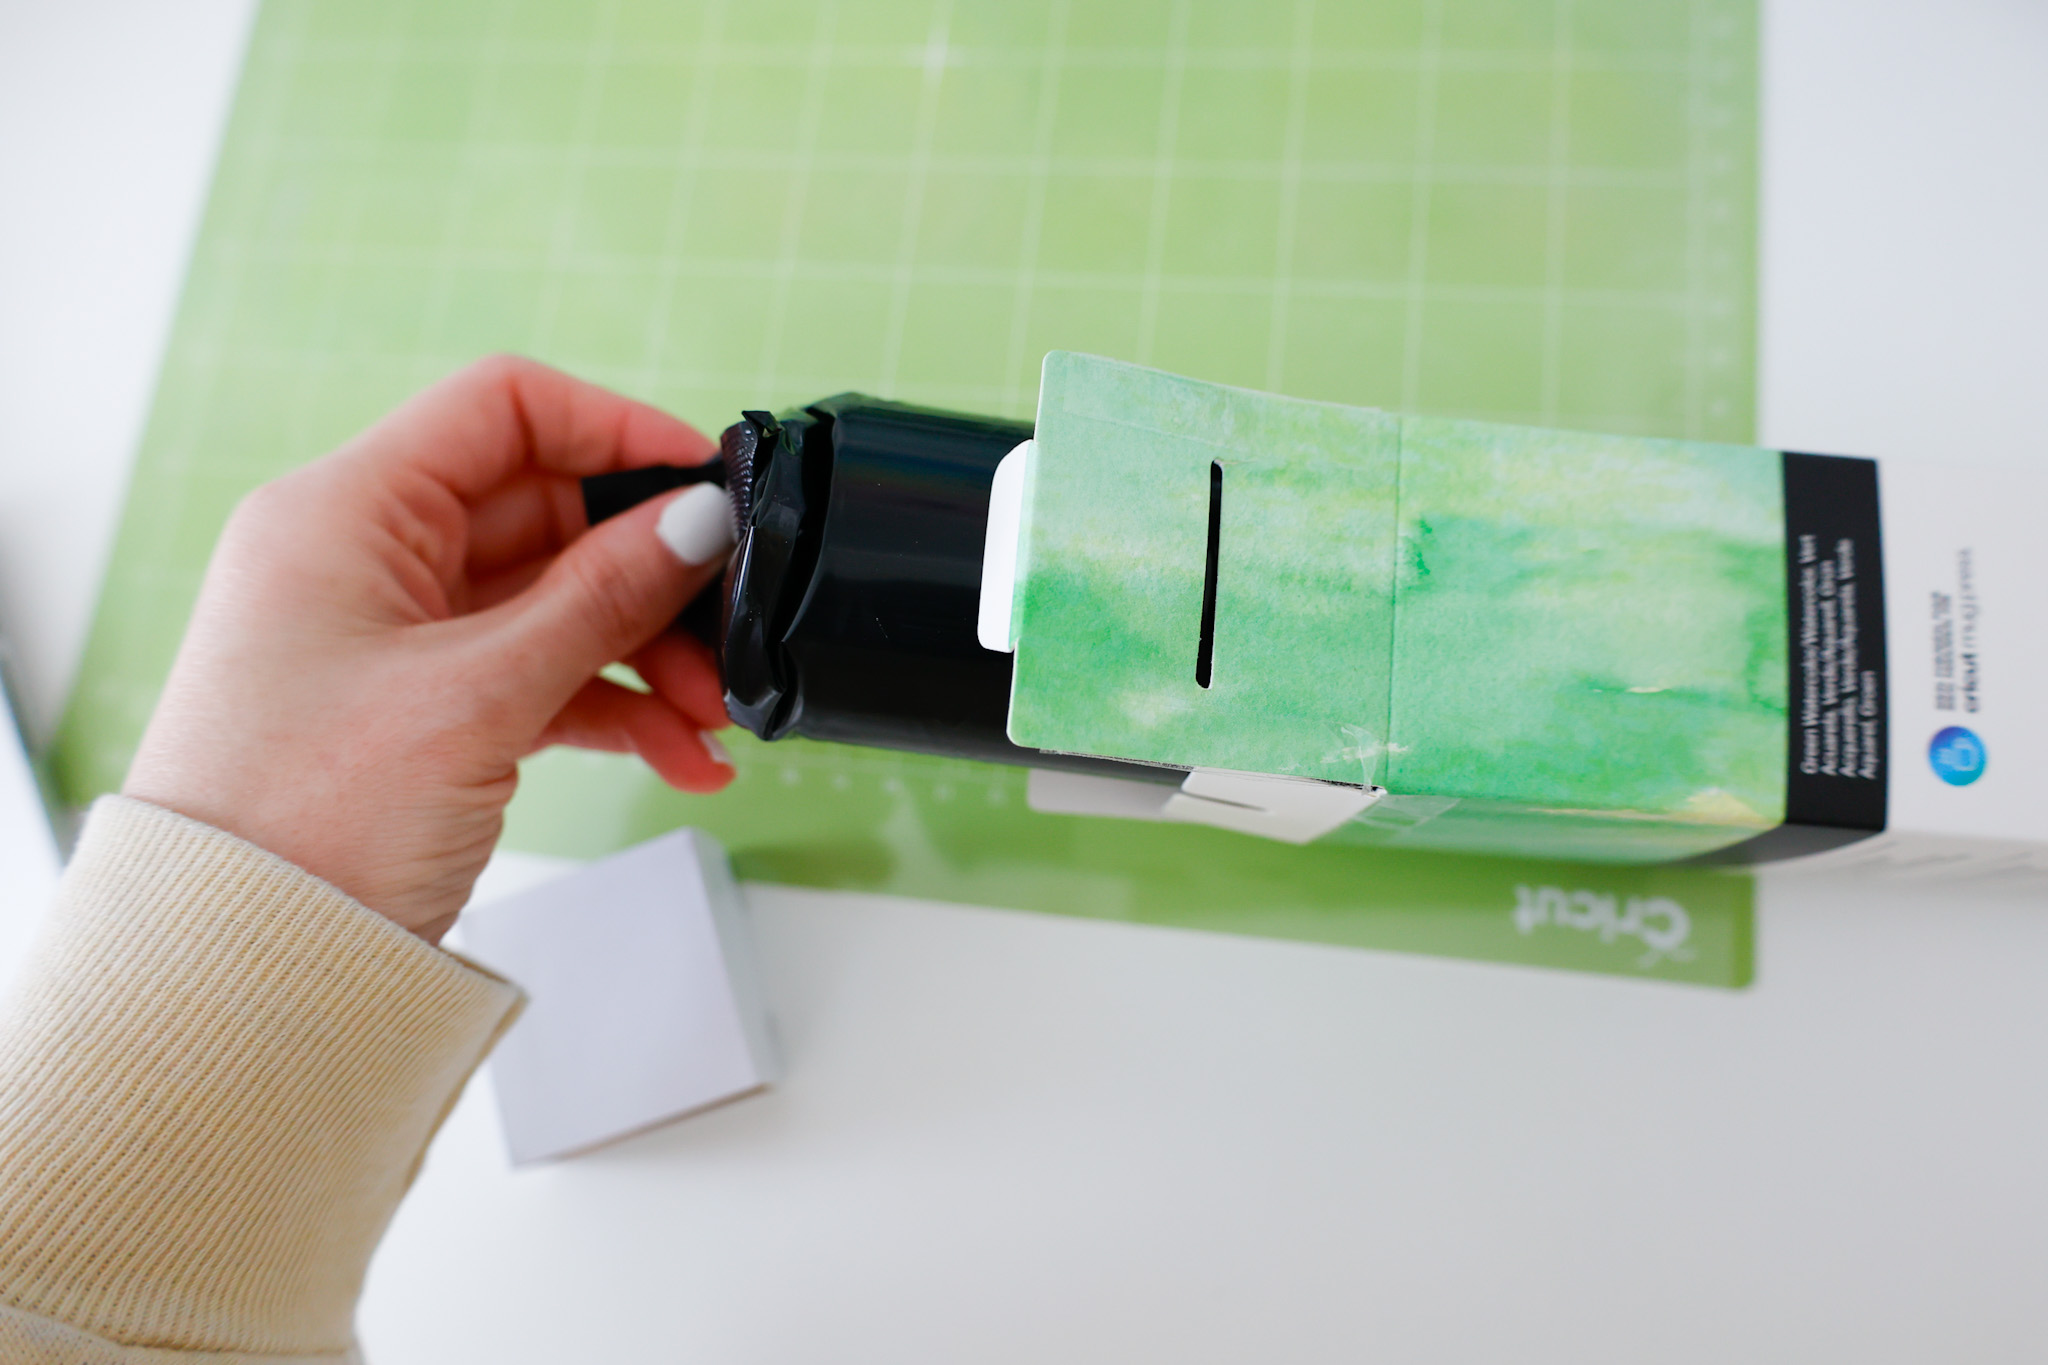
Infusible Ink transfer sheets are always light in color, but once heat is applied, the colors turn vibrant.
For instance, the black infusible ink sheets look brown until they are used.
Look at the image on the outside of the box to see what your activated infusible ink design will look like.
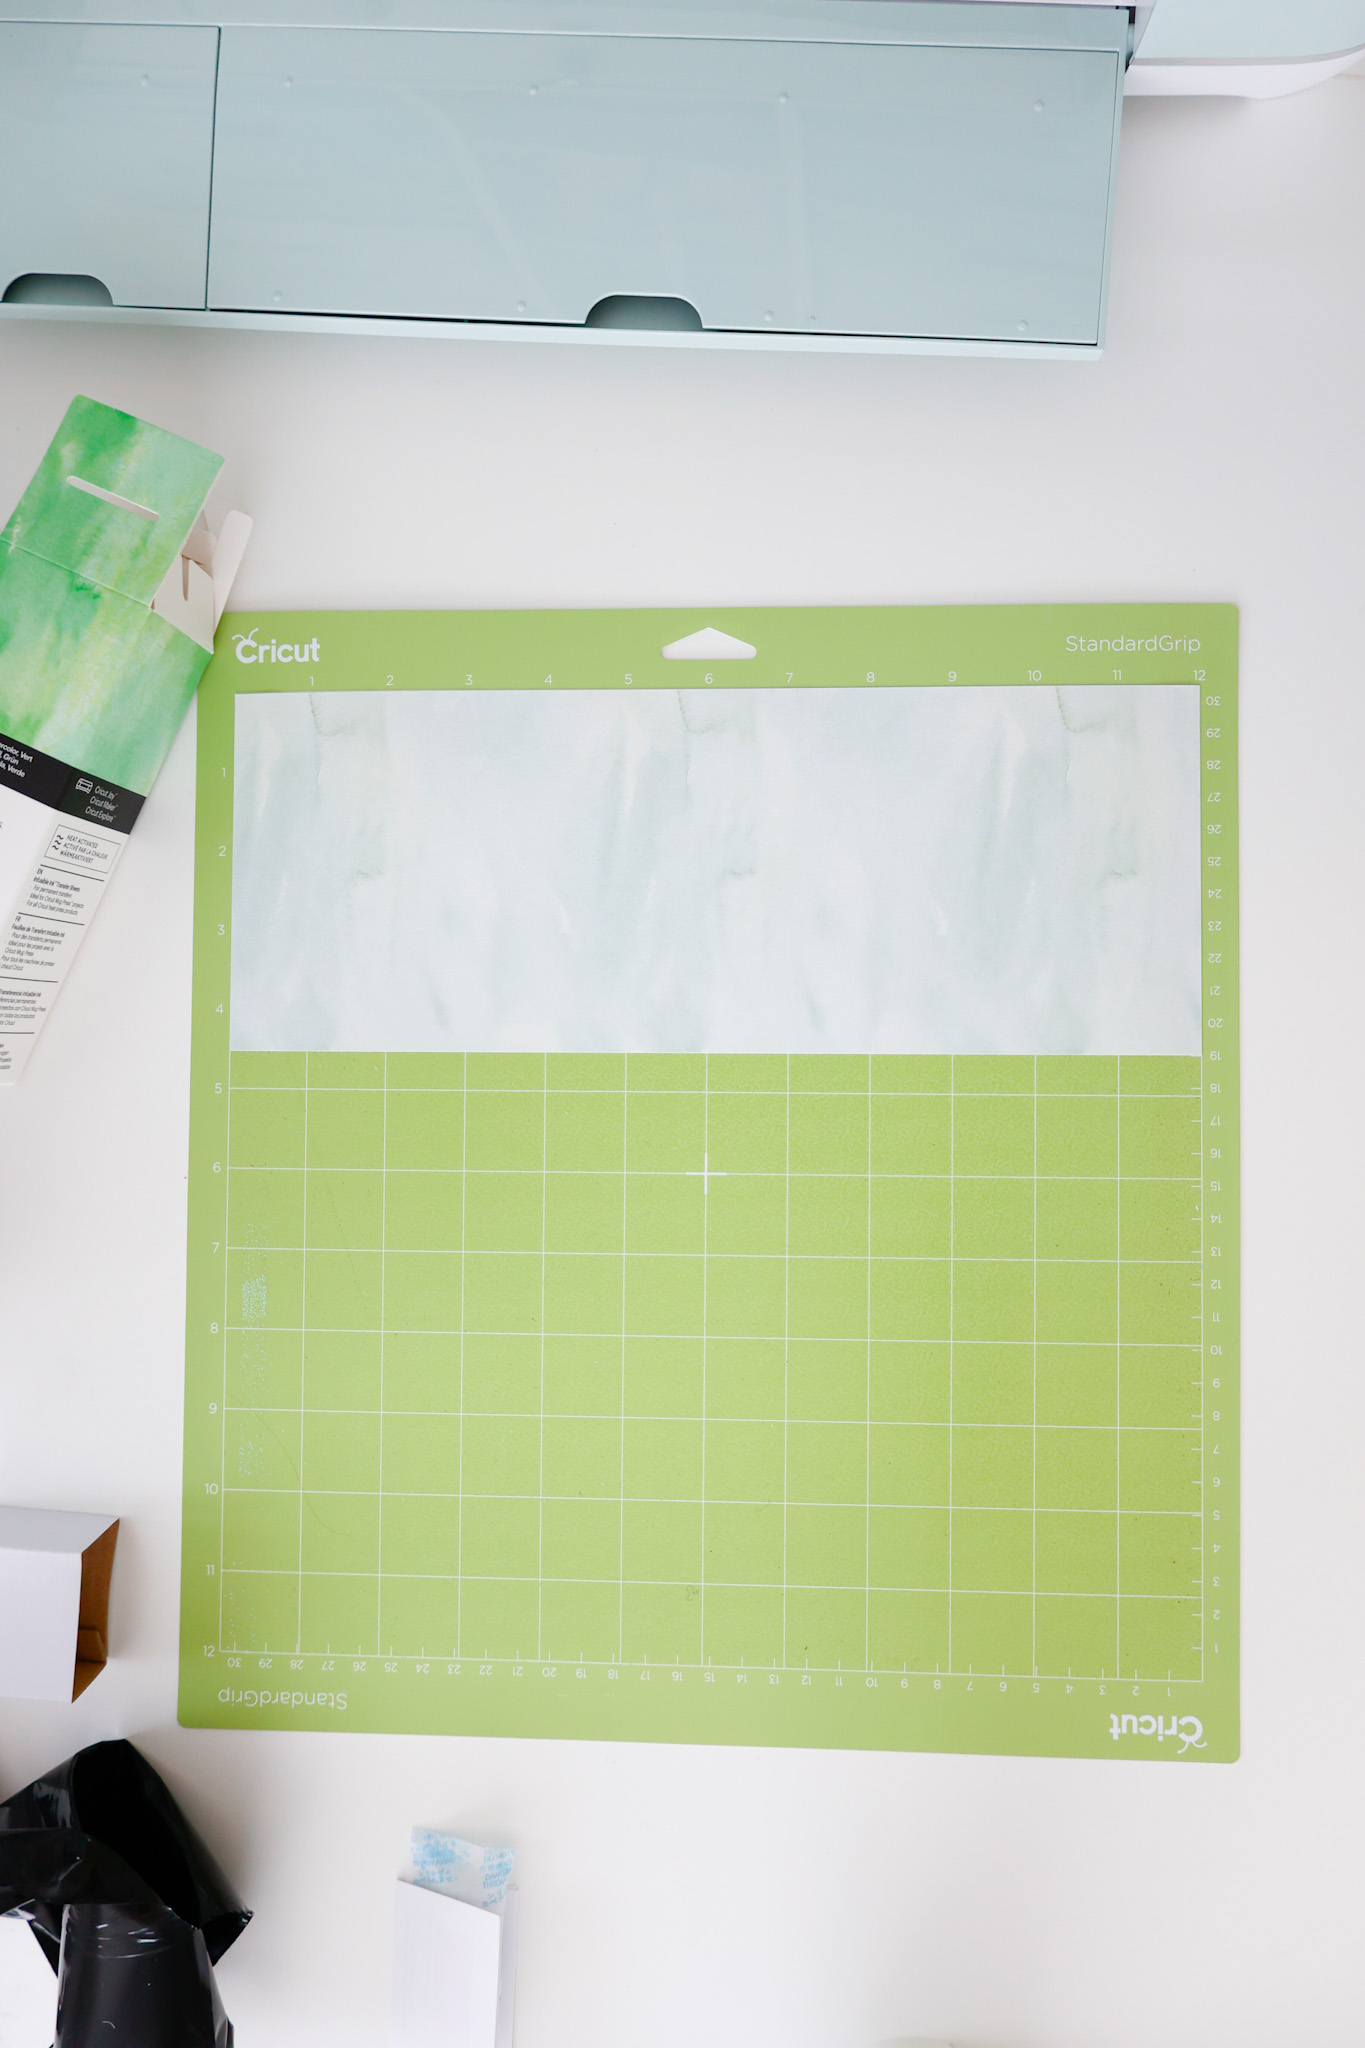
Once your transfer sheet is placed on a green StandardGrip mat, load your mat into your machine with a fine-point blade in housing B.
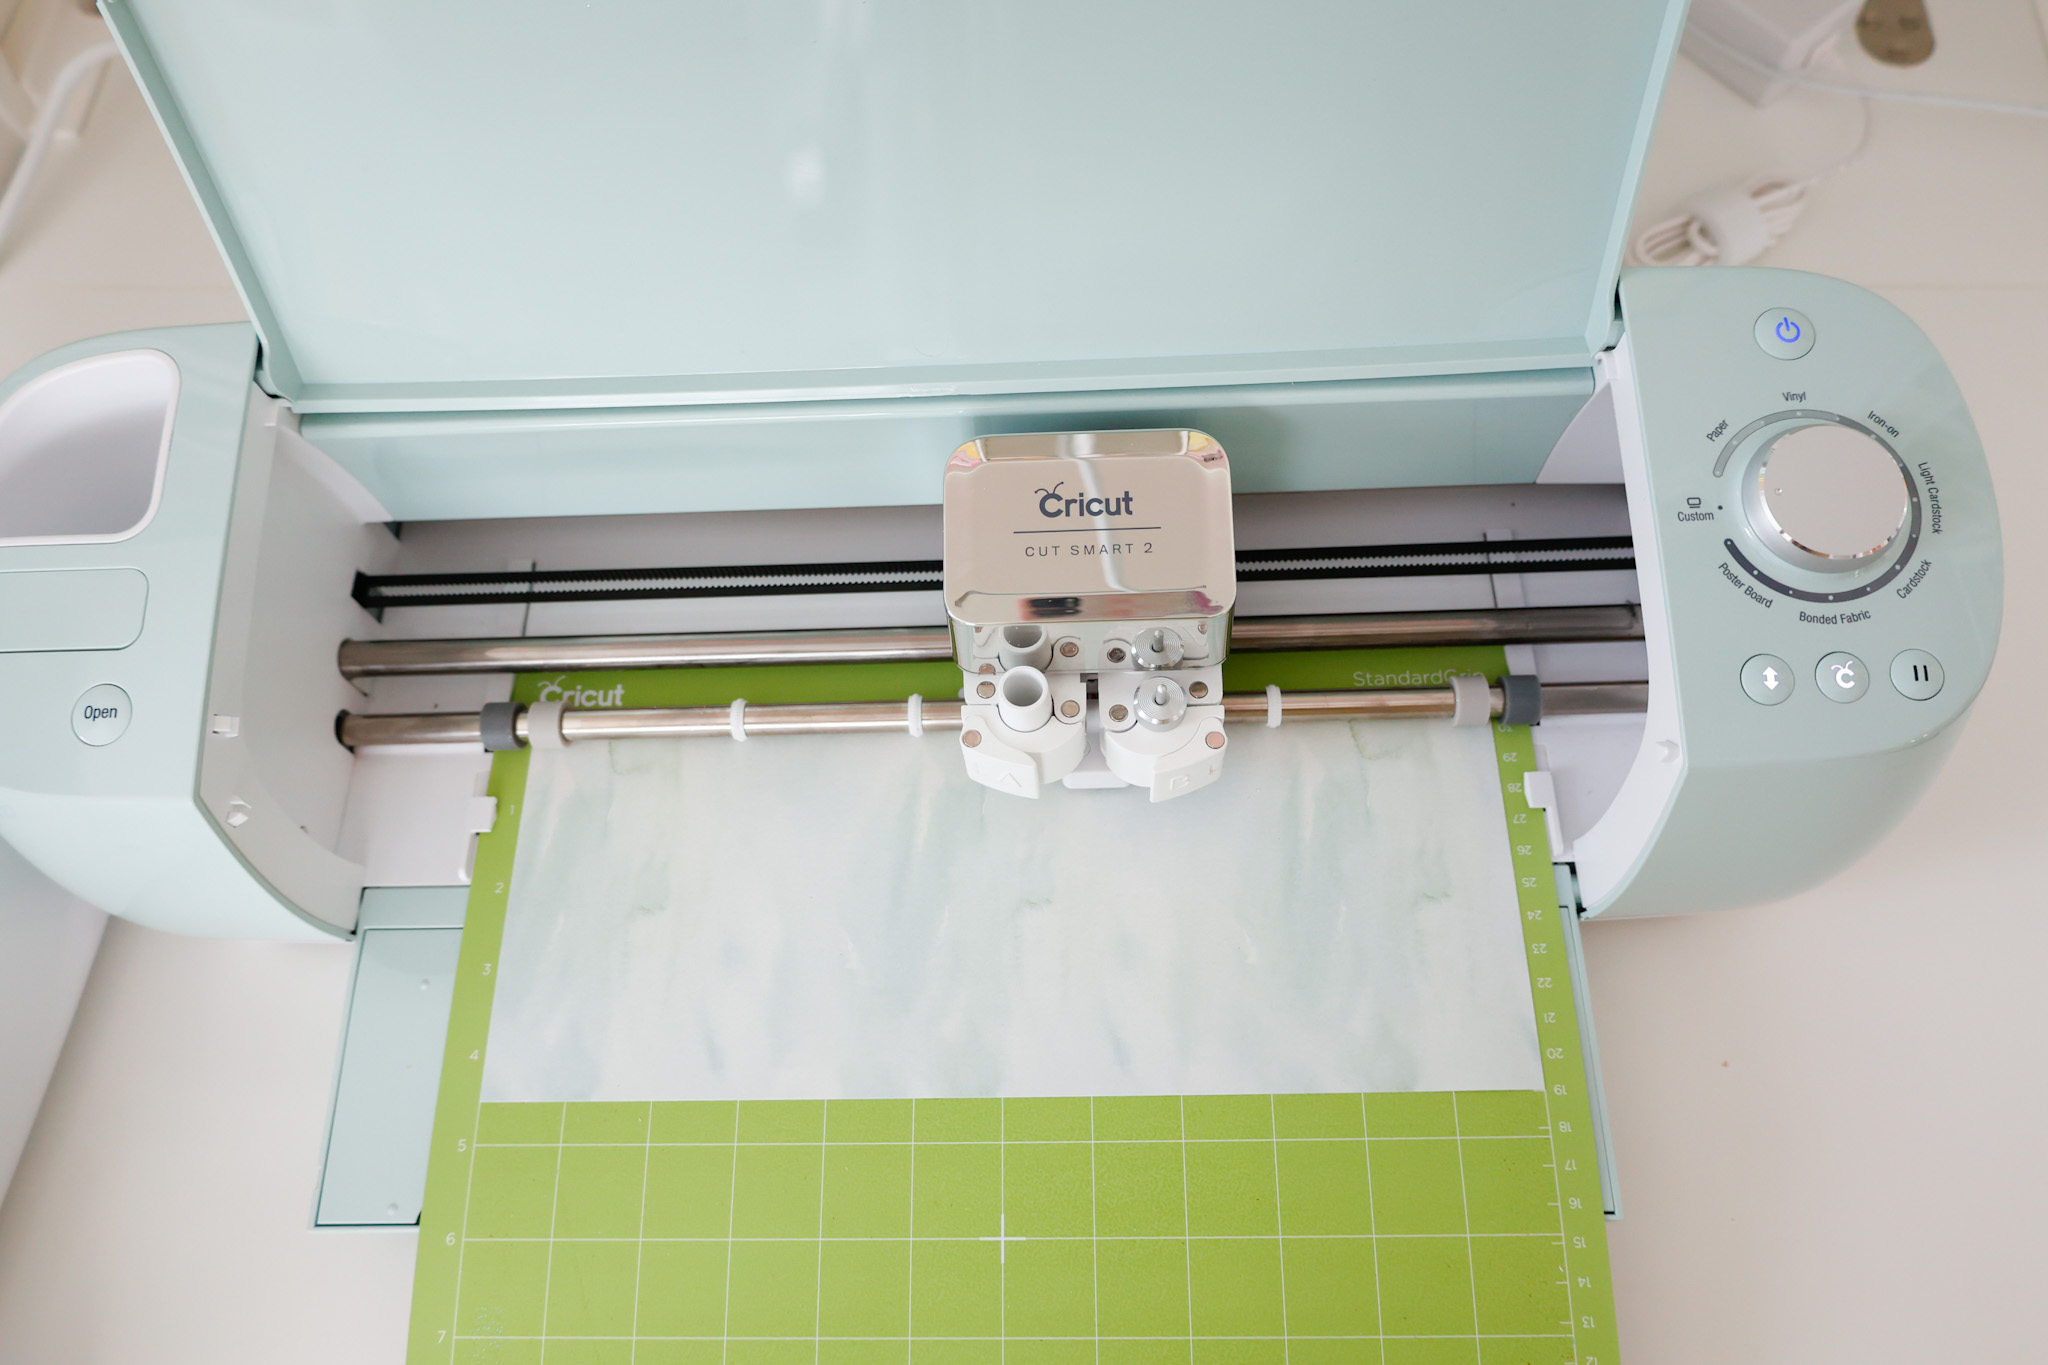
Double-check that your design is mirrored, and proceed to cut your transfer sheet.
To cut infusible ink, I set my dial to Custom on my Explore Air 2, and selected Infusible Ink Transfer Sheet from the list of custom materials on the Make It screen in Design Space.
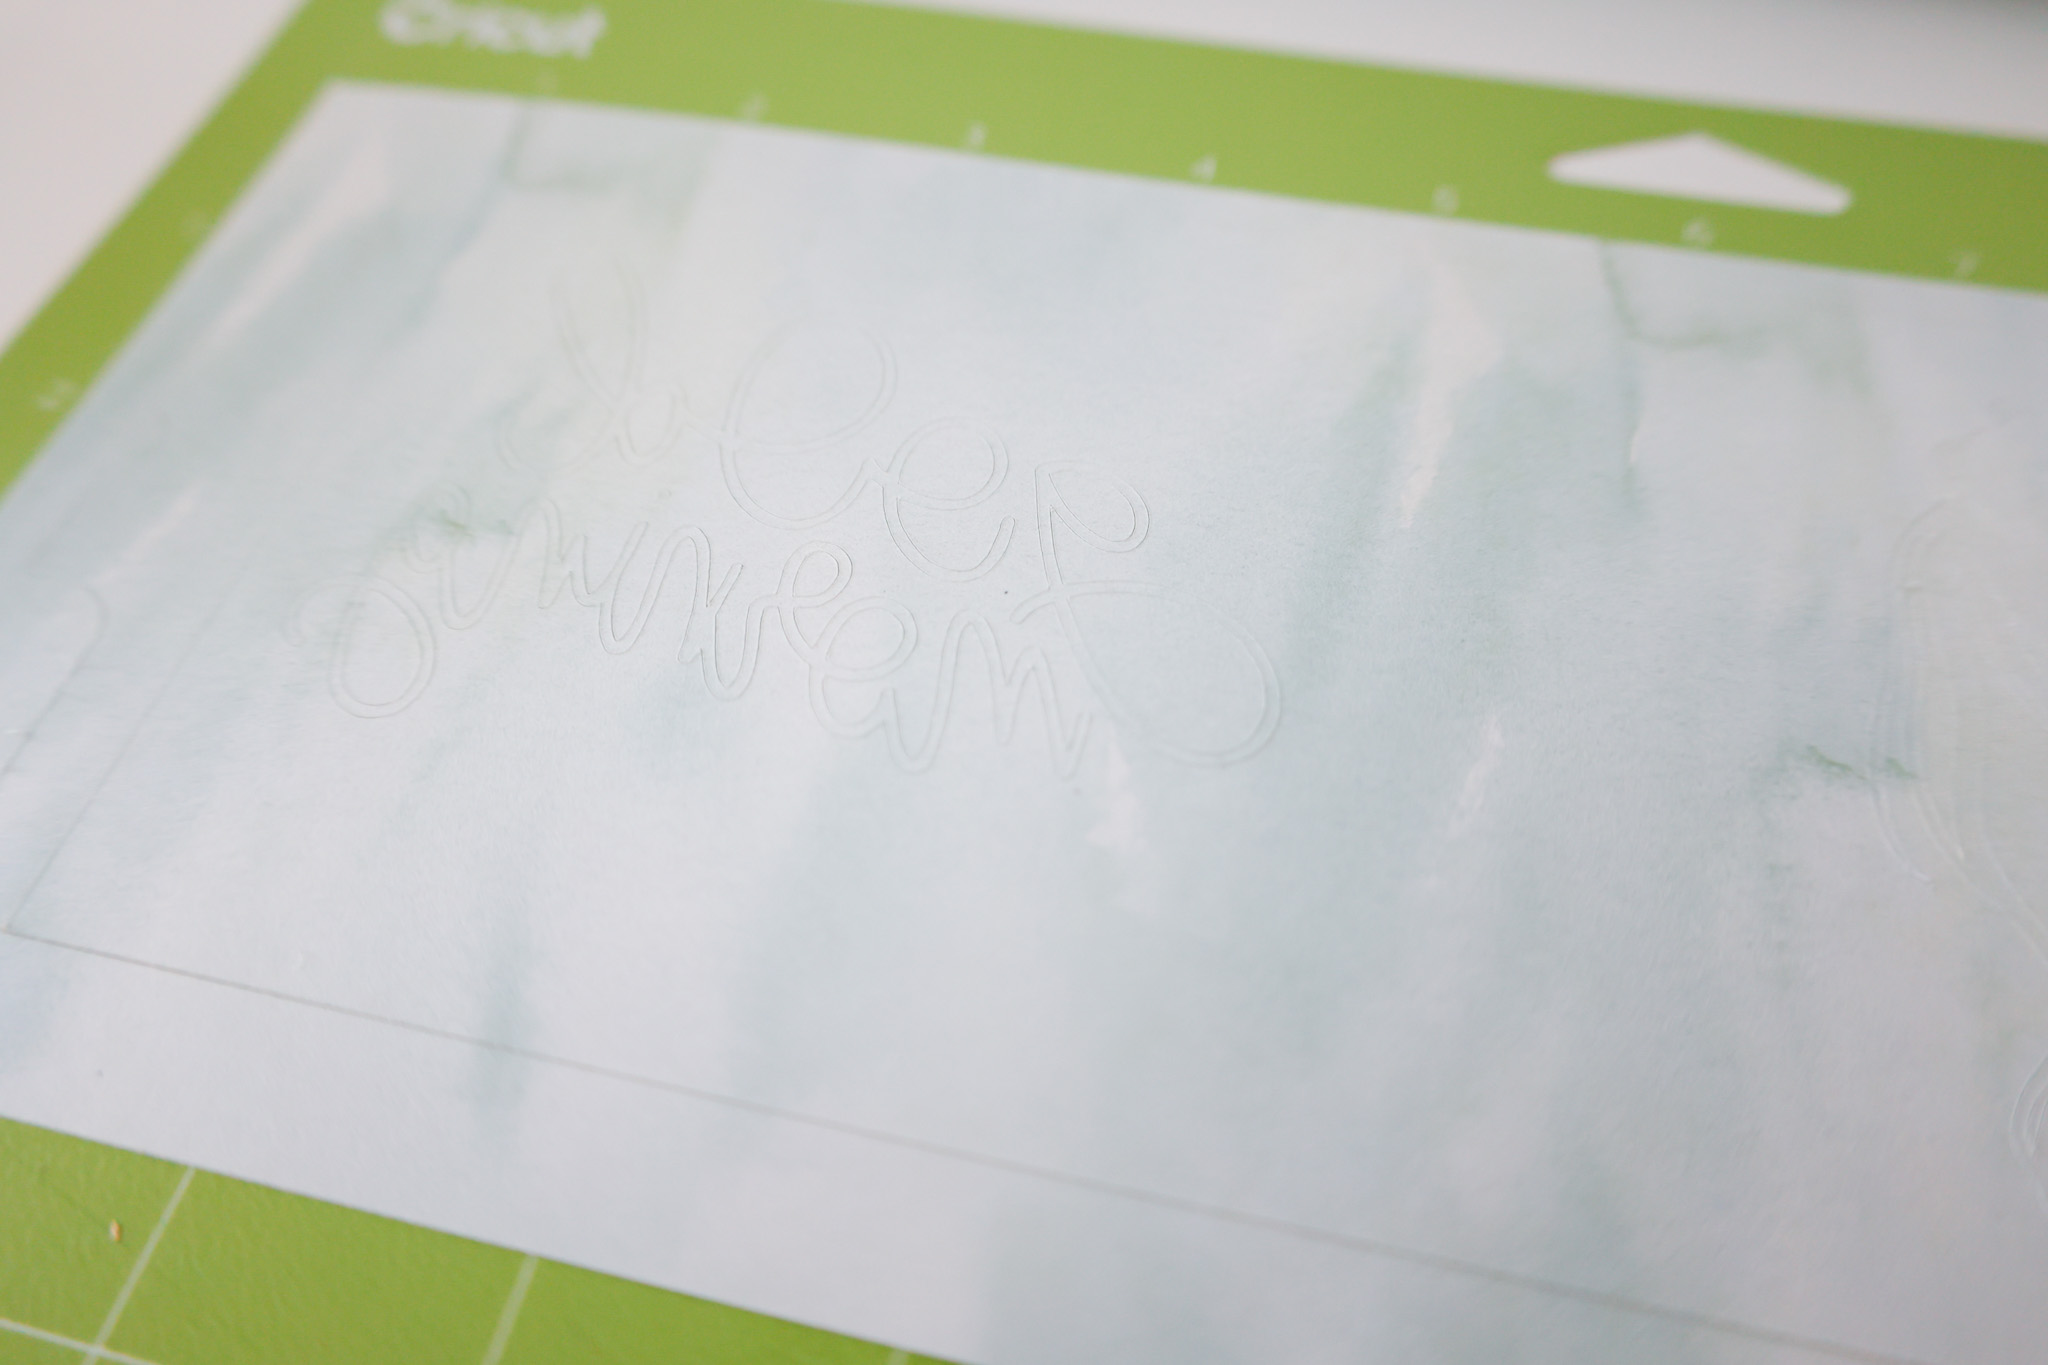
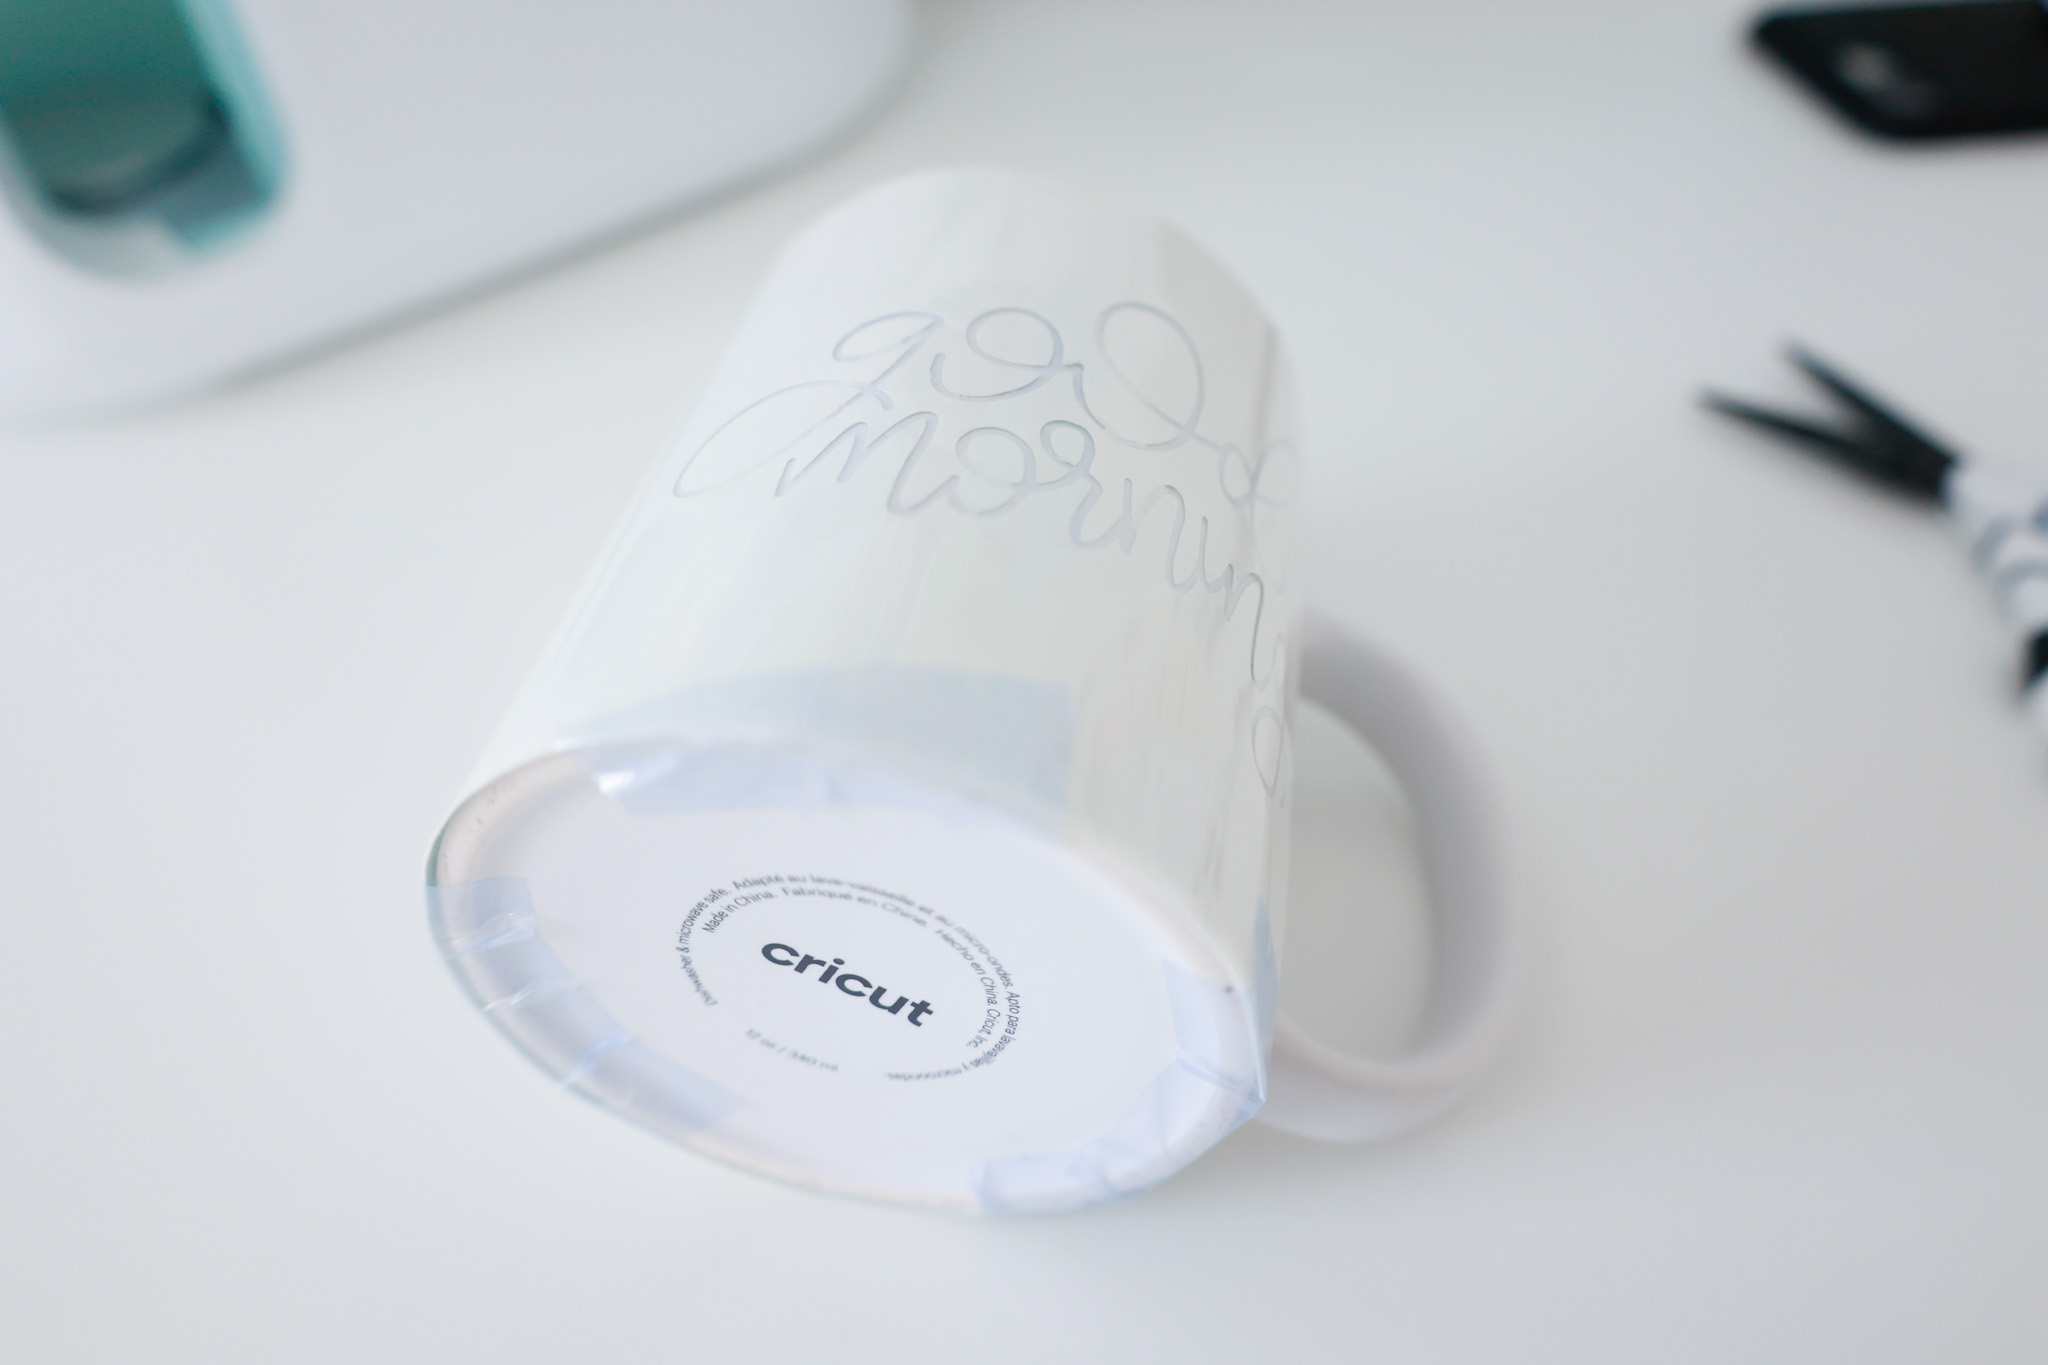
Your cutting machine will cut your design as well as the outline of your mug wrap.
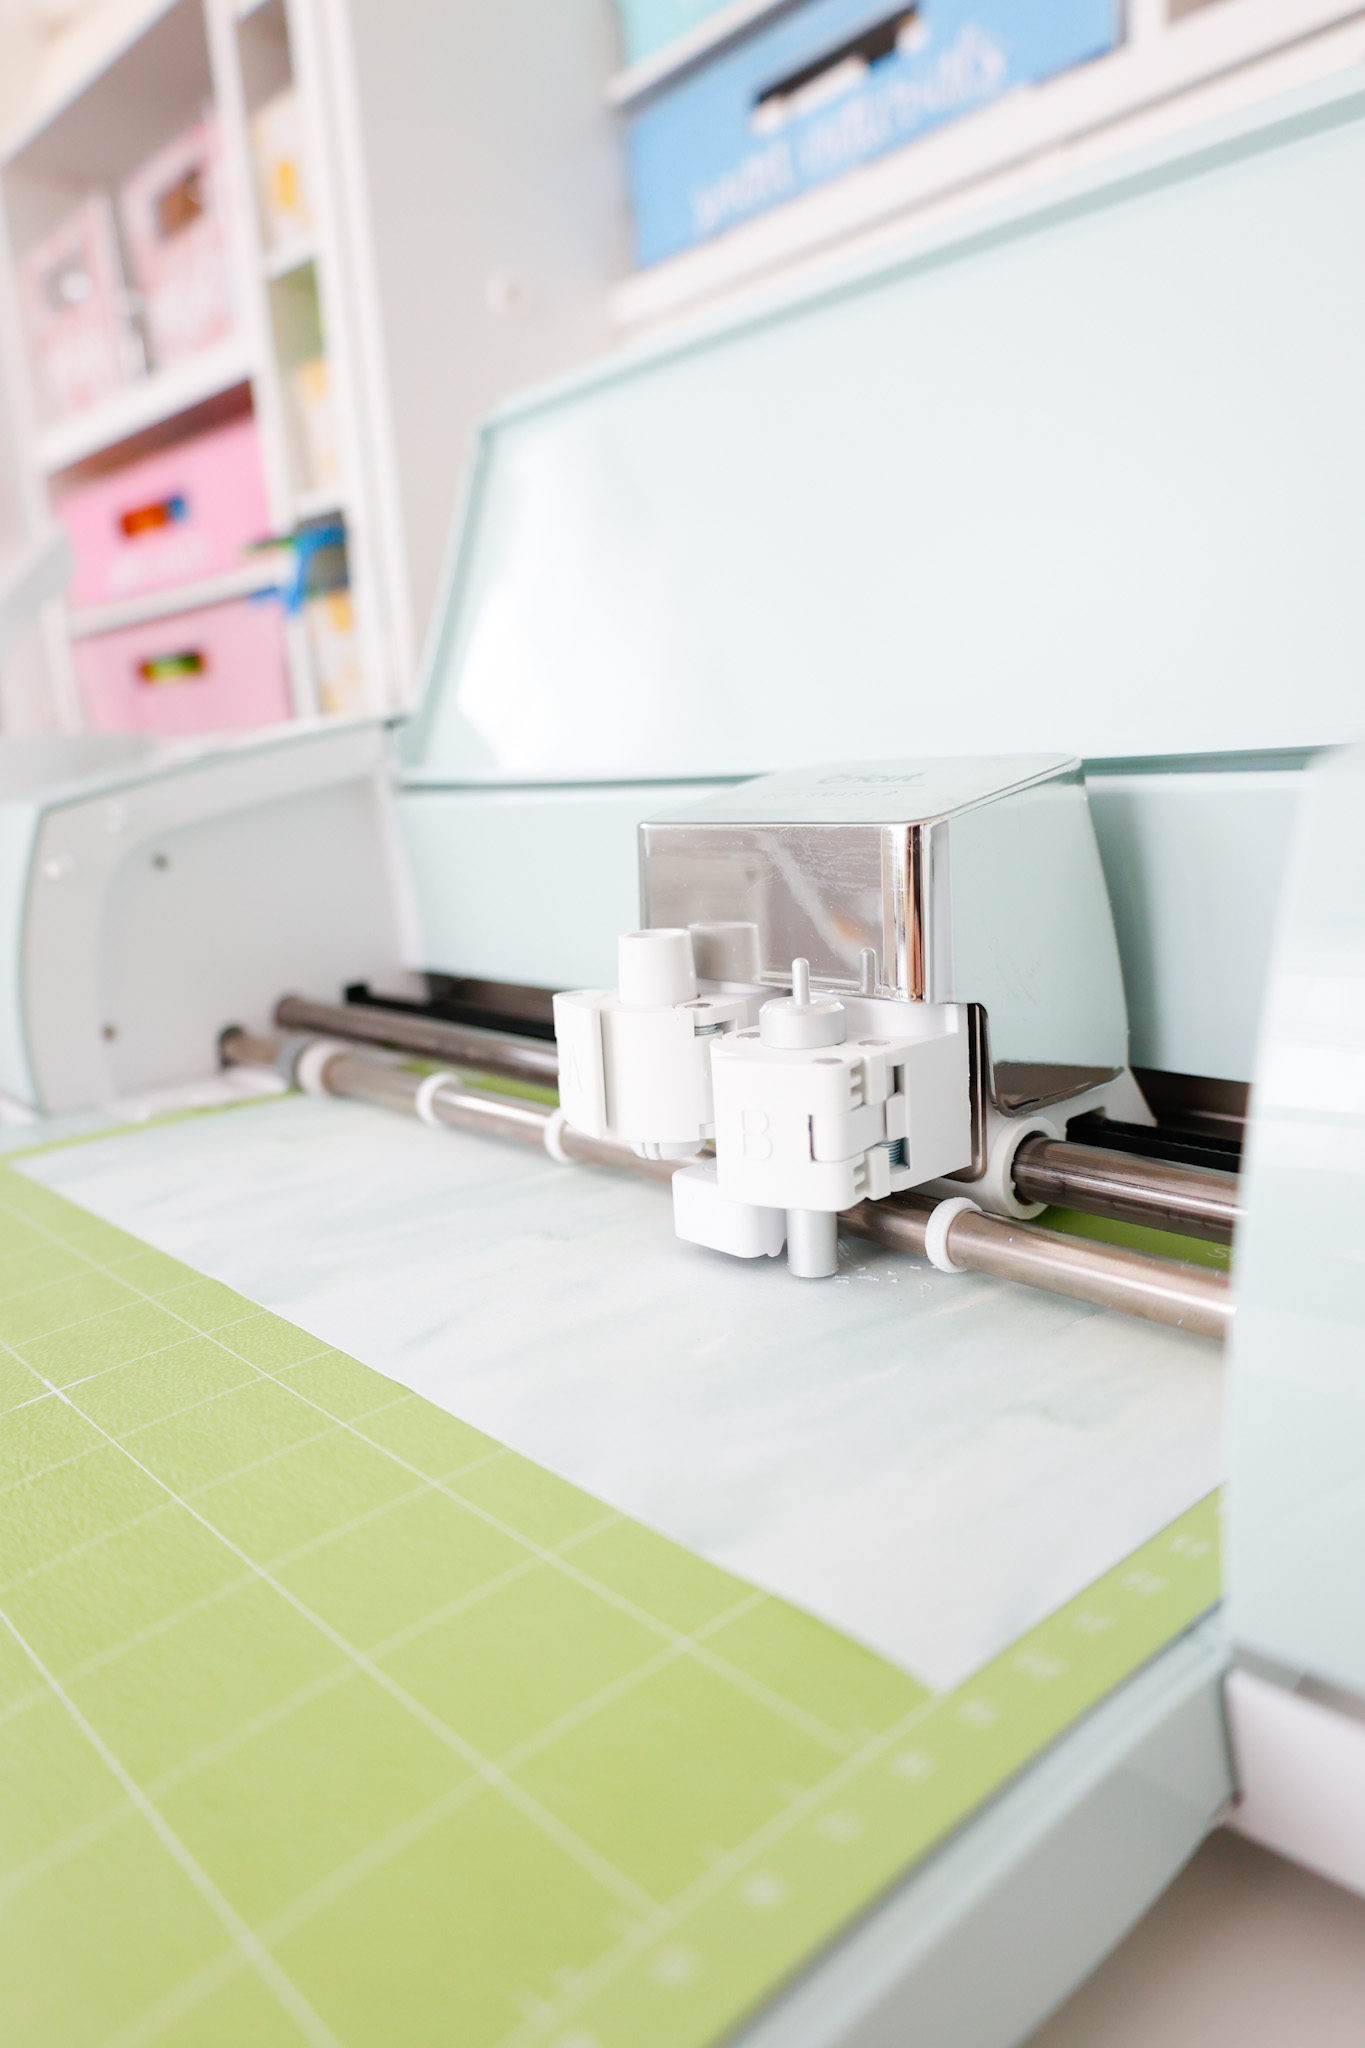
Once your design has been cut, remove your mat from the machine.
You should be able to see your mirrored design cut.
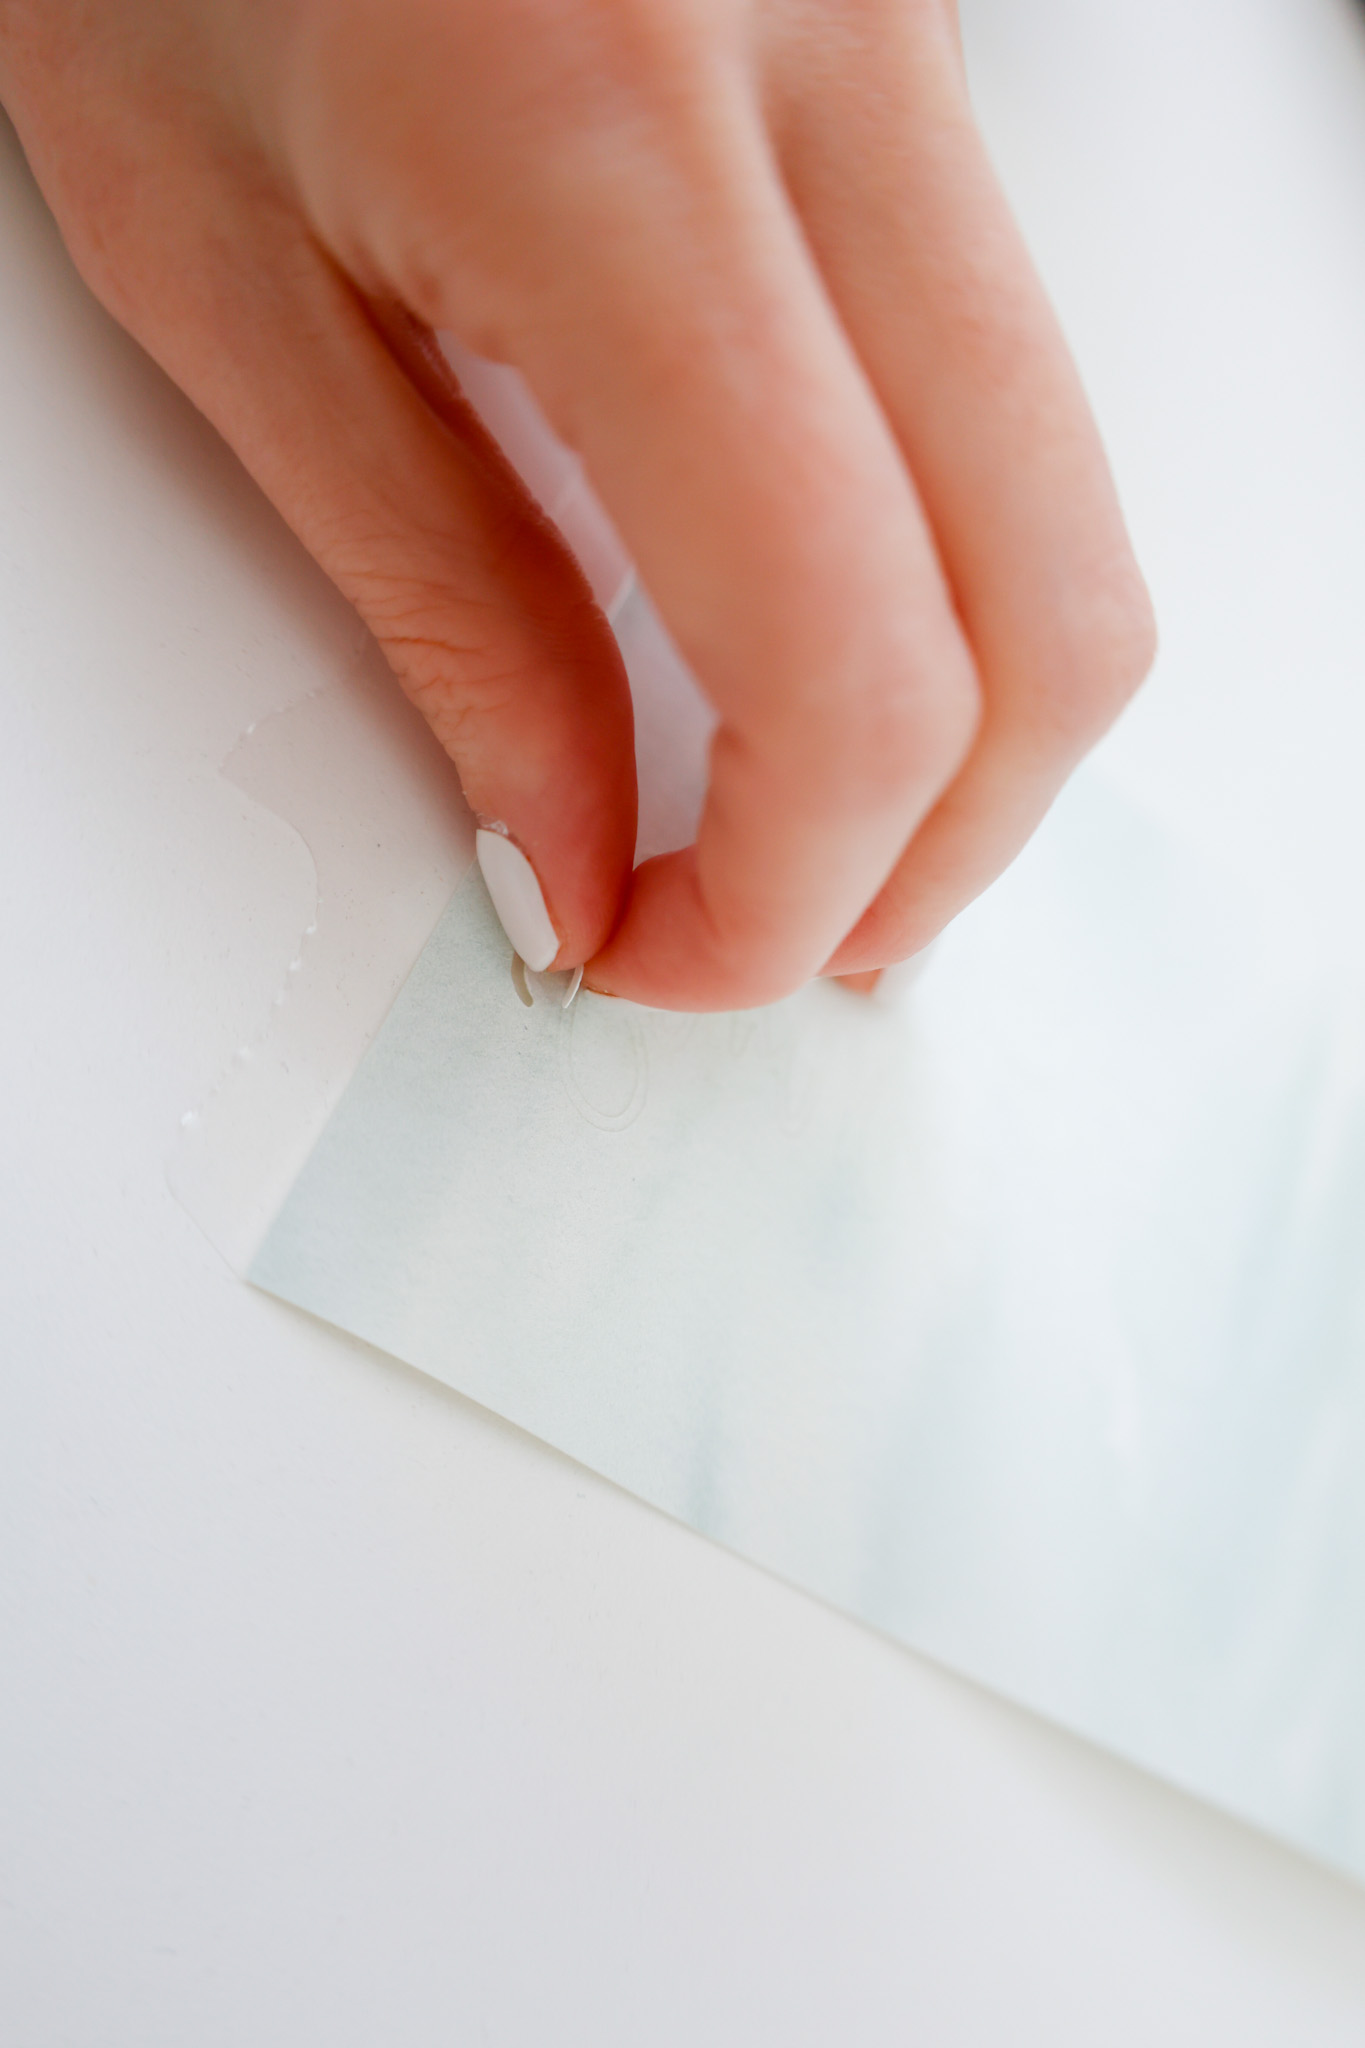
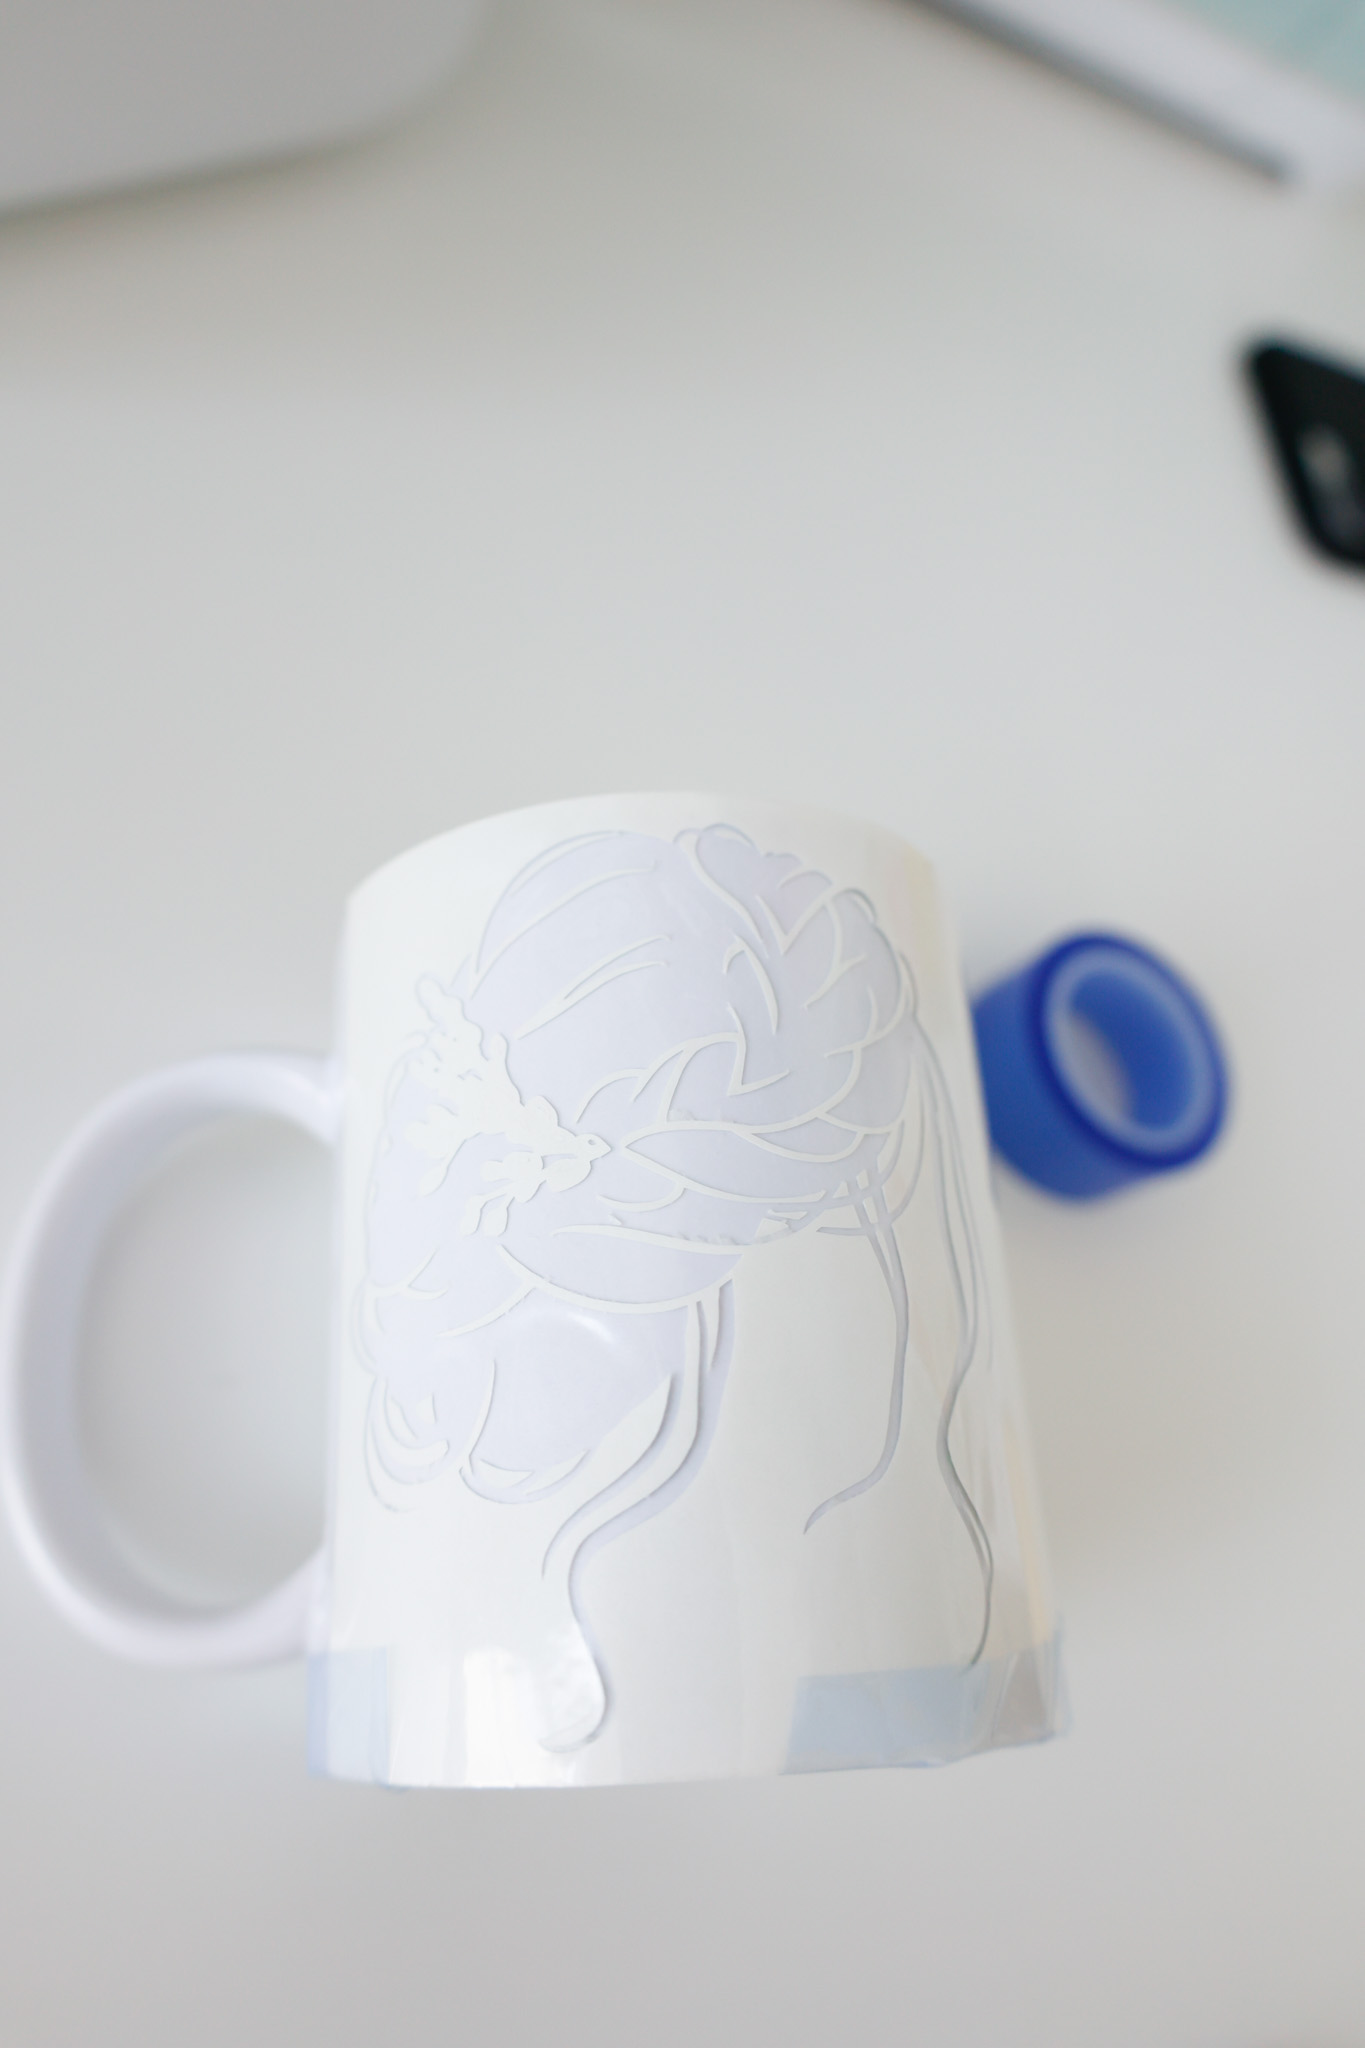
Remove the transfer sheet from the mat by placing the mat face down on a flat surface and curling it away from your transfer sheet.
Weed your design with your hand.
I like to curl the transfer sheet and lift the pieces I need to with my thumbnail.
Cricut advises that you refrain from using a weeder as that can scratch off the infusible ink from the transfer sheet, resulting in spots from your design missing.
Once your design has been weeded, it’s time to apply it to your mug!
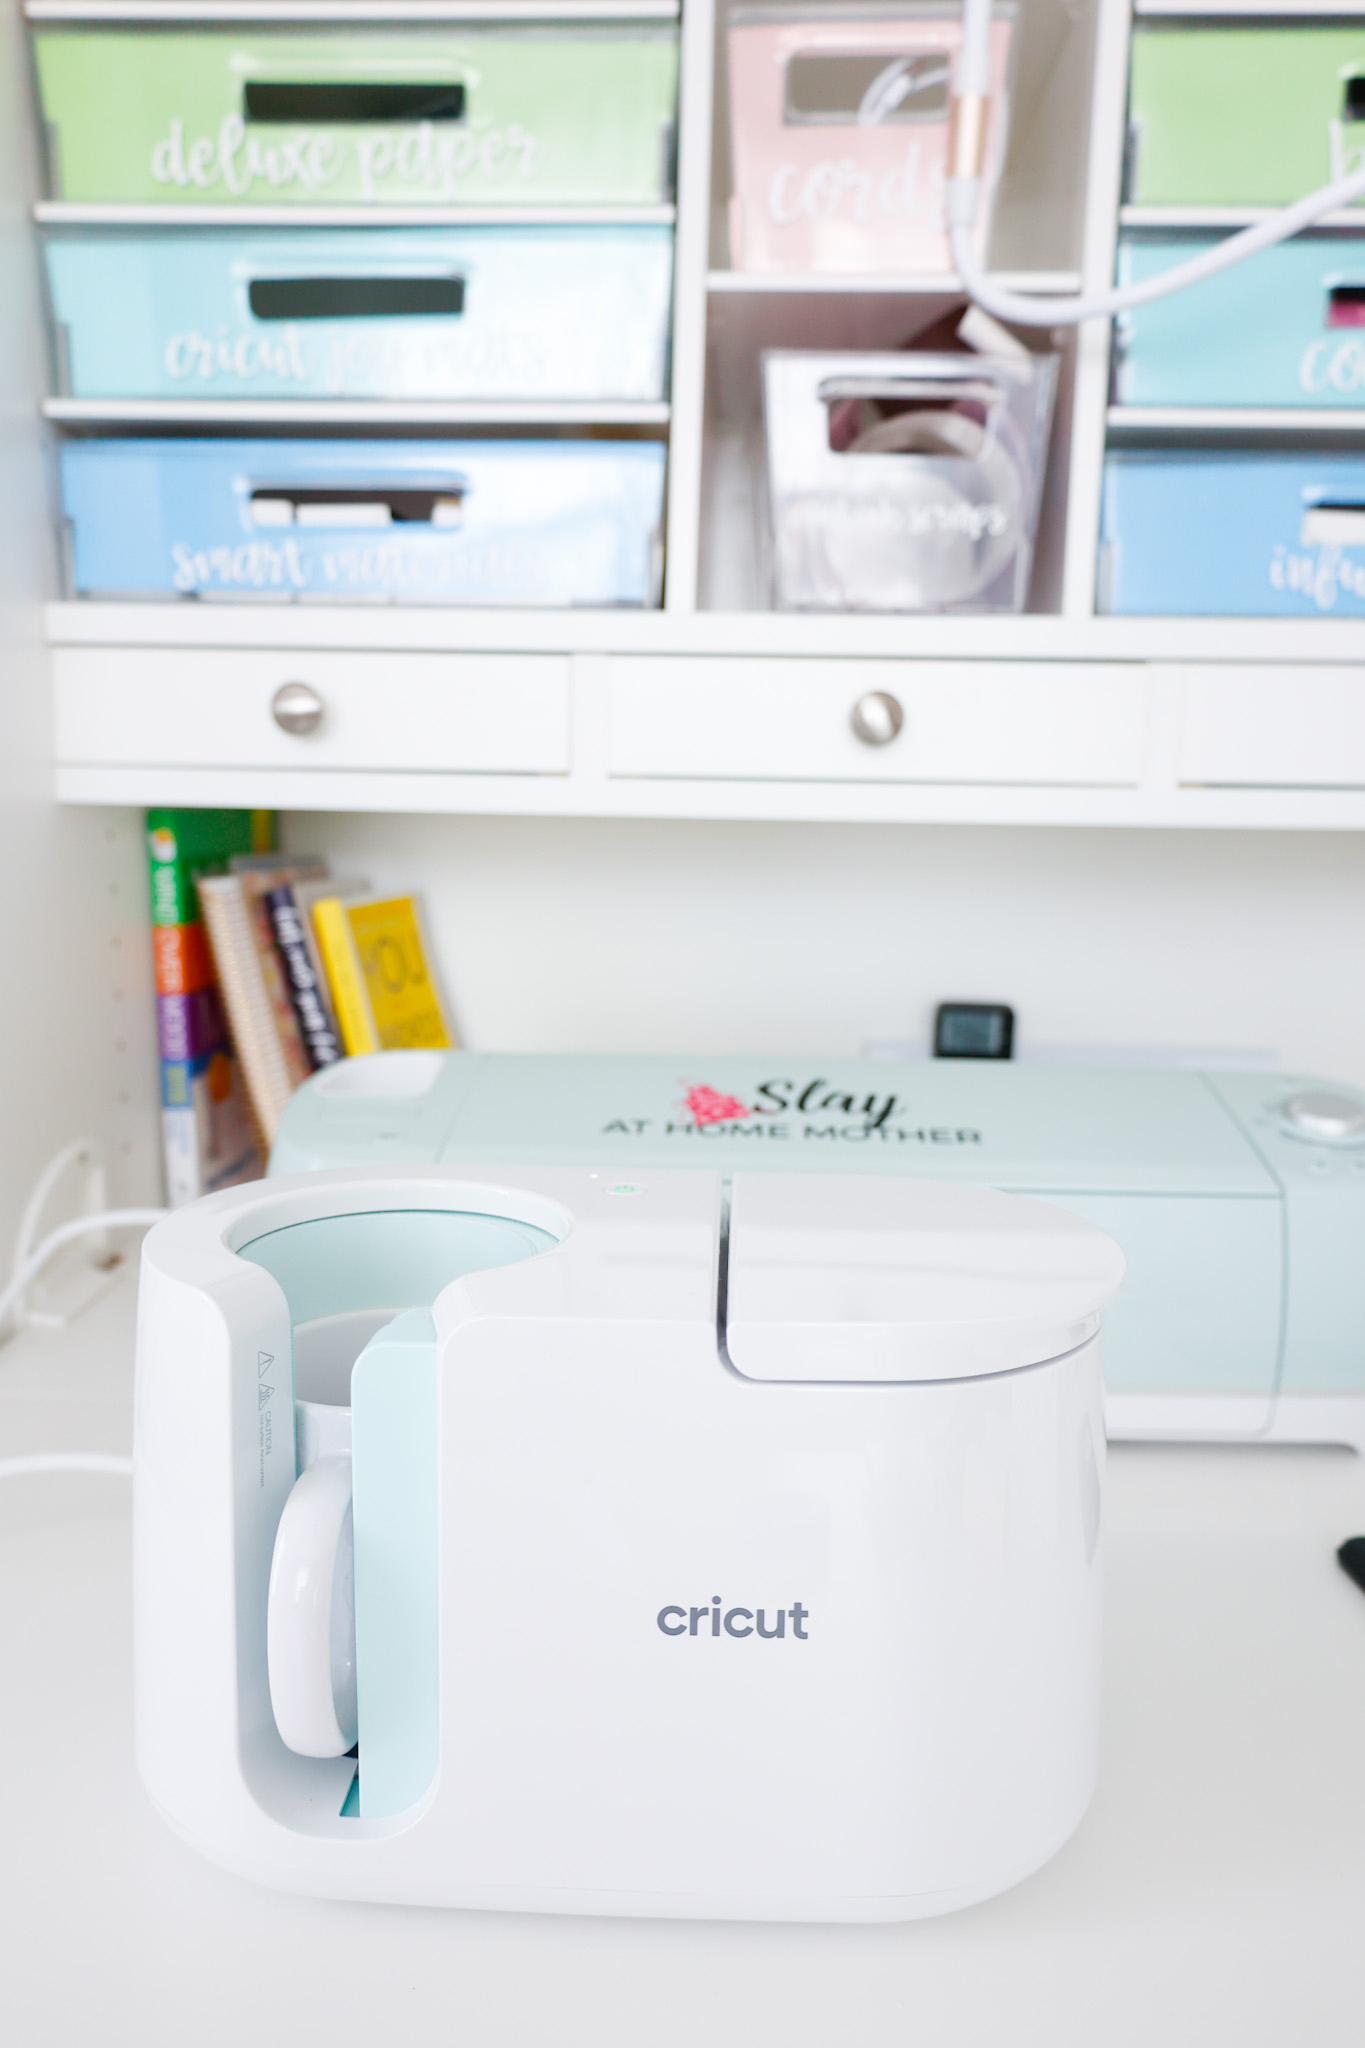
If you haven’t already, go ahead and plug in your Cricut Mug Press and power it on so it can begin preheating.
Make sure the room is well-ventilated – simply opening your Craft Room door so you aren’t completely enclosed can help.
No temperature adjustments need to be made, just power it on and wait for it to beep so you know it’s ready.
Before applying your design, be sure to use a lint roller on your mug – this prevents any stray hairs or pieces of lint from attaching to your mug permanently during the transfer process.
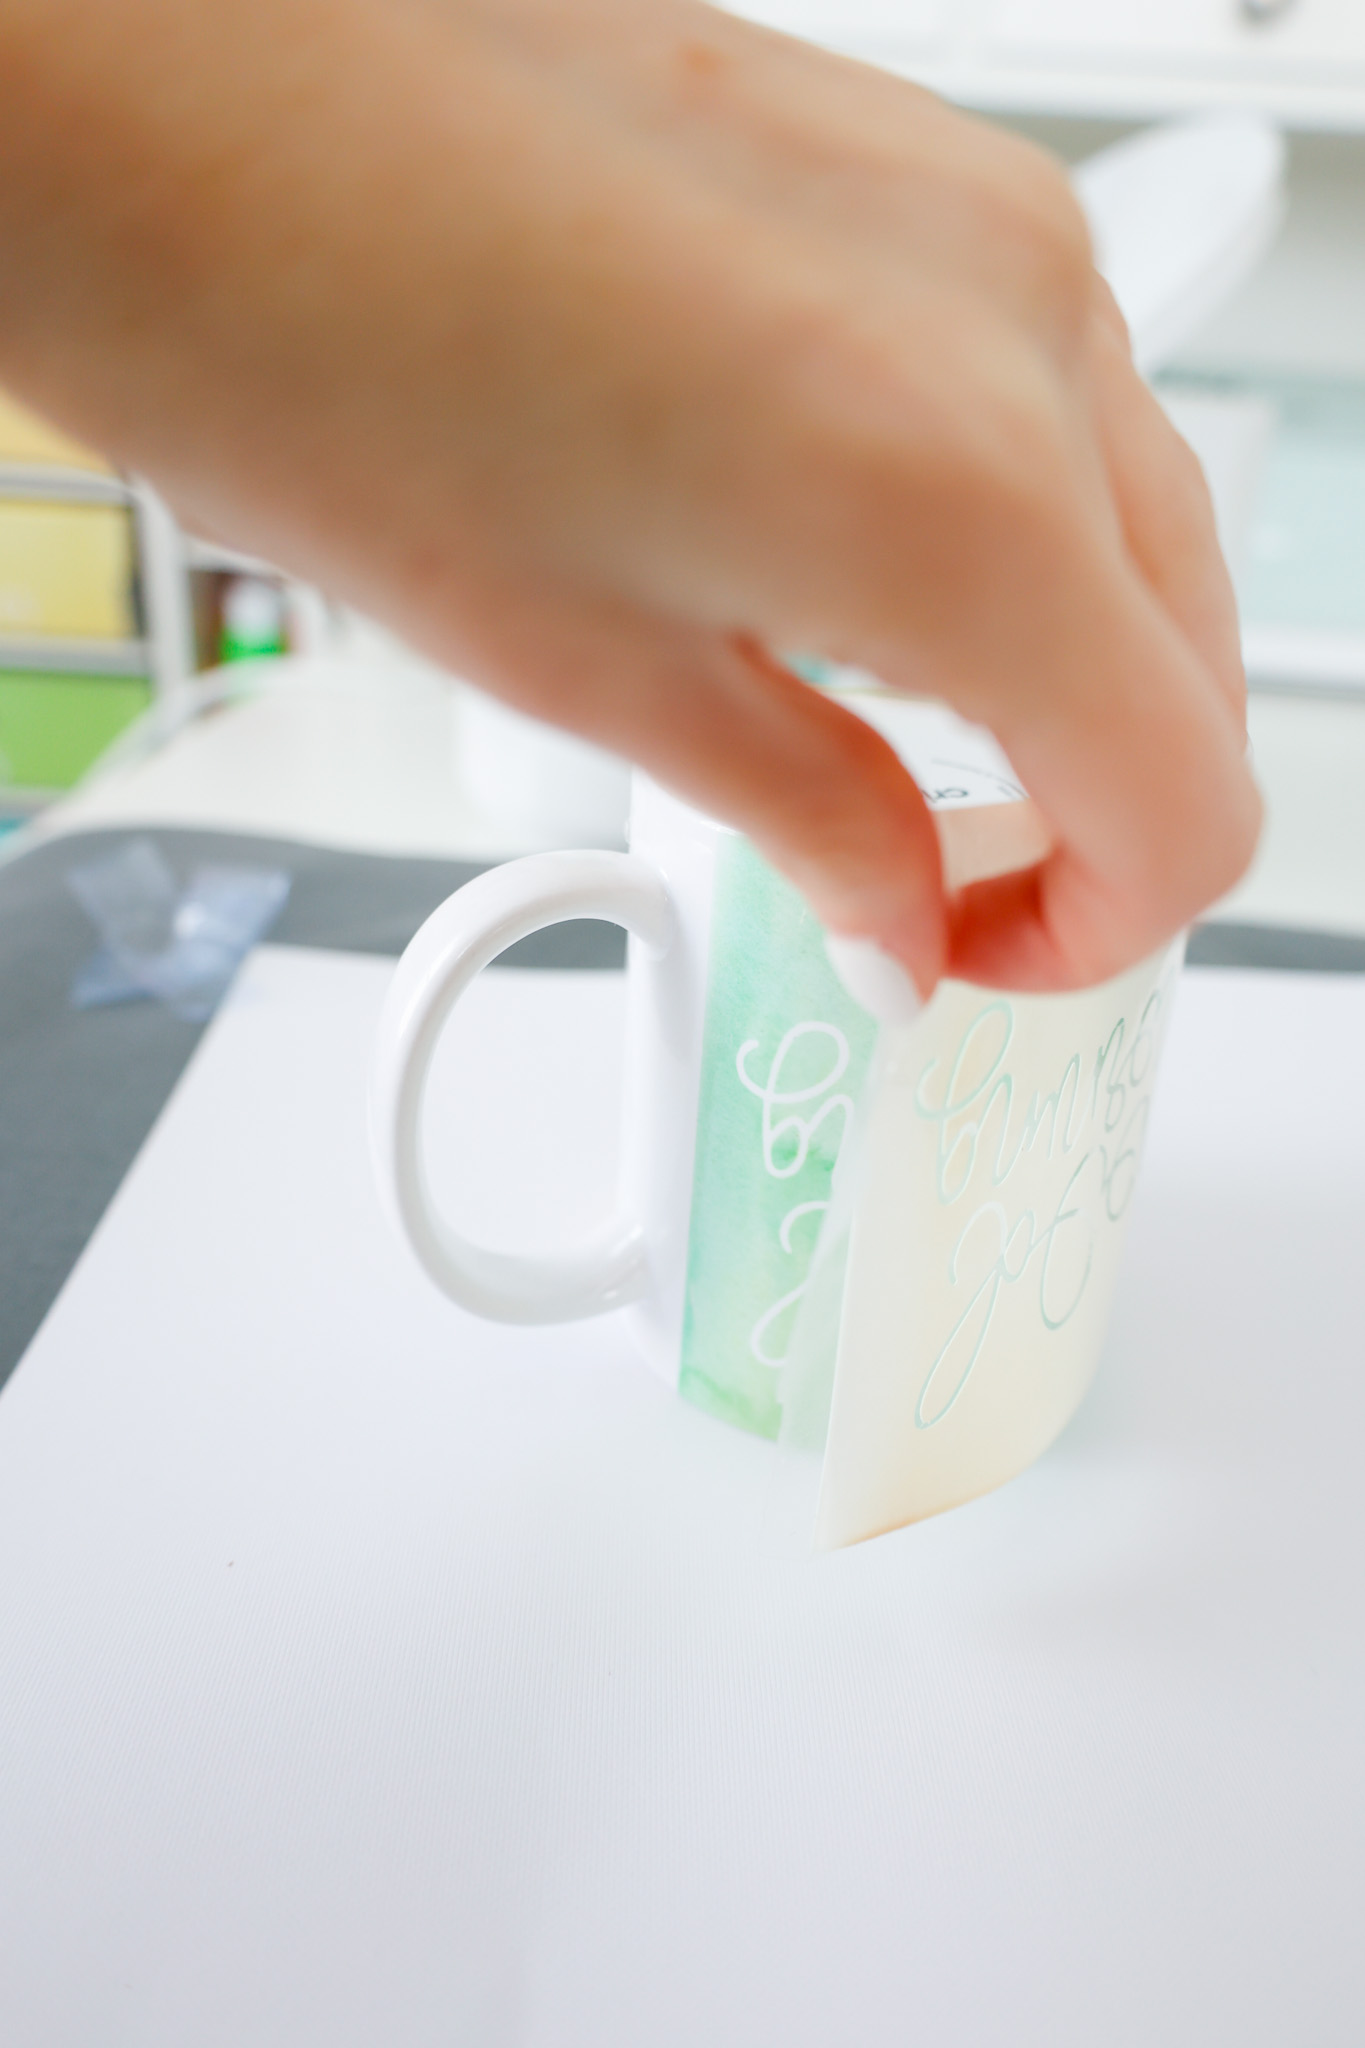
Wrap your design around your mug, using the tabs on each end of the transfer sheet (they are clear and sticky) to stick it to your mug securely.
Take 3 pieces of heat-resistant tape and secure the bottom of your sheet to the mug for a more even transfer.
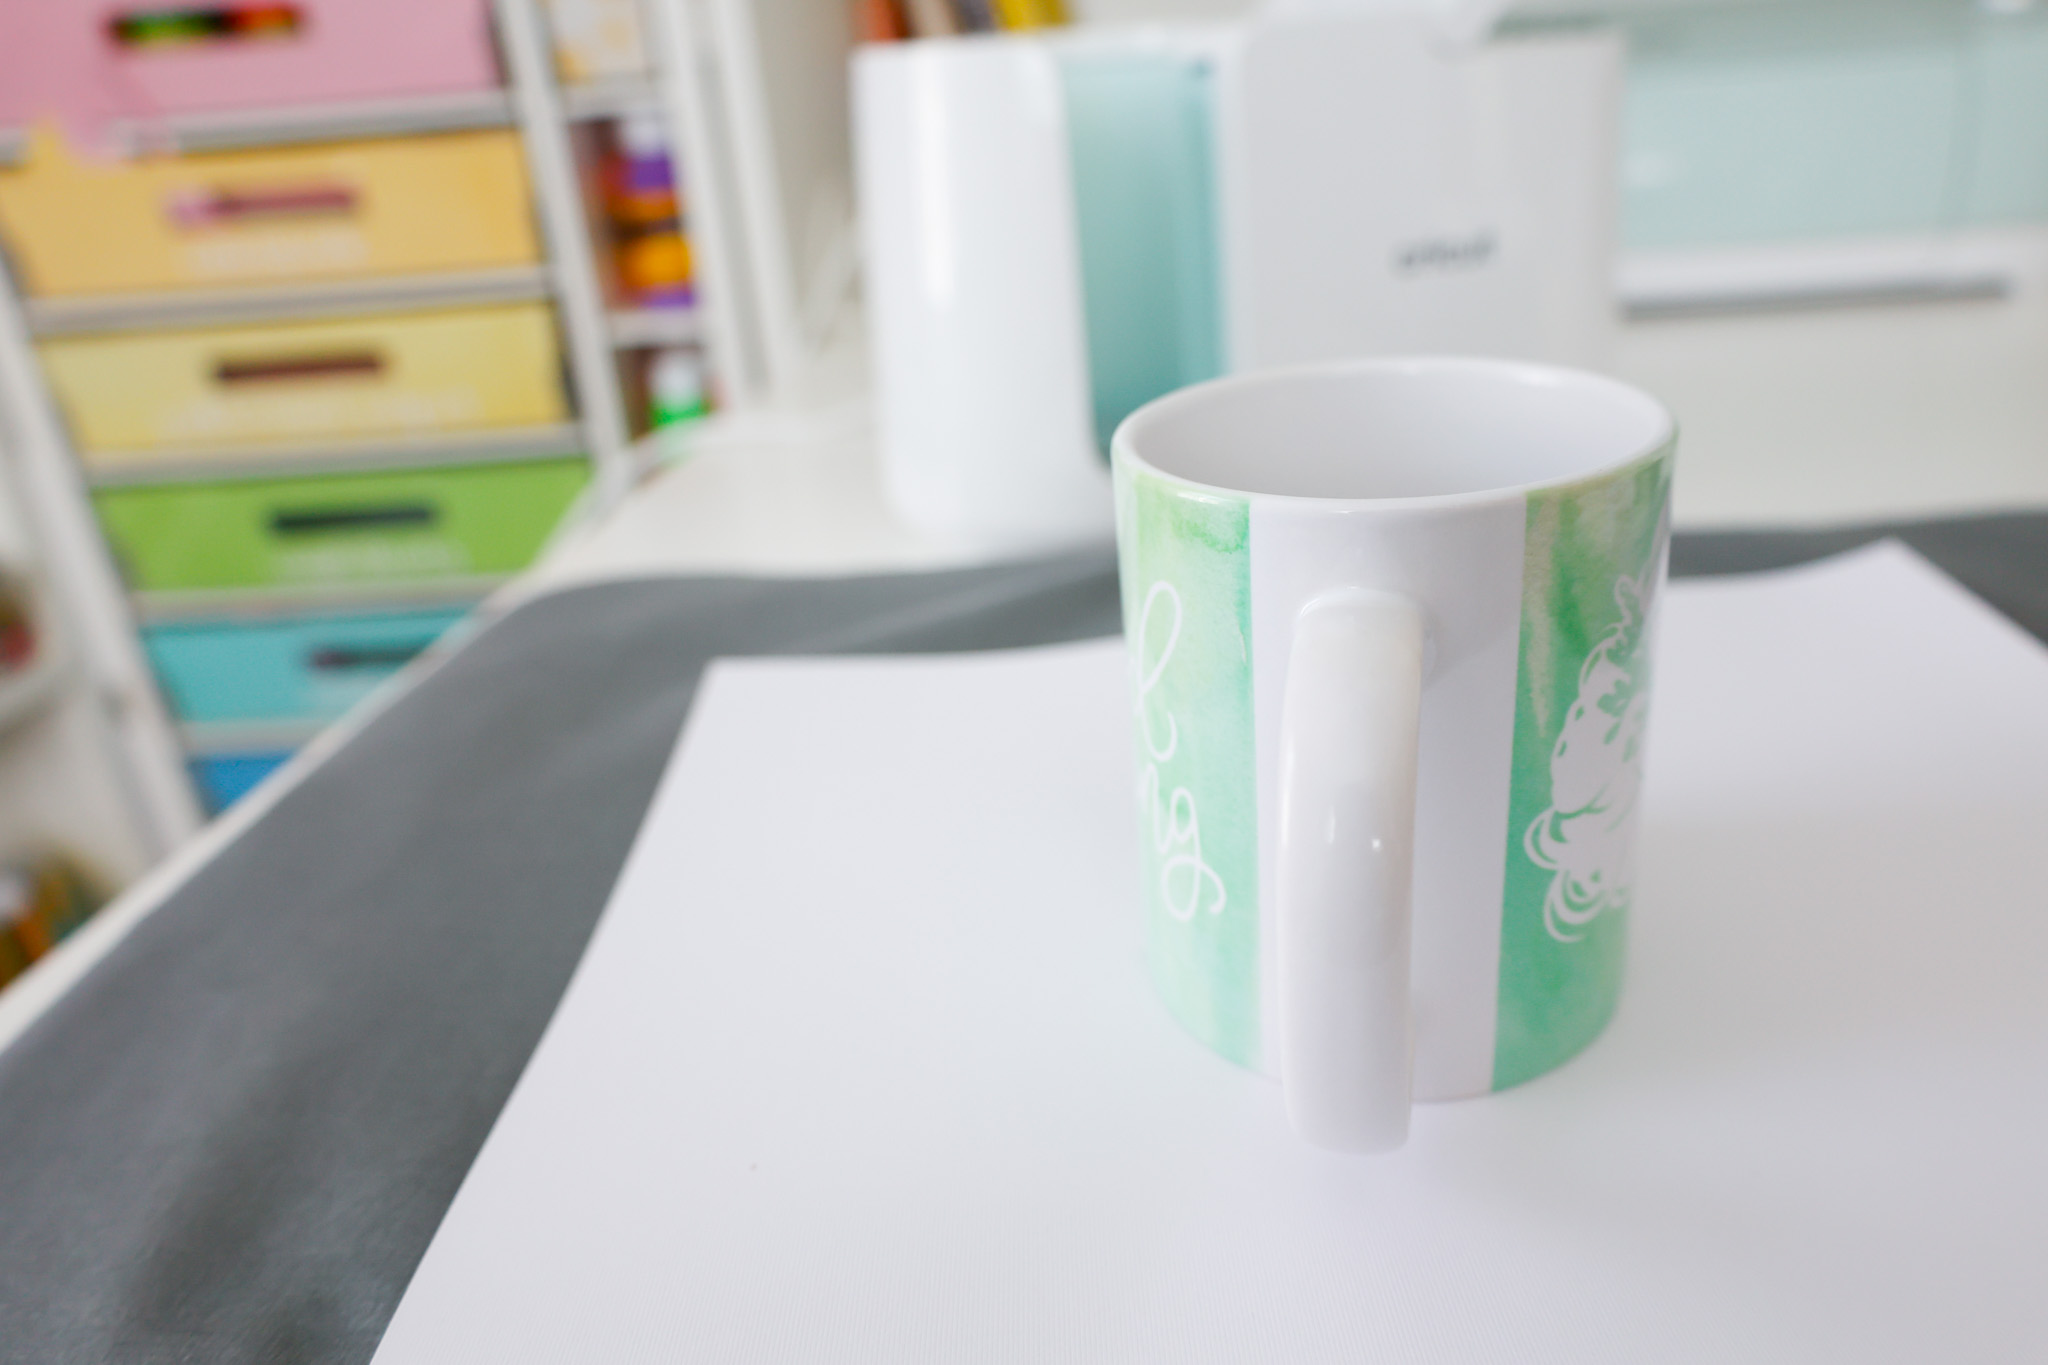
I like to put one of these pieces of tape by the handle, as you can see in the photo below…
Once your design is on your mug and your Mug Press has preheated, carefully pick up your mug by the handle and place it in the Press.
I put the handle a little to the right.
Push down the lever on top of the machine and the opening for your press will close to secure the handle of the mug for pressing.
And now your Mug Press will do the rest!
In about 6 minutes, your mug will be ready to be taken out of the Mug Press.
The lights on top of the machine act as a progress bar so you can see how close your project is to completion.
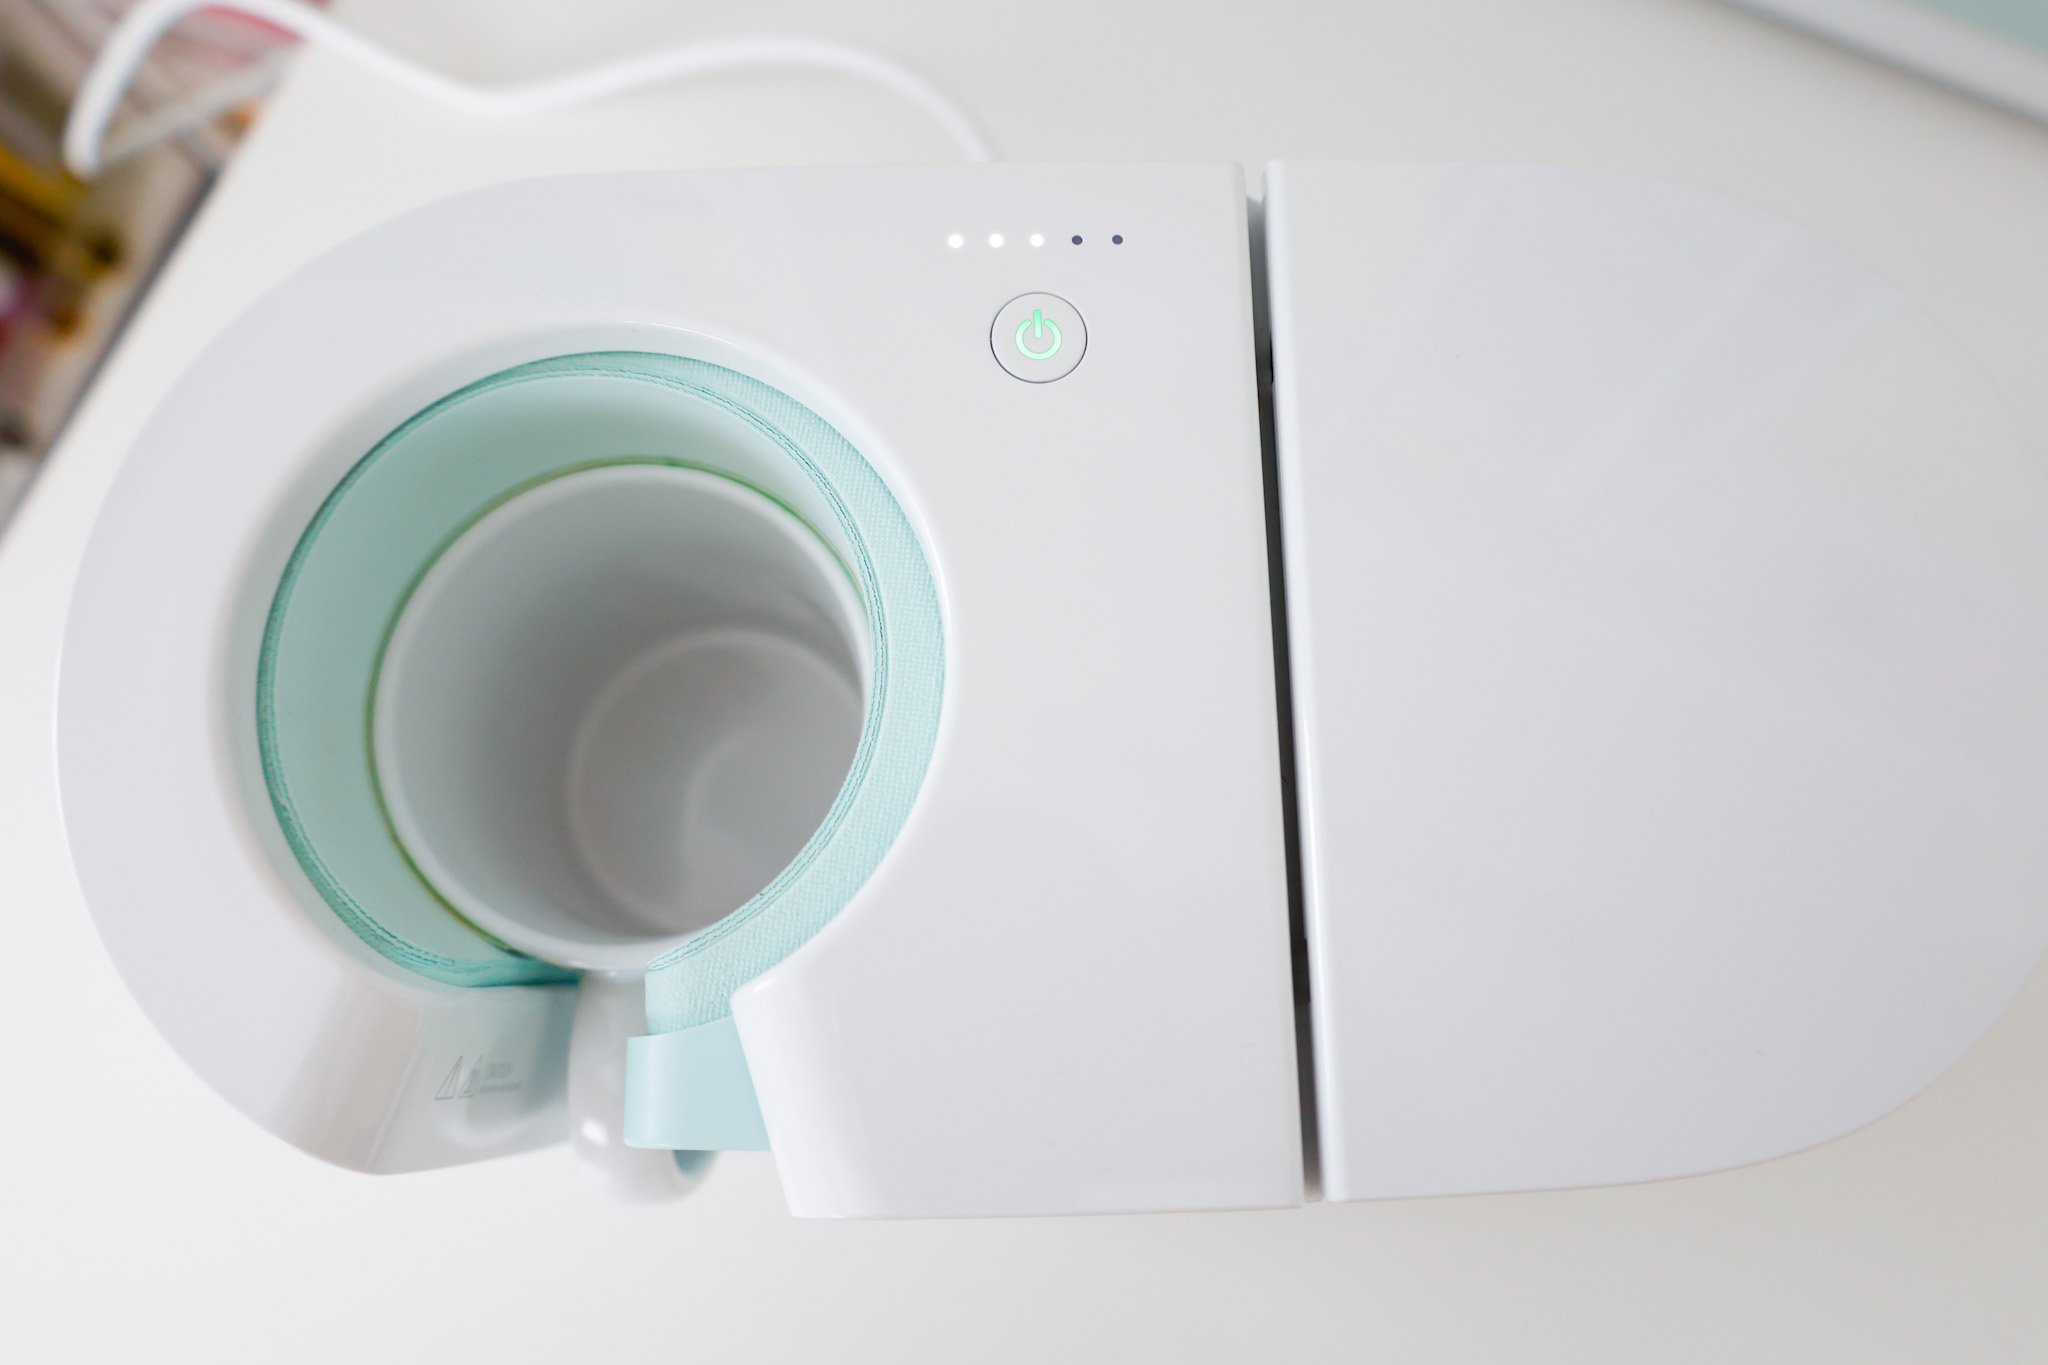
Once done, the Cricut Mug Press will beep three times to let you know it’s finished.
Lift the lever up, and carefully remove your mug.
To prevent any ink from transferring onto your desk or table, you can place your finished mug on a piece of white cardstock while it cools down.
Allow for it to cool for 15-30 minutes.
I have a DreamBox that I am very protective of, so I place mine on an EasyPress mat and white cardstock. 😉

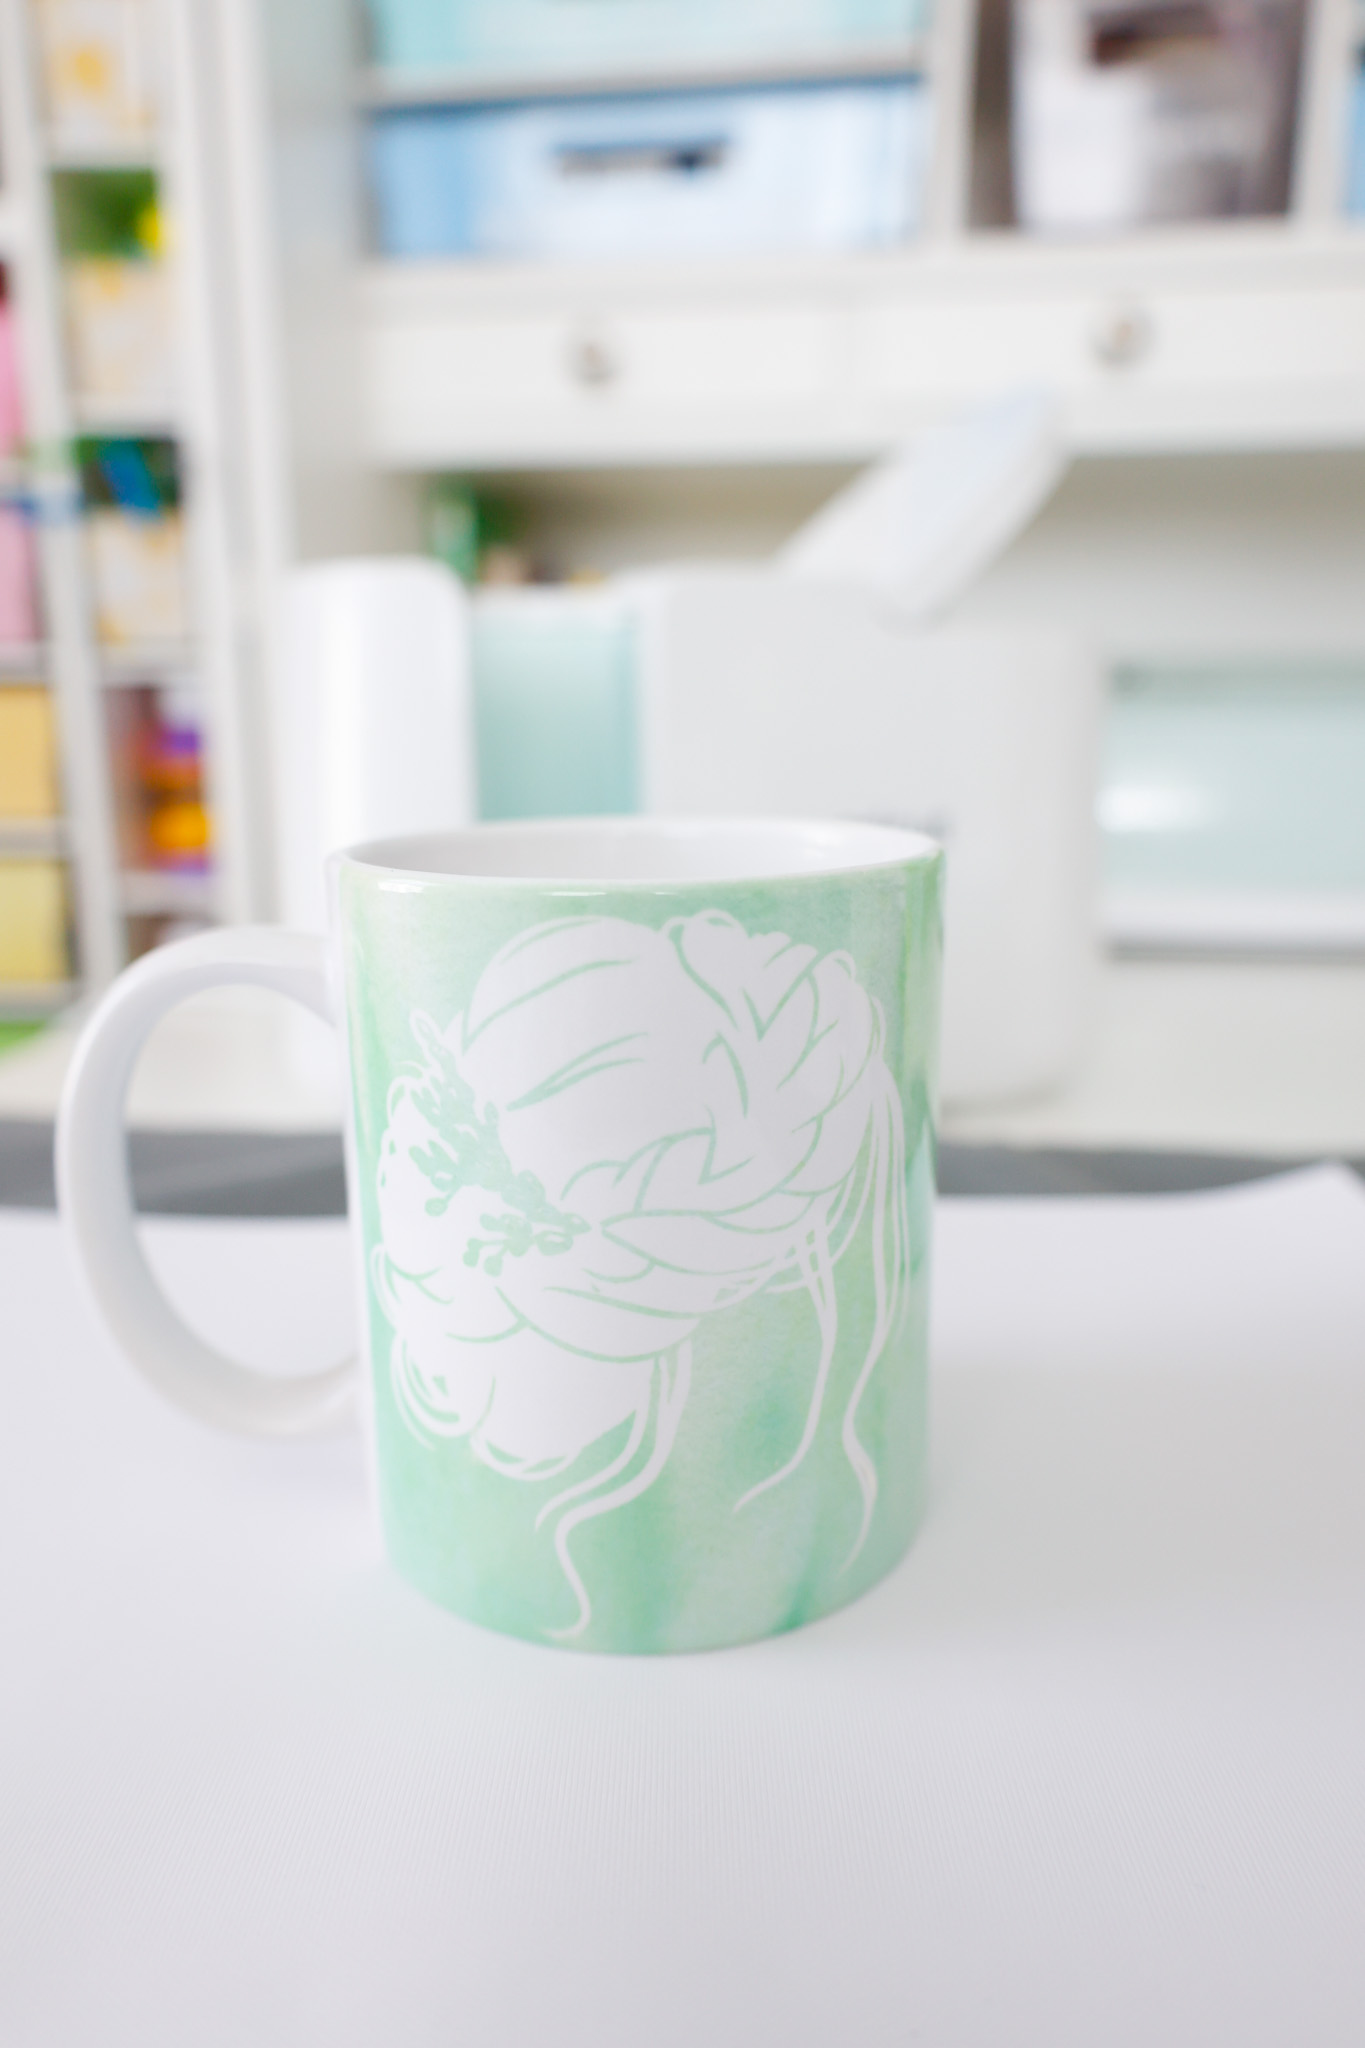
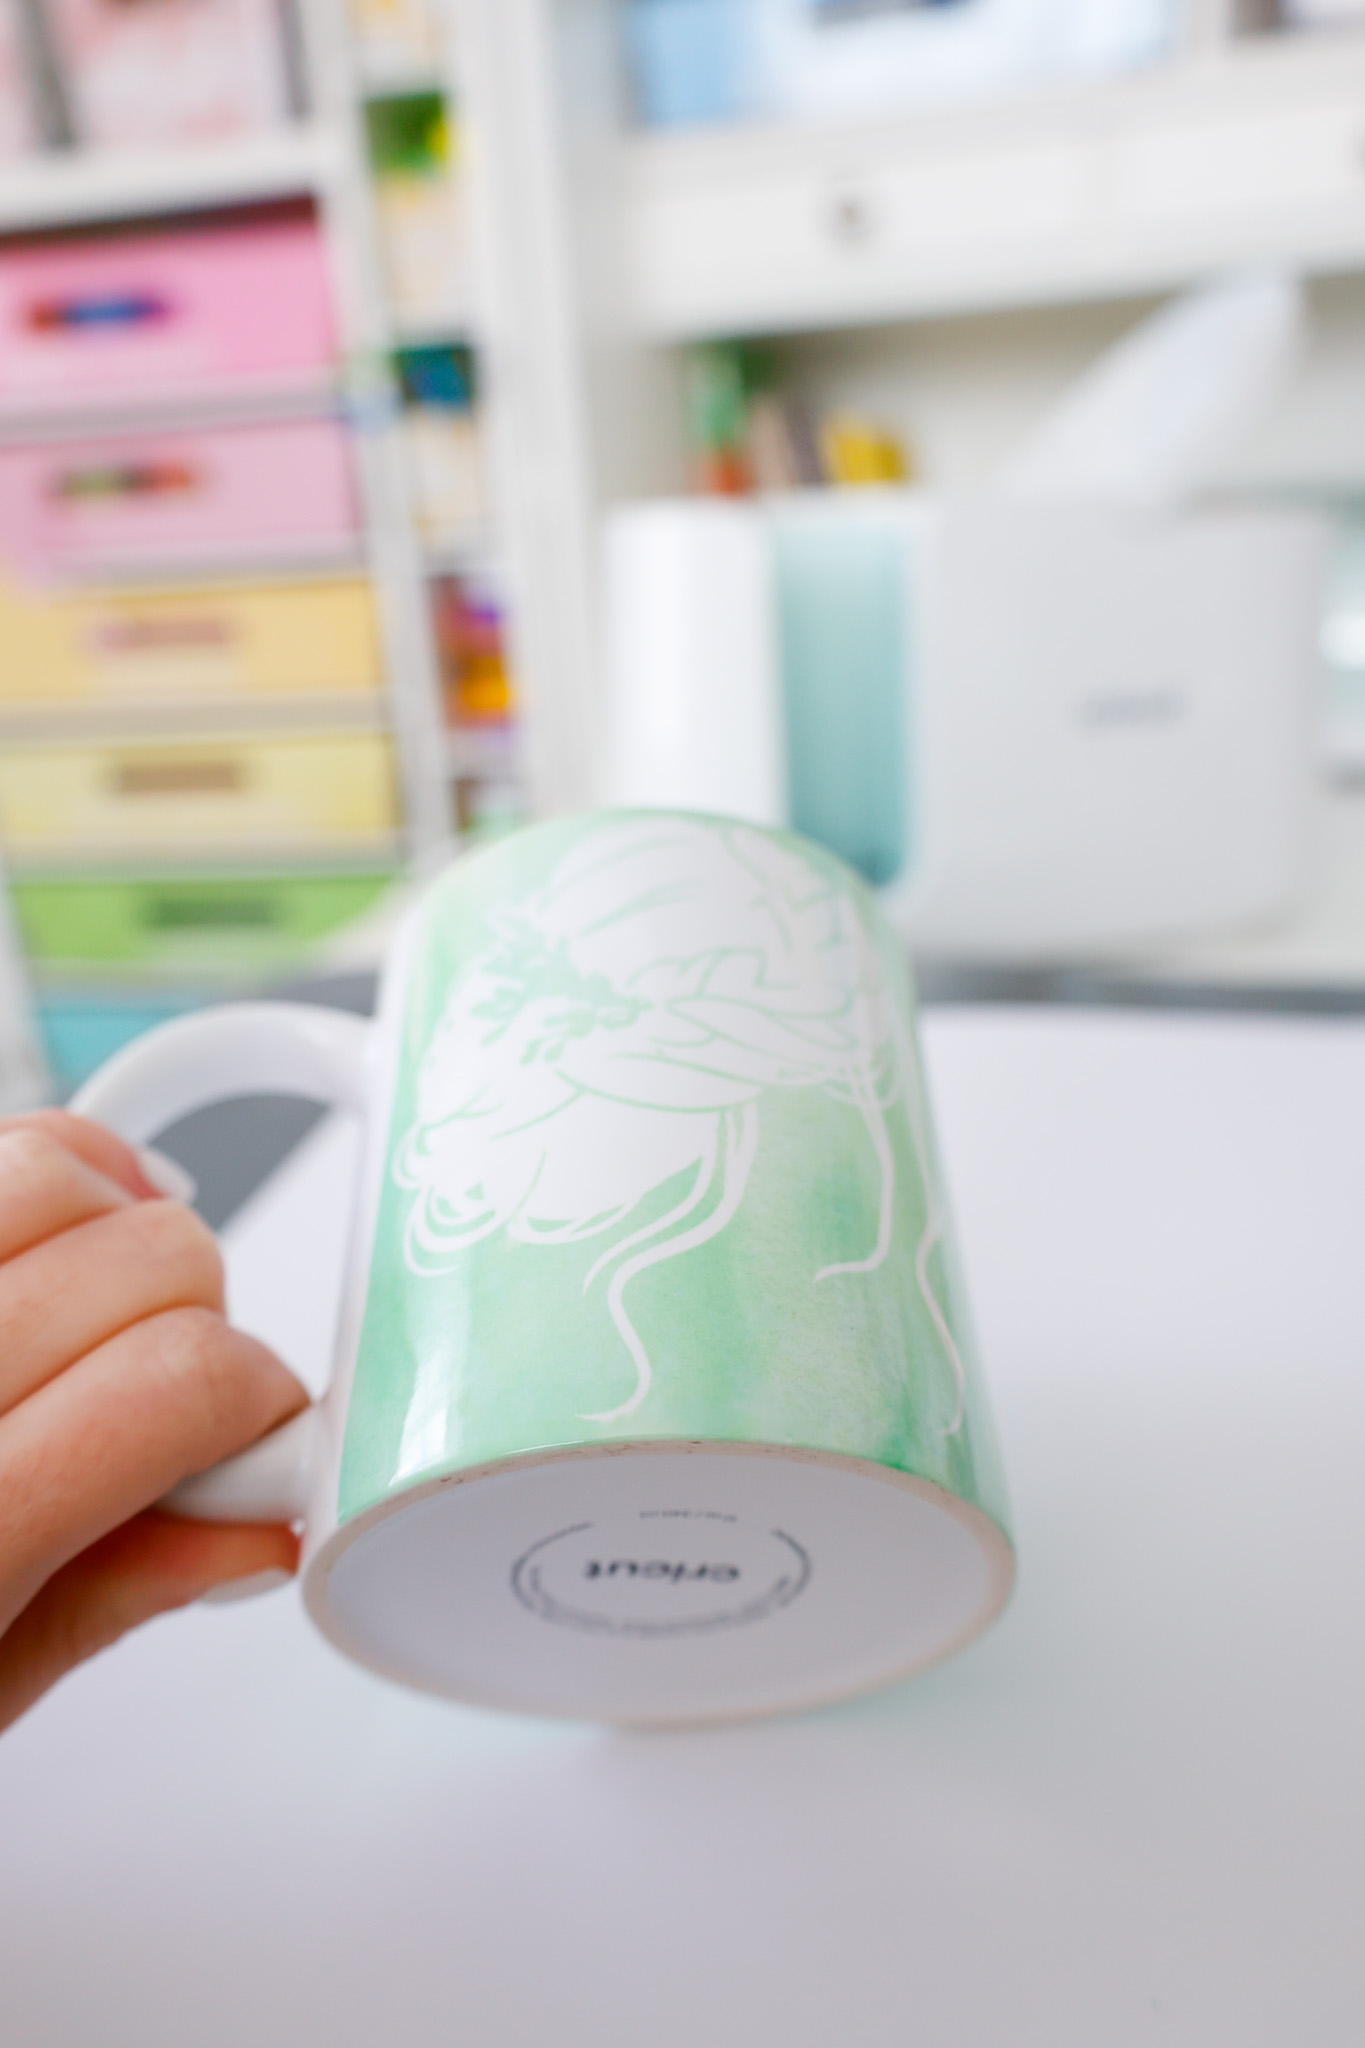
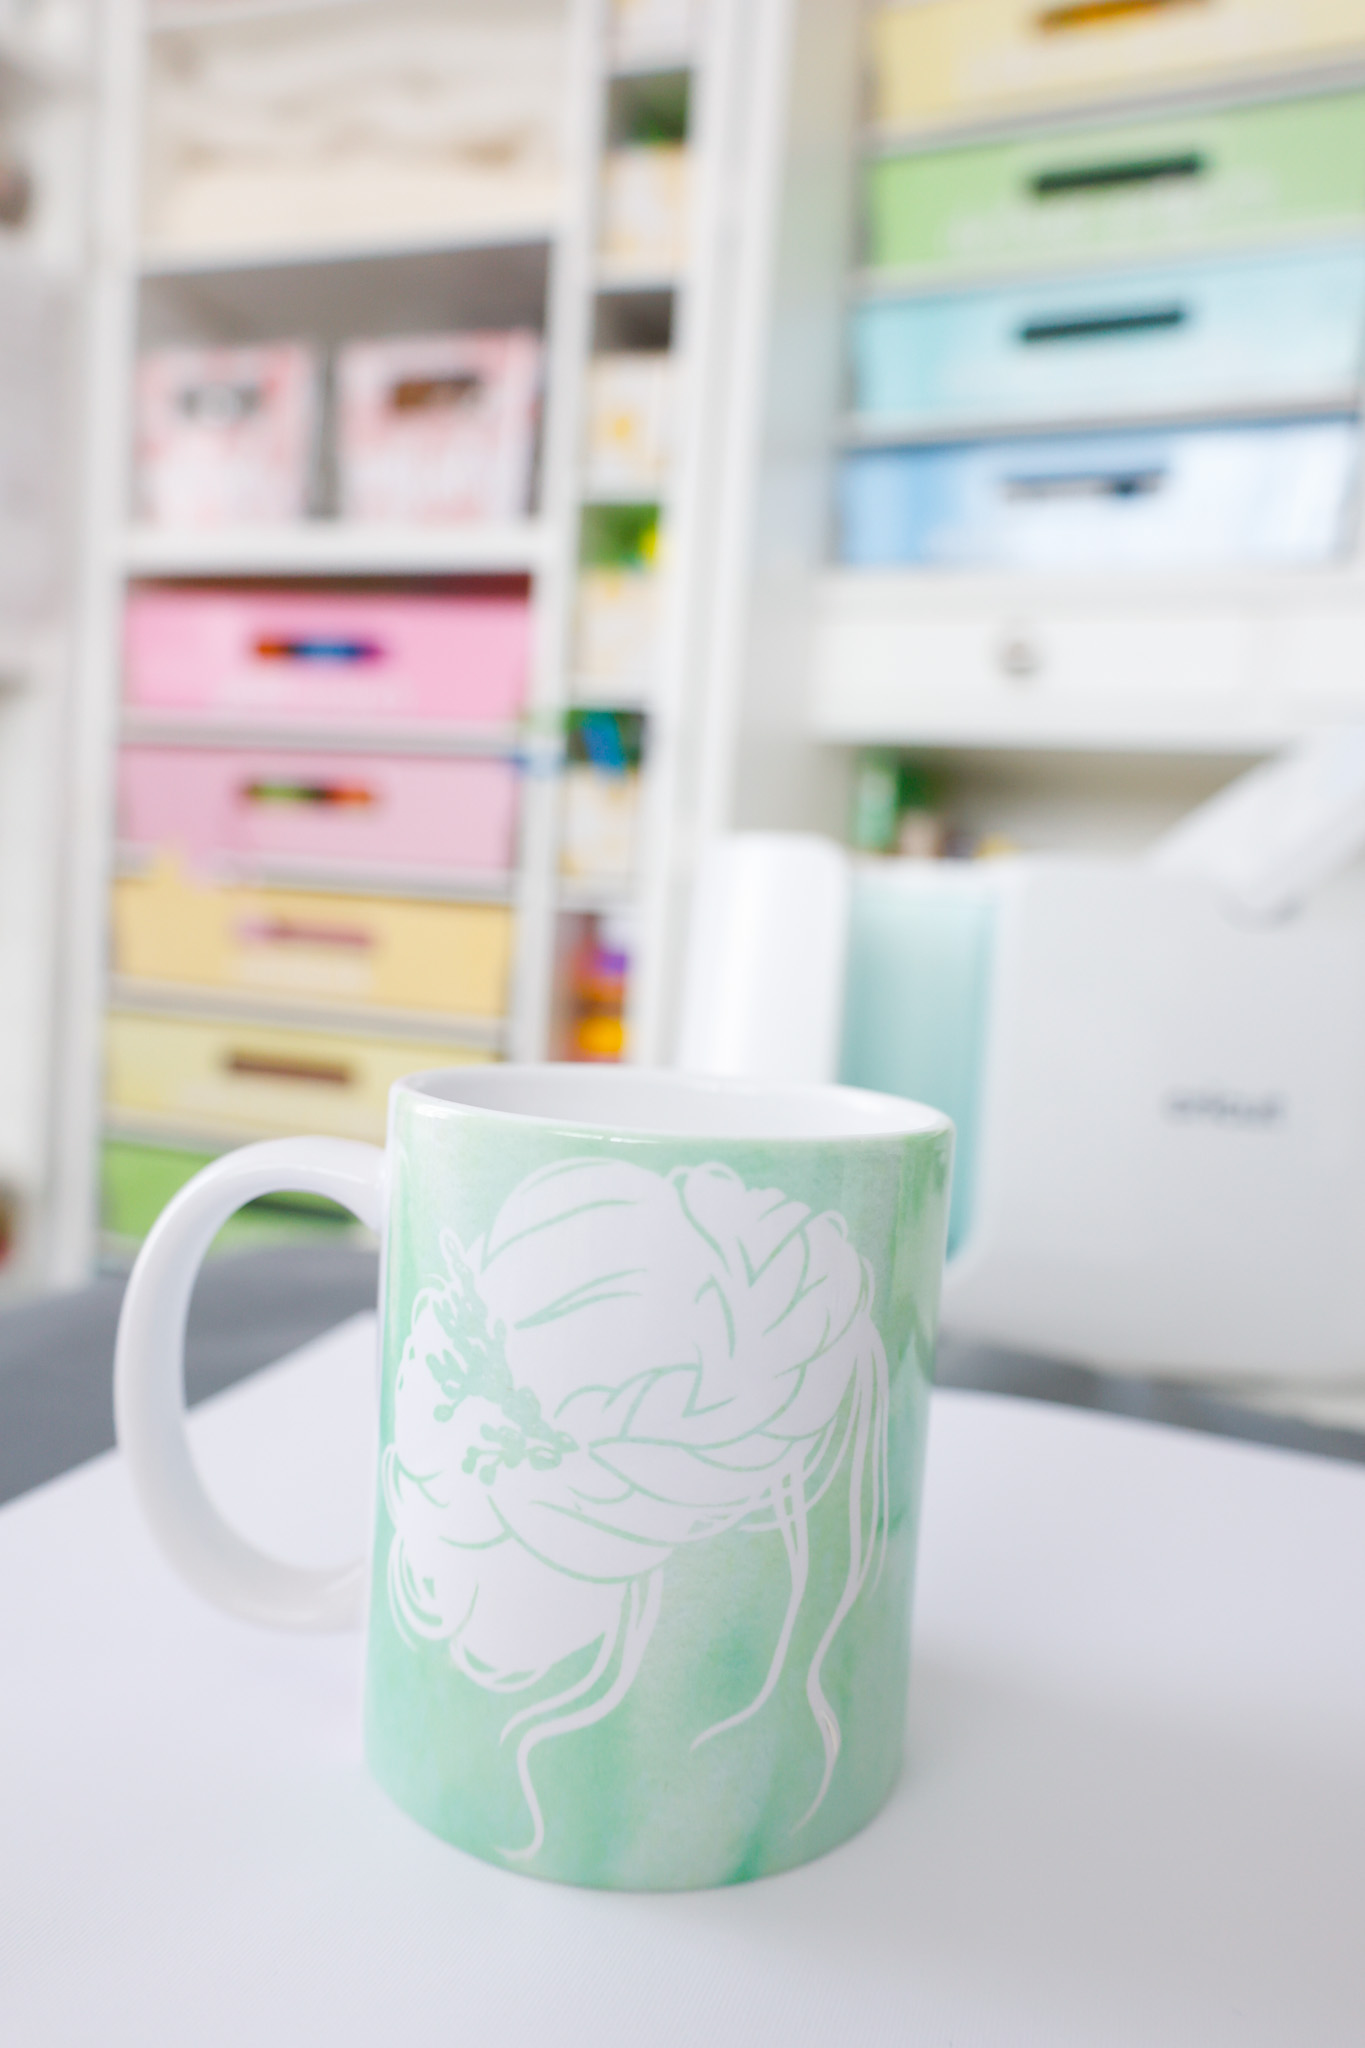
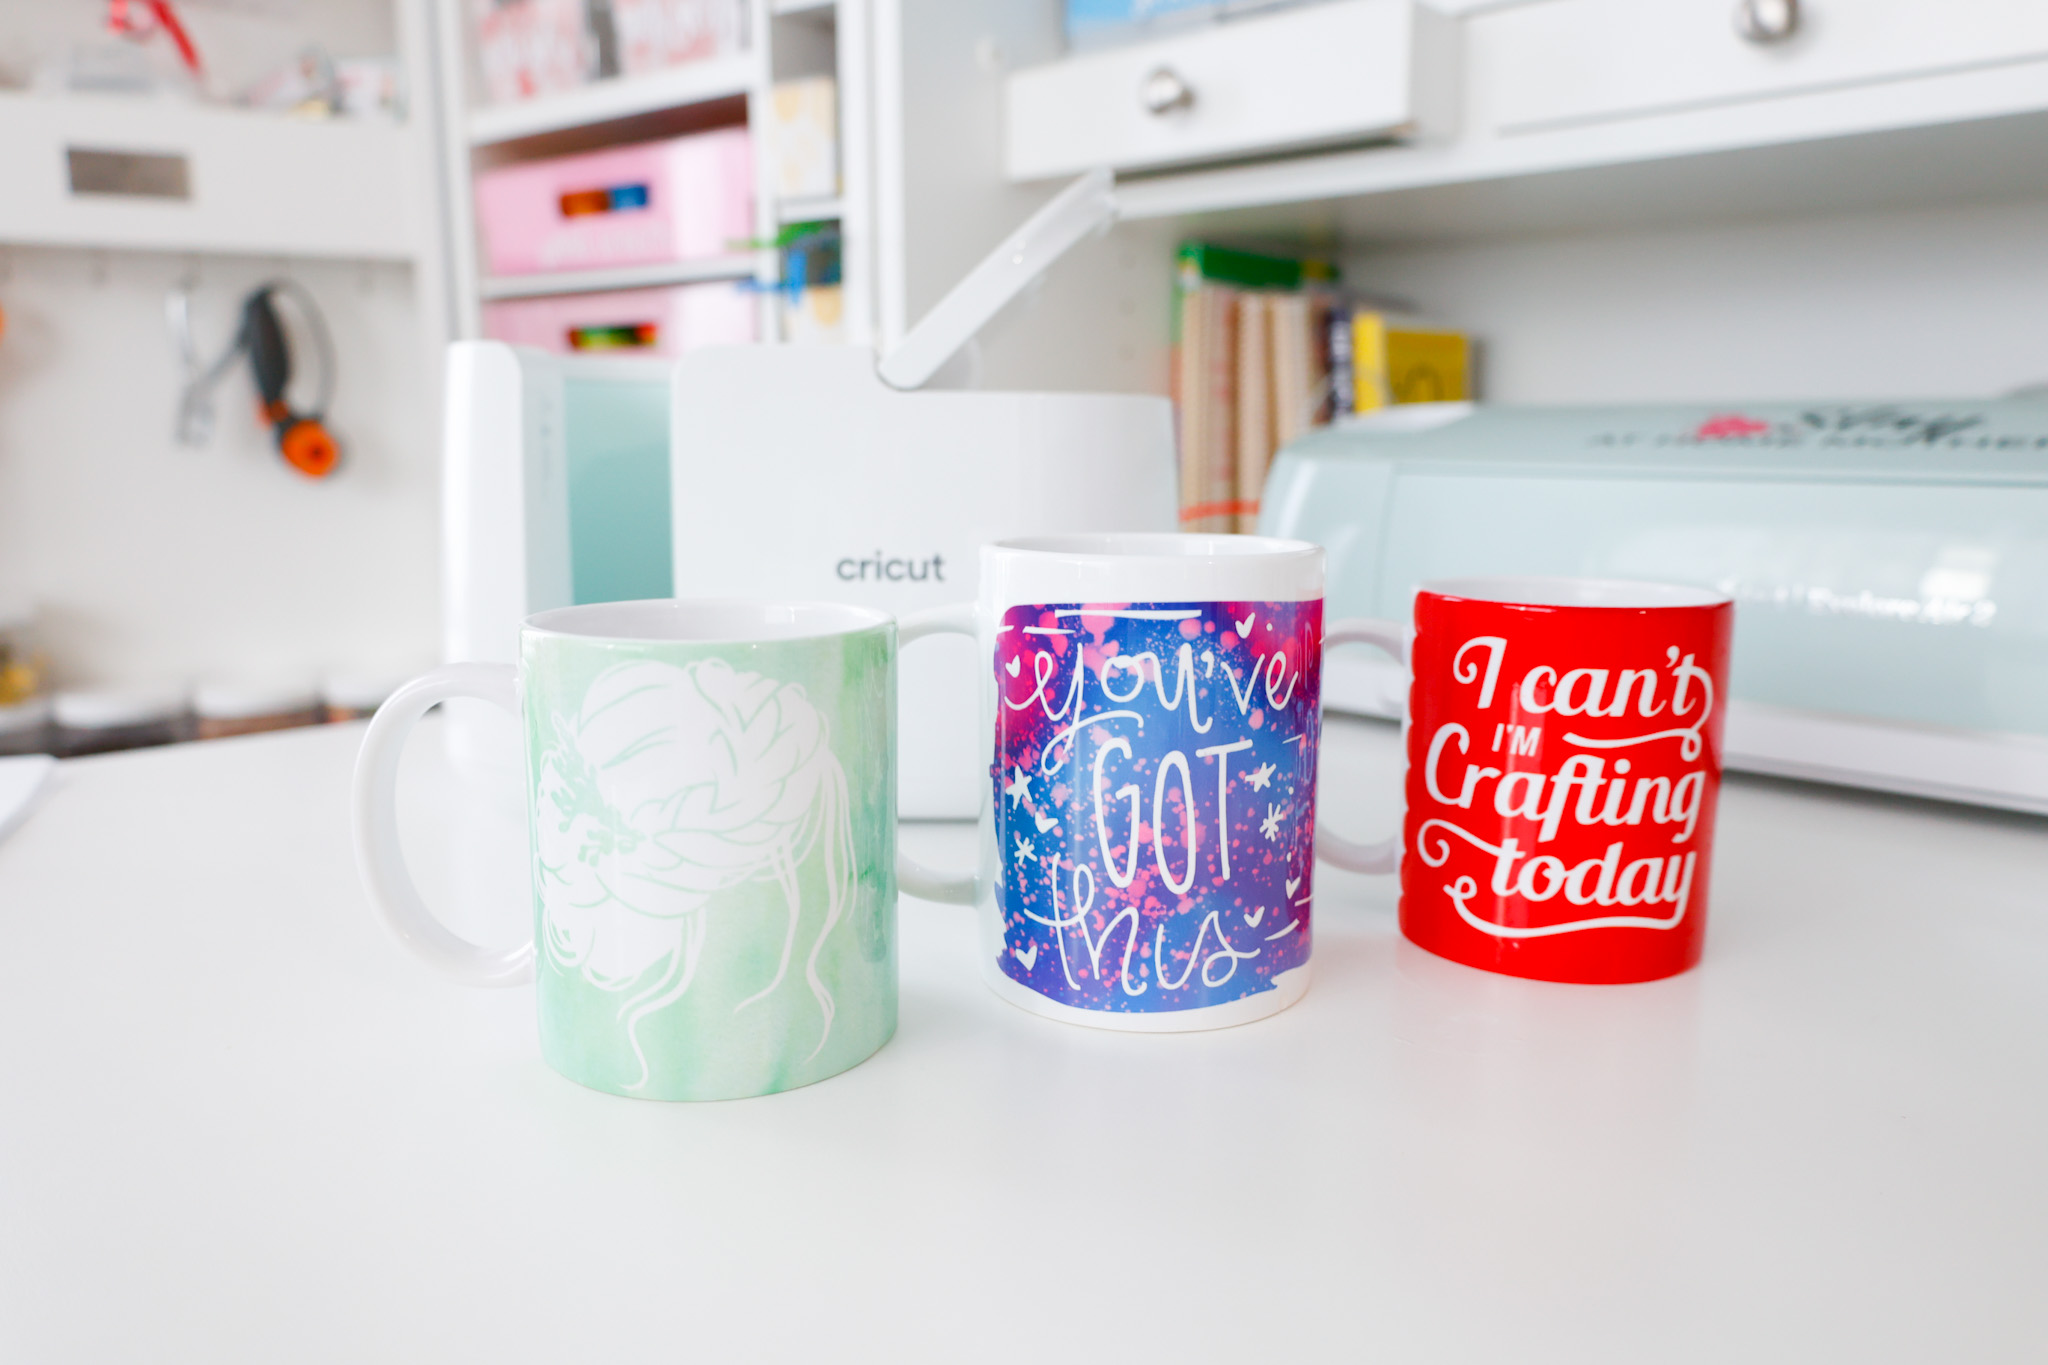
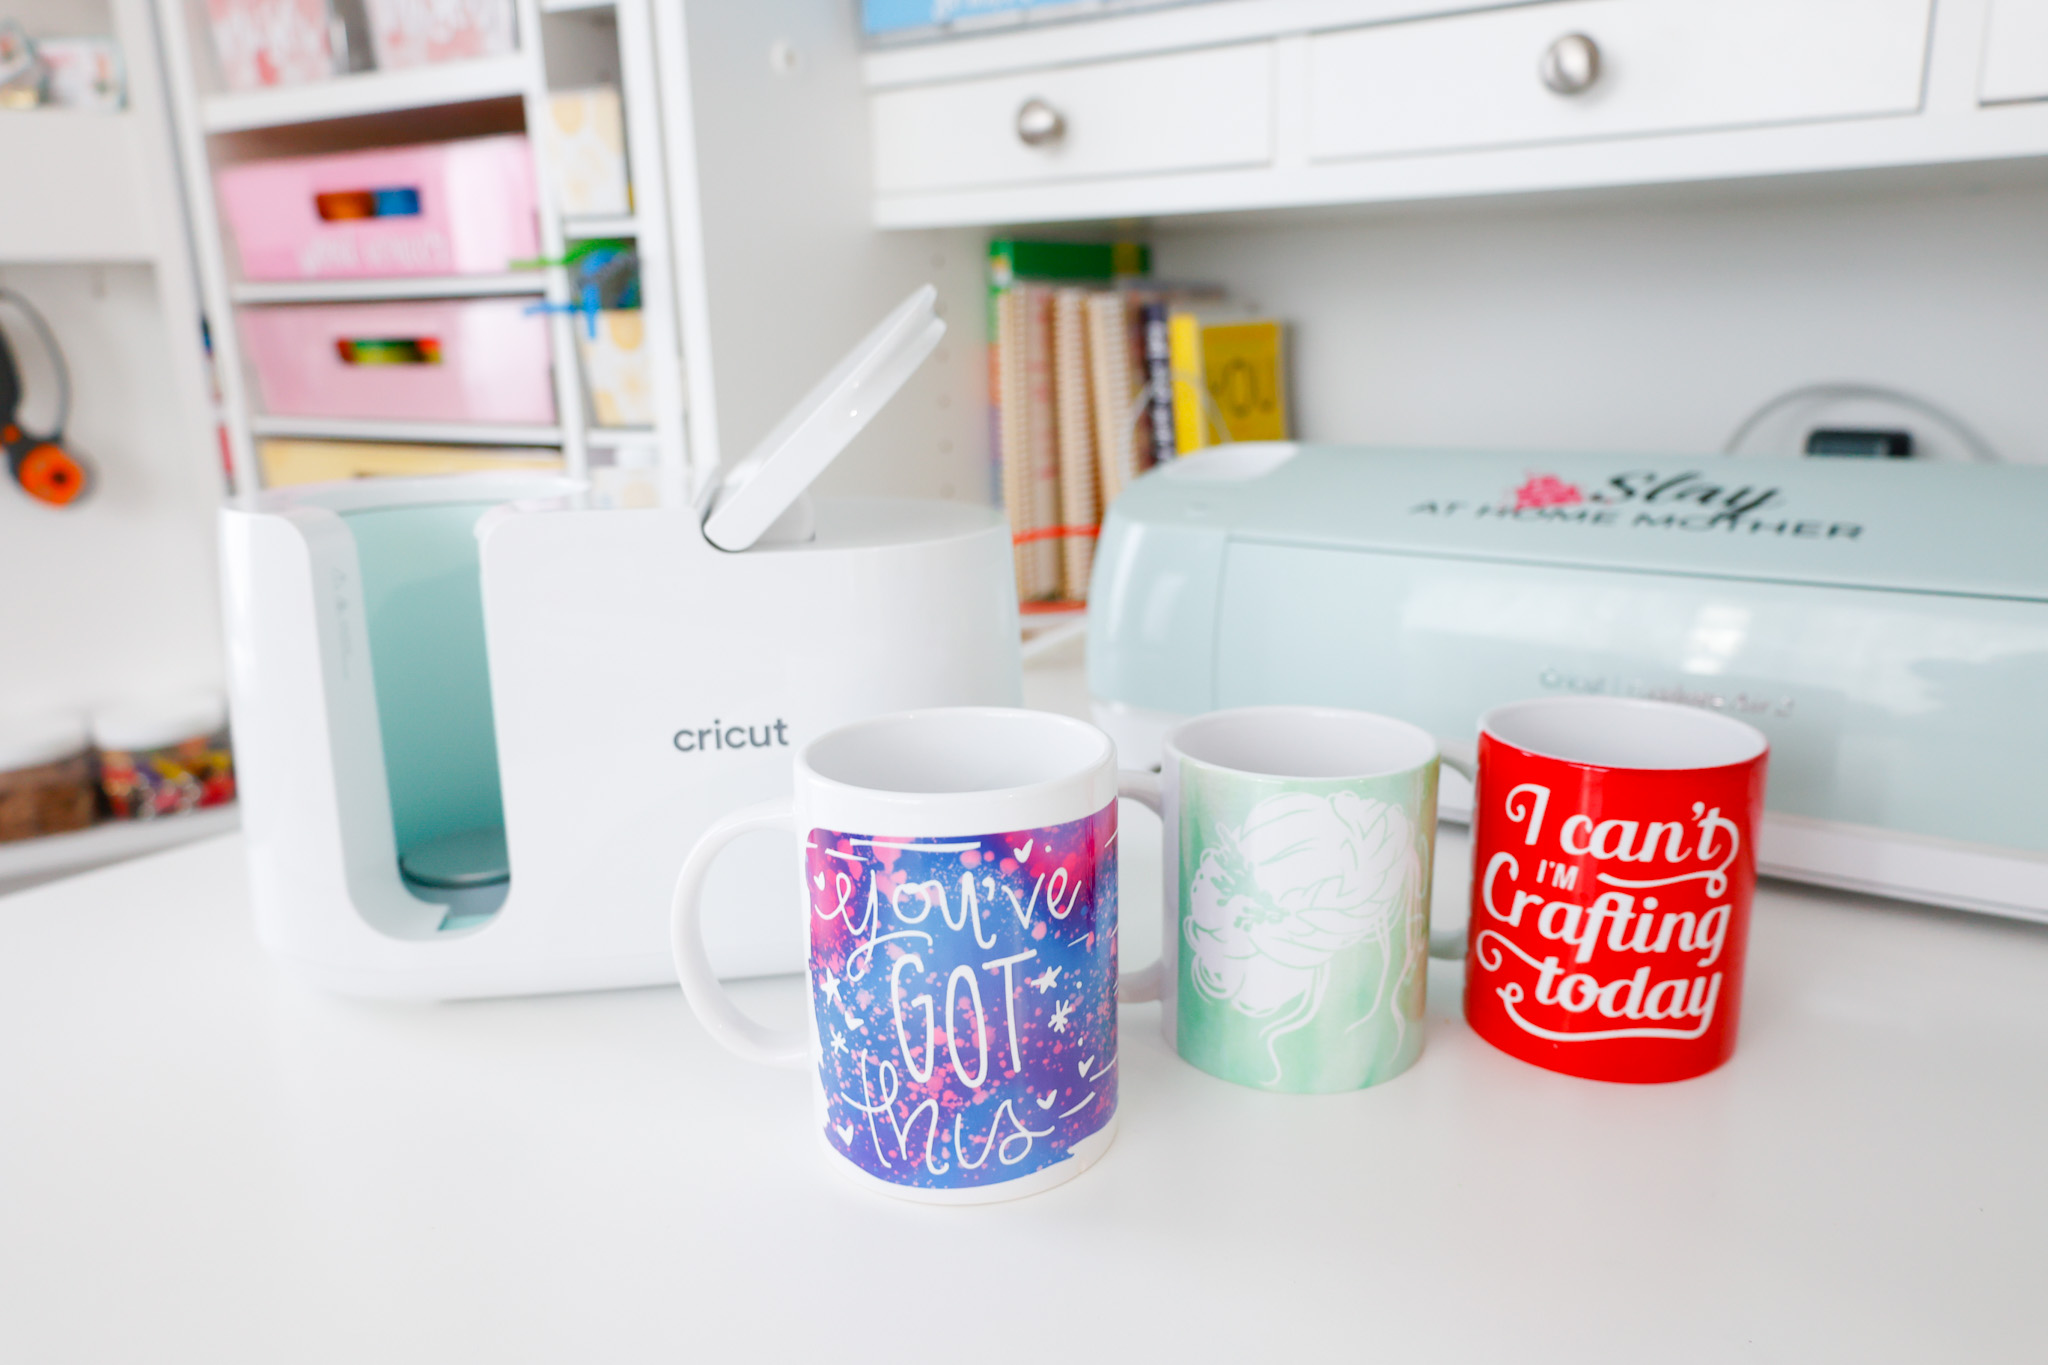
My mug is cooling down in these photos, but I wanted to include these to show you that you can see past the lines of the transfer sheet that the green infusible ink is BRIGHT.
Once your mug has cooled down, remove the tape and transfer sheet.
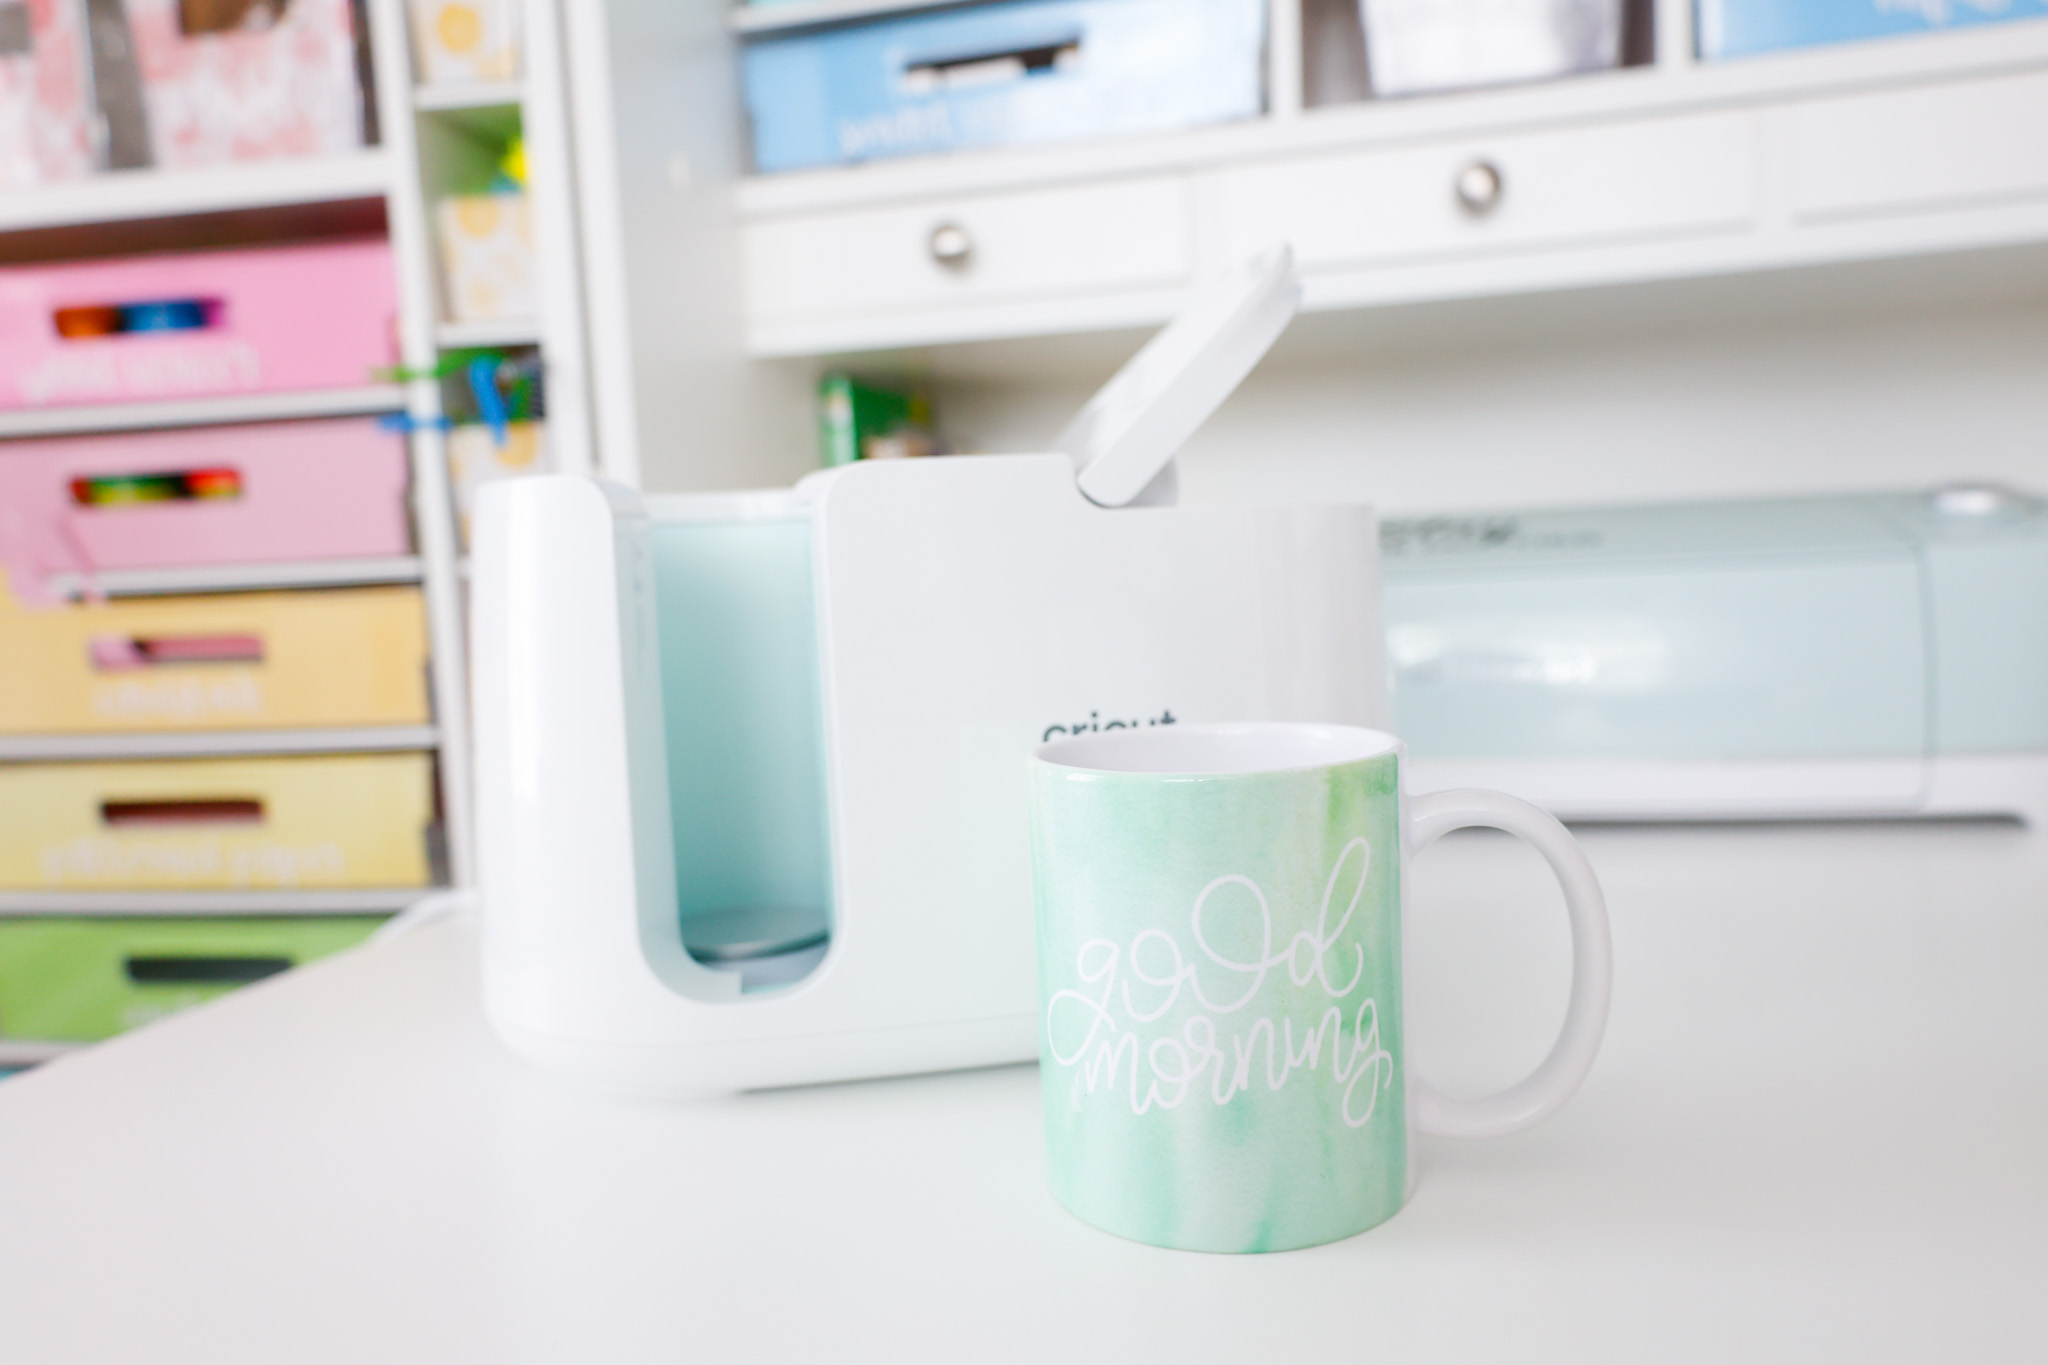
Mug Press Finished Mug
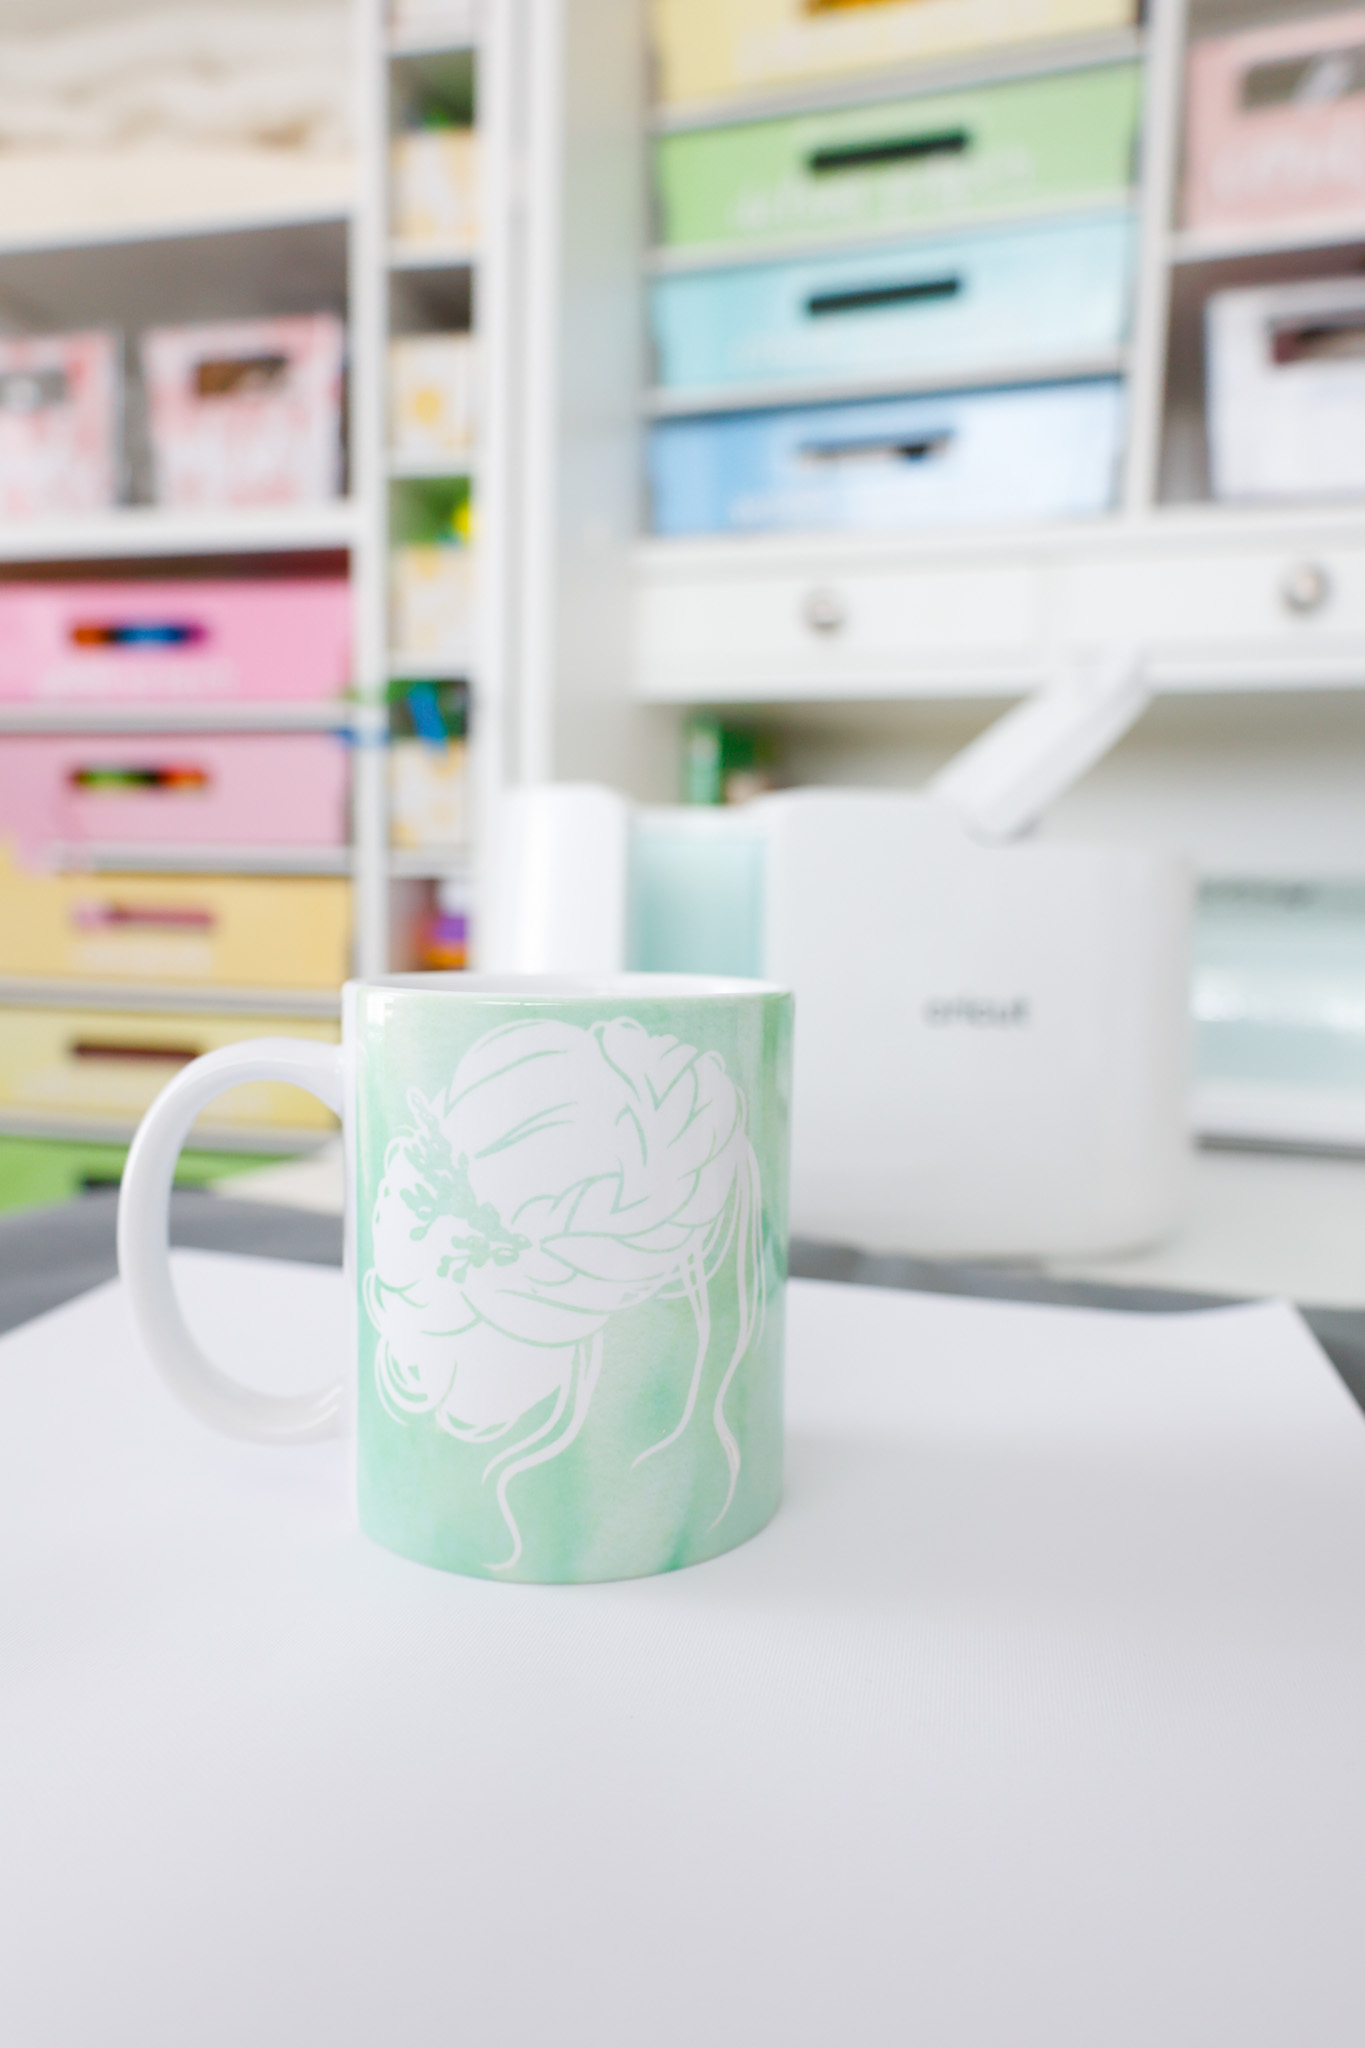
Look at this beauty!
Once you are finished with your mug, feel free to place it in the dishwasher to clean it and use it the next morning for a hot cup of coffee that you can reheat a million times without ever worrying about the design coming off! 😉

Here’s a closeup of the straight edge I chose for my 12 oz. mug…
And what the bottom edge of the mug looks like…
I highly recommend using the heat-resistant tape, by the way – it makes the bottom edge transfer perfect!

My Thoughts On The Cricut Mug Press
I am so excited about this machine!
I think Cricut knocked it out of the park with their Mug Press.
If you’ve been on the fence about infusible ink, this machine takes all of the guesswork and worry away.
I really love the auto-off safety feature and the fact that I don’t have to make any temperature or pressure adjustments.
This machine is going to make making homemade gifts so much fun now.

I’m excited about all the mugs I can make for my in-laws with the kids’ drawings, and Christmas gifts for my wonderful sisters-in-law.
BRB gotta go make one for my husband now!
What are your thoughts on the Cricut Mug Press? Would you like to see a Mug Press design using Infusible Ink pens next? Let me know in the comments below!
*Post originally published March 2021, last updated March 2023.

Yes, can you make one using the pens, I’d love to see the result using that method. I’m starting to think I might really need one of these now…..lol 😂😂😂