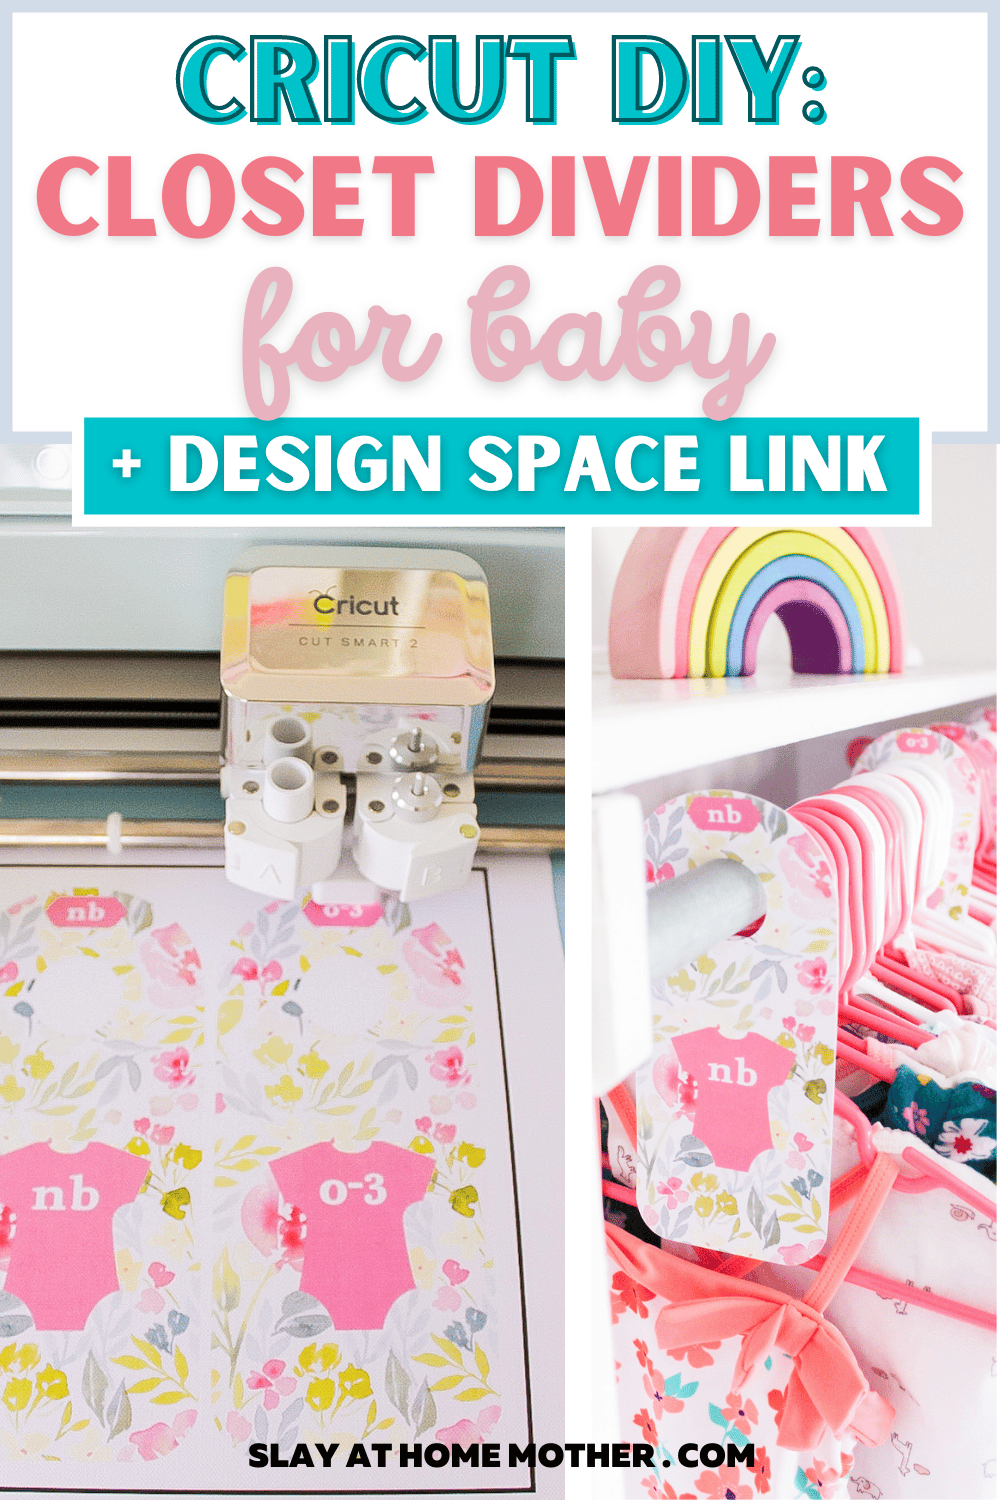
Make your own DIY closet dividers using your Cricut machine and the easy-to-use Print Then Cut function with this easy tutorial…
Today’s crafting tutorial is a mix of home organization, crafting, and DIY – my favorite kind of post!
Before I tell you about these incredible closet dividers I made for our daughter’s closet, I have to warn you.
And I’m totally serious.
But there’s a sh*t ton of pink going on.
At times, it’s BLINDING.
And I apologize for that.
We finally had a baby girl, and I finally had the excuse to have pink in my house (you know, being a boy mom and all).
I might have gone a little overboard with the pink.
I’m talking pink hangers, pink clothes (well, most of her clothes are hand-me-downs from her just-a-few-months-older cousin), pink sheets, pink wall decals, pink stuffed animals, and pink toys.
There’s no mistaking Zoey’s room for being anything other than a little girl’s room, that’s for sure!
Okay, now that we got that out of the way, I’m happy to share her nursery closet dividers with you all!
I made dividers for her closet in the old house while I was still pregnant and we didn’t know if she was a boy or a girl (did anyone else wait until the delivery to find out their little one’s gender?) did them to fit her thick-as-a-pencil closet bar at that time.
But those hangers, while they were a fun project, wouldn’t work in the new house for her closet seeing as she now has a good-sized closet hanging bar versus a 3mm thick bar ;).
Since having a little girl and inheriting a bunch of clothes from my sister-in-law (thanks, Adrienne!), I’ve become a little frustrated with just hanging the clothes and not having dividers.
If you’re new here, I loooove to organize.
As a busy mom of three running her own business, organization saves me a lot of time and sanity, and it goes hand in hand with what I love to do and help other moms do!
I thought that maybe if I just hung them for a while by size, I would get the hang of it and just know what clothes were what size. I even got into the habit of hanging shirts first, then pajamas, then pants.
The pants were the visual separation between sizes.
But I still got confused at times, even when hanging clean clothes up!
I also like to keep an inventory of our kids’ clothes, especially when they’re young so that when I see a sale come up I can stock up on future sizes our kids need.
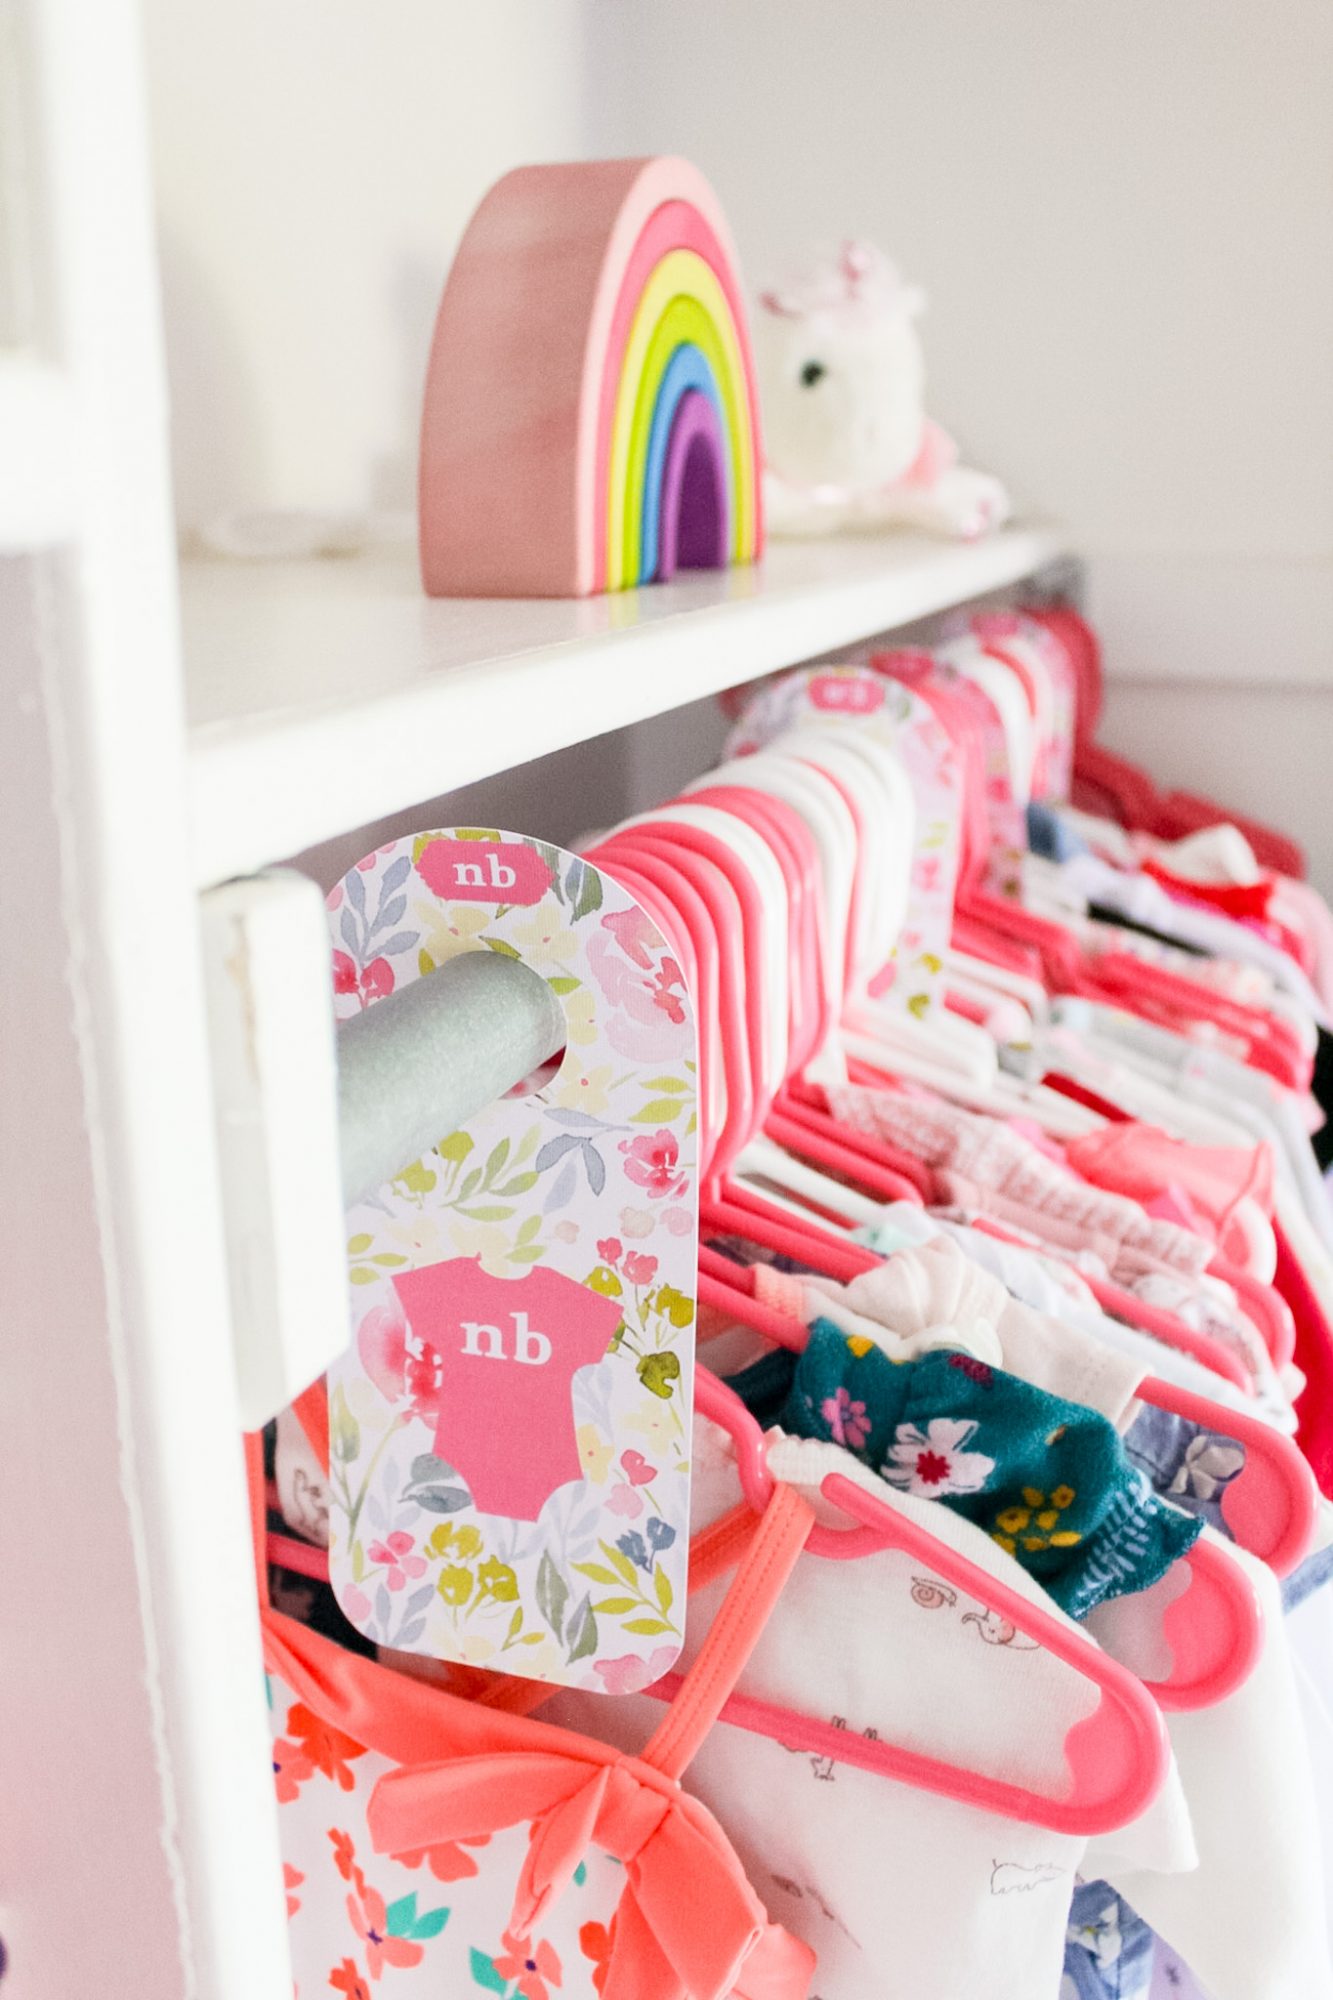
Closet dividers help me keep an inventory of clothes by visually showing me how big a section of clothes is.
If the section of clothes for a certain size is lacking, I know to stock up on that size during the next sale.
For instance, Zoey has some slim pickings when it comes to the 9-month clothes category.
With these beautiful baby closet dividers I made for her, I can just look up and see where the sizes are, what I need to stock up on, and how many items of one size I have (shirts, pants, dresses, etc).
These closet dividers would make a great baby shower gift, as well!
Anyways, I recently whipped these nursery closet dividers up in Design Space, and am thrilled to be sharing this tutorial with you all in this post…
This post contains affiliate links, however, all opinions are my own, as always.
What You Need To Make These DIY Baby Closet Dividers
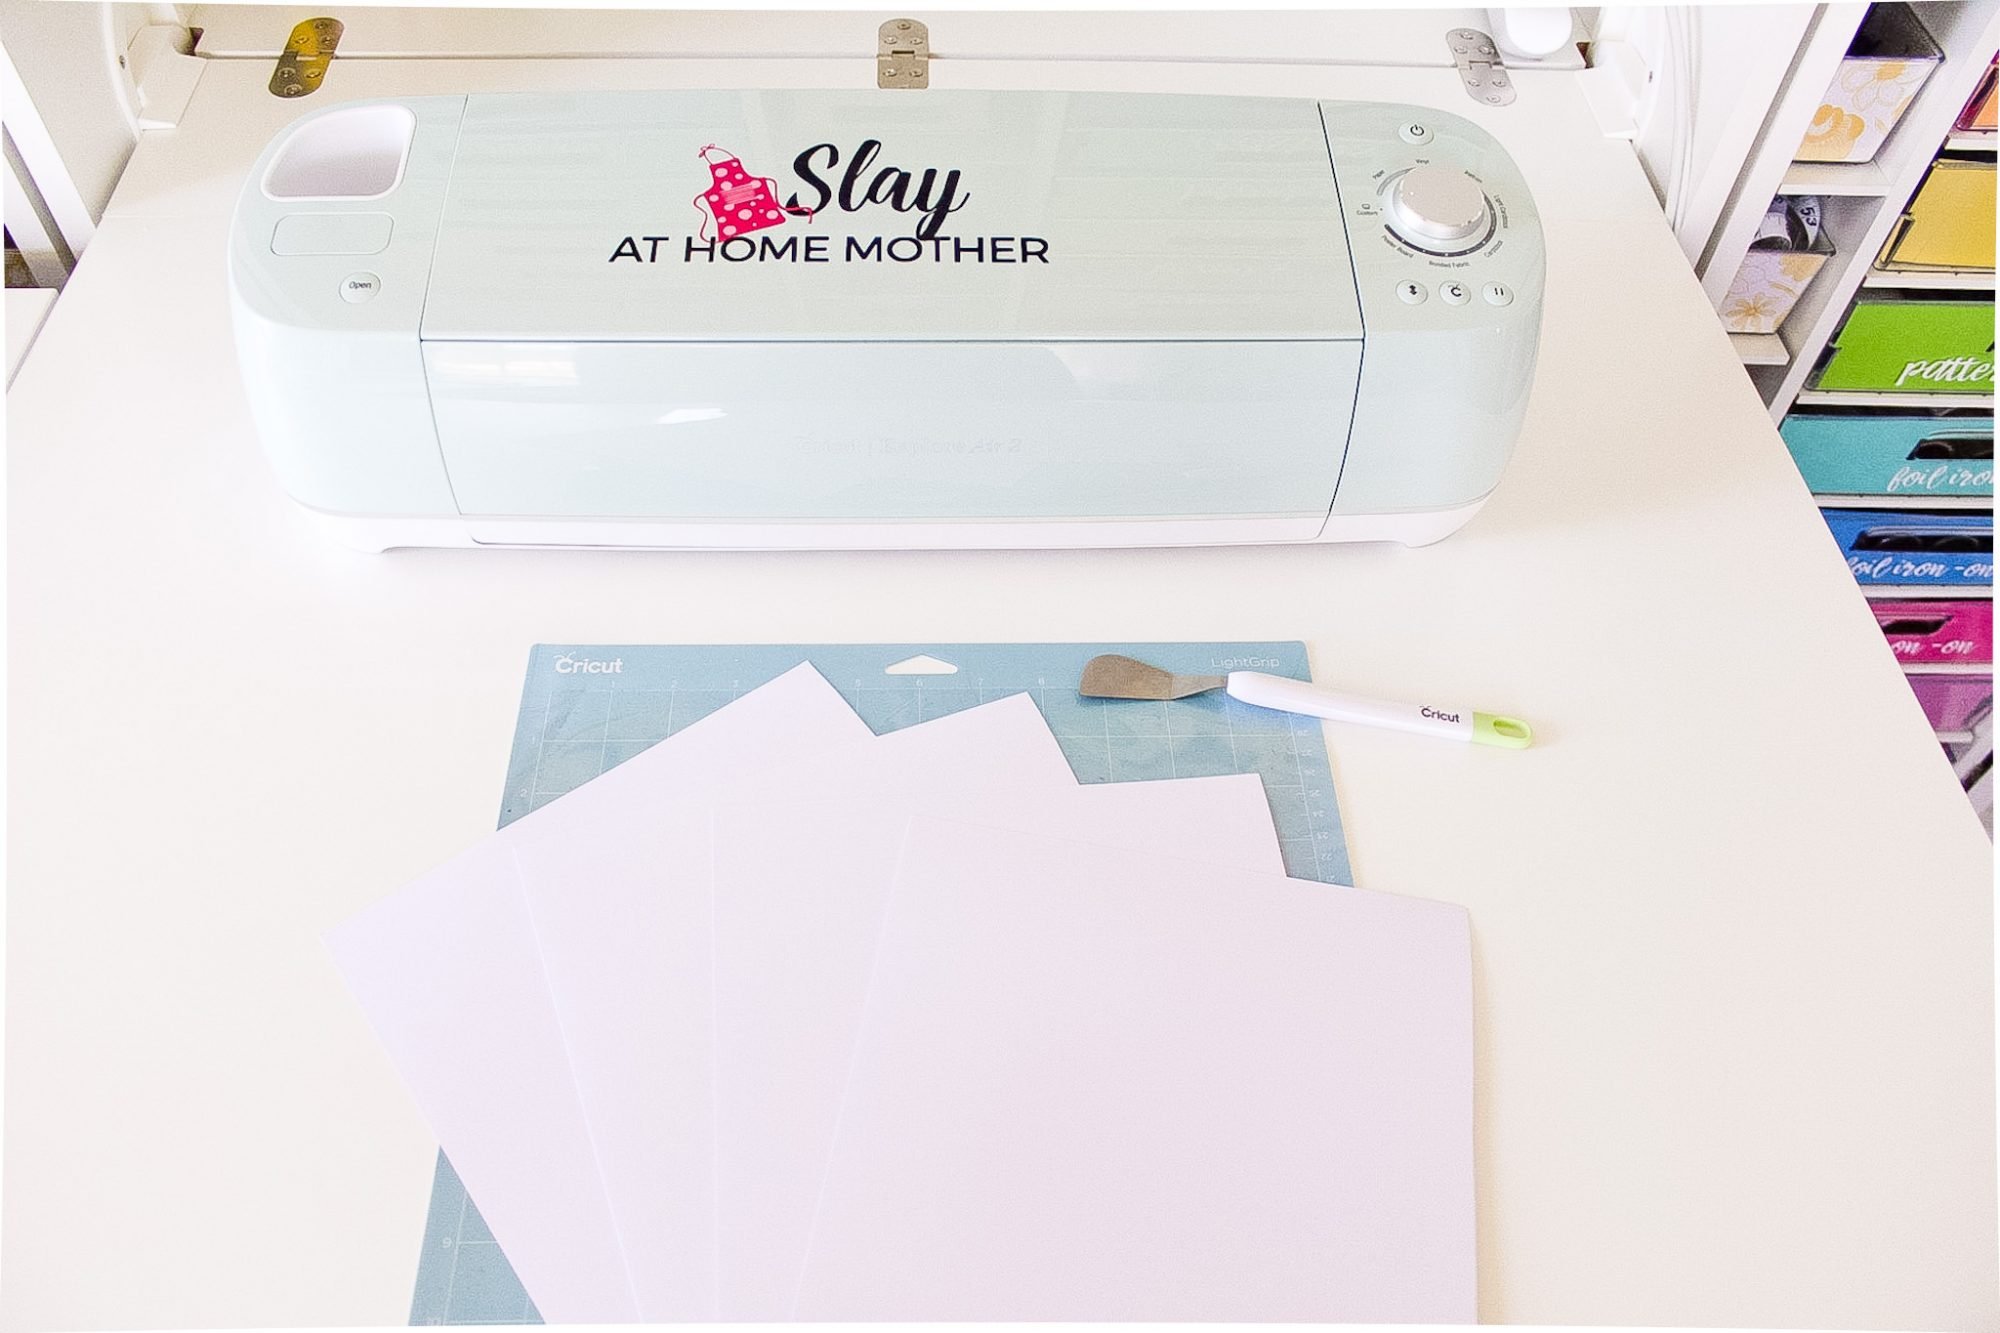
Here’s what you need to make your own DIY Nursery Closet Dividers…
- 4 pieces of white 80 lb. cardstock
- 1 piece of paper
- LightGrip mat (the blue one)
- Cricut spatula (comes in the Cricut basic tools set)
- Cricut Access
- Cricut machine (Explore Air 2 or Maker)
- Printer
This tutorial uses an image and design elements available to Cricut access subscribers – I highly recommend and use Access myself!
Cricut Access gives you access to over 100,000+ other incredible images, fonts (including those you have stored on your computer!), and exclusive deals on Cricut materials and MACHINES.
A Quick Note about cardstock
For my closet dividers, I used 80 lb. white cardstock – the dividers seem to be plenty sturdy and ‘stiff’, but you could always go up to 100 lb. cardstock if you wanted to.
Also, feel free to use cream-colored cardstock versus white if you have that on hand already.
This design should work as well on cream.
Plus, Cricut often has cream-colored cardstock on sale for about $2.50 for 20 sheets – which makes it about $0.13 per sheet!
Designing Your Closet Dividers In Cricut Design Space
If You’re Making Closet Dividers Using My Design In Design Space…
Click this link HERE, and click on ‘Make It’.
You’ll print out the design first (print out all four pages, make sure ‘Add Bleed‘ is selected), and cut on LightGrip blue mat.
If You’re Designing Closet Dividers Yourself In Design Space…
Open up your Cricut Design Space application on your phone or desktop.
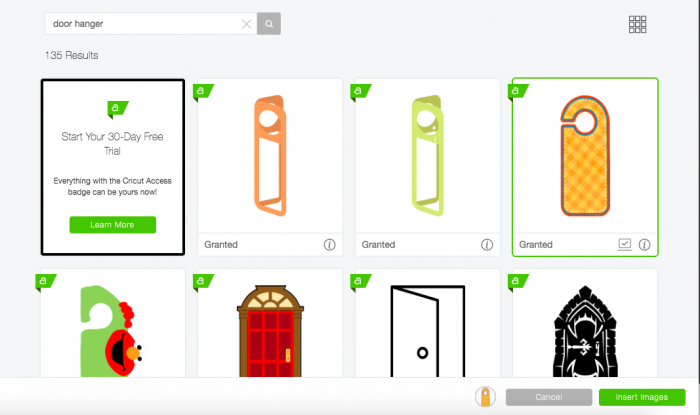
Click on ‘Image‘ in the left toolbar, and search for ‘door hanger‘.
Select the yellow door hanger image in the screenshot below (the one with the green highlighted square around it). Click on the ‘Insert Images‘ button towards the bottom right of the screen.
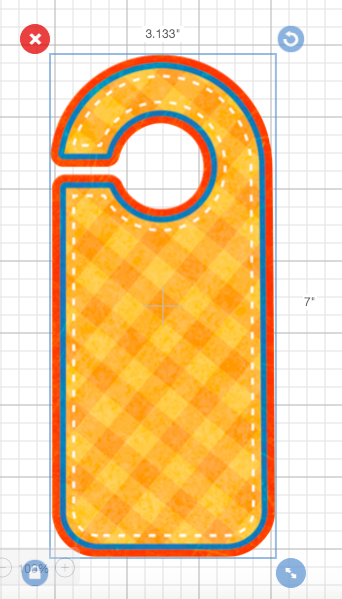
Adjust the size of your door hanger so that the height is 7″.
See the screenshot below…
Start off with just one door hanger, don’t skip to copying and pasting this image until you have it looking JUST the way you want.
Trust me, this saves a lot of design time ;).
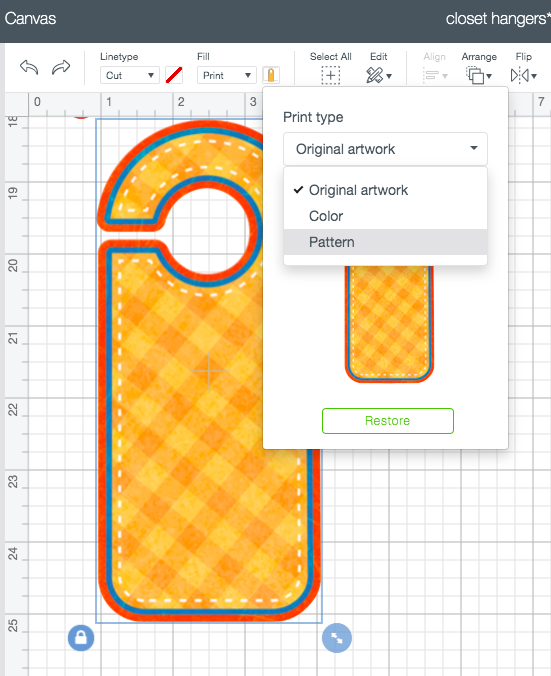
Now, we are going to mess with the pattern and coloring of our door hanger to match what we want!
Towards the top left, under Fill, click on the icon image that looks like a tiny version of the door hanger image, and scroll down to where it says ‘Pattern‘.
Clicking on ‘Pattern‘ allows us to select a pattern available within the Cricut application – which, if you’re going after the floral pattern I used for my door hangers, this is where you go to get it!
You May Also Like: Print Then Cut DIY Stickers (Thorough tutorial with tons of screenshots!)
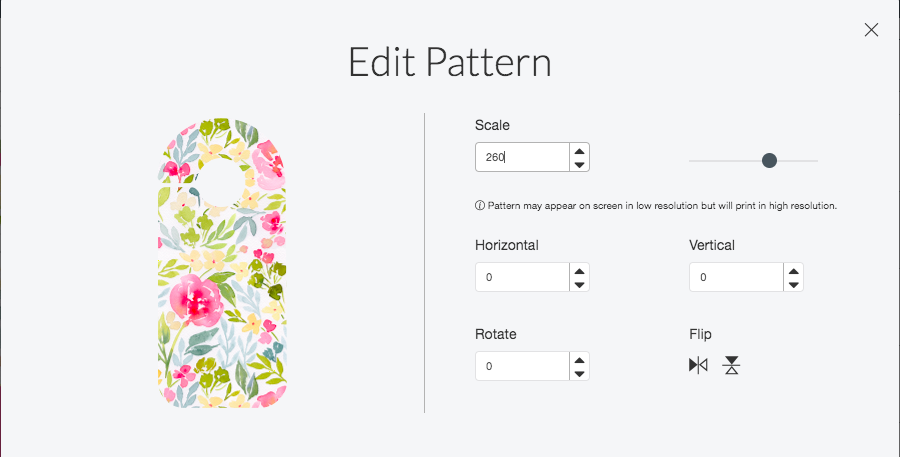
Once you have selected the pattern you want, you can click on ‘Edit Pattern‘ within the same area (under Fill) and scale the pattern to fit your image, especially if it seems to be repeating in multiple areas within the shape.
For this design, I scaled it to 260.
Next, add whatever design elements you want to really customize the look of your closet dividers!
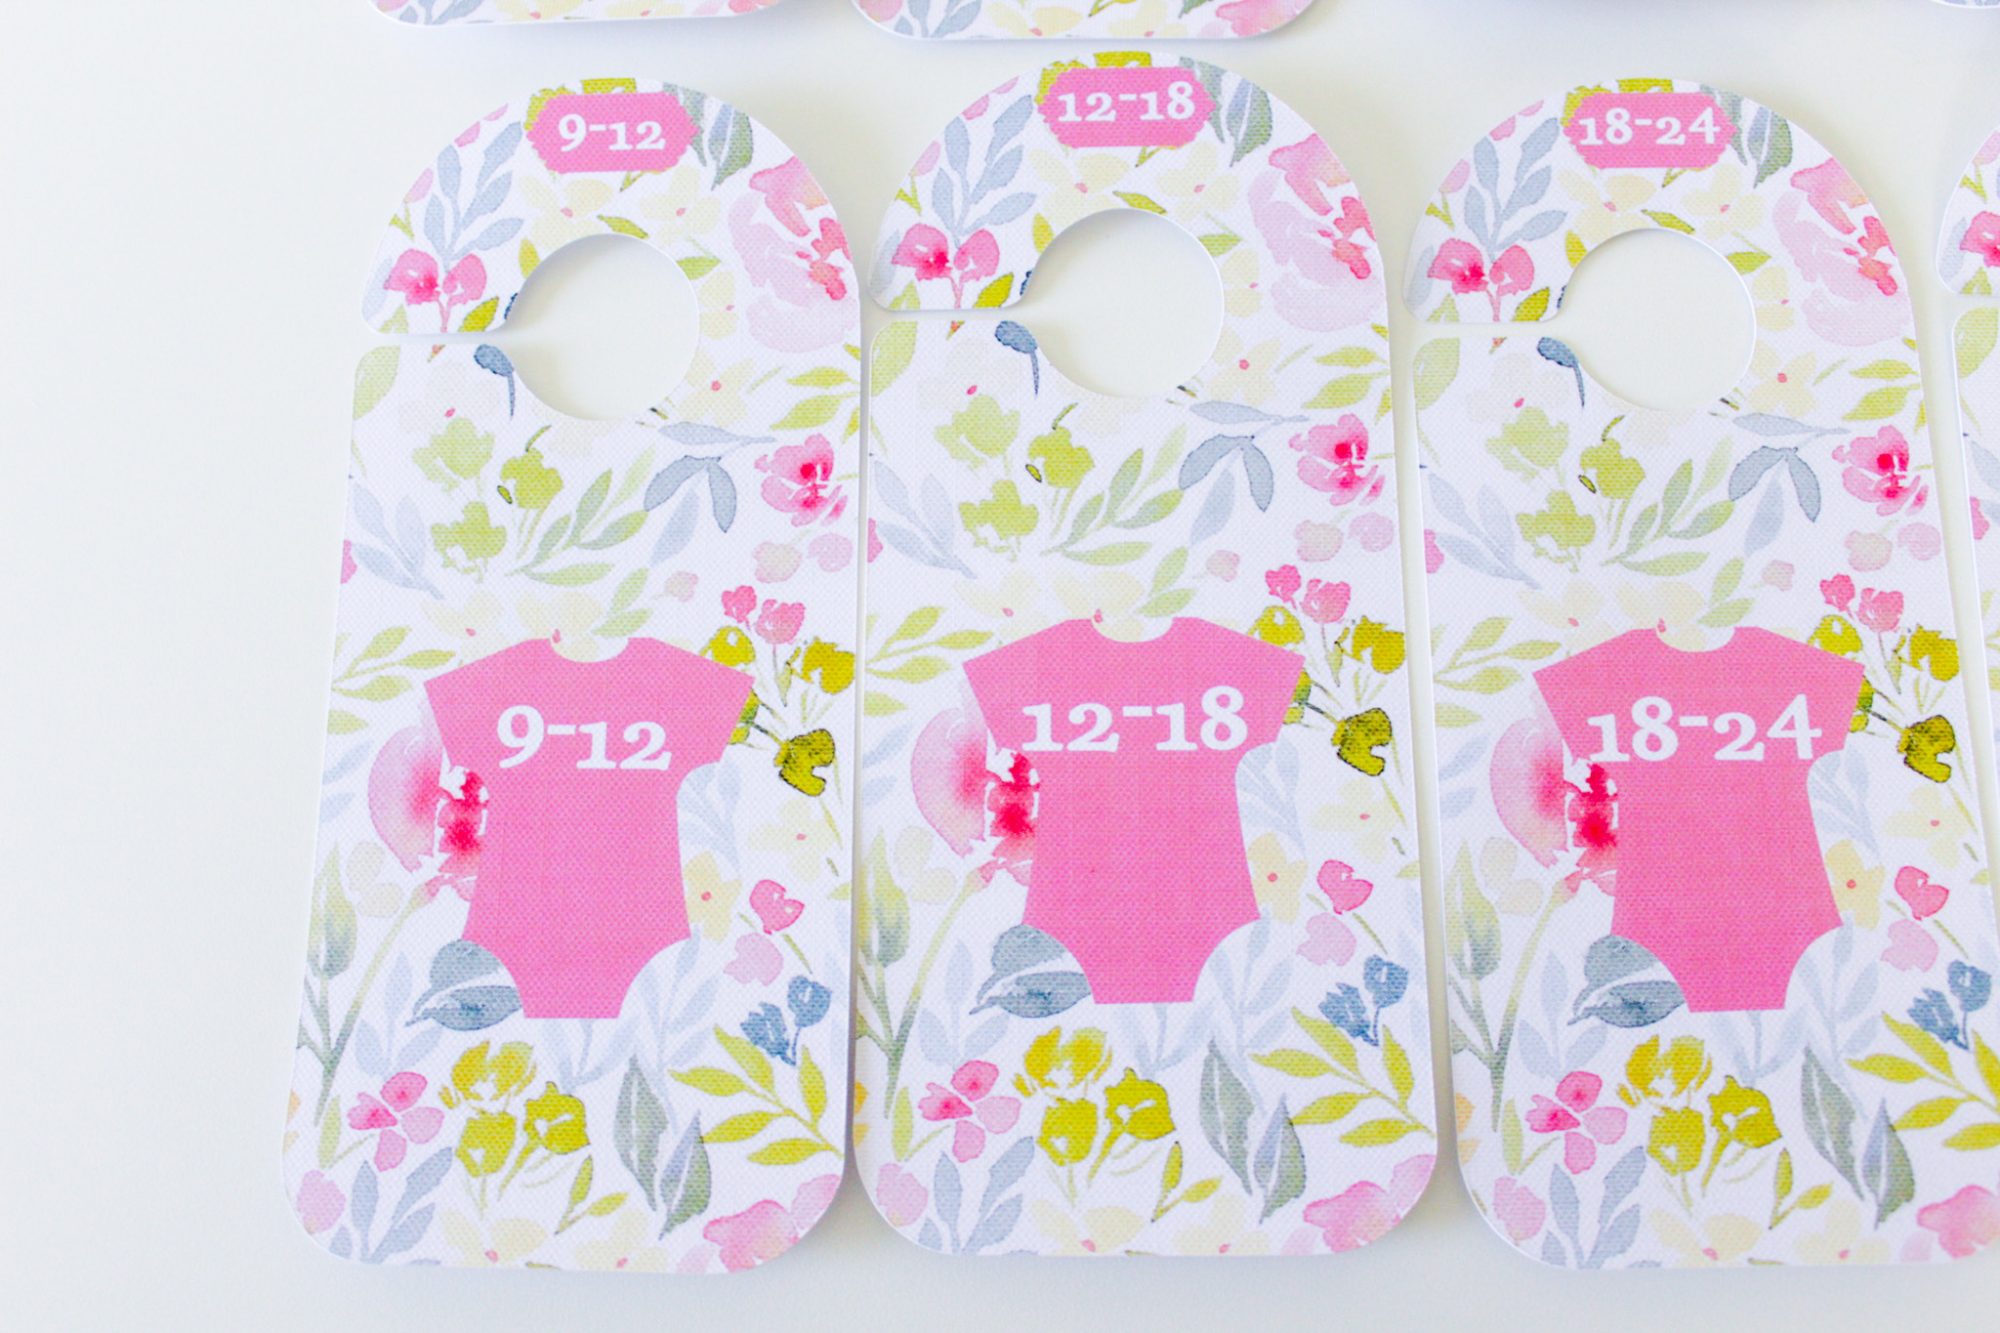
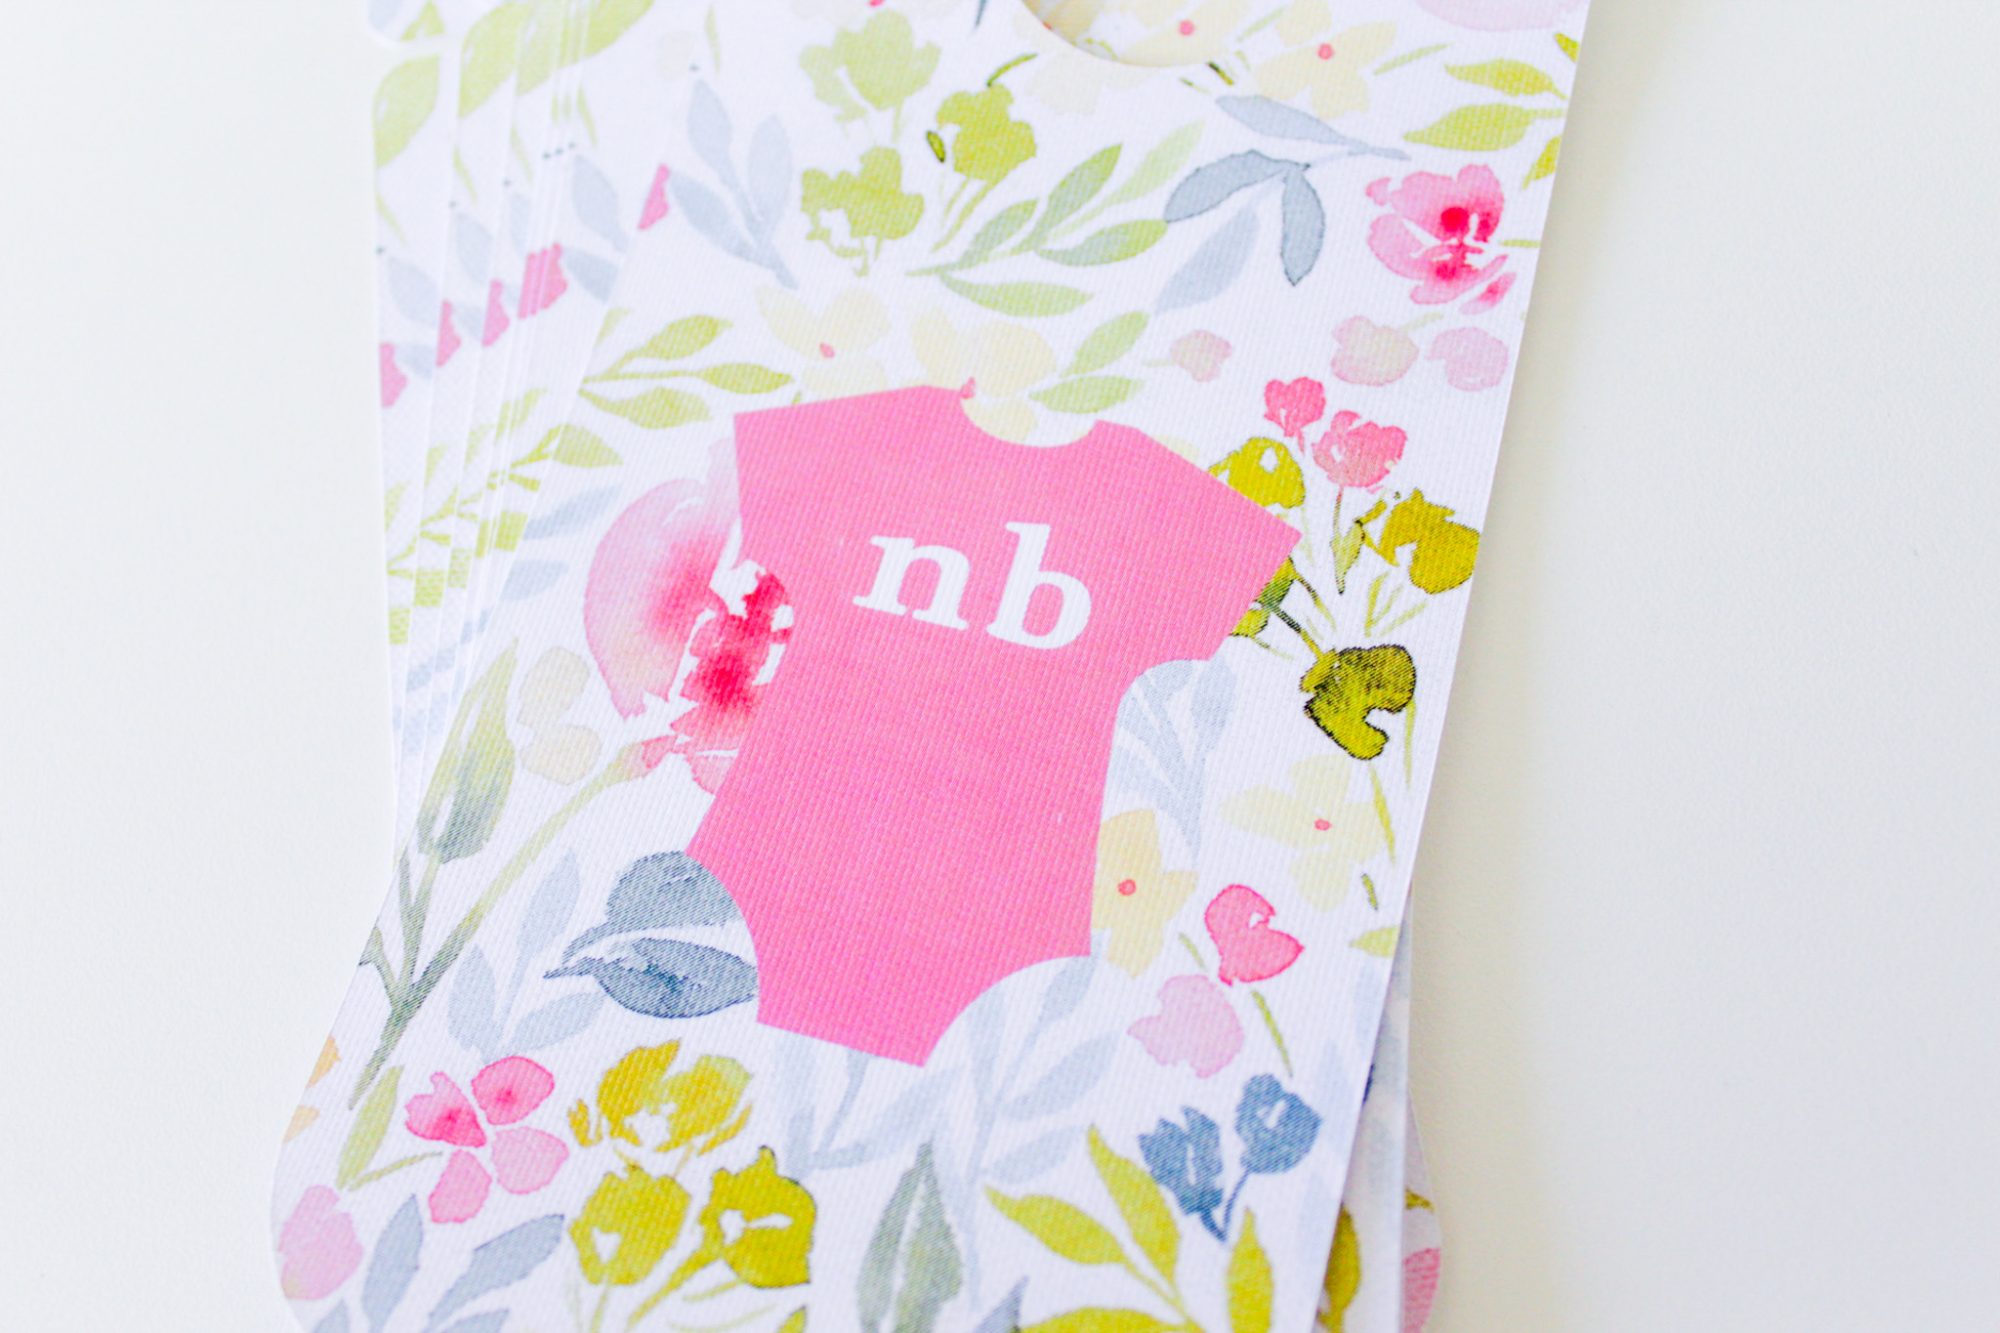
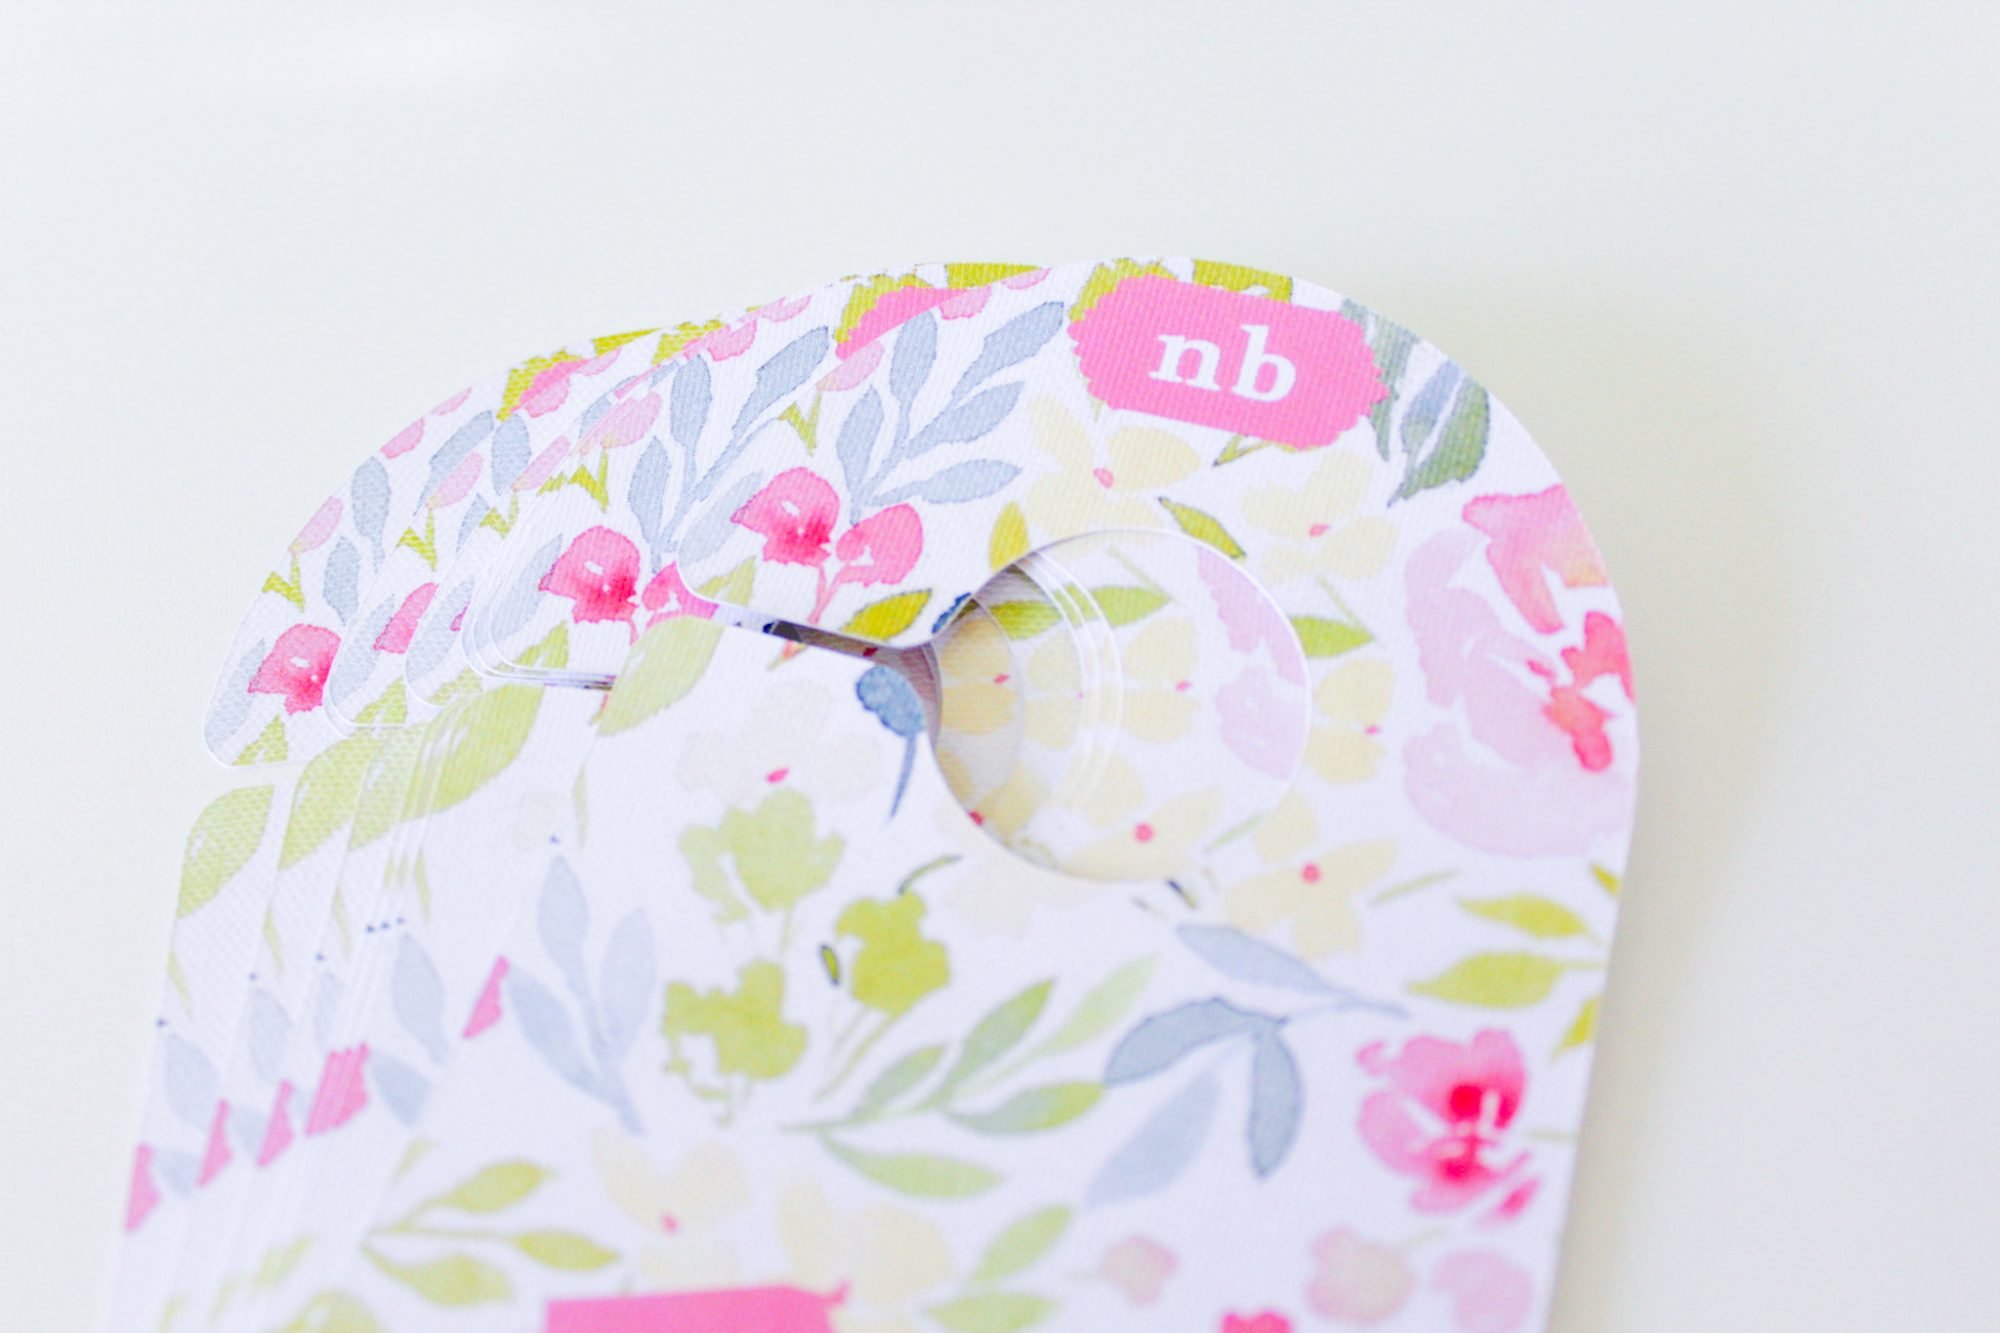
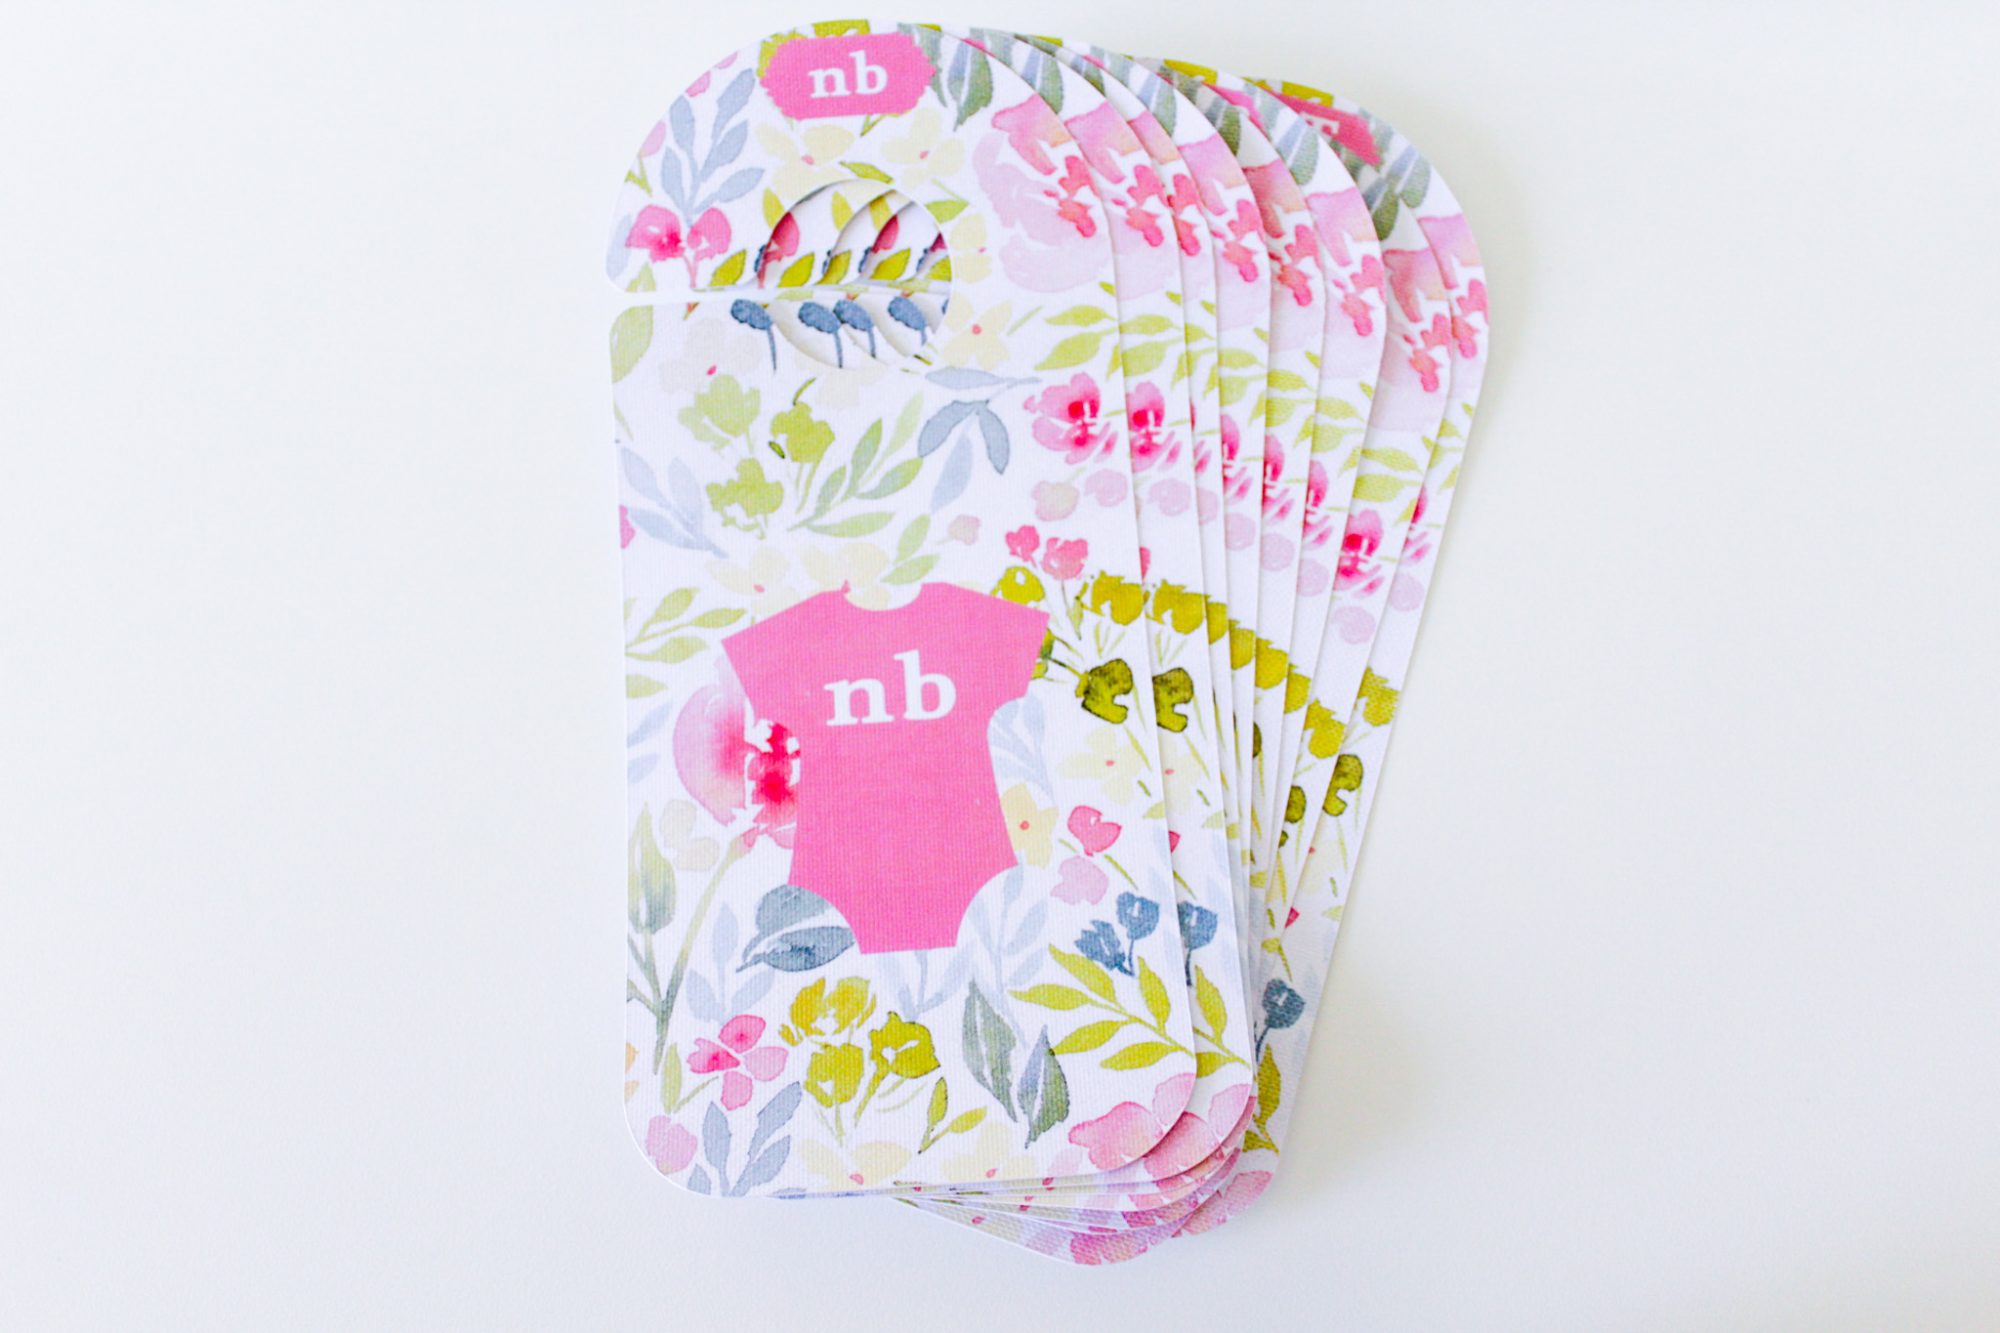
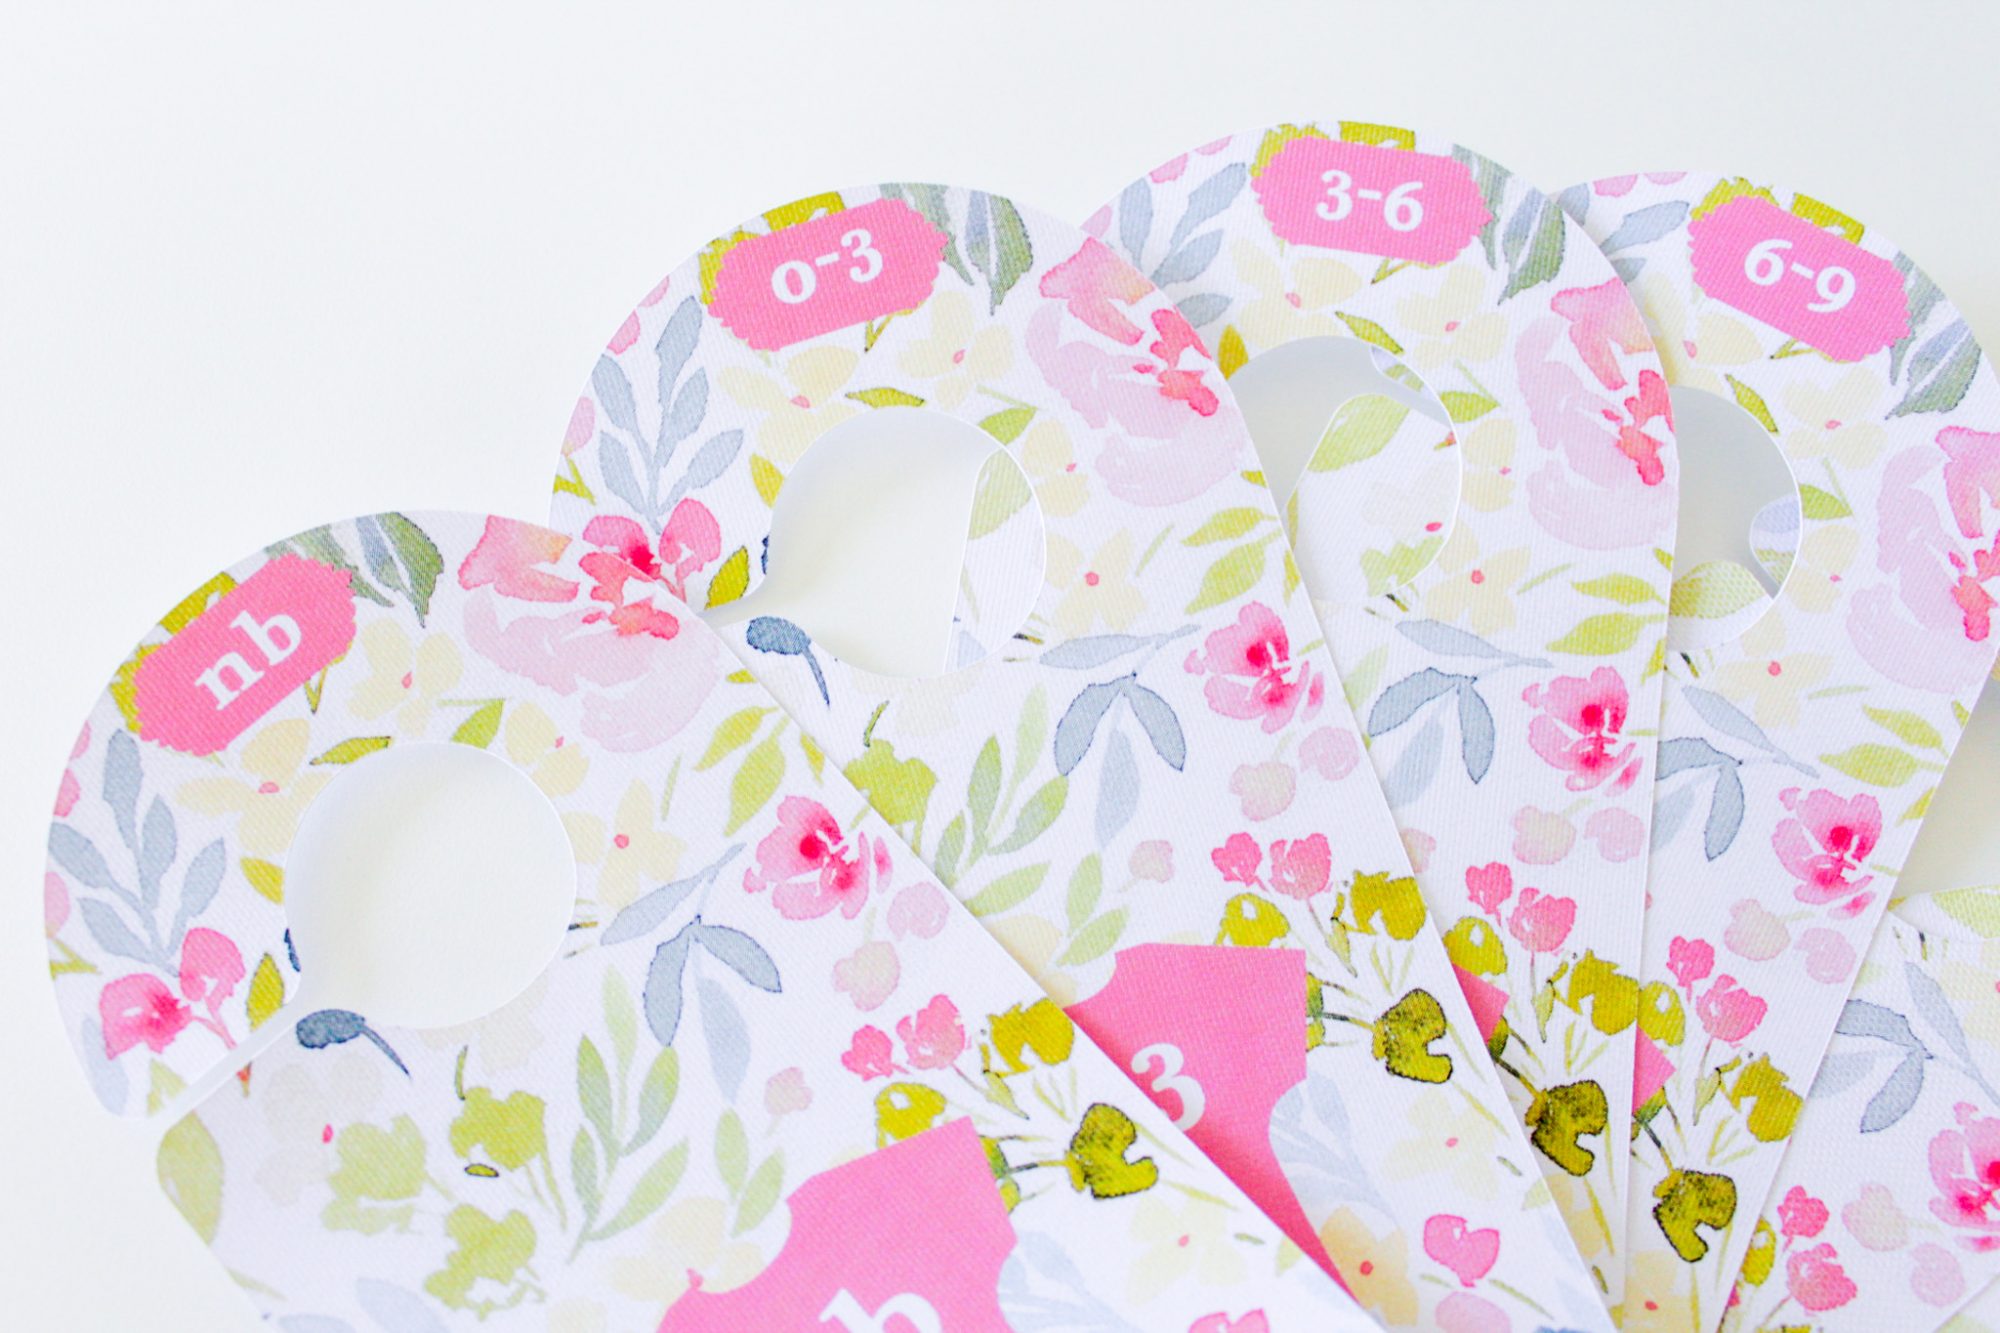
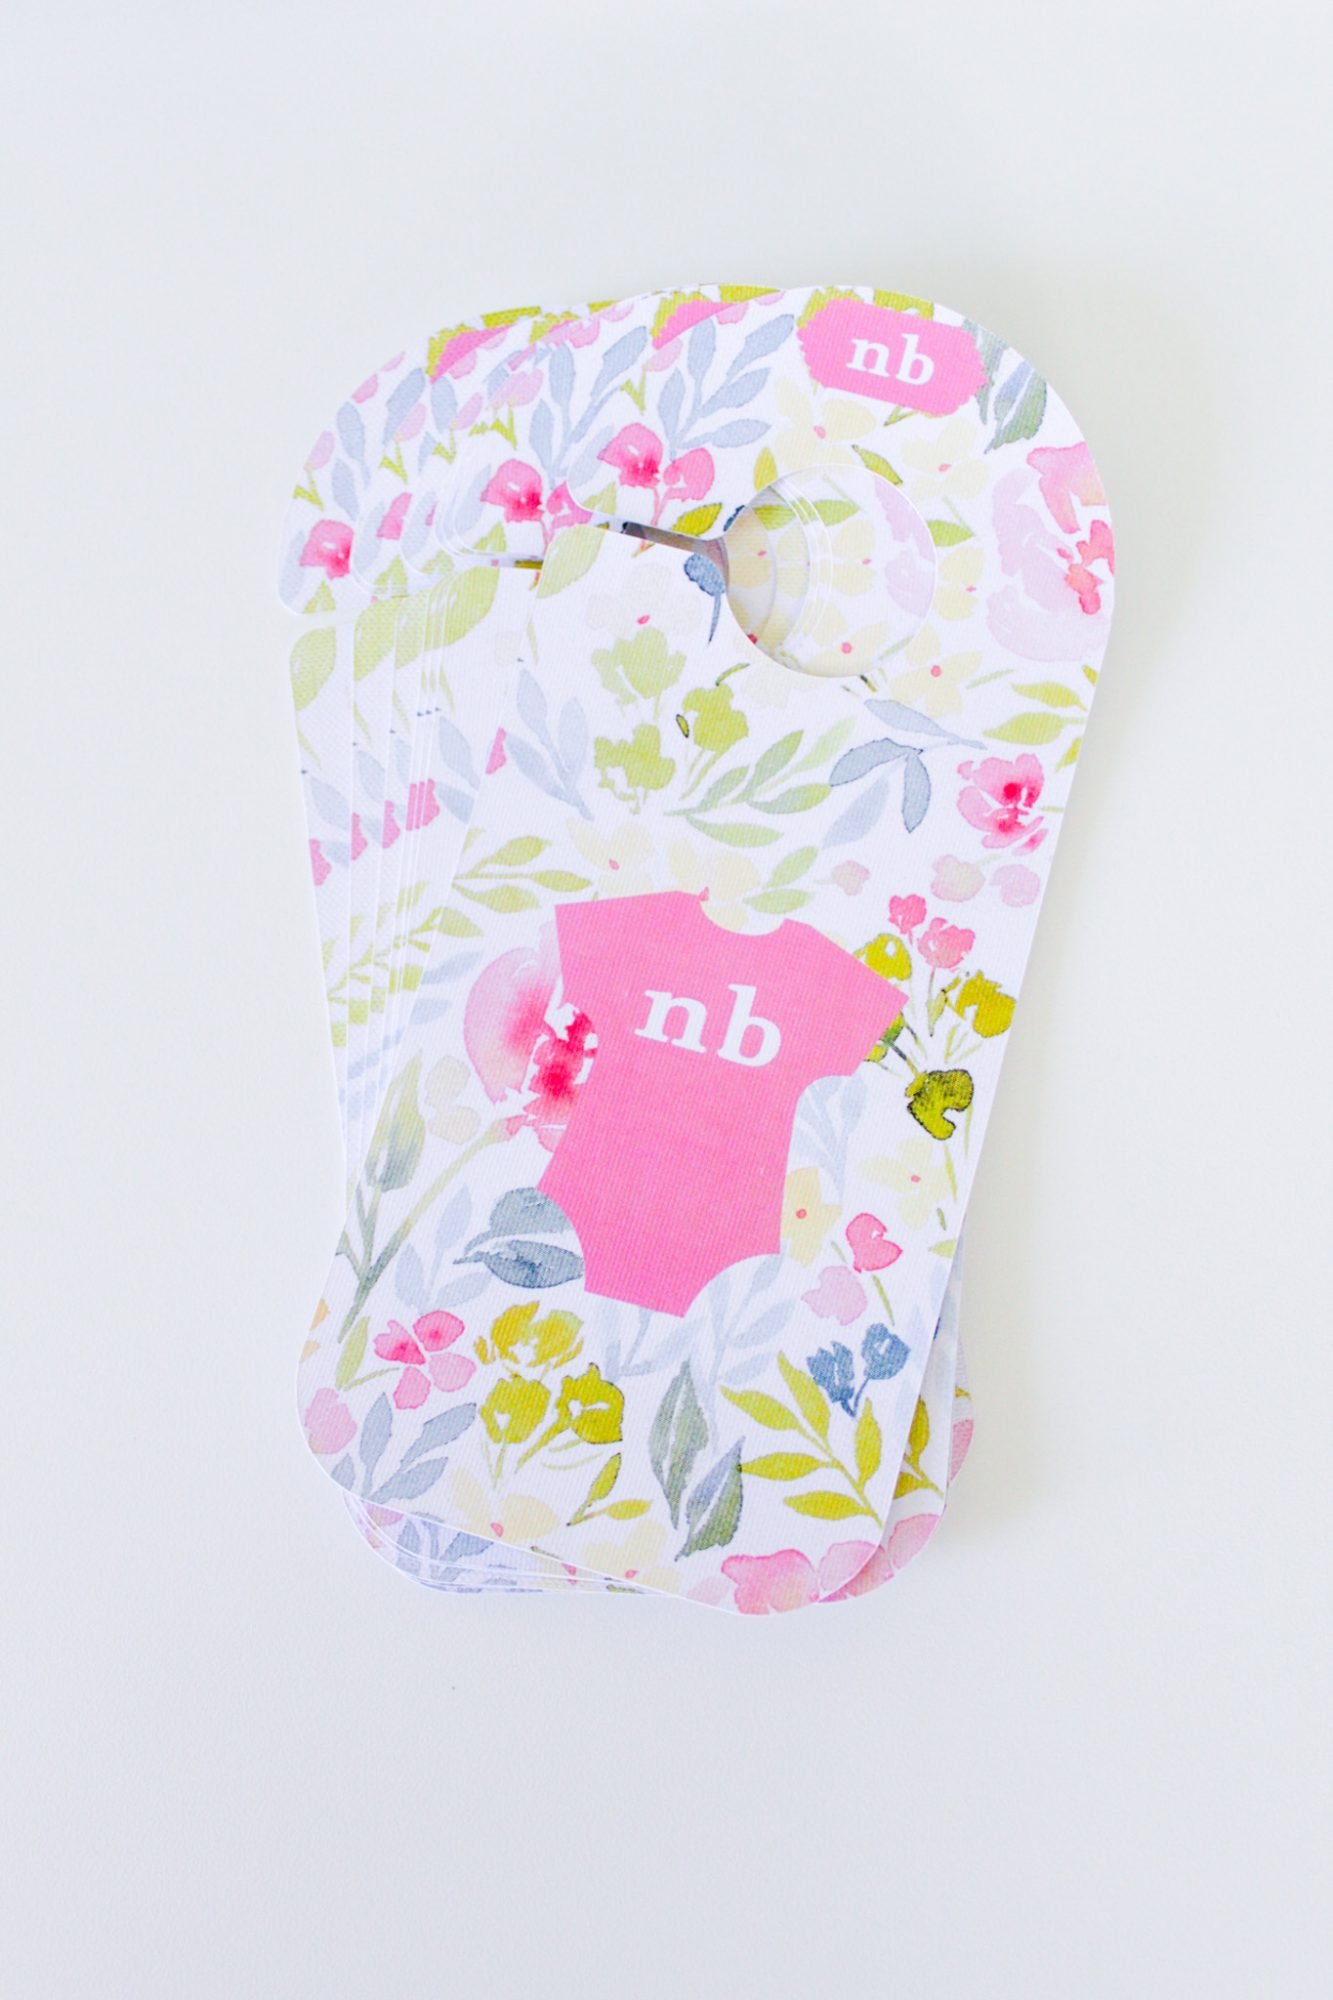
For mine, added a ‘label‘ to put at the top for the sizes, and a ‘onesie‘ to put on the front for sizes.
I added text where I wanted, and then, selecting the entire design for my one closet divider, clicked on ‘Center Horizontally‘ under the ‘Align‘ tab (see screenshot below).
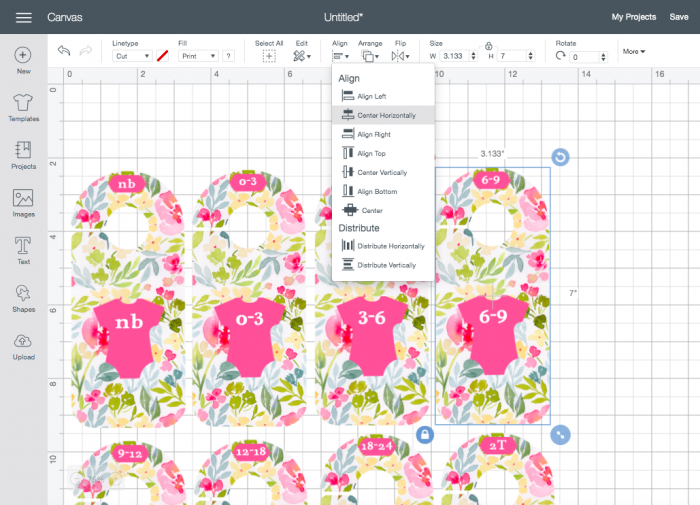
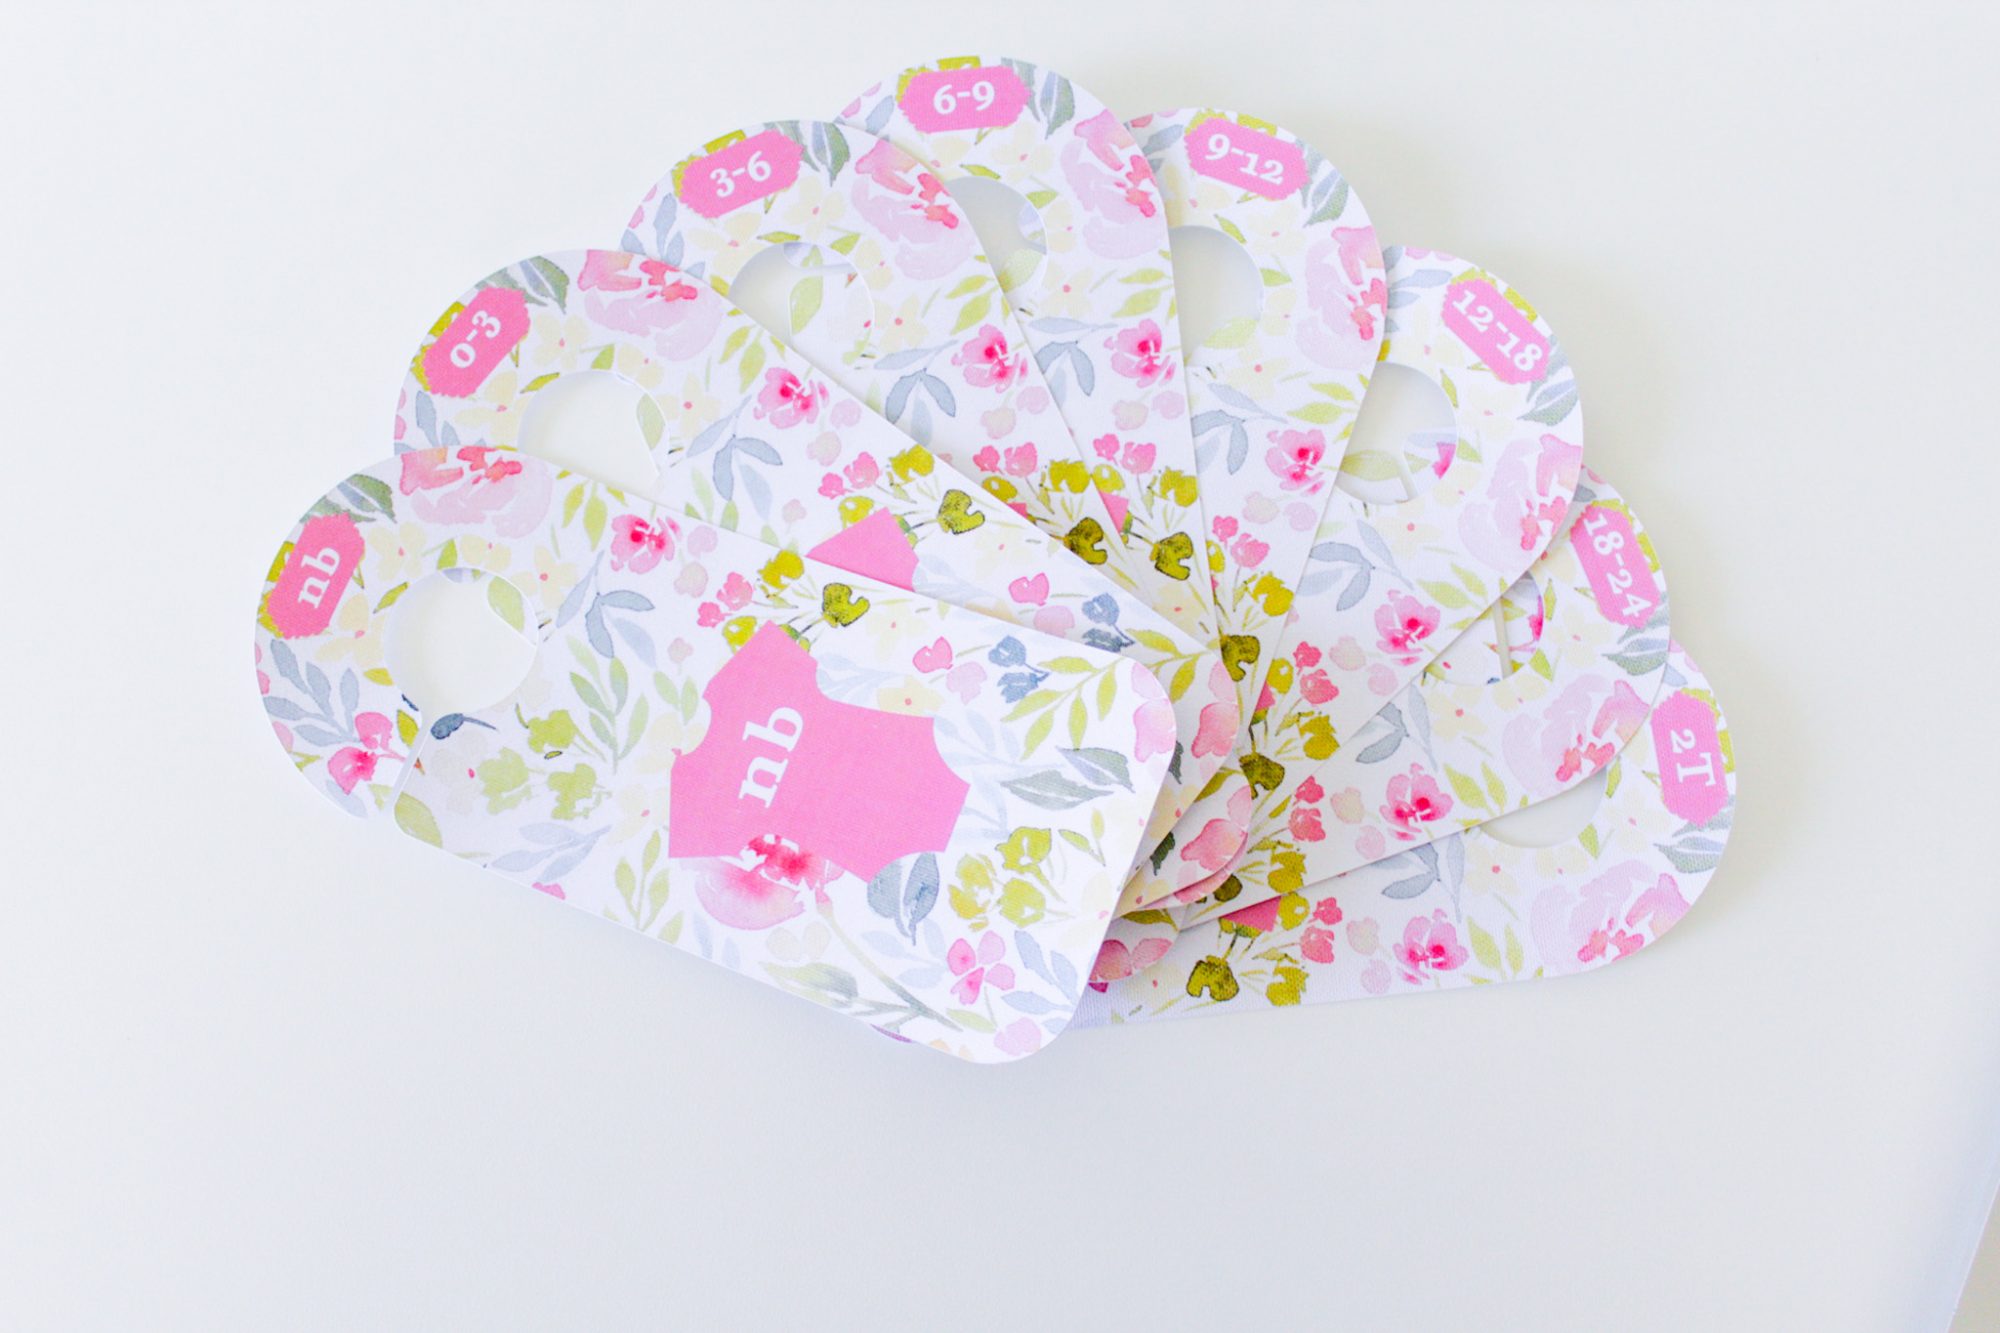
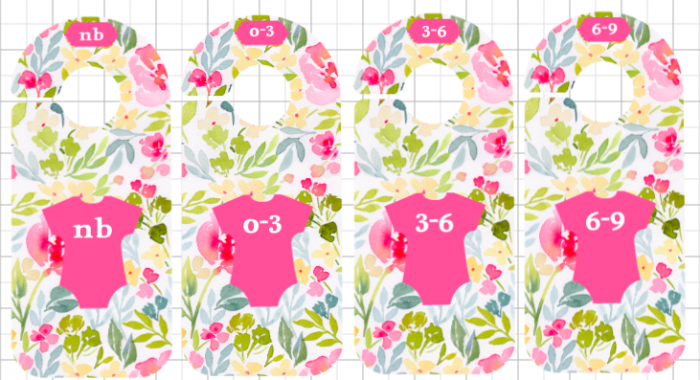
I then copied and pasted the image until I had 8 closet dividers, changing the text to accommodate the sizes as follows:
- NB
- 0-3 month
- 3-6 month
- 6-9 month
- 9-12 month
- 12-18 month
- 18-24 month
- 2T
Almost ready to Print Then Cut, I Attached two closet dividers together (since I was going to be printing and cutting two closet dividers per sheet of cardstock), and then Flattened them.
Flatten Each Closet Divider Before You Hit The ‘Make It’ Button!
If you do not Flatten your design, and we’ll use my design as an example, your Cricut will also cut out the onesie, pink ‘label’ at the top, and the numbers, as well as the door hanger shape.
That’s not what we want, we only want the door hanger shape to be cut!
Flattening an image makes it so that your Cricut only cuts the outlining shape, none of the inside cuts.
Using Print Then Cut On Your Cricut Machine
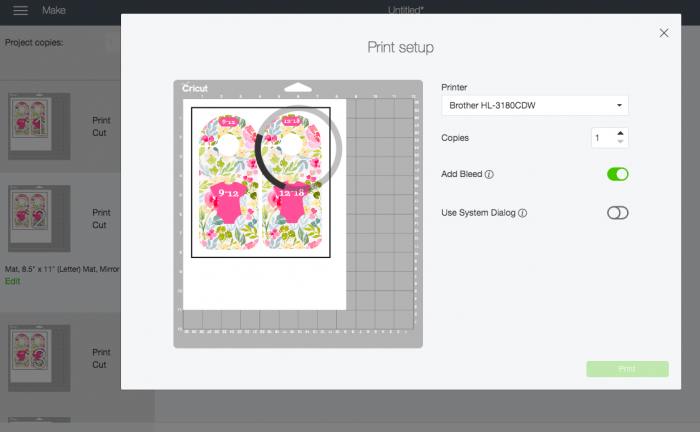
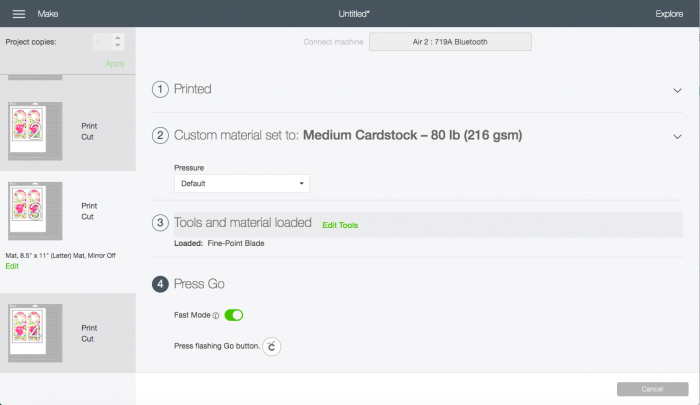
Now we’re ready to Print Then Cut!
To start, click on ‘Make It’…
And print out each sheet of closet dividers.
The black square surrounding your closet dividers will be printed out by your printer.
These are score lines, and they help tell your Cricut machine exactly where to cut.
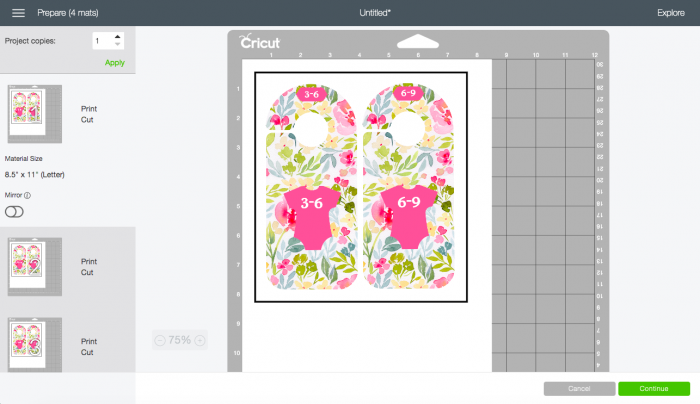
Be sure to select ‘Add Bleed’ when cutting – this means that your printer will extend the design and ink a little past the actual outline of the design so that when the Cricut cuts it, your design encompasses the entire front of your closet divider.
I use this Add Bleed option when I am designing and cutting out my own stickers, as well.
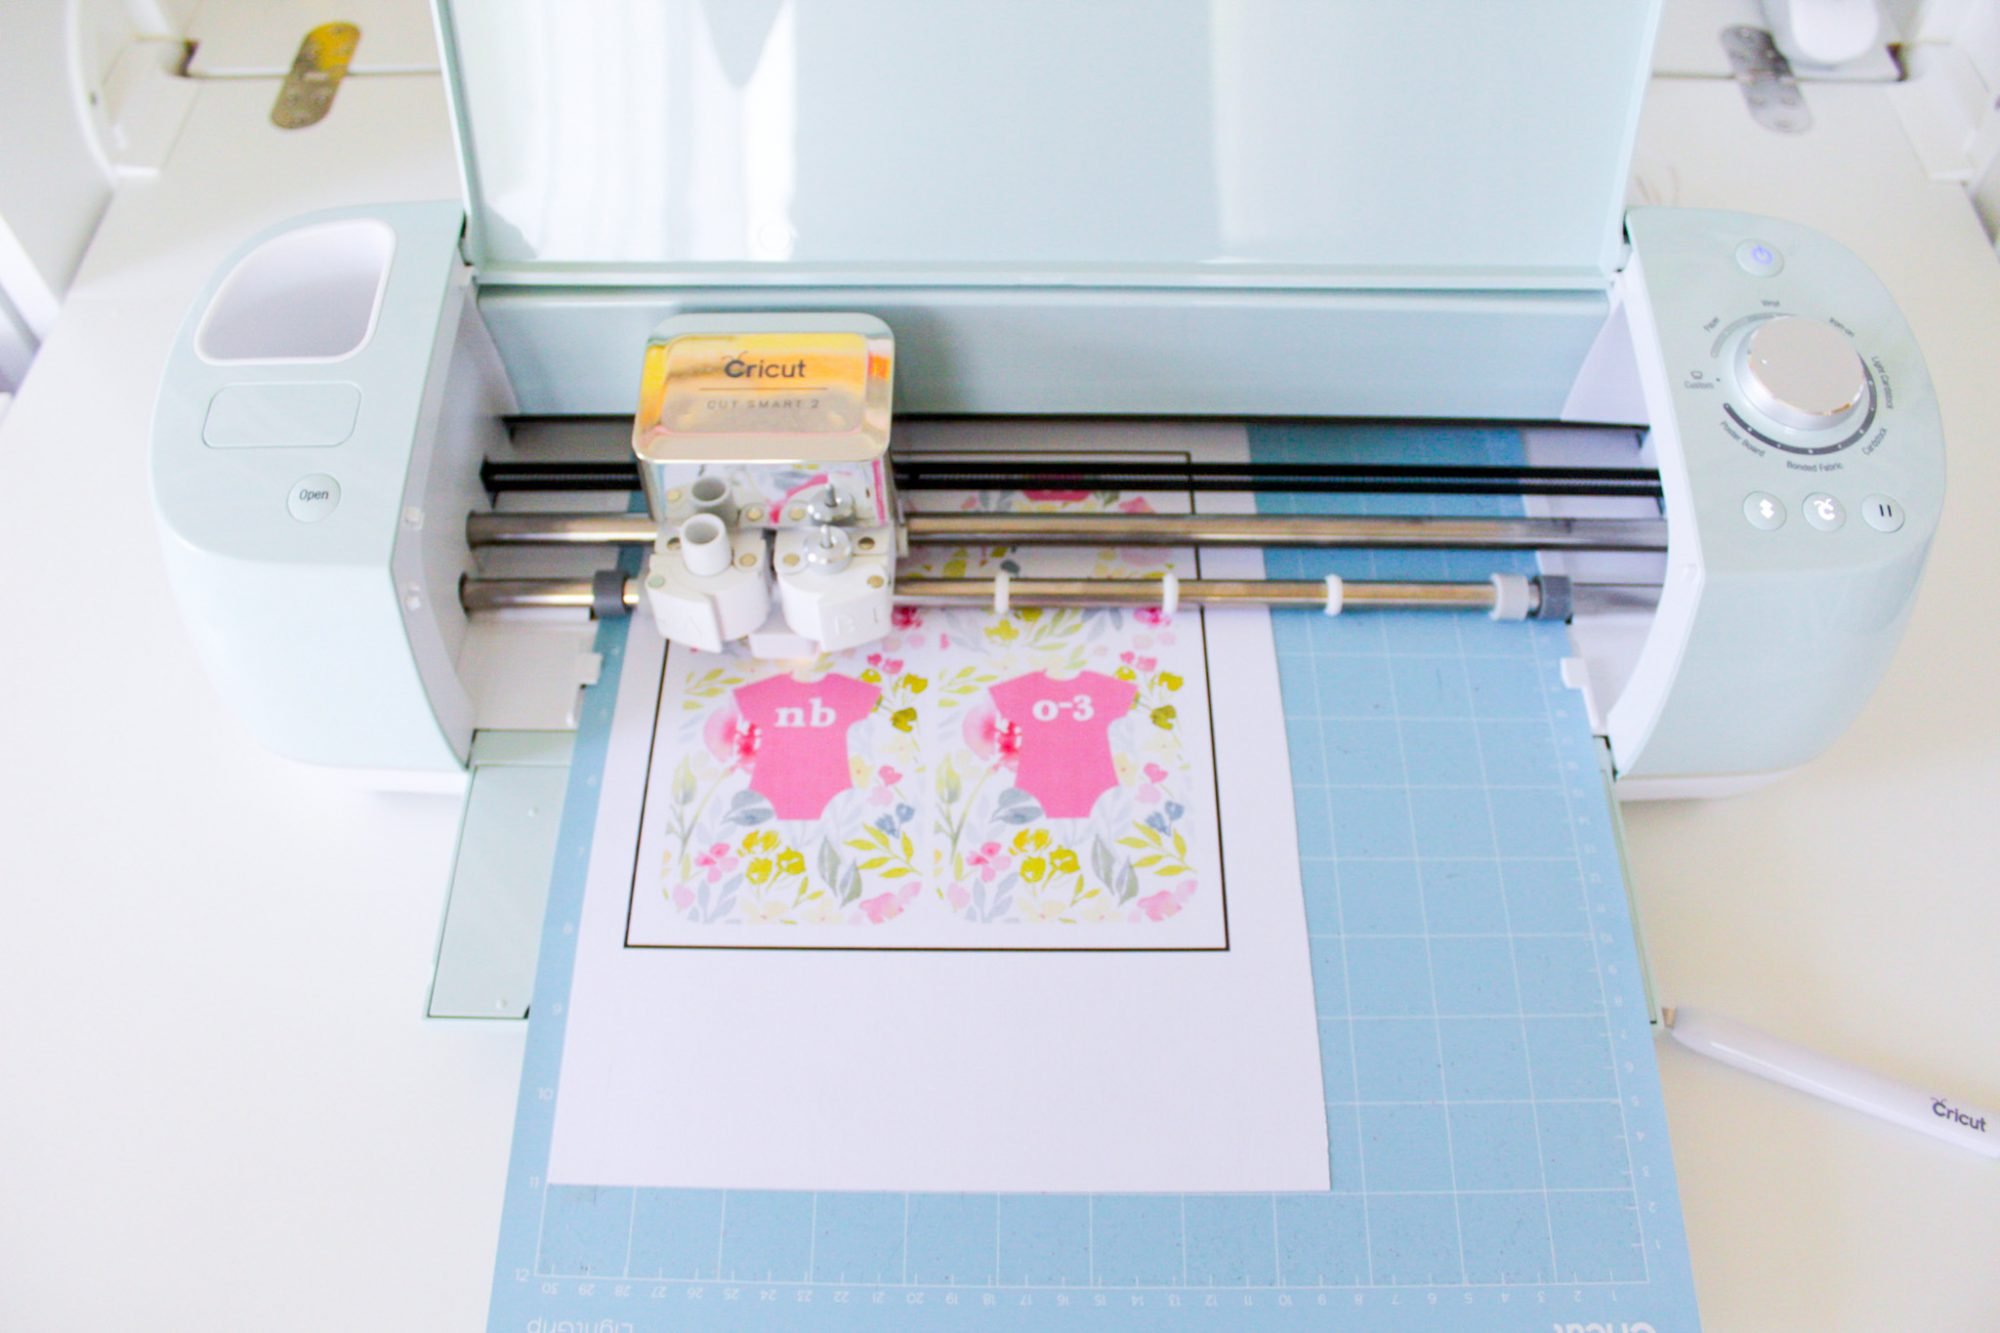
Once your four sheets of cardstock have been printed on, they’ll look like this…
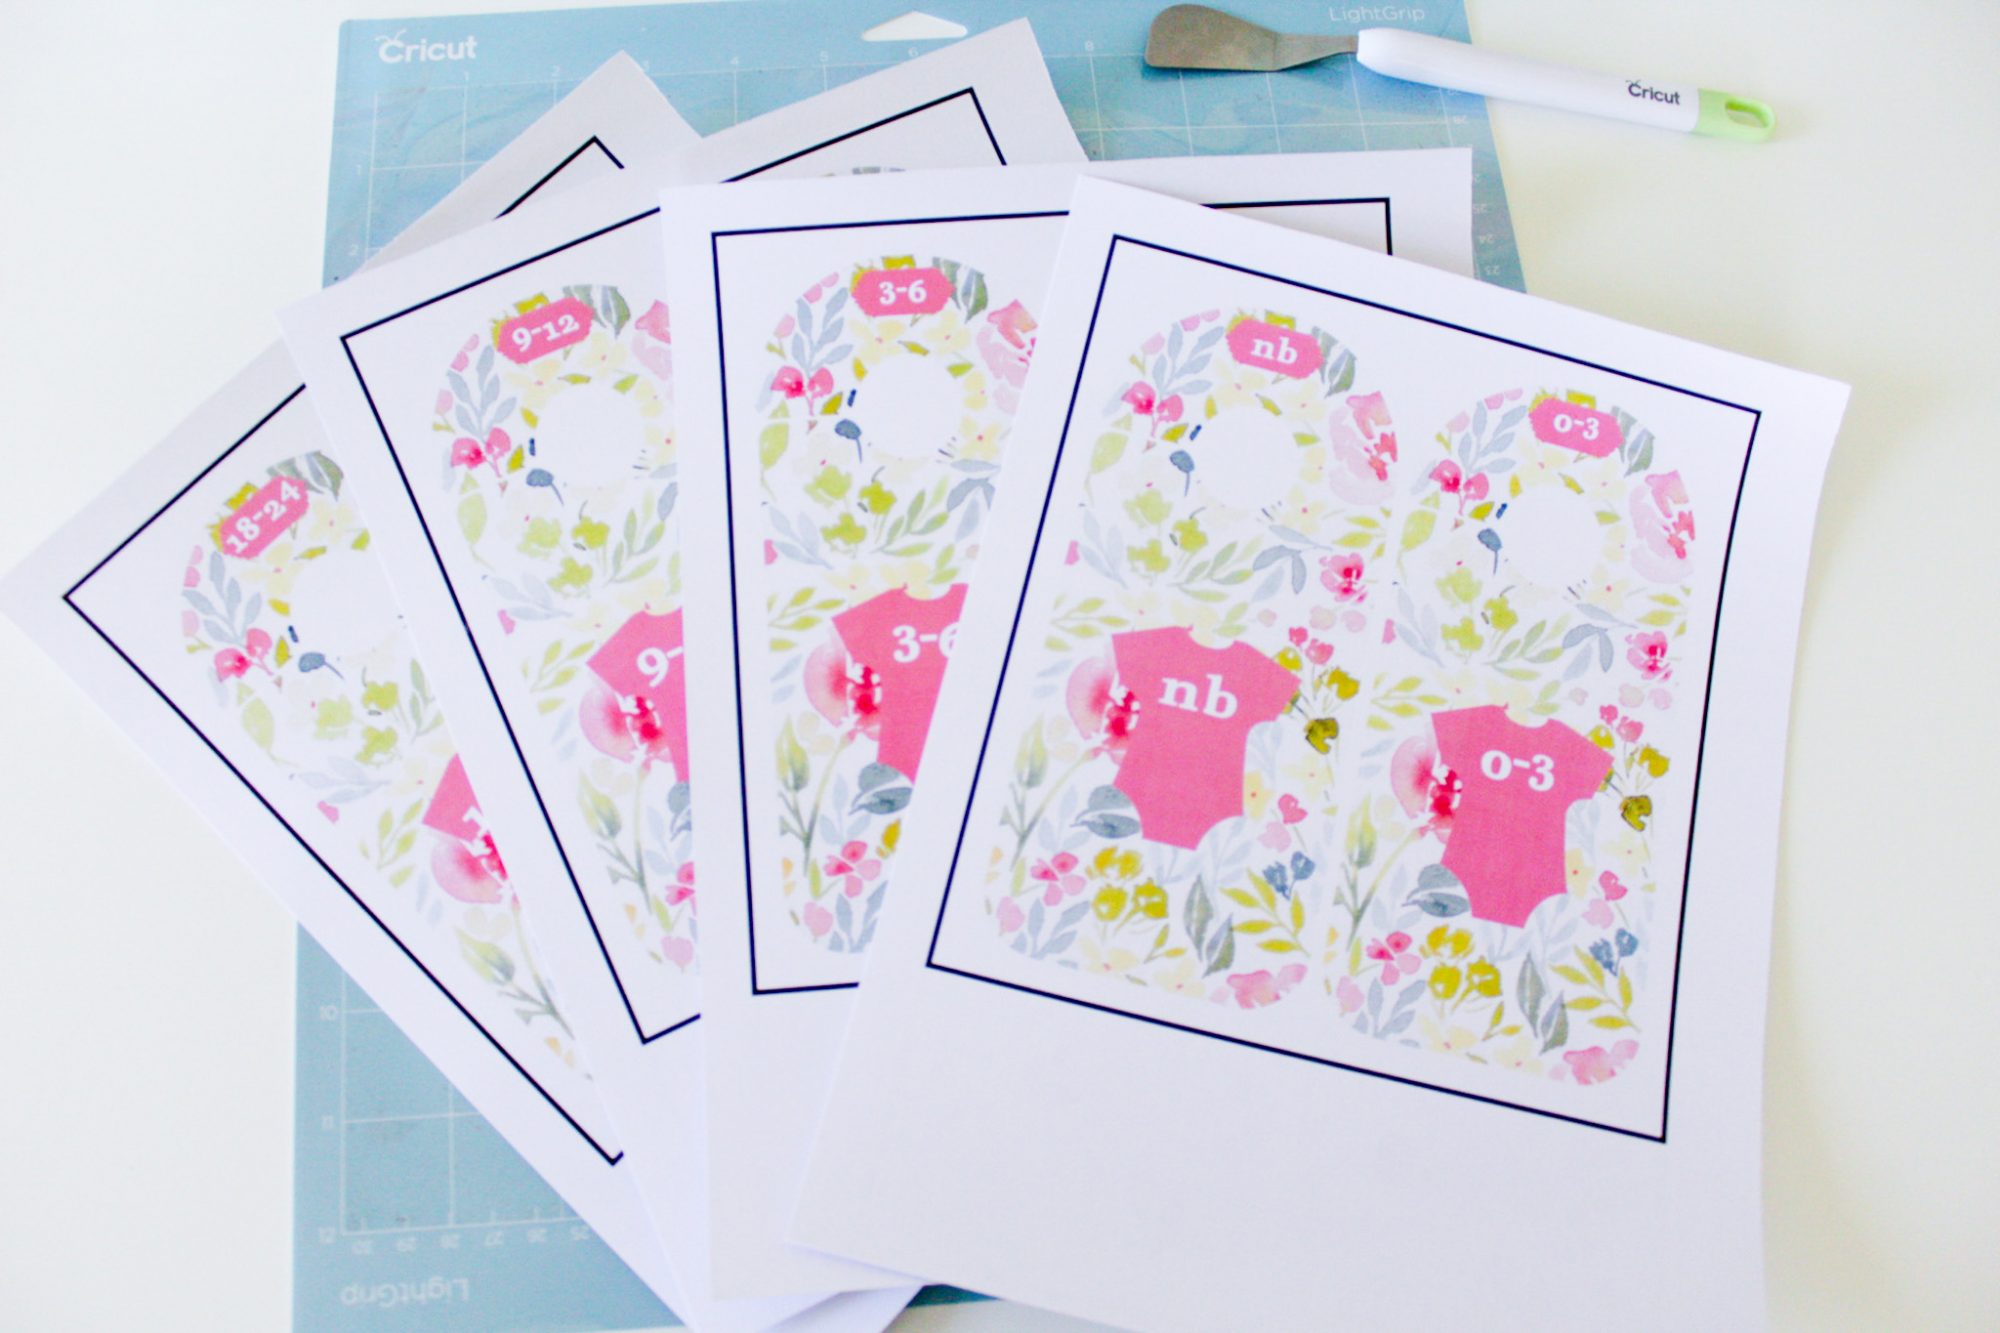
Don’t cut along the black line with scissors or anything – your Cricut machine needs that for scoring, as I mentioned earlier in the post.
Attach your cardstock to the blue LightGrip mat (you can also use a brayer to help secure it to the mat if you’re worried about getting the white cardstock dirty with your fingers), and cut!
First, your Cricut machine will move around the design to Score, and a tiny little light will light up as it scans the image for those black lines we talked about earlier.
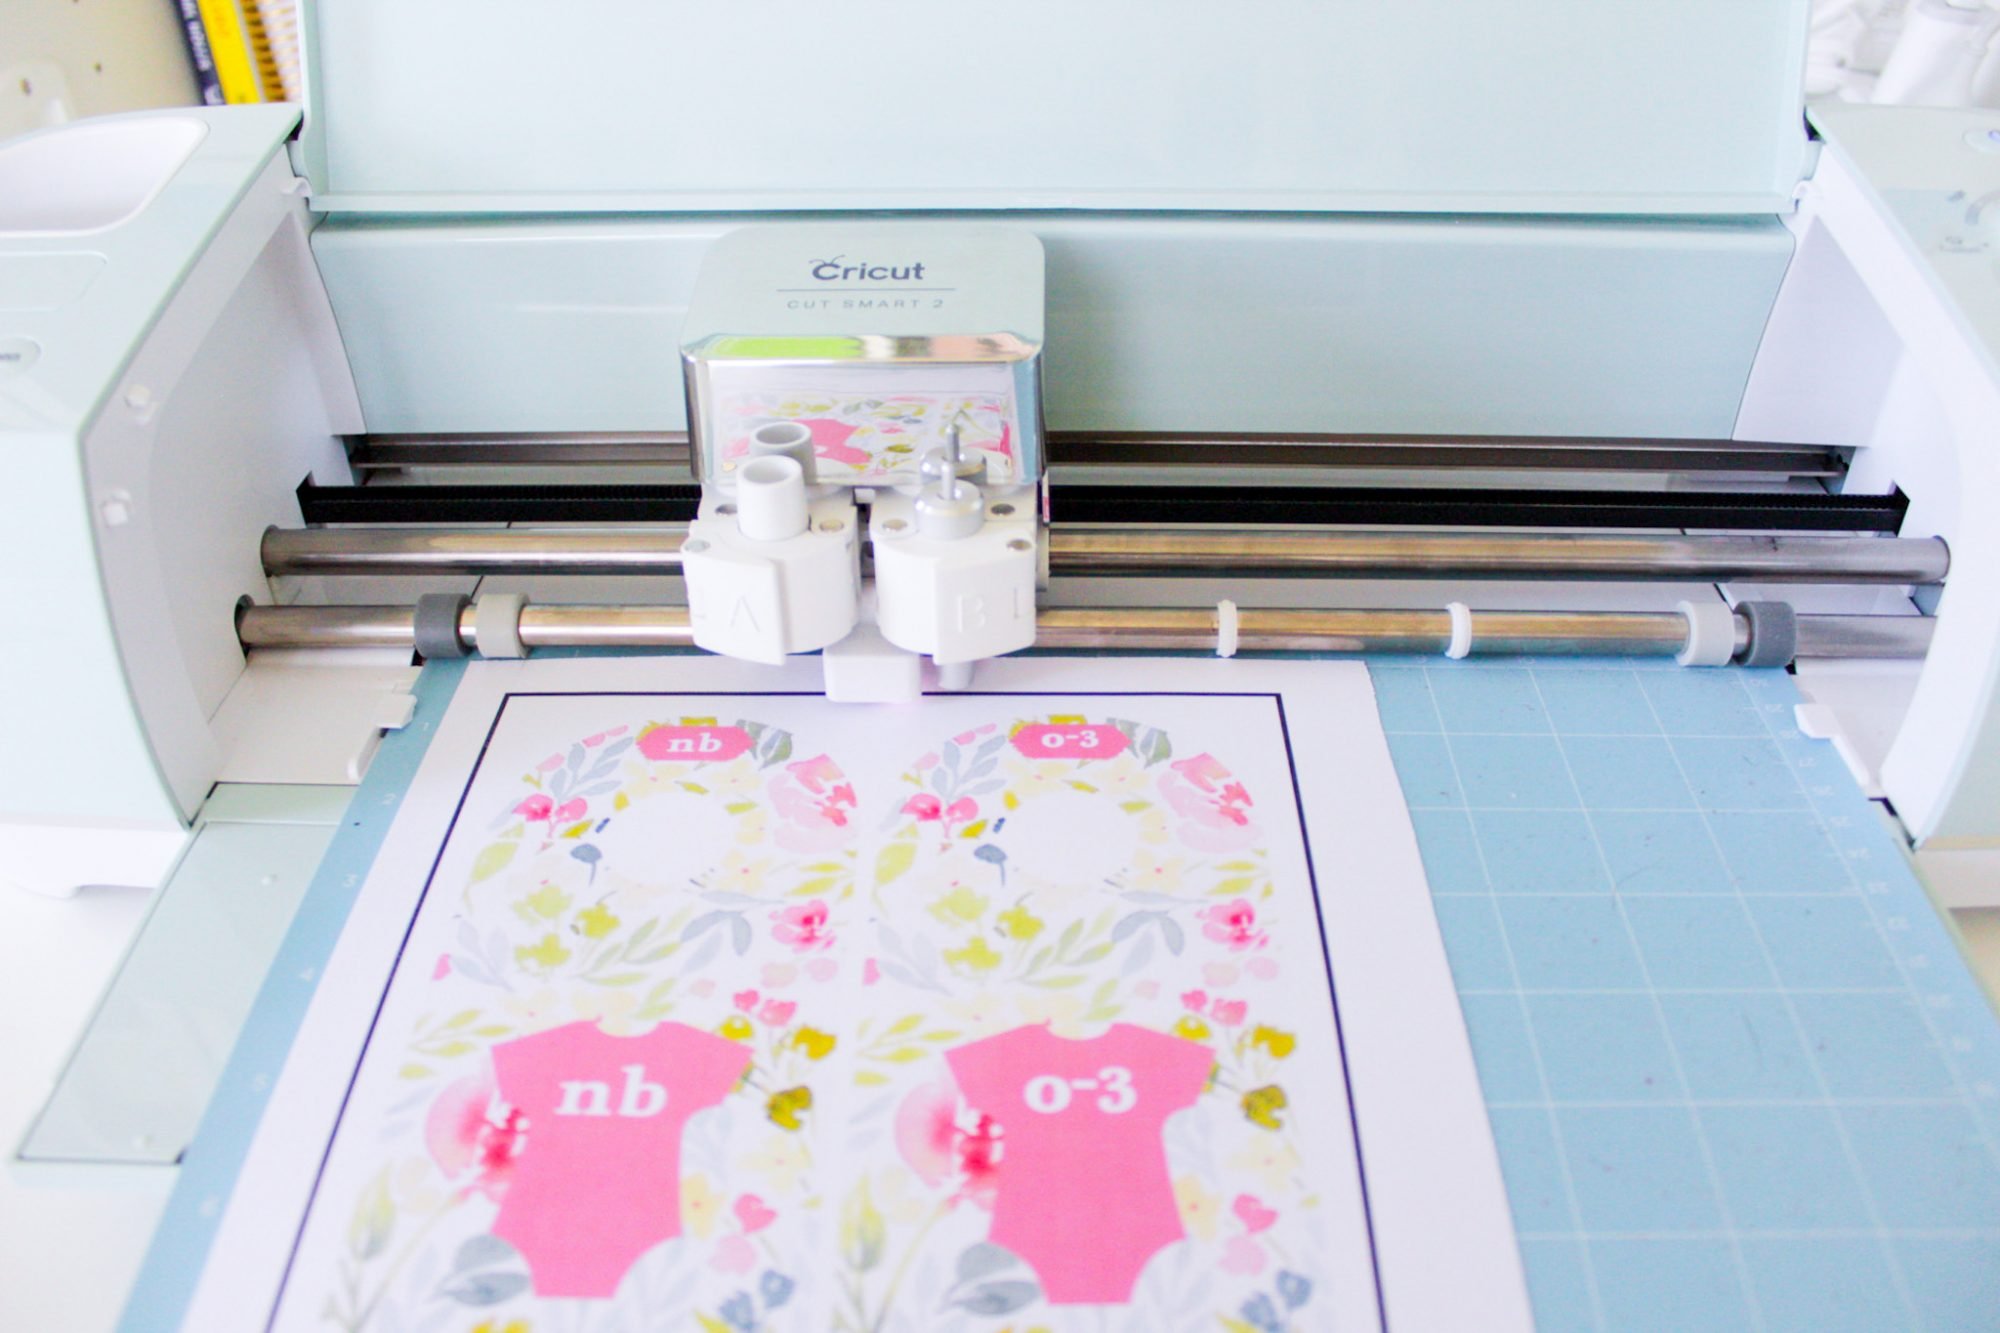
Once it’s done scoring, it will begin cutting.
Cutting these two closet dividers took about 15 seconds!
How To Remove Cardstock From Cricut Mat Without Curling It
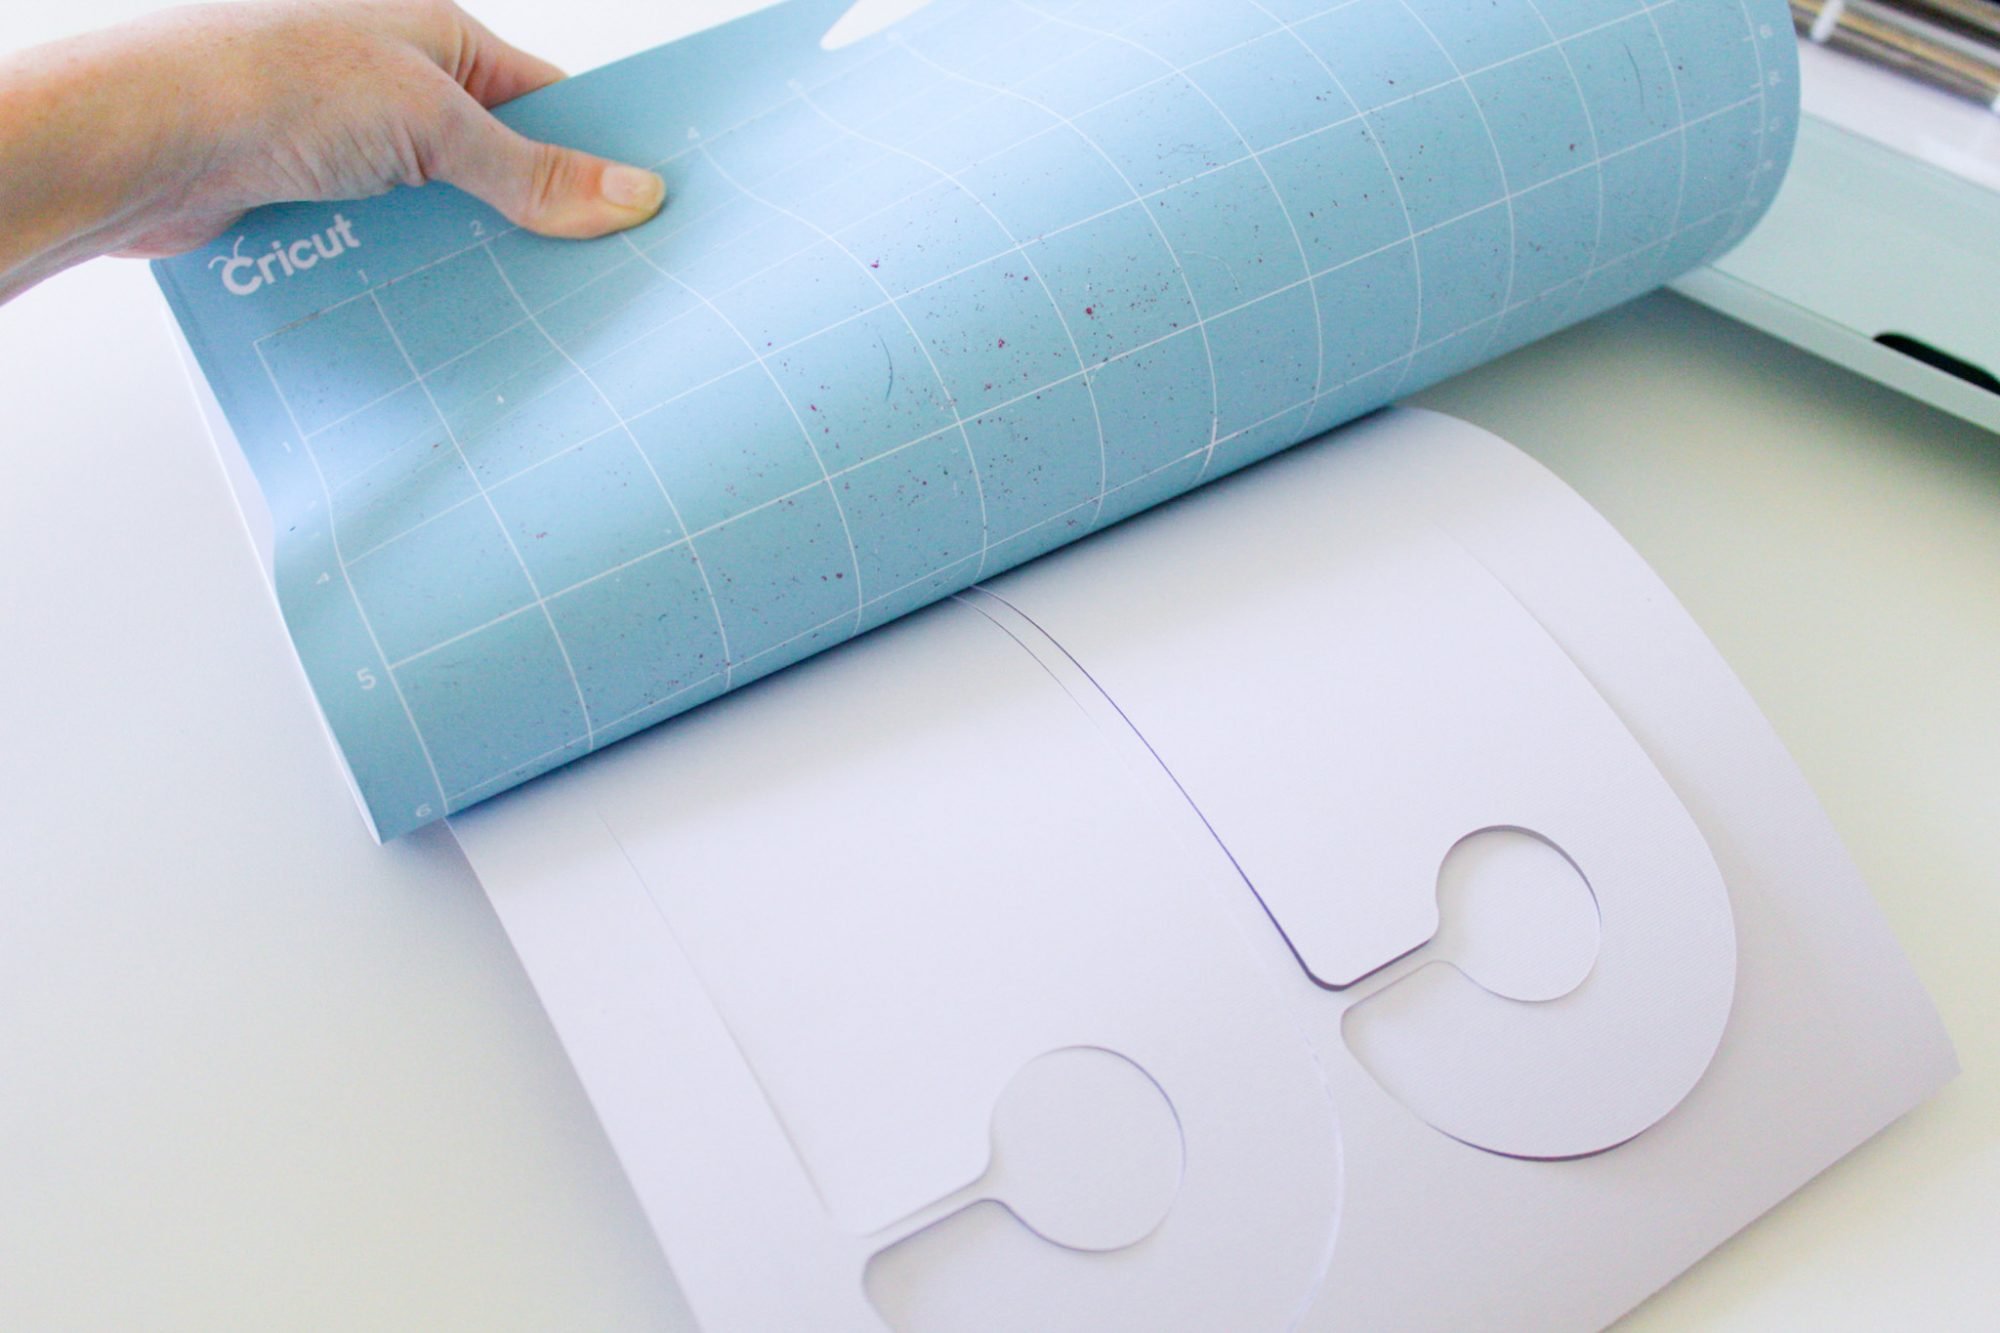
I made this mistake early on after getting my Cricut – I tried making cardstock Halloween bat decorations with black cardstock, but when I went to peel up the bats from the mat, they curled!
Oops!
I soon learned that there’s a trick to removing paper and cardstock from your mat – just turn the mat over and peel the mat away from the paper!
The paper should be touching your work surface, so make sure it’s been wiped clean if you’re using white cardstock like I am.
Lift up the mat from the paper, and bend it back, curling it away from the cardstock.
The mat will not snap or break, and the paper will gently lift from the mat’s adhesive.
If you need some extra lift for your paper to separate from the mat, use a Cricut spatula (this comes in the basic tools set) to gently lift away the paper from the mat while it is still turned face down.
Finished DIY Nursery Closet Dividers
And here are my finished DIY Baby Closet Dividers!

These closet dividers, printed on and cut from 80 lb. cardstock, are very durable and sturdy!
I don’t feel like they are going to rip or tear when I’m putting them on the hanging bar in Zoey’s closet, and they look so vibrant and pretty!
You Make Also Like: DIY Front Door Round Welcome Sign With The Cricut Explore Air 2
I’m genuinely considering selling these in an Etsy boutique as a digital item, what do you guys think?! 🙂
I think they are perfectly sized and printed so that the sizes of clothing can be distinguished easily.

I hope this tutorial was helpful, especially if you are new to Print Then Cut.
I’d love to see or read about the closet dividers you crafted using my tutorial either in the comments below or with a tag on Instagram!
*Post originally published July 2020, last updated February 2023.

When I click on your link to make this project, it sends me ton design space but its for a Welcome sign, not the door hangers. When I attempt to do this myself, I cannot find the floral pattern. I’m not sure what I am doing wrong. I just Love these and want to make them for my neice. Thank you,
Kathy Seagram
Hi Kathy, thank you so much for letting me know! I’ve fixed the link in the post, here is the correct link as well: https://design.cricut.com/landing/project-detail/5f03441d2006821360769dd7 Congrats on your beautiful niece!!!