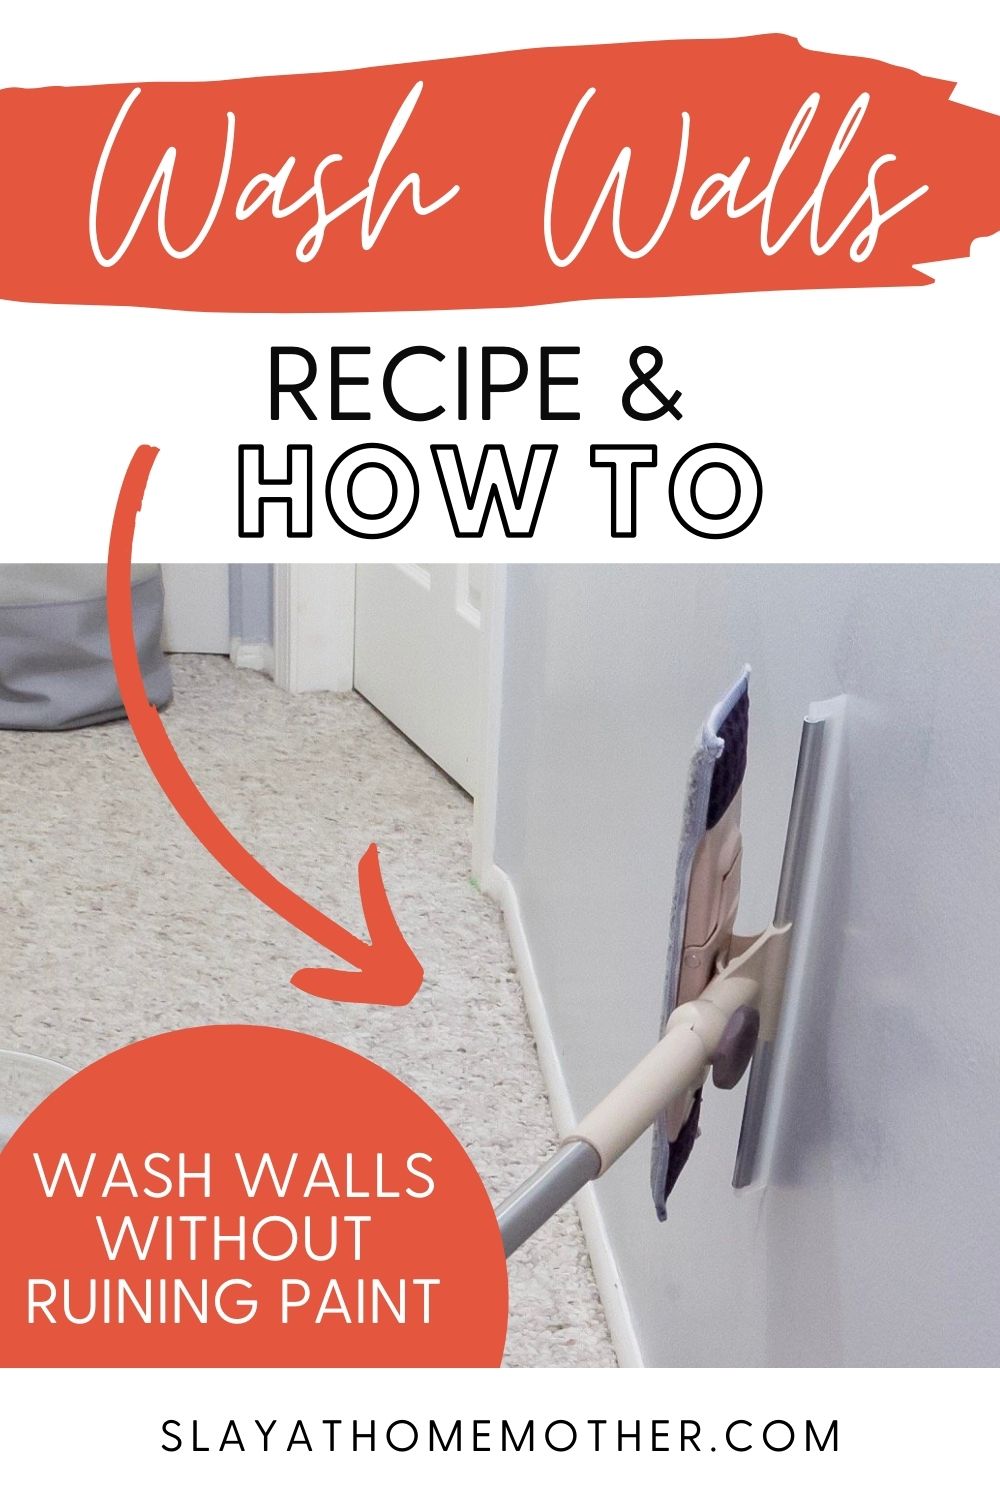
Cleaning walls with a mop is so easy! Learn how to with our favorite mop for cleaning walls, plus a free DIY wall cleaner recipe…
It REALLY hit me after we painted our walls a light gray color with blue undertones last year.
As pretty and bright as the color was, it started to show me things I never knew were there!
The dogs would scratch their backs against the walls, the kids would trace circles on the walls with their hands, and there was dirt from God knows where just sitting there on the wall…
It opened my eyes to just how dirty our walls could get.
I surveyed a few friends to see if they washed their walls.
None of them cleaned their walls or had really thought of doing it (besides cleaning up the obvious, in-your-face kind of messes).
It absolutely makes sense, though.
We vacuum our carpets and wash our floors, so why isn’t it common knowledge to wash the walls too?
Luckily, you can learn how to clean walls, it is much easier than it sounds.
In this post, I’ll show you the few tools you need, how to make your own wall cleaning solution, how to clean walls (even those super dirty kitchen walls), and how to rinse your walls when done cleaning!
The very best part of this is that you can use this easy homemade solution to wash not just your walls, but also your baseboards and ceilings!
I used it on the ceiling above my stove (an area that needed some serious TLC – it was seriously grossing me out!), and it worked beautifully with minimal scrubbing on my end! All I did was gently rub the solution on and the dirt and grime just came right off!
I have a nifty before and after photo below that shows you just how good this solution works without stripping paint or leaving streaks…
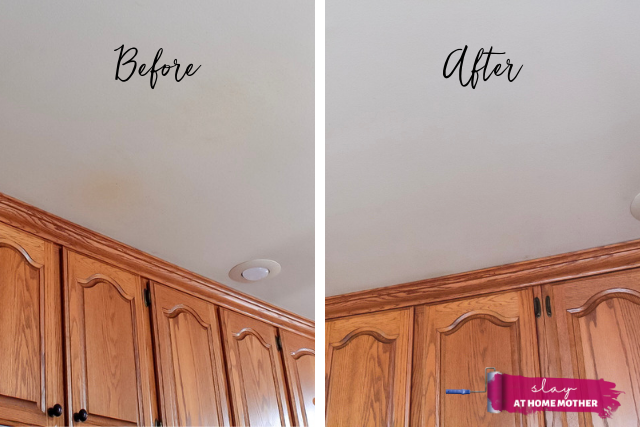
I’ll admit that I needed to stand on my kitchen island with my husband nearby to catch me in case I fell (mostly because I am vertically challenged at only 5 feet tall) so I could get at the right angle to thoroughly clean the ceiling in our kitchen, but I think the picture speaks for itself.
It was SO easy to do, and I’m really excited to share my wall cleaning solution and the absolute best way to clean walls.
*Note: Please try to use a ladder with a friend or family member nearby, don’t follow my example of standing on your kitchen island or counters to access your ceilings!
This post contains affiliate links for your convenience at no cost to you, however, all opinions are my own.
What You Need To Wash Your Walls
Here are the tools I use to clean our walls:
- Squeegee Microfiber Mop (here is the exact one I use, and here is a very similar alternative if that one is sold out)
- Wall-Cleaning Solution (see below to make your own)
- Bucket for solution
- Microfiber cloth
My sister-in-law actually gave me the idea to use a squeegee.
It works great for windows, but you can also use it for your walls.
I recommend a squeegee microfiber mop over a regular floor mop for your walls and ceilings – and I’ll tell why you by showing you in a photo further down in this post…trust me, you’ll want to buy a squeegee microfiber mop!
Do your research before purchasing, making sure to check reviews and inquire about the handle length of your squeegee because you’ll need to reach the tippy-top of the walls and the ceilings.
For shorter folks like Yours Truly, the handle length is especially important for us and should not be ignored.
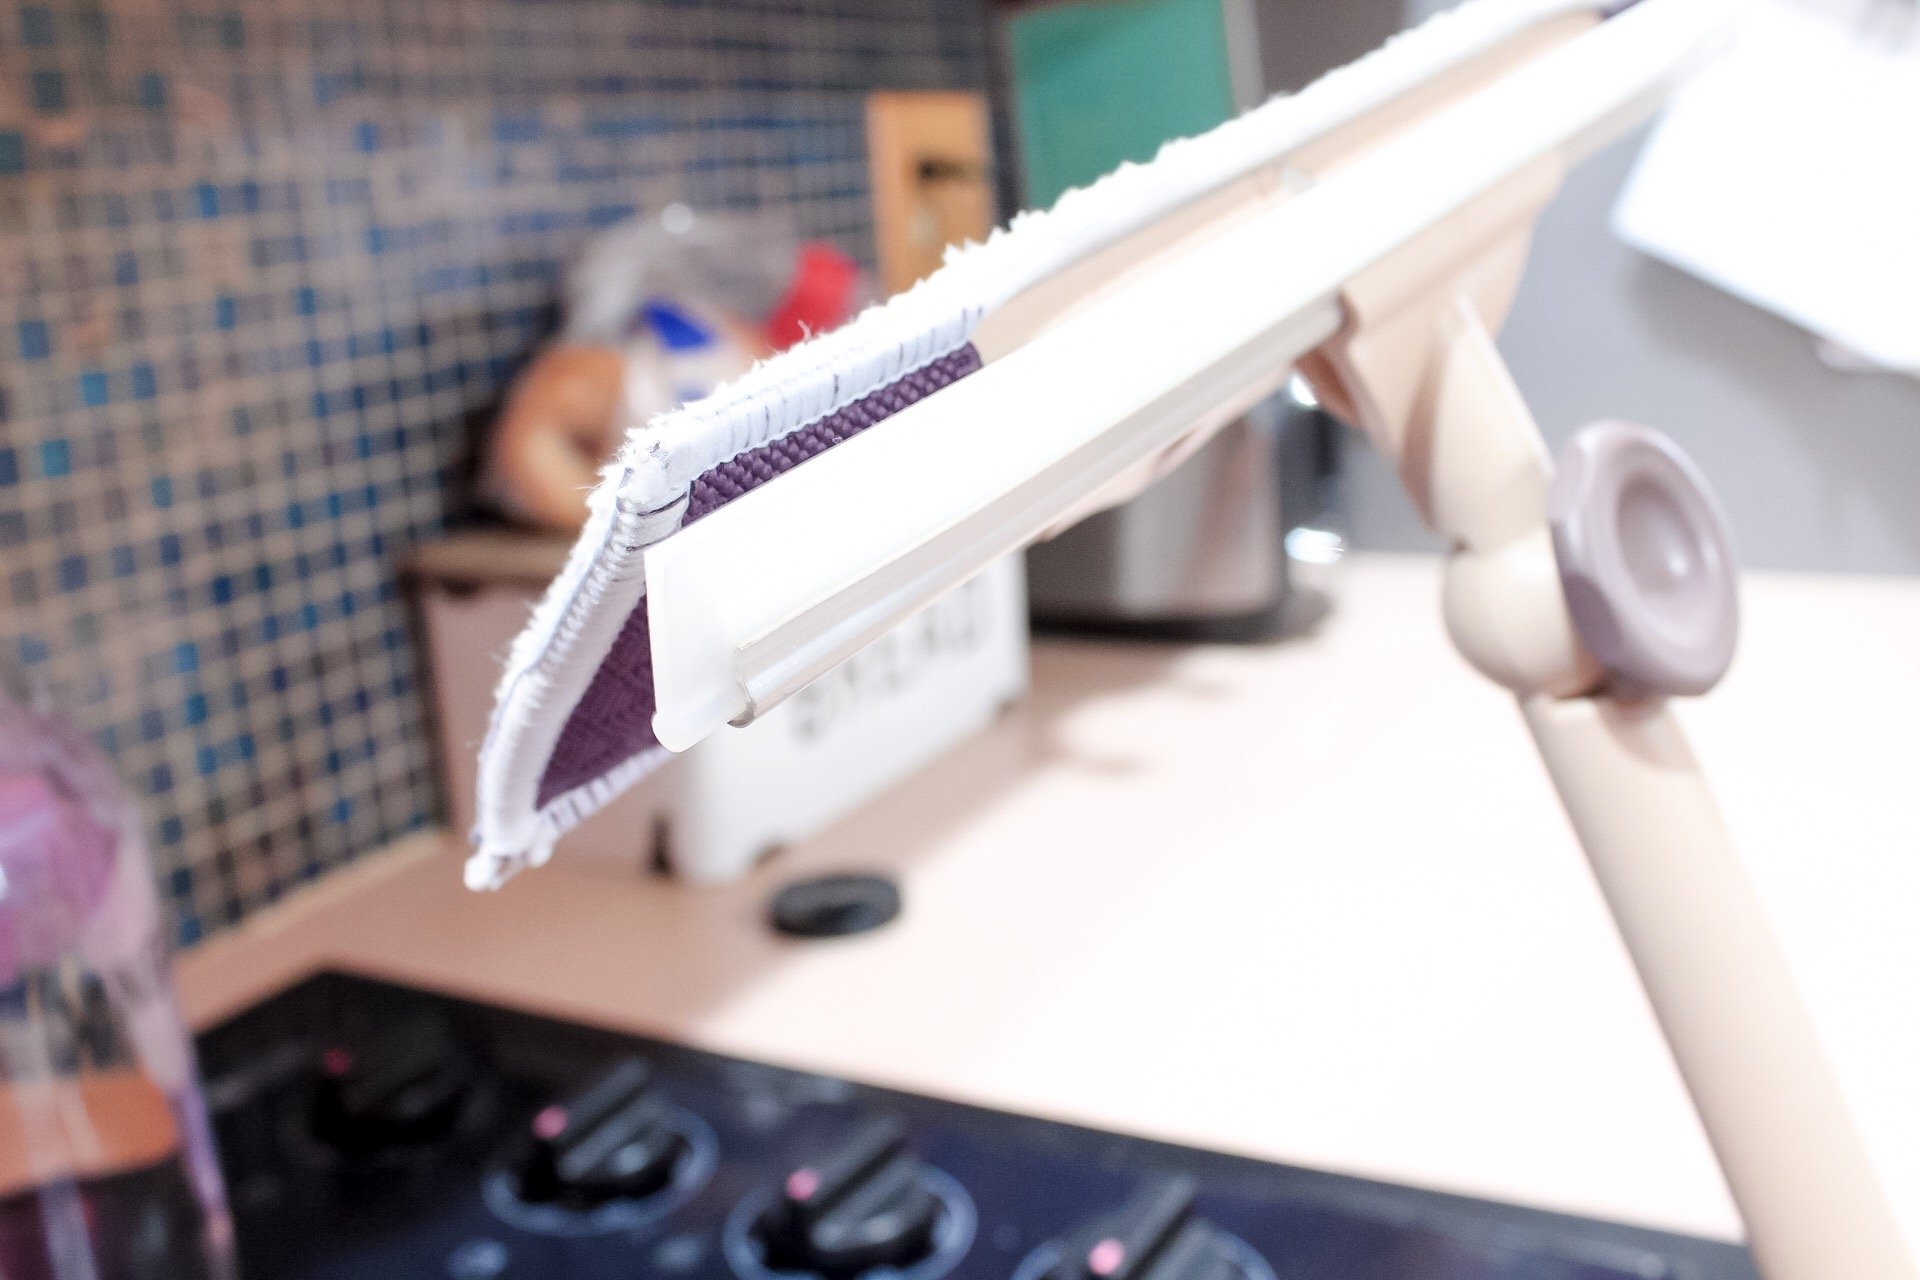
ALSO – After washing my own walls, particularly in a very narrow but tall hallway, I’d recommend picking one up that can dissemble.
If my squeegee didn’t unscrew at one spot in the handle, I wouldn’t have been able to clean as easily towards the bottom part of the wall and would have had to work a lot harder.
DIY Wall Cleaning Solution
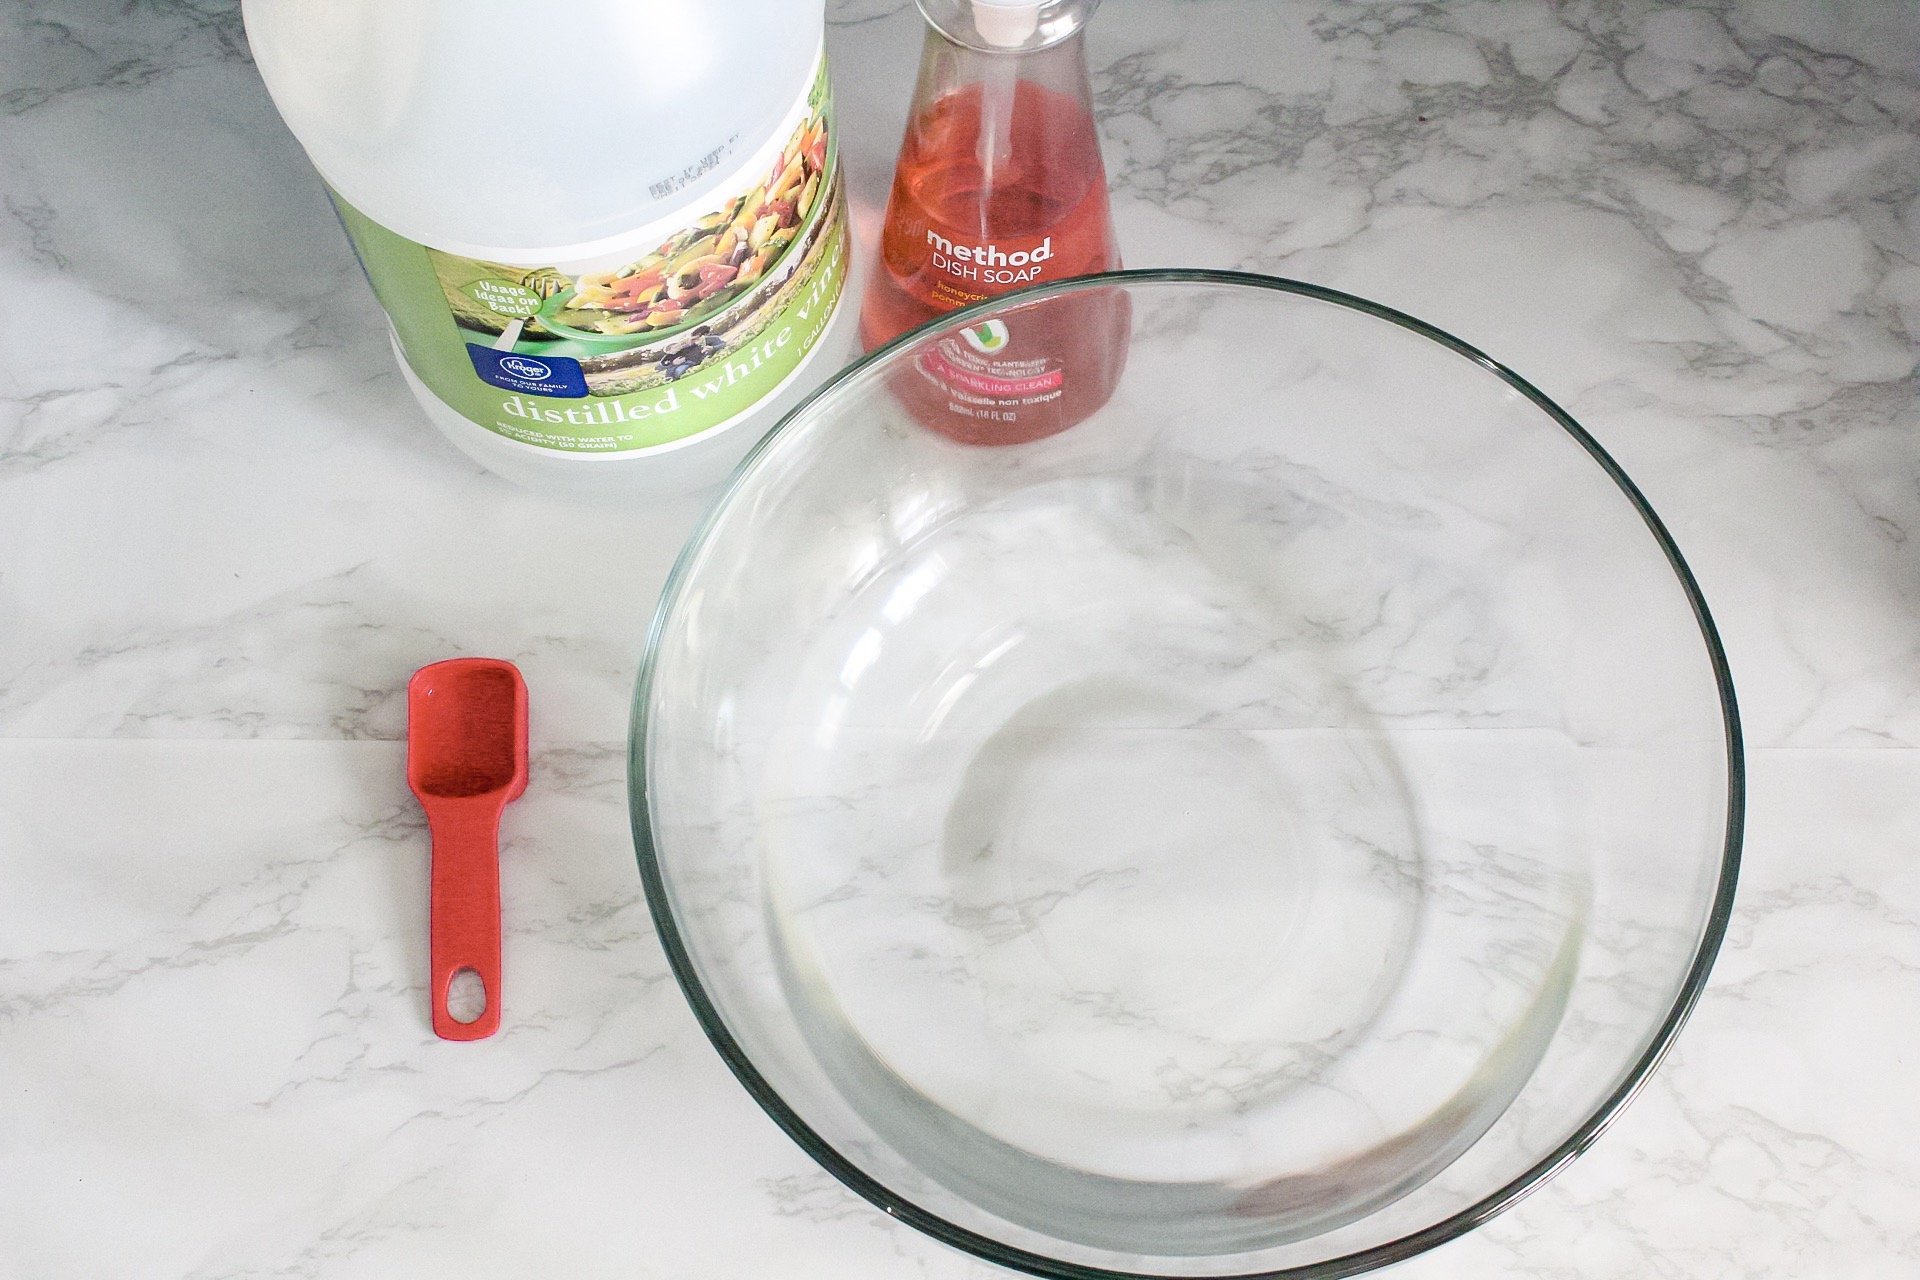
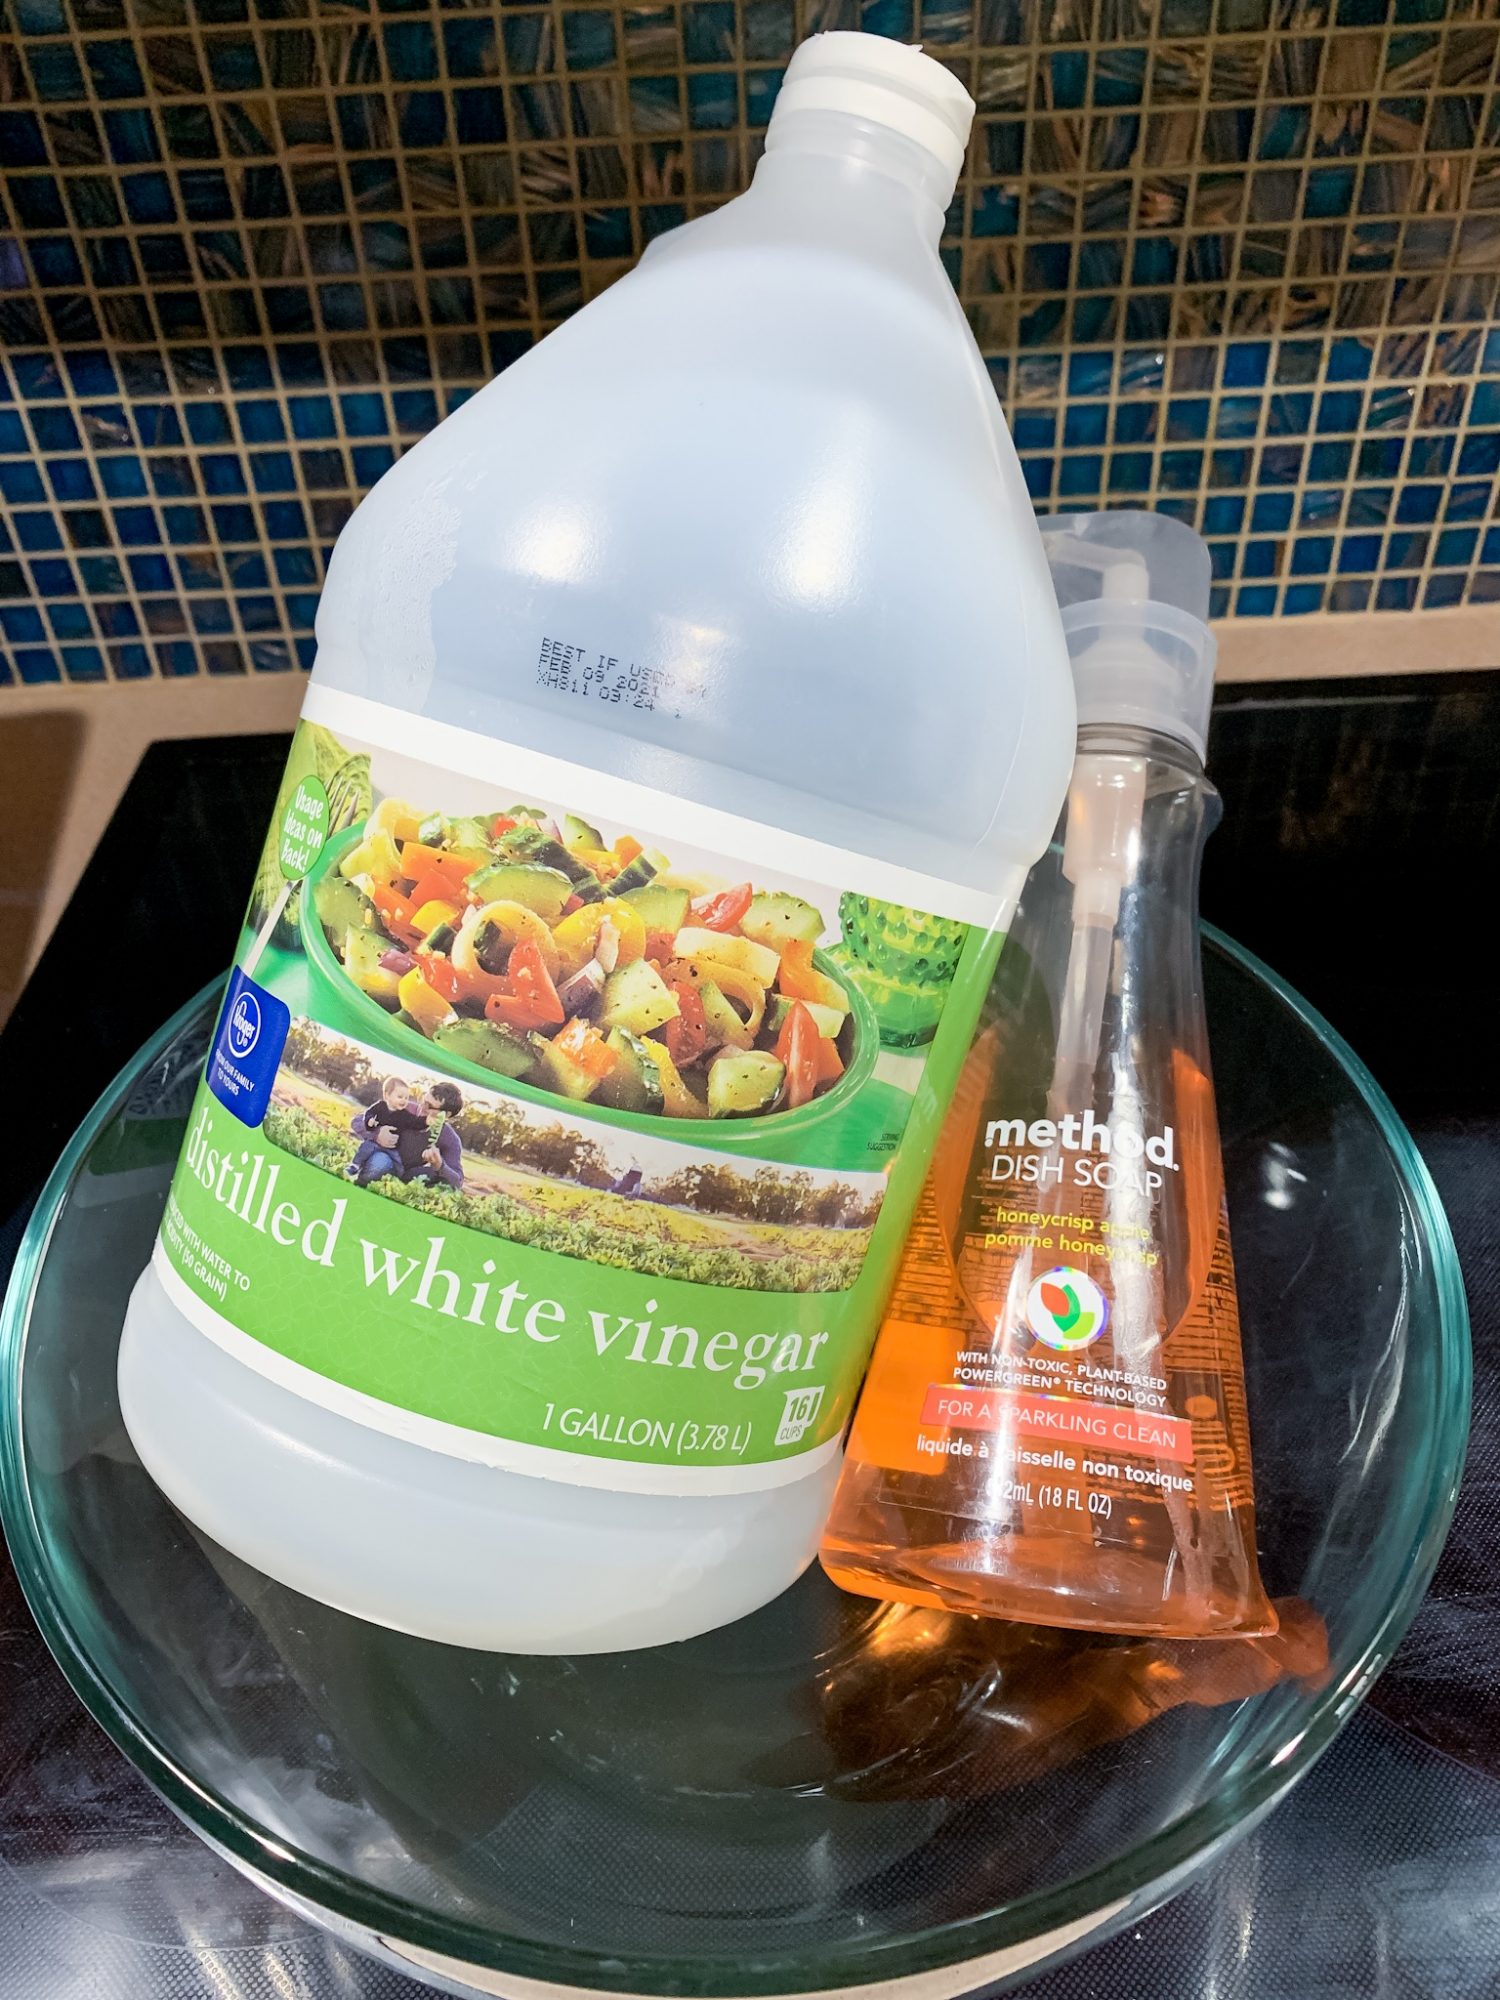
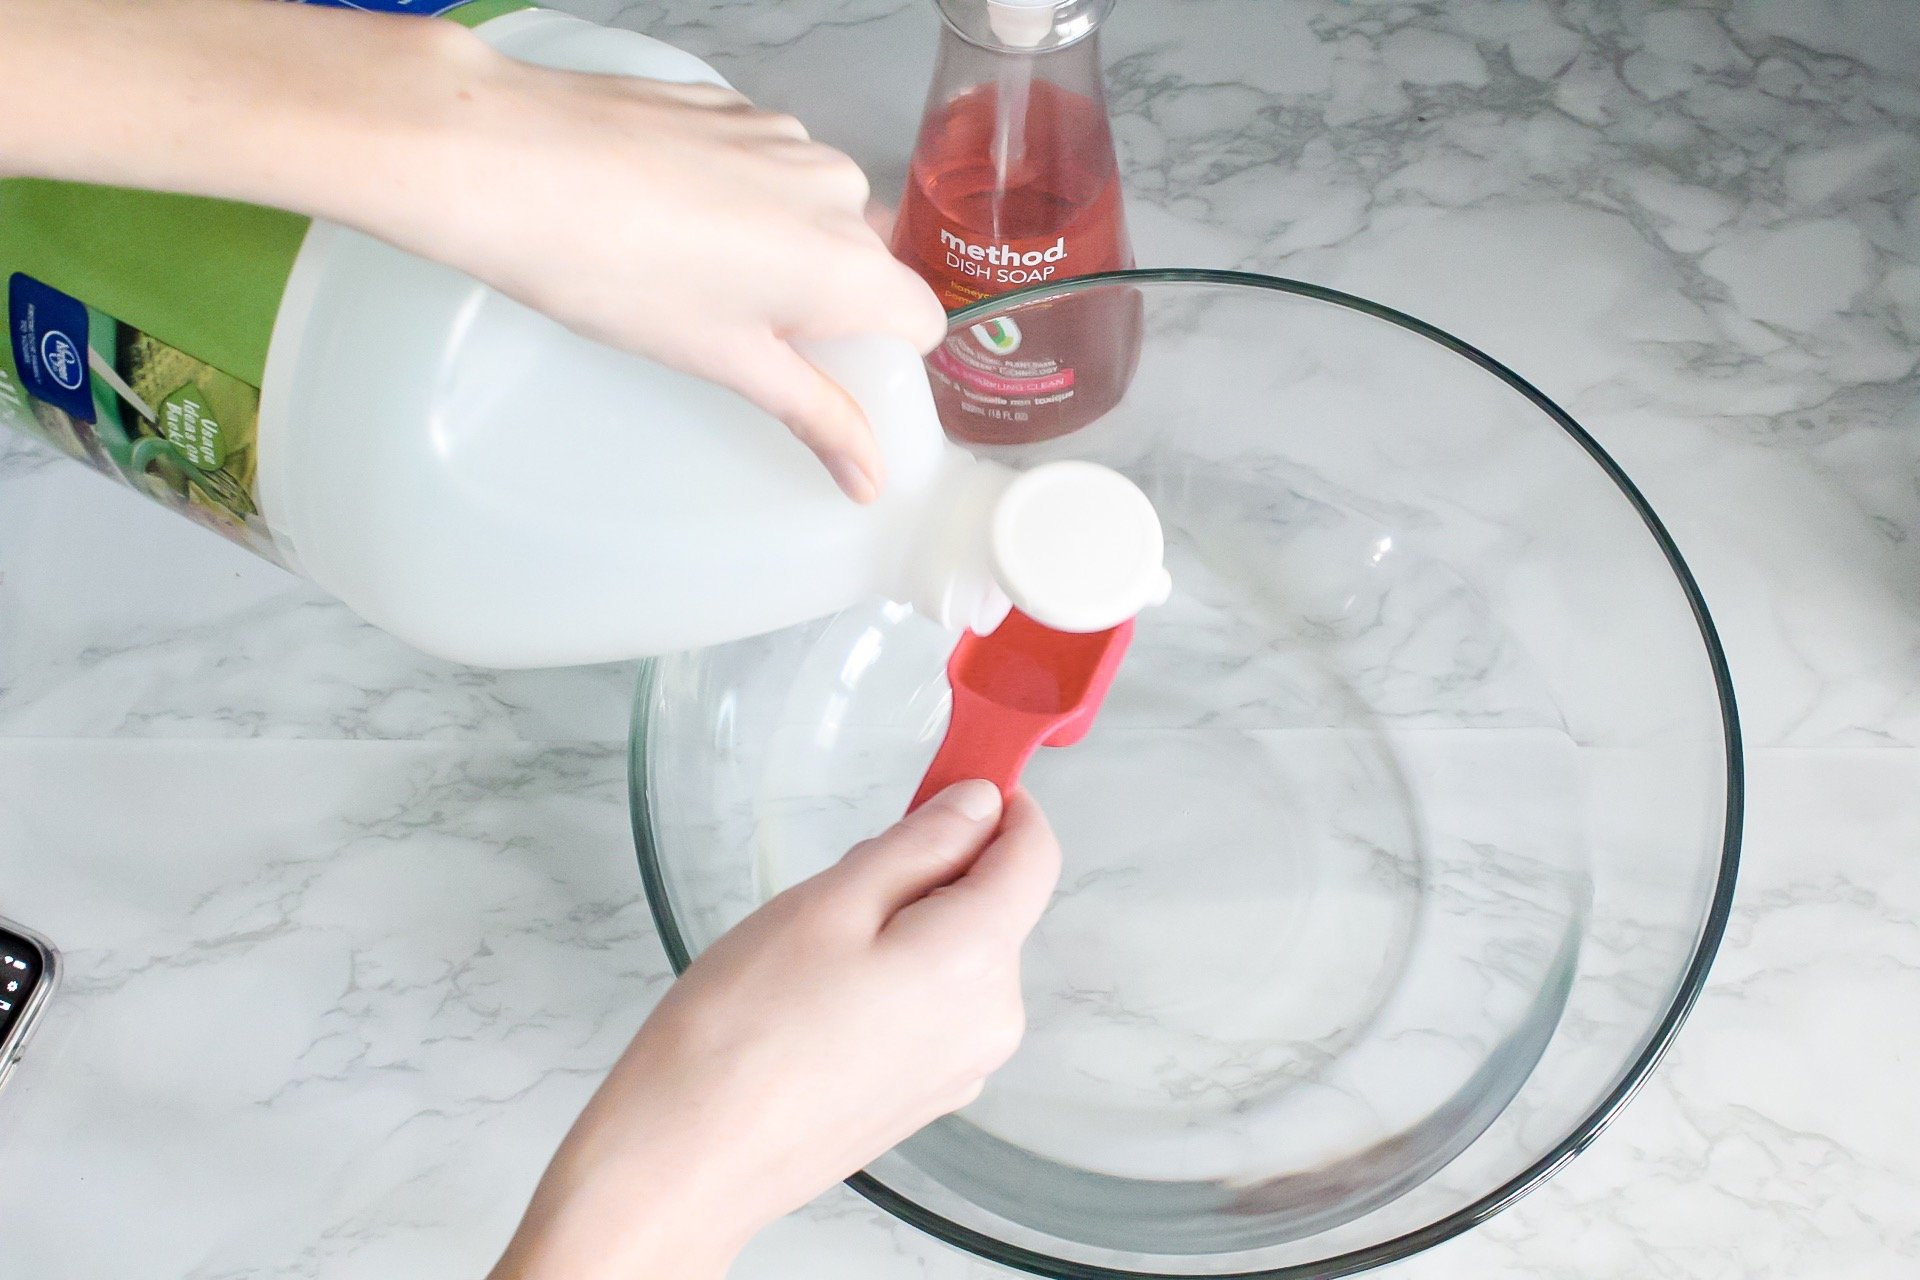
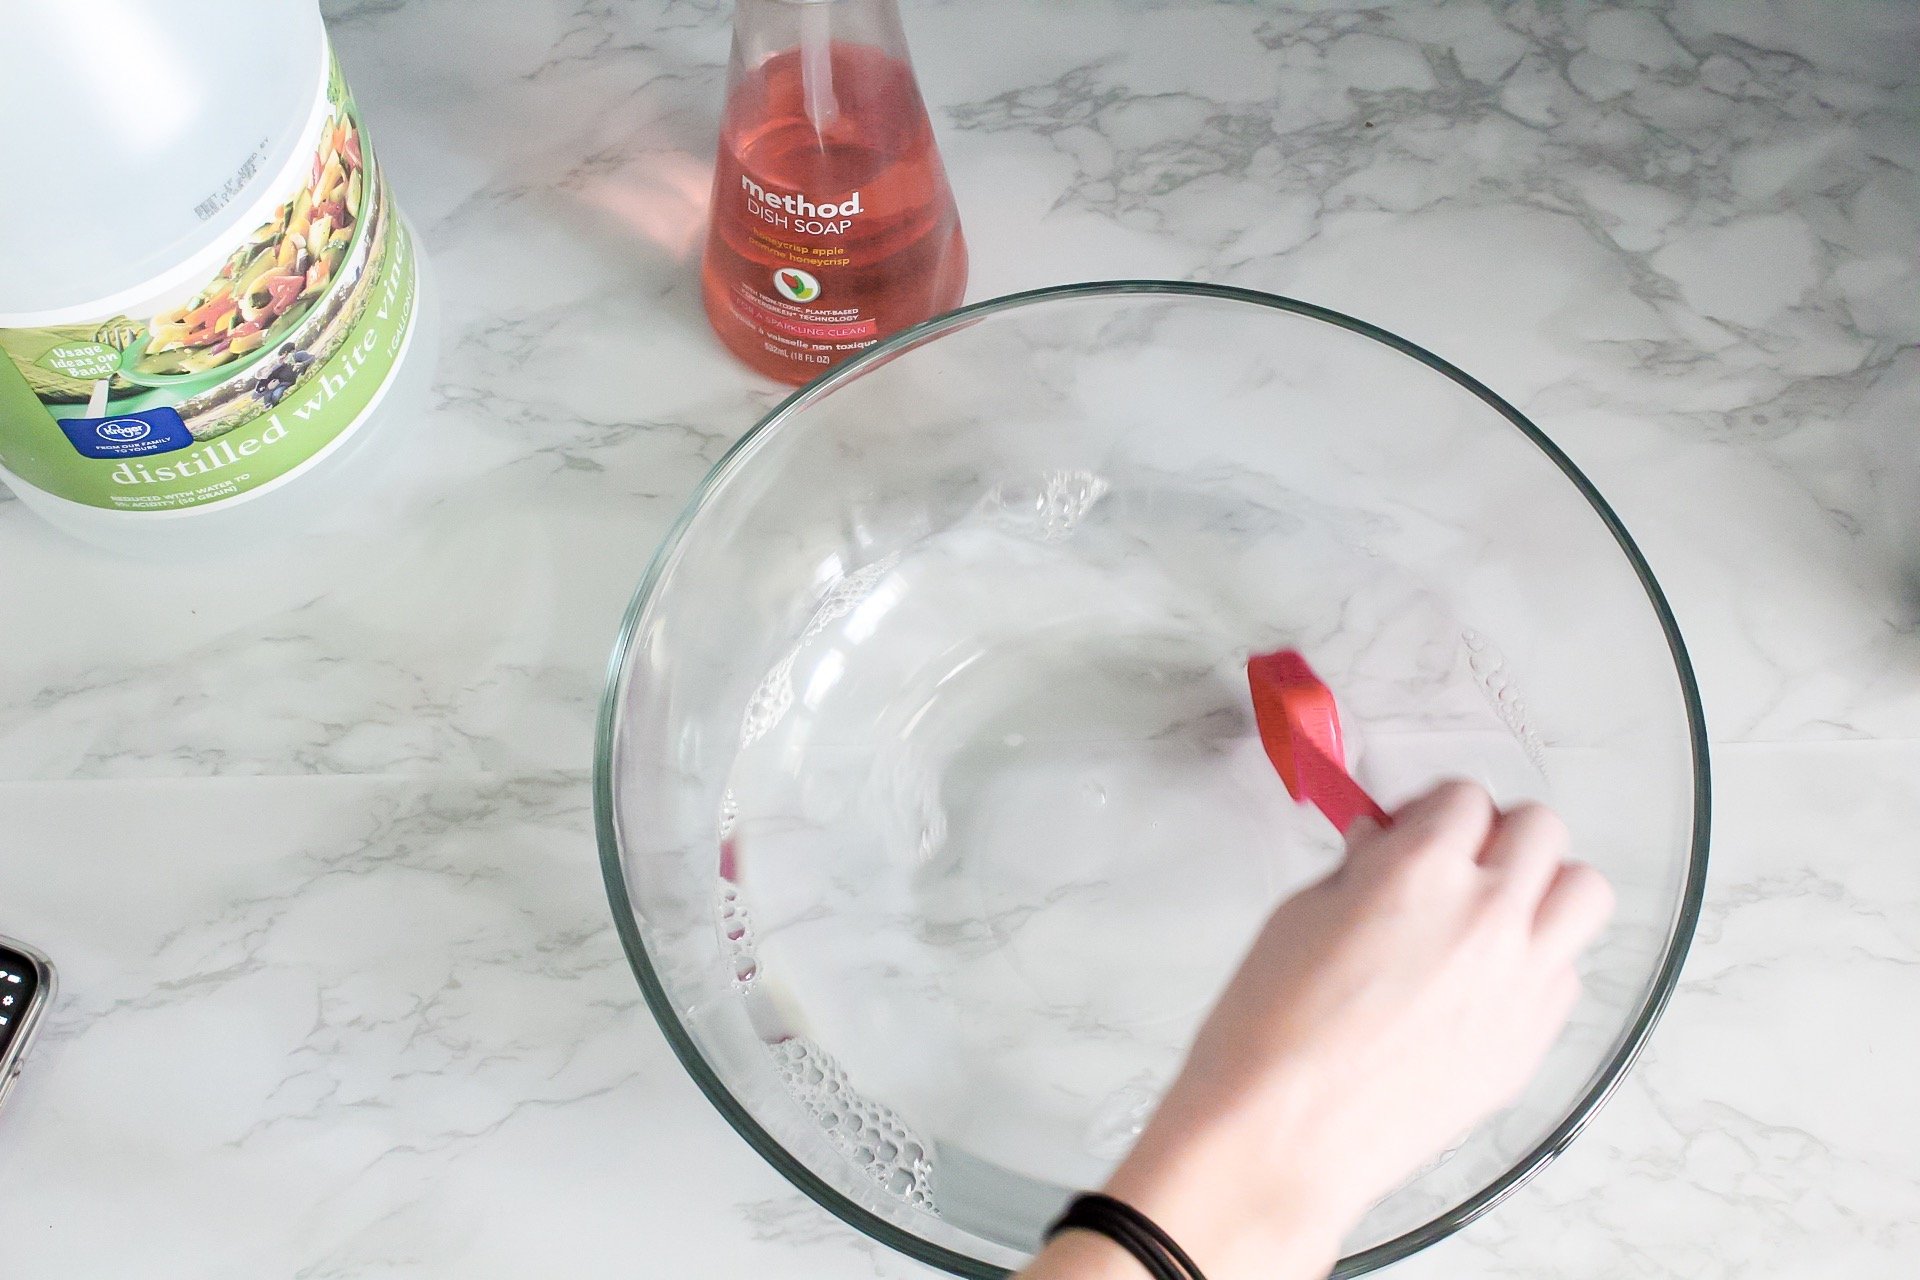
You don’t need to clean walls with TSP to get them clean – use just 3 ingredients to make your own wall cleaning solution!
The best part is that you probably already have everything you need to get your dirty walls clean again.
This solution leaves no streaks in my experience, and I use it once every 6-8 weeks to clean our dirty walls and baseboards.
DIY Best Wall Cleaner
Here’s what you’ll need to make this wall cleaning solution:
- 3 pumps of Dishwashing liquid
- 2 tbsp white Distilled Vinegar
- 4 cups of HOT Water
- bucket or bowl (in which to contain your wall-washing miracle liquid 😉)
Mix the hot water, soap, and vinegar together, and you’re ready to wash some walls!
You can even use this solution to clean the walls before painting!
Do I Have To Include White Vinegar?
Nope!
I had this question asked on my Instagram the other day, and I love that someone thought to bring it up.
You can clean your painted walls without adding white vinegar to your cleaning solution as long as your walls are already maintained regularly.
The vinegar adds some extra OOMPH to this cleaning solution that helps you get rid of tough stains, odors, smoke, scuff marks, and everyday dirt buildup that is invisible to the eye but definitely there.
Should I Dust the Walls?
Although not required, yes, you could dust the walls before you begin. You can use a swiffer, a feather duster, or a vacuum with a brush attachment to get all the loose dirt and soil off the wall.
Cleaning Walls With A Mop
Dunk your squeegee microfiber mop in the dish soap, vinegar, and hot water mixture.
Wring or squeeze out extra water.
Starting in the corner of the wall, run the microfiber mop across the walls.
Be sure to wash the entire wall and not just the dirty spots. You might be tempted to do this with kitchen walls, but trust me, wash the whole wall!
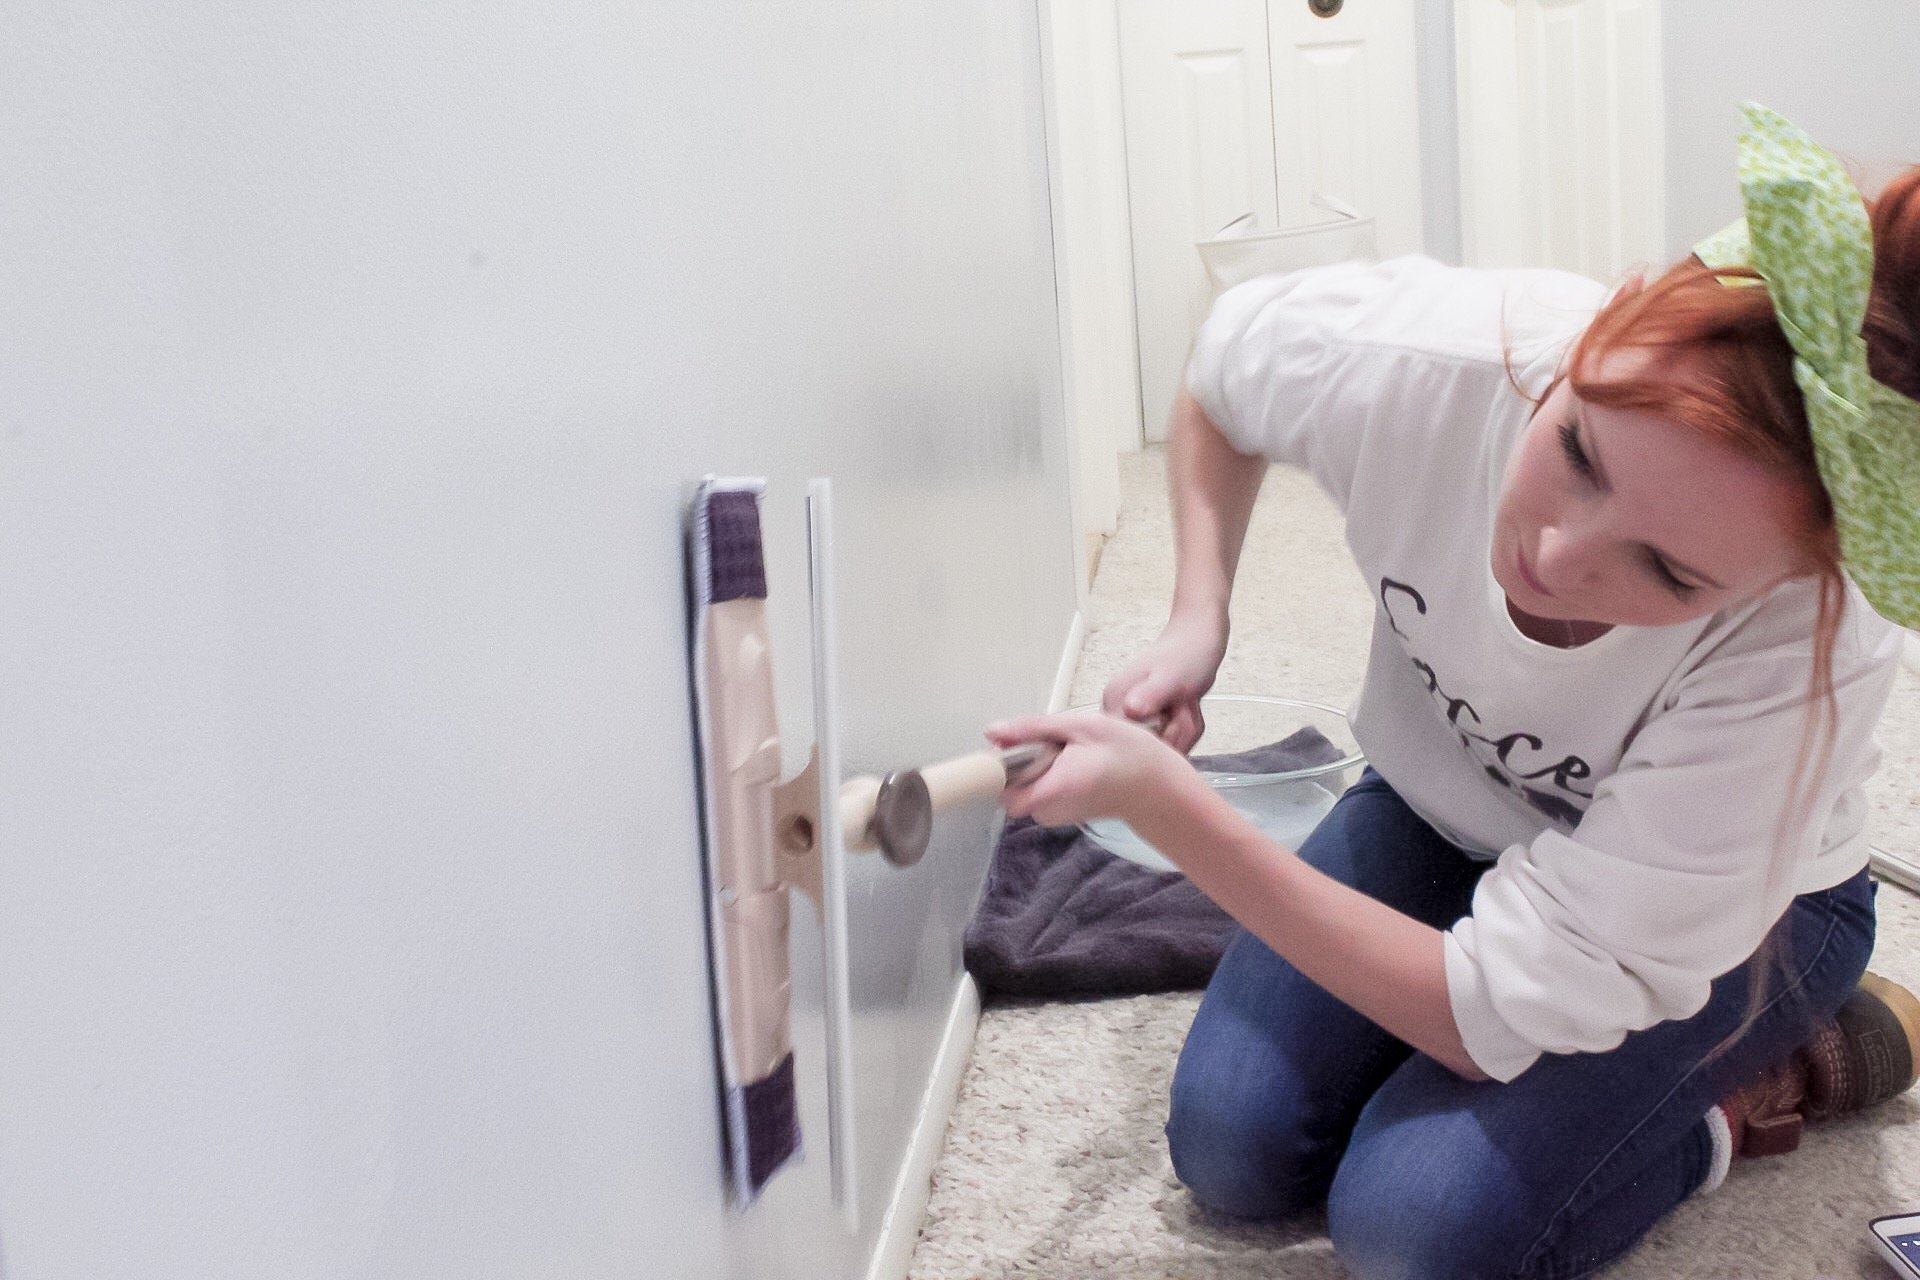
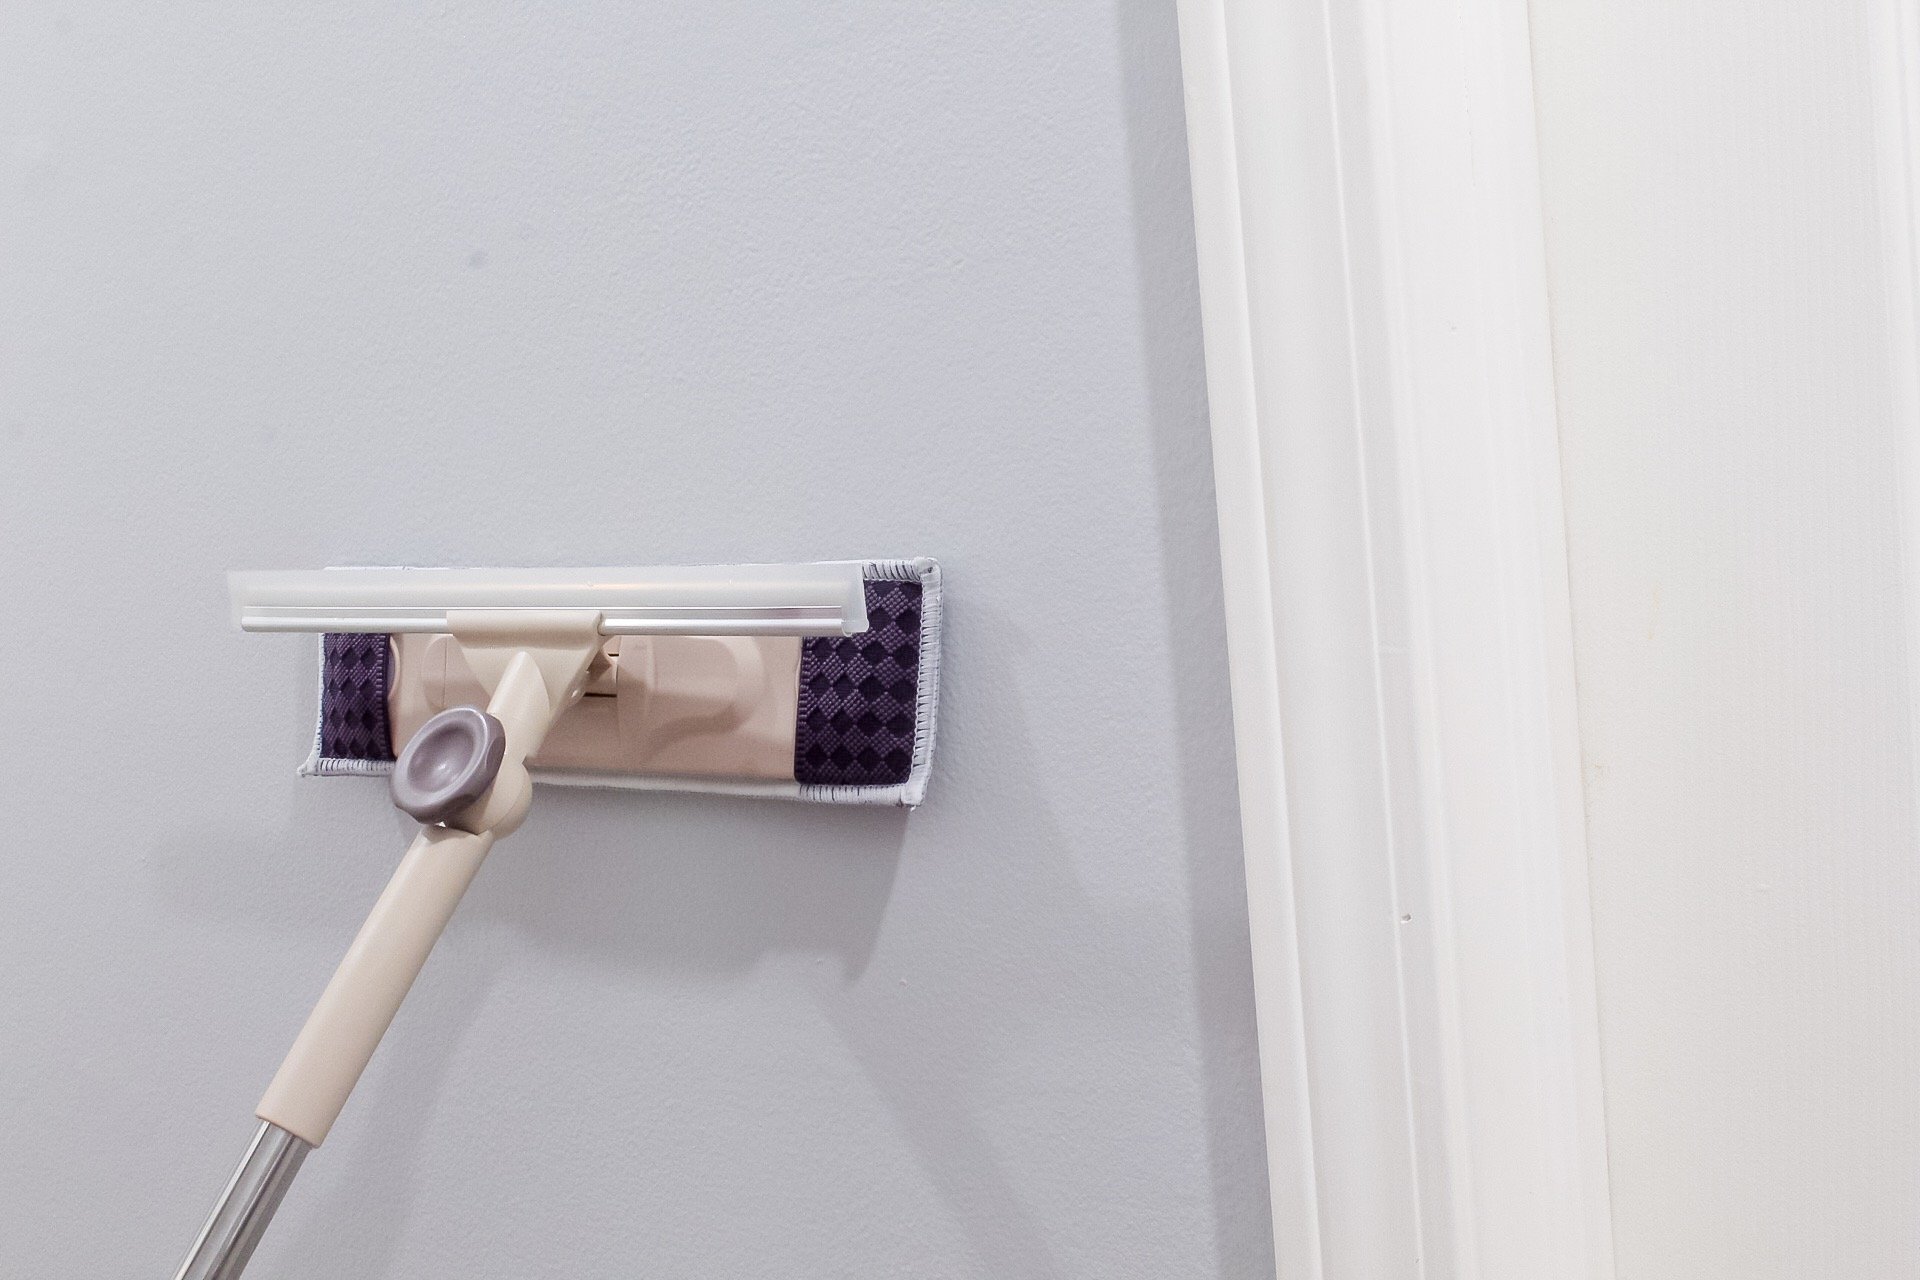
In the photo above, I have unscrewed the bottom part of my mop’s handle so I can more easily clean the bottom part of the wall in our tight hallway – worked like a charm!
When you’re done washing the walls, use the squeegee to remove the dirt and dirty water from the walls.
Having a towel placed at the base of the wall where you are squeegee-ing to catch the excess water is ideal if you have carpet or don’t feel like mopping the floor after you’re done ;).
Squeegee the entire wall, wiping your squeegee with a clean, wet cloth every other swipe.
Or, you can wipe the squeegee across the floor towel as you go for convenience.
The microfiber mop is gentle on painted walls and takes the work out of regular hand scrubbing. At the same time, the squeegee removes nasty dirt and dirty water that you can’t see sitting on the wall .
Plus, it eliminates streaks and drips.
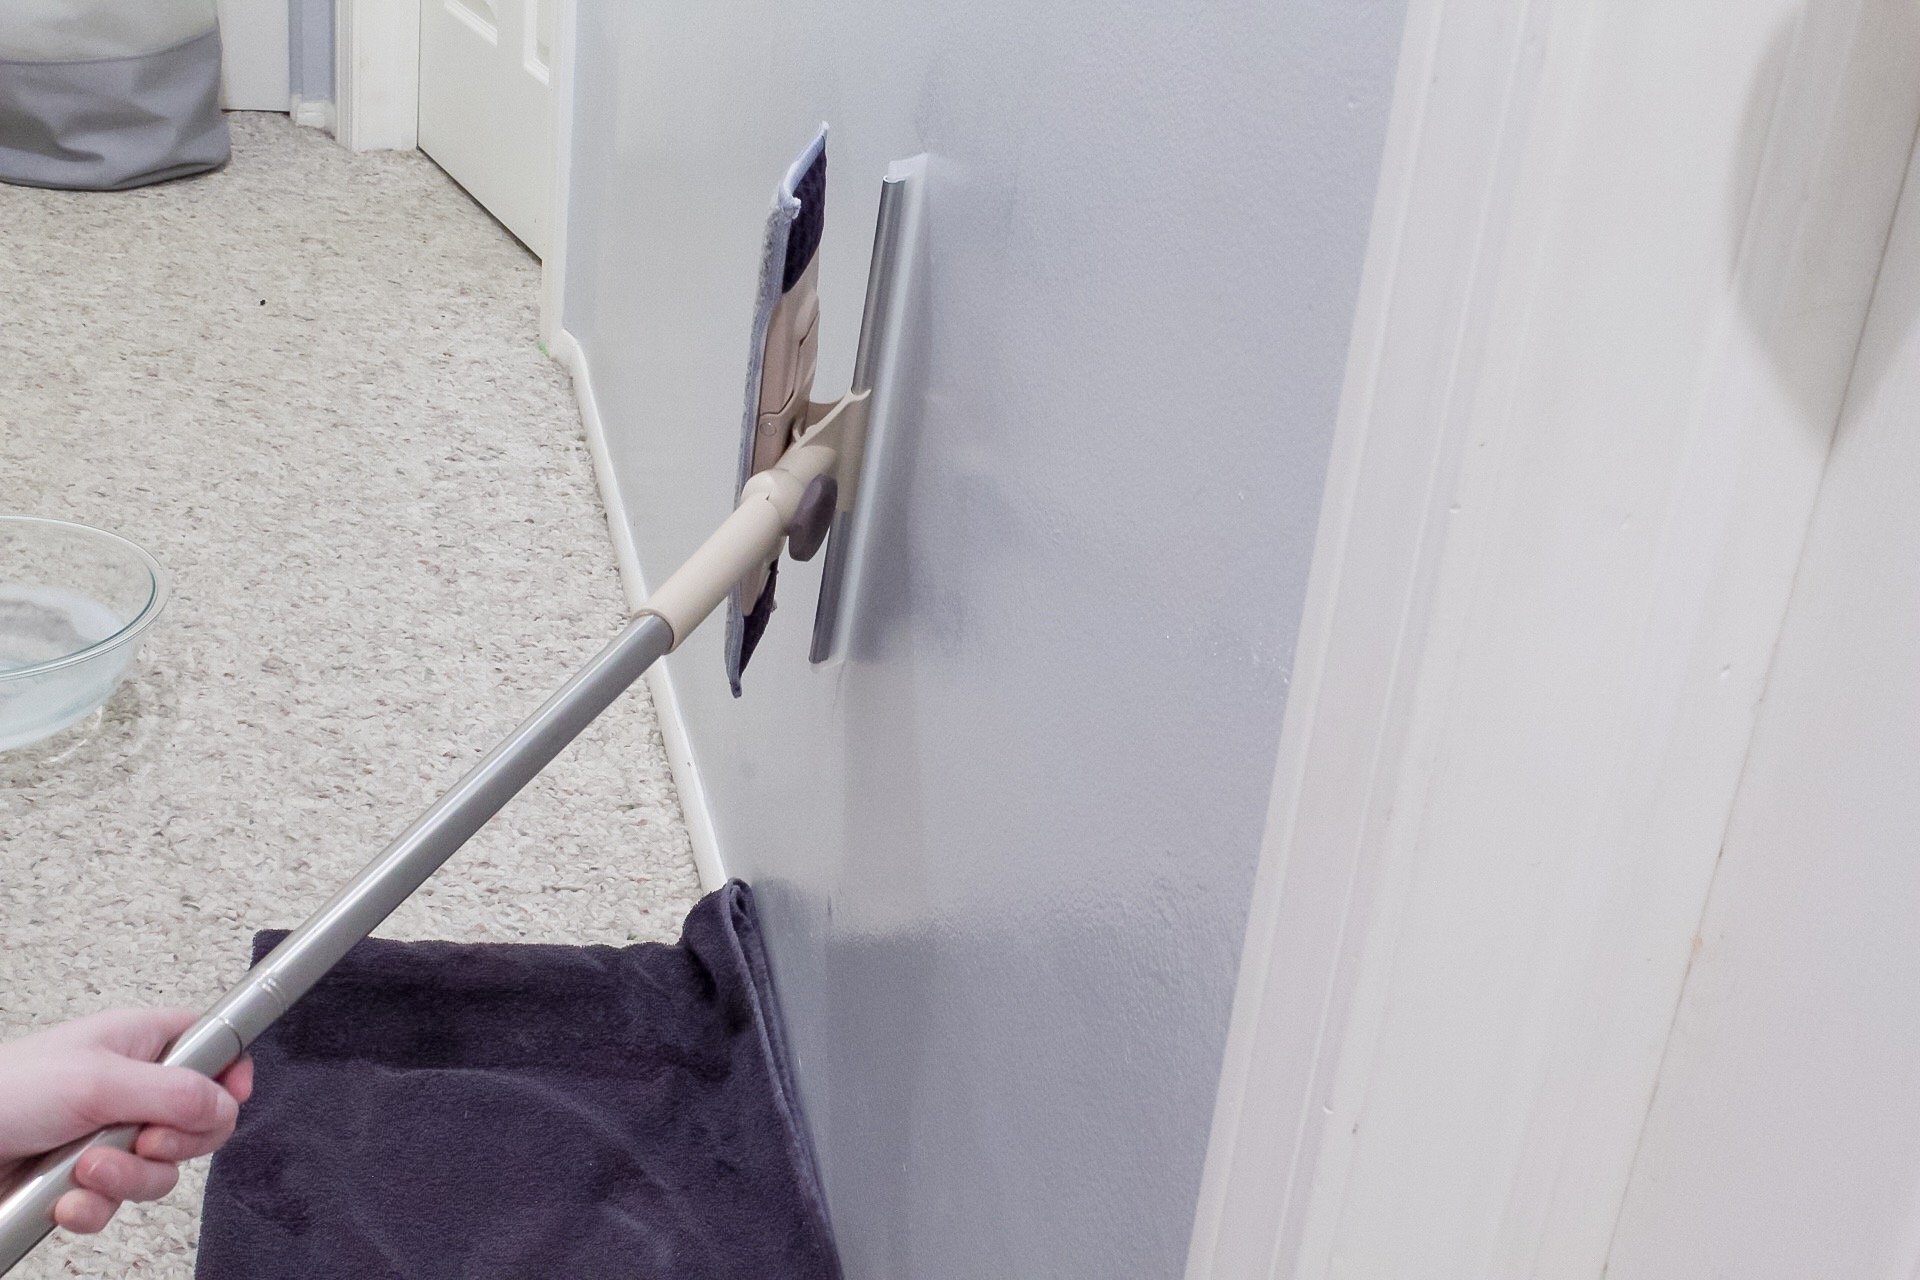
Remember when I mentioned earlier that you definitely want a squeegee mop over a floor mop to wash your walls?
The reason why is, when I washed my walls with the microfiber mop part of my squeegee mop, it cleaned off the visible dirt and looked great!
But when I decided to use the squeegee end, it removed this layer of dirt that I thought was my paint color!
In the photo below you can see that line of dirt!

The middle right half of the wall in the photo above is after I cleaned the wall with the dish soap and white vinegar mixture.
It looked fairly clean to me – I couldn’t see any visible marks and was fairly happy with the results.
But when I swiped the squeegee across the ‘clean’ walls, a layer of dirt and water was removed, and my true clean walls were revealed!
If you choose to use a floor mop on your walls and towel dry them, that’s your right!
After seeing a noticeable difference between using a squeegee and not using it – I highly recommend the squeegee.
I had some crayon marks from my toddler on the hallway walls, and they came right off with this easy wall cleaning solution, although I can’t speak for how it would work on pen or marker marks.
If you have REALLY tough spots to remove (like scuff marks, pen or marker) on your walls, try using a wet magic eraser.
How To Clean Baseboards And Ceilings
Using the wall cleaning solution recipe I gave you for the walls, dip a microfiber cloth into the solution, squeeze excess solution out, and start lightly scrubbing along your baseboards.
This solution works so well that you shouldn’t need to scrub hard unless you have a longstanding, difficult mess to clean (like dried-up food).
For ceilings, use the same method you would for the walls. Take special care to wring out excess water before applying the microfiber mop to the ceiling (to avoid solution and water dripping all over you).
Rinsing Walls After Cleaning Them
After washing your walls and squeegeeing all of the dirty water from them, give them a quick rinse with clean, warm water using your mop again.
Be sure to rinse out your squeegee microfiber mop before rinsing your walls, and to again squeegee the water from the wall after mopping the walls.
Touch-ups And Minor Cleaning Tips For Walls & Baseboards
This cleaning solution is meant for deep cleaning walls, but there are times you may just need to clean one little spot off the wall…
My go-to product to use for cleaning random dirty fingerprints from walls is just a regular sponge with warm soapy water or a magic eraser! Use your sponge or magic eraser in circular motions to grab those everyday messes.
Like toddlers do, Jax drew with a black pen on the wall.
The black pen was hiding under our stand-alone fireplace in the dining room (it must have rolled under there at some point), but was retrieved and put to good use creating a mural on our light gray dining room walls.
YIKES.
I don’t find the need to mix up this cleaning solution for minor fixes like that. I found that a magic eraser did the trick just fine!
Please note that with some paint finishes, the magic eraser may remove a thin layer of paint because it is abrasive, so be sure to test in an inconspicuous area first. Just use a damp cloth if your wall fails the spot test.
Now that you’re a total pro at this whole cleaning your walls thing, you can feel confident cleaning your walls every 6-8 weeks if your wall paint is a lighter color, and every 4-6 months if you have a deeper paint color.
As long as you have some soap, water, and vinegar, you can make endless amounts of wall cleaning solution and battle marks and stains on your walls from the kids and furry friends in your home!
Looking to get focused on your deep cleaning ventures? Check out this Deep Cleaning Checklist: February Cleaning Duties To Focus On.
*Post originally published February 2019, last updated November 2025.

I really appreciate it that you mentioned how squeegee cleaning removes both dirt and dirty water you can’t even see dripping on your pastel wall. This should remind my mom to have the cleaners do the daily rinsing of the twin’s playroom walls to keep them germ-free and spotless for their wall painting activities. For the weekly cleaning, though, it would be best if she could get only the best local wall cleaners to maintain the sparkly quality of the Sacramento home’s all-glass and stainless steel walls with their microfiber mops, high-tech squeegees, and earth-friendly organic cleansers.
Thanks for this guide on how to clean our walls with a homemade solution no less. Awesome stuff, and I’ll be using the guide keenly from now on.
Where can you find extra pads for the Squeegee Scrubber Cleaner- I found the actual cleaner on Amazon per your link but can’t find the replacement/extra pads.
Hi Crystal! With the one that I own and linked, the microfiber pad is machine washable. So after cleaning your walls, you just toss it in the washing machine. I allow mine to air dry after washing.
I had another look on Amazon as well, and could not find a squeegee cleaner that offered replacement or extra pads, all of them seem to be reusable, machine washable pads like the one I linked and use!
Im getting ready for a kitchen remodel & new paint scheme. Needless to say, my walls & ceiling were dirtier than I realized! You recipe for wall cleaner is the most awesome I’ve ever used.
Can we use the solution on flat paint?
It SHOULD be fine on flat paint as long as you use the squeegee tool I mentioned in the post as you wash and rinse with plain water 🙂 I would work in small sections just in case.
Thanks for this post, Corrine! I’m reading this while stuck at home with my kids during the Coronavirus quarantine, and I’ve decided to clean my walls (and floors) while I have some free time. I’ve been reading all kinds of cleaning blog posts to keep me and my kiddos busy during this time, so I’m grateful I found your blog. Your “21 Indoor Activities For Kids To Battle Boredom” has been a huge lifesaver for me and I can’t wait to read more posts like that. Hope you and your family are staying safe and healthy!
Does it have to be white vingar? Can you use apple cider vinegar?
Hi Peggy! I believe you can! I haven’t personally tested this out yet, however, so if you try it I would still test it in an inconspicuous place first, and follow the same steps to rinse your walls after like you would with this recipe using white vinegar. 🙂
Hello!
Thanks so much for posting! The mop you reference is no longer sold on Amazon. Do you have any others you like?
Cheers!
Oh no, thanks so much for letting me know! This one has GREAT reviews and is almost exactly the same as the one I previously linked: https://amzn.to/3jwE9jv
Love this, however I got the alternate one since the one you used is sold out and the black squeegee part comes apart on my walls and leaves small black peices where ever I end. Definitely recomend finding a clear squeegee.