Make your child’s teacher a fun teacher appreciation gift with this adorable dishwasher-safe mug design!

It’s tiiiiiiime to send our babies back to school!
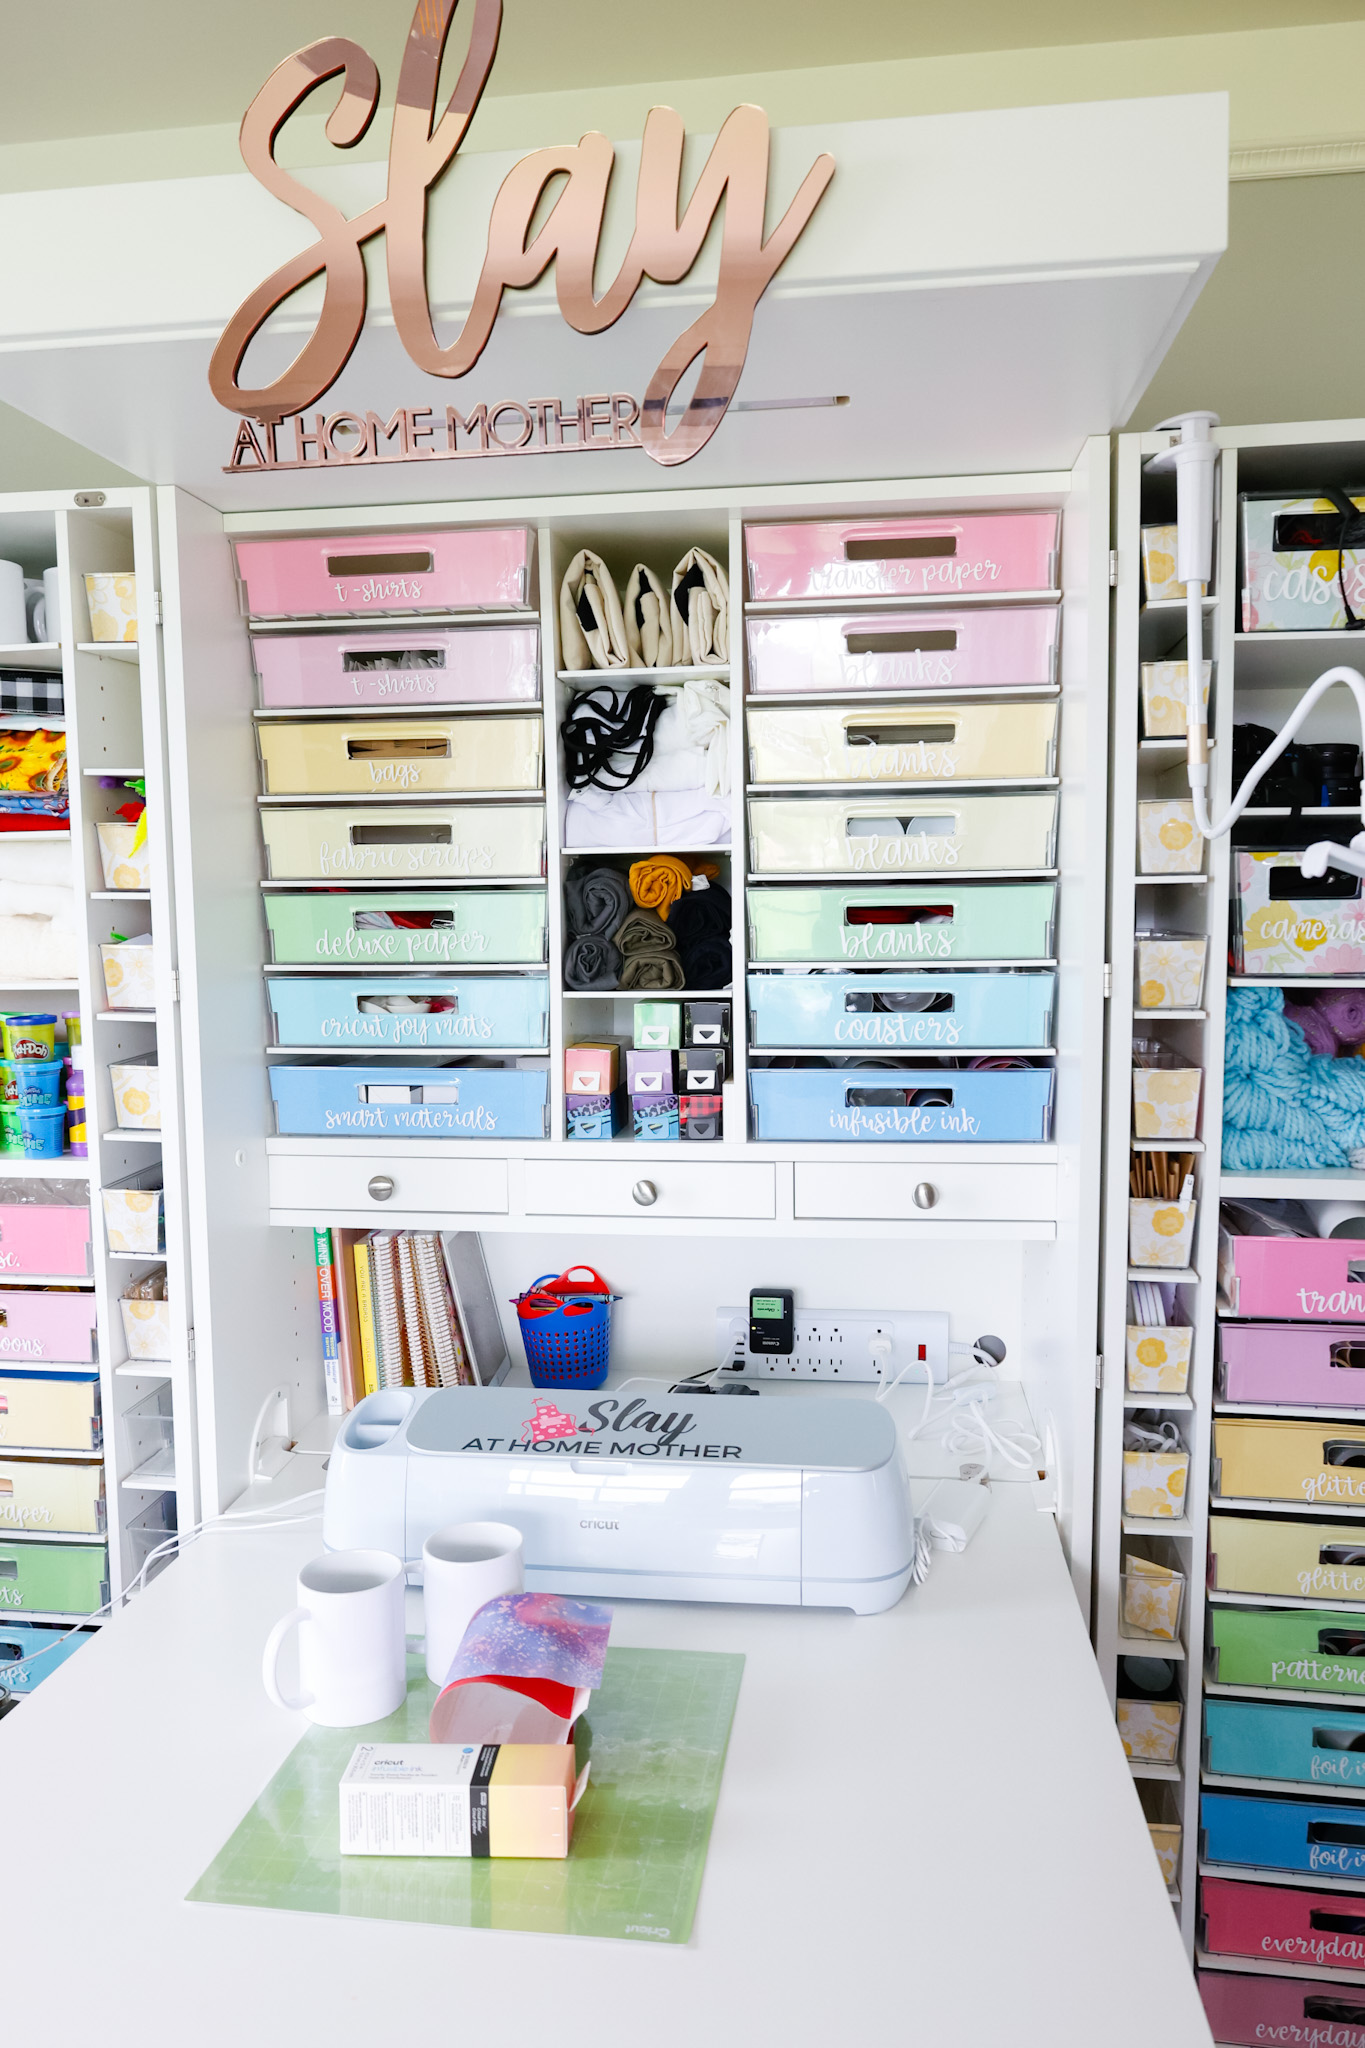
And in this post, I’m making my boys’ teachers some dishwasher-safe coffee mugs.
I’ve even got screenshots to help guide you through the steps, so this is a great beginner Cricut guide.
Here are the mugs I made for our kids’ teachers this year…

This post contains affiliate links, however, all opinions are my own, as always!
What You Need For This DIY Teacher Mug Gift
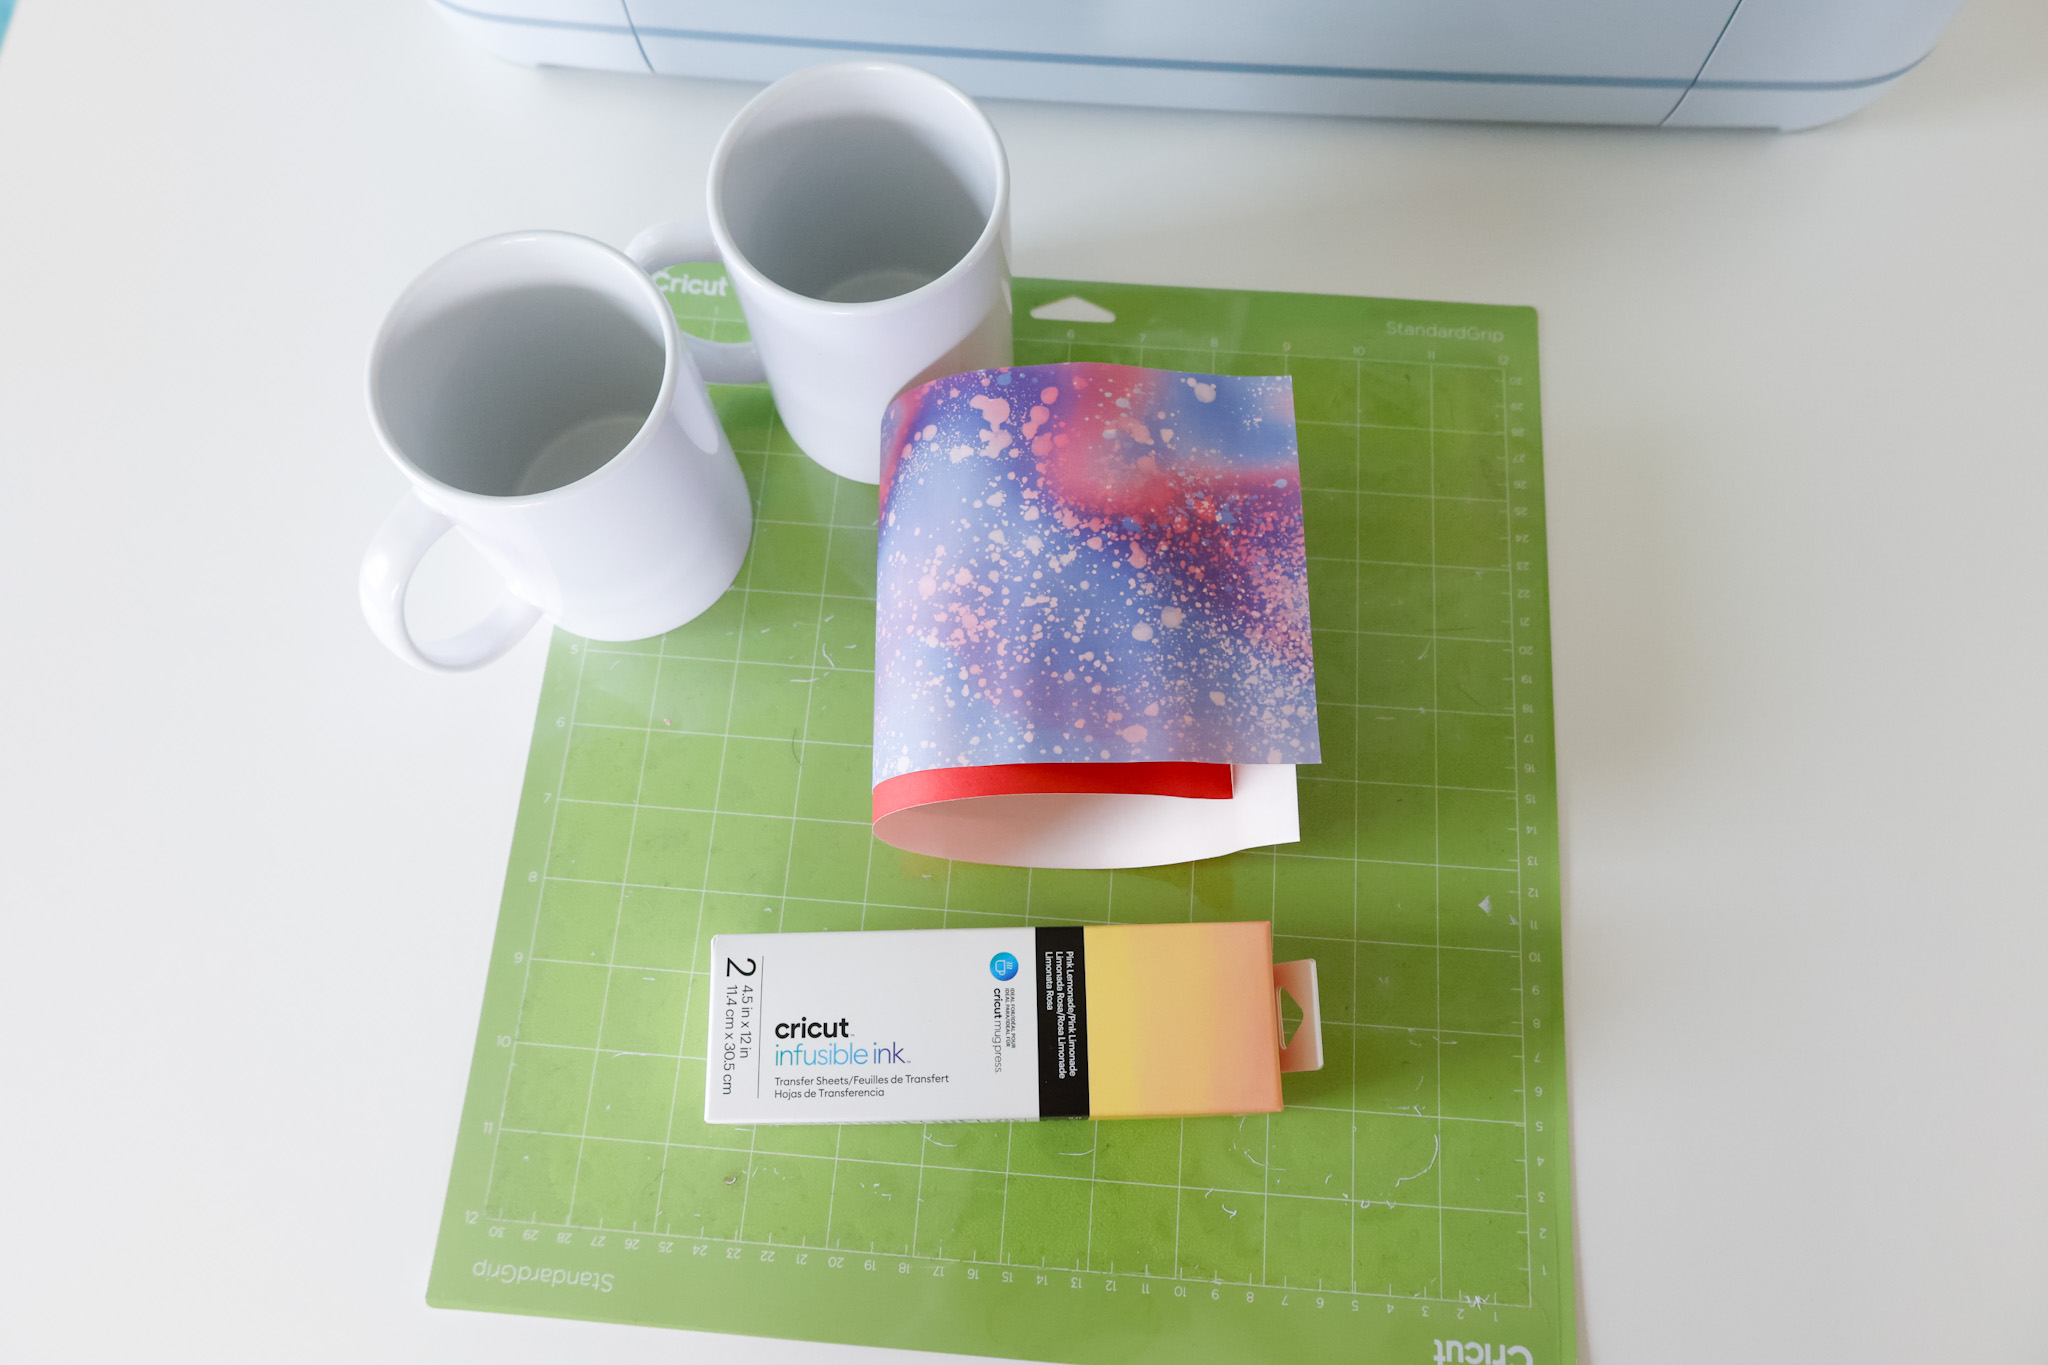
Here’s what I used to make these Teacher Appreciation Gift Mugs…
- Cricut machine (I have the Maker 3)
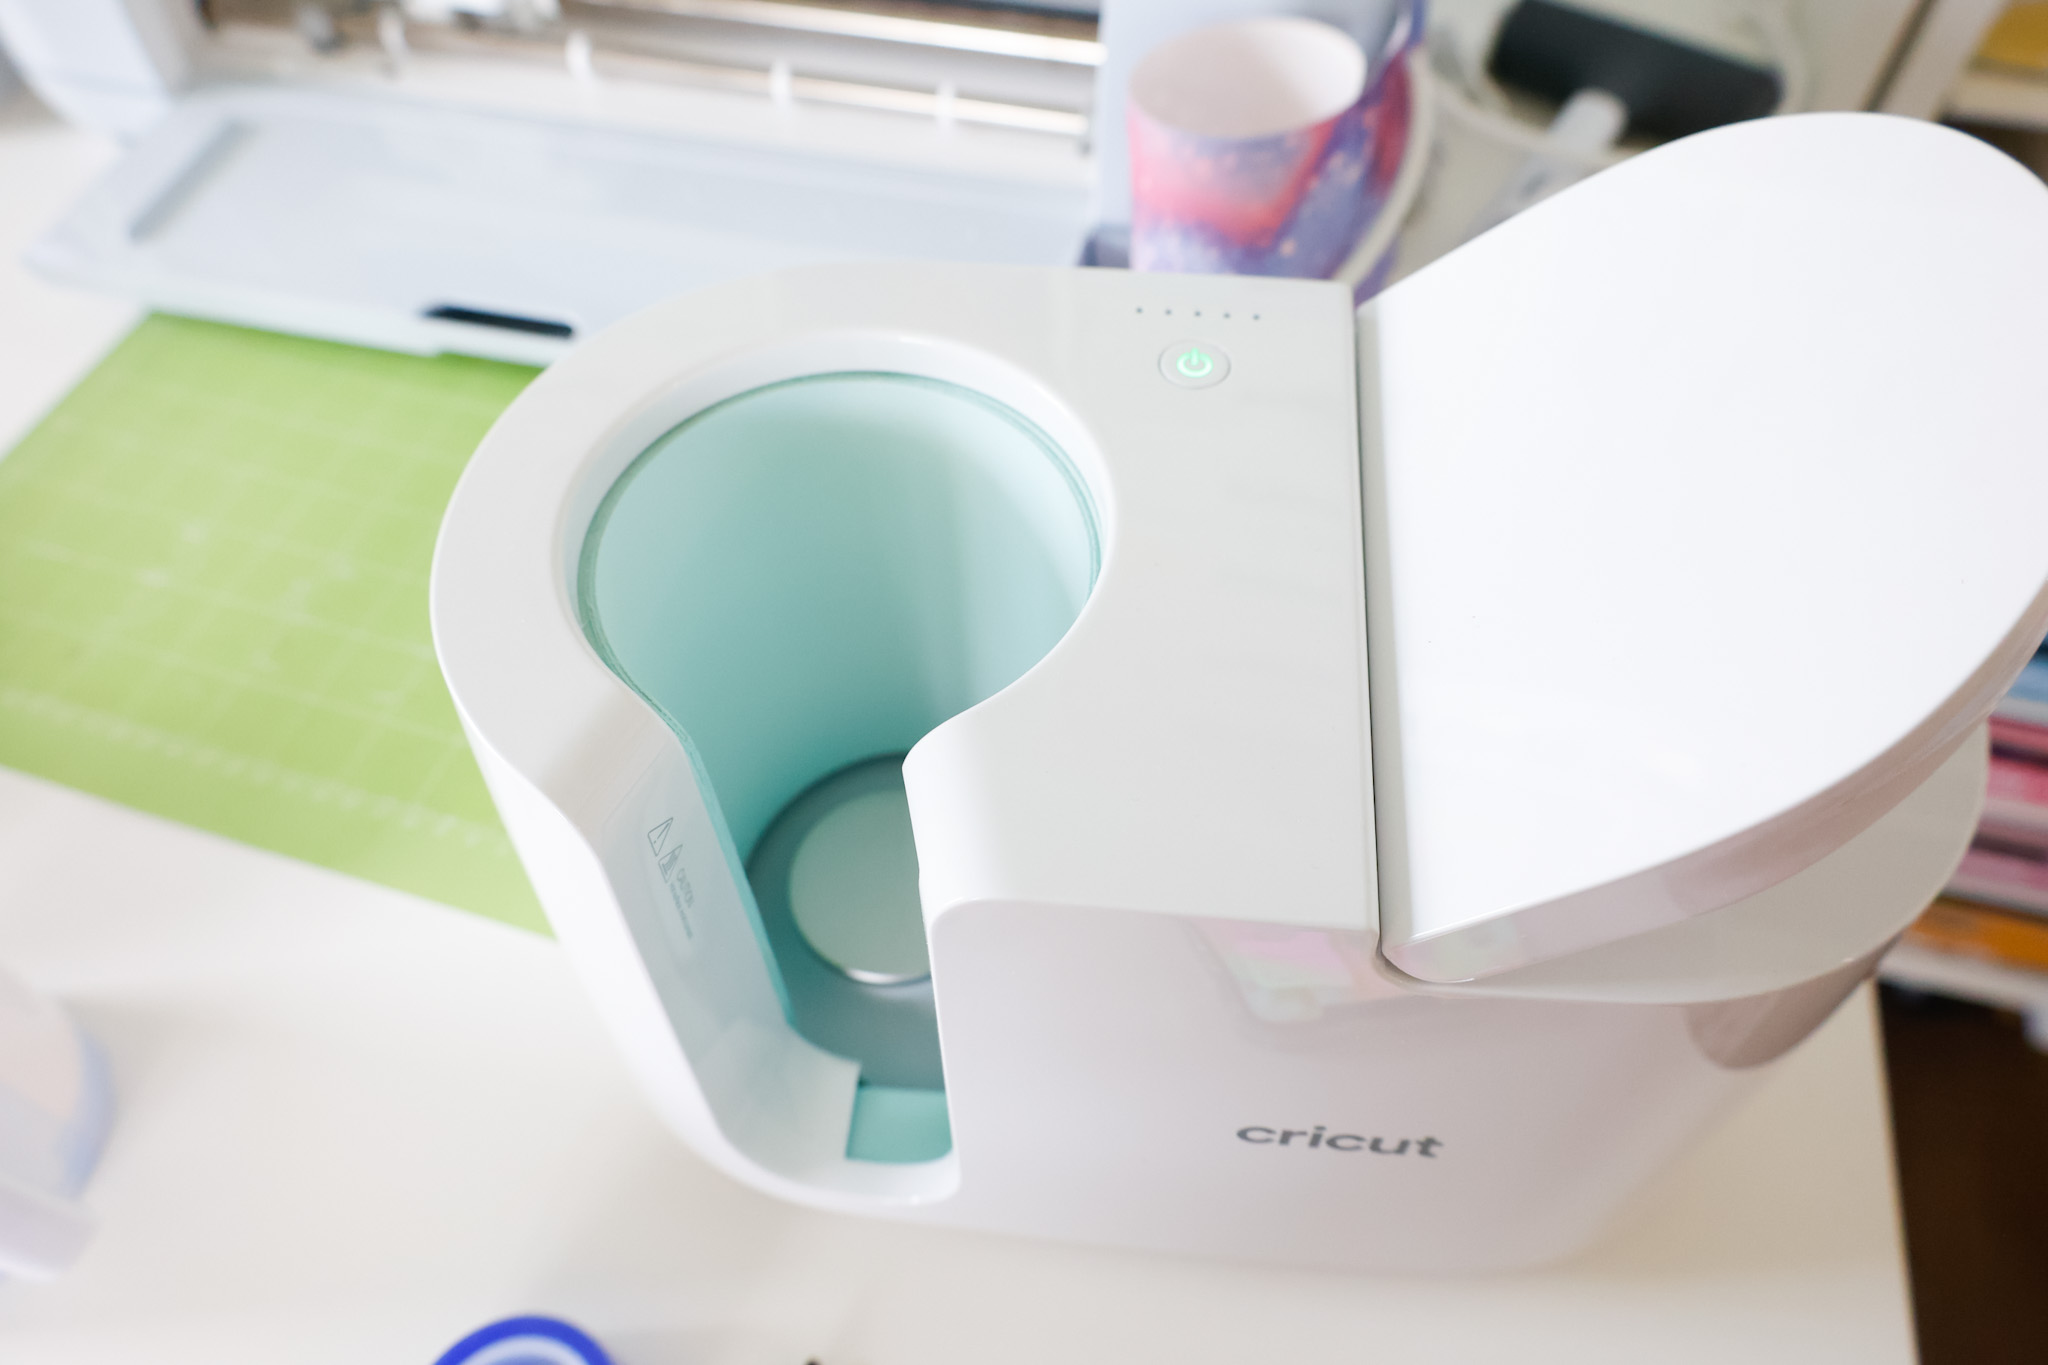
- Cricut Mug Press
- Infusible ink transfer sheets
- heat resistant tape
- butcher paper
- StandardGrip mat (green)
- Cricut sublimination mugs
- towel or EasyPress mat
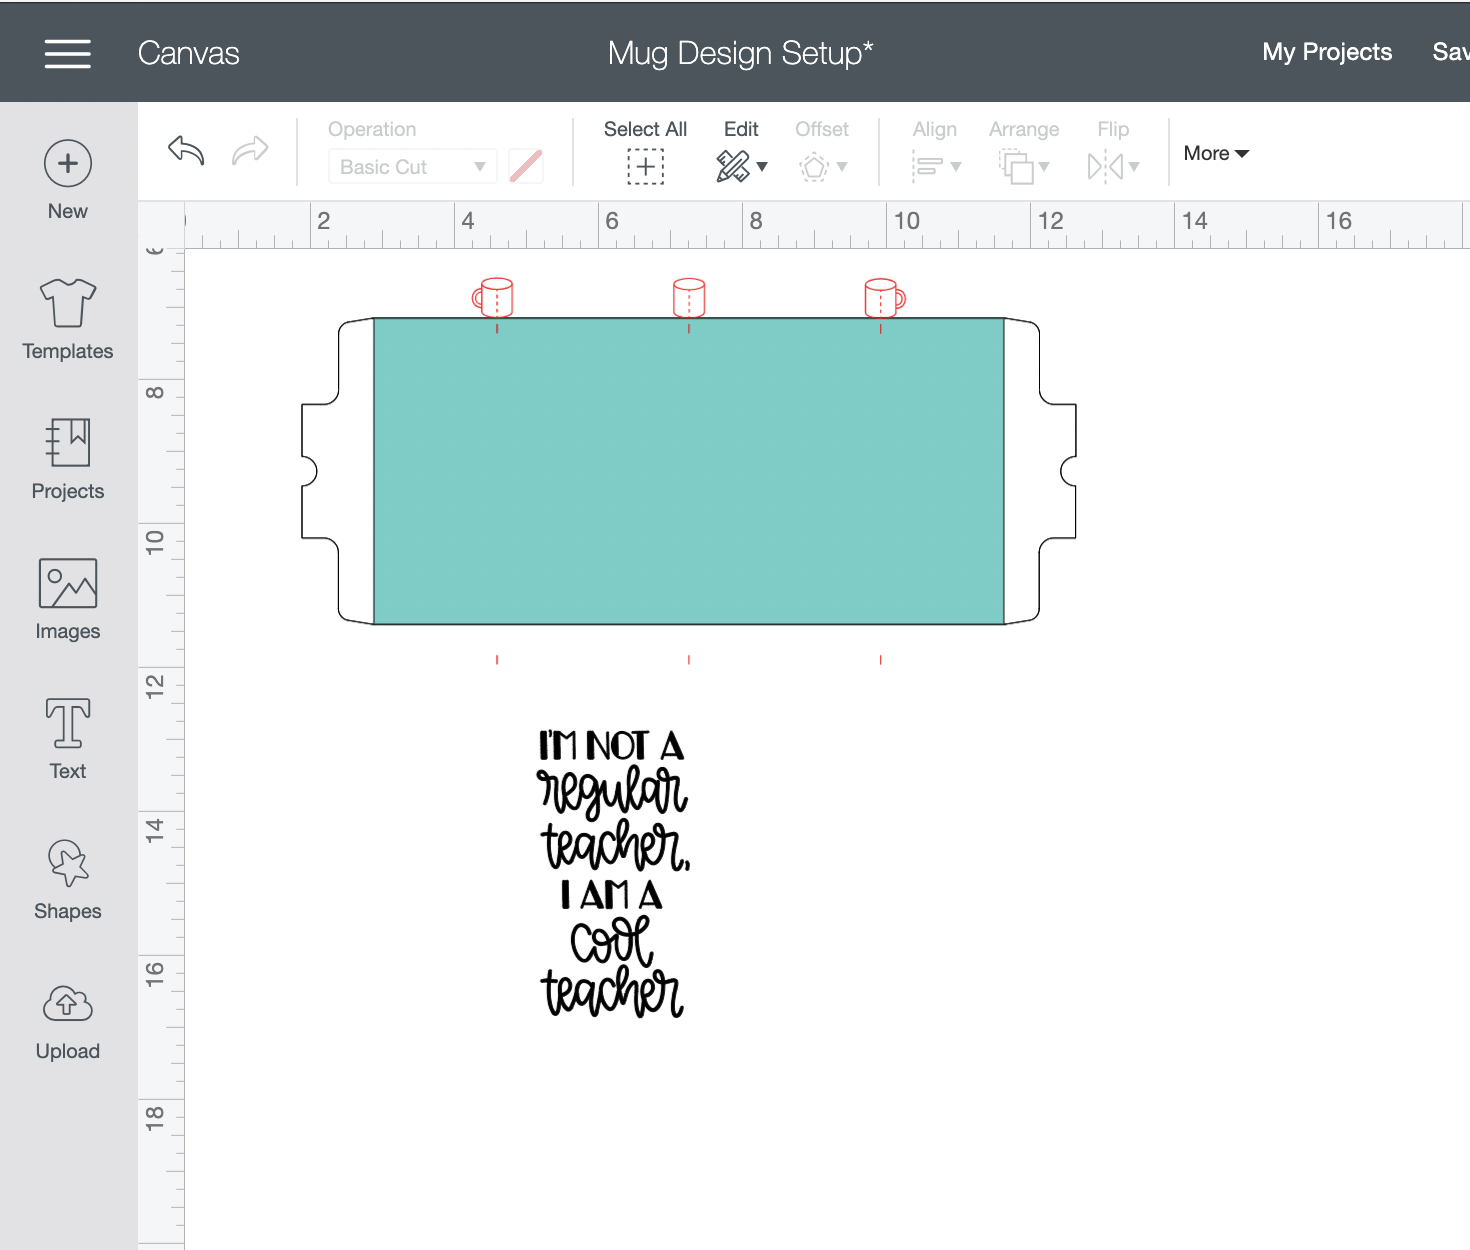
Creating Your Mug’s Design
In this post, I’m going to show you how to split up parts of an image in Design Space to make the design I’ve made on the mugs above, but feel free to use whatever design/image/text makes your heart happy or makes the most sense for your child’s teacher.
You can also access the design in Design Space here – just know that the apple image and ‘cool teacher’ phrase are both Cricut Access images.
I highly recommend Cricut Access, just because you have access to over 100,000 images and fonts to use – it’s an incredible savings plan you can take advantage of if you craft a lot like I do!
Splitting A Design In Design Space With Contour
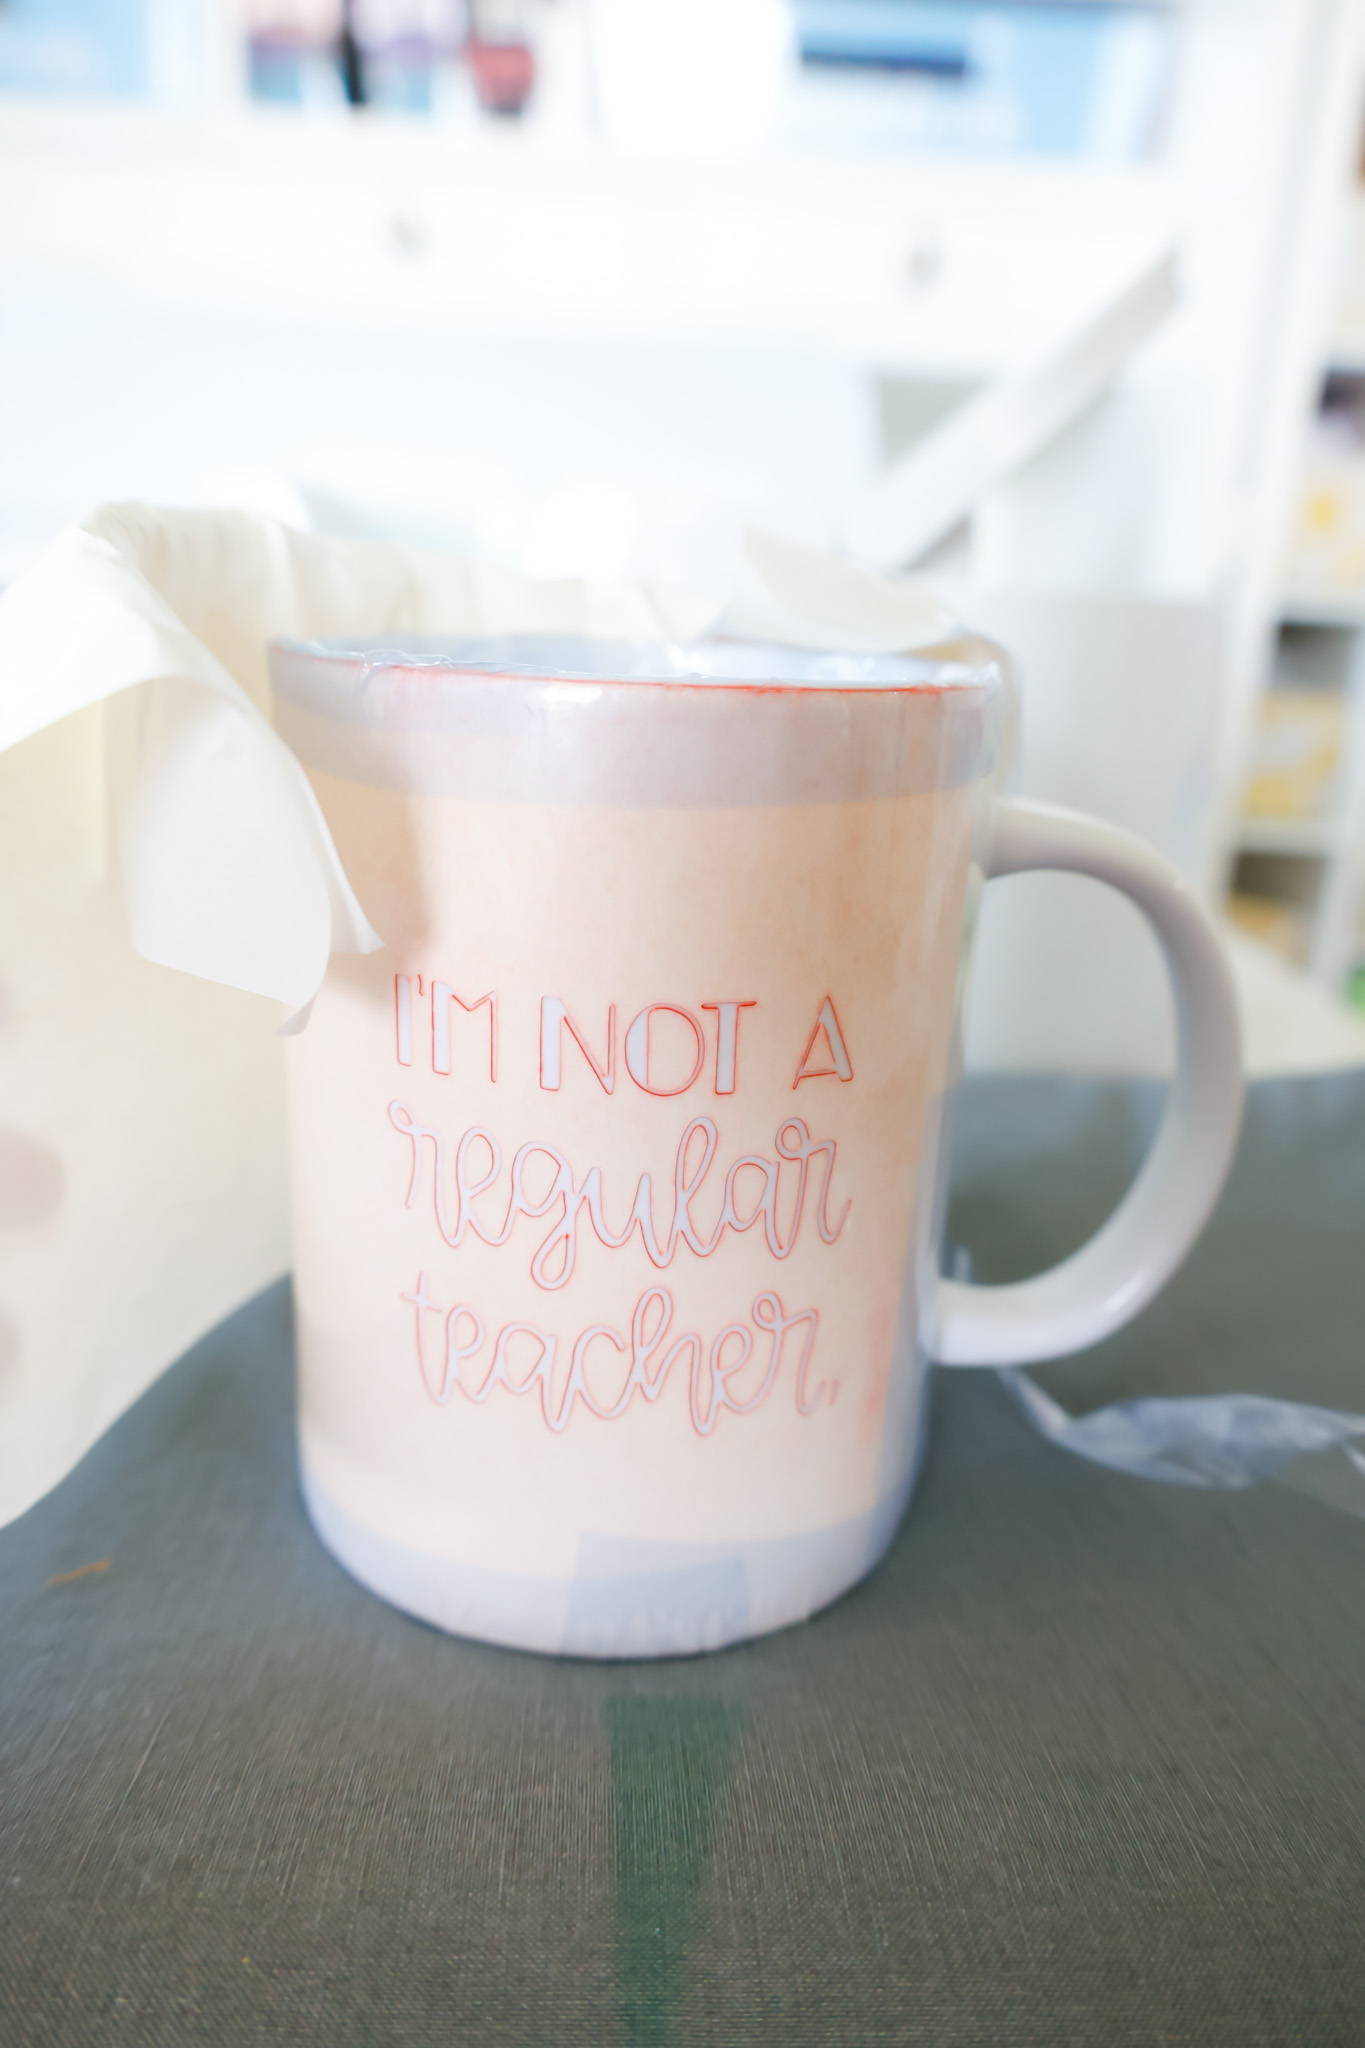
For my teacher mug, I wanted to have one half of the phrase on one side of the mug, and the other half on the other side of the mug.
To do this, I clicked on the image after I inserted it into my design, and click on the Contour button (located at the bottom right of the Design Space screen).
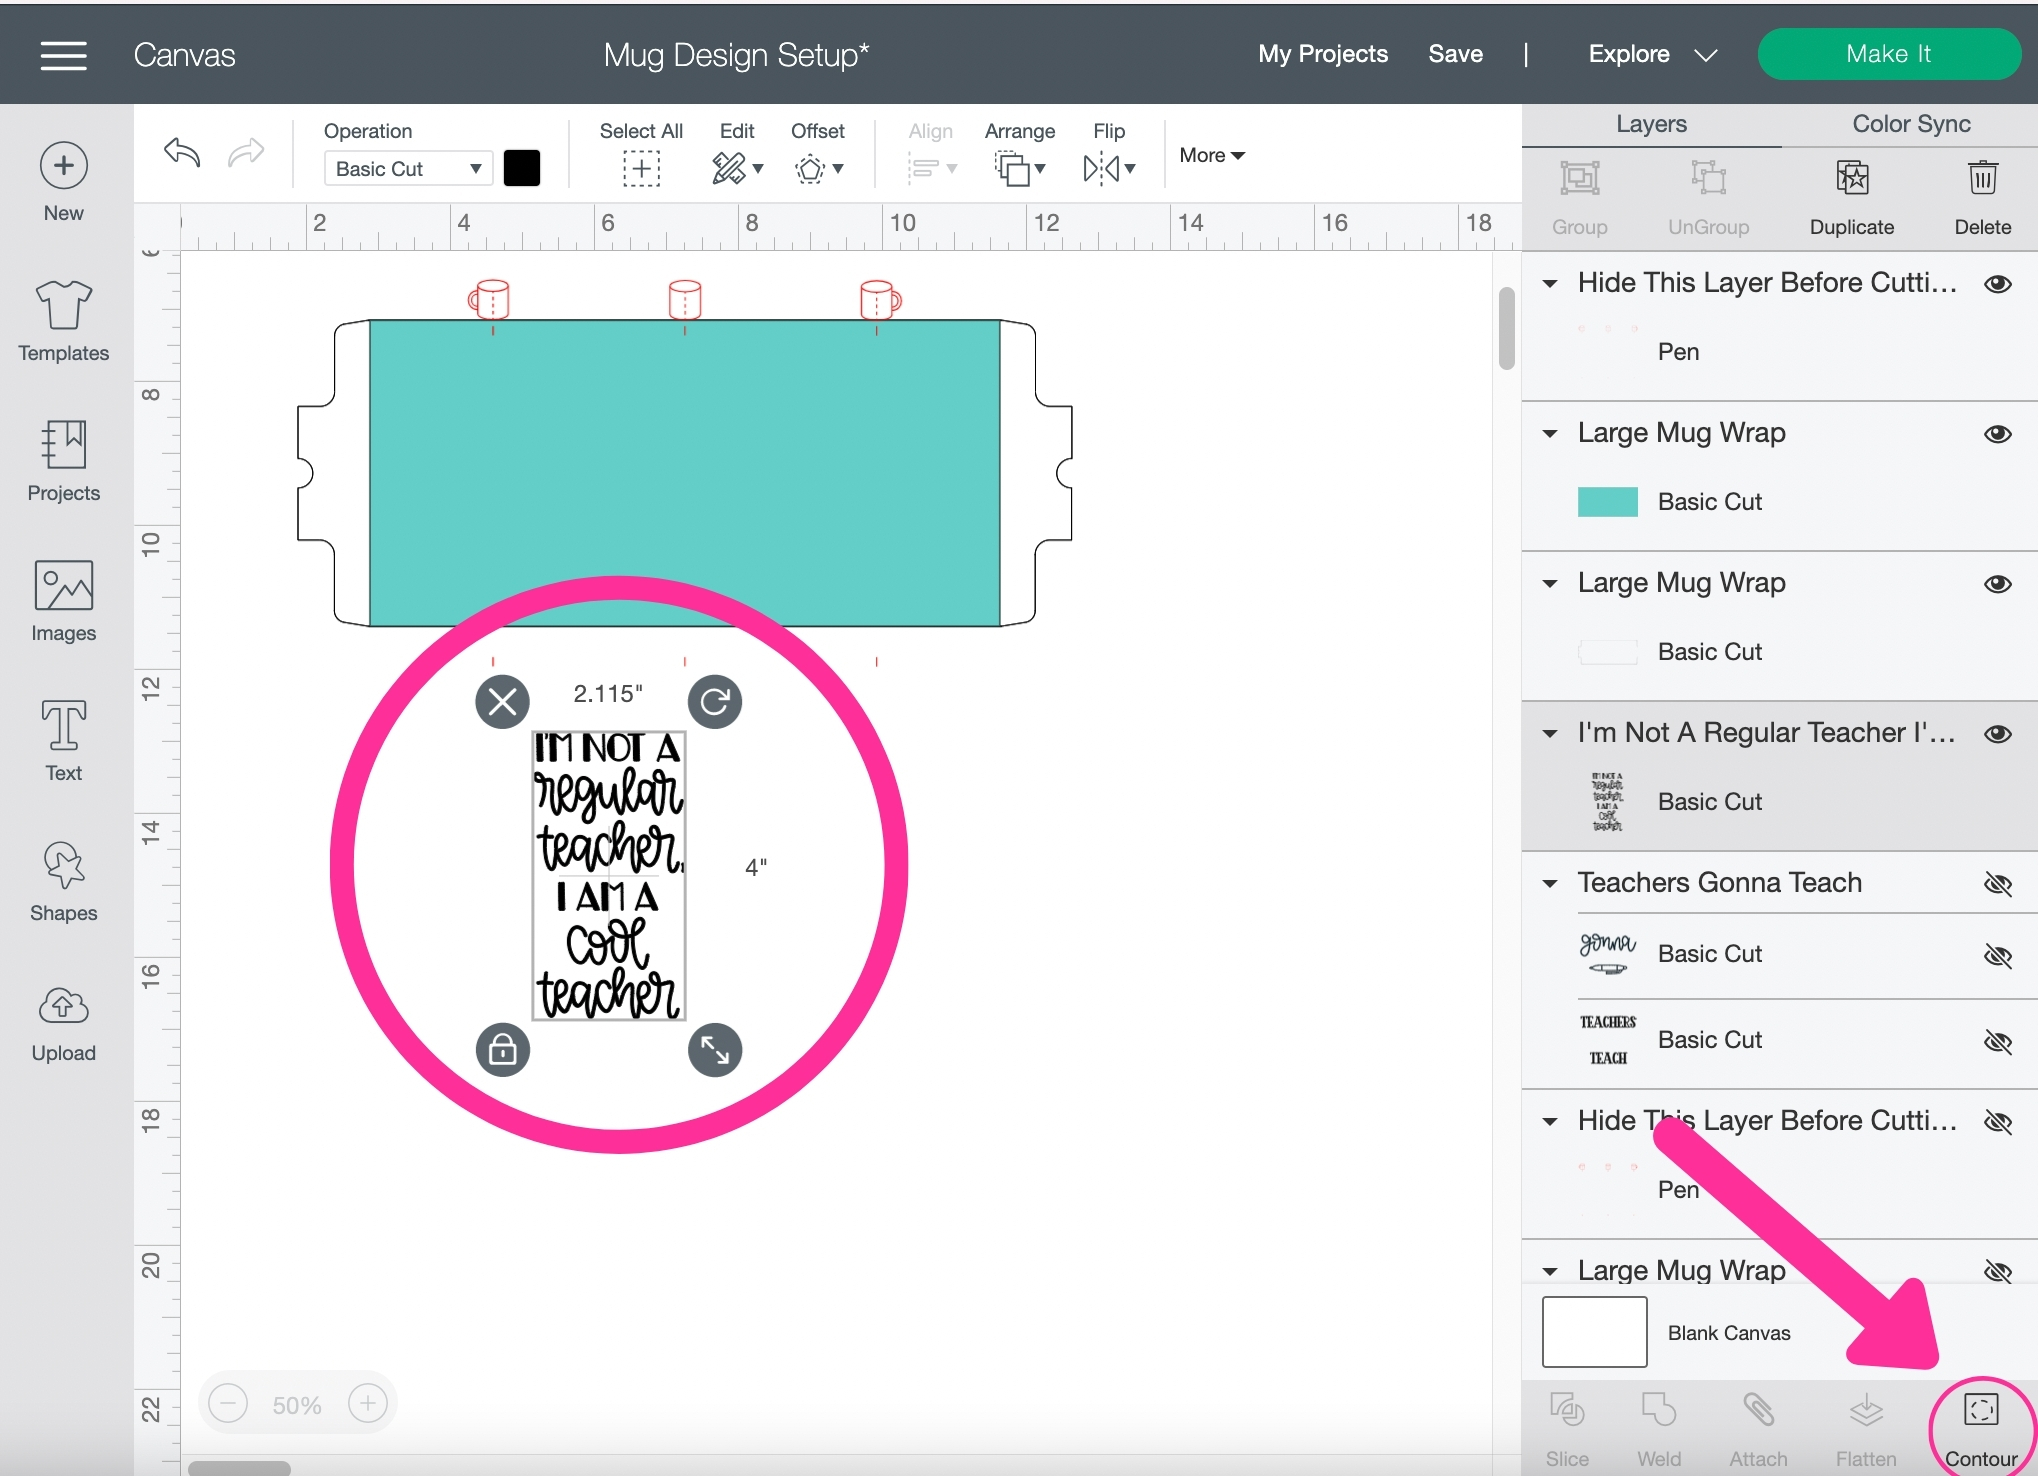
In the Countour screen popup, I first selected the text and elements for the bottom half of the design to ‘hide’ them…
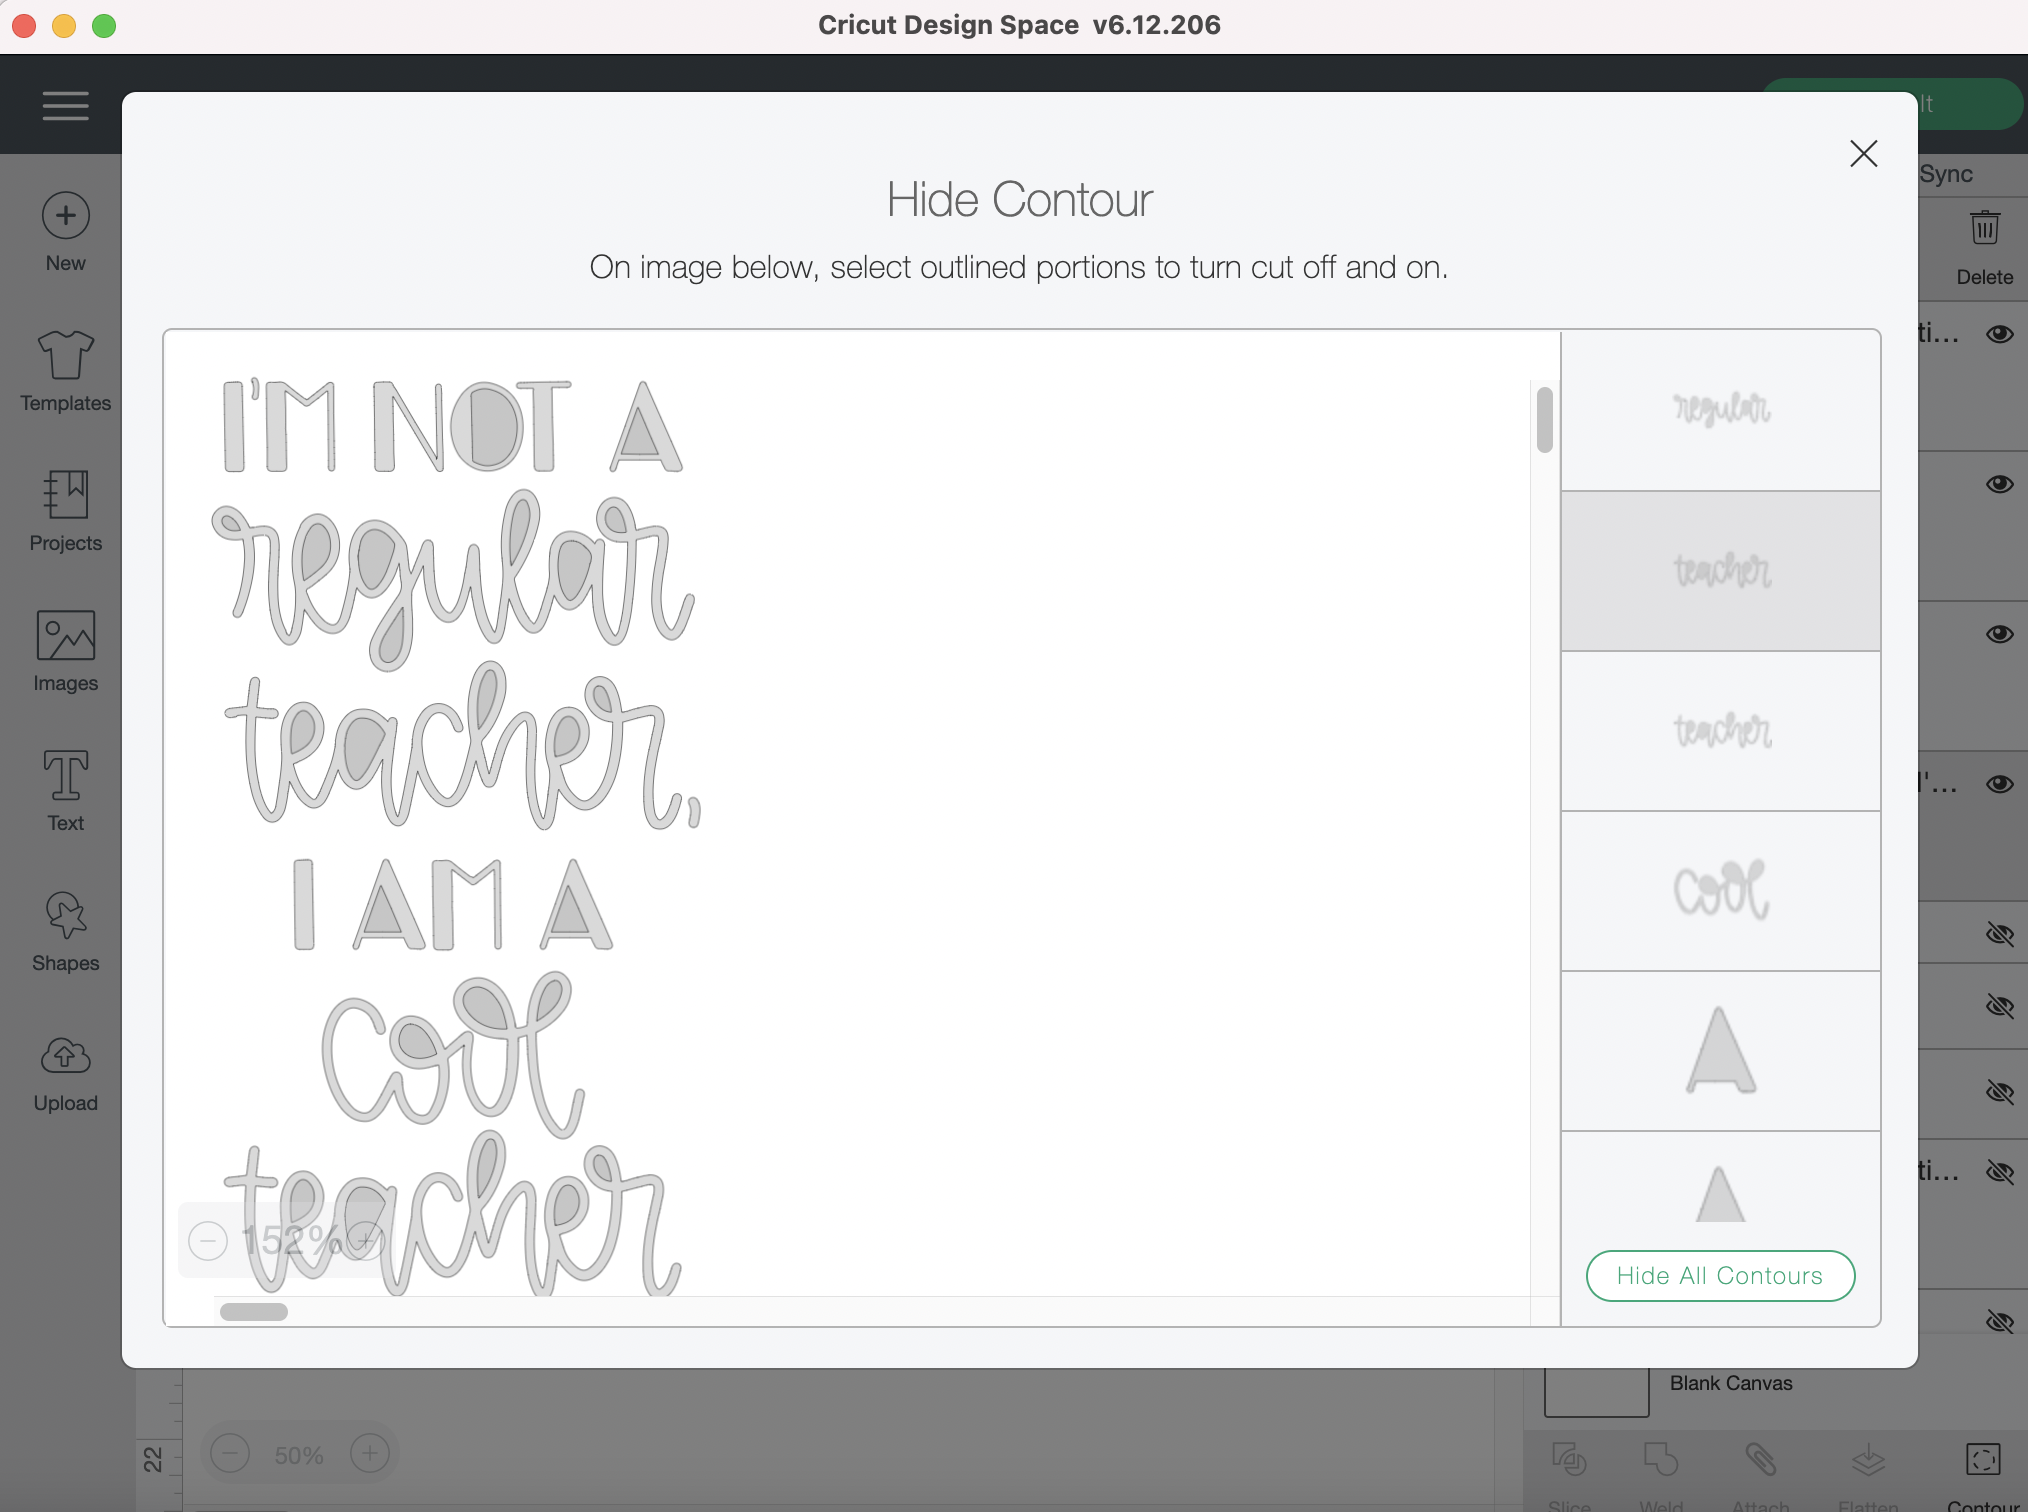
When I was done, I clicked on the ‘X’ to close out the Contour screen and was left with just the top part of the phrase (see below)…
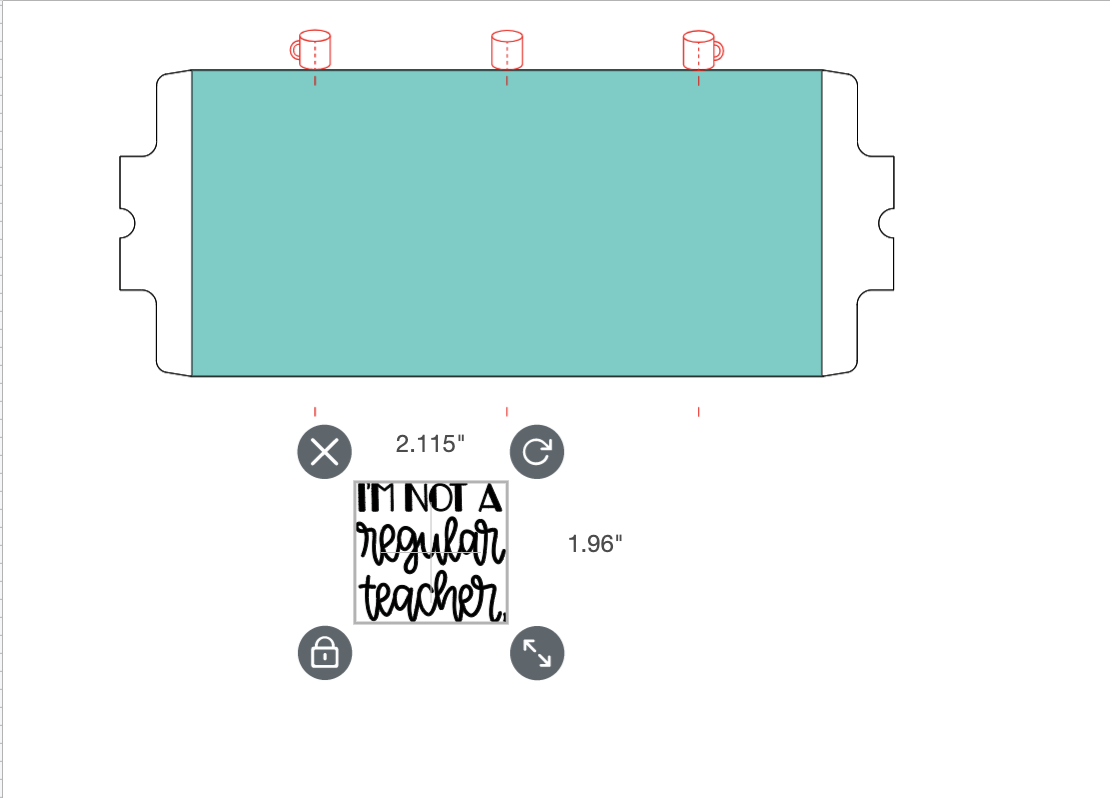
Next, I inserted the same image into my design again, but use the Contour popup to remove the top portion of the phrase so that only the bottom portion was visible.
You can see in the image below that the top half of the phrase is lighter and the bottom half is darker. Only the bottom half (darker portion) will show on this image now.
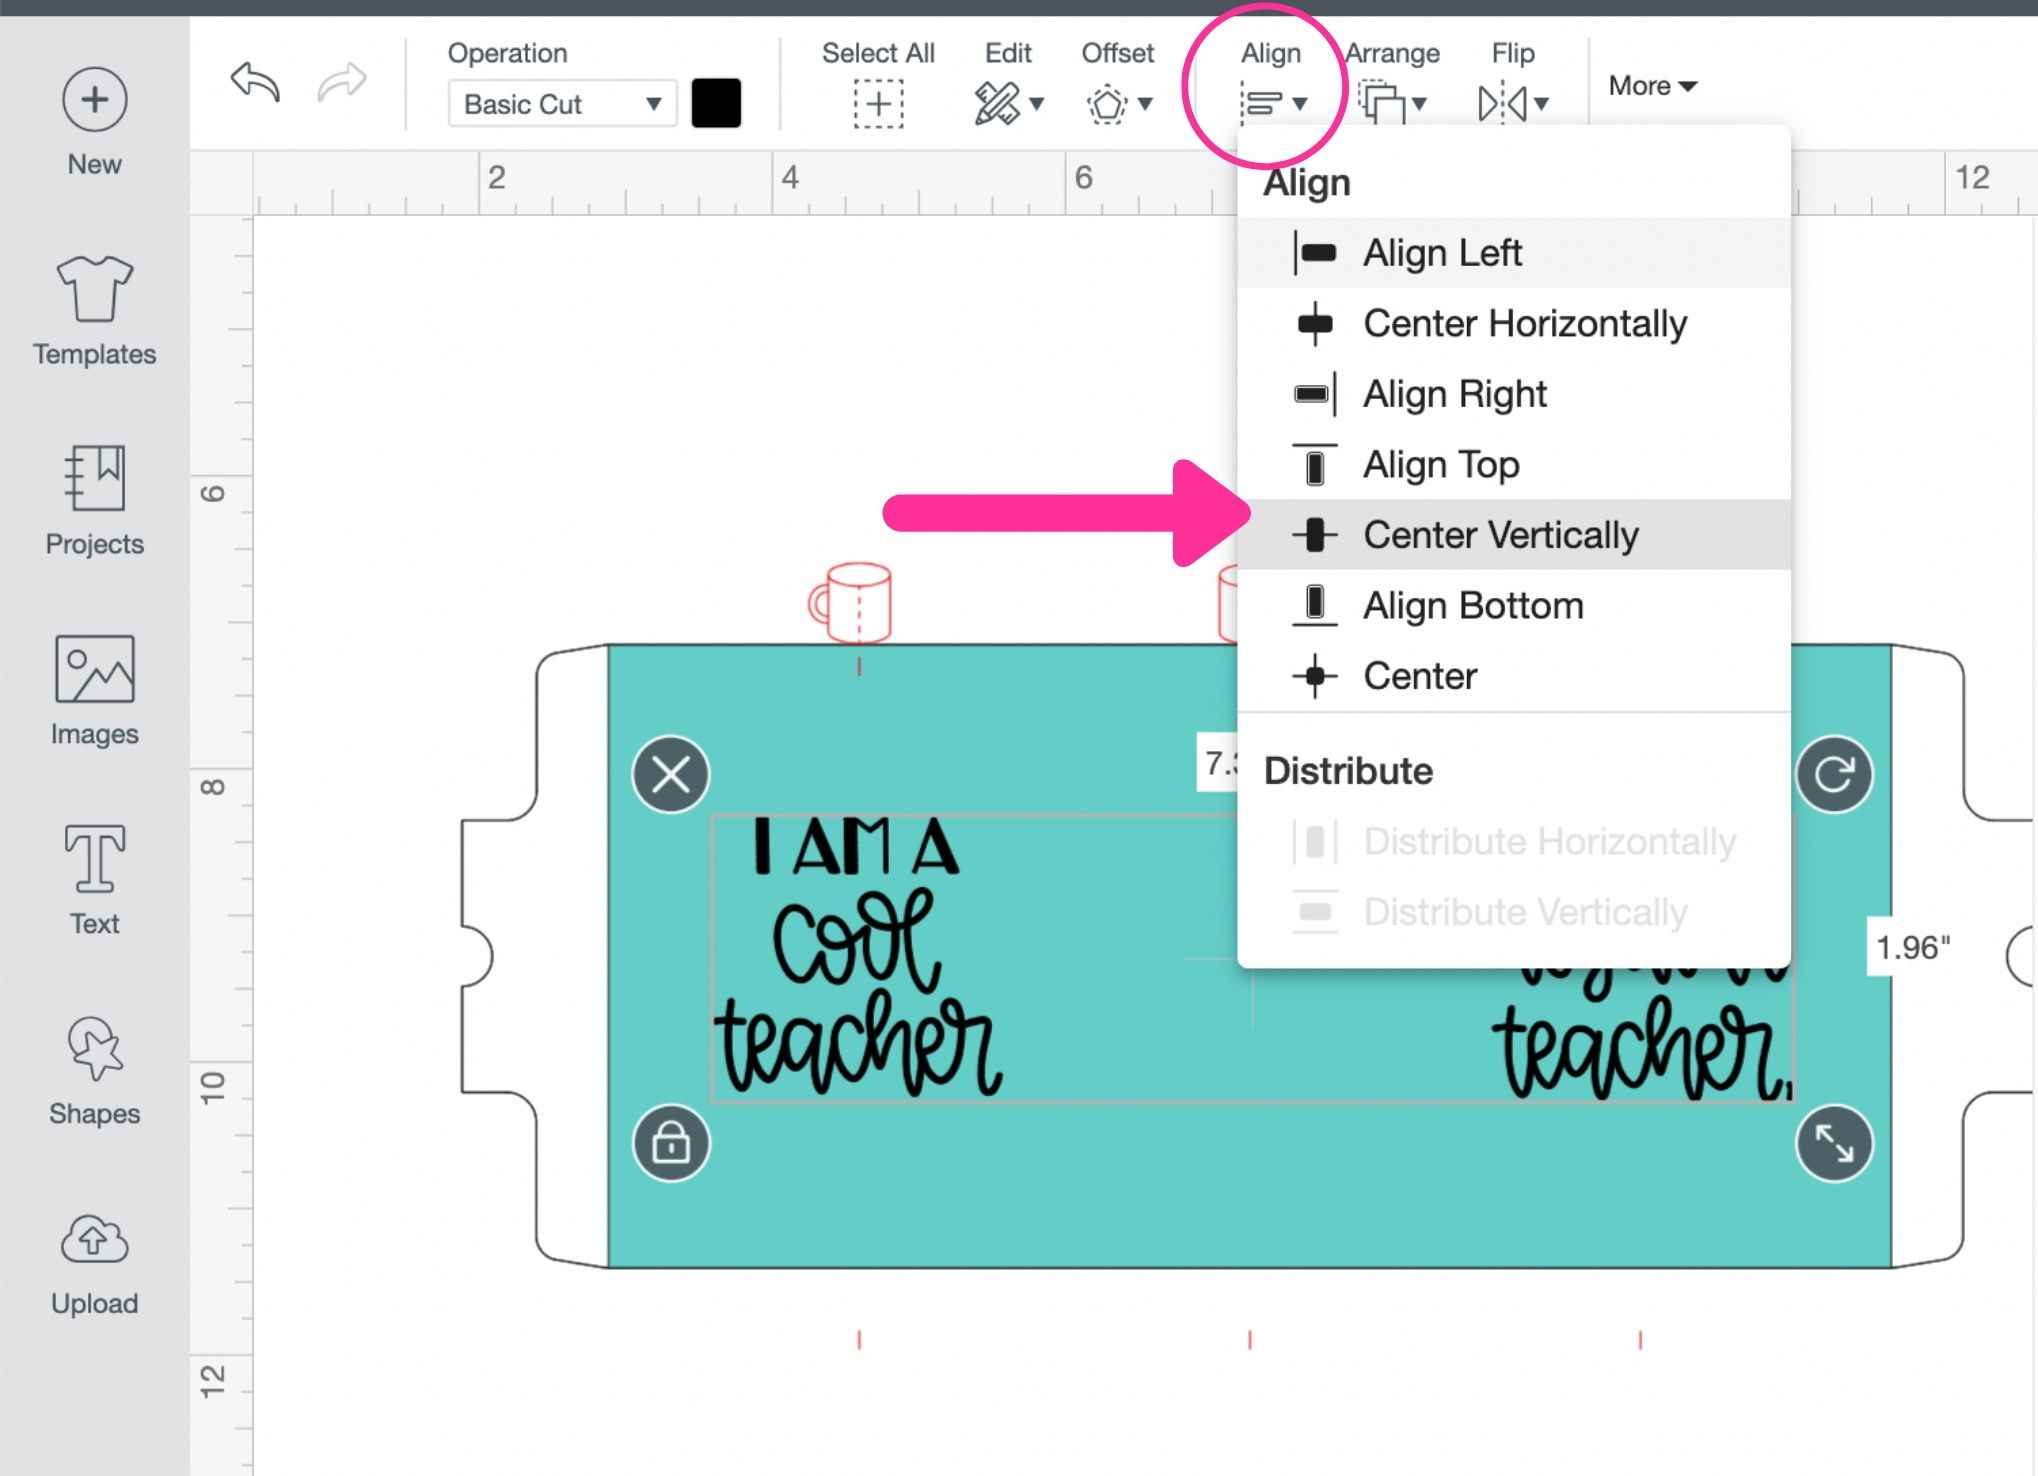
Once I have my images placed where I want them, I want to make sure I have them aligned so that they are even.
To do this, I selected both images, click on the Align icon on the top toolbar, and clicked on Center Vertically…
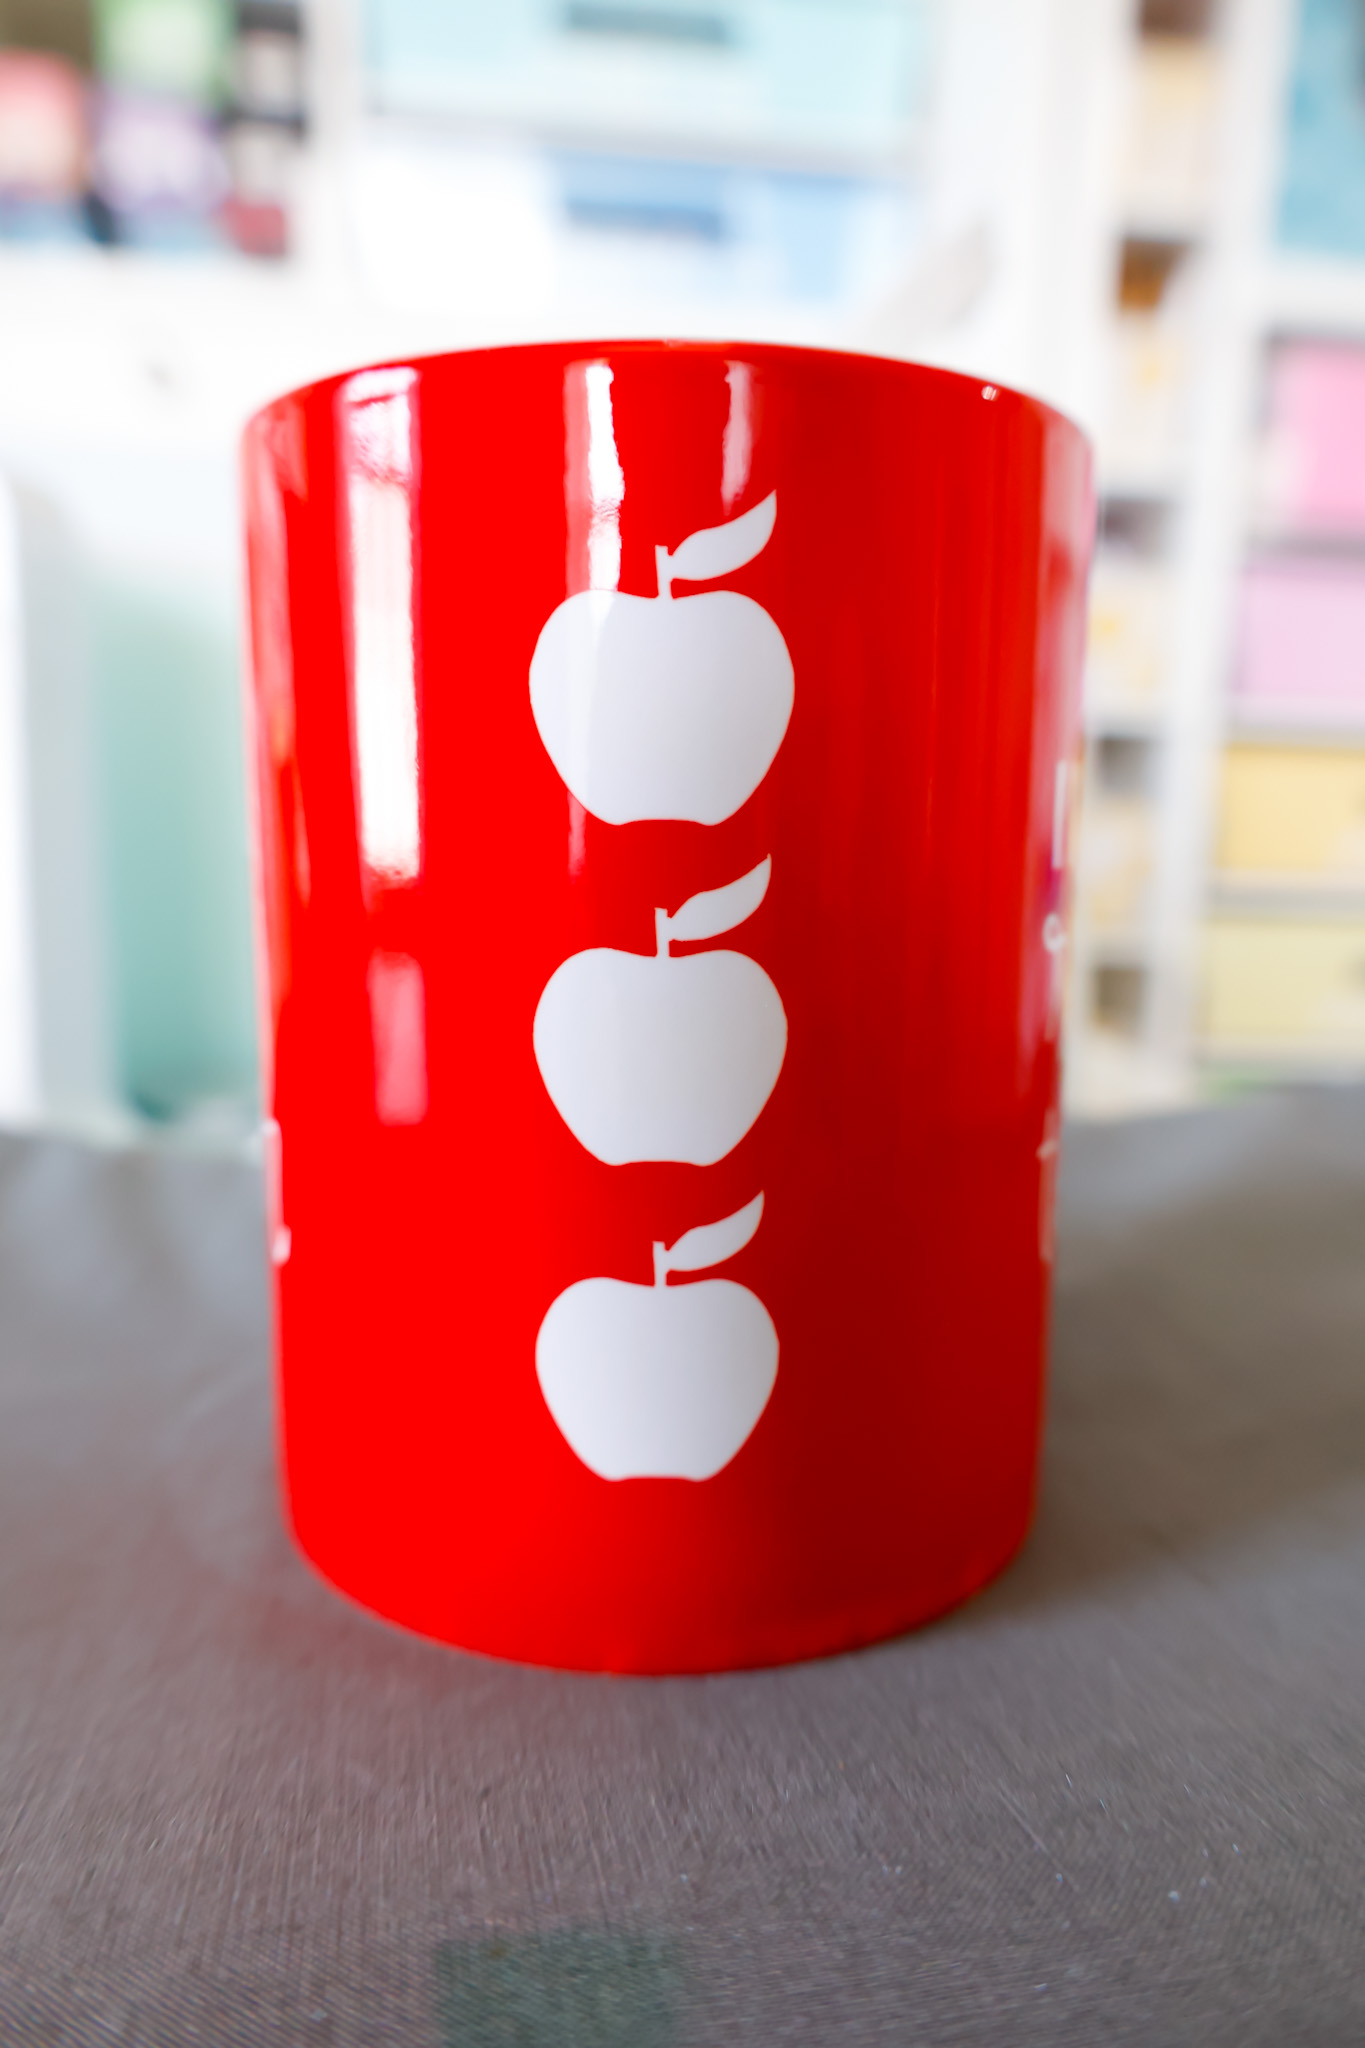
I decided to add a little extra to this mug and found these cute apple images, I knew they’d go perfectly over the middle of the mug design.
I put three of them stacked vertically and aligned them horizontally with the blue mug square image.
I also made sure to Distribute Vertically so there was even space between the apples…
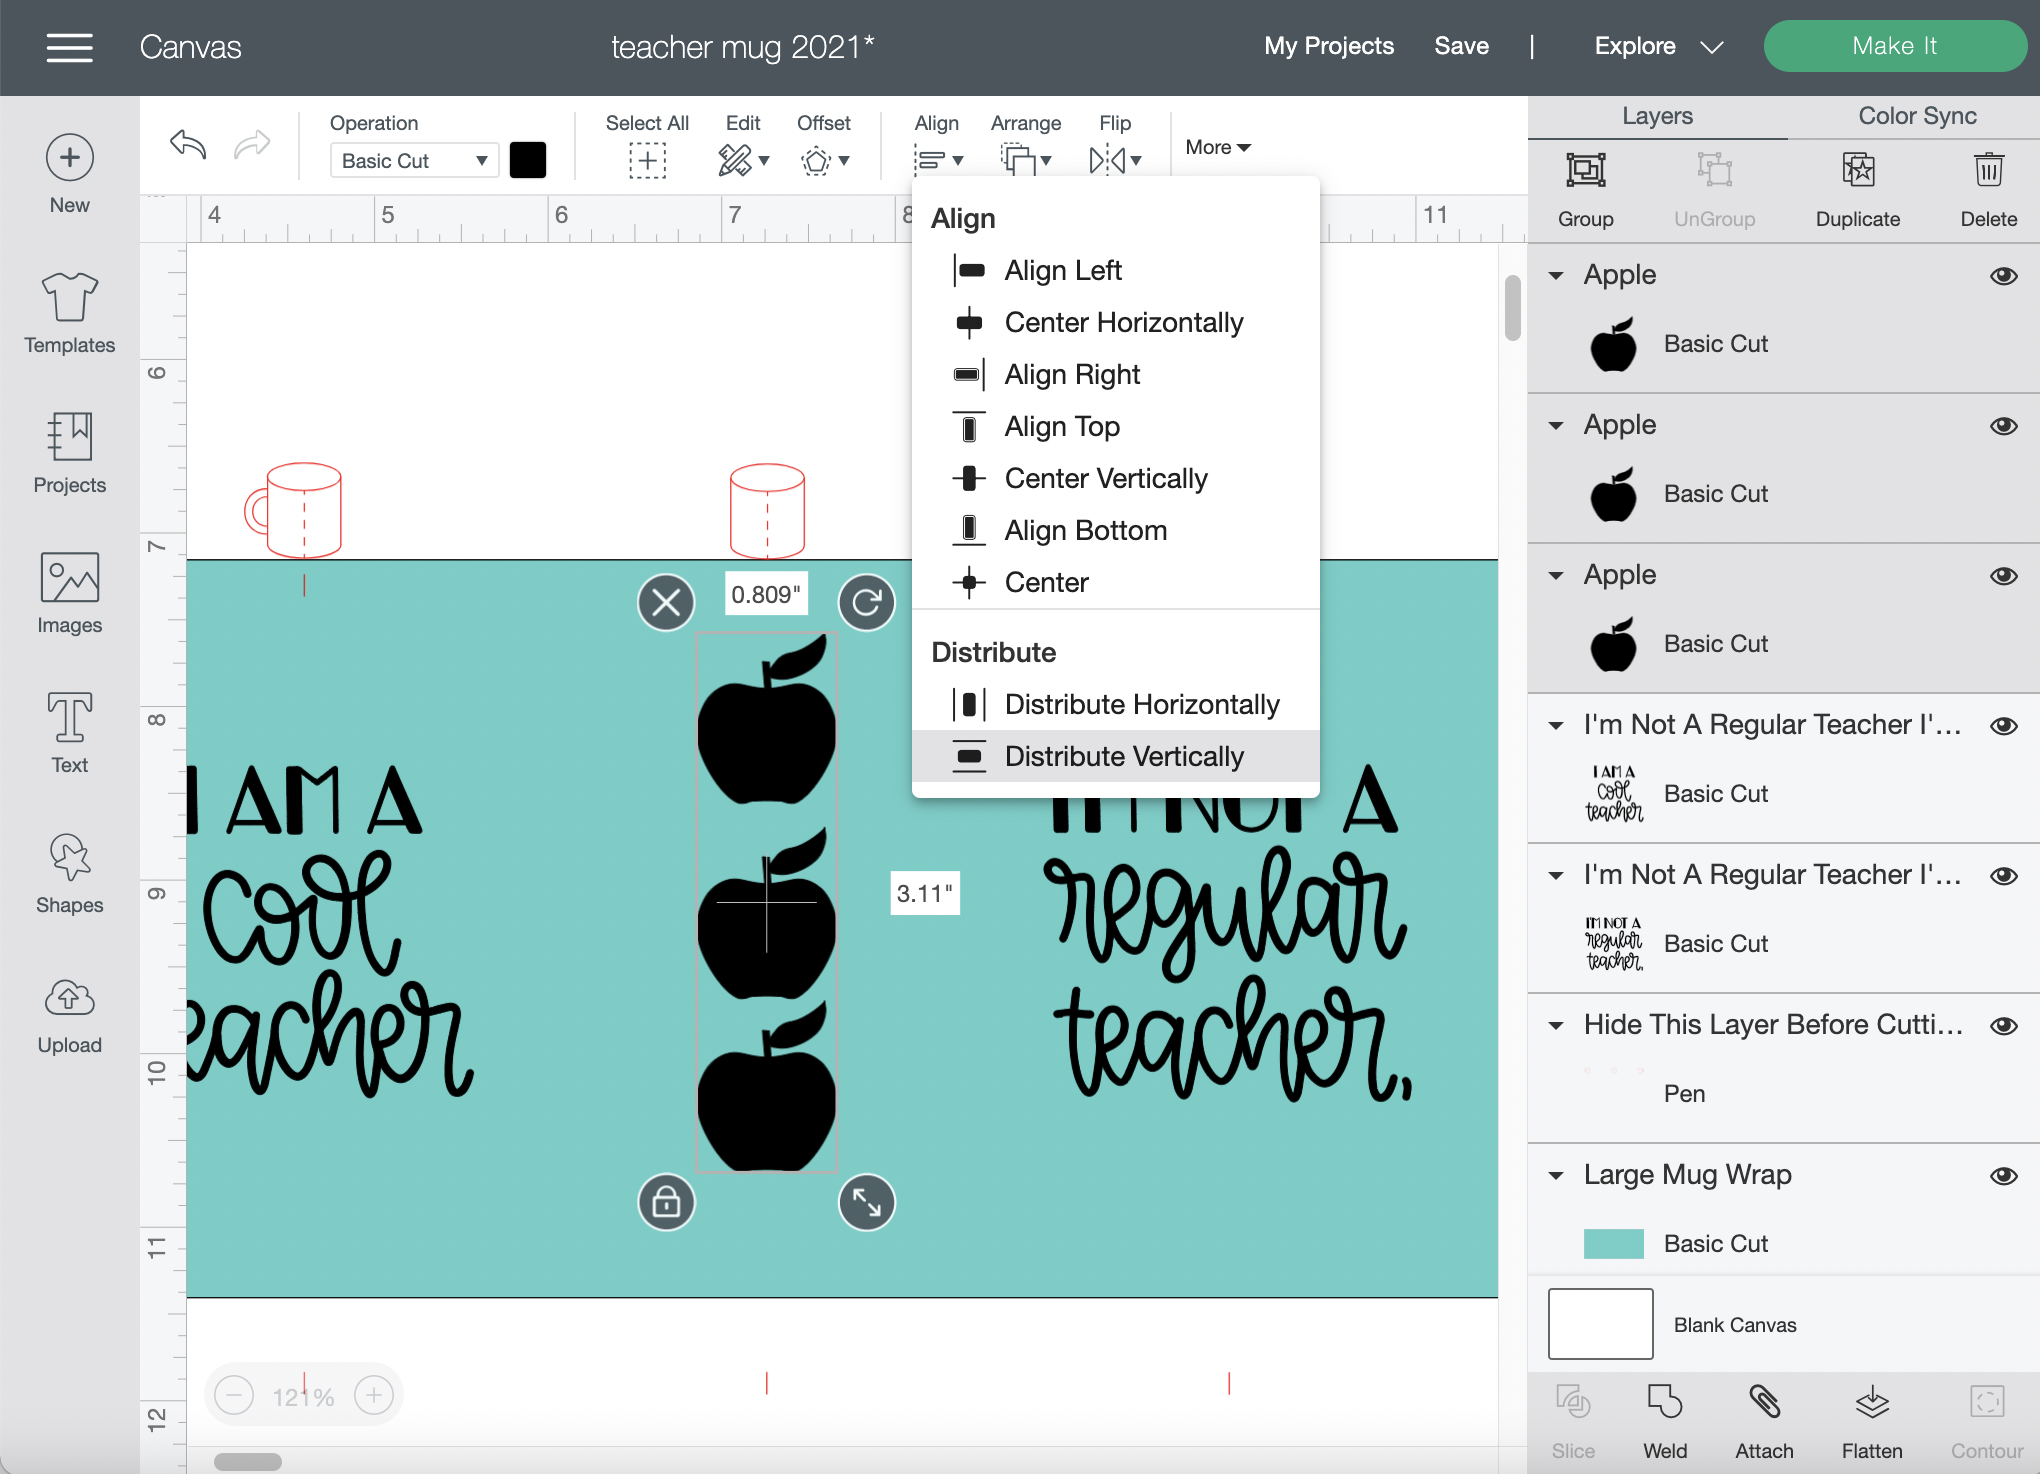
Once I’m done putting the images and phrases wherever I want them to go, I hid the red image guide.
I selected the entire rest of the design and clicked on Attach.
You do not need to Slice when doing a mug design.

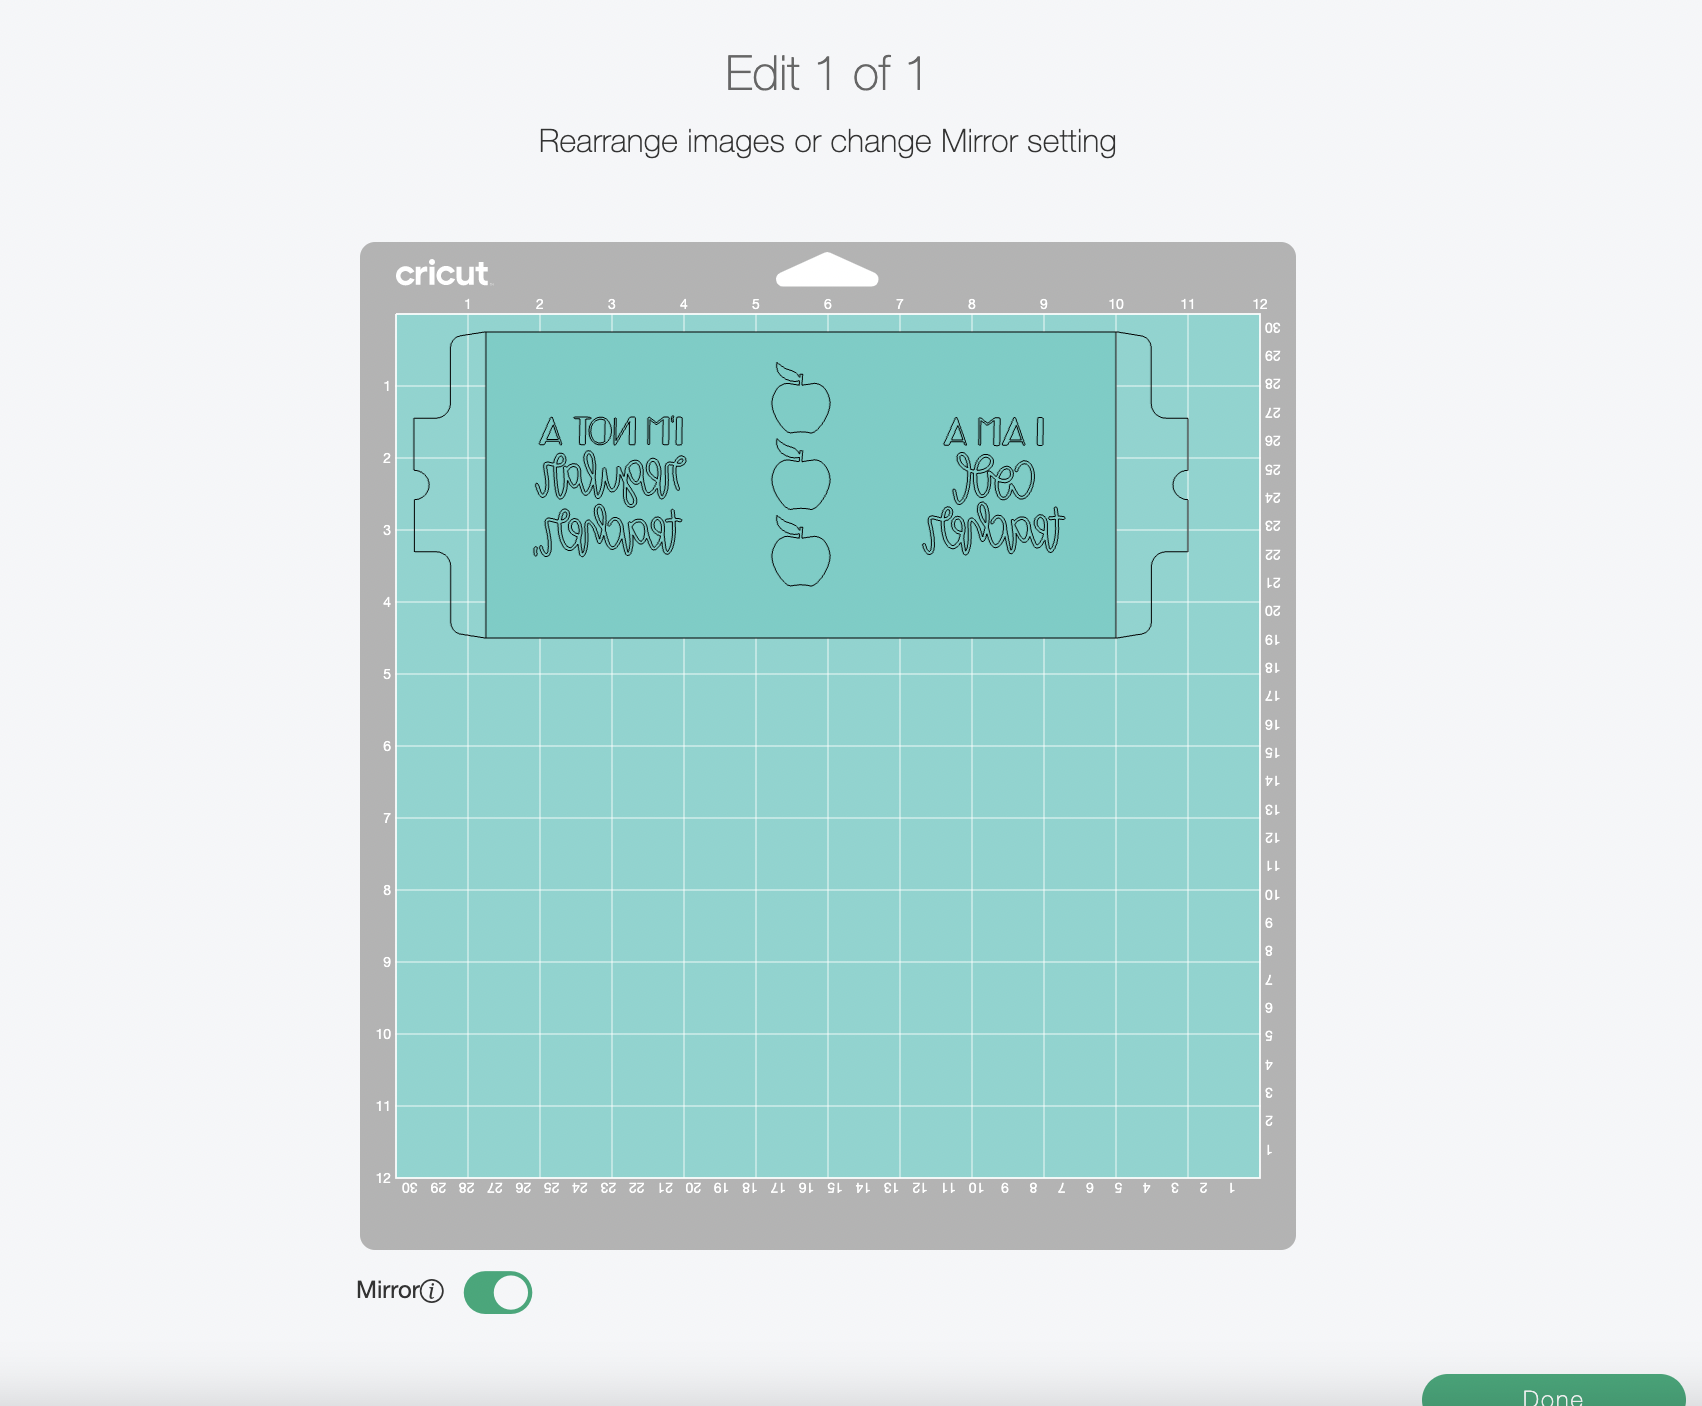
Don’t forget to Mirror!
On the Make It screen, be sure to click on Mirror – this is true for all iron-on and Infusible Ink products.
Related: 15 Back To School Teacher Gifts You Can Make With Your Child
Cutting Your Design With Your Cricut Machine
Before cutting my design, I will go ahead and preheat my Cricut MugPress to save time so it’s ready as soon as my mug is ready to bake.
Place your infusible ink transfer sheet onto a green StandardGrip mat to cut your design.
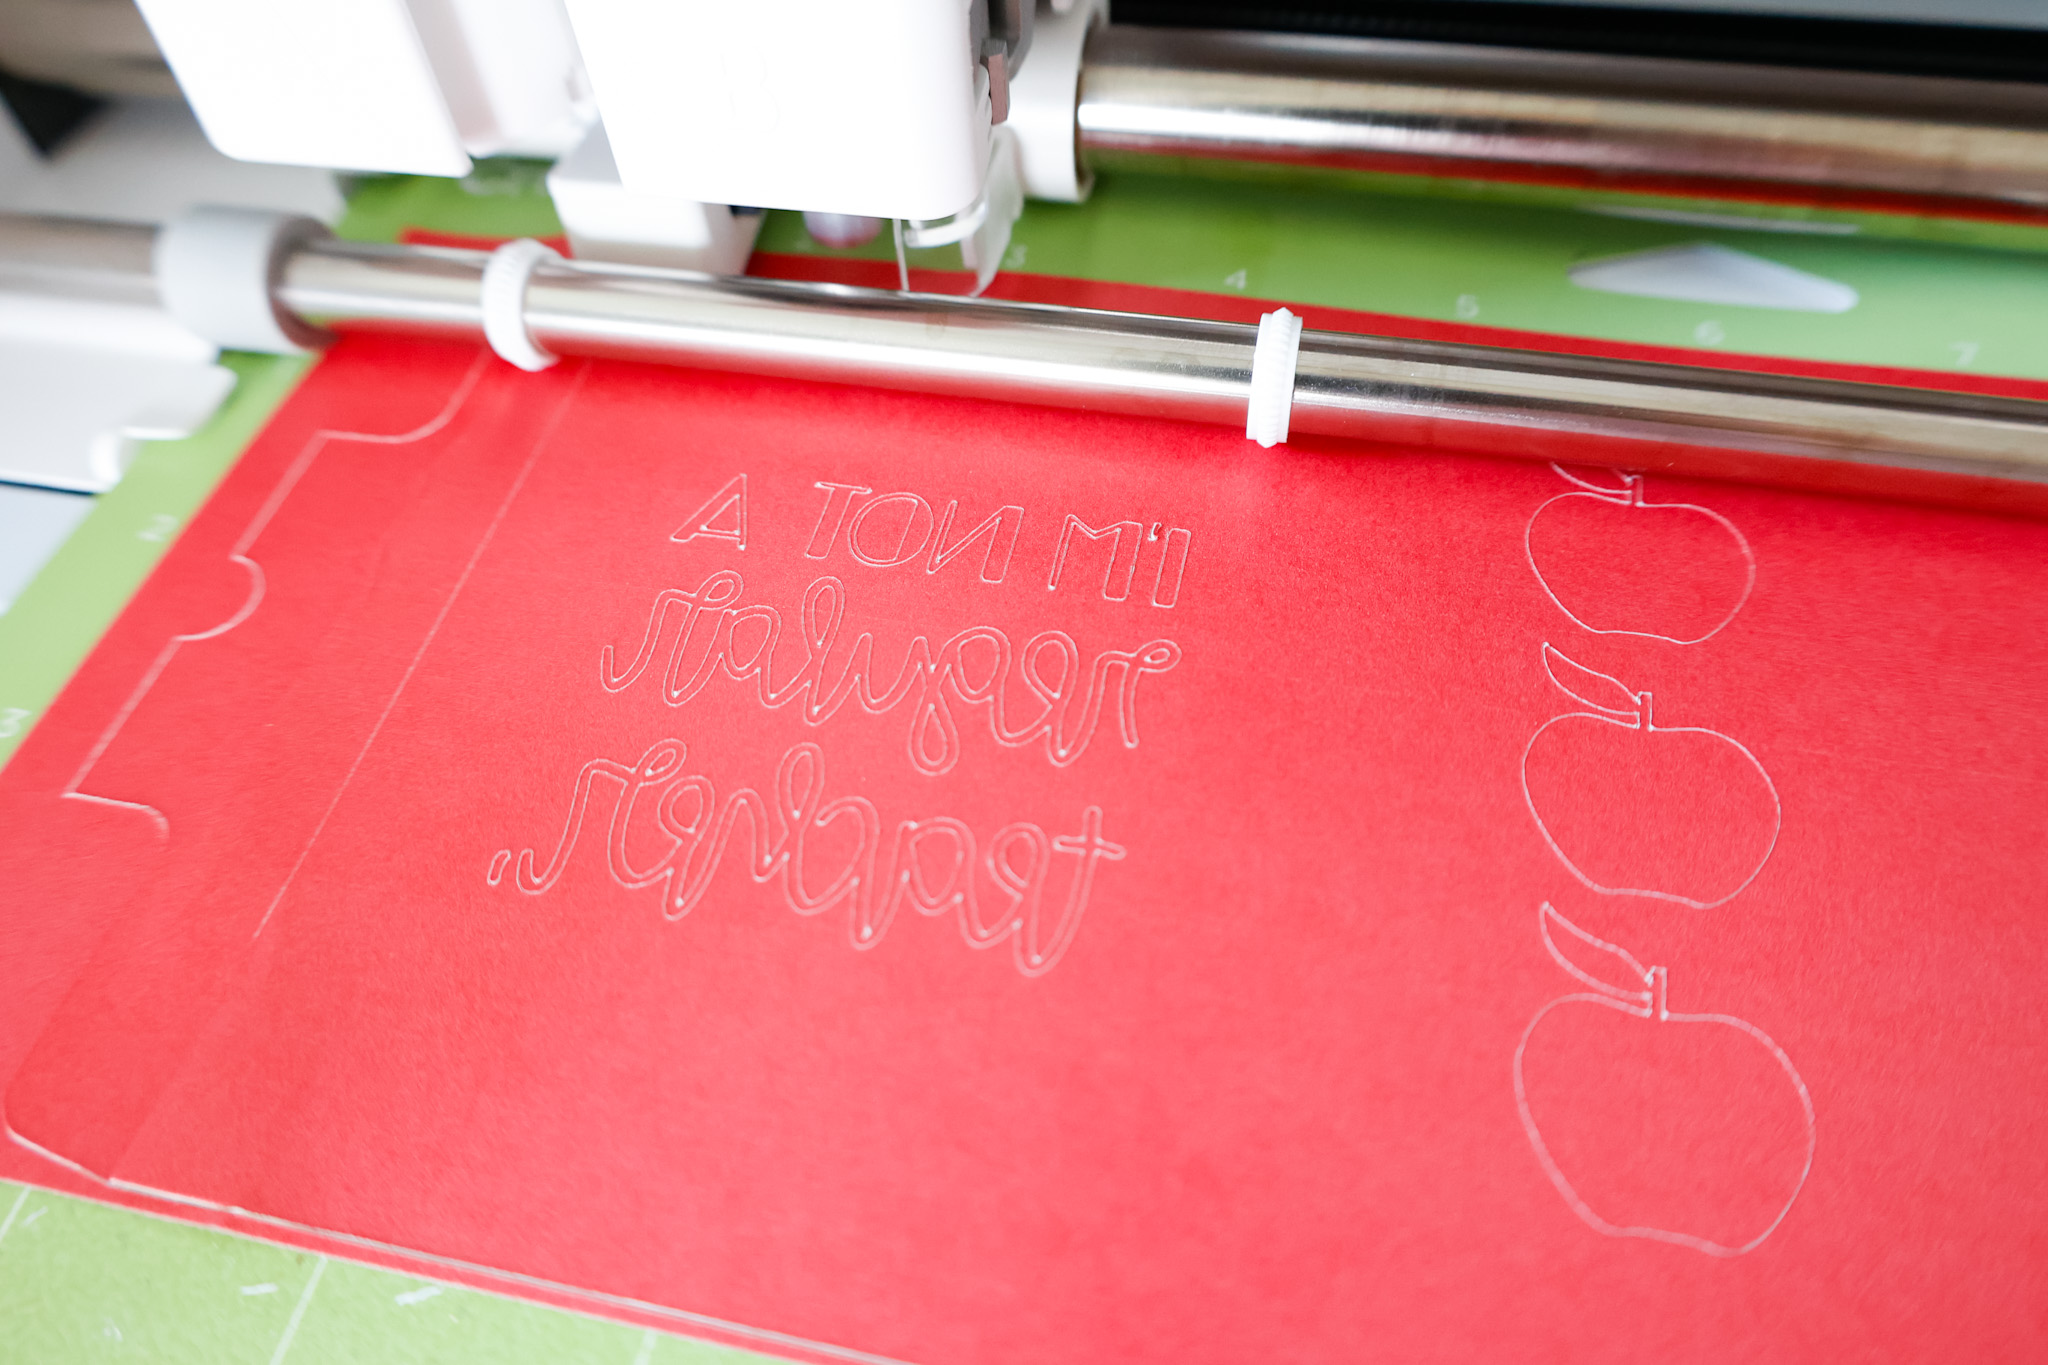
With my new Cricut Maker 3, I just need to select the material (Infusible Ink Transfer Sheets), load my mat, and click the Start button!
This machine is SO much faster than my Explore Air 2, by the way! I’ll be doing a full run-down of this machine soon, so stay tuned.
Once your machine is done cutting, weed away the design, or the negative space around it, depending on your design.
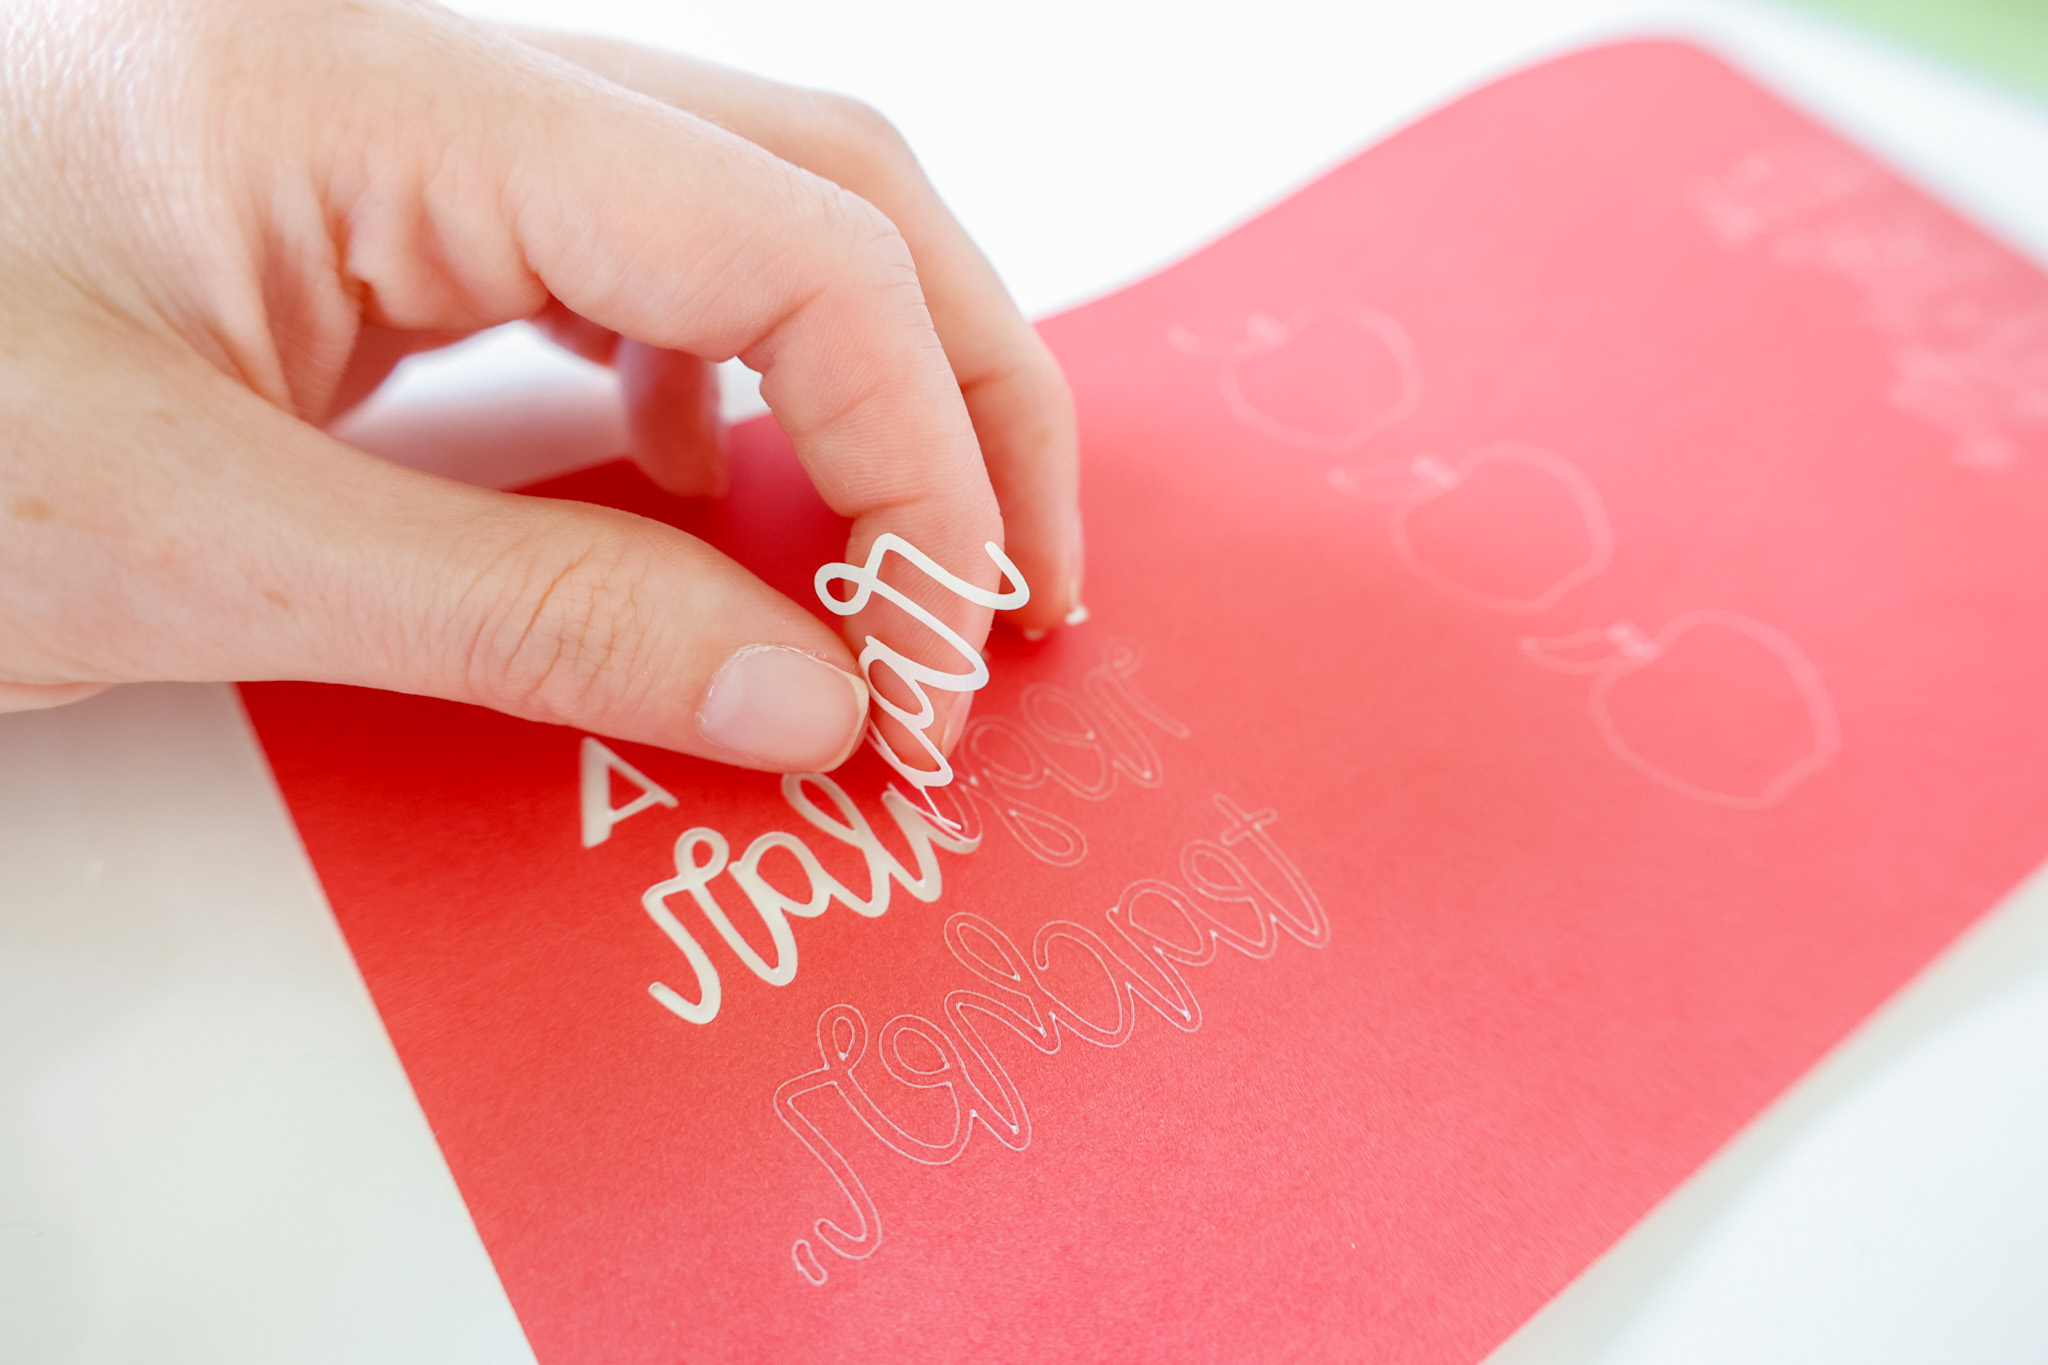
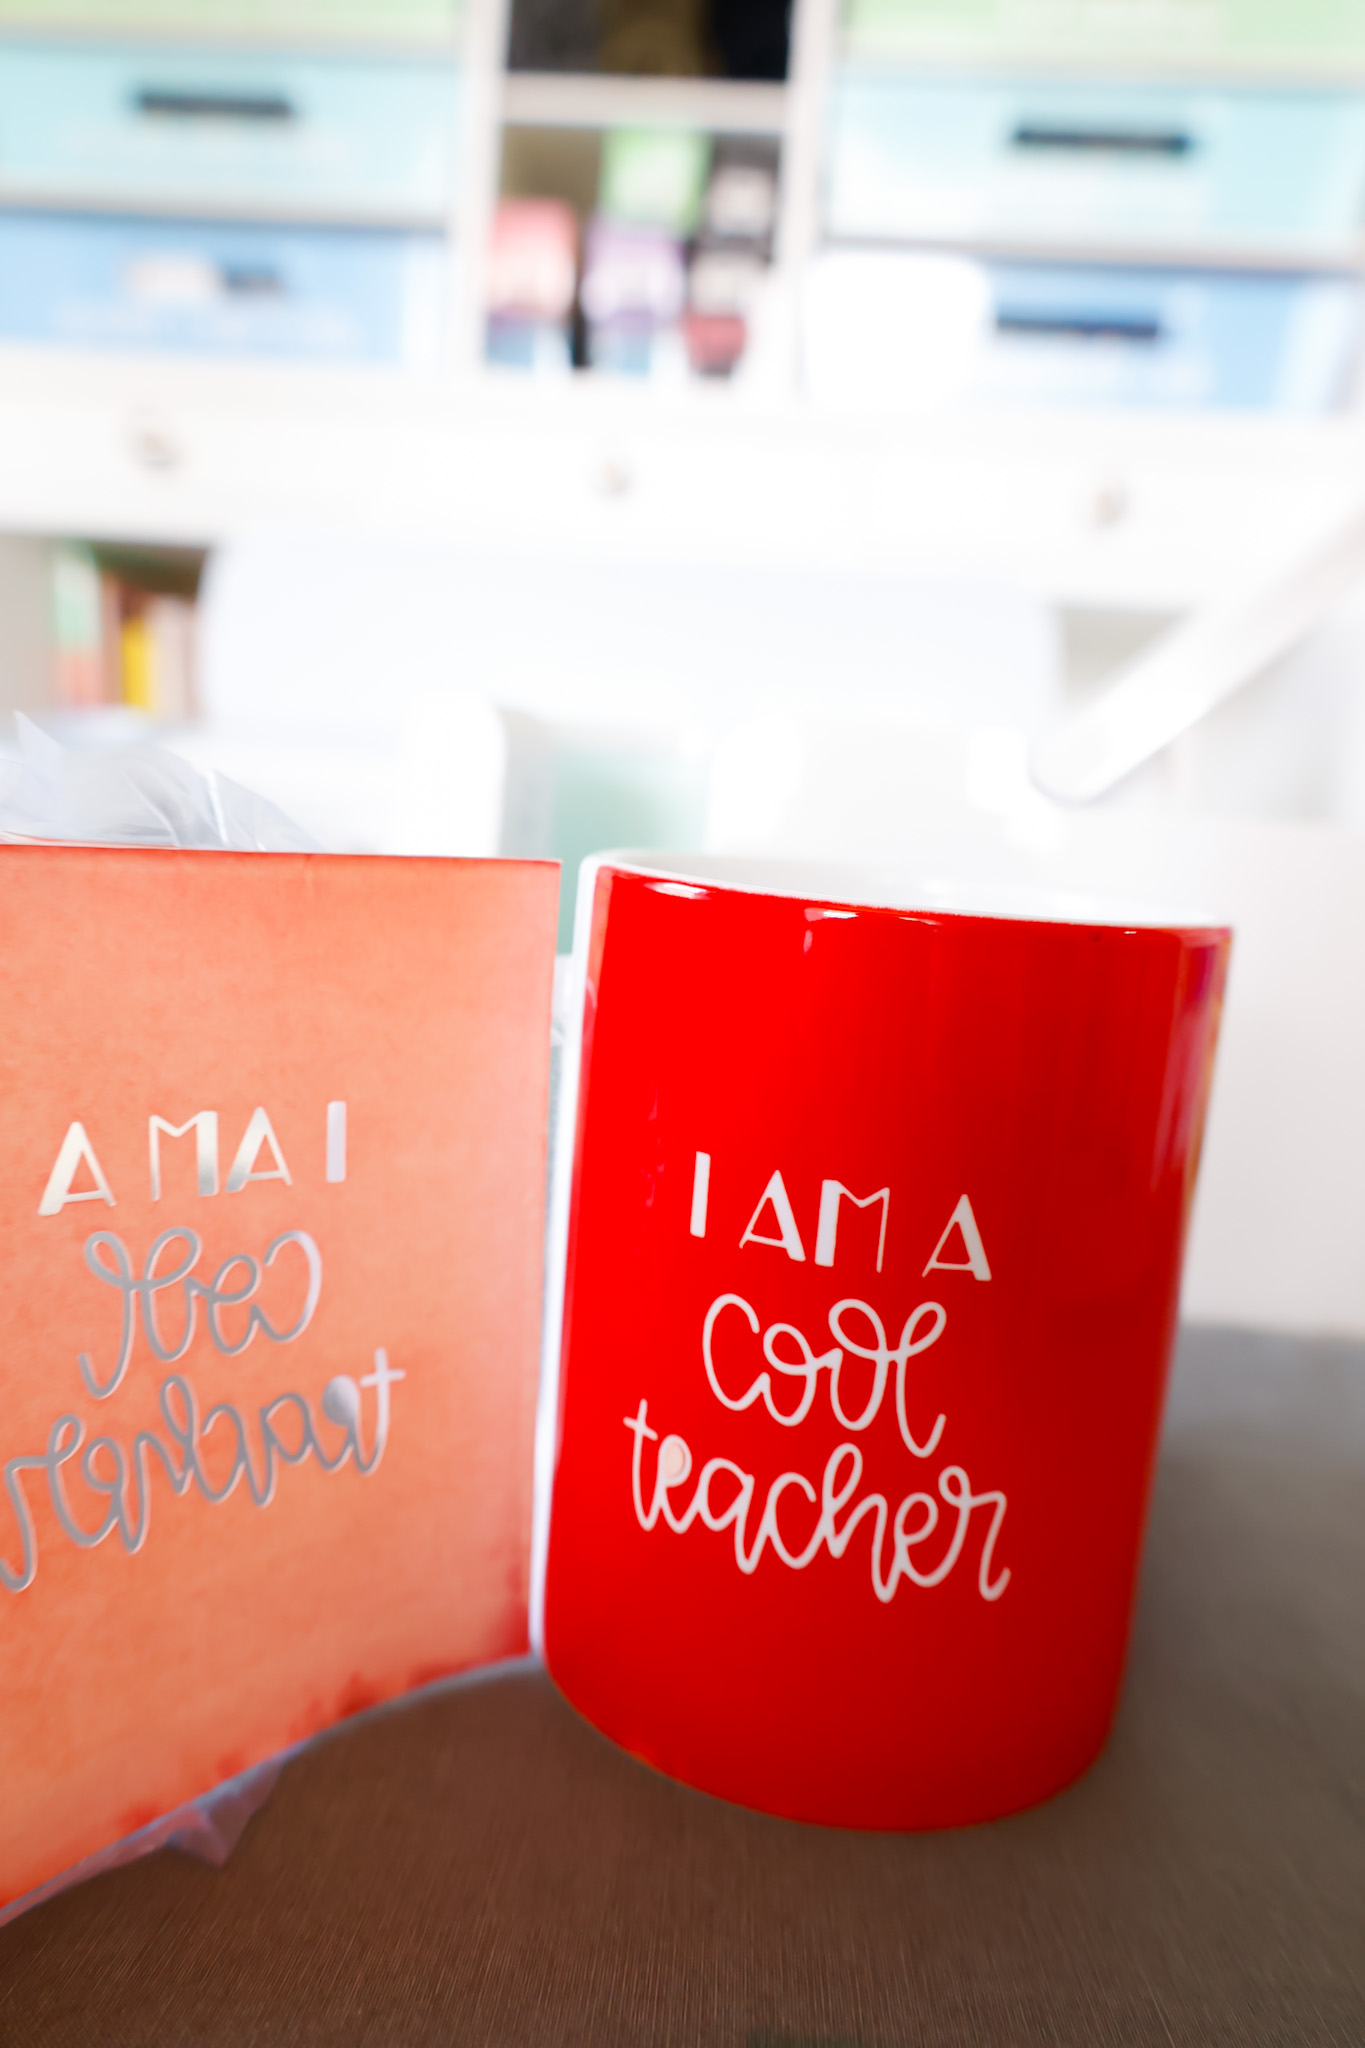
If I wanted my mug to be mostly white with just red text and apples, I would have peeled away the ‘background’ to leave just the lettering and apples on the transfer sheet.
Because I wanted the mug to be red with white lettering, I peeled away the lettering and apples.

Using The Cricut Mug Press To Make Dishwasher-Safe Mugs
Once the MugPress is preheated, I place the transfer sheet on the mug and cover it with butcher paper.
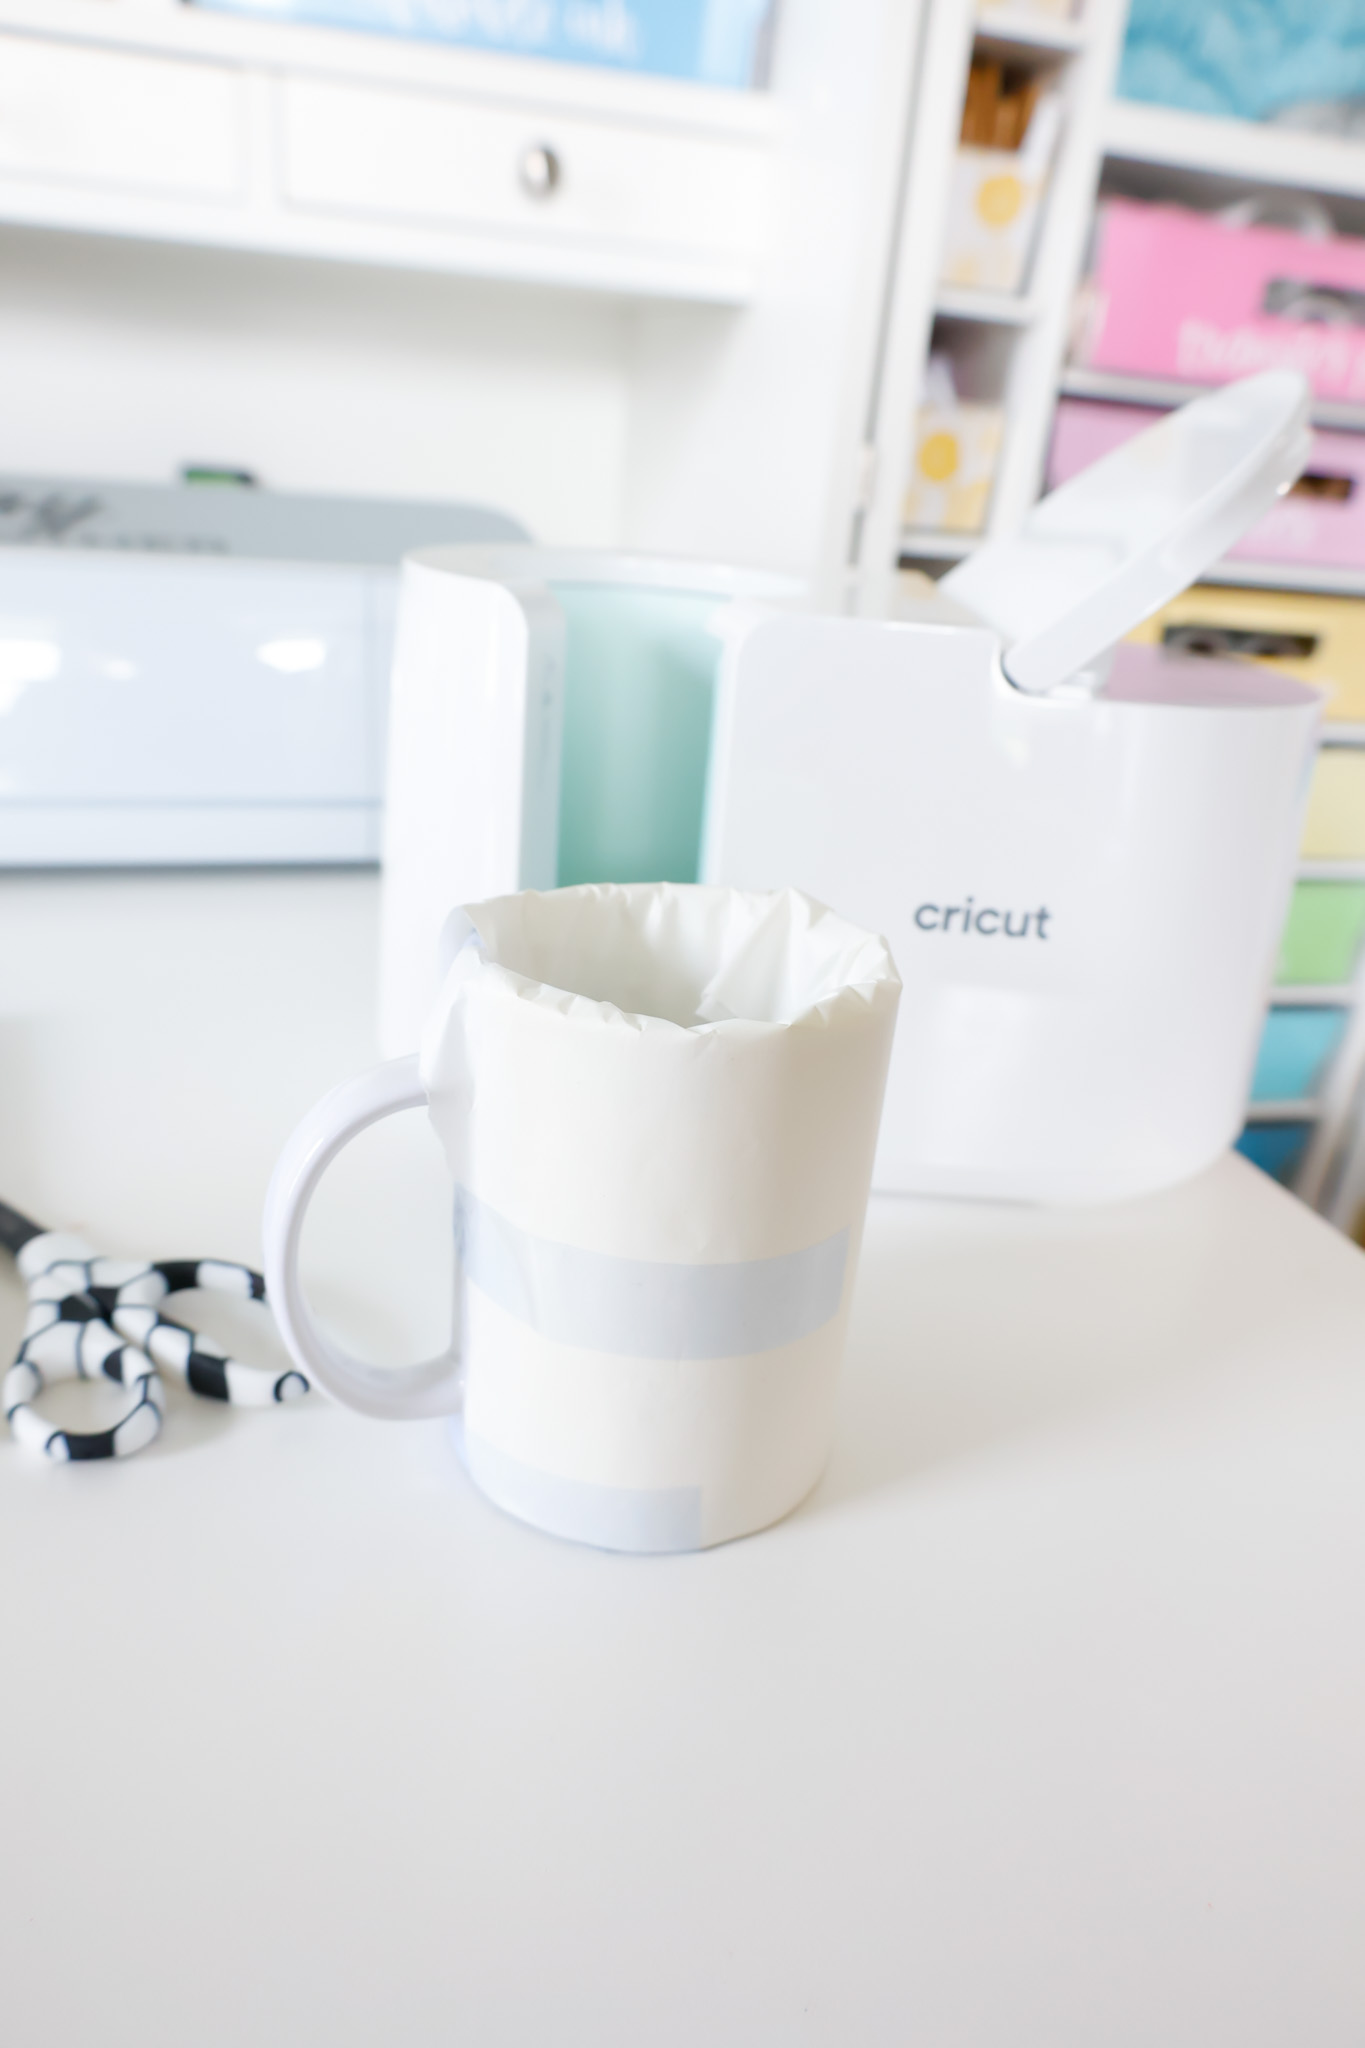
For a seamless application, I always put a long piece of heat-resistant tape along the bottom edge right underneath the handle just to secure that section…
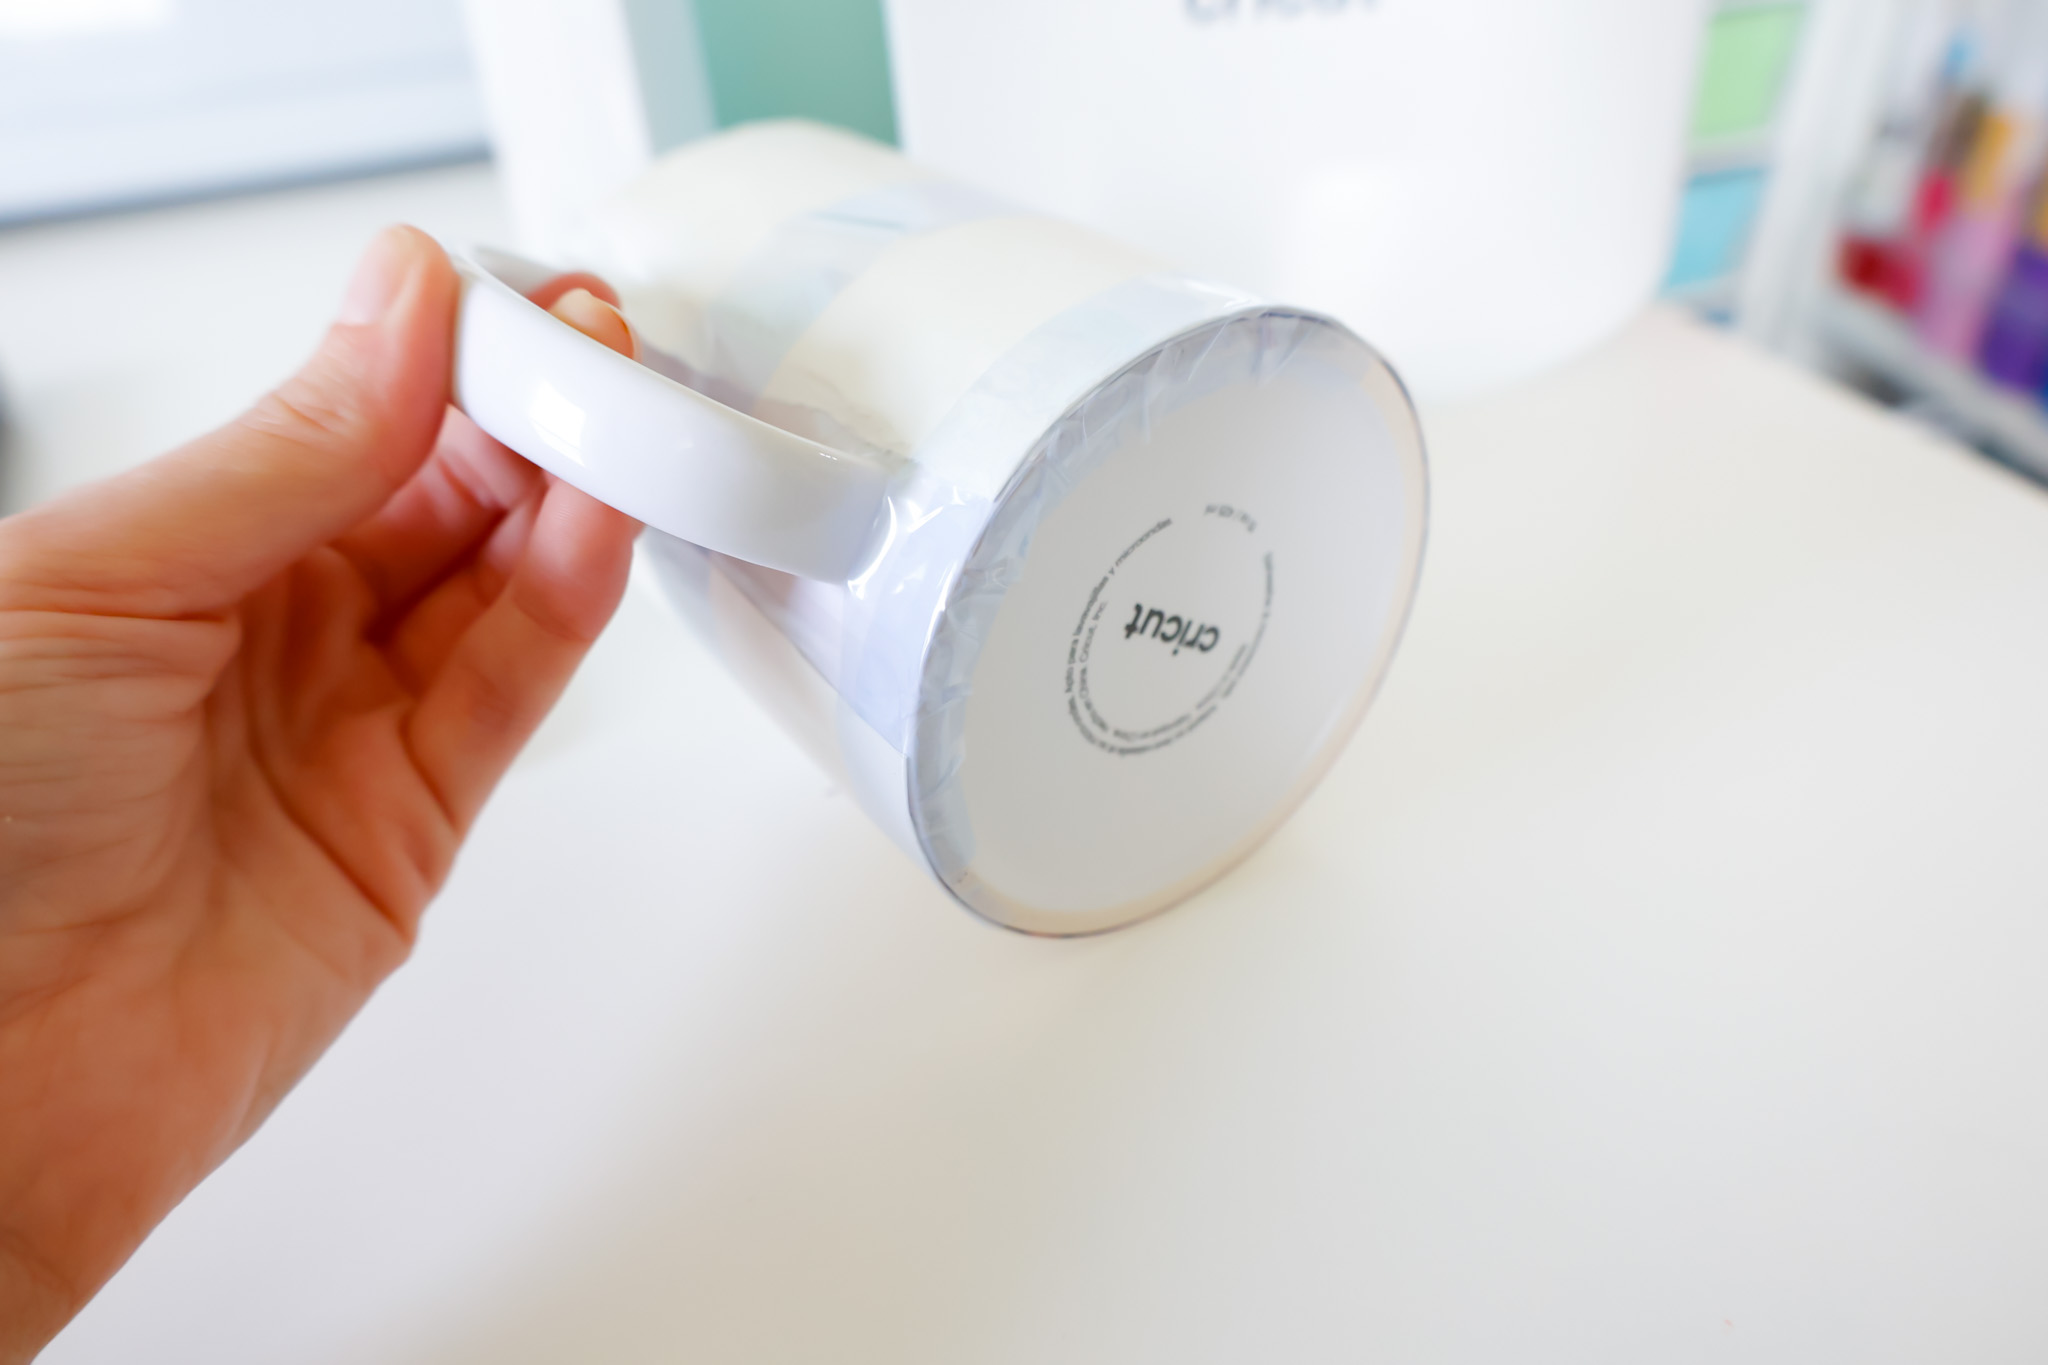
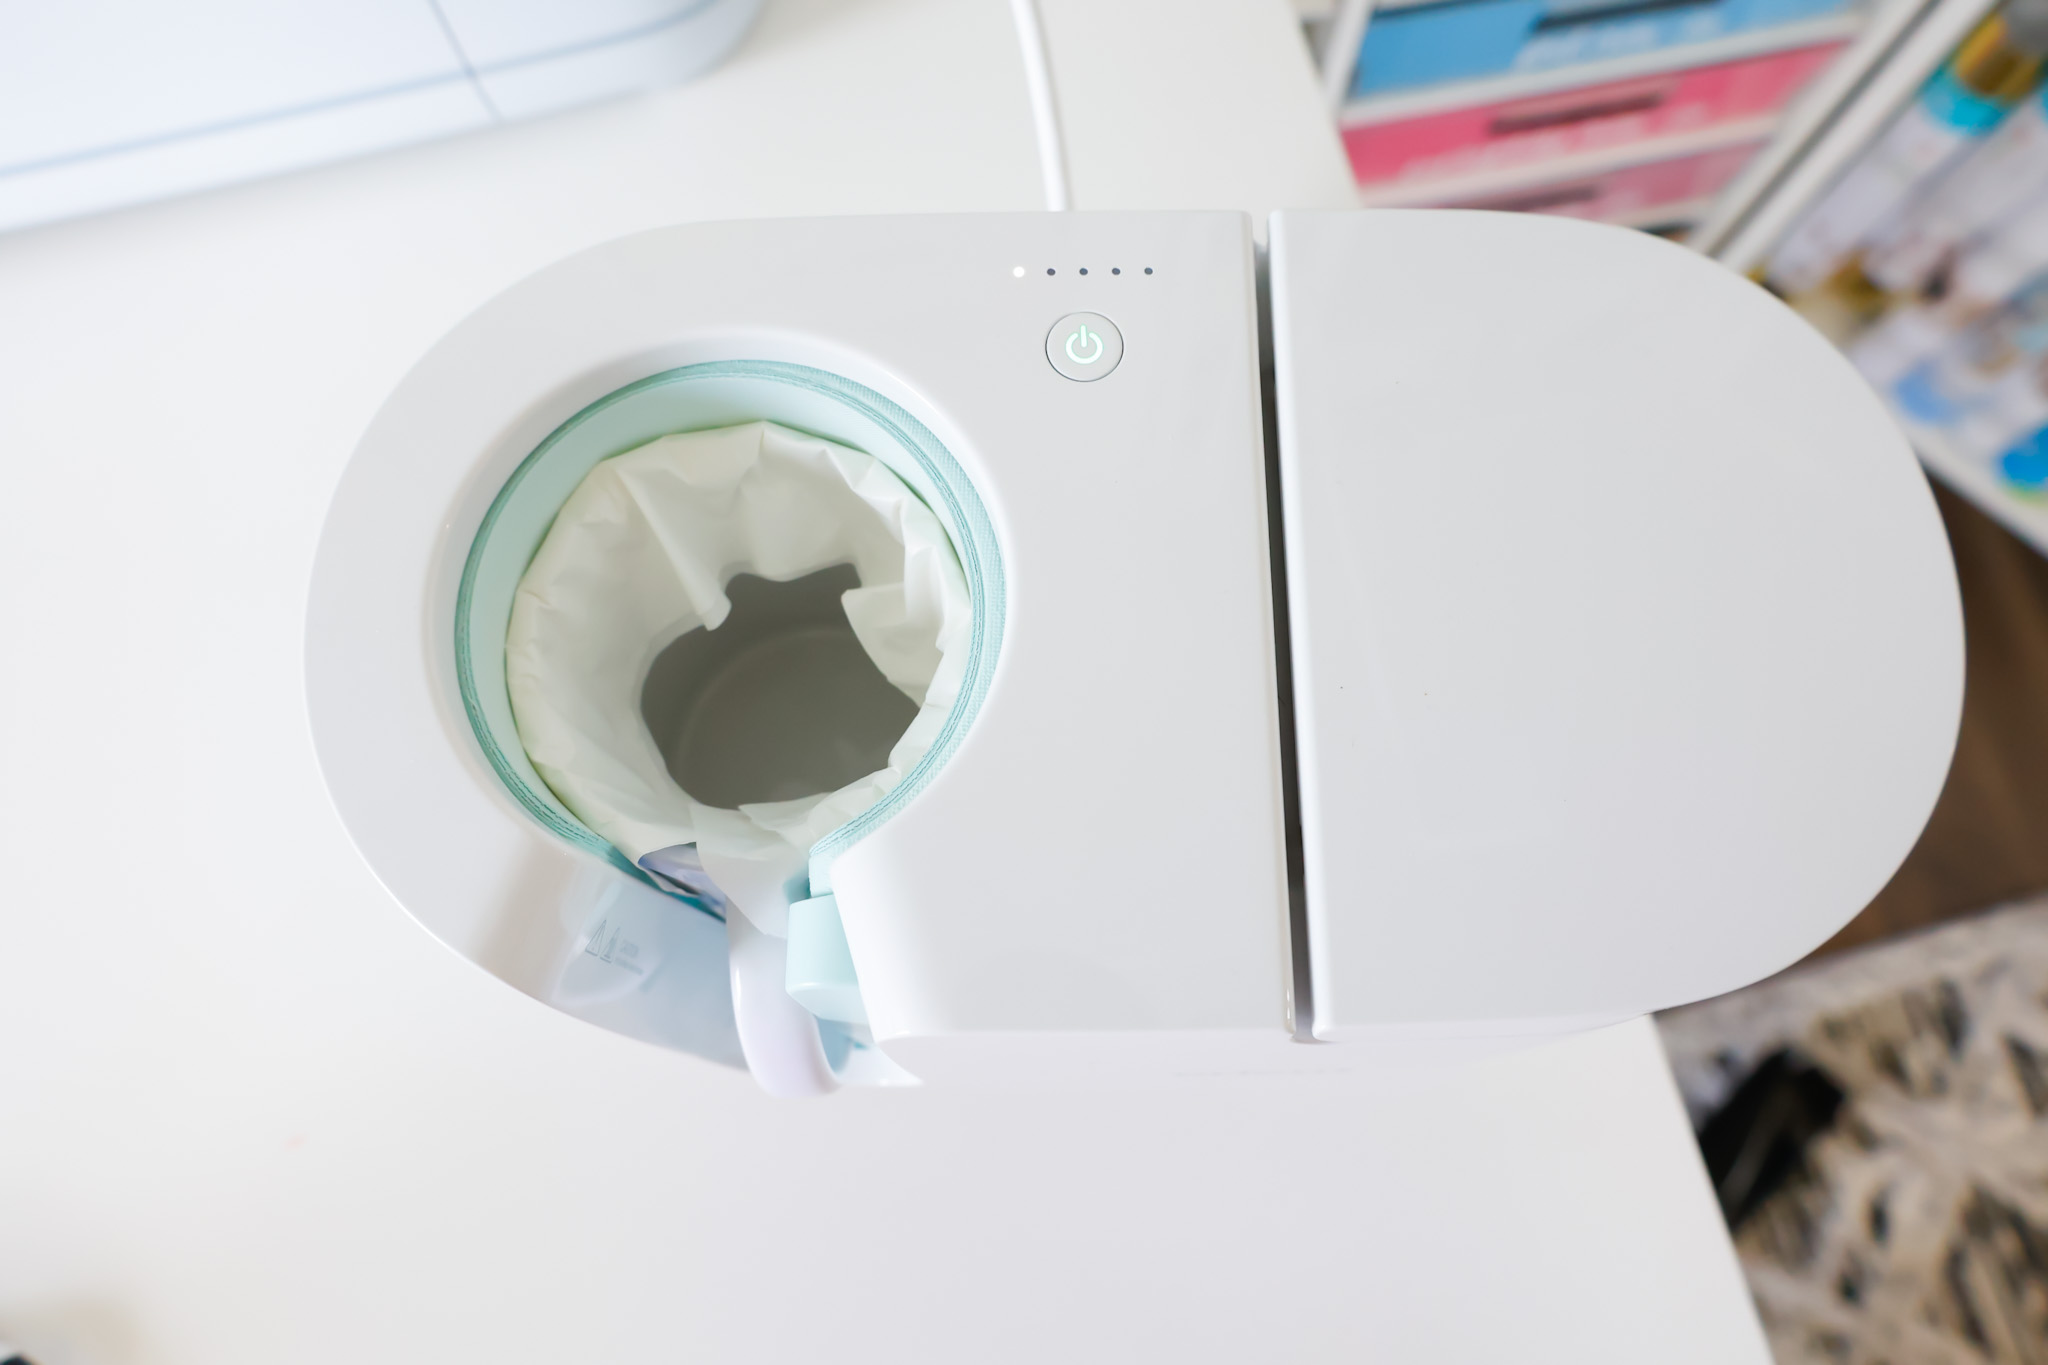
I put my mug in the Cricut Mug Press and pressed the start button.
The progress lights light up to let you know where in the sublimination process it is.
Once your mug is done, carefully remove it from the Mug Press by lifting it up by its handle, and place it on a dark towel or your EasyPress mat.
This helps prevent any accidental ink transfers to your working surface.
Once it’s cooled down, you can remove the transfer sheet to reveal the design!
I love how the apples turned out on the side!
Related: Cricut Mug Press Unboxing And First Project
Here’s the same design using a different Infusible Ink Transfer sheet color…
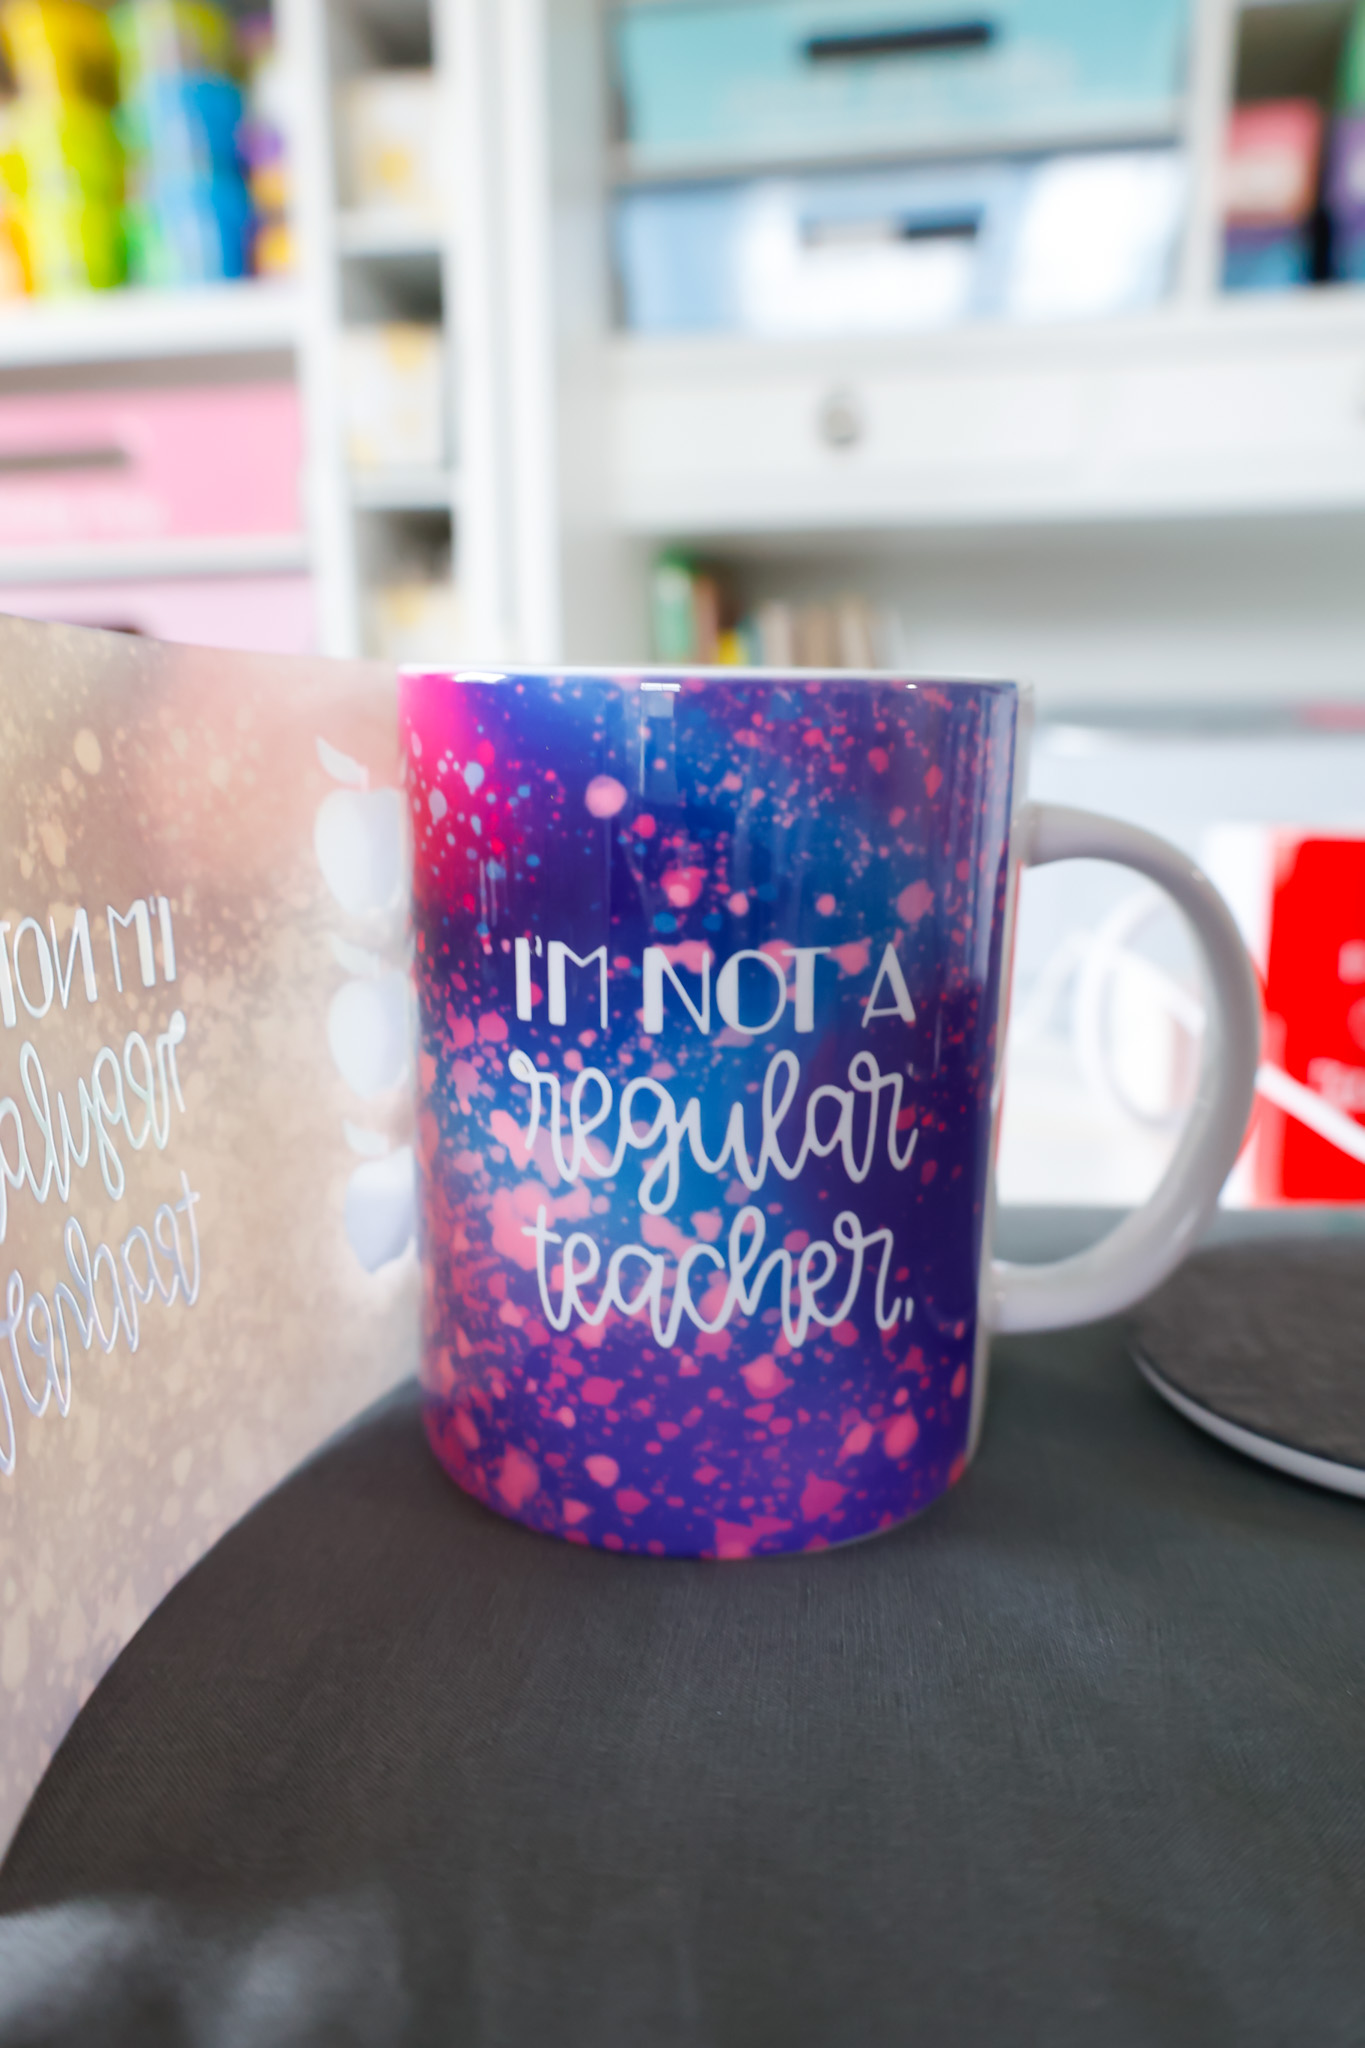
I made it so that when a teacher holds it in their right hand, it shows ‘I’m a cool teacher’ to the rest of the room/class, while it shows the teacher ‘I’m not a regular teacher’.
The apples were the perfect finishing touch.

These mugs are now 100% dishwasher safe – the ink will never wash off, fade, or falter. The design will stay put forever, and they’ll have a gift that really lasts.
Be sure to stuff them with some goodies like…
- expo markers
- highlighters
- candy/sweets
- bookmarks
- gift cards
- a bag/shirt rolled up
- notepad and pen
- pocket planner
- post-its
If you liked this post, you may also like these crafting posts…
DIY Baby Closet Dividers – A Print Then Cut Tutorial
DreamBox Review – The Ultimate Crafting Storage System + A Discount Code!!
DIY Water Bottle Tracker Decals with your Cricut
Cricut DIY Keychain Tutorial + How To Create Monograms In Design Space
*Post originally published August 2021, last updated August 2025.

Leave a Reply